 A client came in last week wearing a tee shirt that had the word BEAUTY printed across it. A few days later her Mom came in, wearing the same shirt. I have no idea as to the origin, intent or meaning of that word having been printed on that shirt. I did not ask. But it did set me to thinking about beauty. And how the pursuit and appreciation of it has been a life’s work, and the source of so much pleasure and satisfaction. Like many others, I came to be a gardener from an intense interest and fascination with the natural world. The visual drama of an emerging leaf, the impossibly intense blue color of a delphinium flower, the fragrance of a mock orange in bloom, the shape of an ancient beech tree-everything about the life of plants provides vigorous exercise and engagement to all of the senses. It is not at all unusual to know of a gardener swooning over this or that flower. So normal in my circle and probably yours. The beauty of nature provides a profound pleasure for the heart, hand, and soul, if you will.
 A definitive explanation of what constitutes beauty is next to impossible, as it does not exist in a vacuum. A beauty designation is entirely arbitrary and fiercely personal. There is a unique relationship between the observer and the observed. What is seen and what is there to be seen. There are those gardeners who adore green flowers or spring ephemera, and those who wax poetic about hot pink peonies, yellow dahlias and red hibiscus. There are others that would be hard pressed to name a plant they don’t like, just as there are those who think that a beautiful landscape would by definition be confined to hellebores and beech trees. Zinnias are most beautiful to me in large part as they remind me of my Mom. Everyone has their own closely held ideas about what is beautiful.
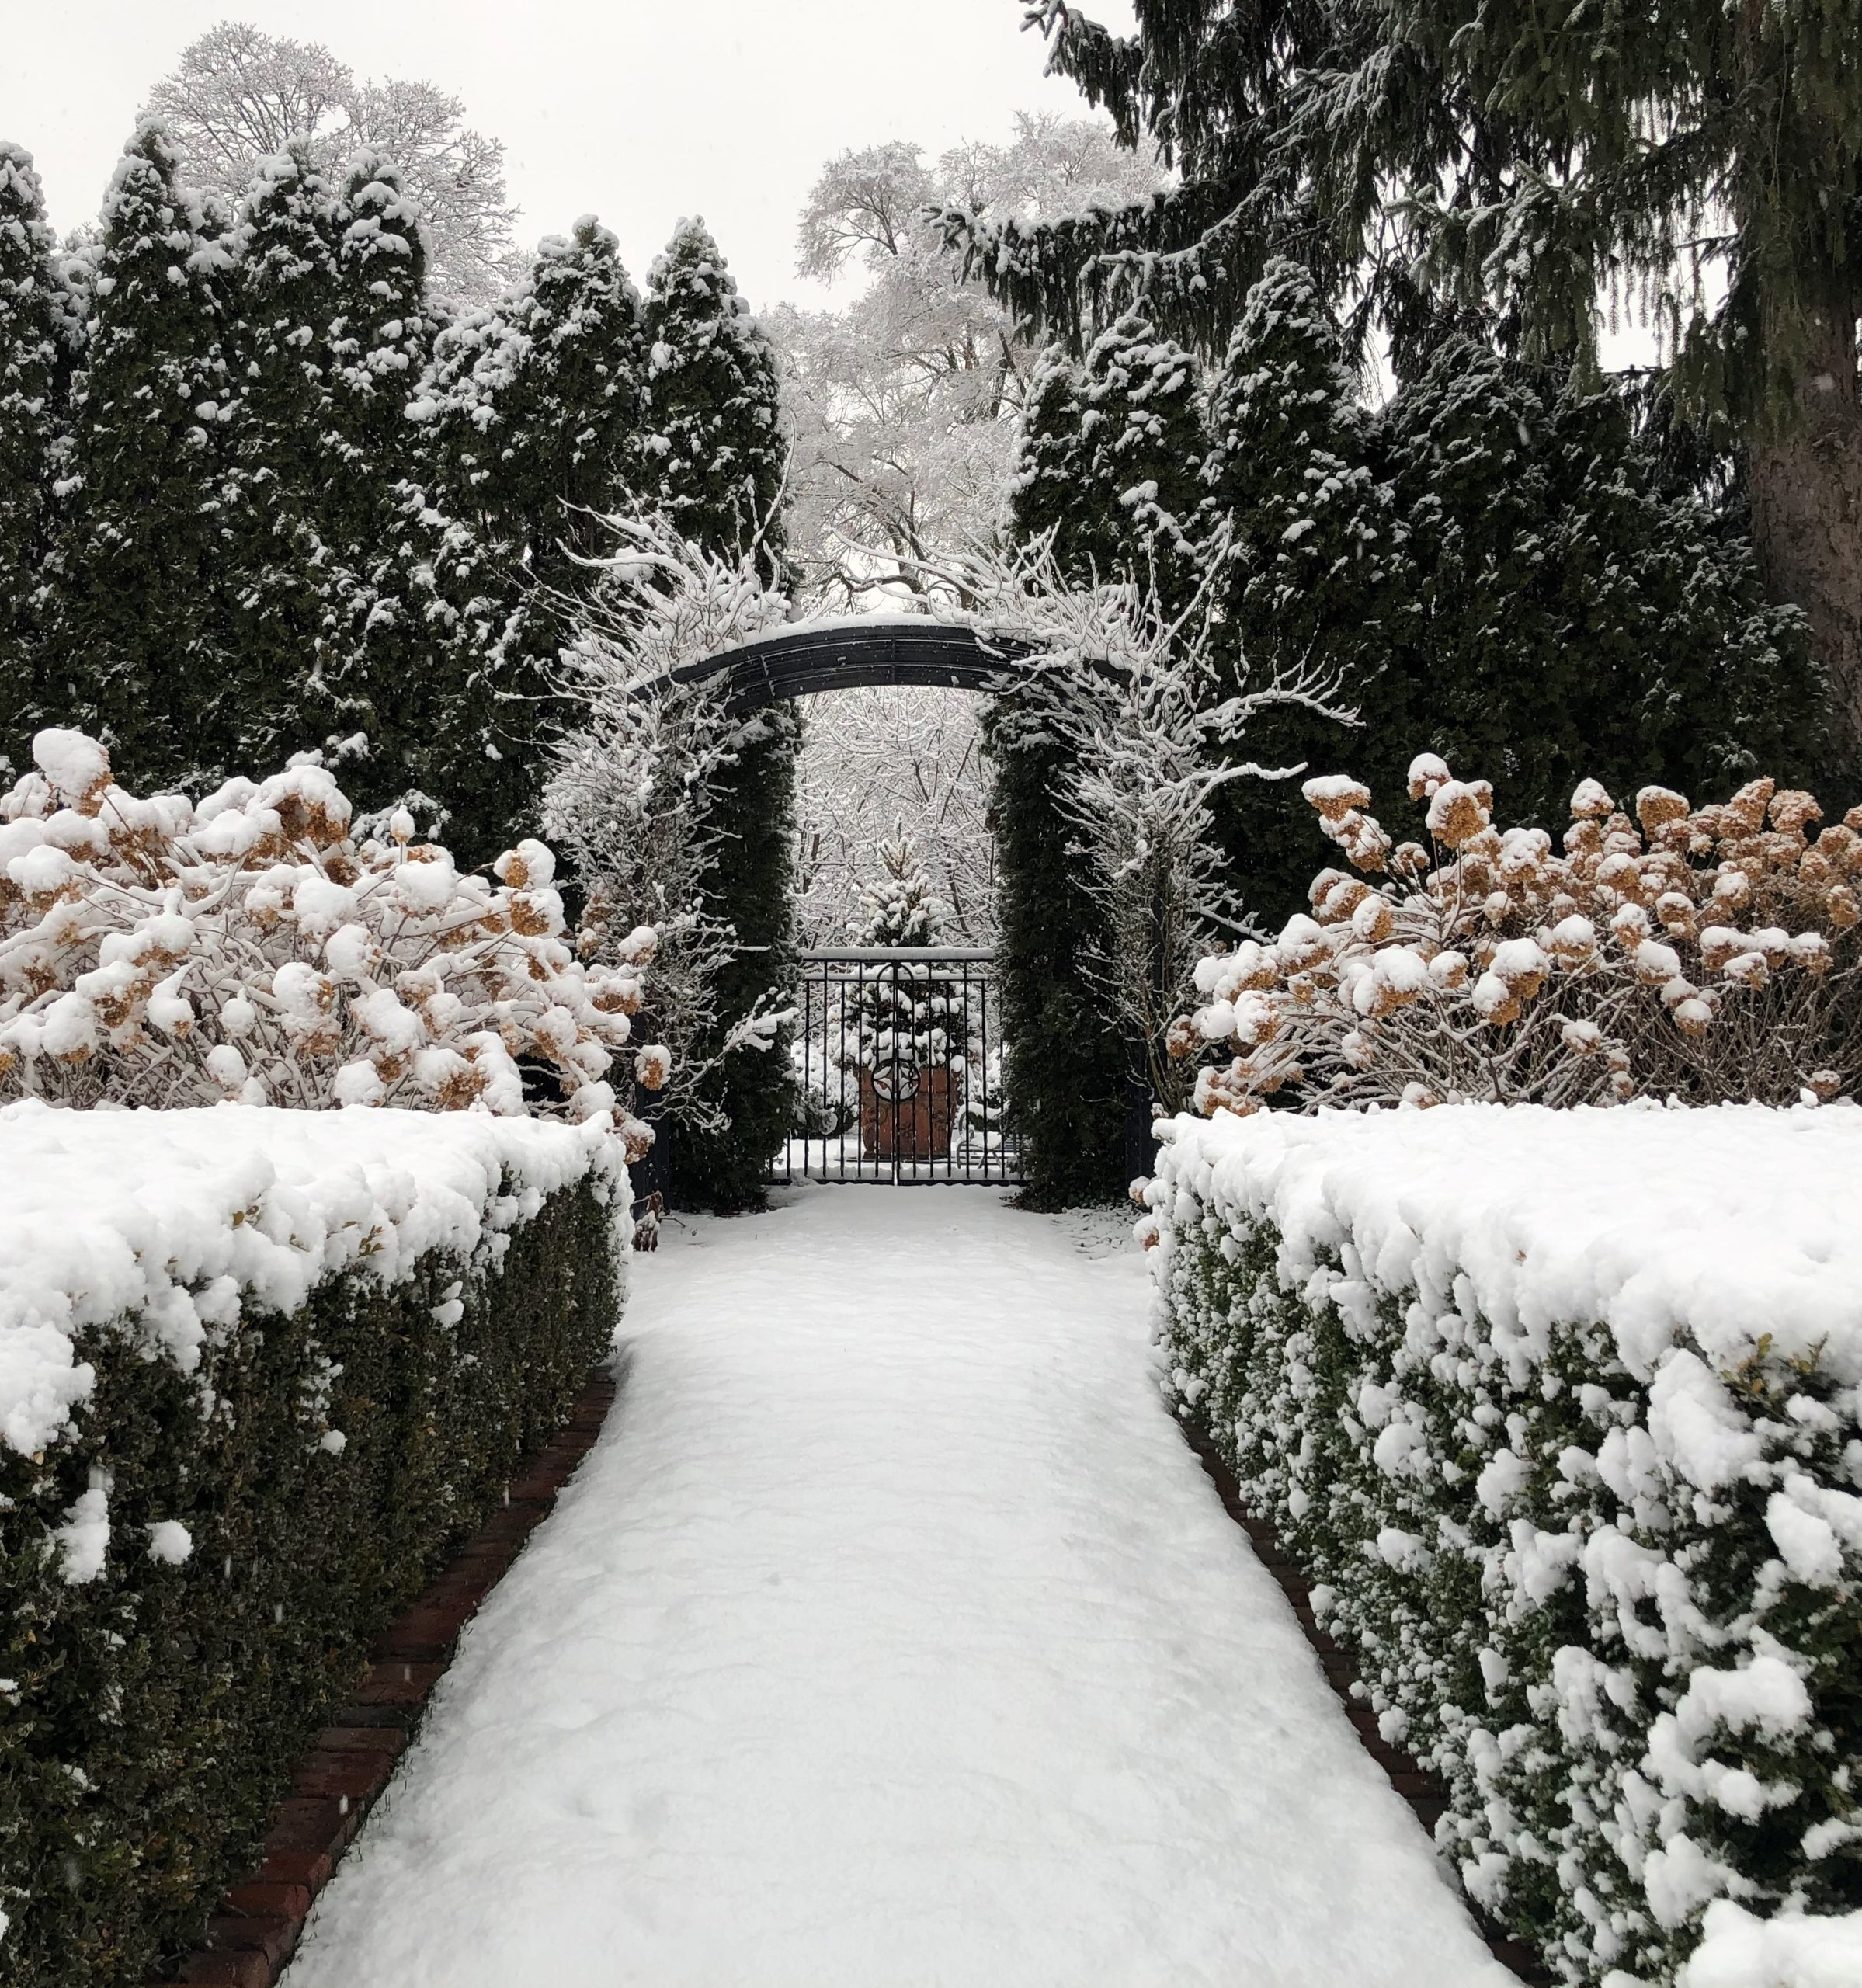
 What constitutes beauty in a garden is a topic of endless discussion. Gardeners and designers of gardens fiercely debate the fine points, and acknowledge their common ground. I admire some gardens and landscapes more than others, as some are more beautiful to me than others. Whether it be plants, houses, landscapes, art, books, music, bridges or… garden pots, a need for beauty has always been an integral part of the human experience. It is as simple and as complex as that.
 It has been my good fortune over the years to come in contact with ornament for the garden of great beauty. I owe most of that exposure to Rob, who has been shopping and buying for Detroit Garden Works since before it opened in 1996. It is our 25th year in business this year. I find it remarkable that a modestly sized garden shop in the Midwest has not only survived for that long, it has prospered – buying and selling objects and plants of beauty for the garden. That beauty designation by Rob might include something smart and forward thinking. Some other item might be redolent of the earthy odor of history, sassy and off center, or strongly evocative of a farm garden. His is a very discerning eye, and his range of expertise in his field has been amassed over a long period of time. Opening the shop all those years ago was about wanting to share that aesthetic with other gardeners, and make beautiful garden ornament available to others. That is what we do – celebrate the beauty of the garden.
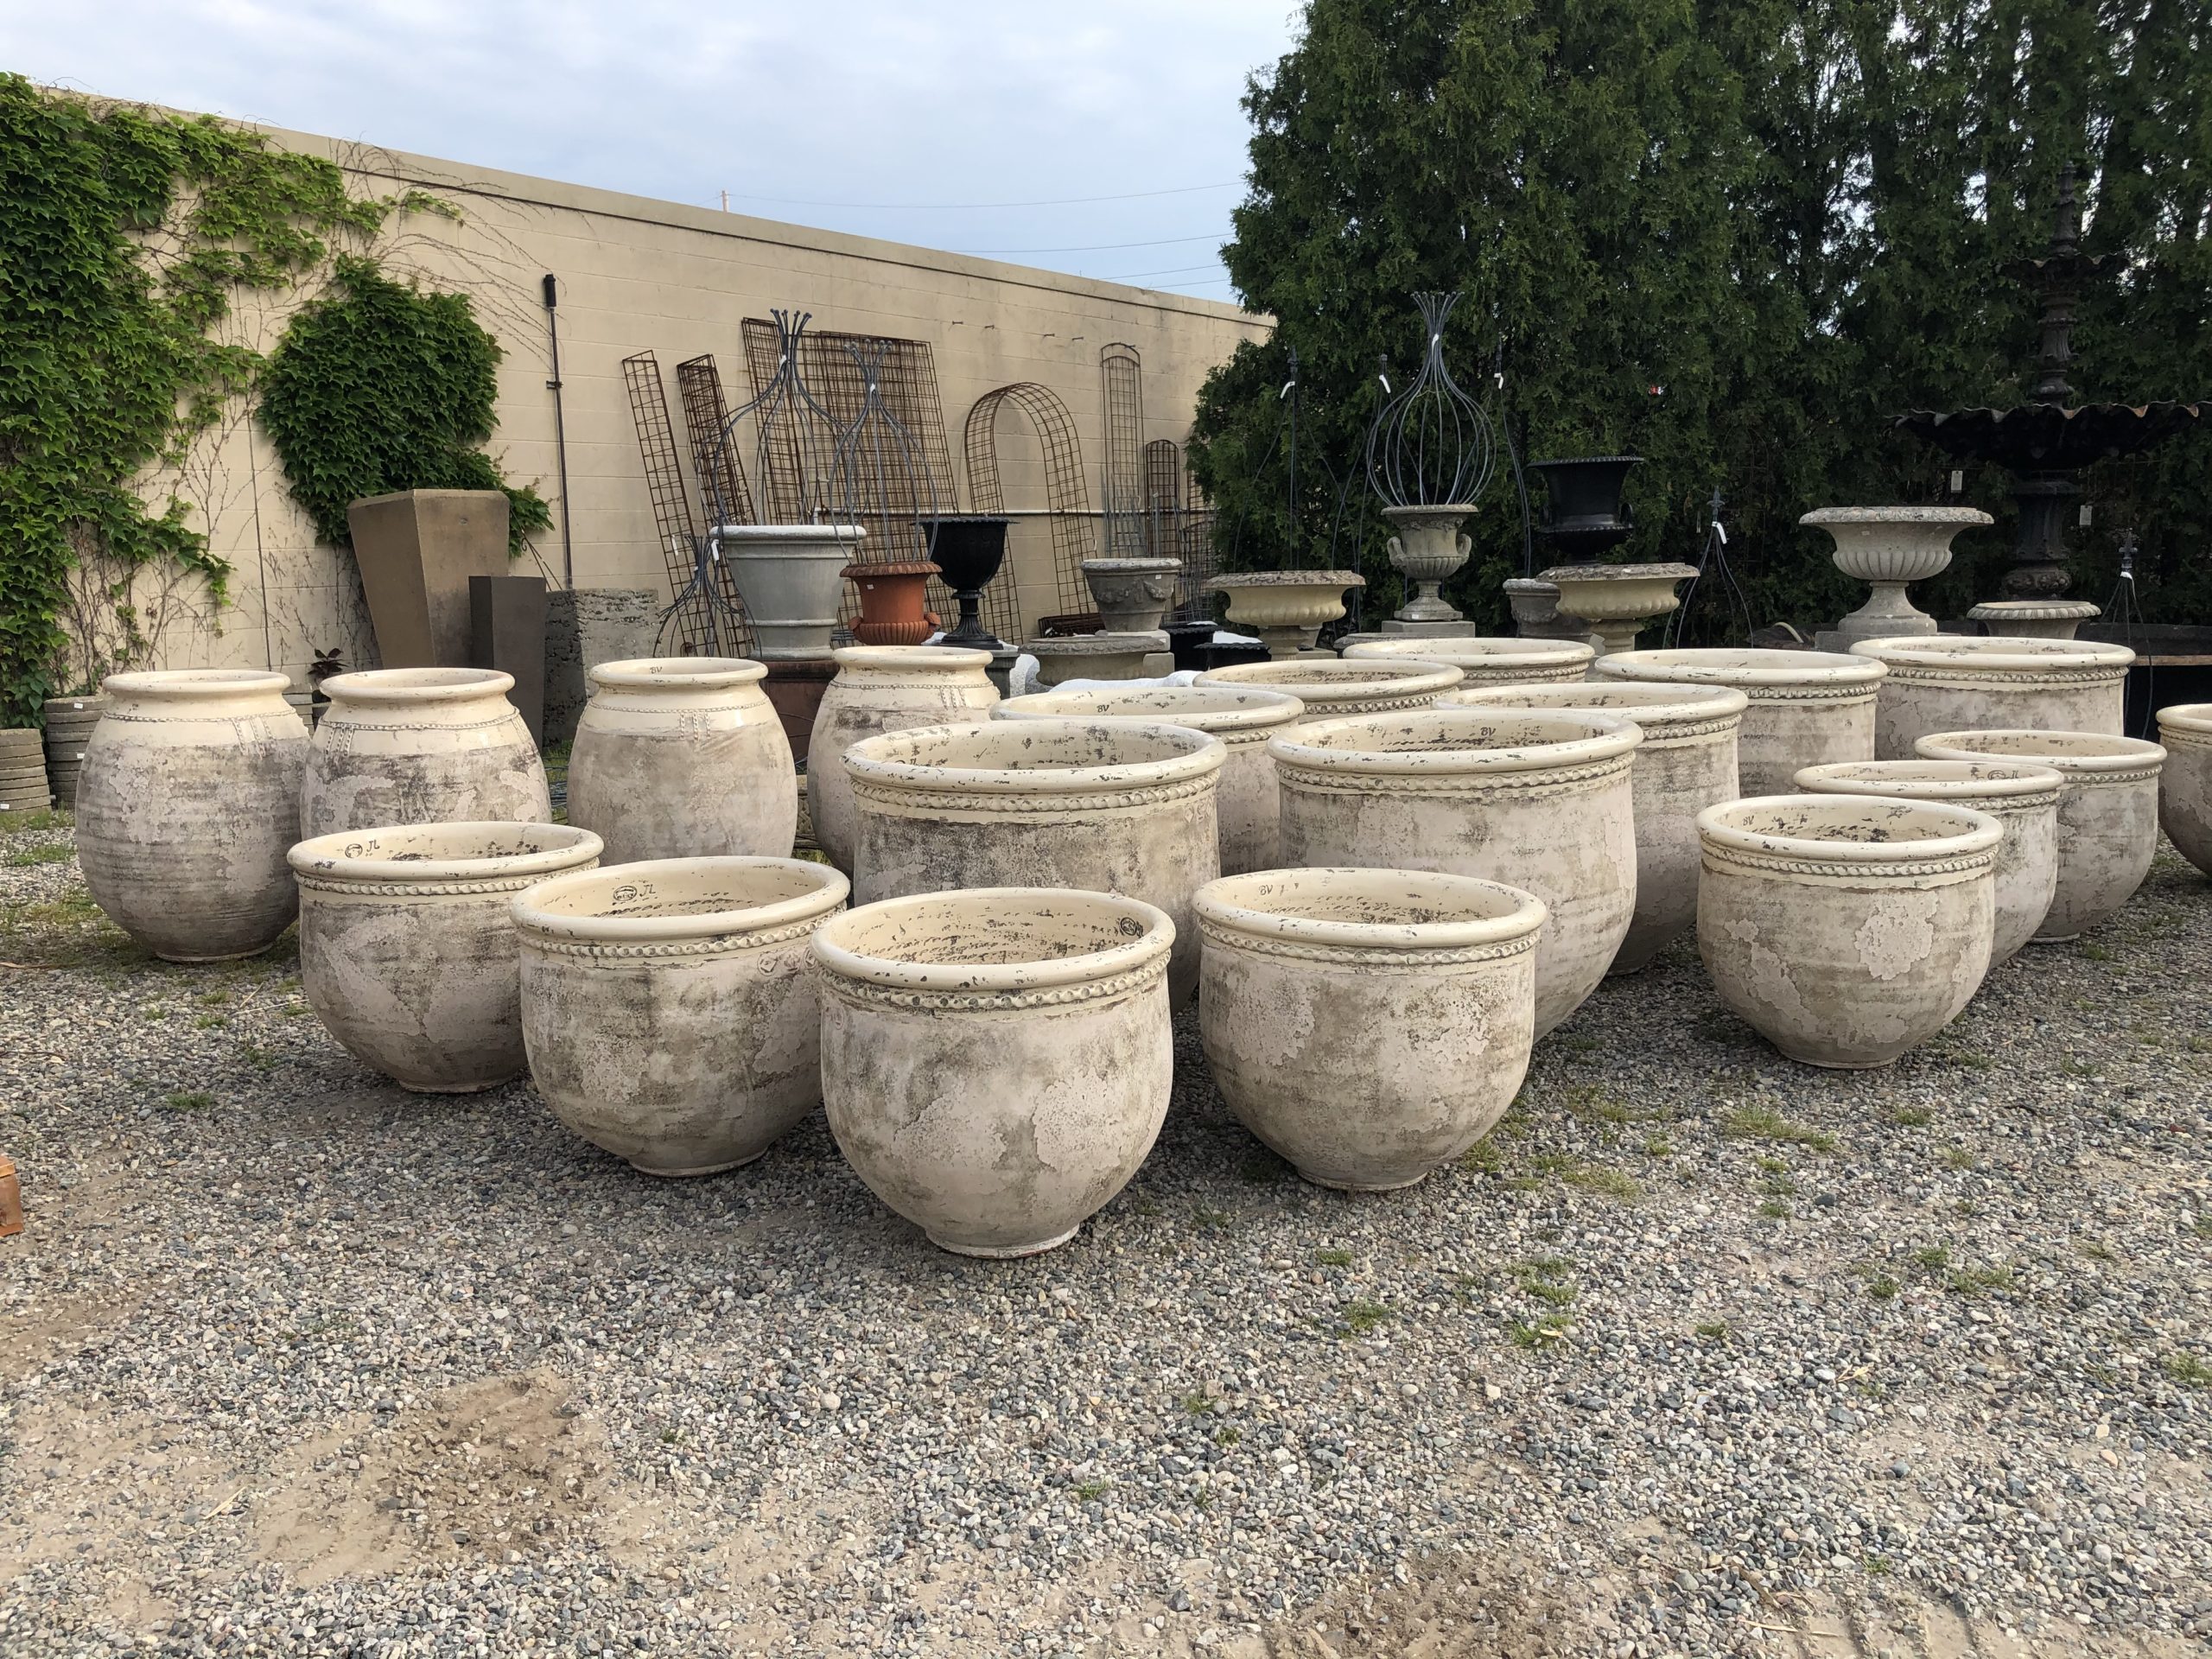
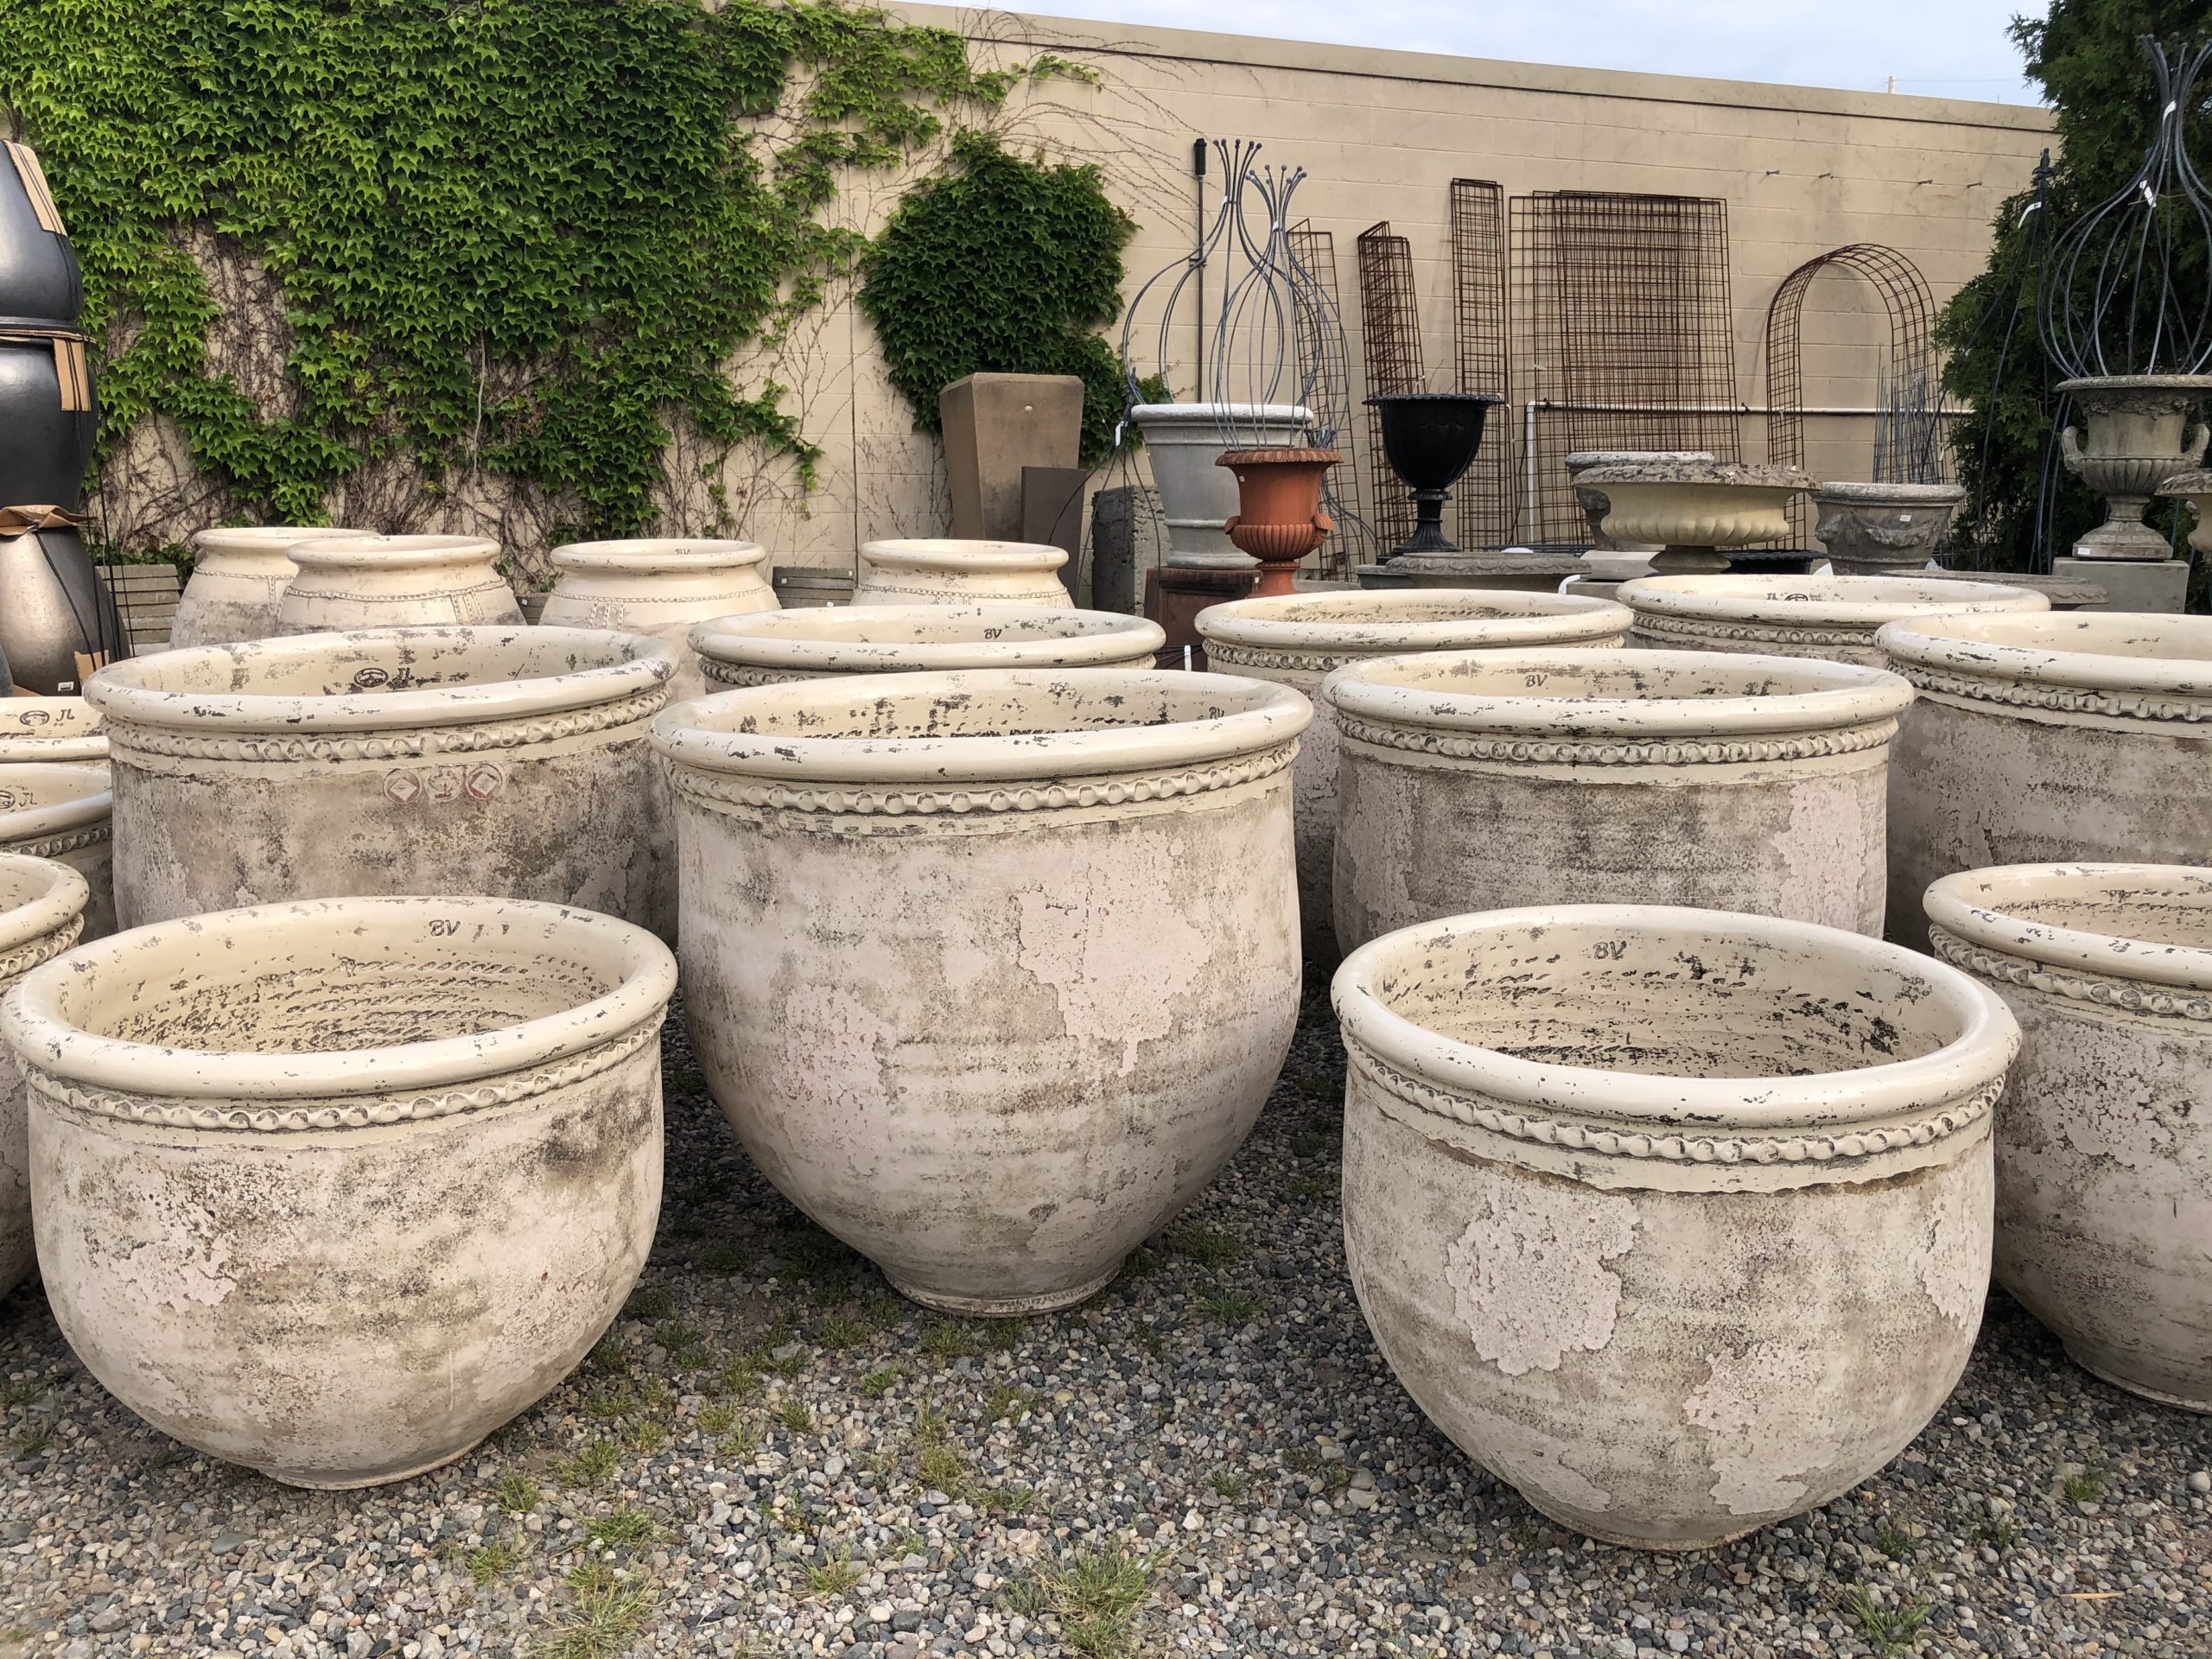
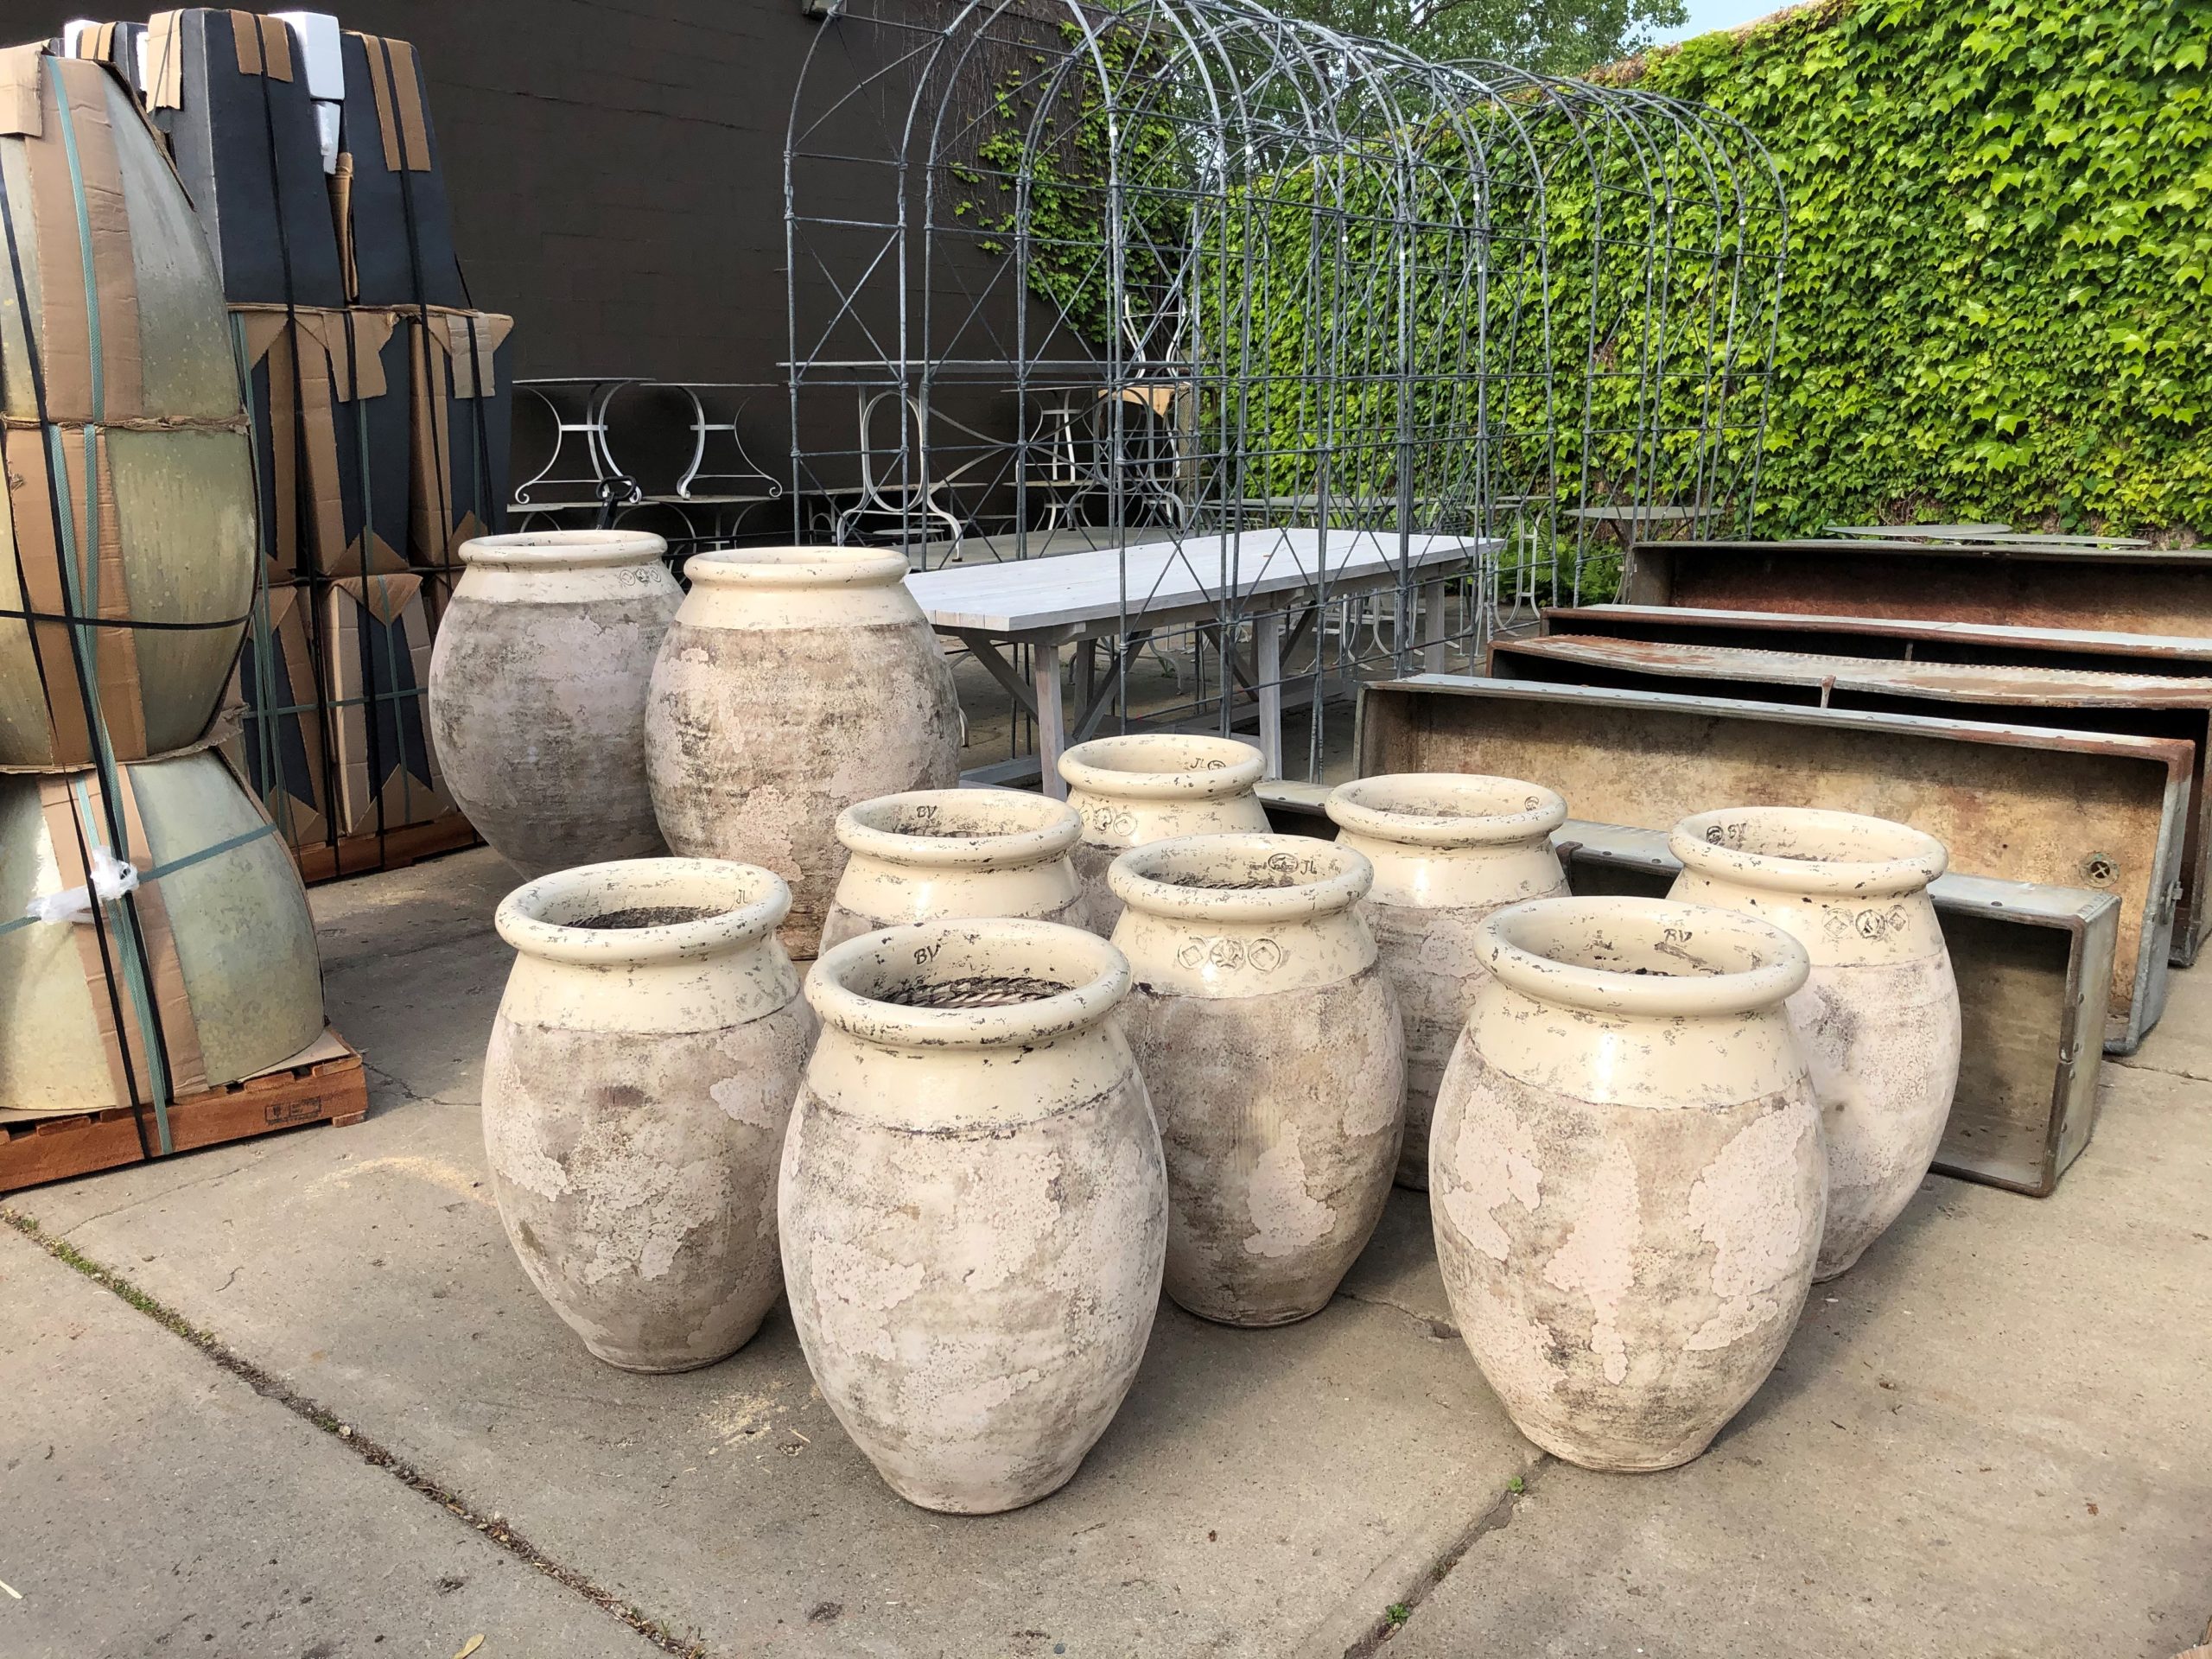
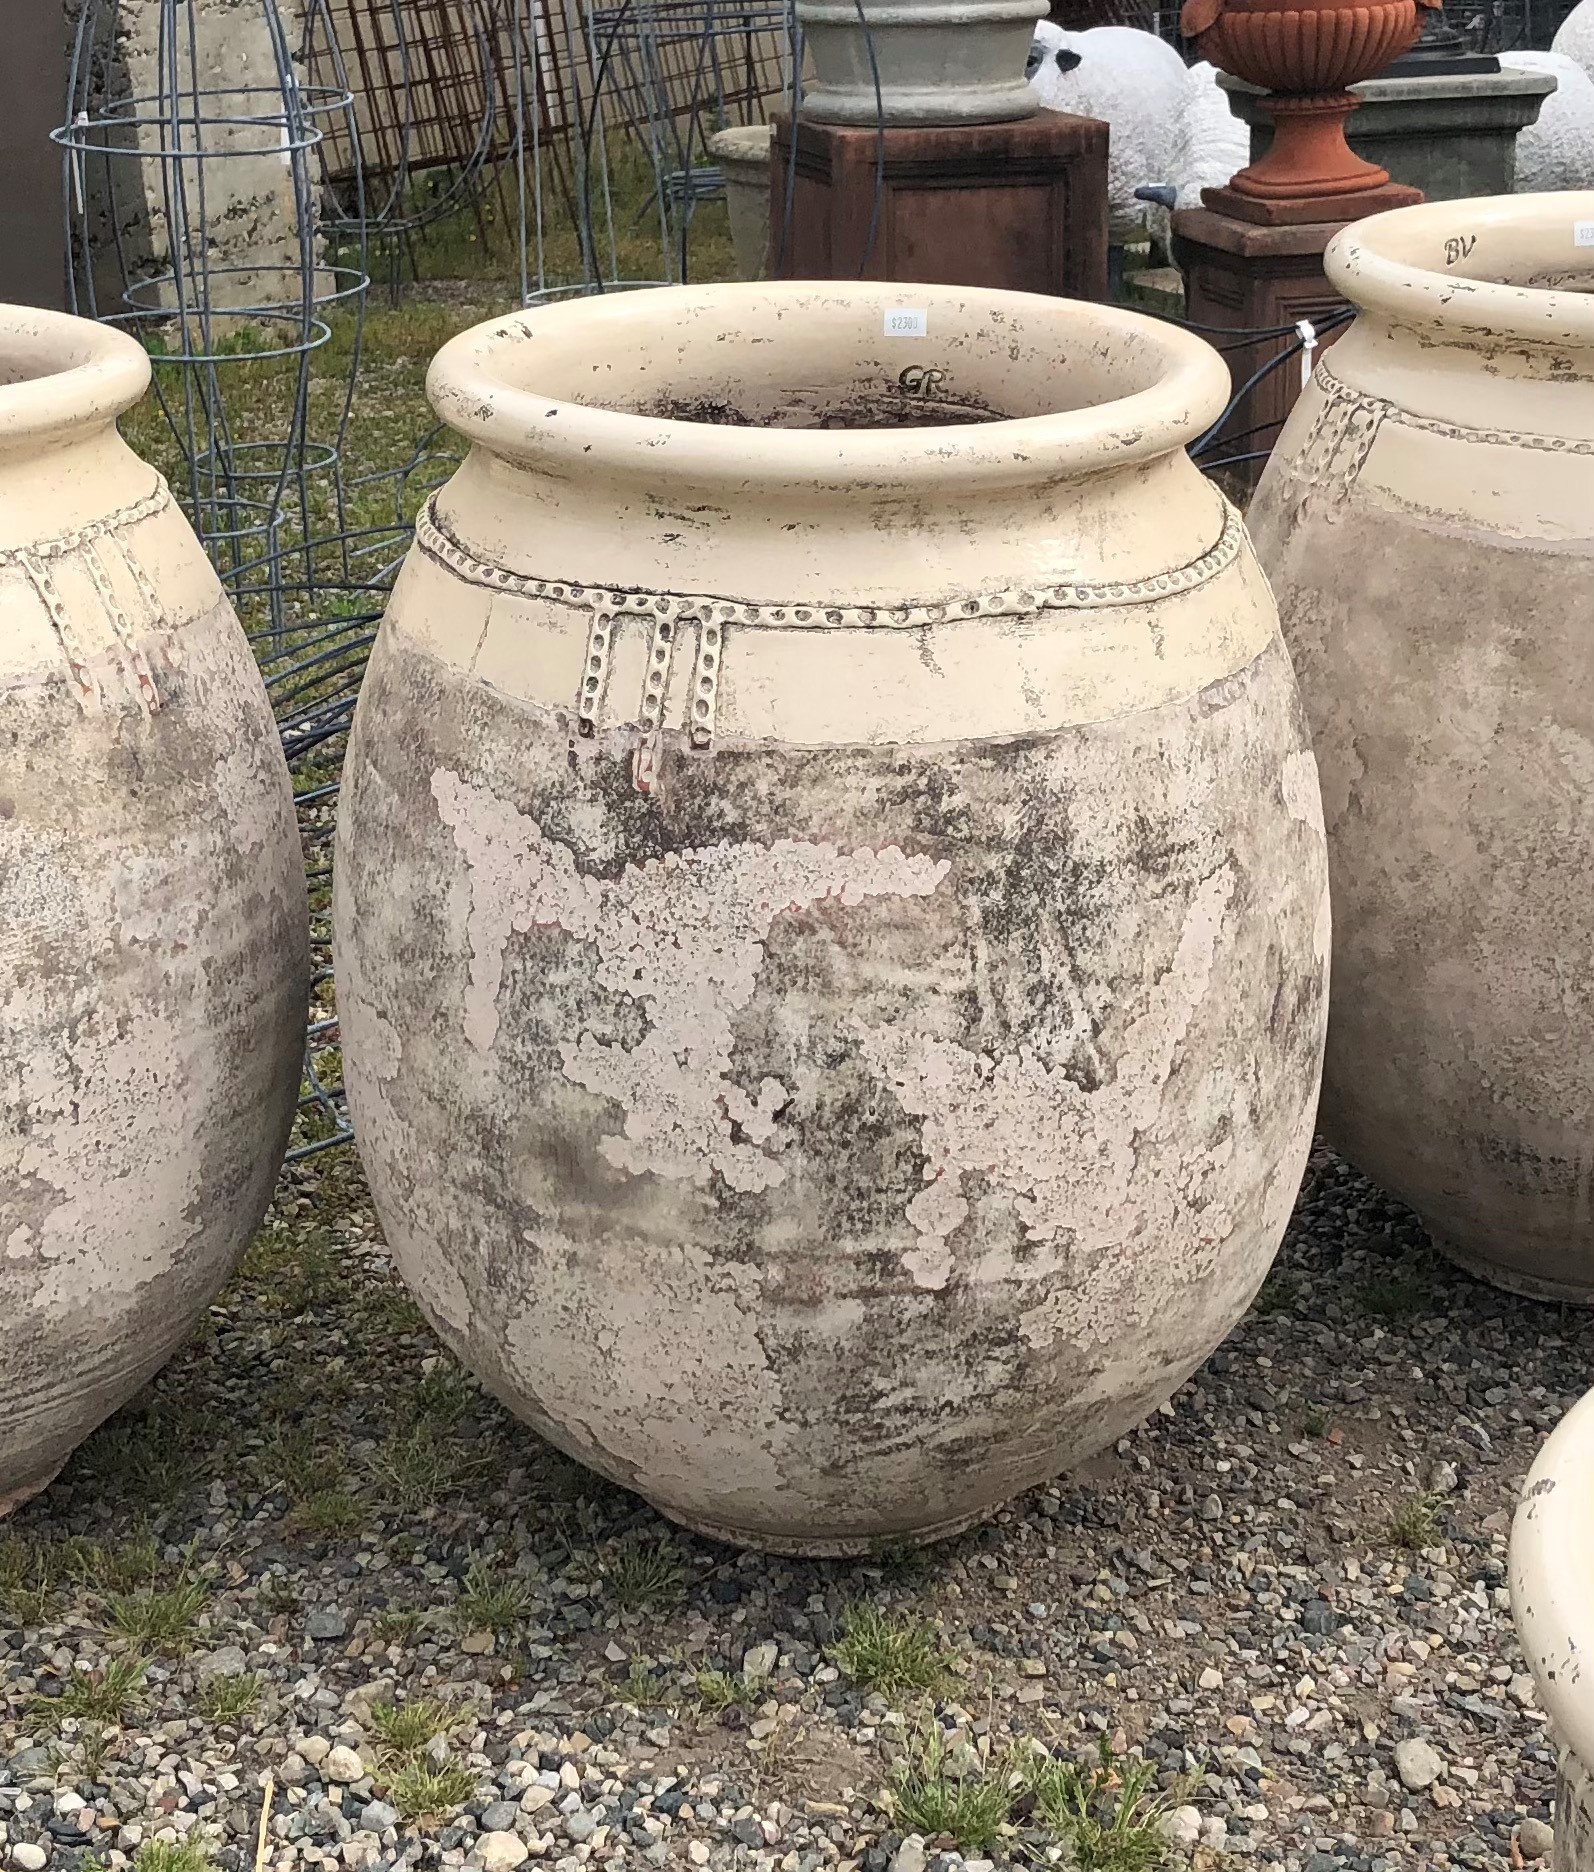
 Which brings me to a discussion of these pots. They are of French manufacture. A poterie that has been in business since the late nineteenth century has evolved from a company making terra cotta roof and drain tiles to a fine art studio creating pots of great beauty for the garden. The poterie was built but 300 meters from their clay quarry. There is precious little about them that is not to like. The sculptural shapes are classically French. The designs date back centuries. Each pot is hand made, and signed by the artisan who made it.
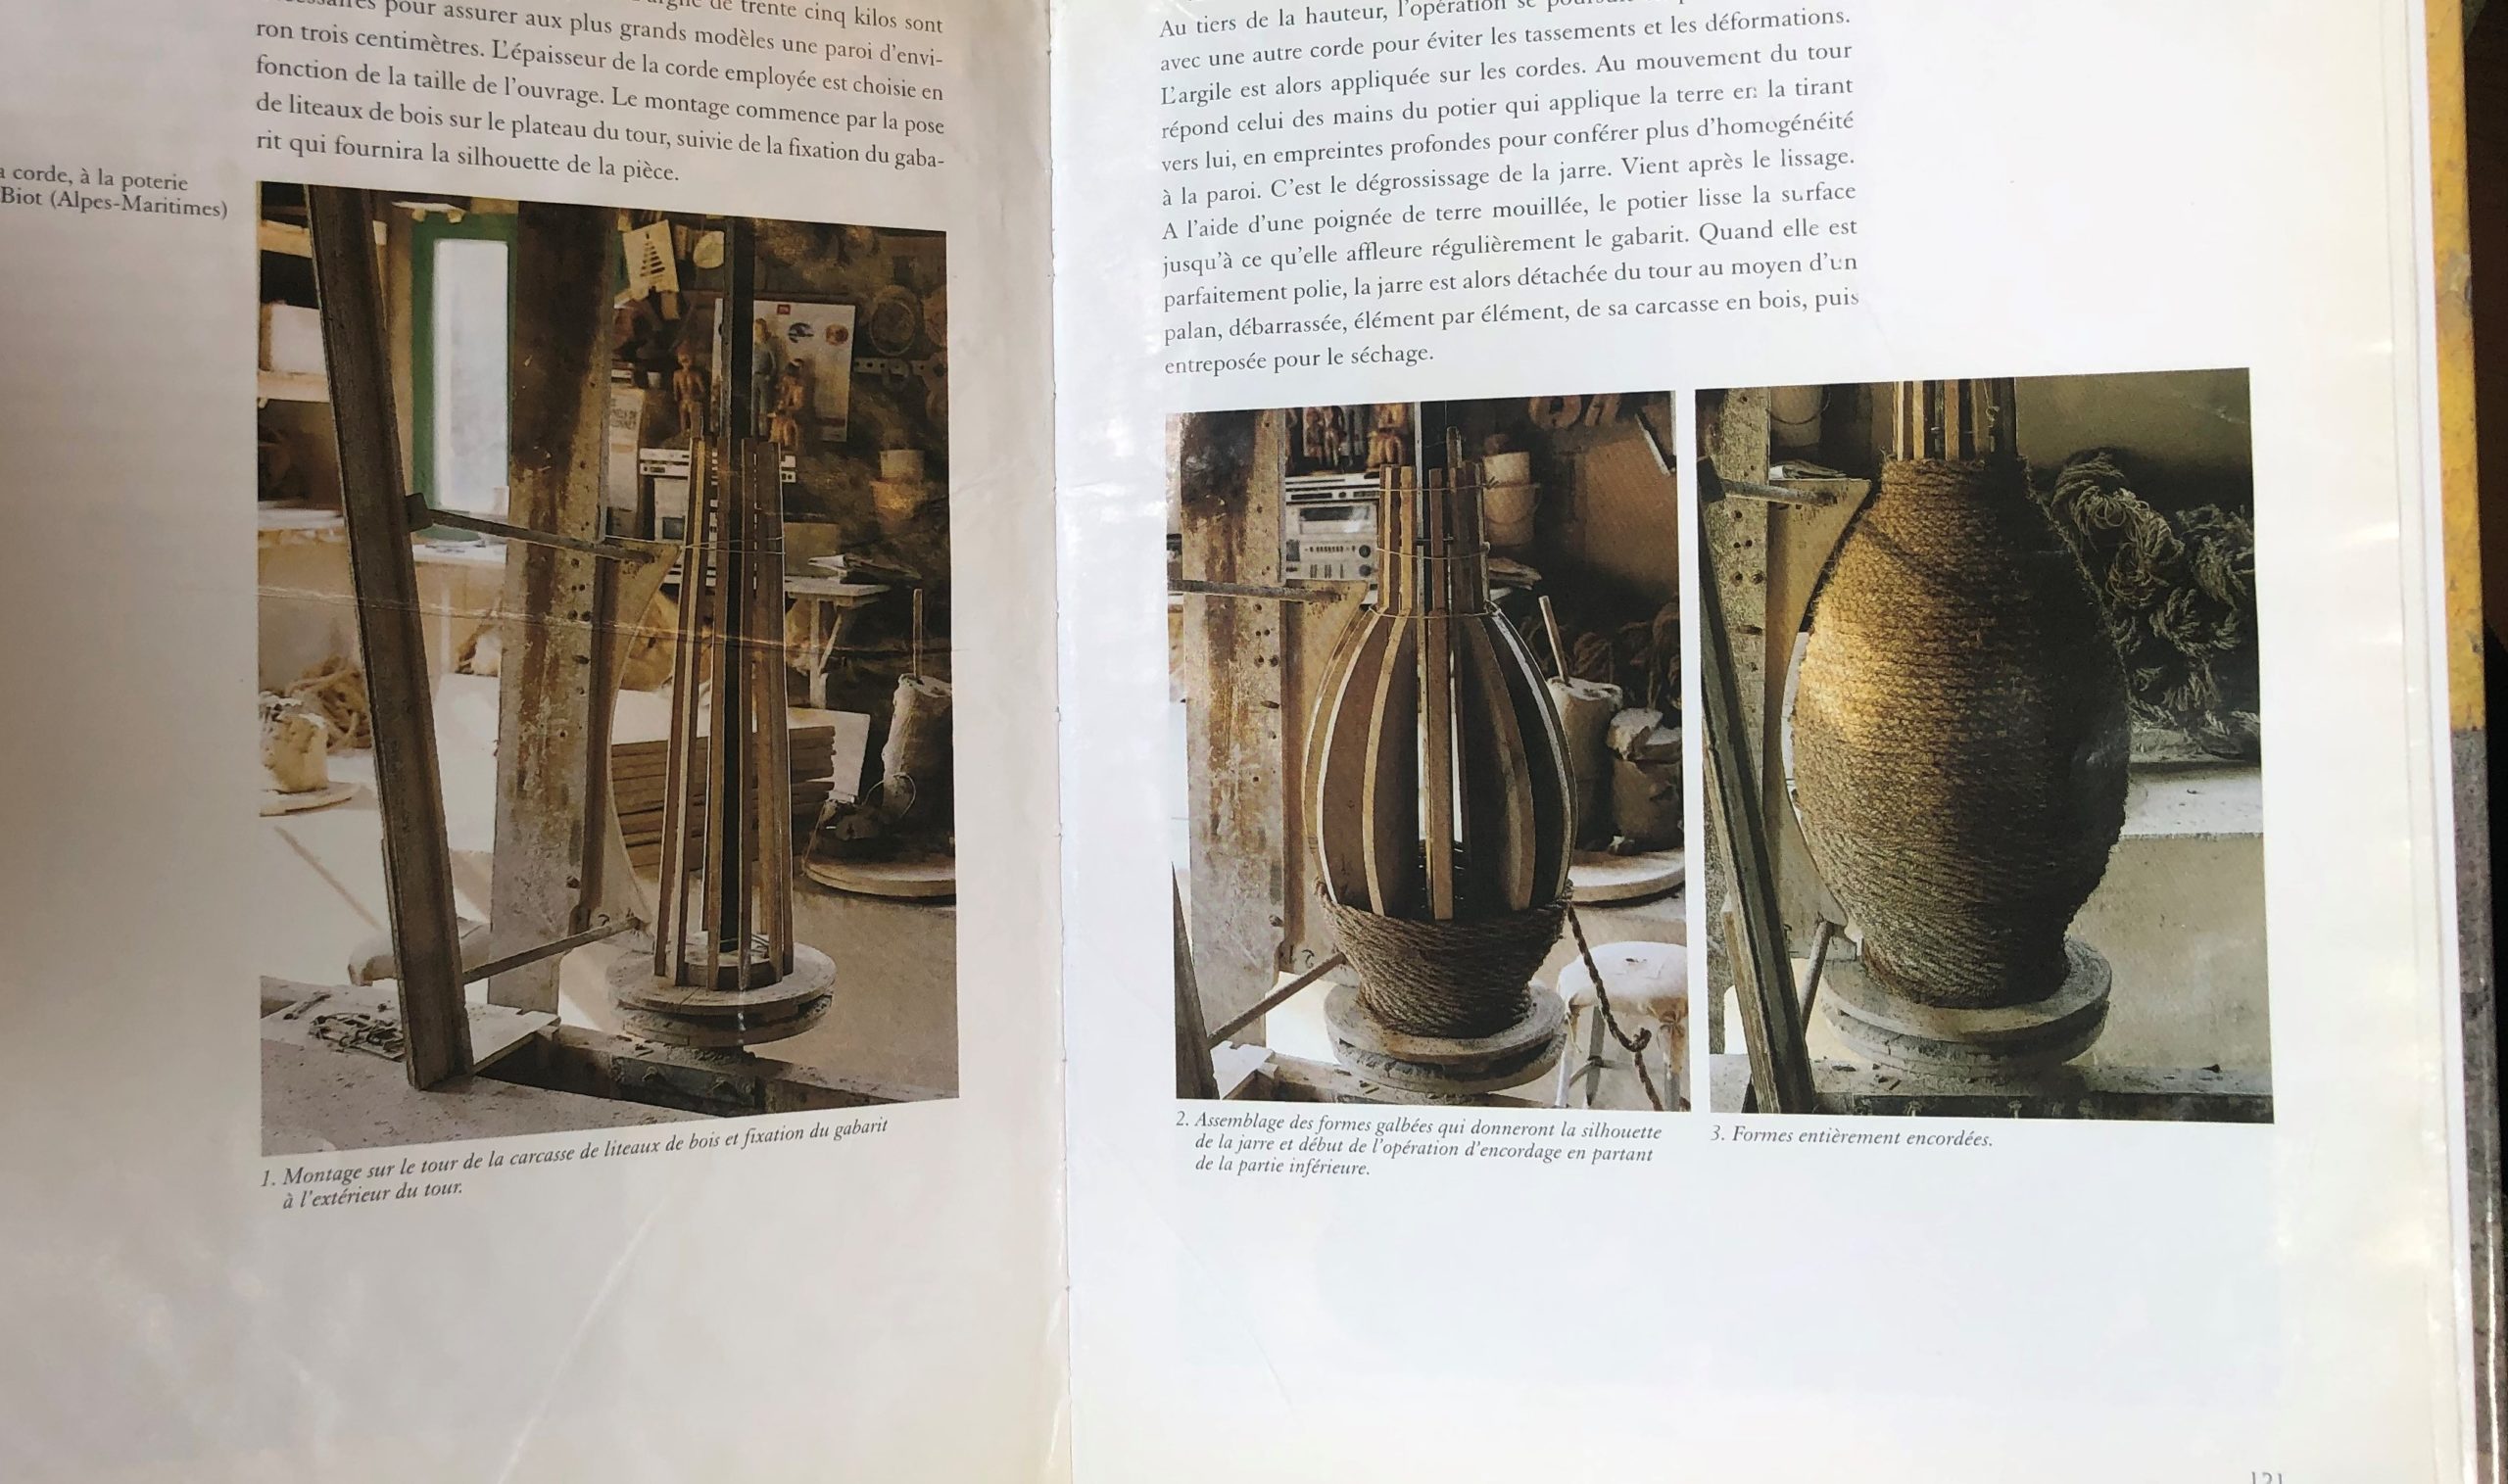
The pots are made via an ancient process. Heavy rope is coiled around a wood form that describes the shape of the pot being made. The clay is pressed onto and into that rope form, until the desired thickness and shape is reached. As the clay dries, it shrinks away from the rope form. That rope is saved for another day, another pot. The success of this incredibly simple process depends on a potter of great skill and experience to make a pot of uniform thickness and integrity that can withstand the great heat of the firing process.
This particular finish is a tour de force. The top third of the exterior of the pots, the rims and interiors of each, is drenched in a thick creamy and lustrous glaze that looks good enough to eat. The body of the pots has a thinly applied ceramic matte patina comprised of many shades of cream, taupe and gray. There are places where the red clay body shows through. The cloud like appearance and texture of this finish is hard to describe. I like that. Any object whose beauty defies description will continue to enchant. The surface of each pot is its own painting.
 The contrasting surfaces are as appealing to the touch as they are to the eye.
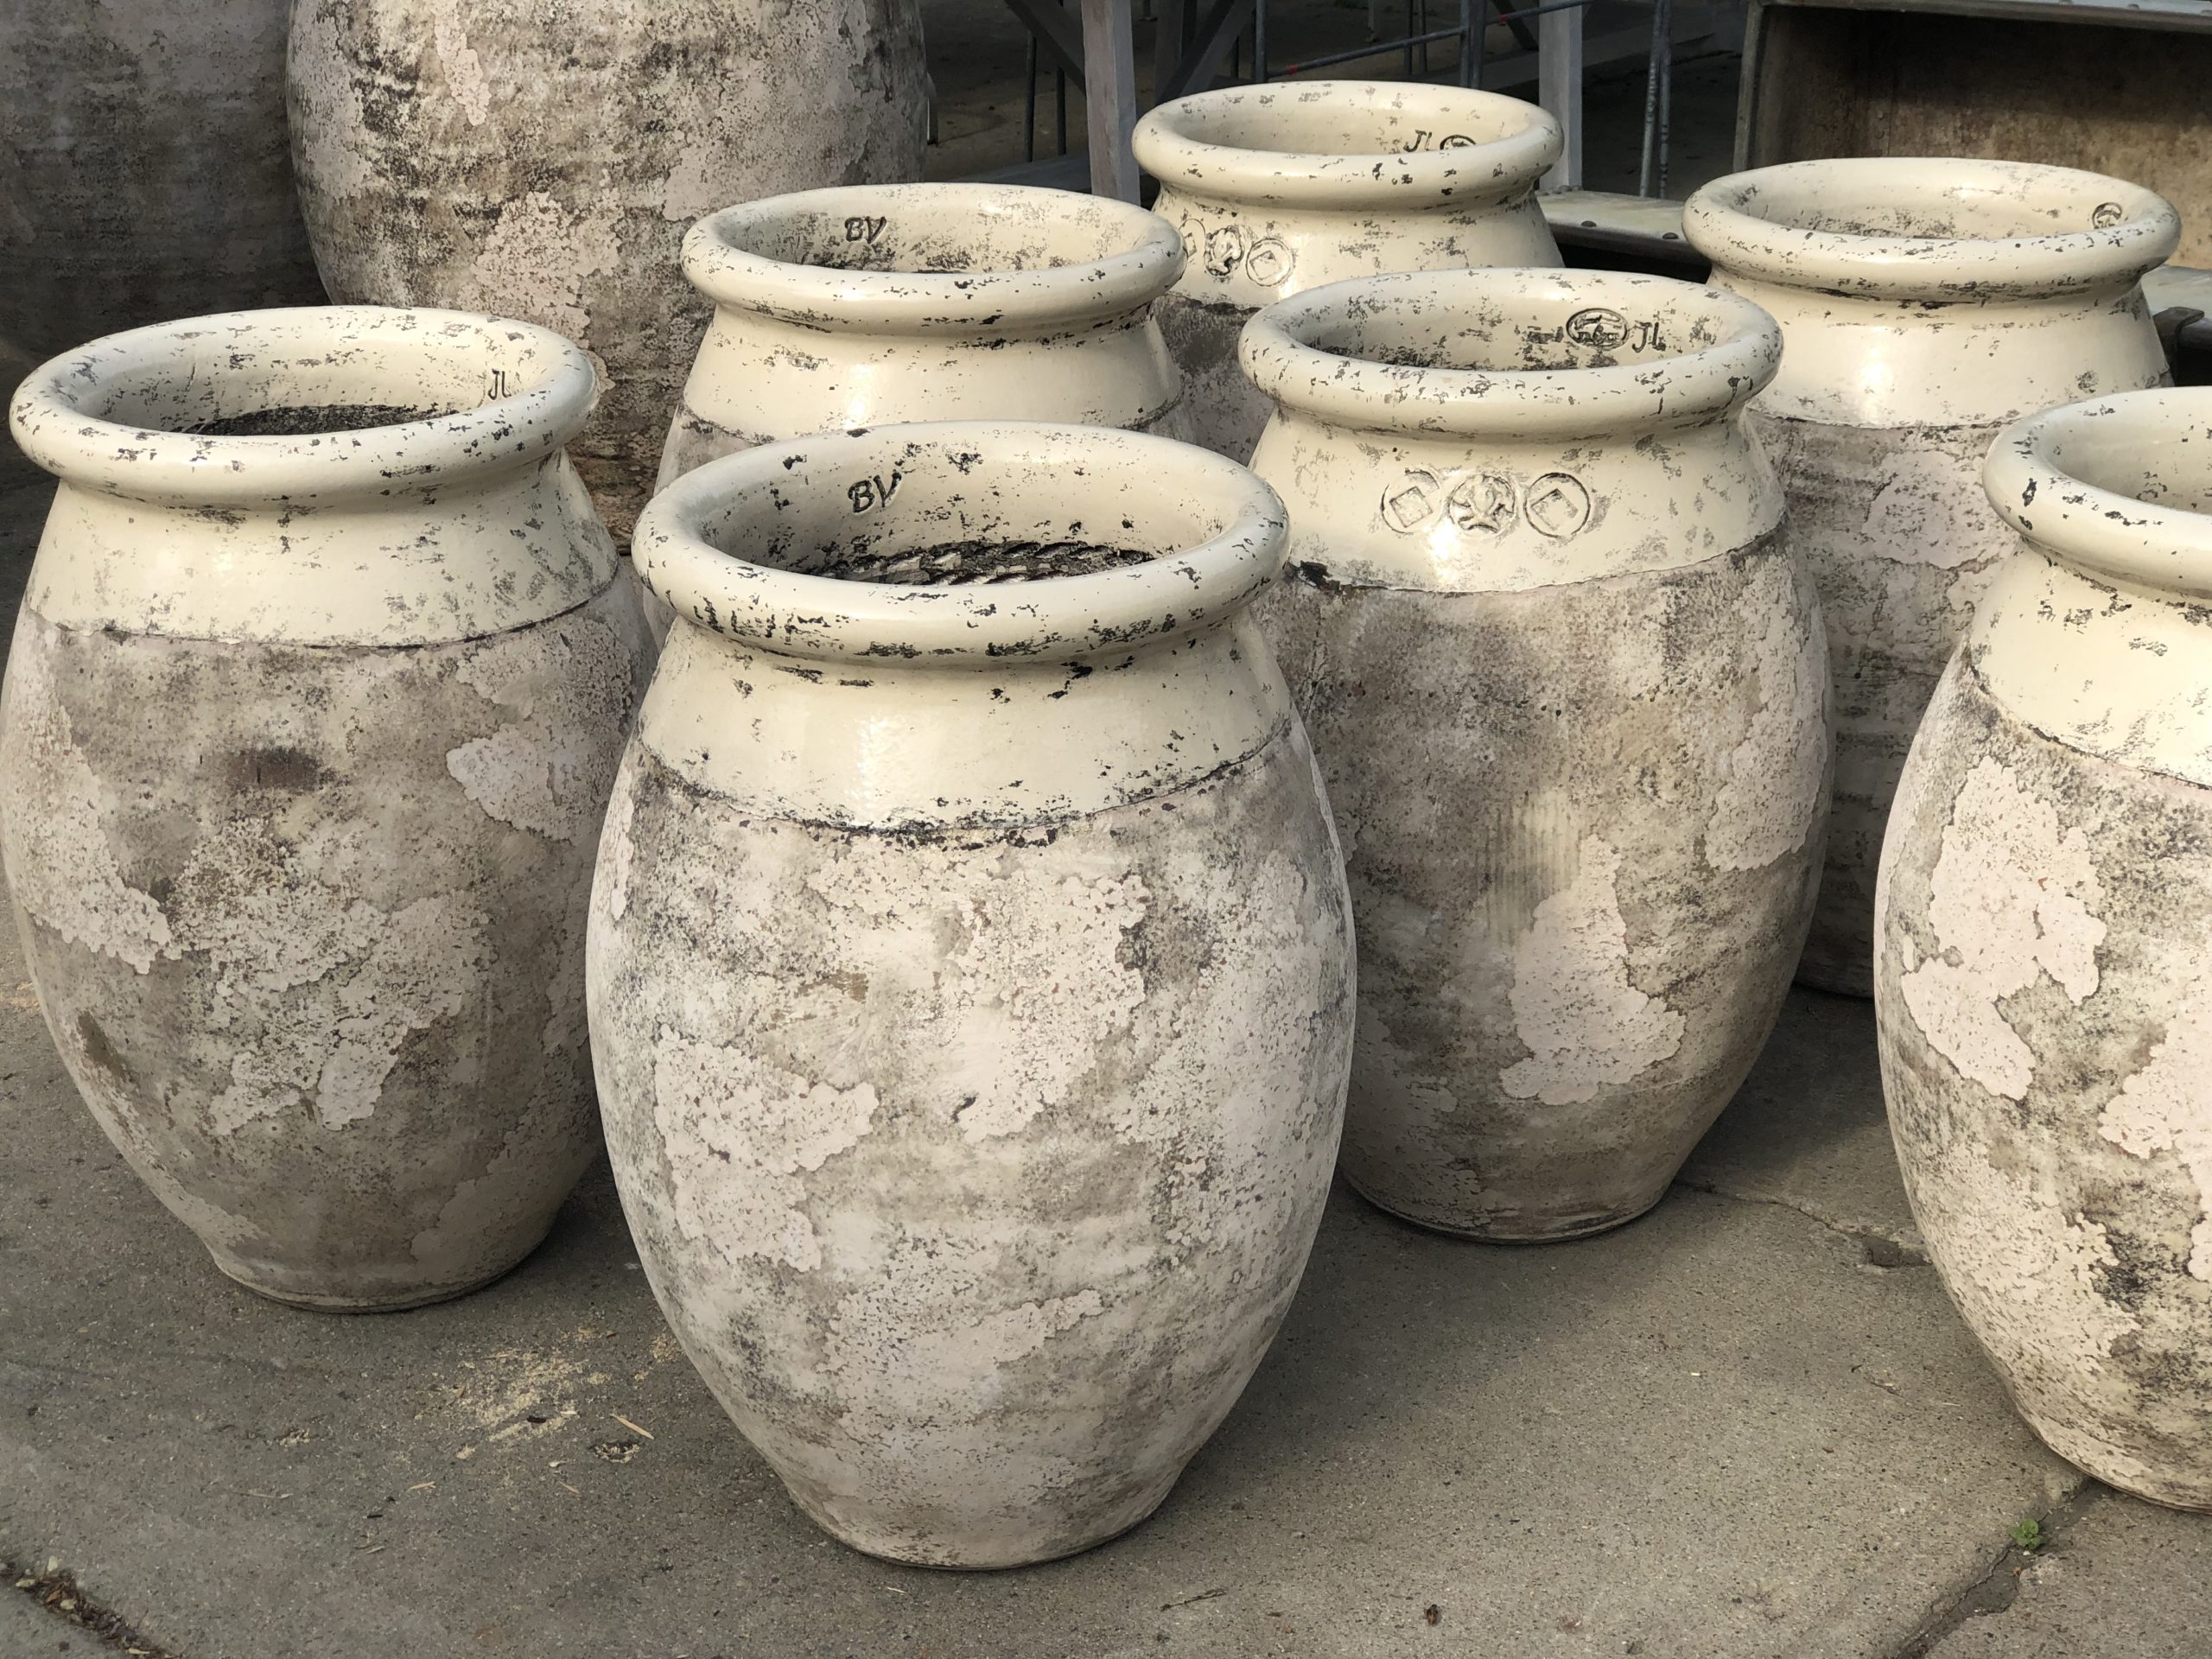
 This picture makes it clear that each pot is hand made. Each one of these olive jars is subtly different in shape and size than its neighbor.
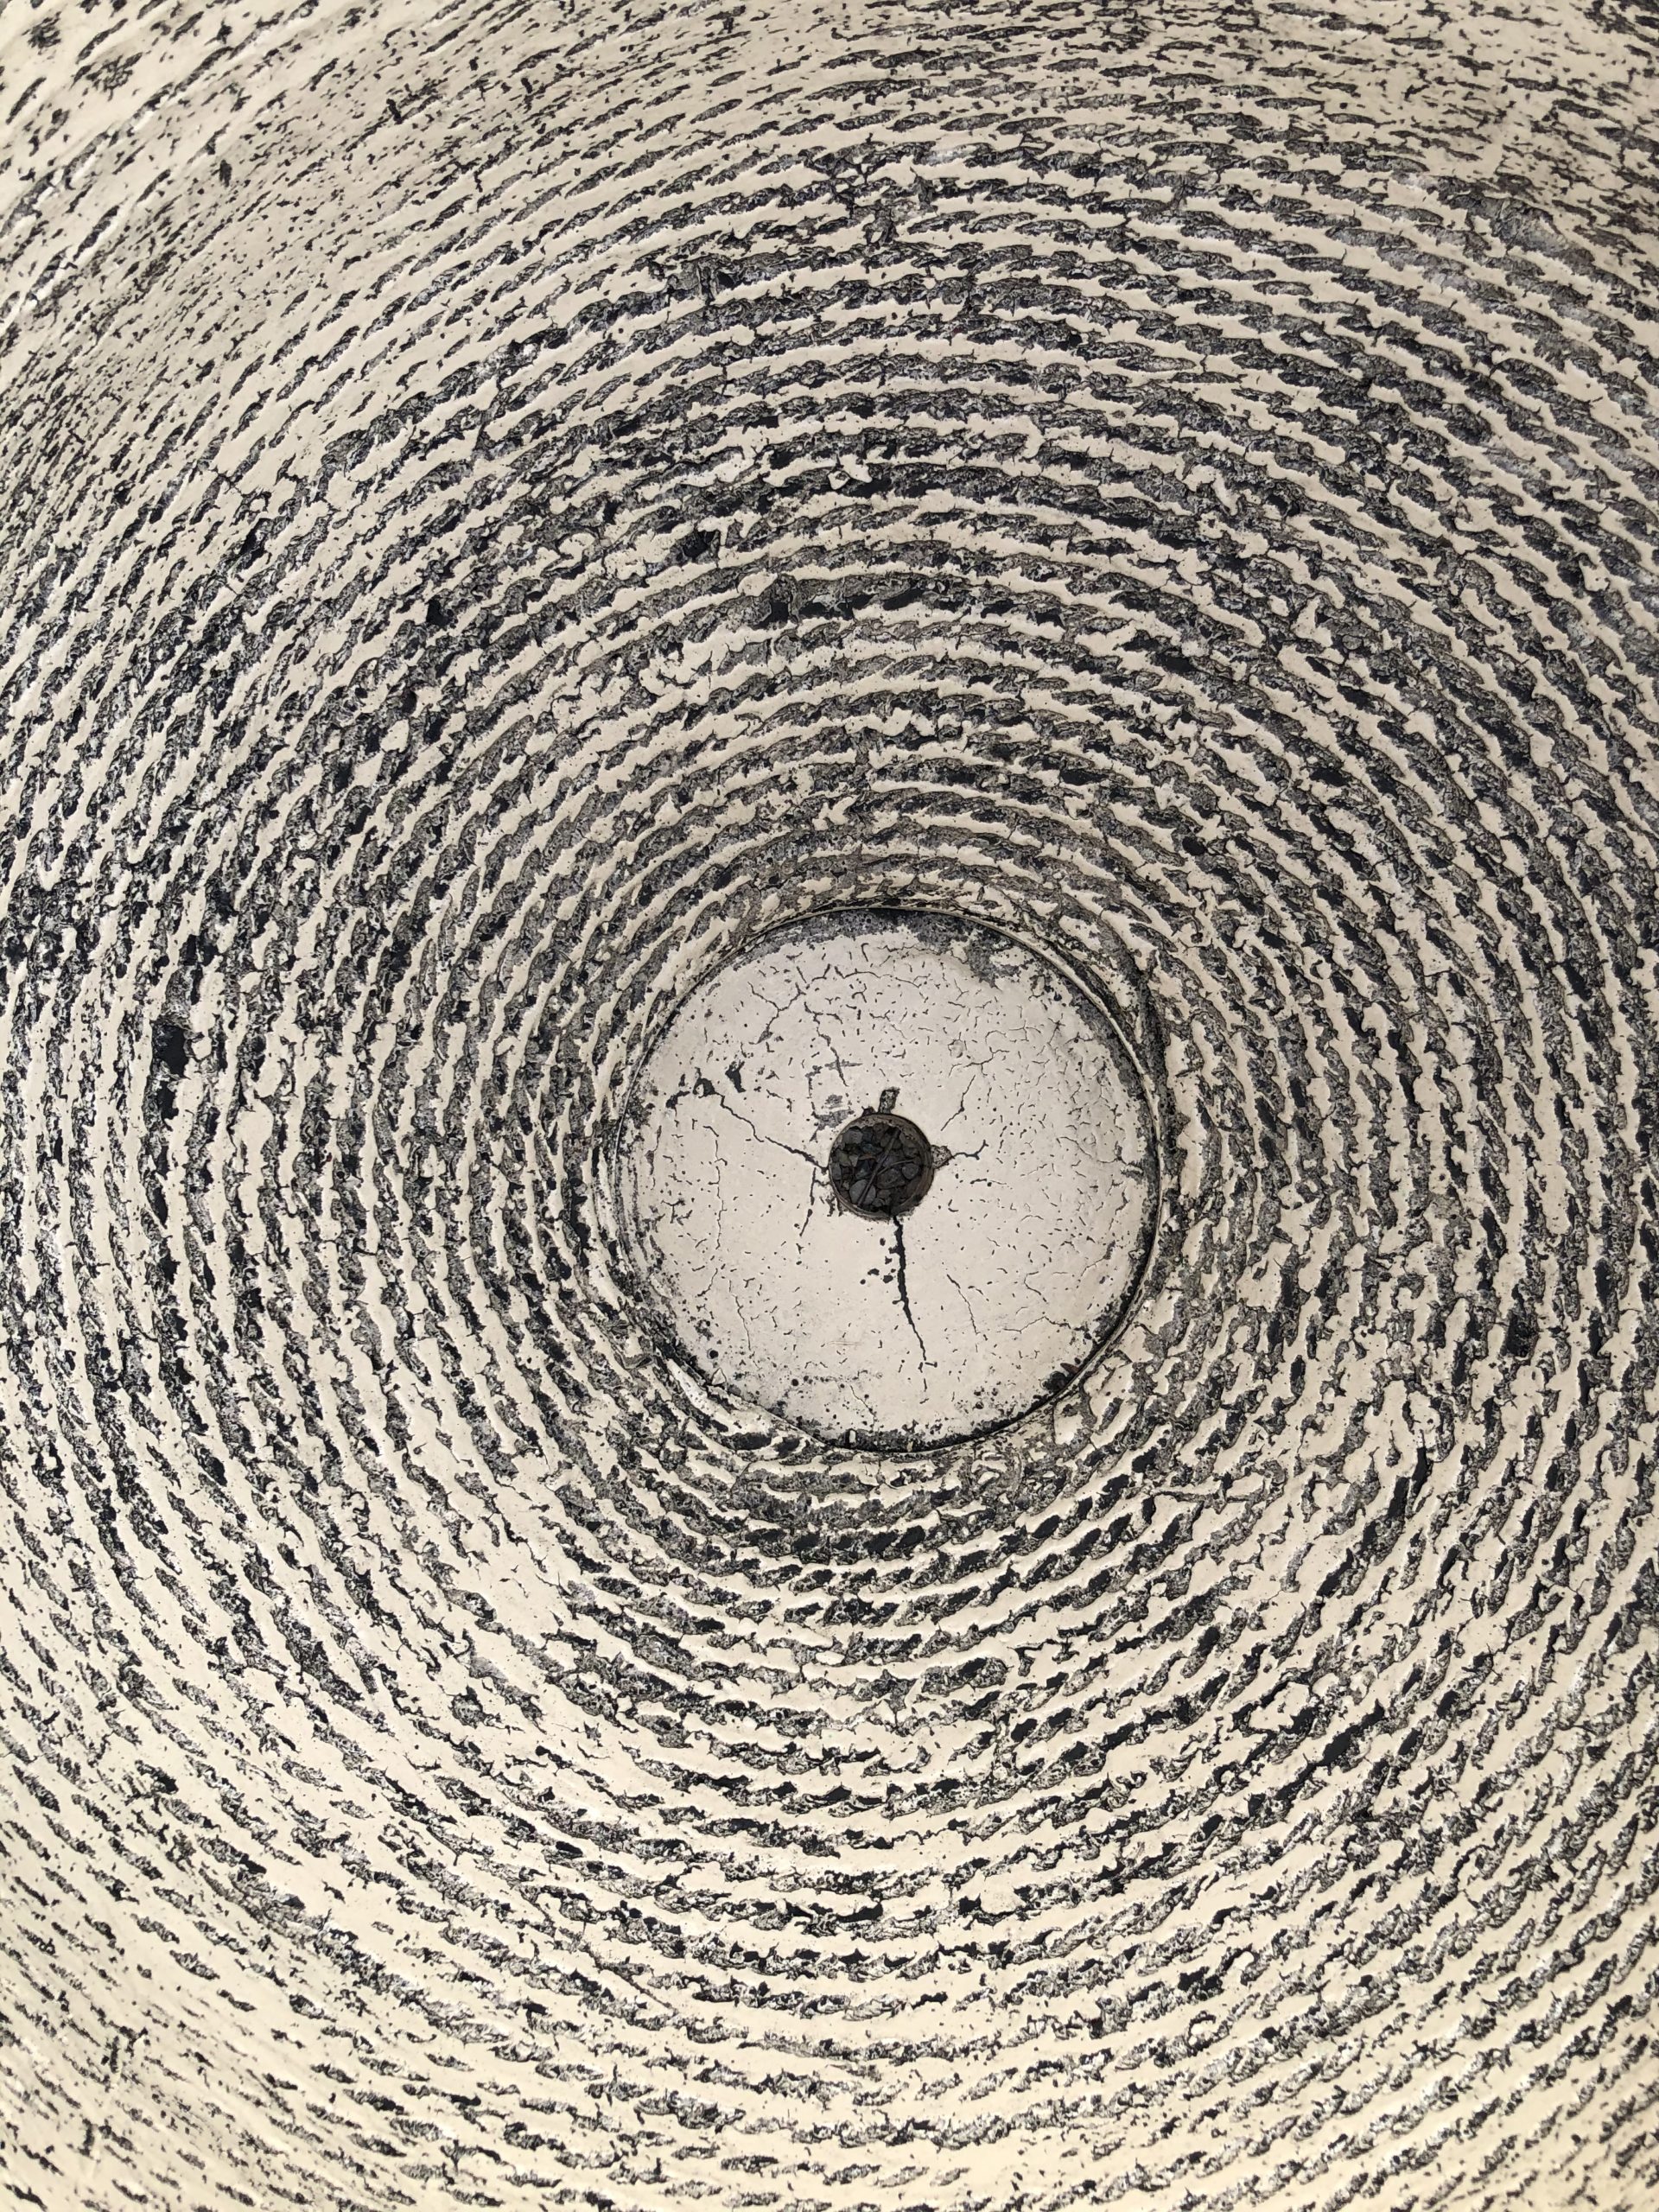 The pattern of the rope inside survives the glazing and firing process.
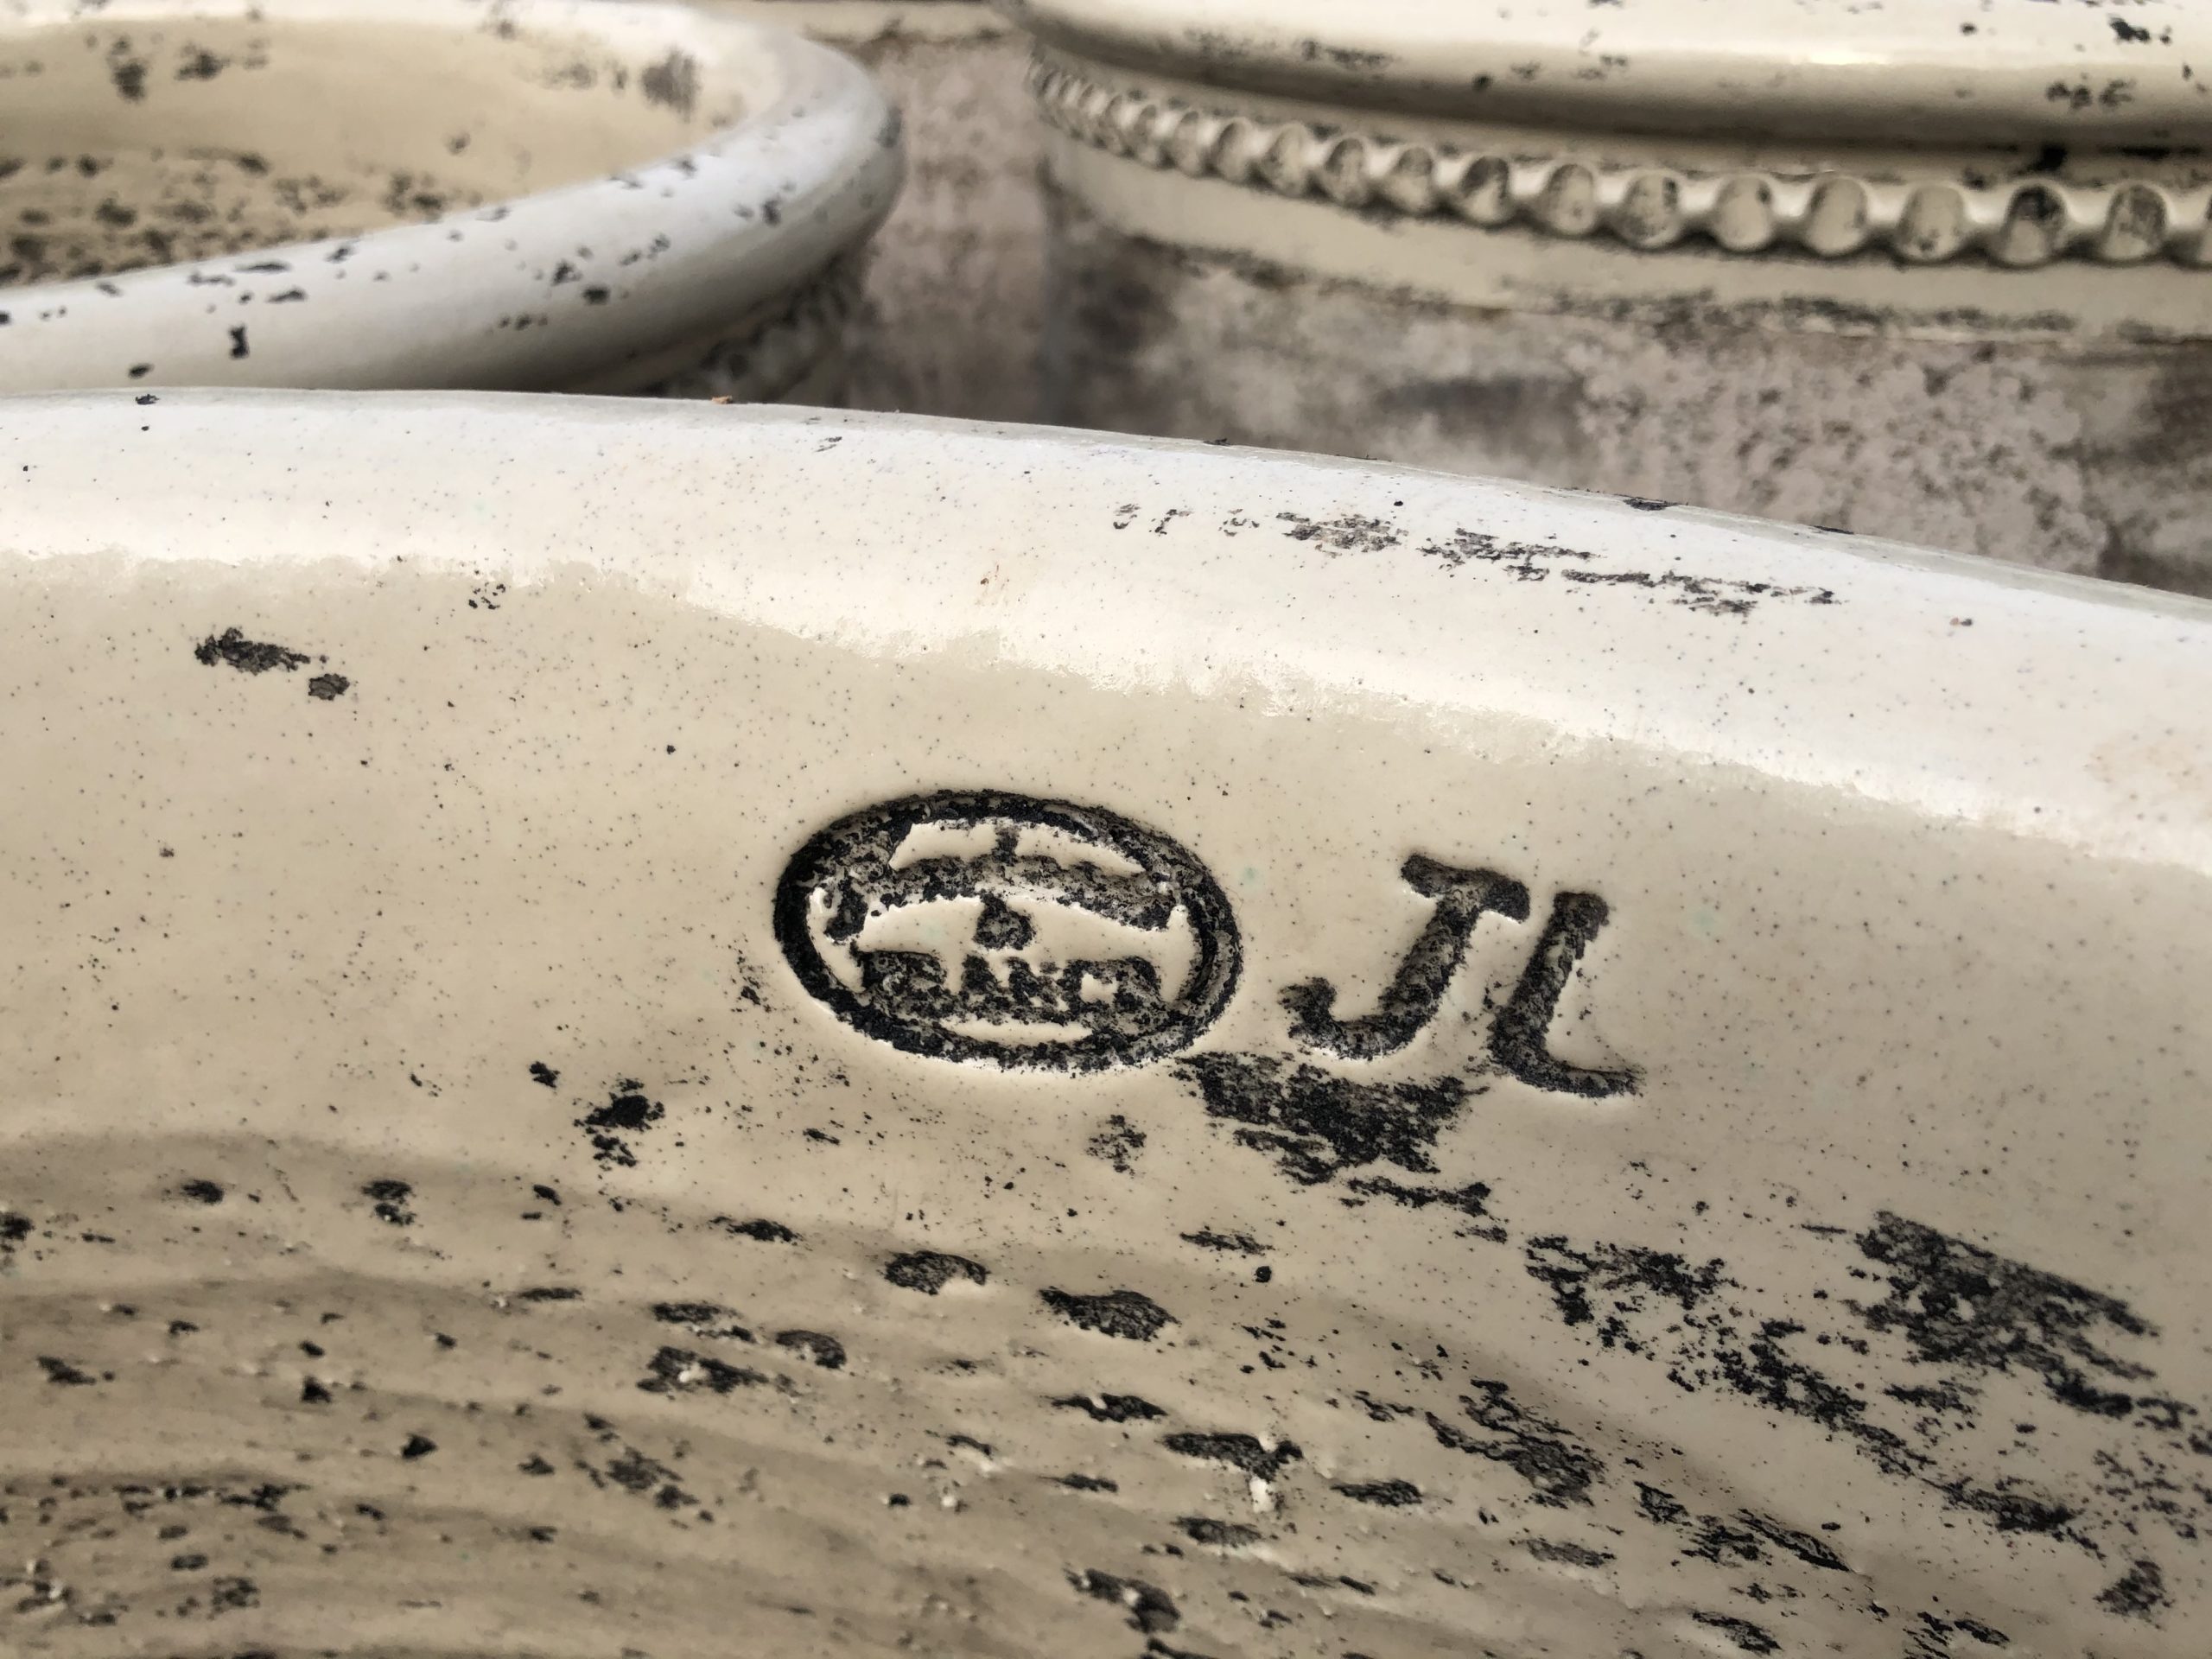
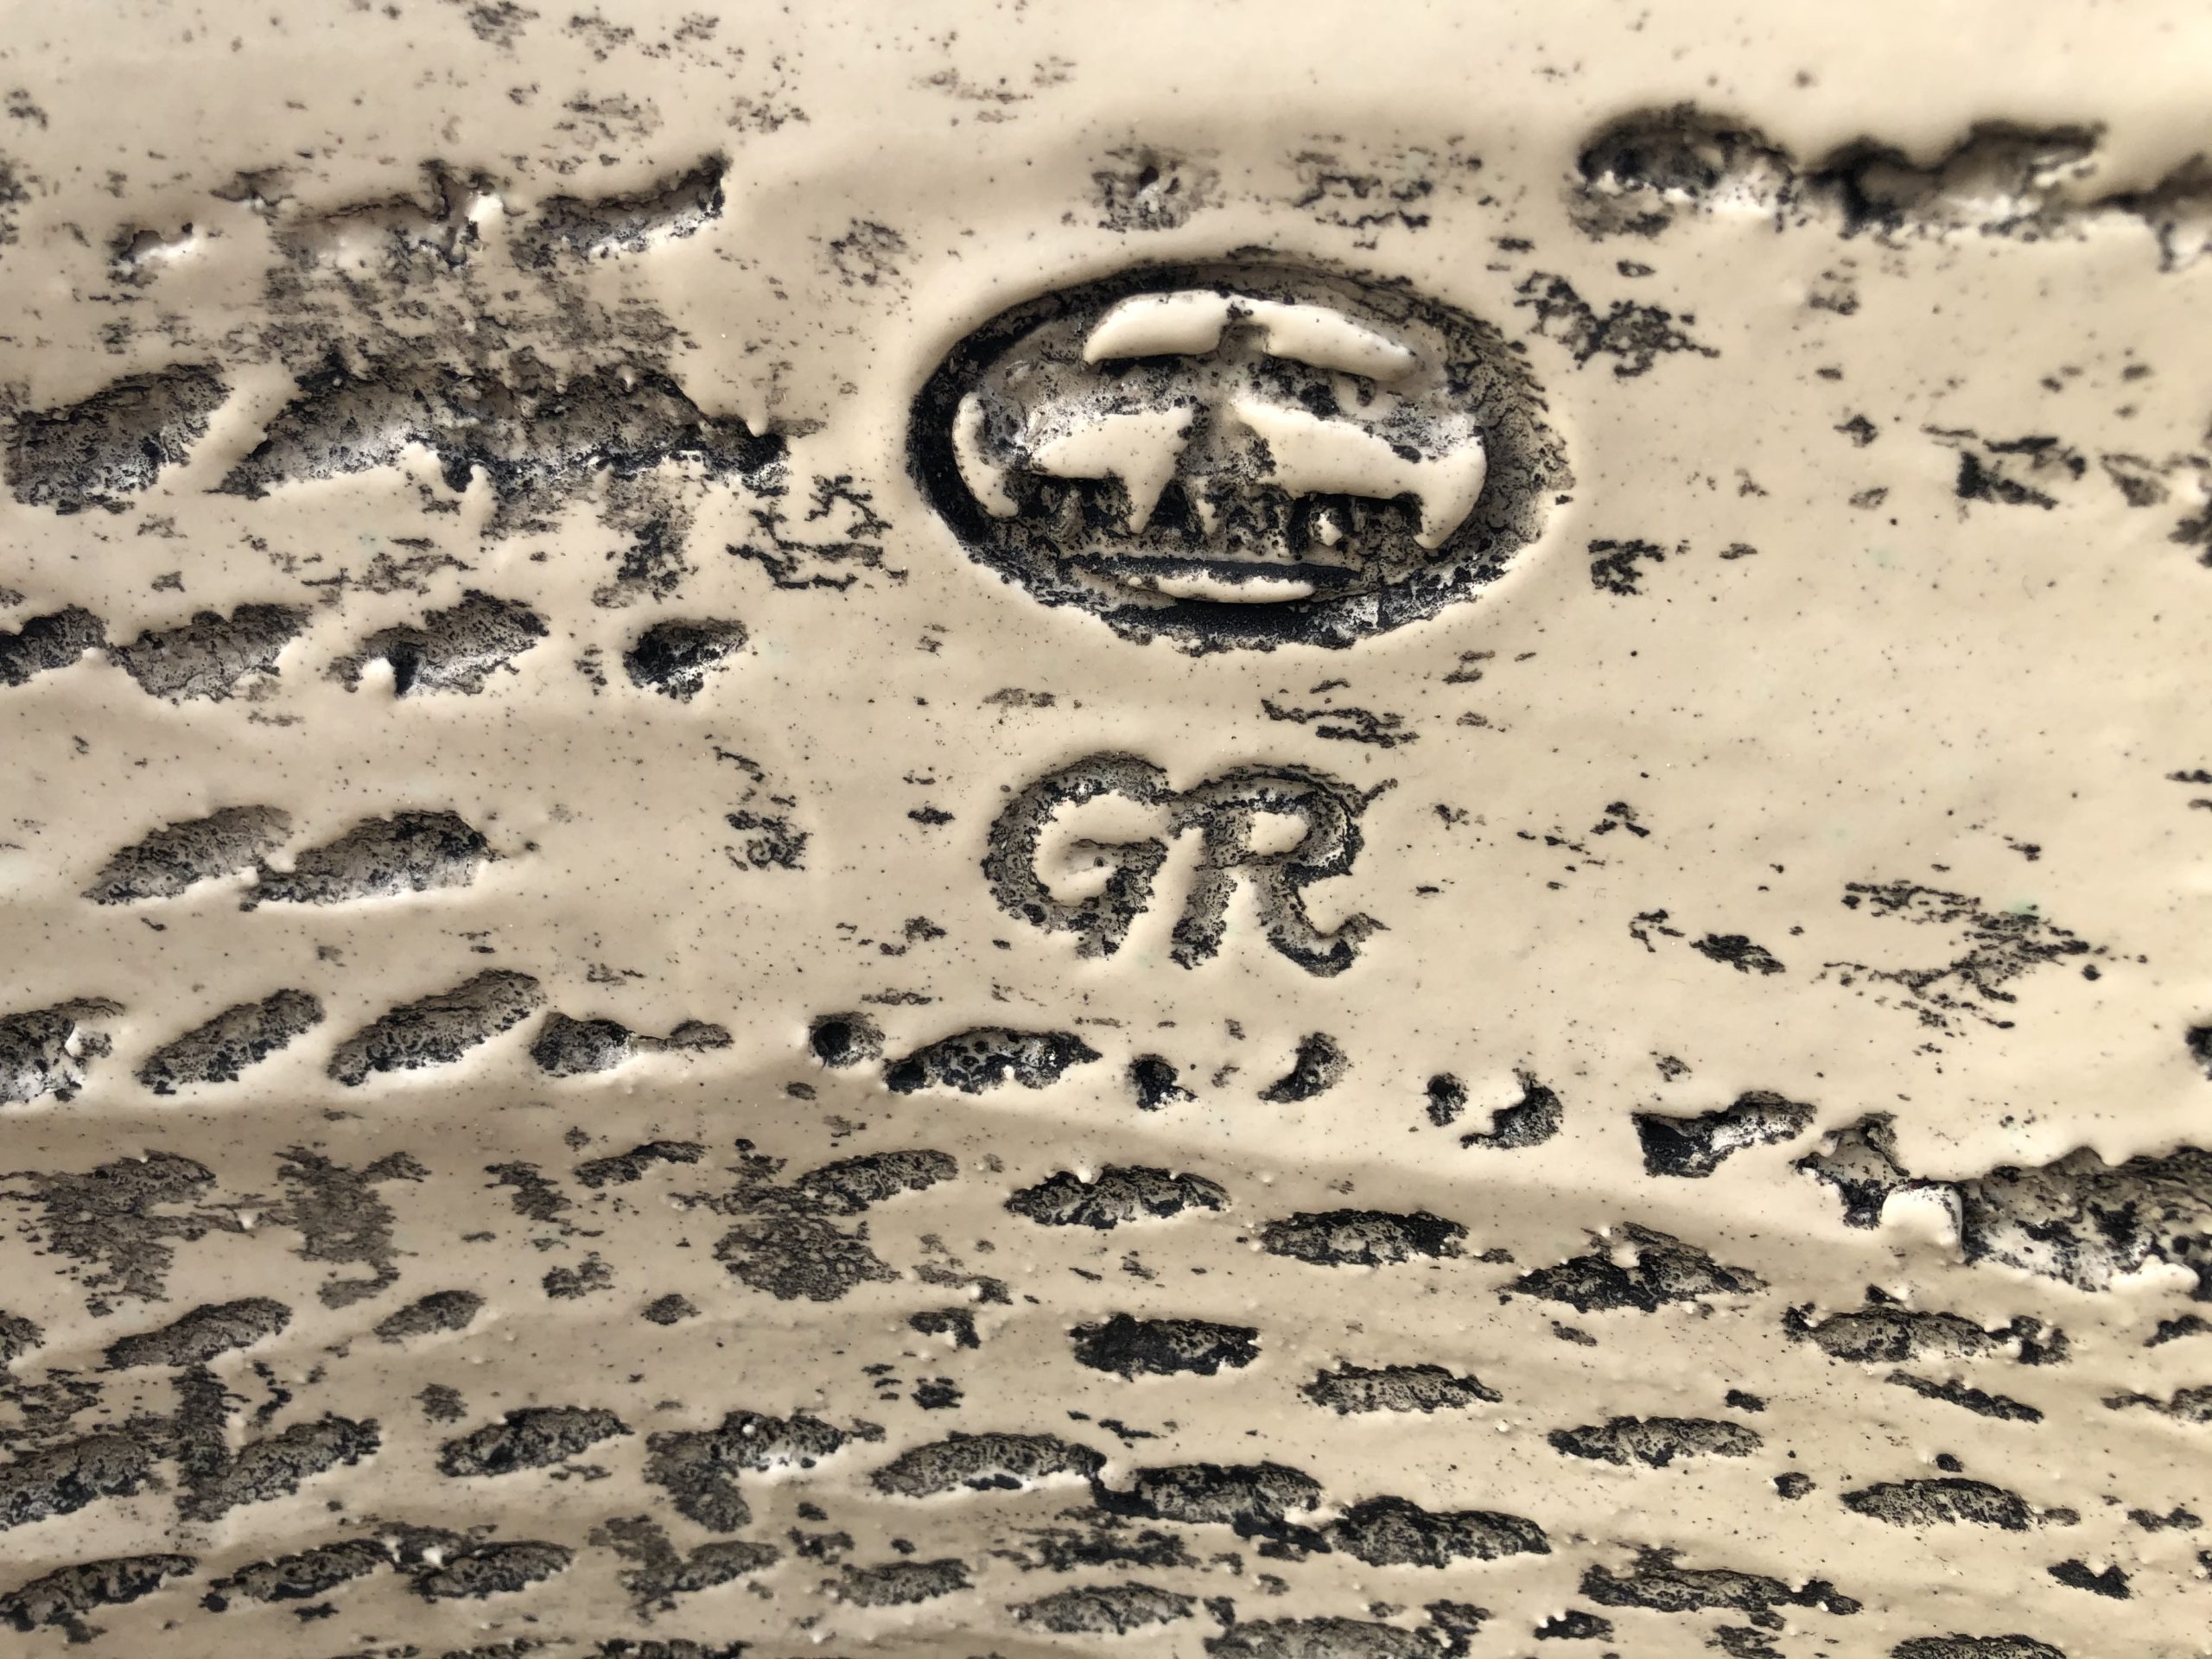
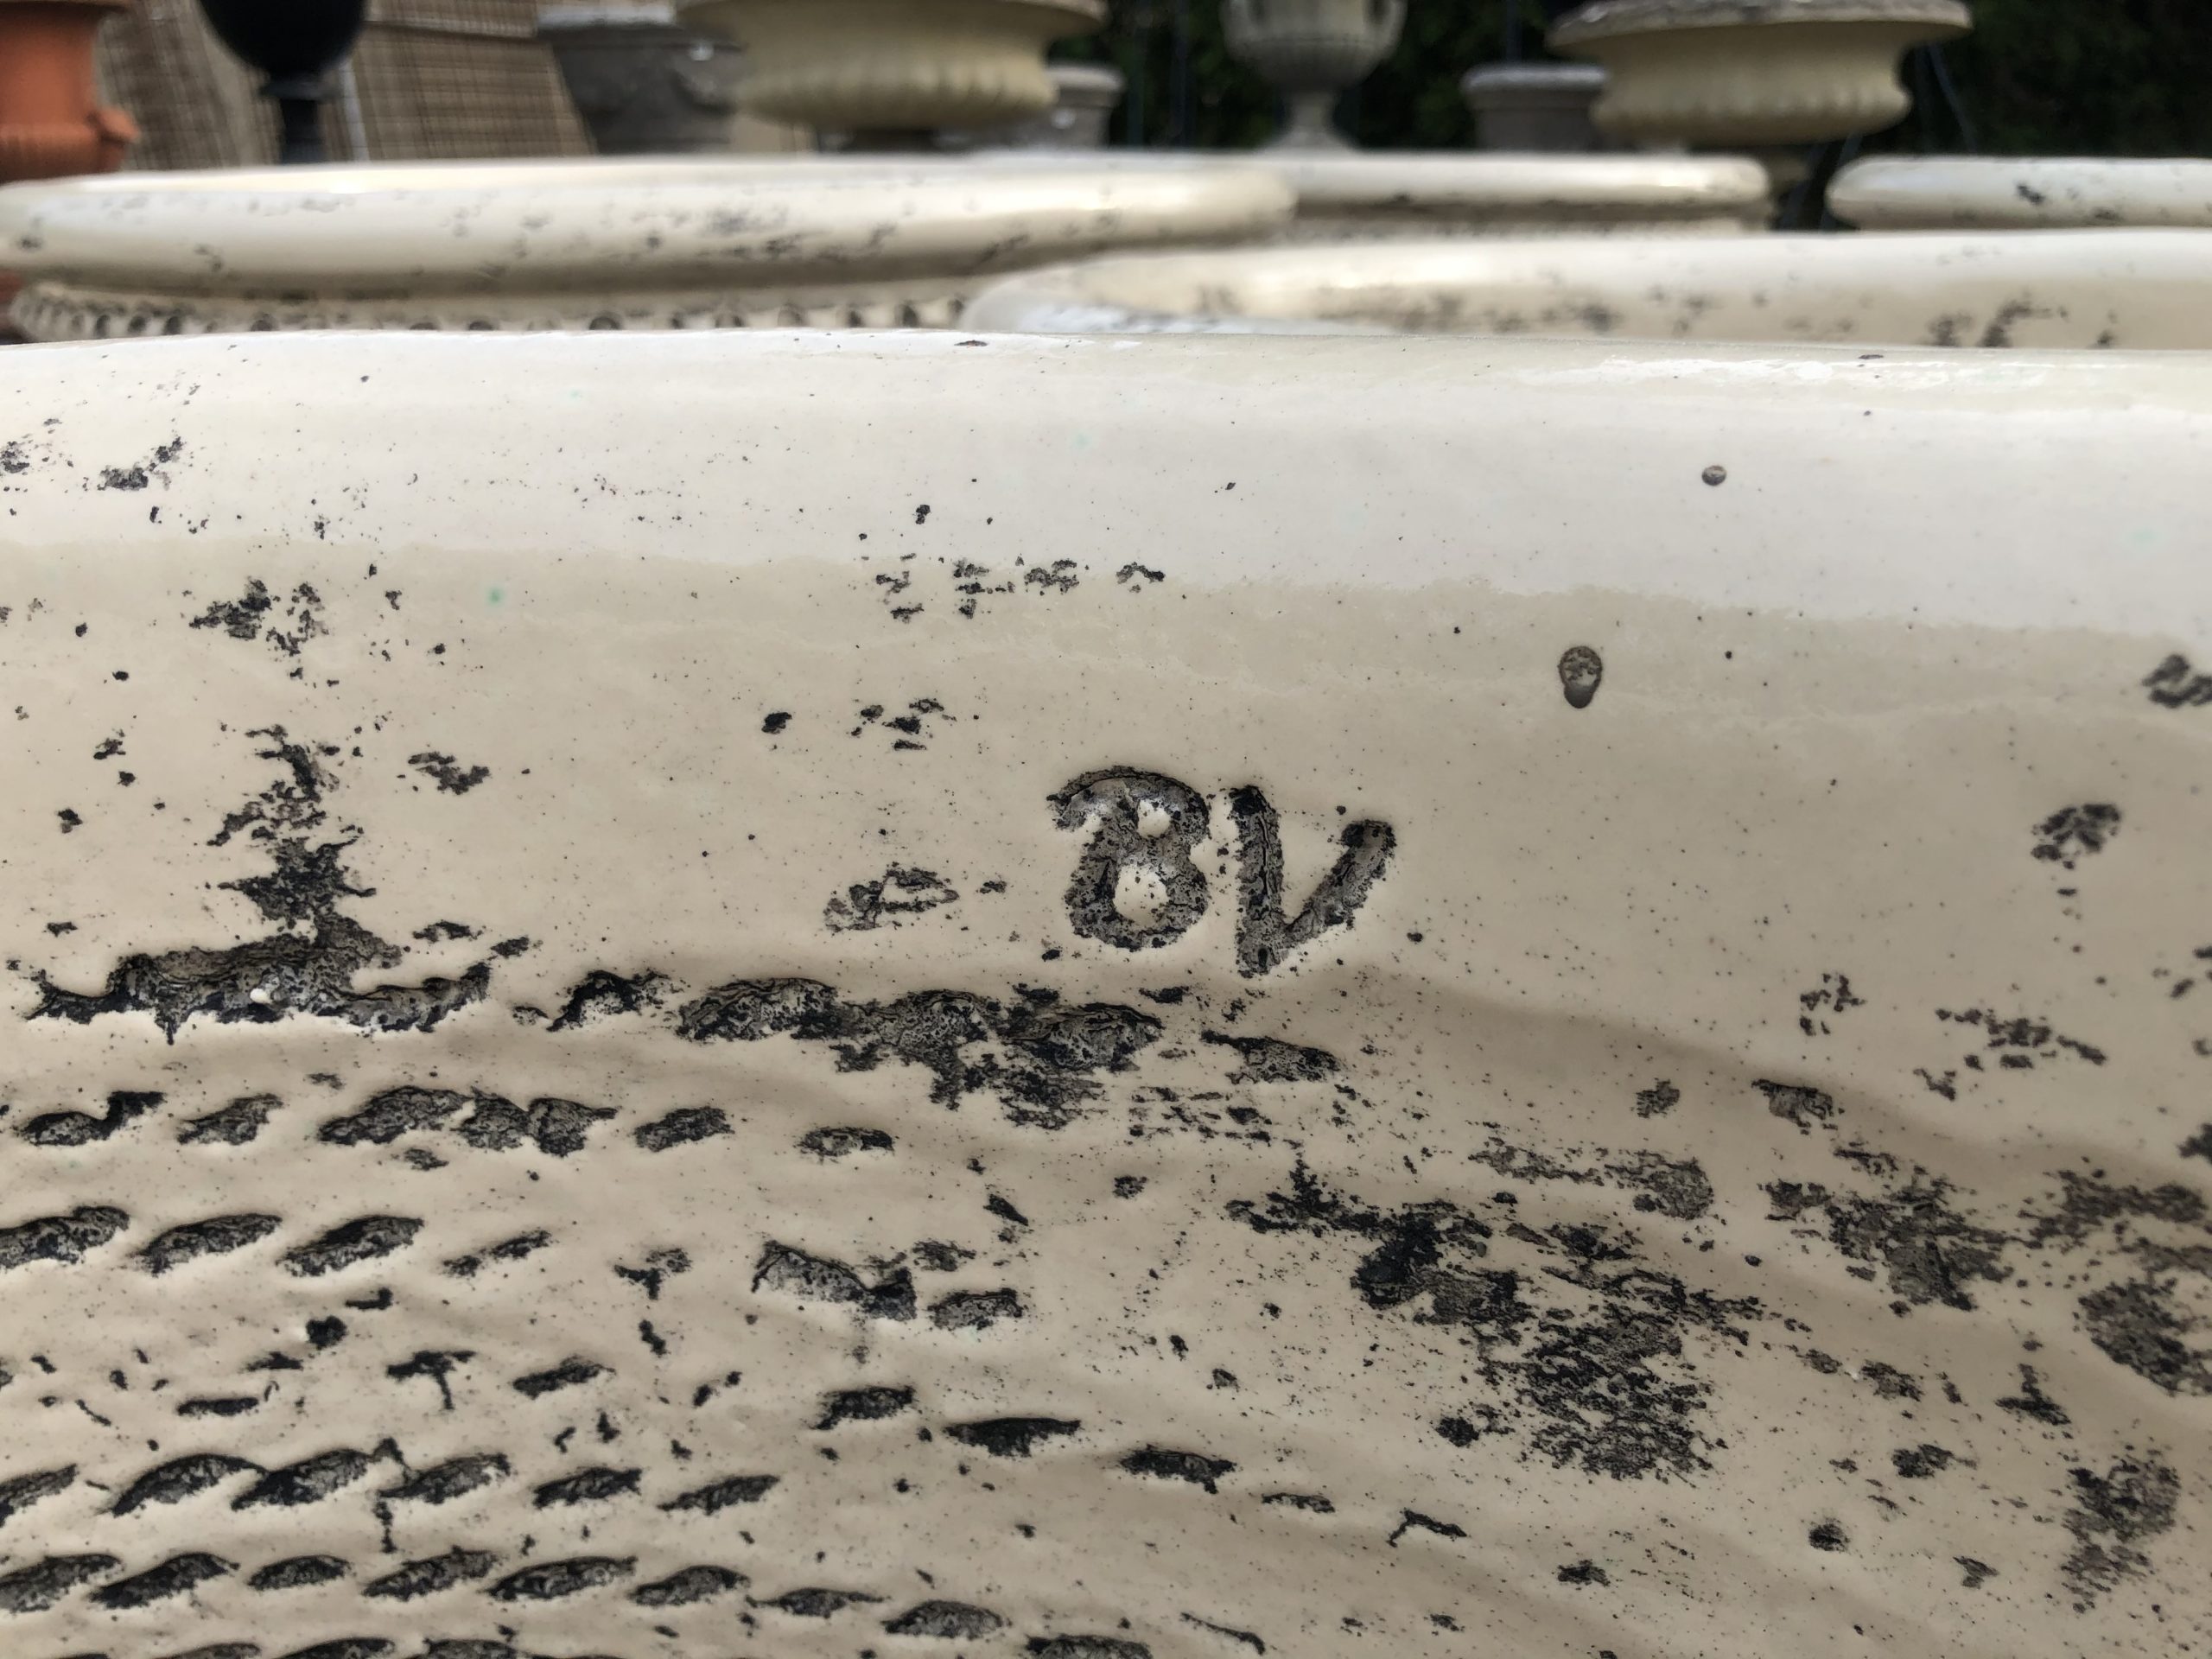
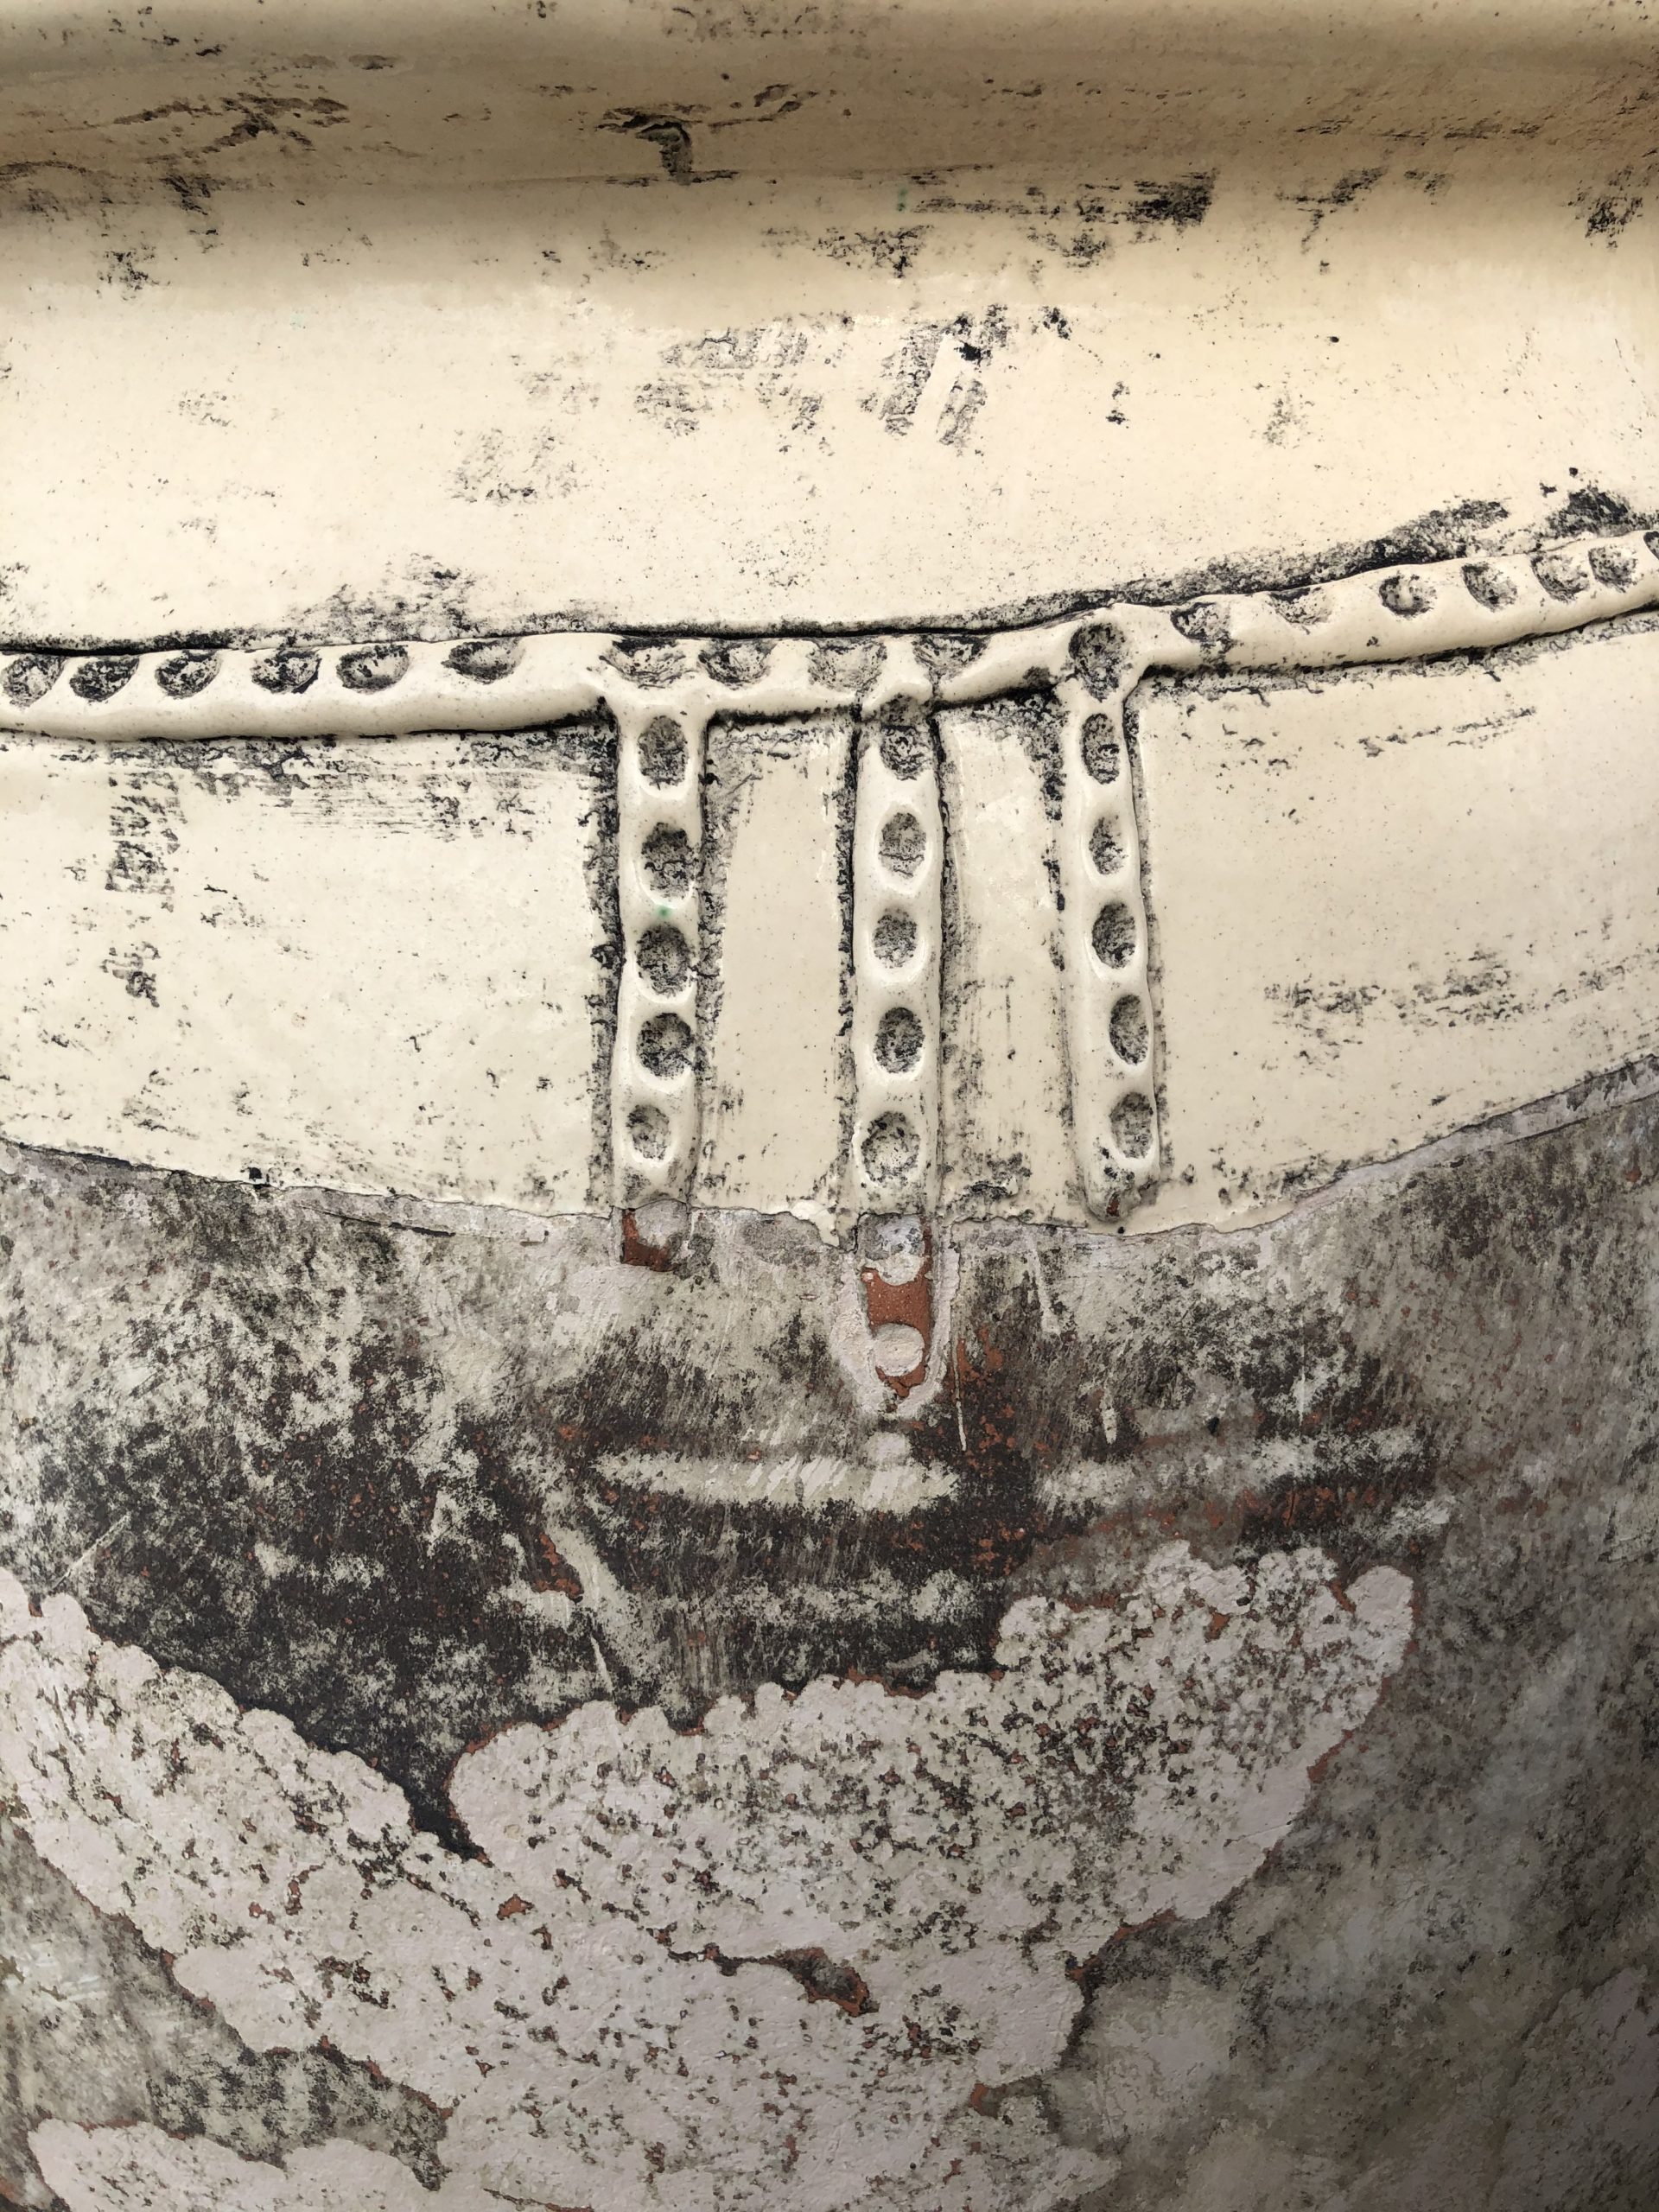
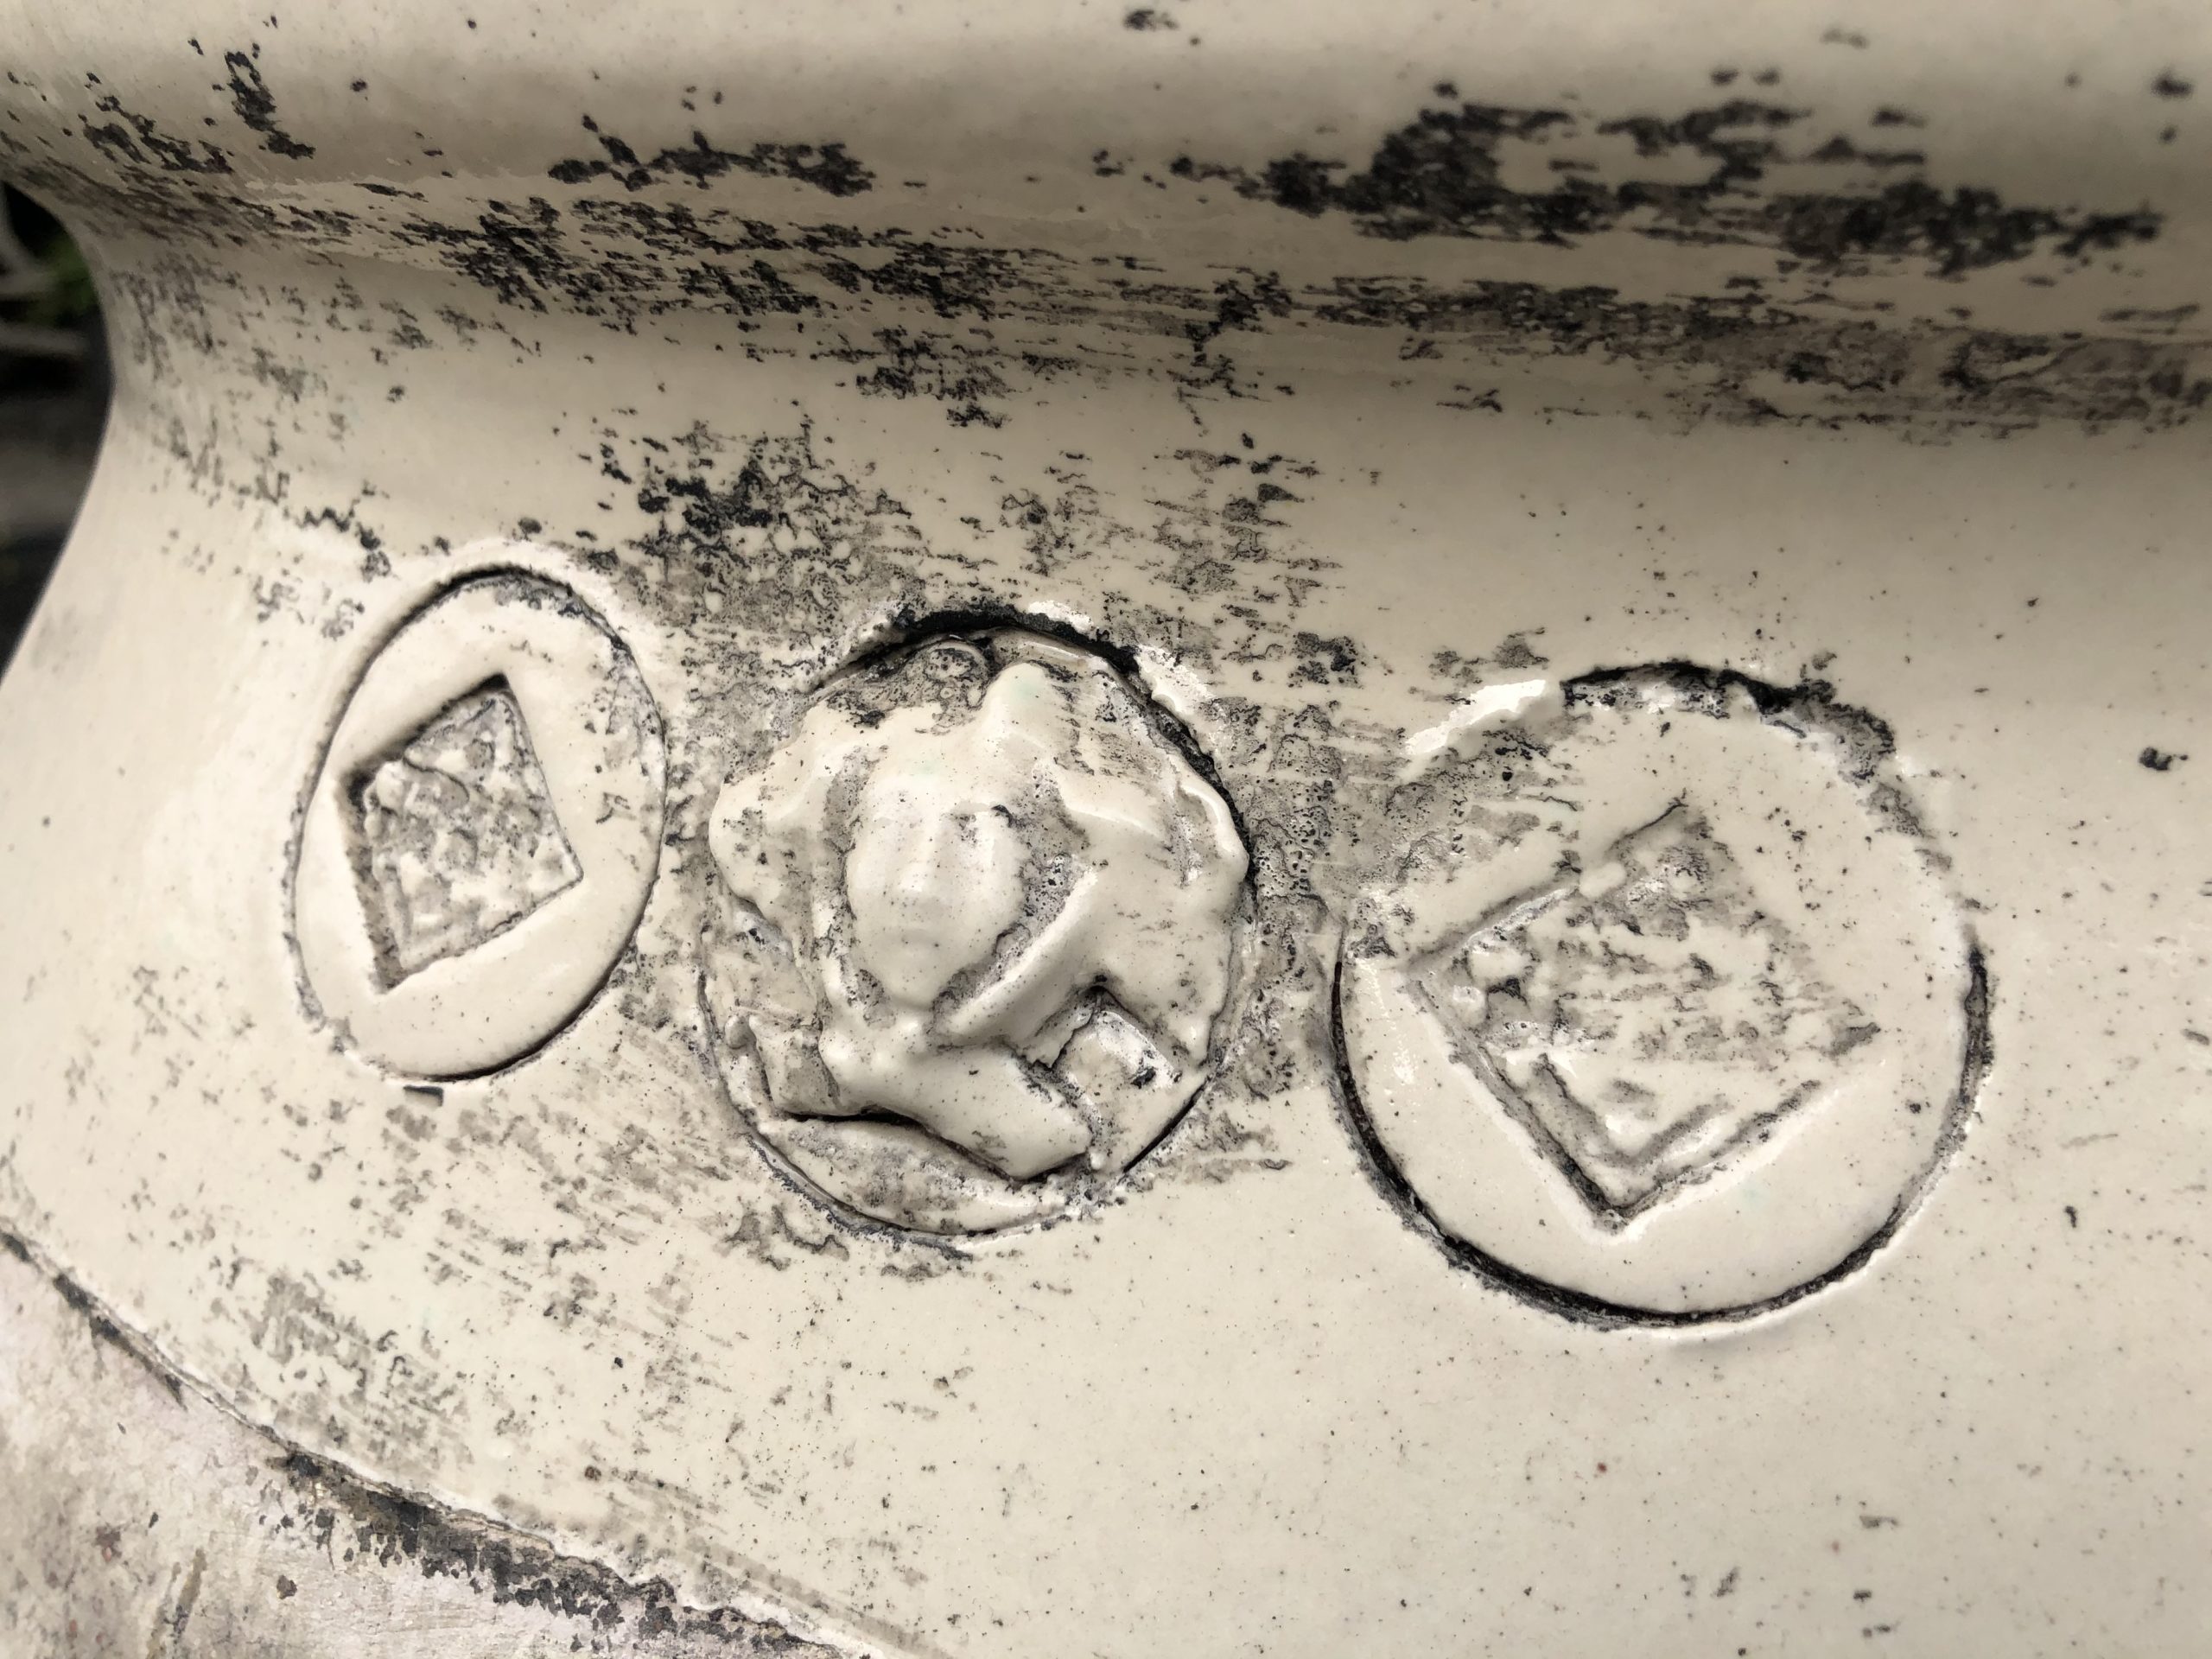 The stamps
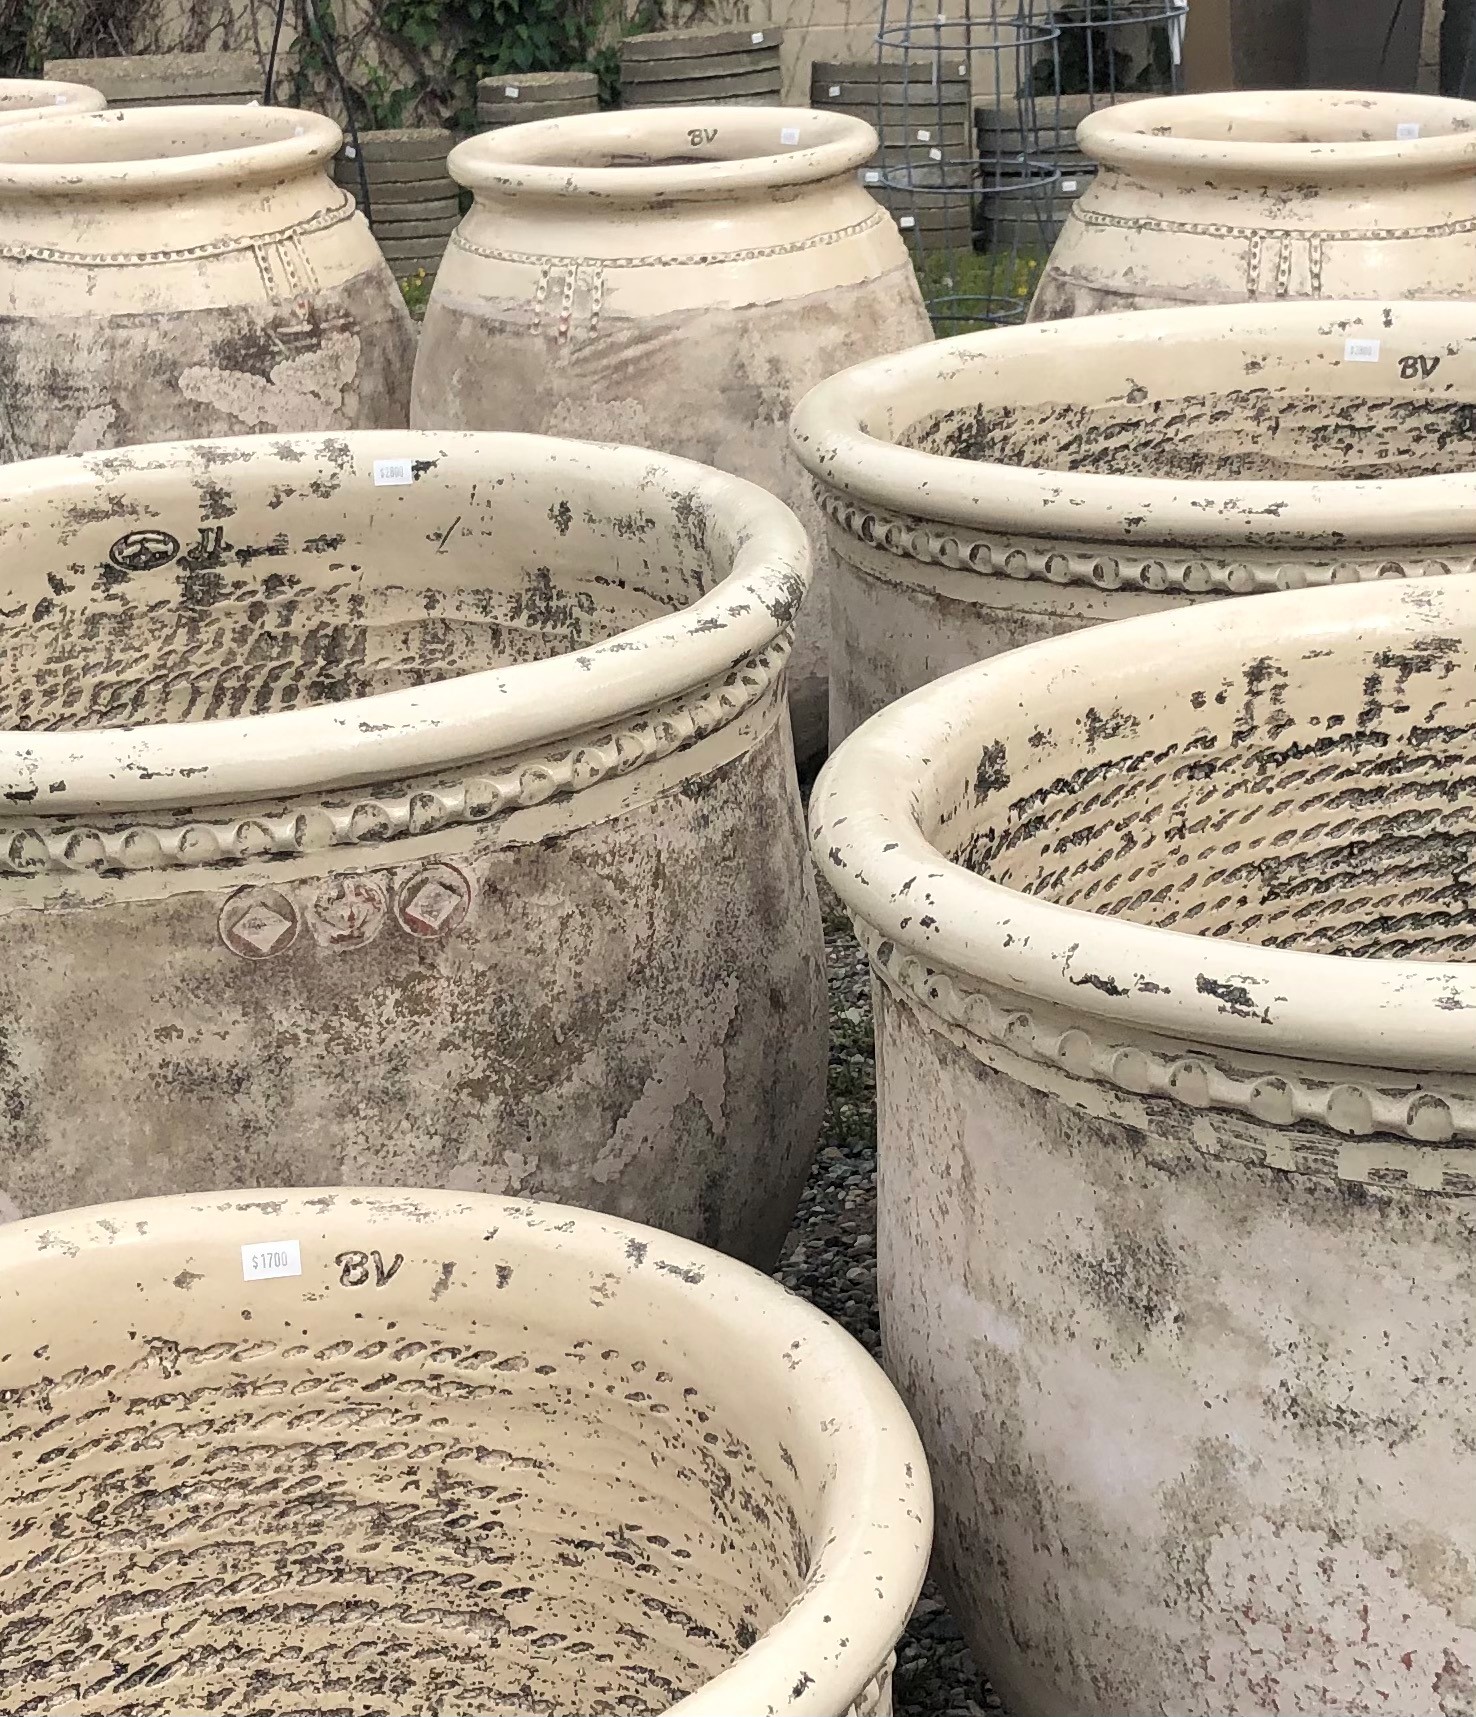
 The collection of medium olive jars
The tear drop jarre
And the most arrestingly beautiful Bugadier.
 This is indeed an extraordinarily unusual and beautiful collection of pots.
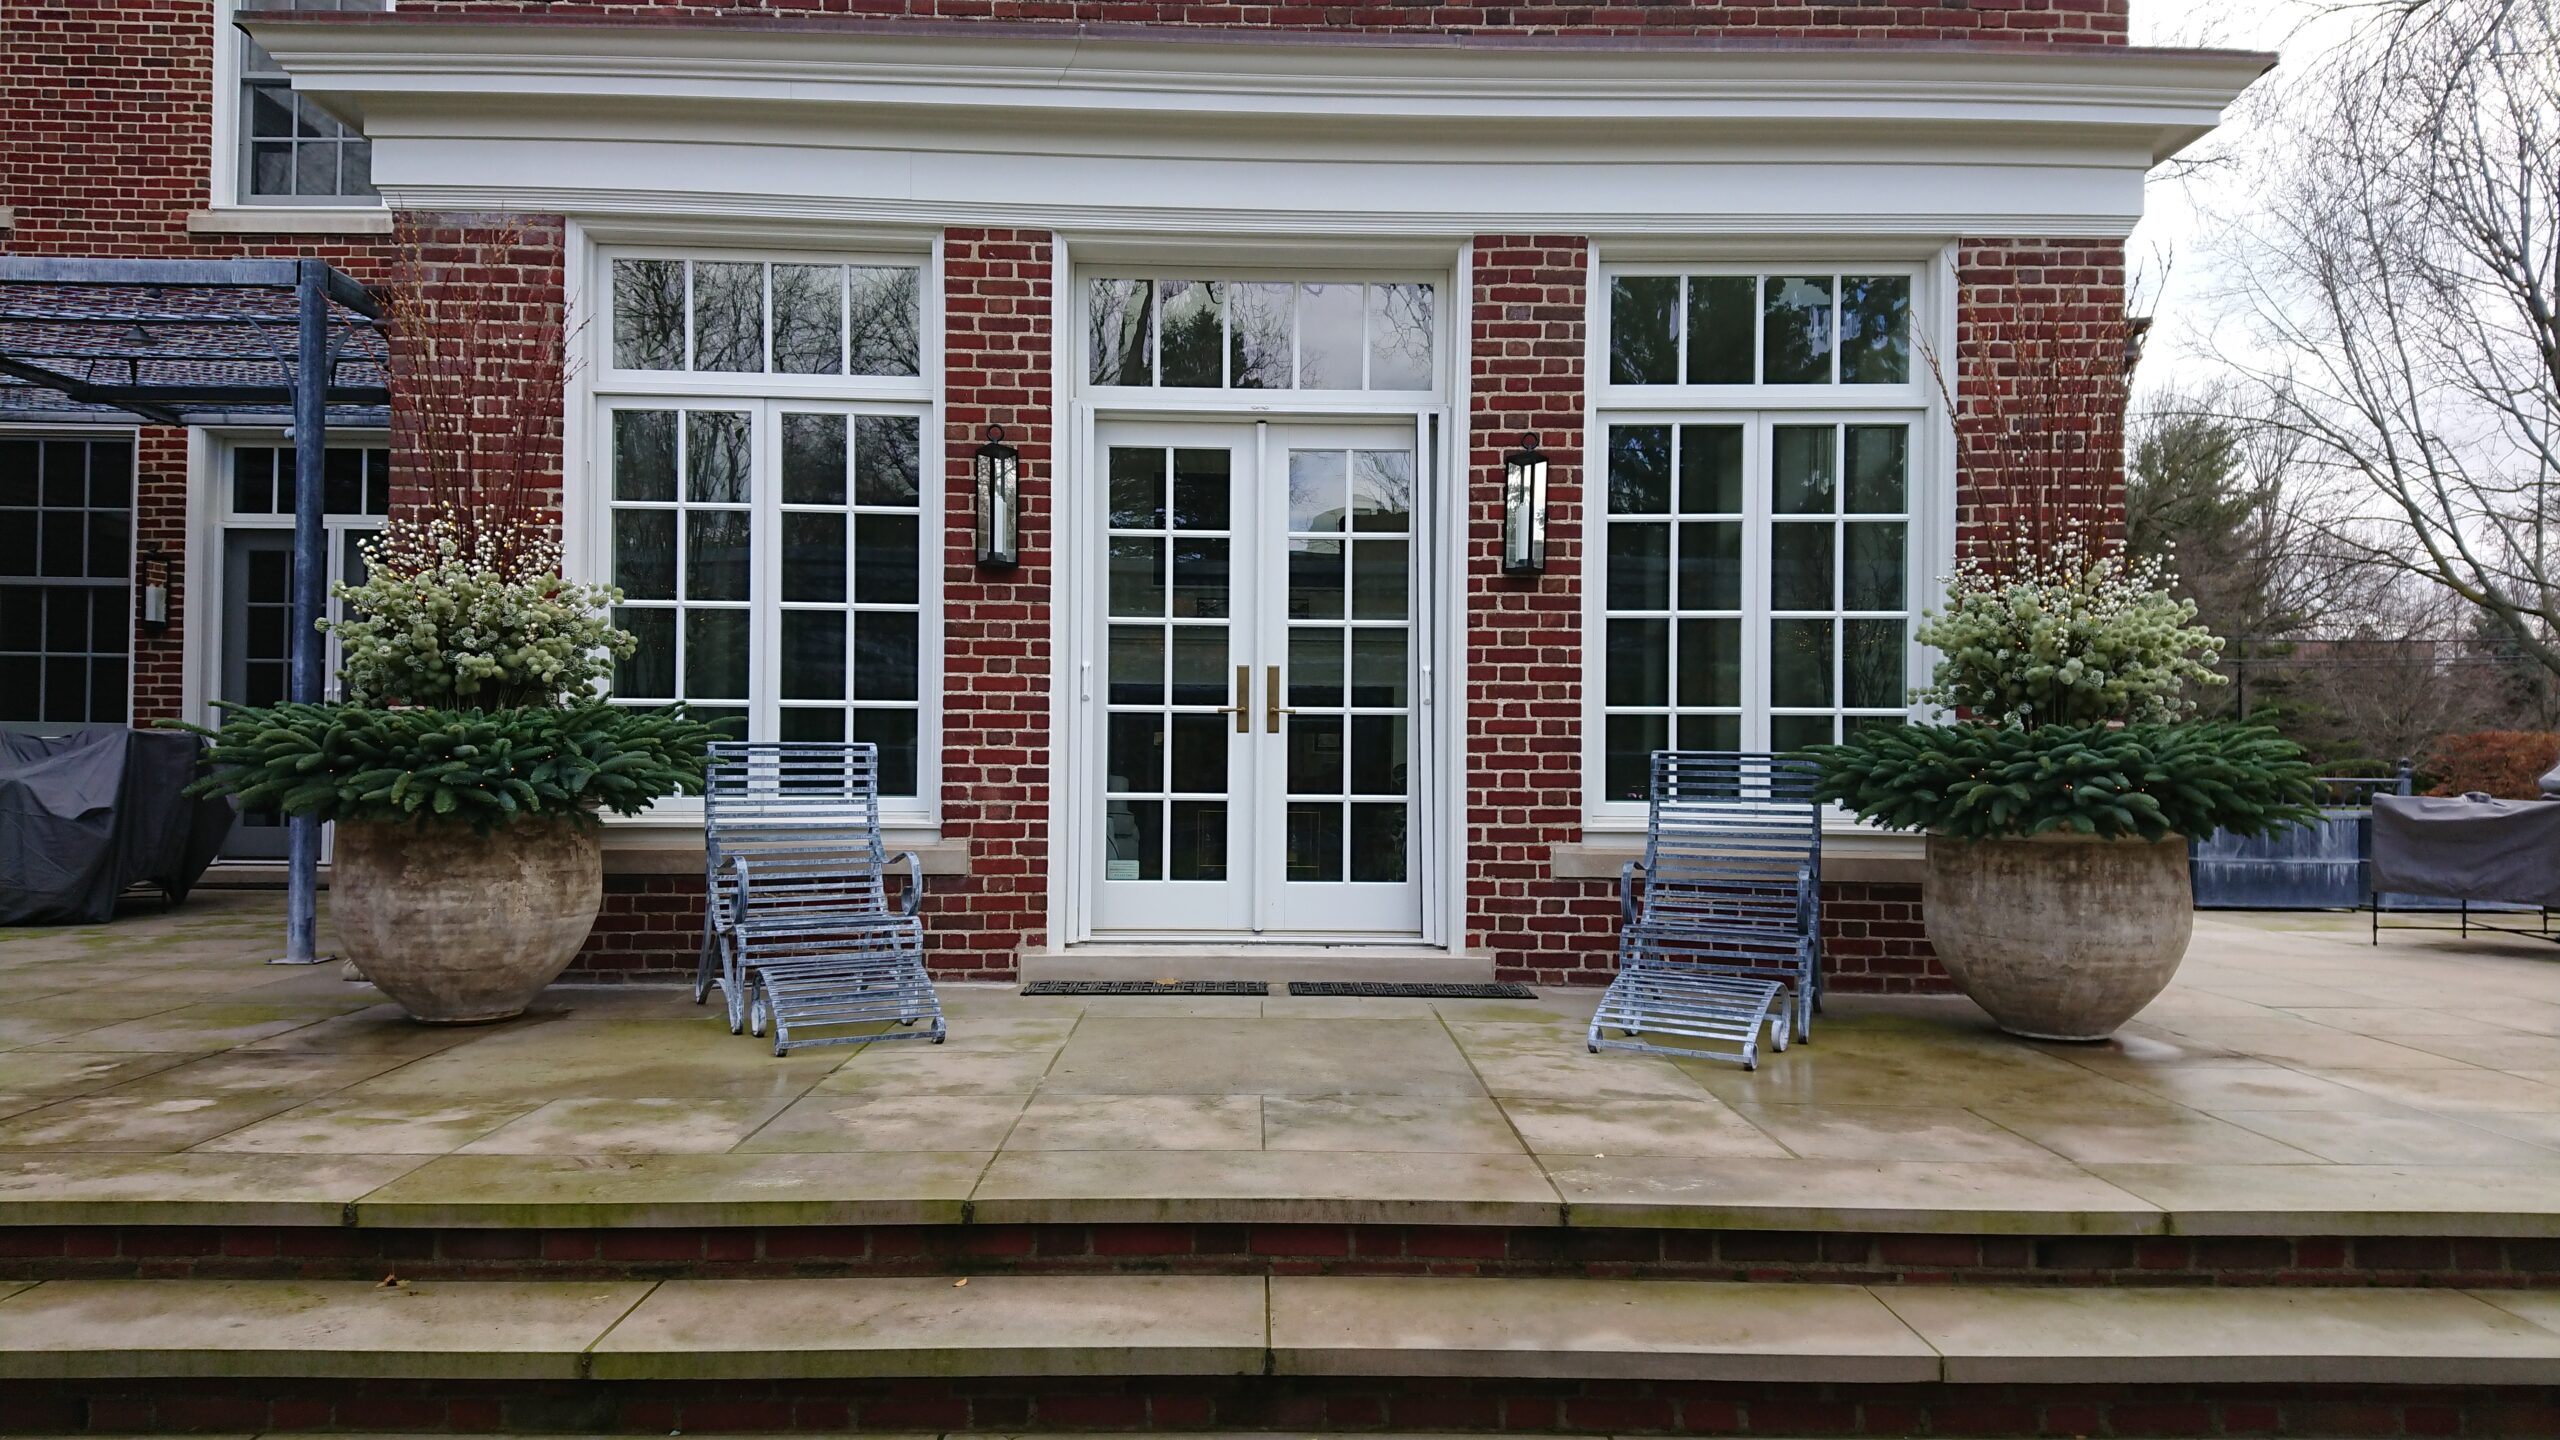
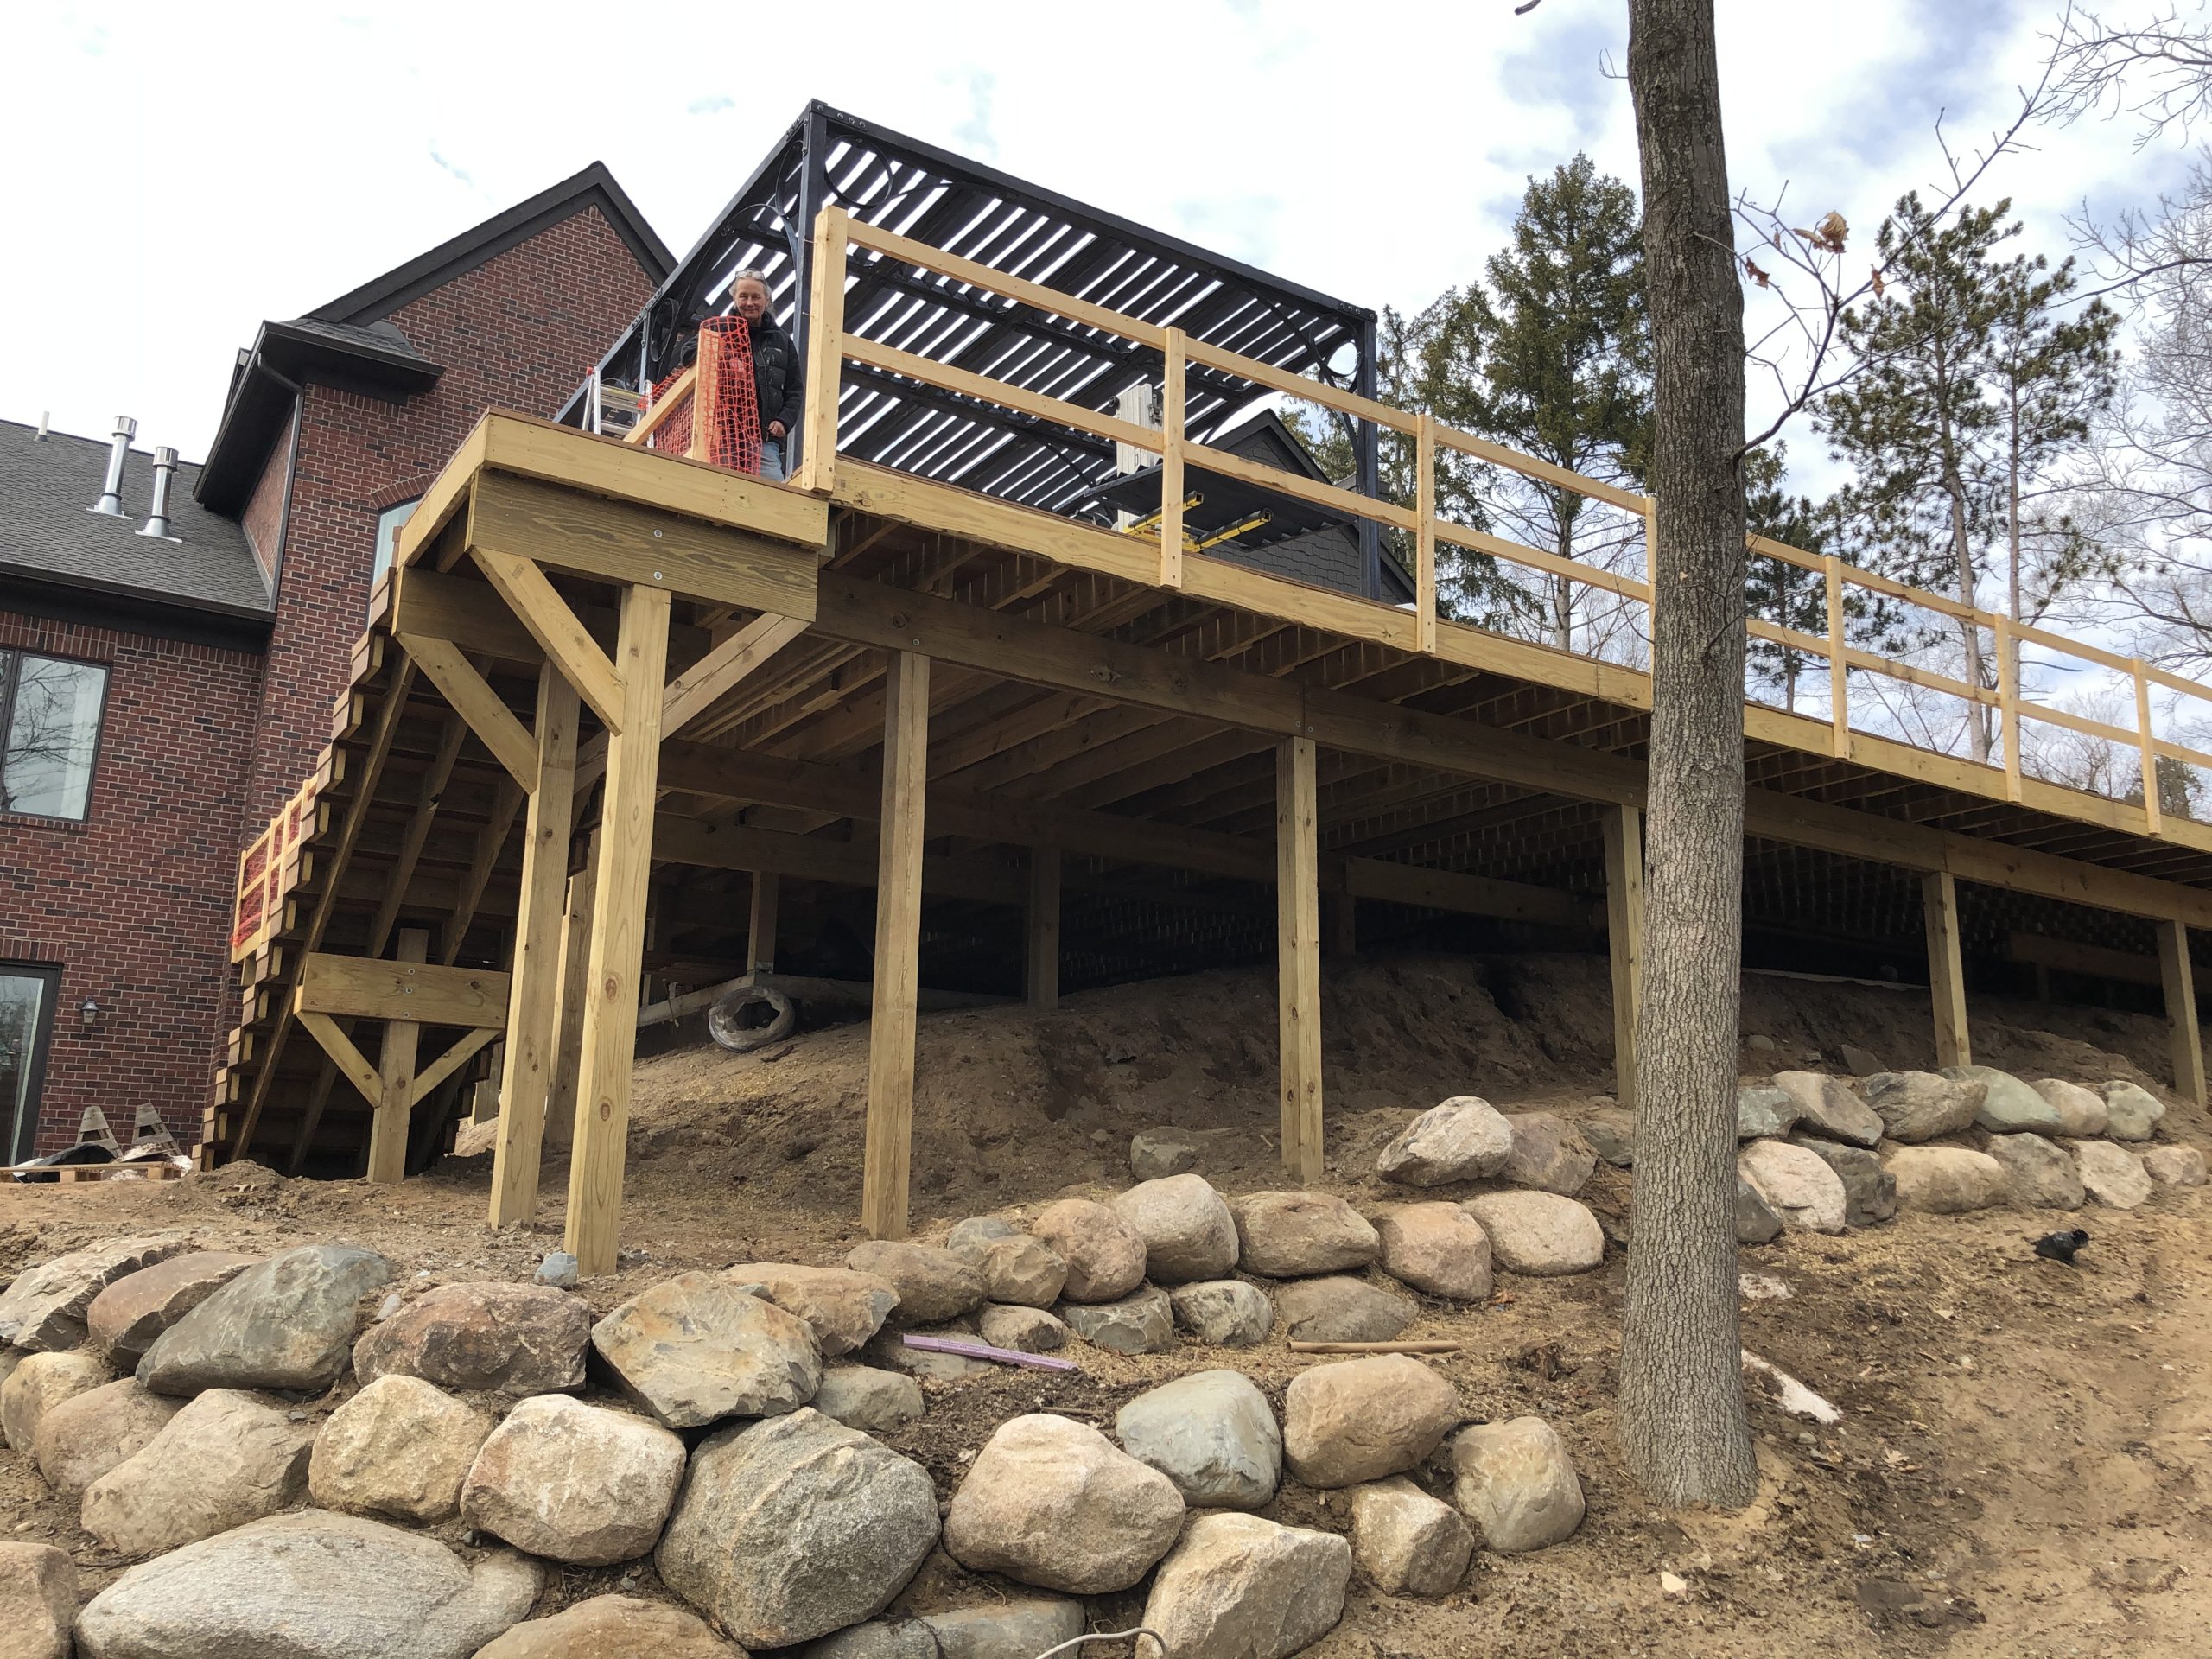
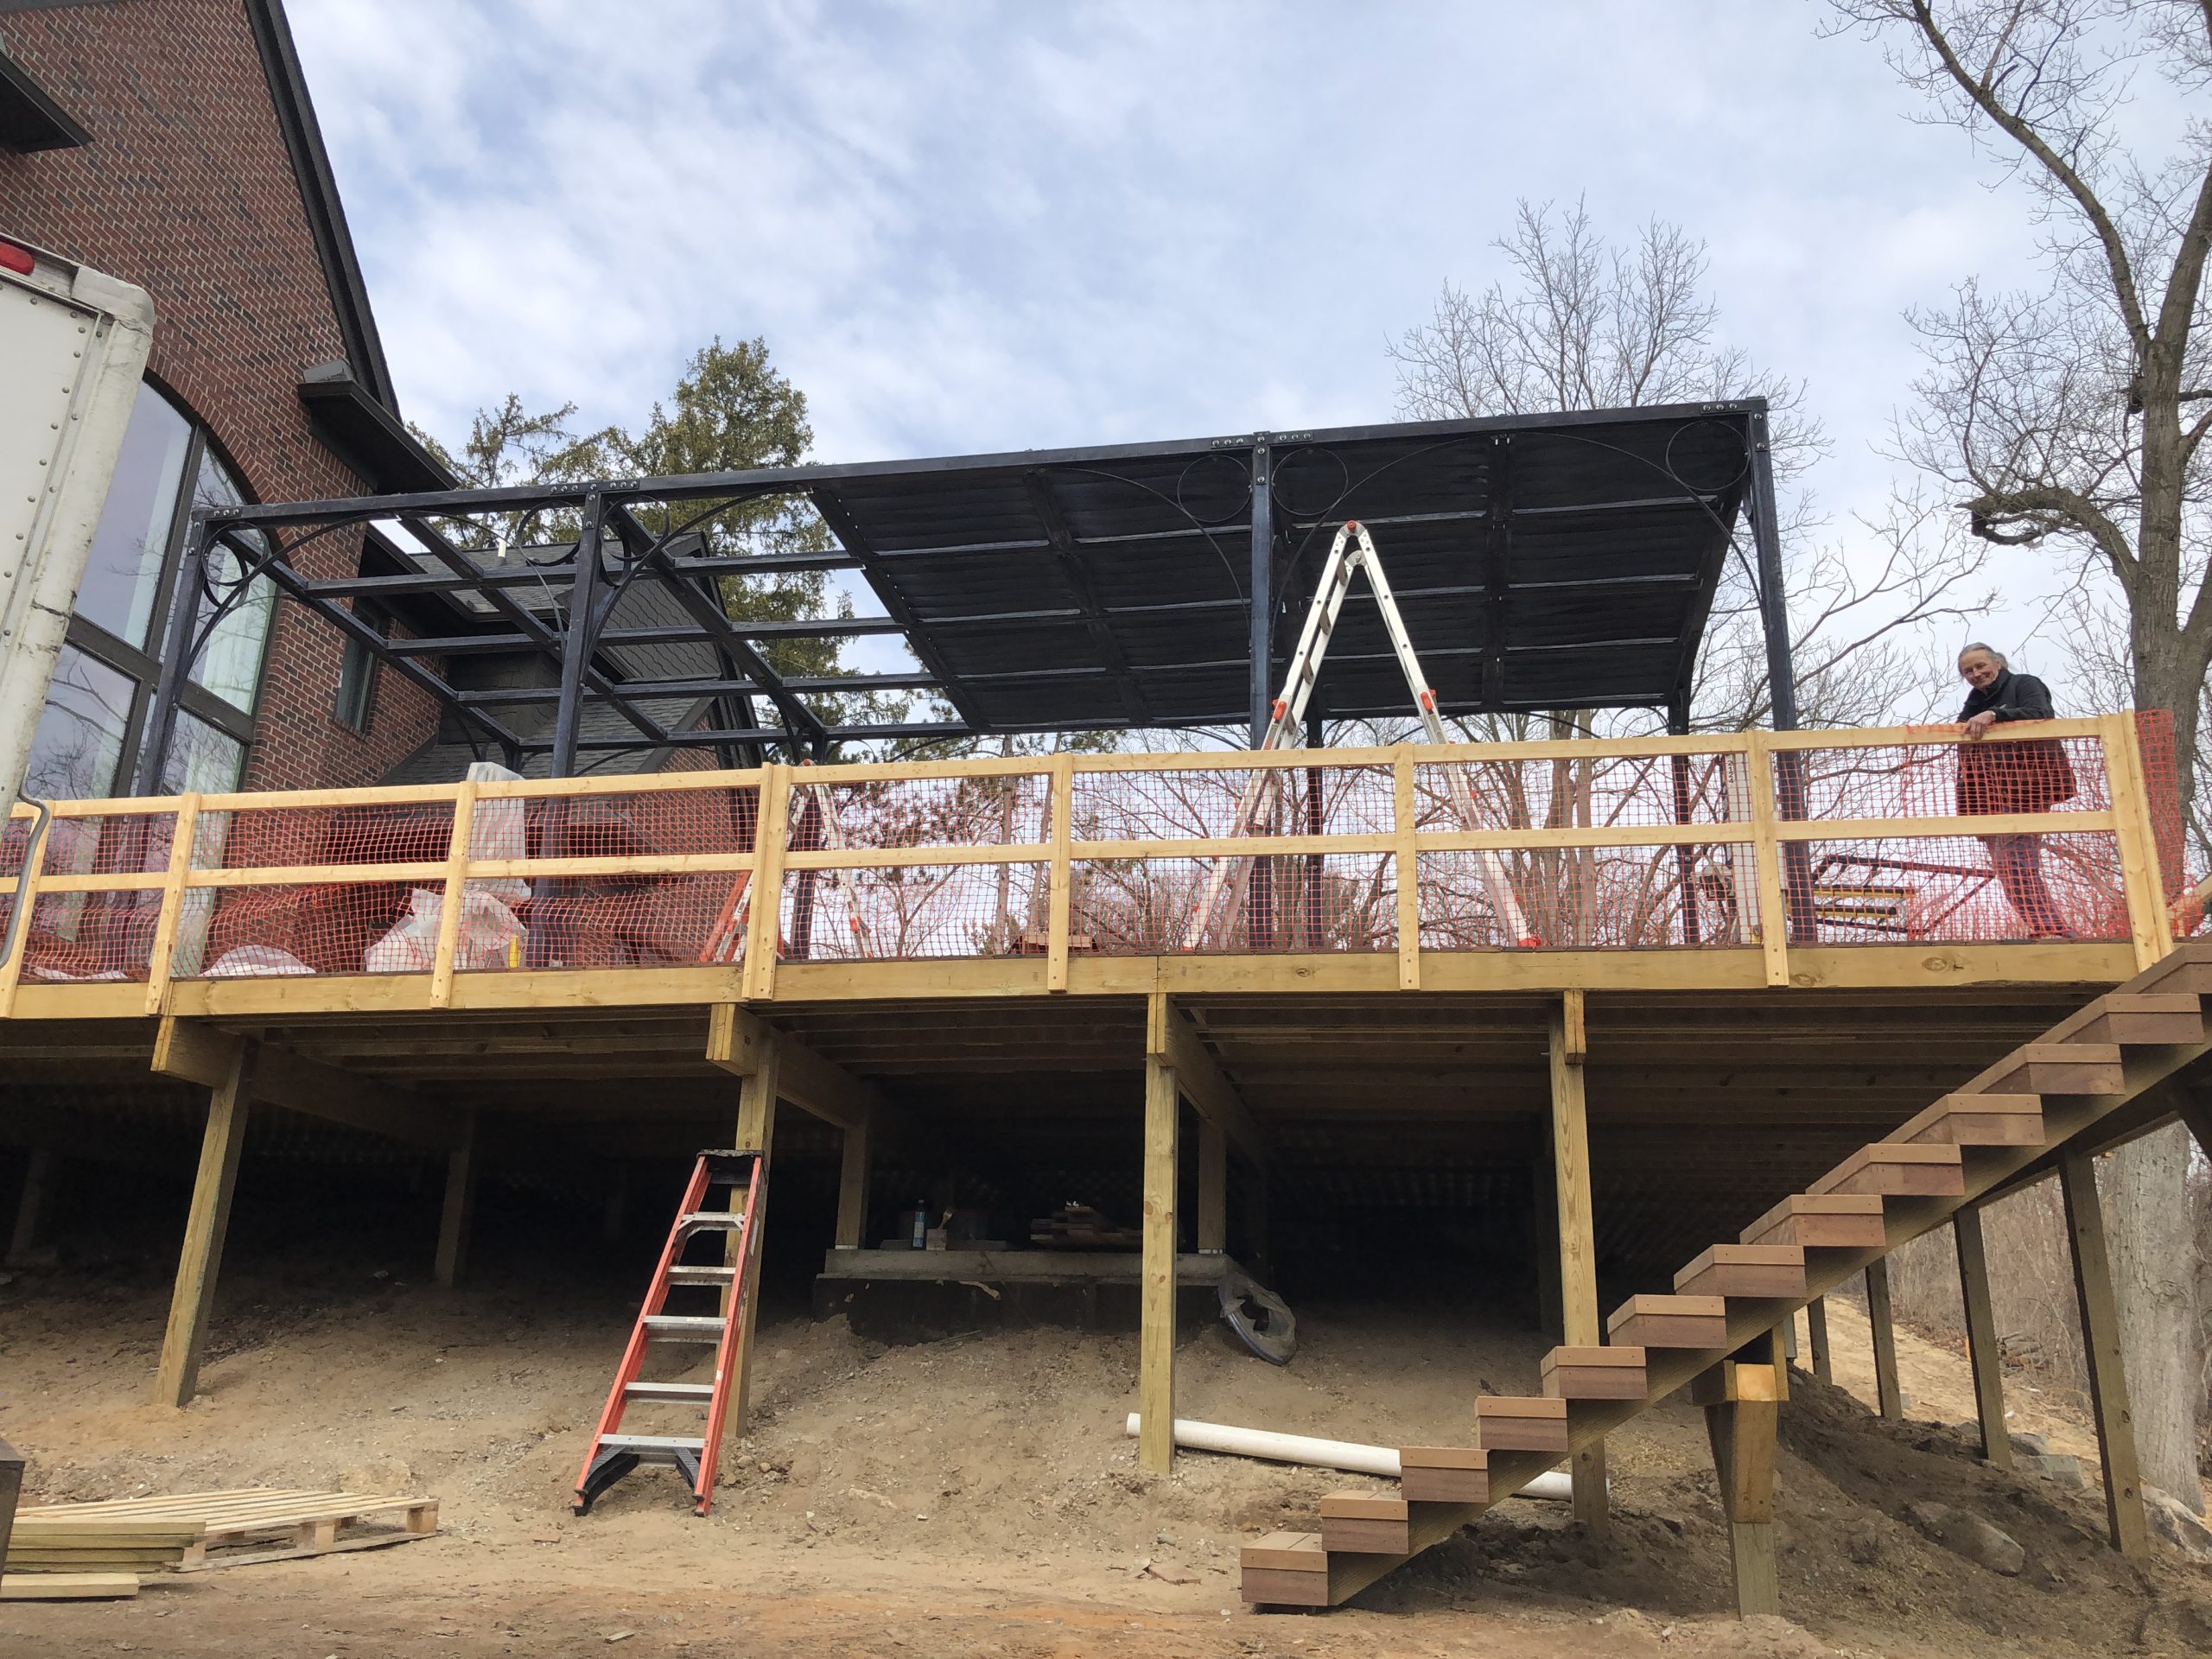
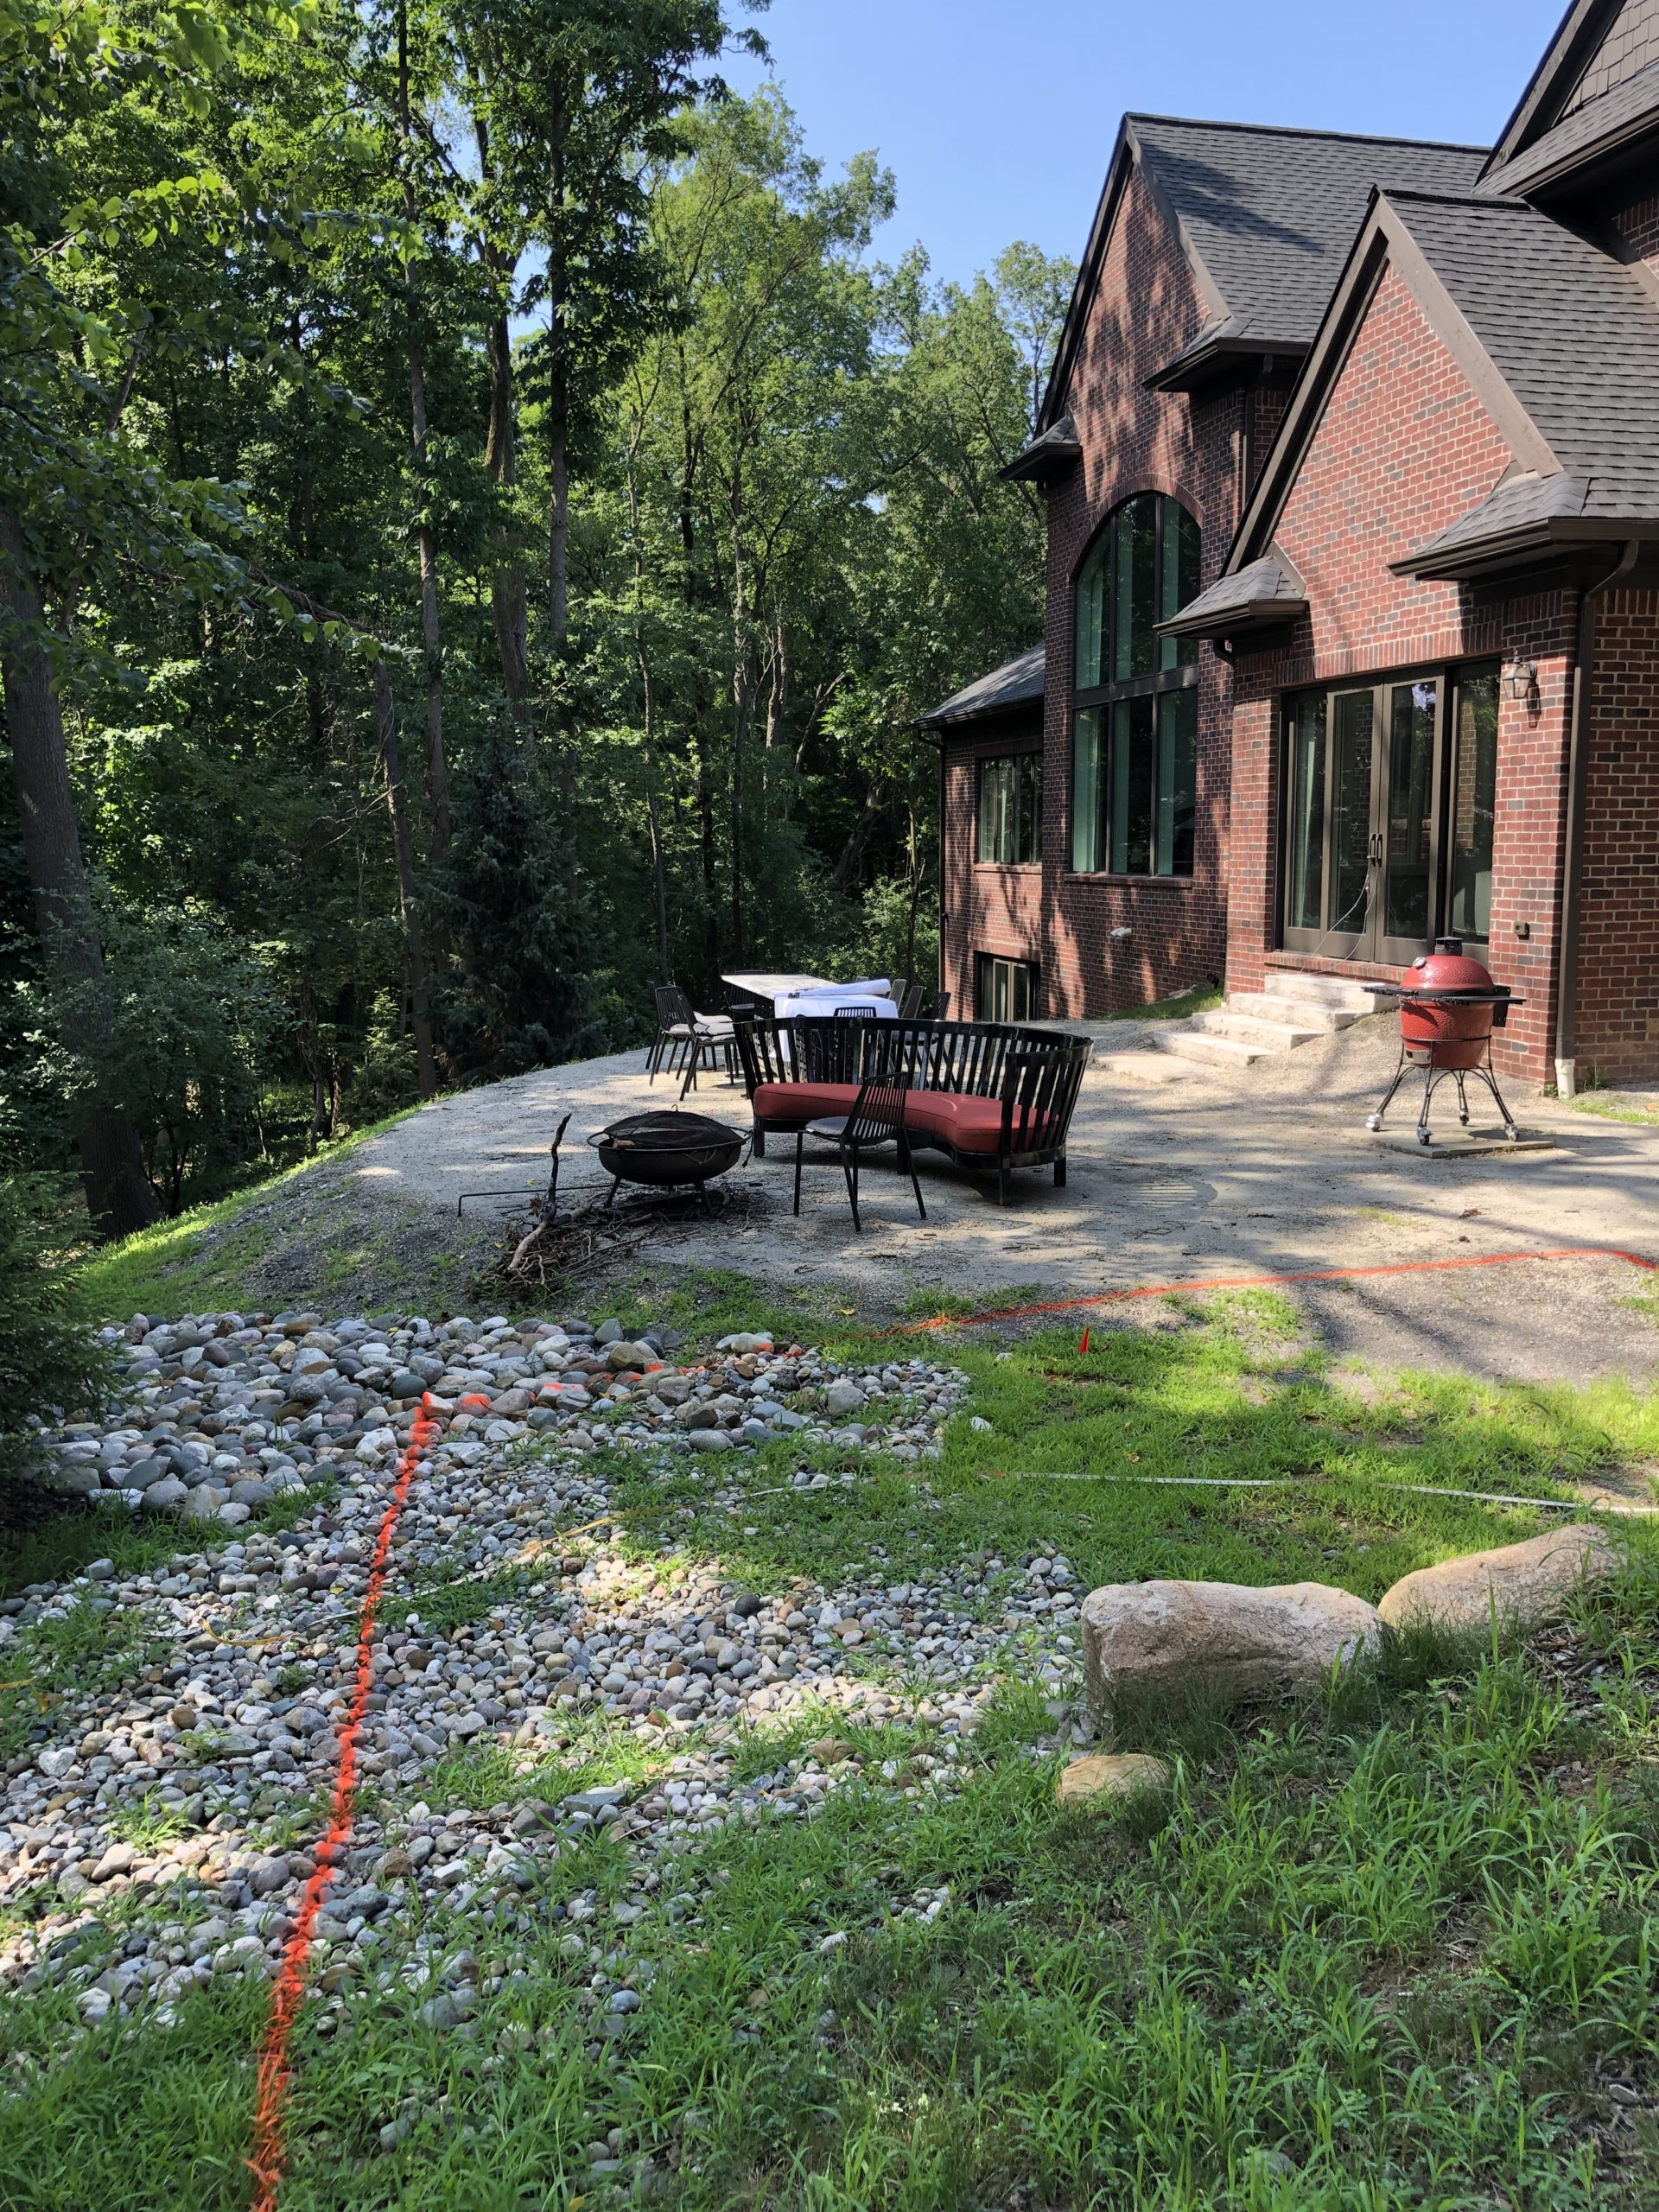 I am several years into a landscape project with great and ever so patient clients. In 2019 we removed their old dysfunctional driveway, regraded the entire front yard, and added back a new driveway and a landscape to go with. So far, so good. The back yard has been the subject of our efforts for better than a year. As the house is built on and into a steep hill, the rear yard had no flat usable space outdoors. Unless you count the 400 odd square feet pictured in the photo above. A large scale ipe deck with a swimming pool – part of which is cantilevered over an 11 foot drop in grade – has strongly addressed that problem. They like to entertain, and they are actively involved in supporting their greater community. They also like spending time out of doors. They were keen to create a place that would be beautiful and functional. The deck and pool were monumental undertakings, due to the sheer size, the difficulty accessing the site, and the extreme grade. We are very near the end of that part, but for the glass rails that will surround the deck. I am hoping the project will be entirely finished by the end of May, so they have the rest of this season ahead of them to enjoy it.
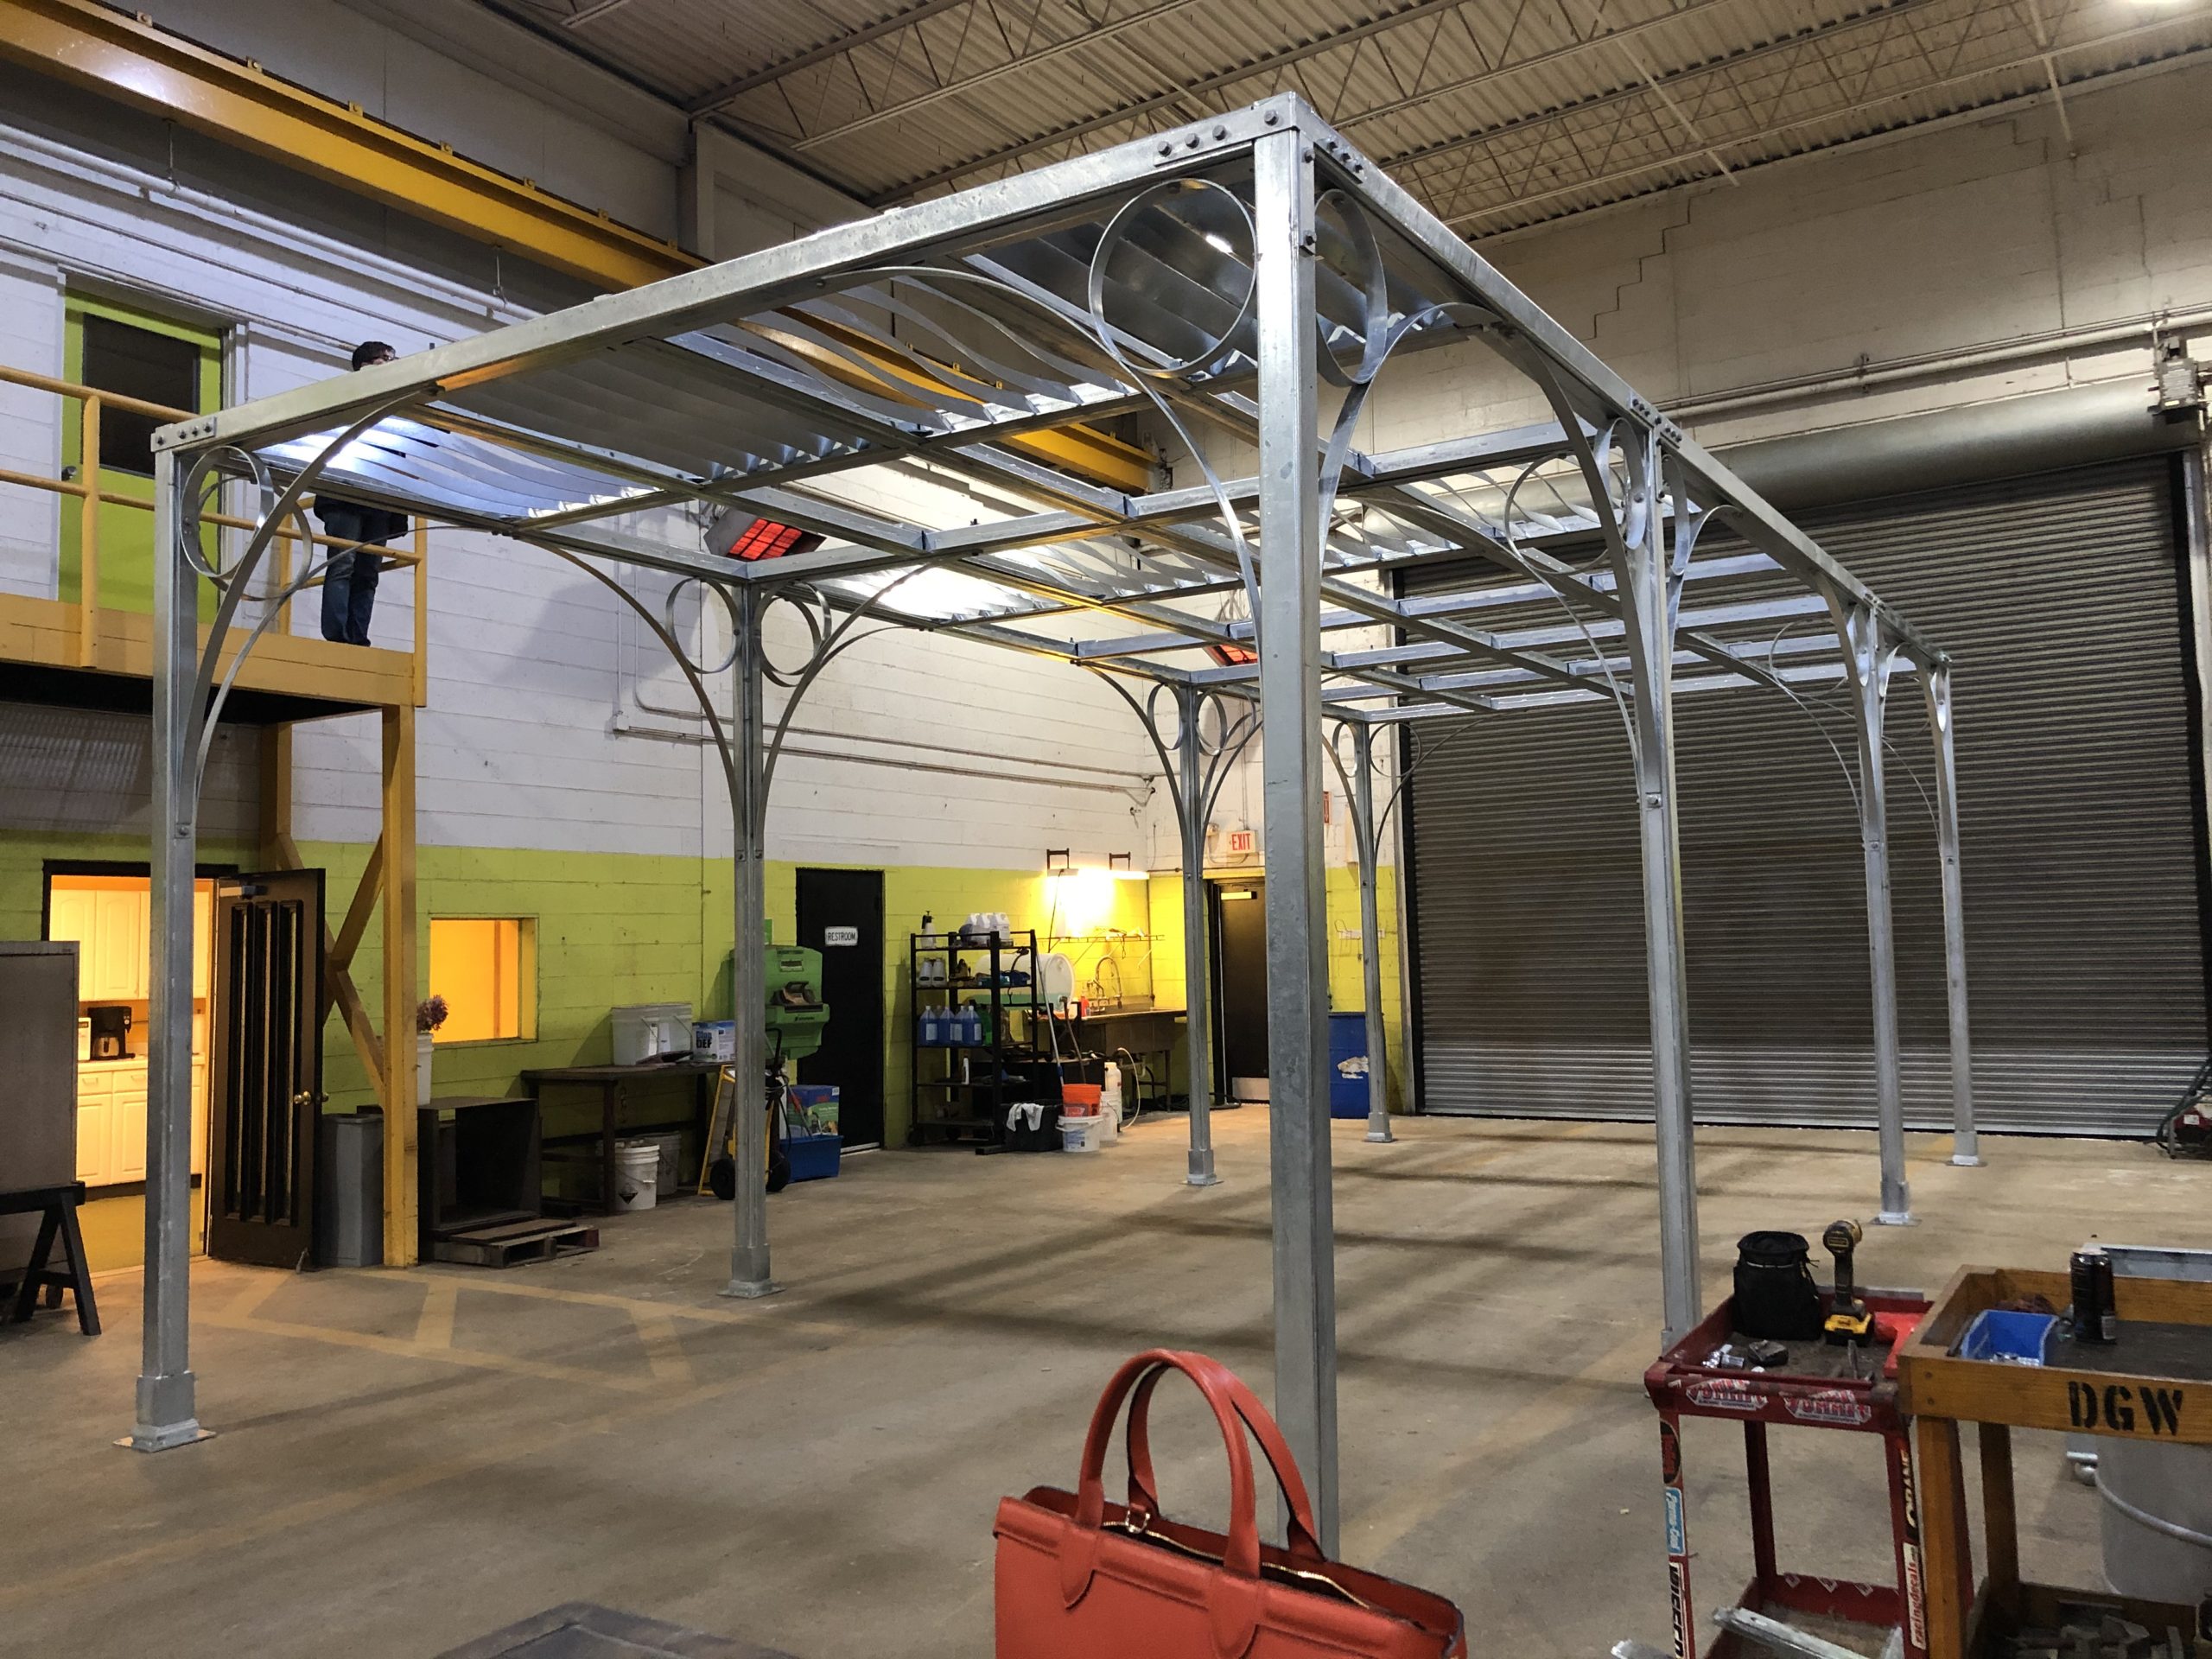 One component of that landscape was a pergola to be fabricated at Branch. Those of you who follow this blog know that I bought a 7 acre property with industrial buildings and large capacity bridge cranes in 2004, with the express idea of designing and fabricating heirloom quality objects for the garden in steel. We have been at exactly that over the ensuing years. The years have provided an opportunity to tune up fabrication protocols. And they have provided a framework for the evolution of design. Our original pergolas from years ago were designed primarily to provide large scale, organizing structure to a landscape. Seating areas under them naturally came to mind. They also could support large growing lax vines. Think climbing roses, climbing hydrangea, grapes and wisteria, or sweet autumn clematis. Both the strength of the steel and the permanent performance of the finish made them a great partner for vigorously growing vines that would put on weight, year after year. Those leafy plants that eventually grow over the roof would eventually provide shade.
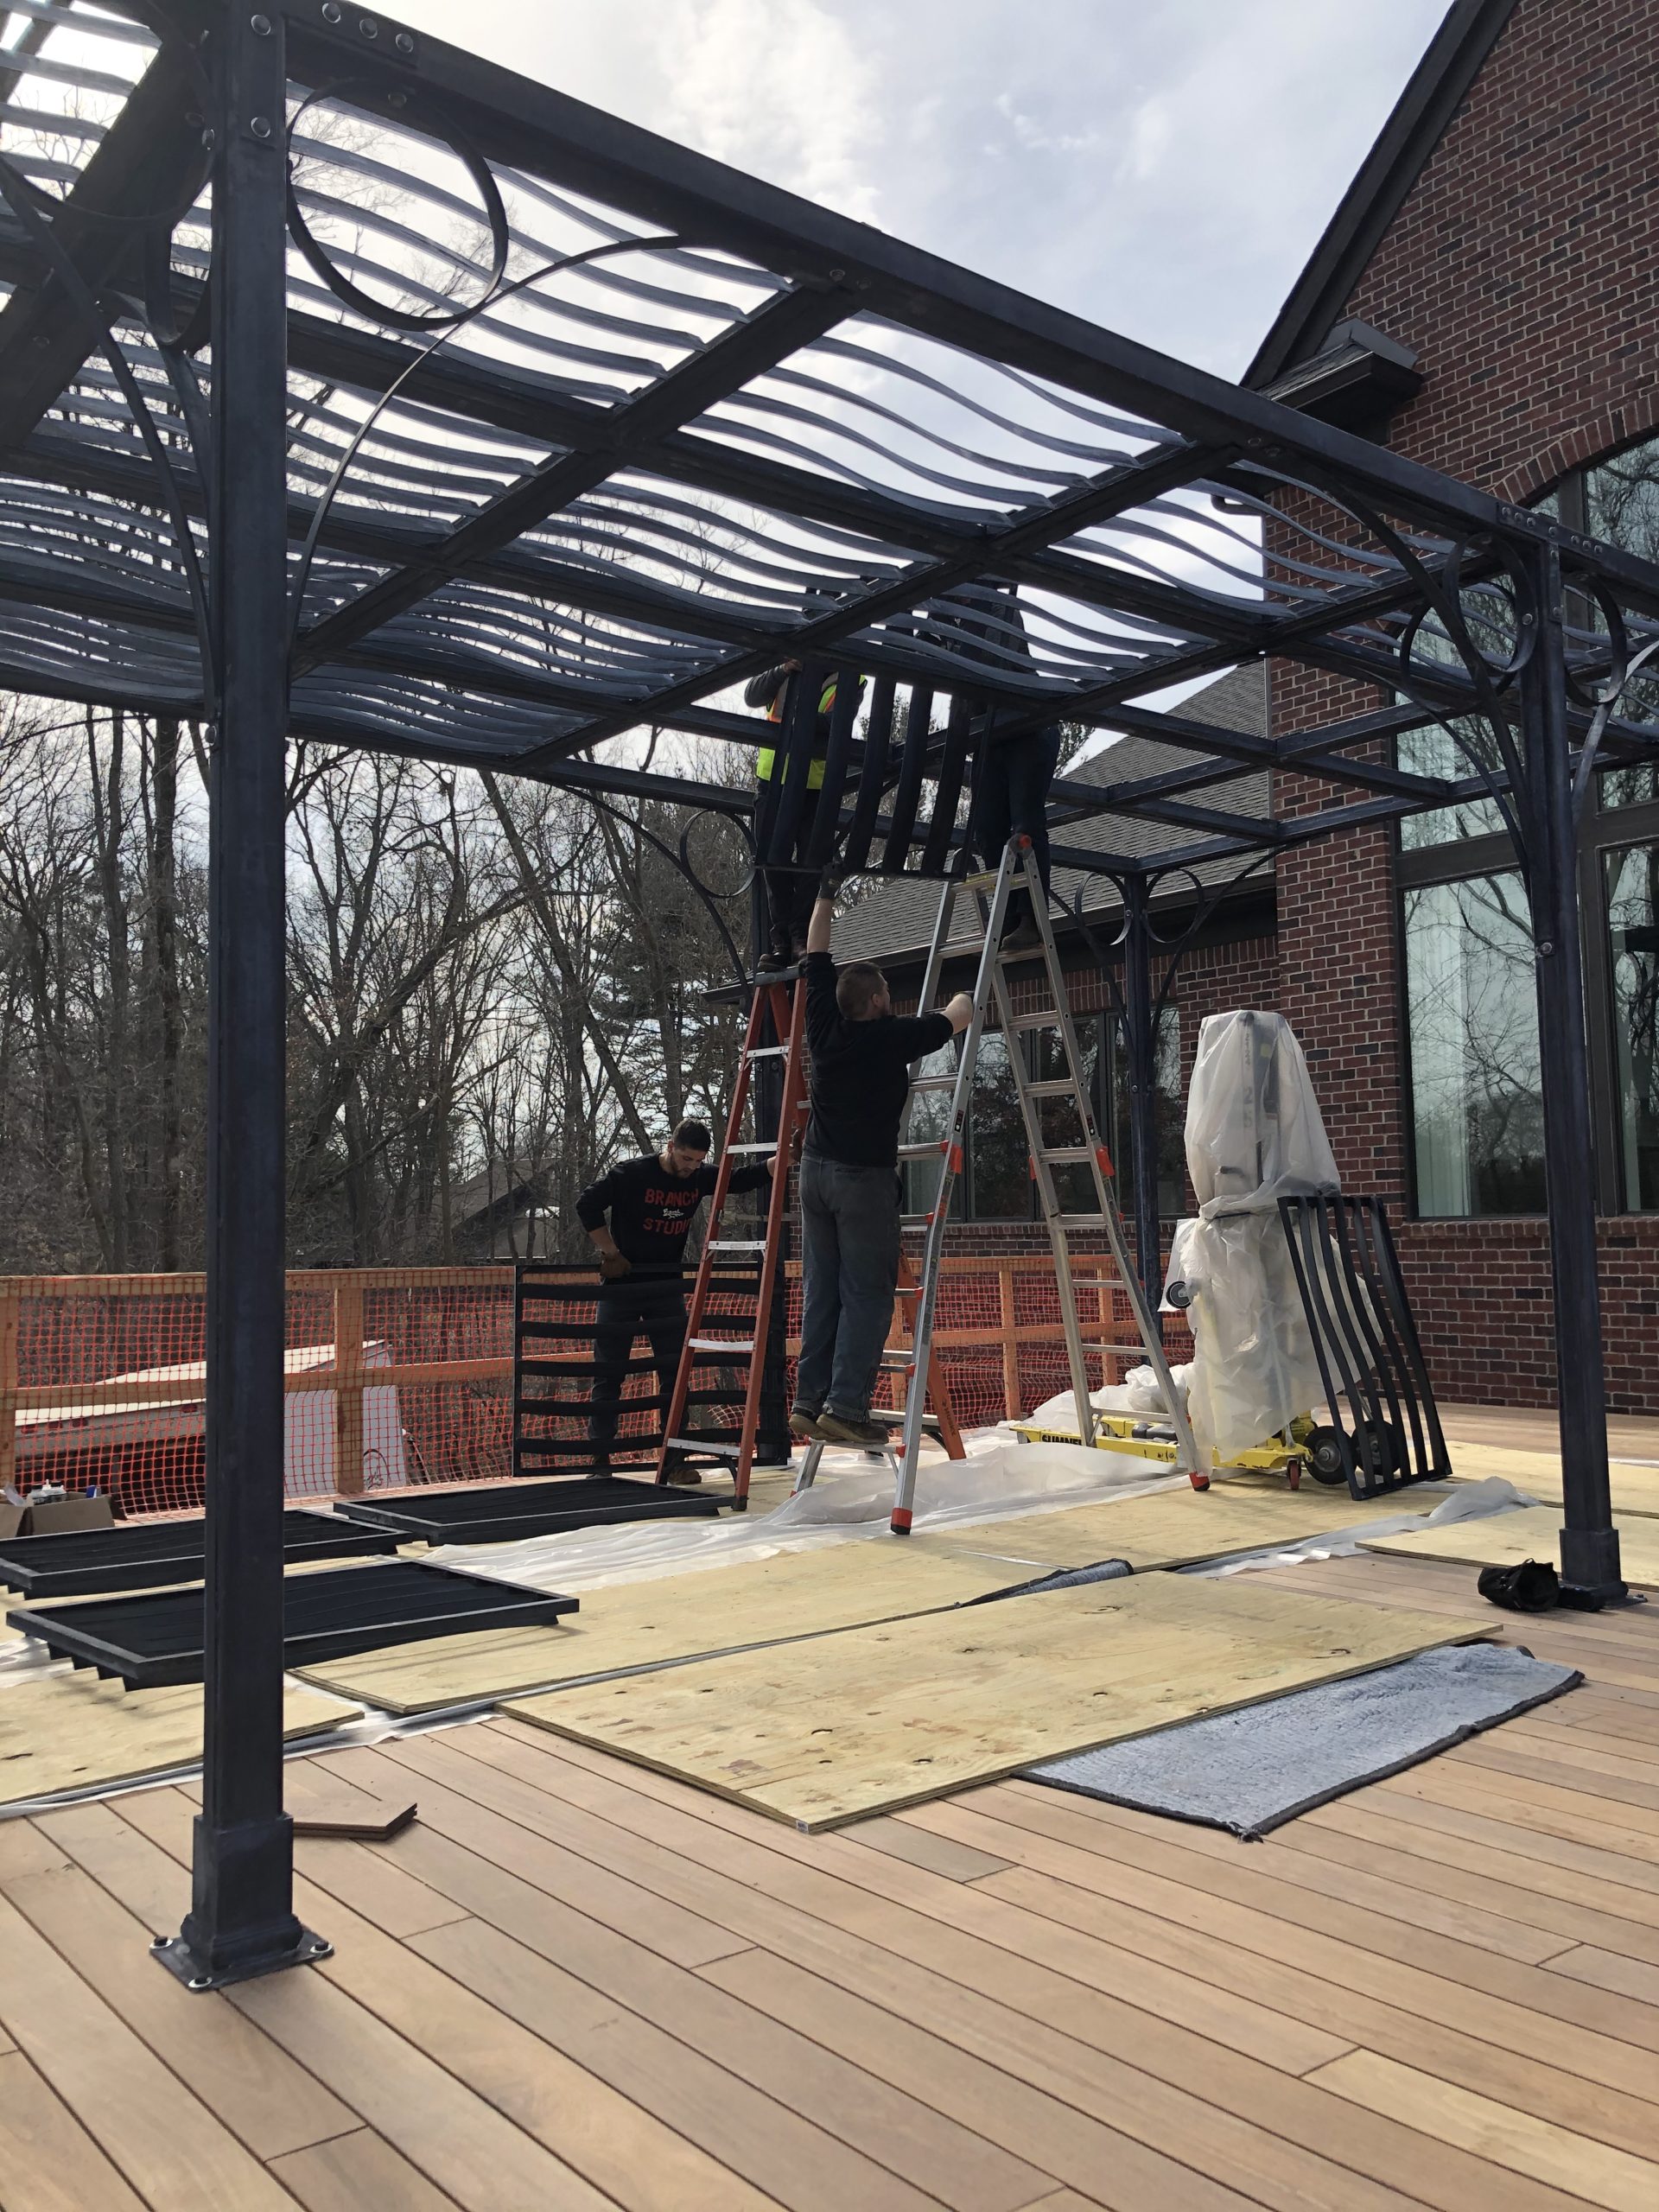 However, not every location for a pergola is accommodating to in ground plants. The south end of this deck is long ways away from any soil, and the location is very sunny. We needed a structure with the intrinsic ability to provide shade. A pergola that could provide a shaded area for dining and seating would be a welcome addition to the deck furnishings. The curving louver design was inspired by the art glass sheathing a waterfall next to the pool. Engineering this roof took time. Eventually, 28 individual fixed louver steel roof panels that could be dropped into a framework built in to the roof were fabricated. The structure is 32 feet long, and 14′ deep. The 11′ height of the structure matches the height of a horizontal frame set in a series of 6 large windows on the facade of the house. The columns and corner brackets are beefy, as the roof is heavy.
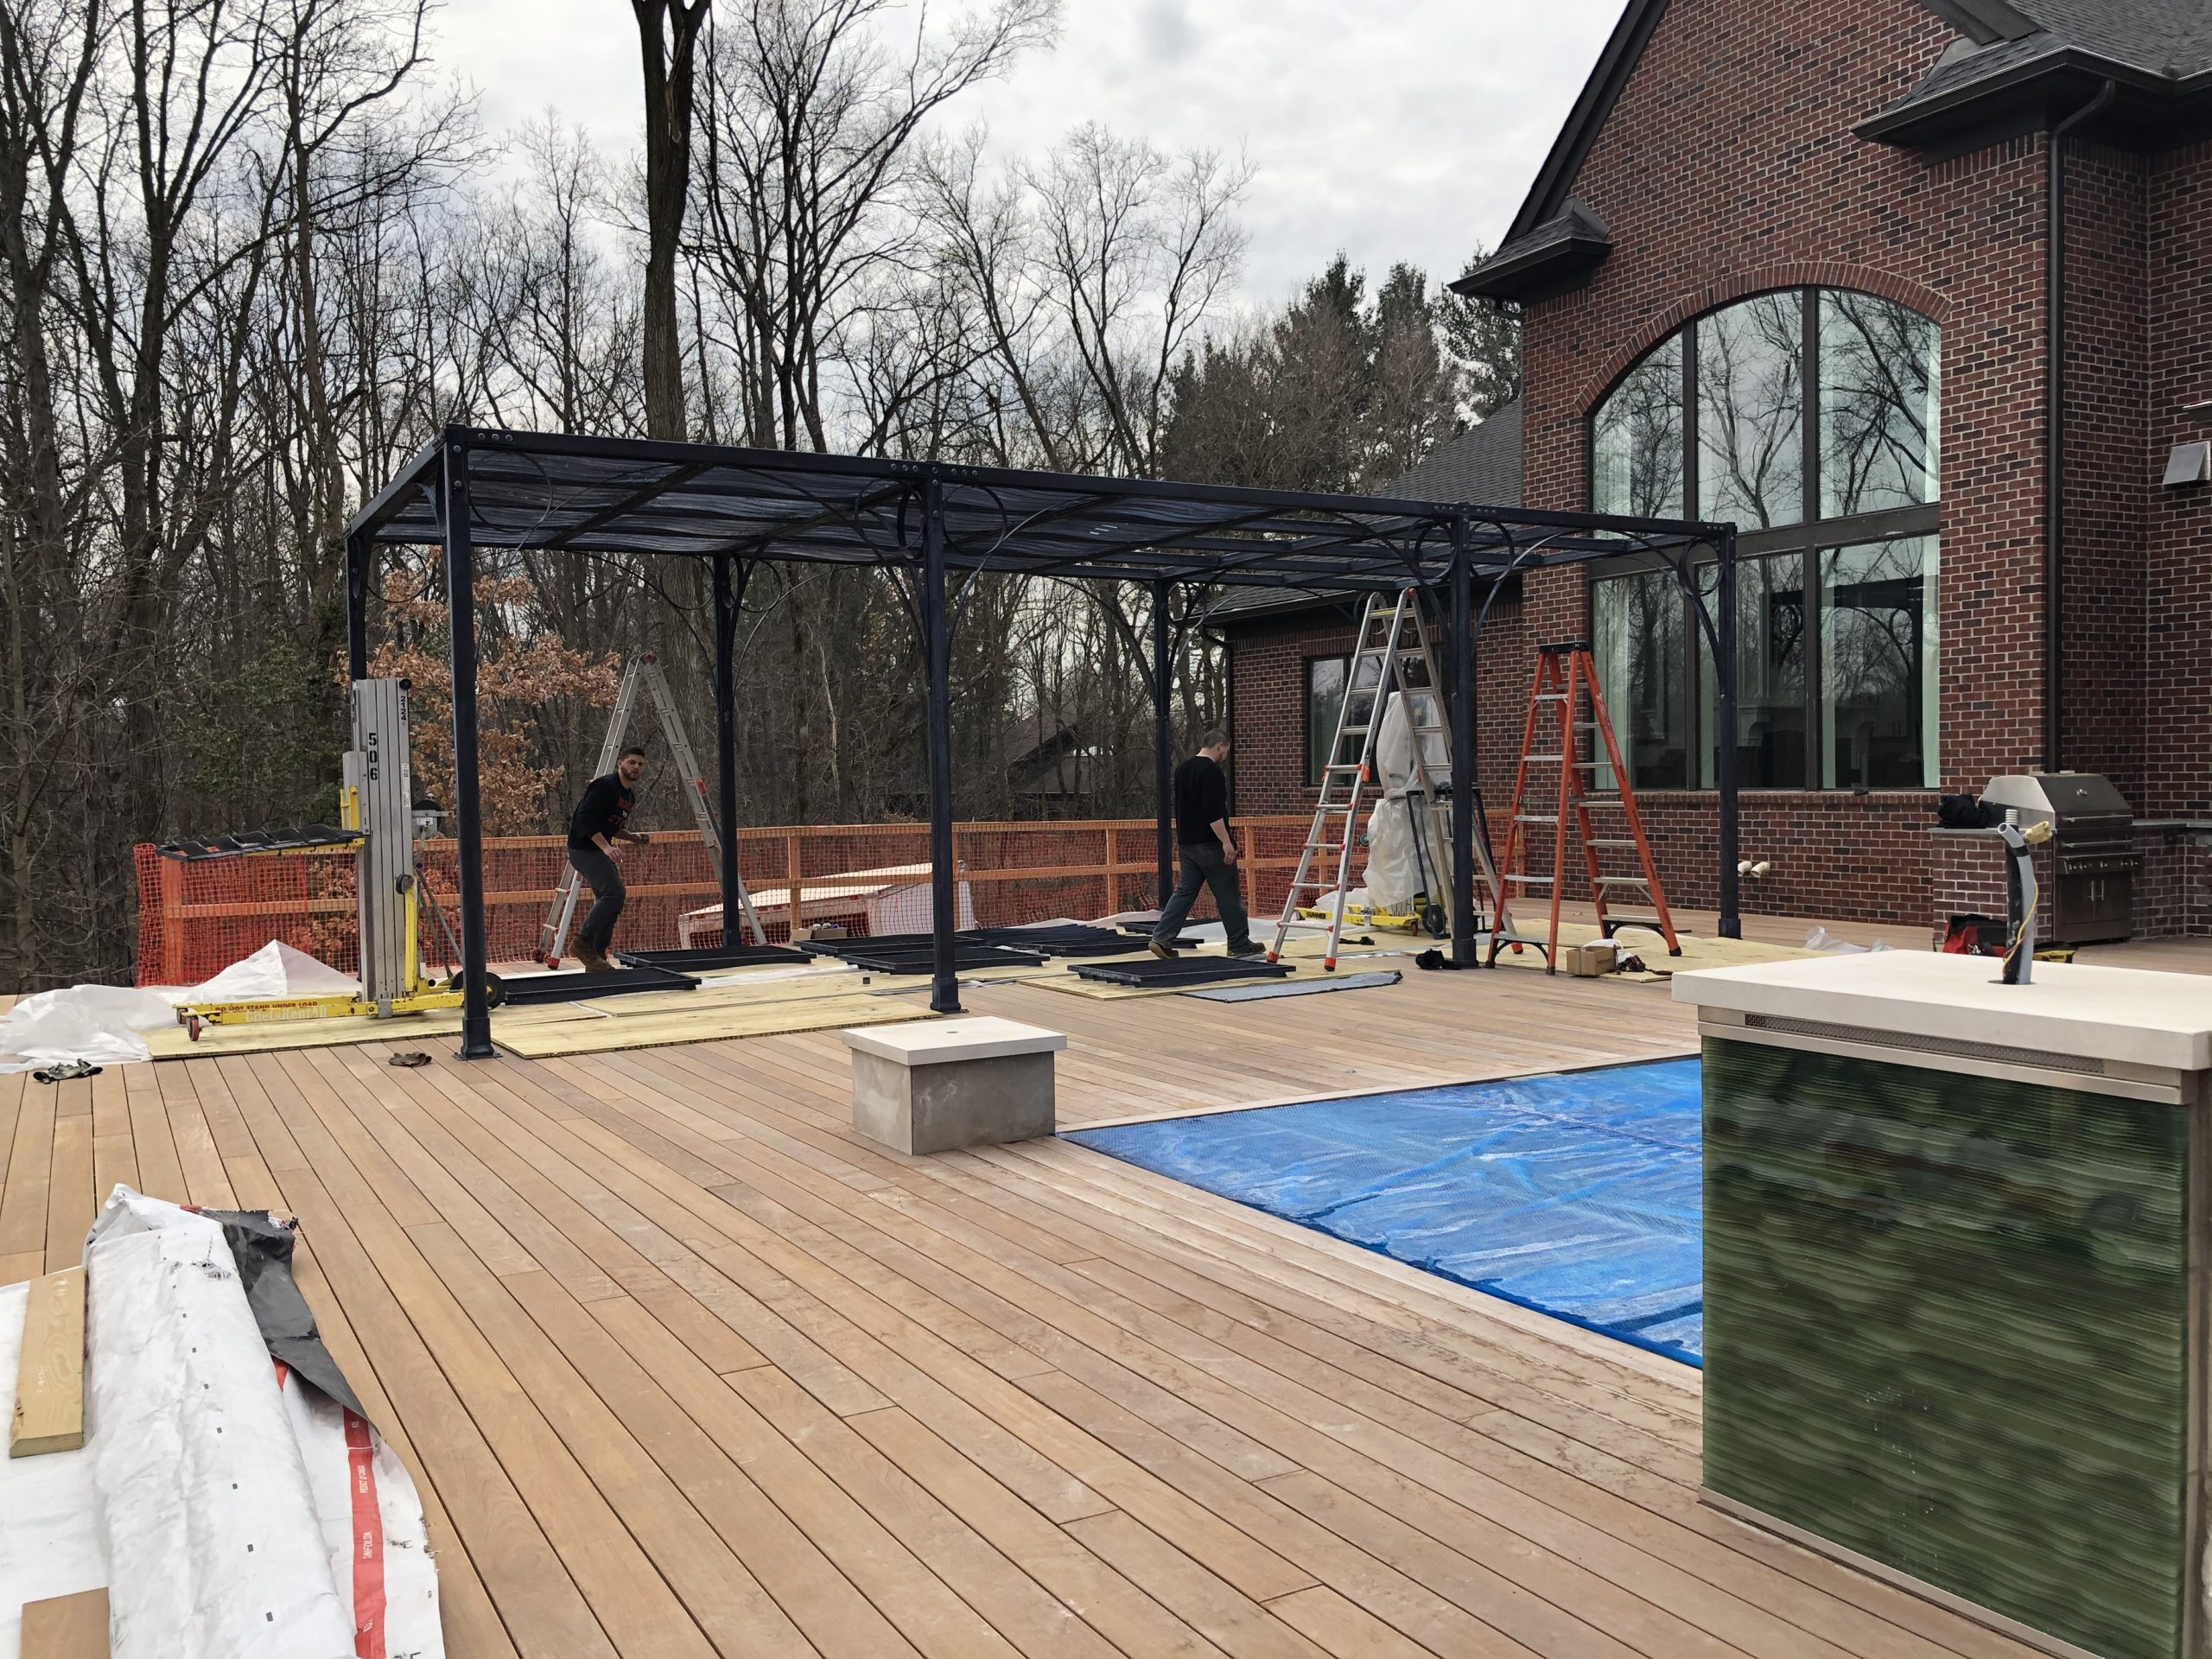
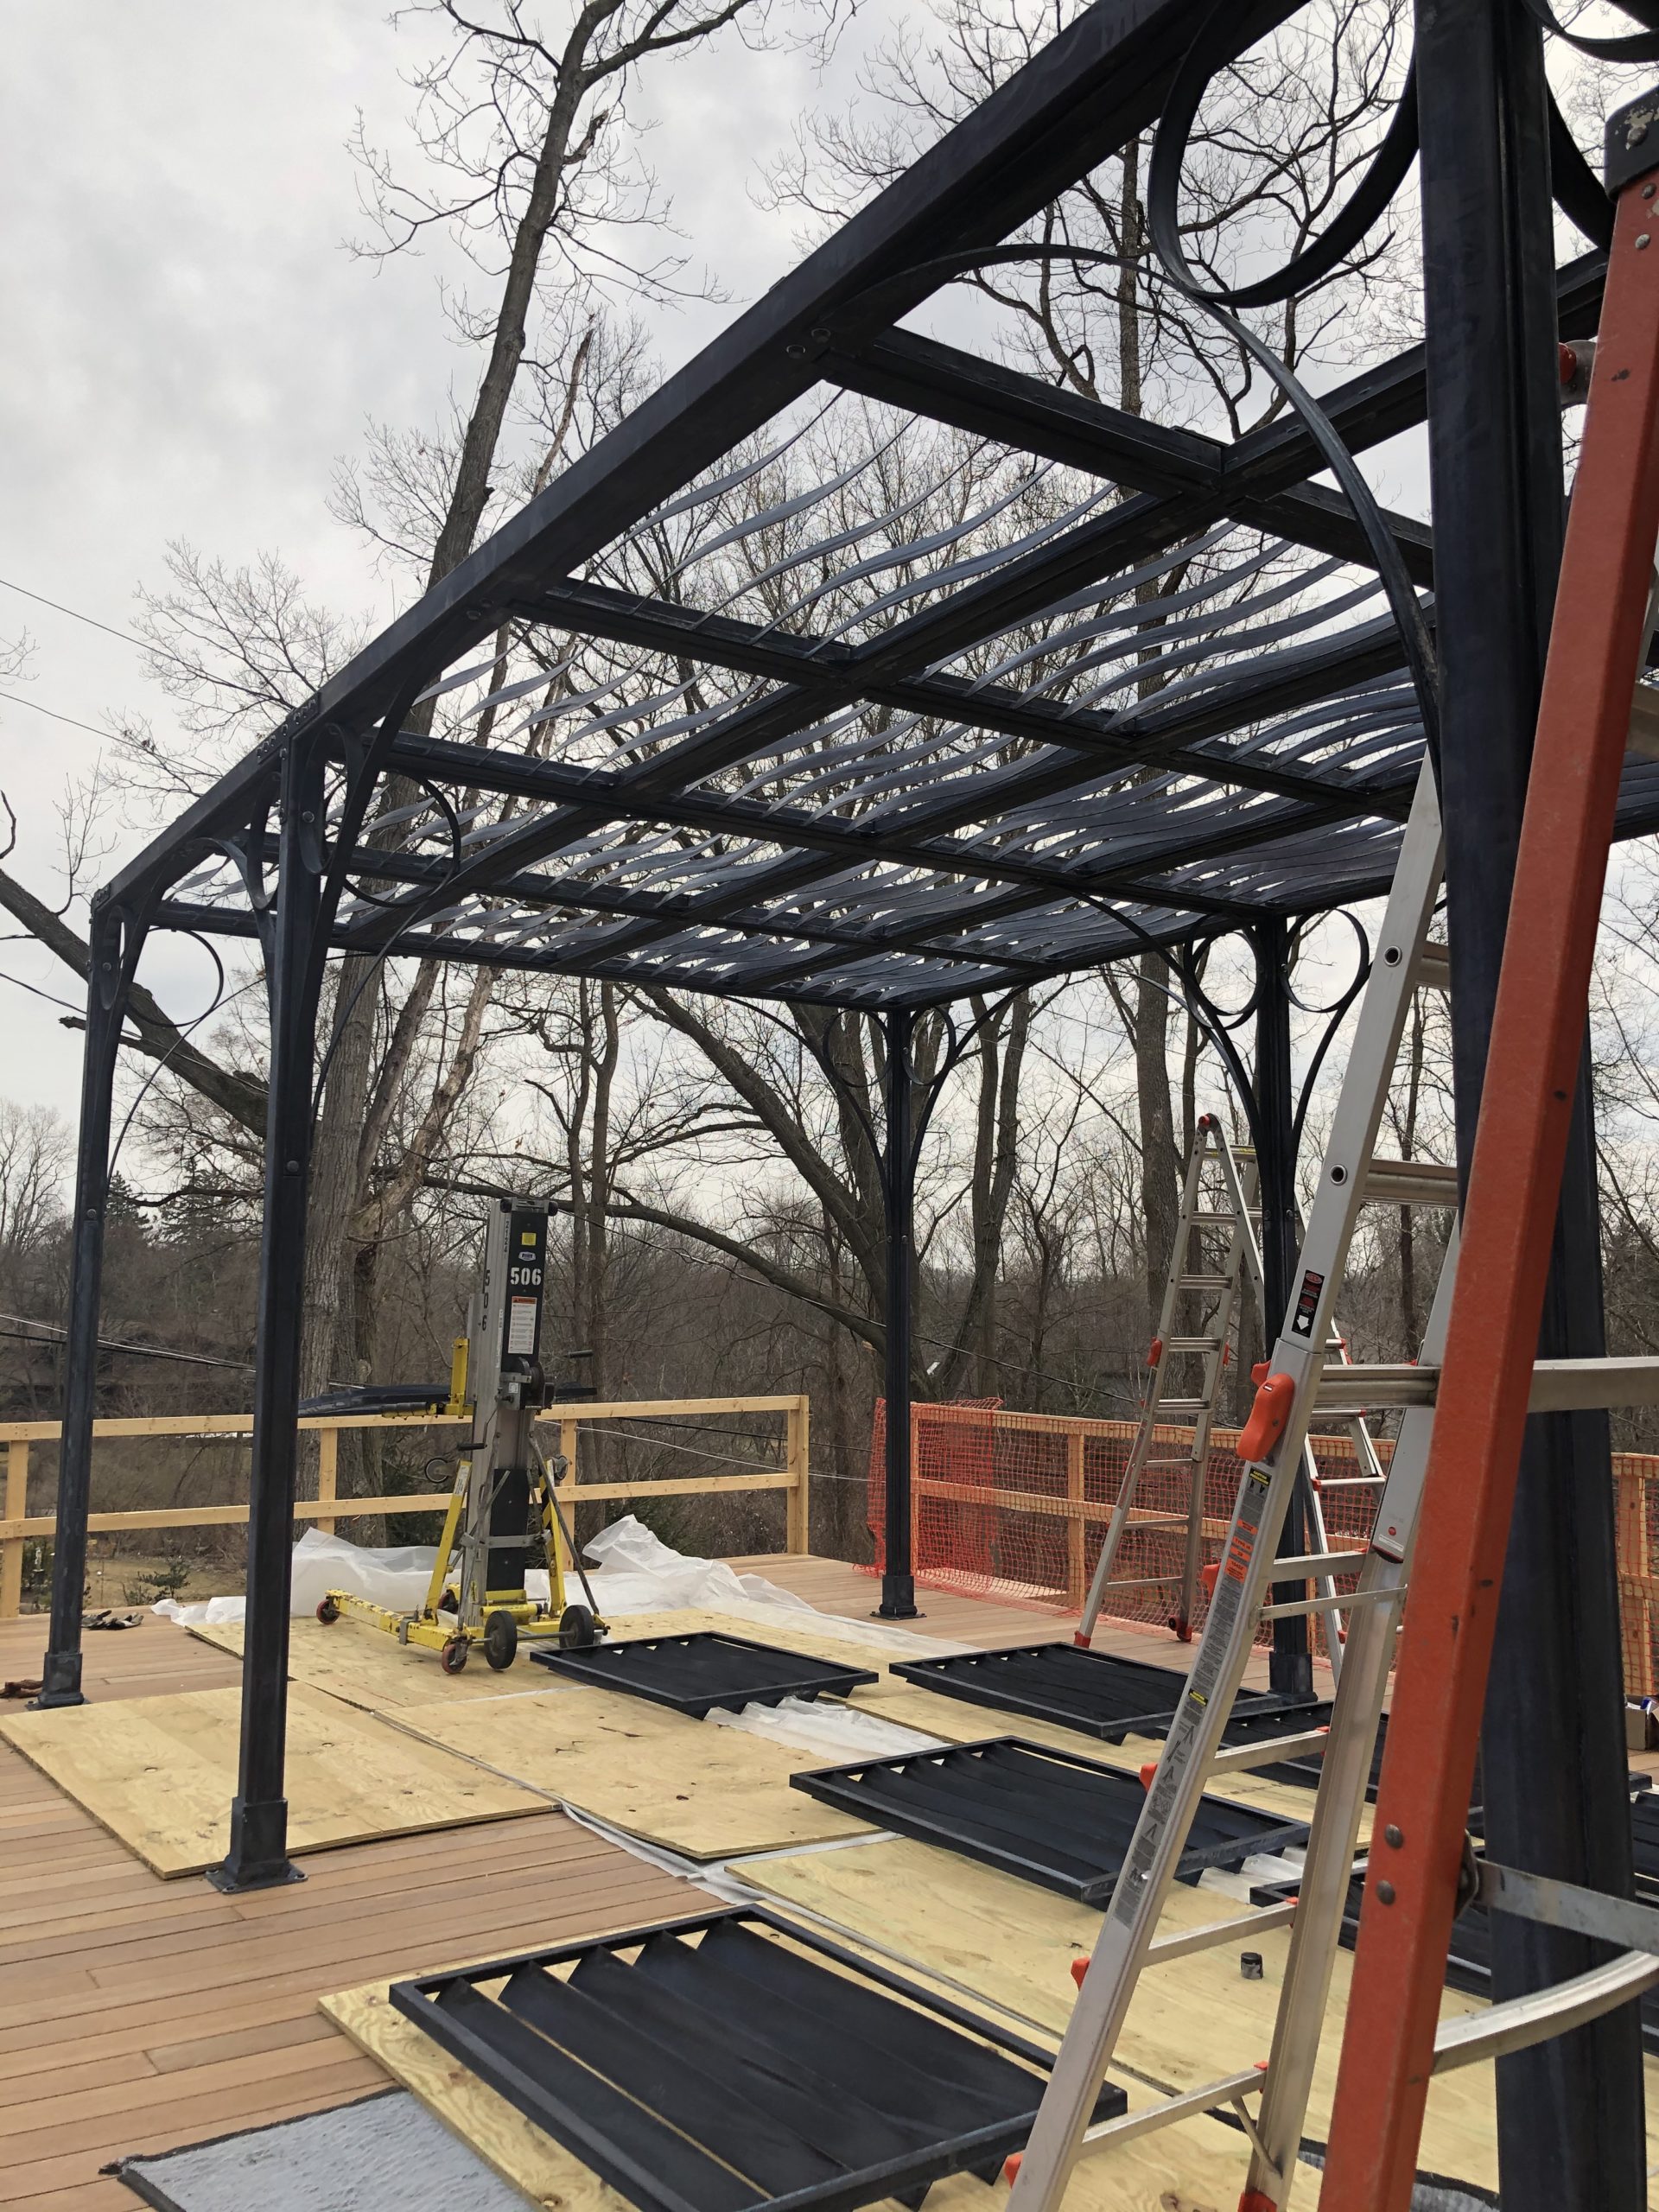 All of the roof panels are identical. But they cast different levels of shade depending on their orientation. Since the spring season is up next, and the intensity of sunlight at that time of year is subdued, the panels were placed to provide a more open shade from the south side. Being outdoors on a sunny spring day is one of the garden’s most memorable experiences.
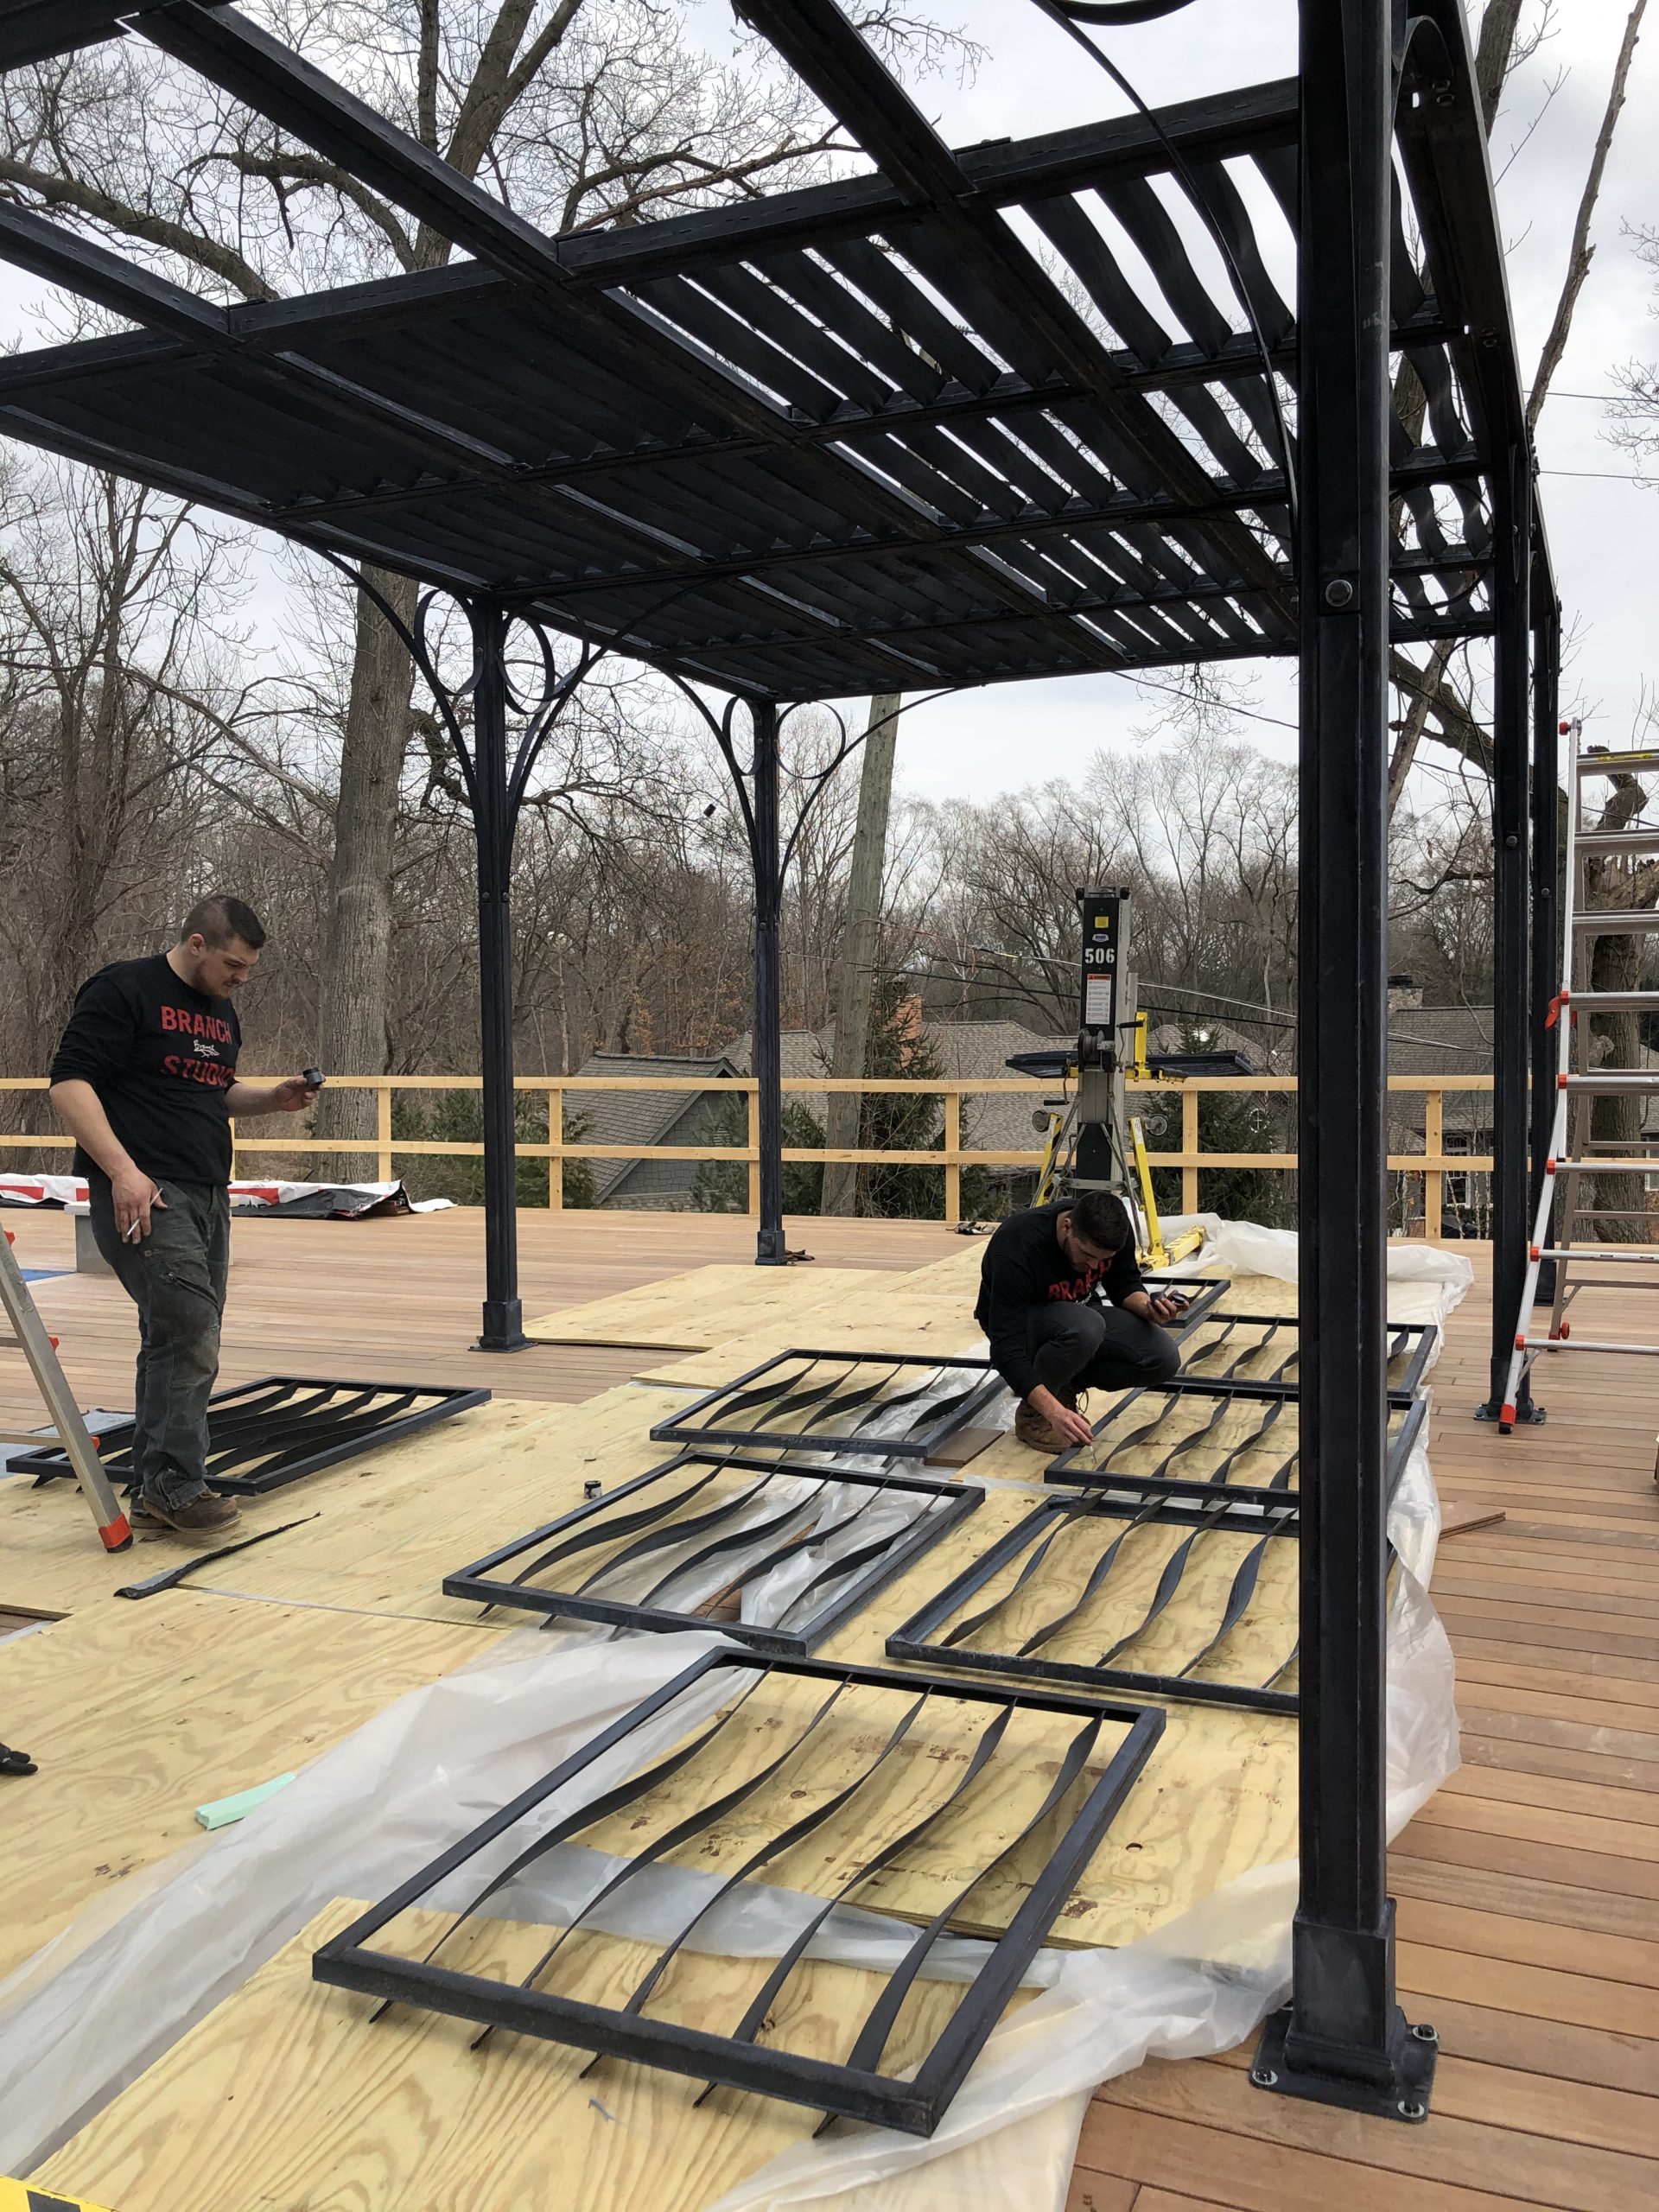
 From the north side, the shade cast will be much more pronounced. The sun is still low in the sky now, so it will be interesting to see what level of shade is provided once the sun is directly overhead. In any event, the pergola will go a long way towards providing a comfortable place to enjoy the outdoors.
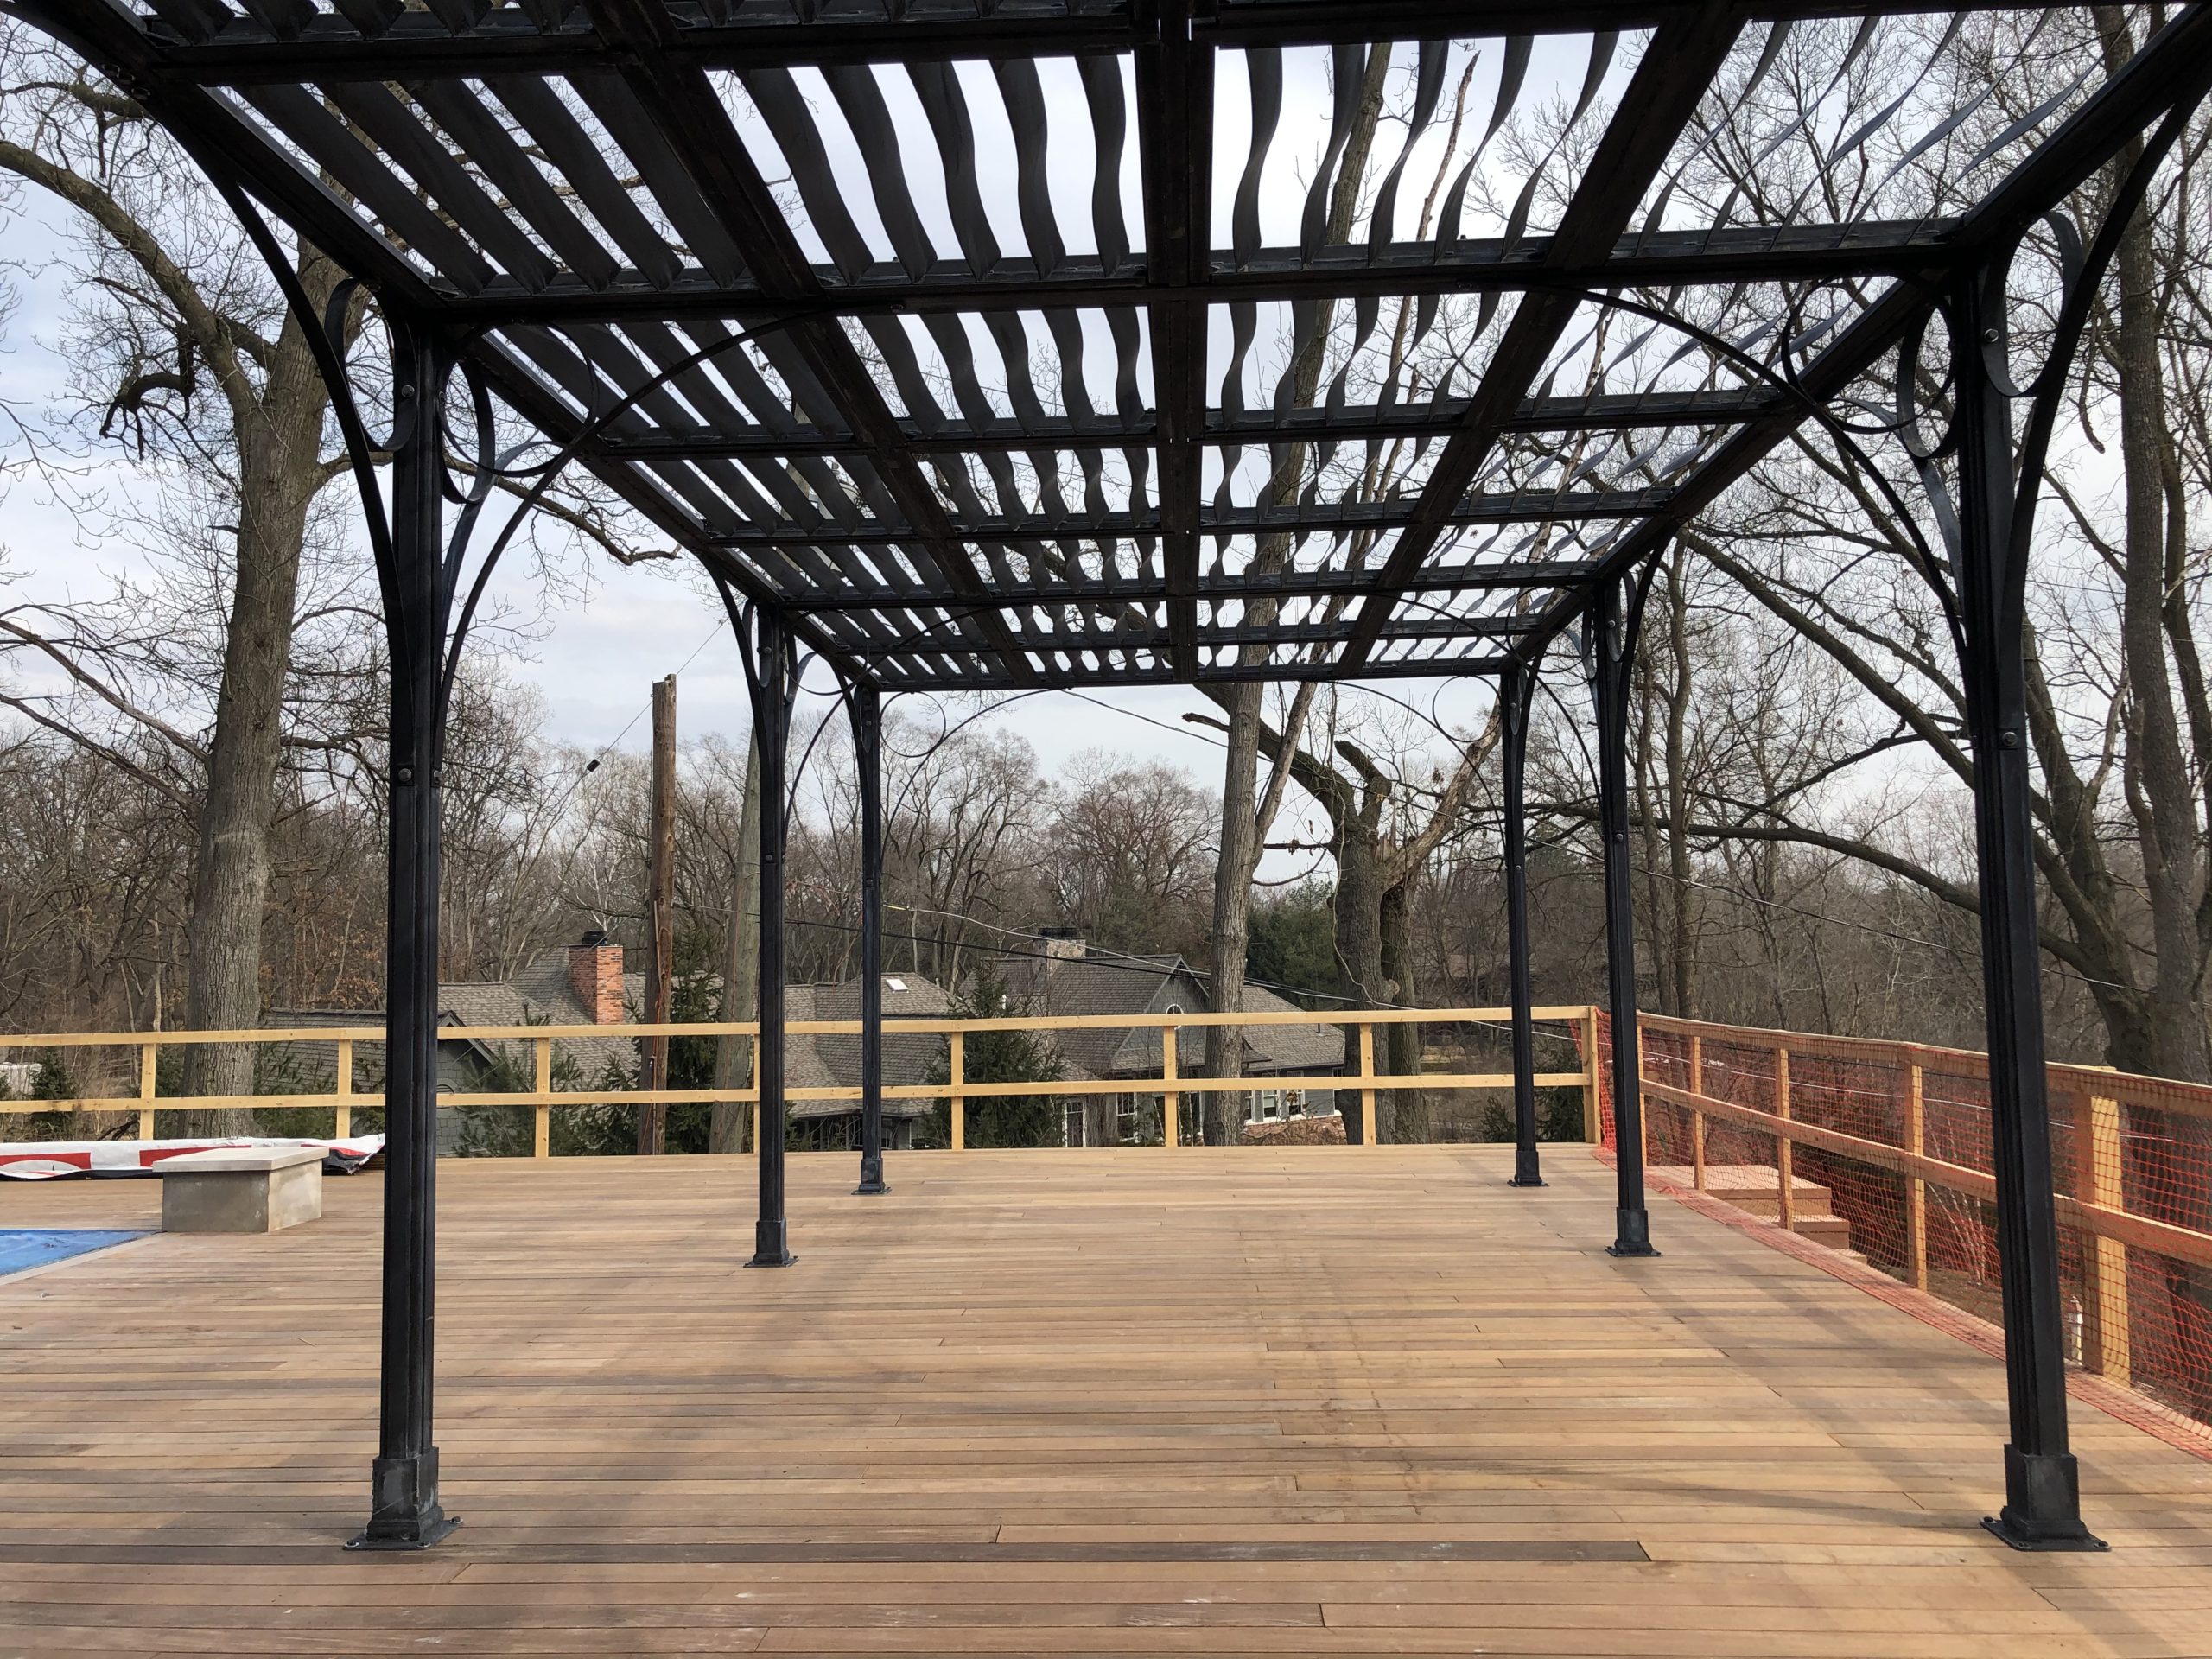 Everyone’s interest and participation in the landscape is unique to them. I have come to have loads of respect for all forms that expression might take. On a practical level, it means trying to provide whatever direction it takes to get people outdoors. It also means cultivating empathy as an essential element of good design. What could happen next is not predictable, but I have had numerous instances over the years of a tentative interest in nature blossoming into a commitment to the health and well being of a piece of property. Or down the line a garden with which to teach their children how to grow vegetables and flowers. Or a new found love for spring flowering bulbs or fruit trees. It happens.
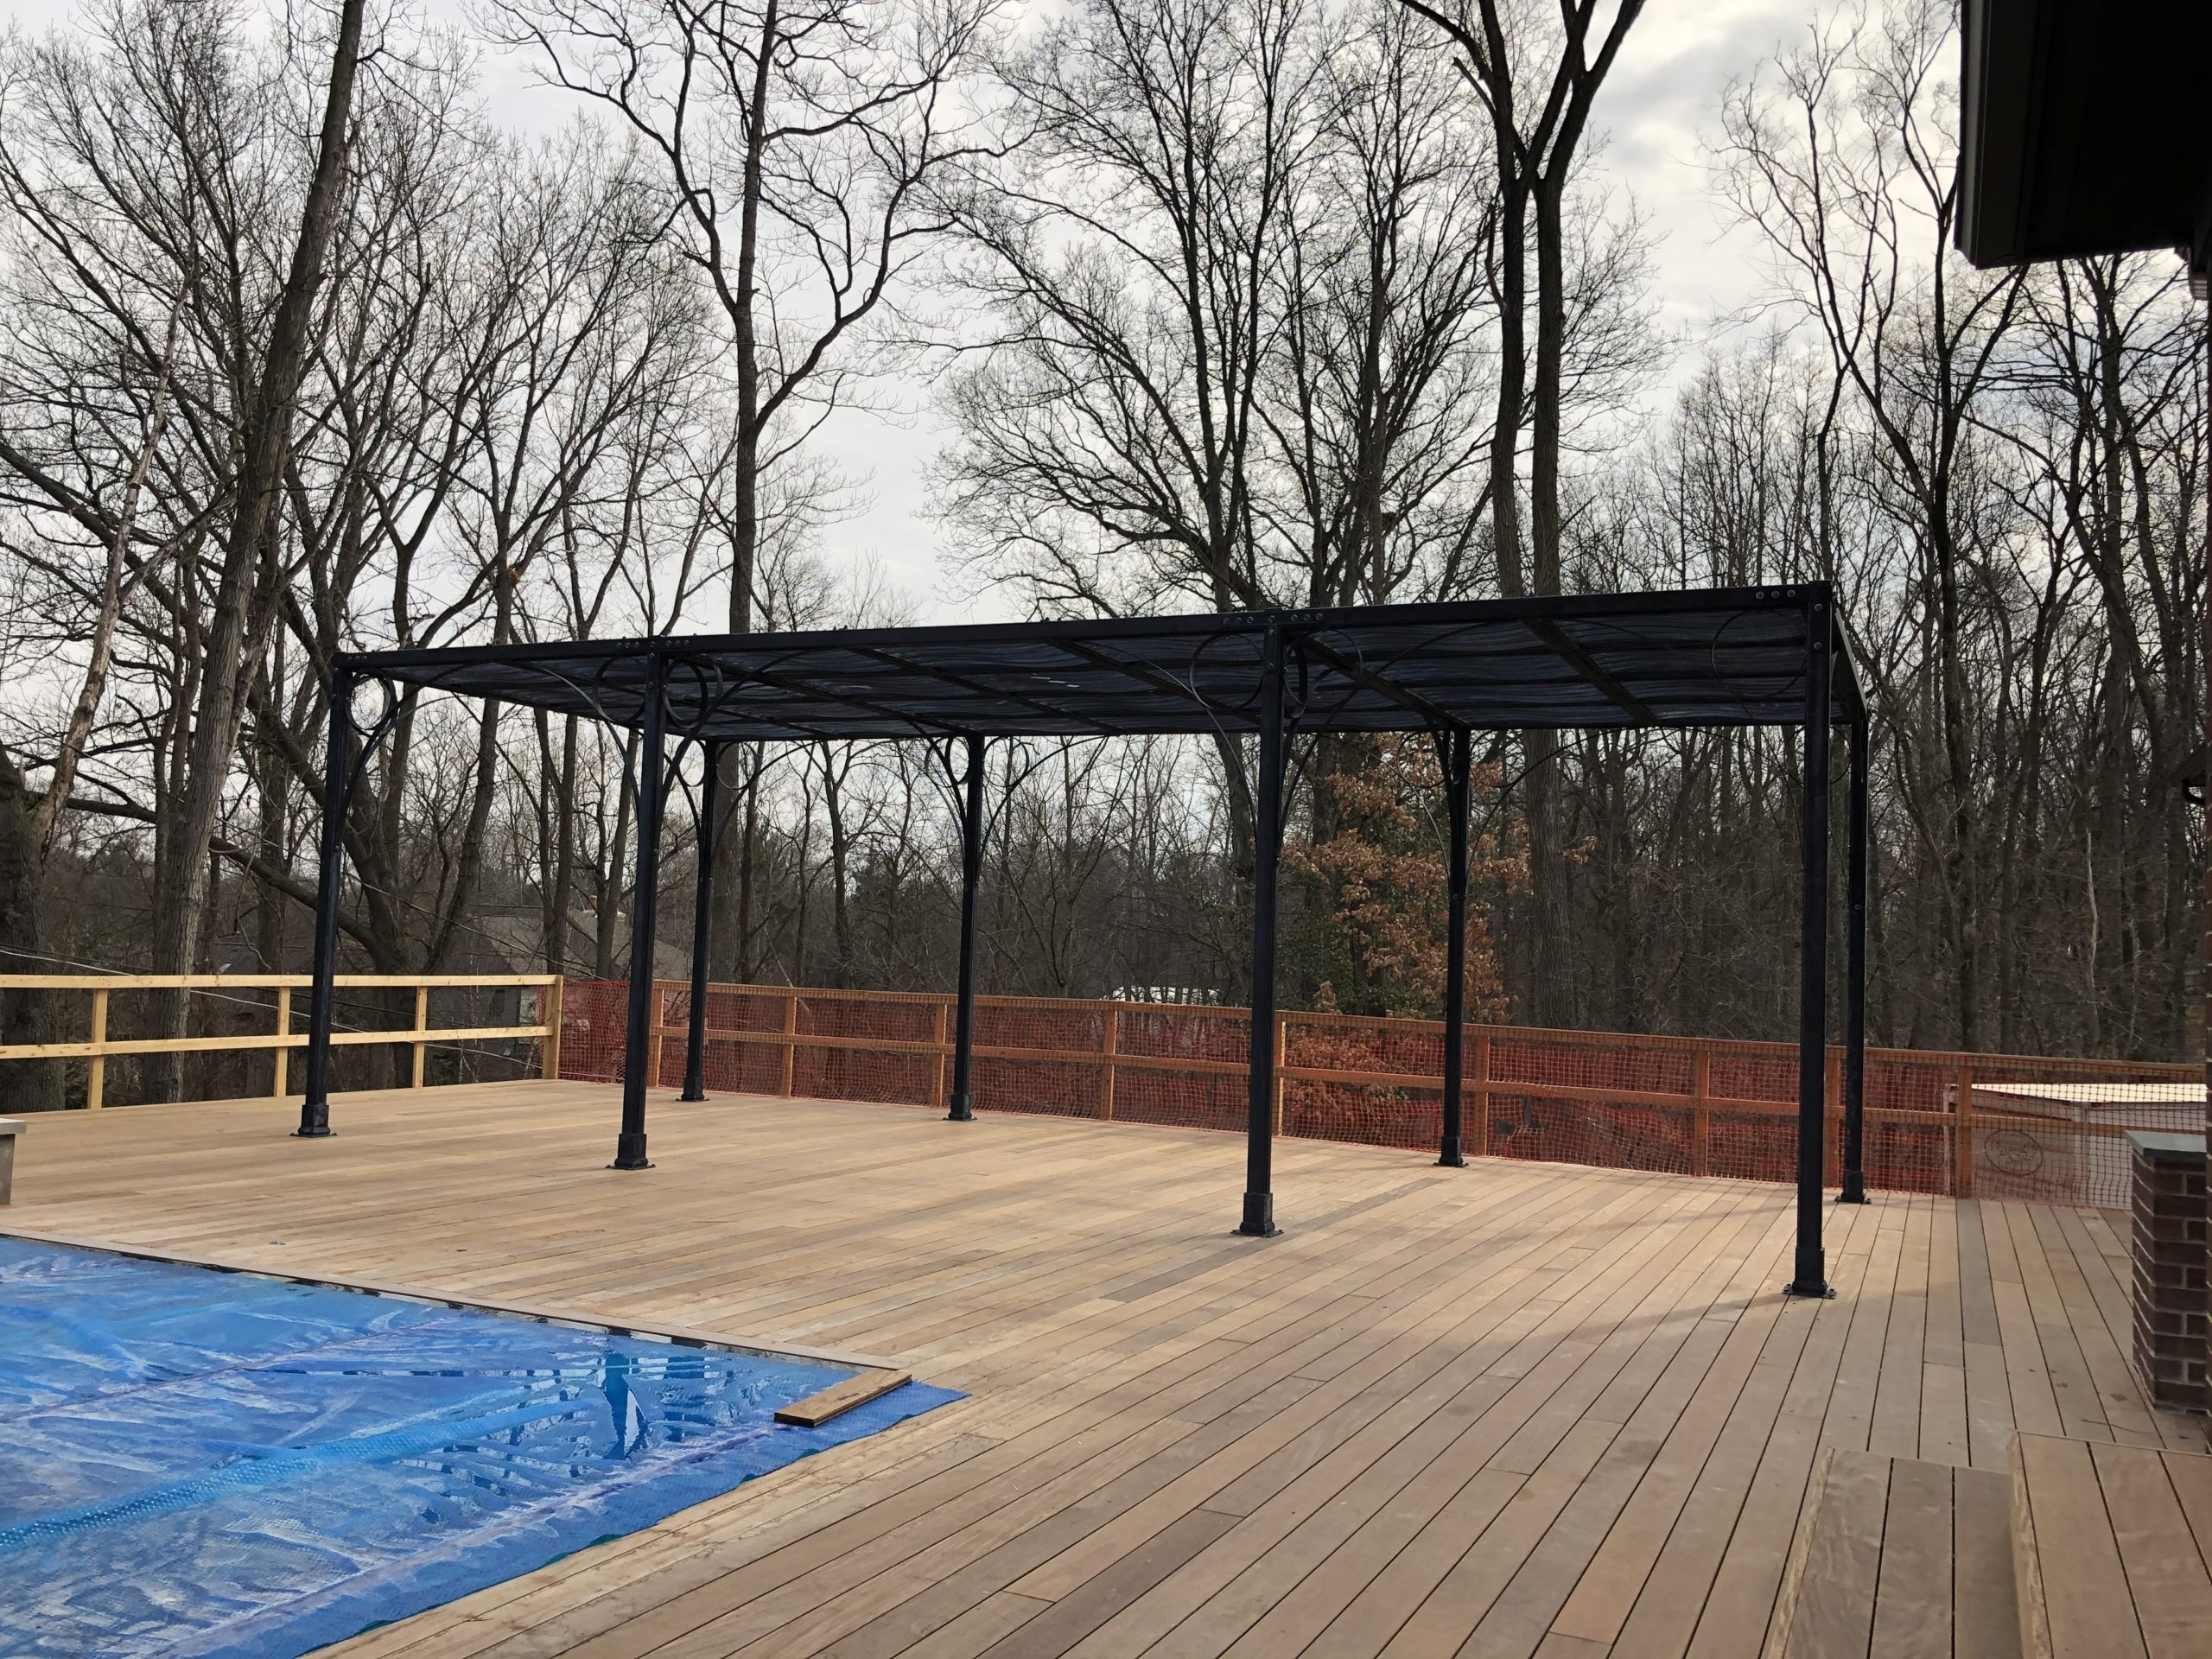 There is a special personal satisfaction in having taken the design of a structure for the landscape to another level. Our head of design and engineering, Dan Moore, and his fabrication group of 6 do a terrific job of manufacturing our stock line of boxes, pots, fountains and ornament. They do an equally great job of engineering and fabricating something they have never made before. I think they like making those forays into the unknown. All they needed from me was the concept.
 It will scarcely be another month or two before this space will be humming with activity. The waterfall will be running and the pool will be open to the sky.The glass rails should be installed by Memorial Day. The furniture has arrived, and is in place; the outdoor grill is hooked up. I can easily imagine this space full of people enjoying a summer evening.
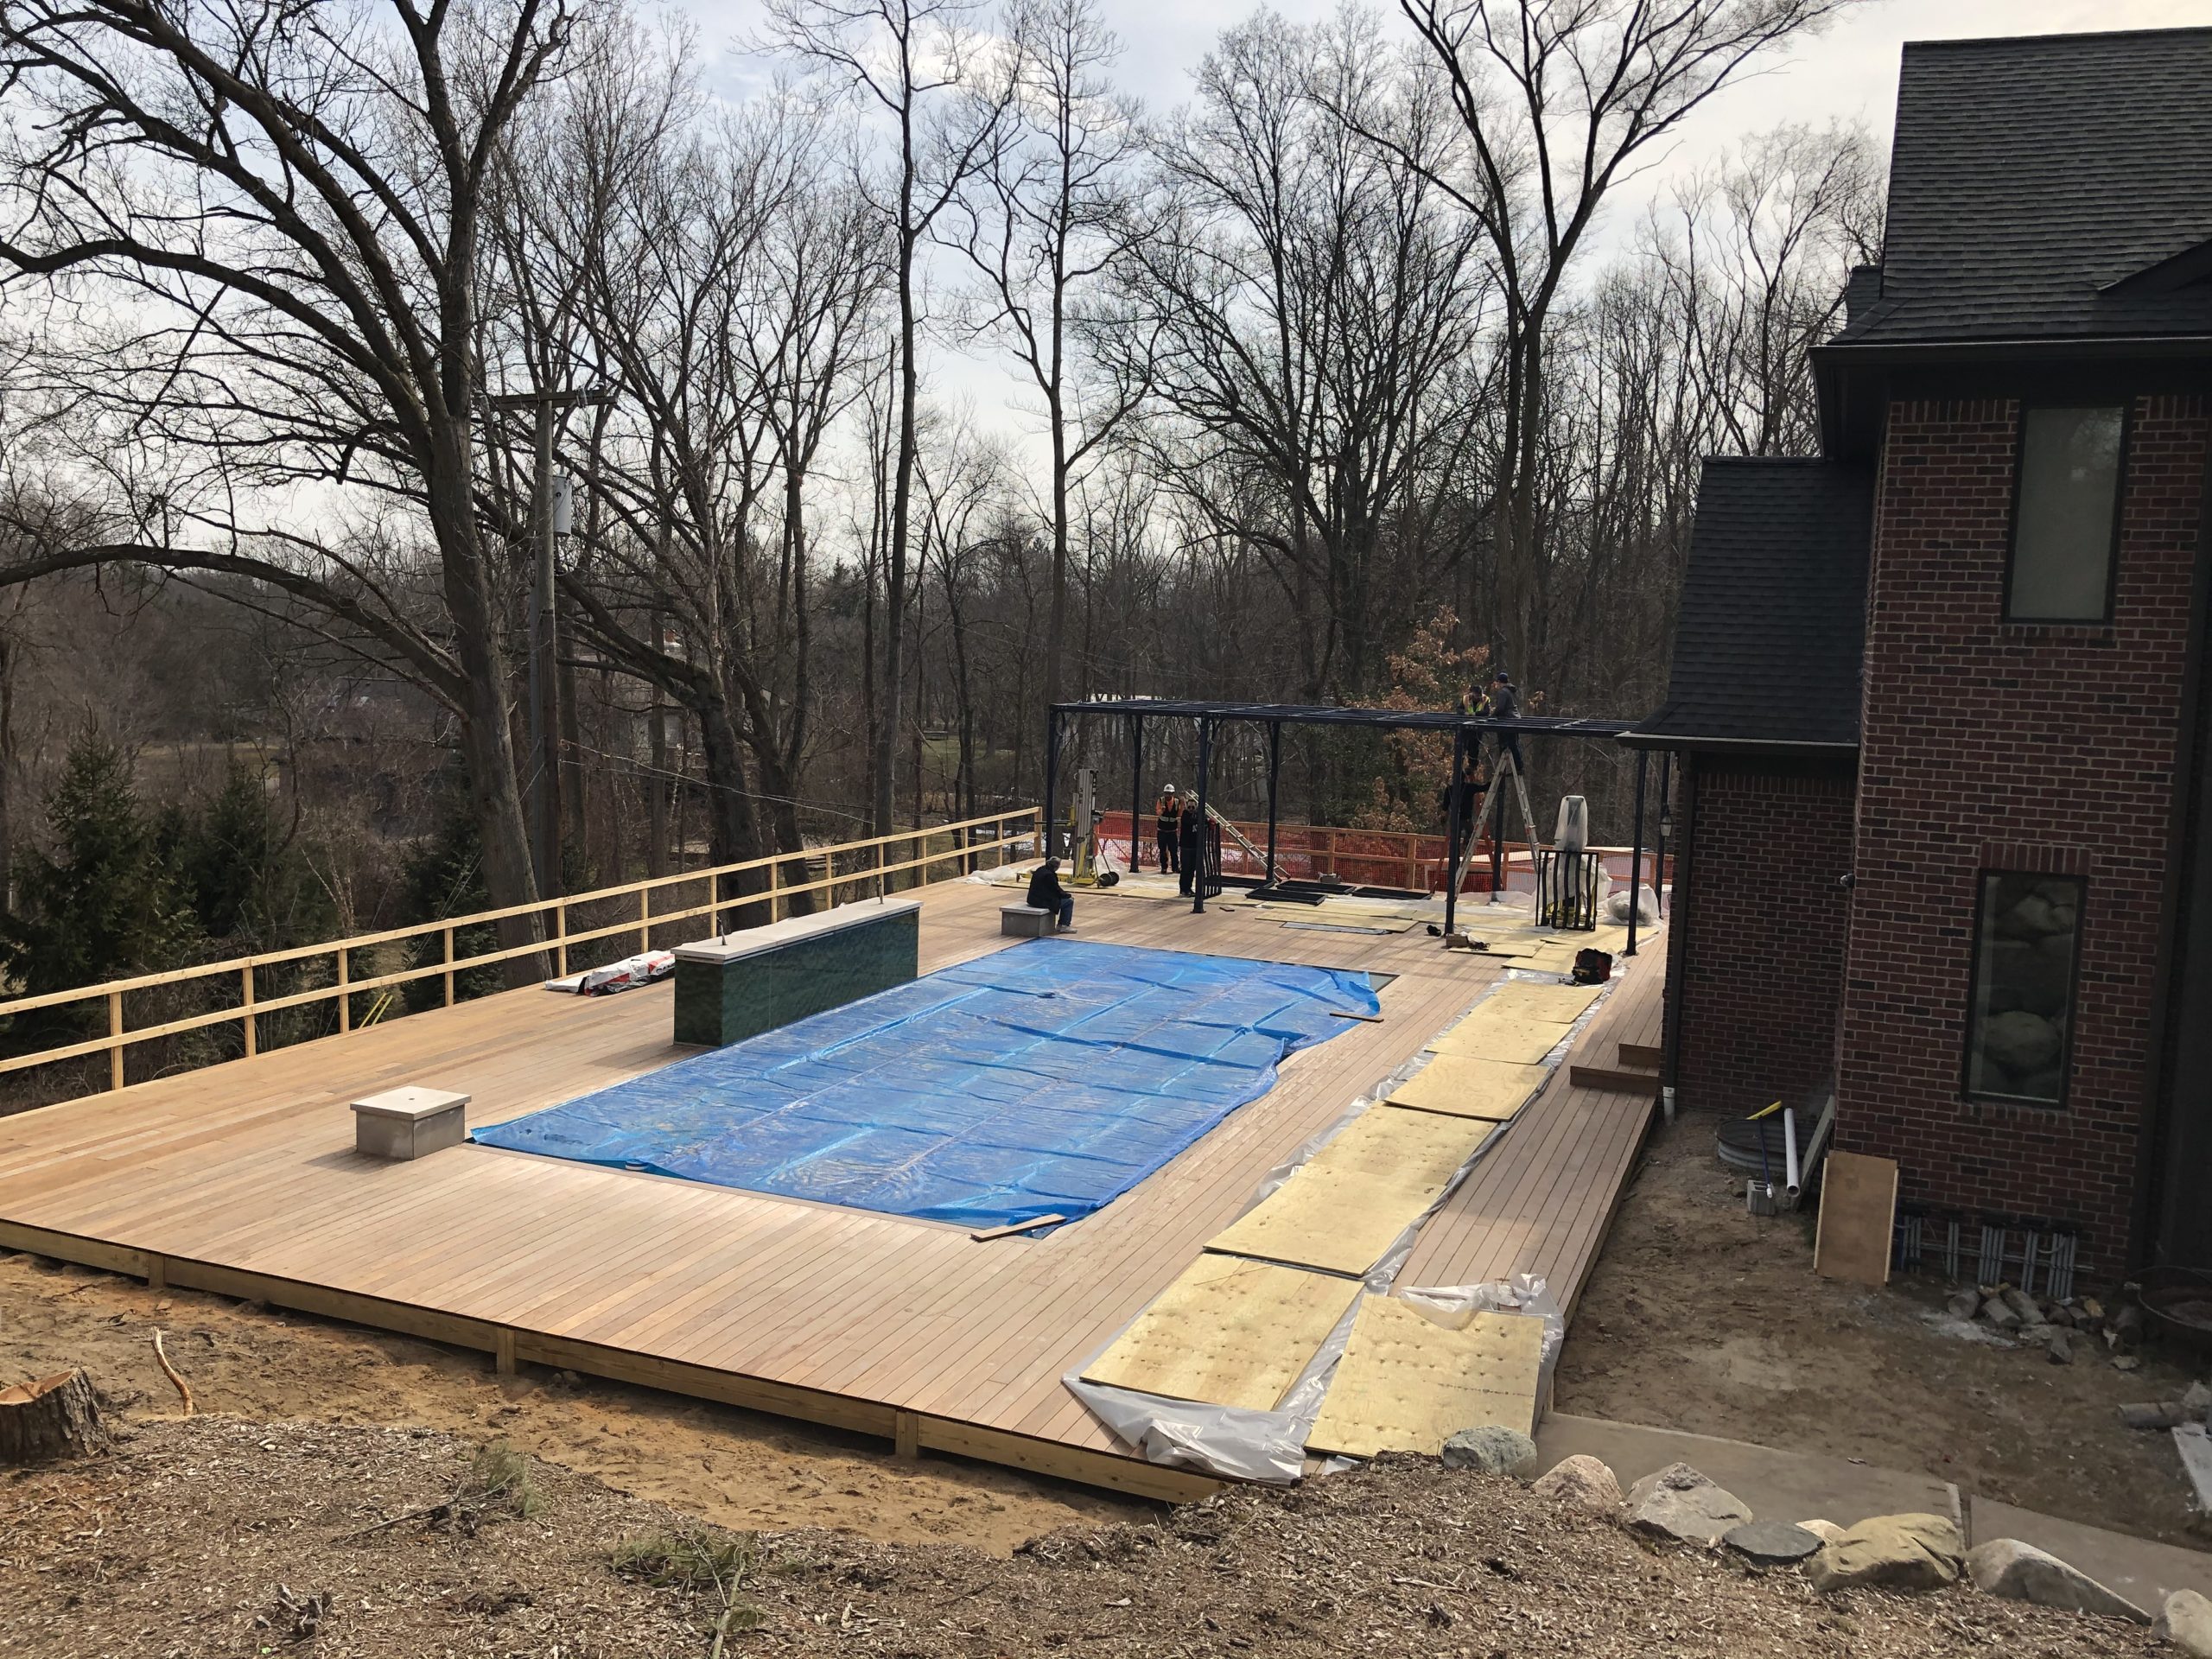 The last part, as usual, will be the landscape. We will be ready to start that in a few weeks. Most of what we plant will be trees. A new generation tucked in to an existing old woodland.
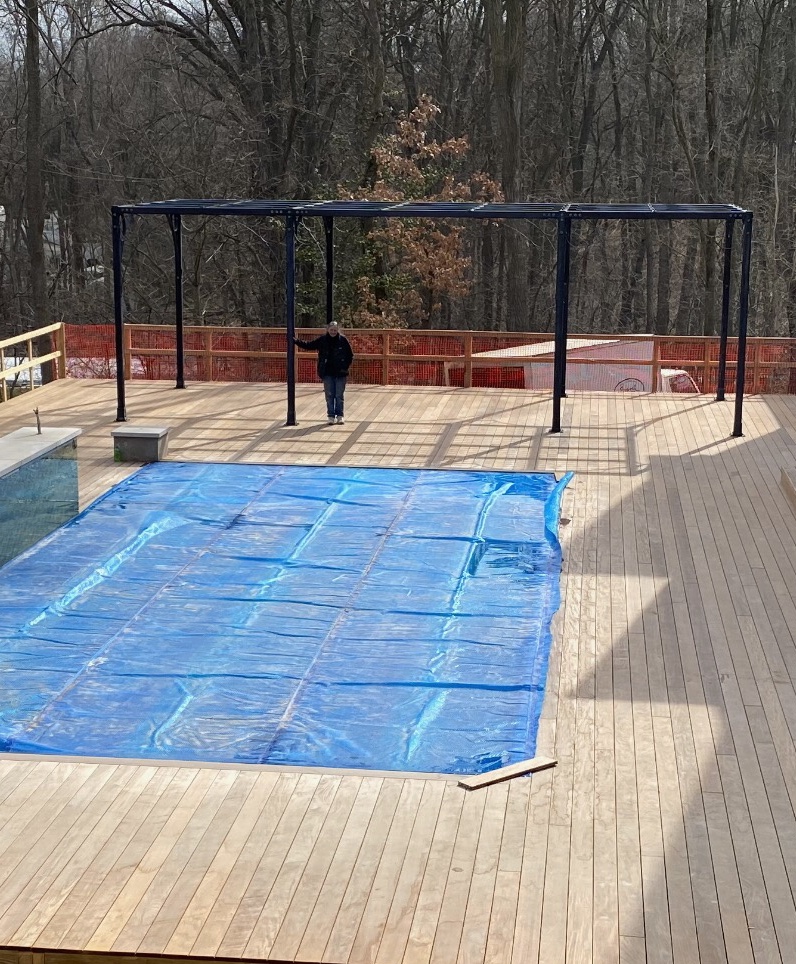
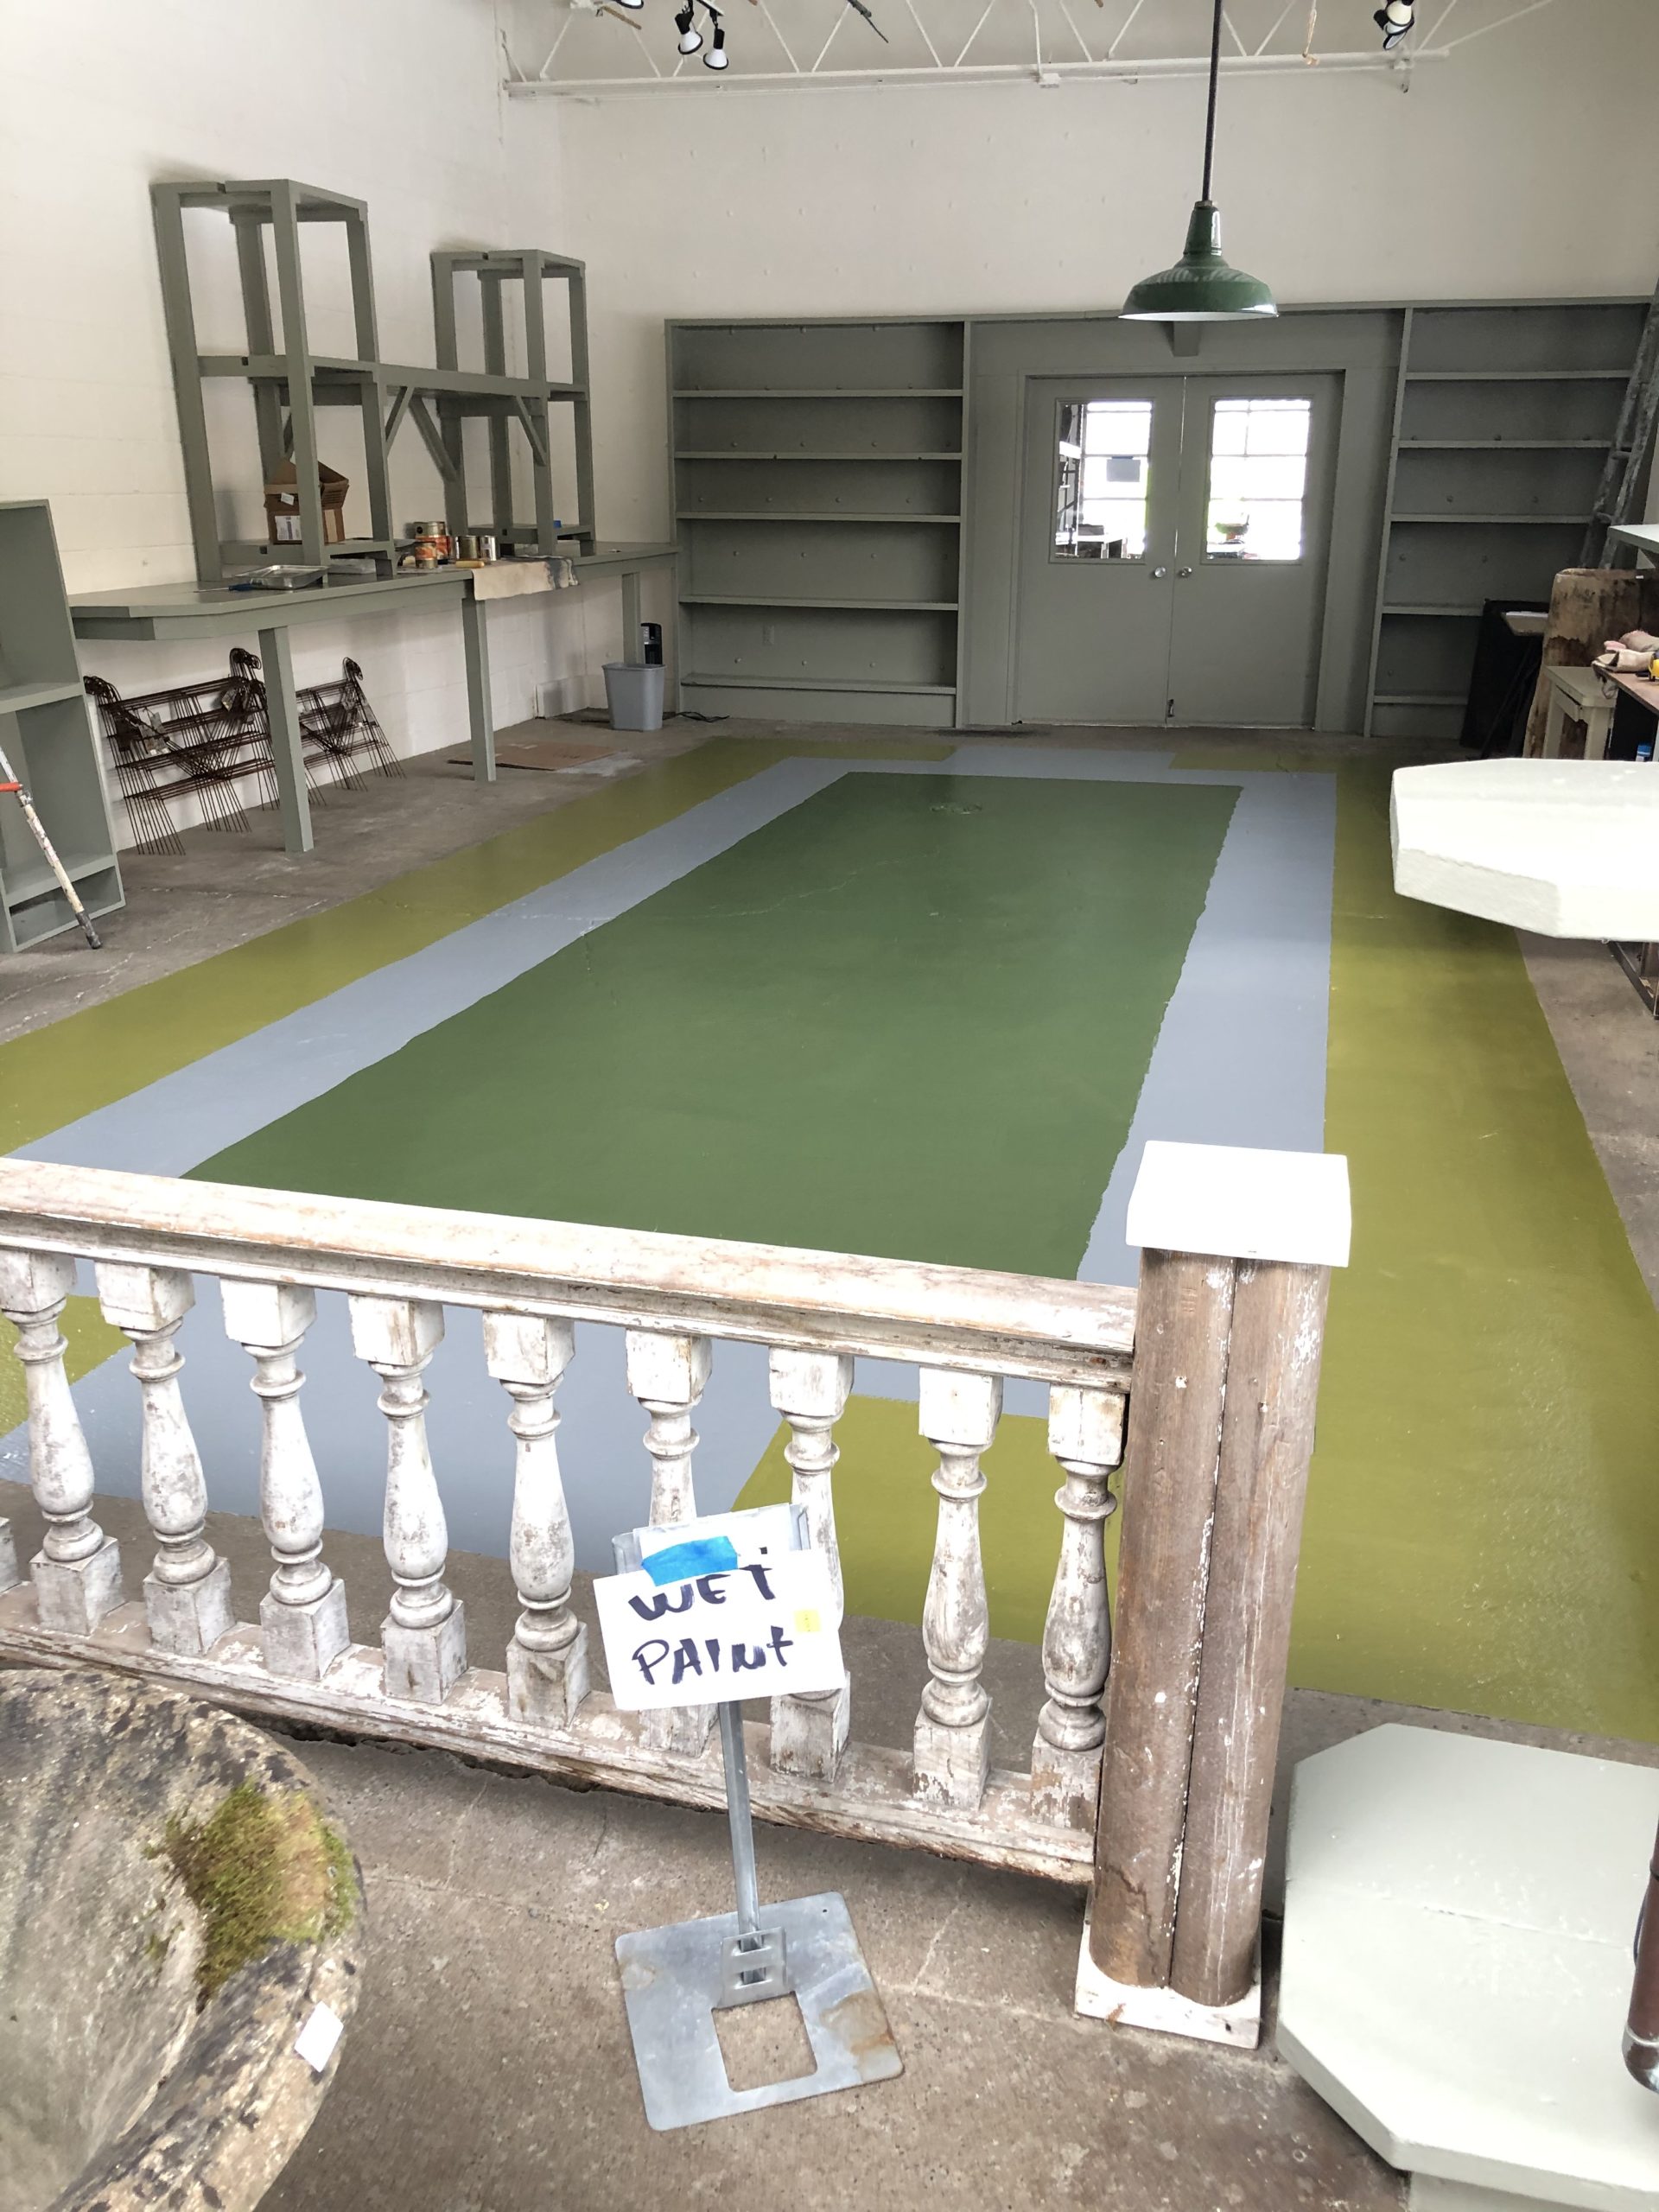
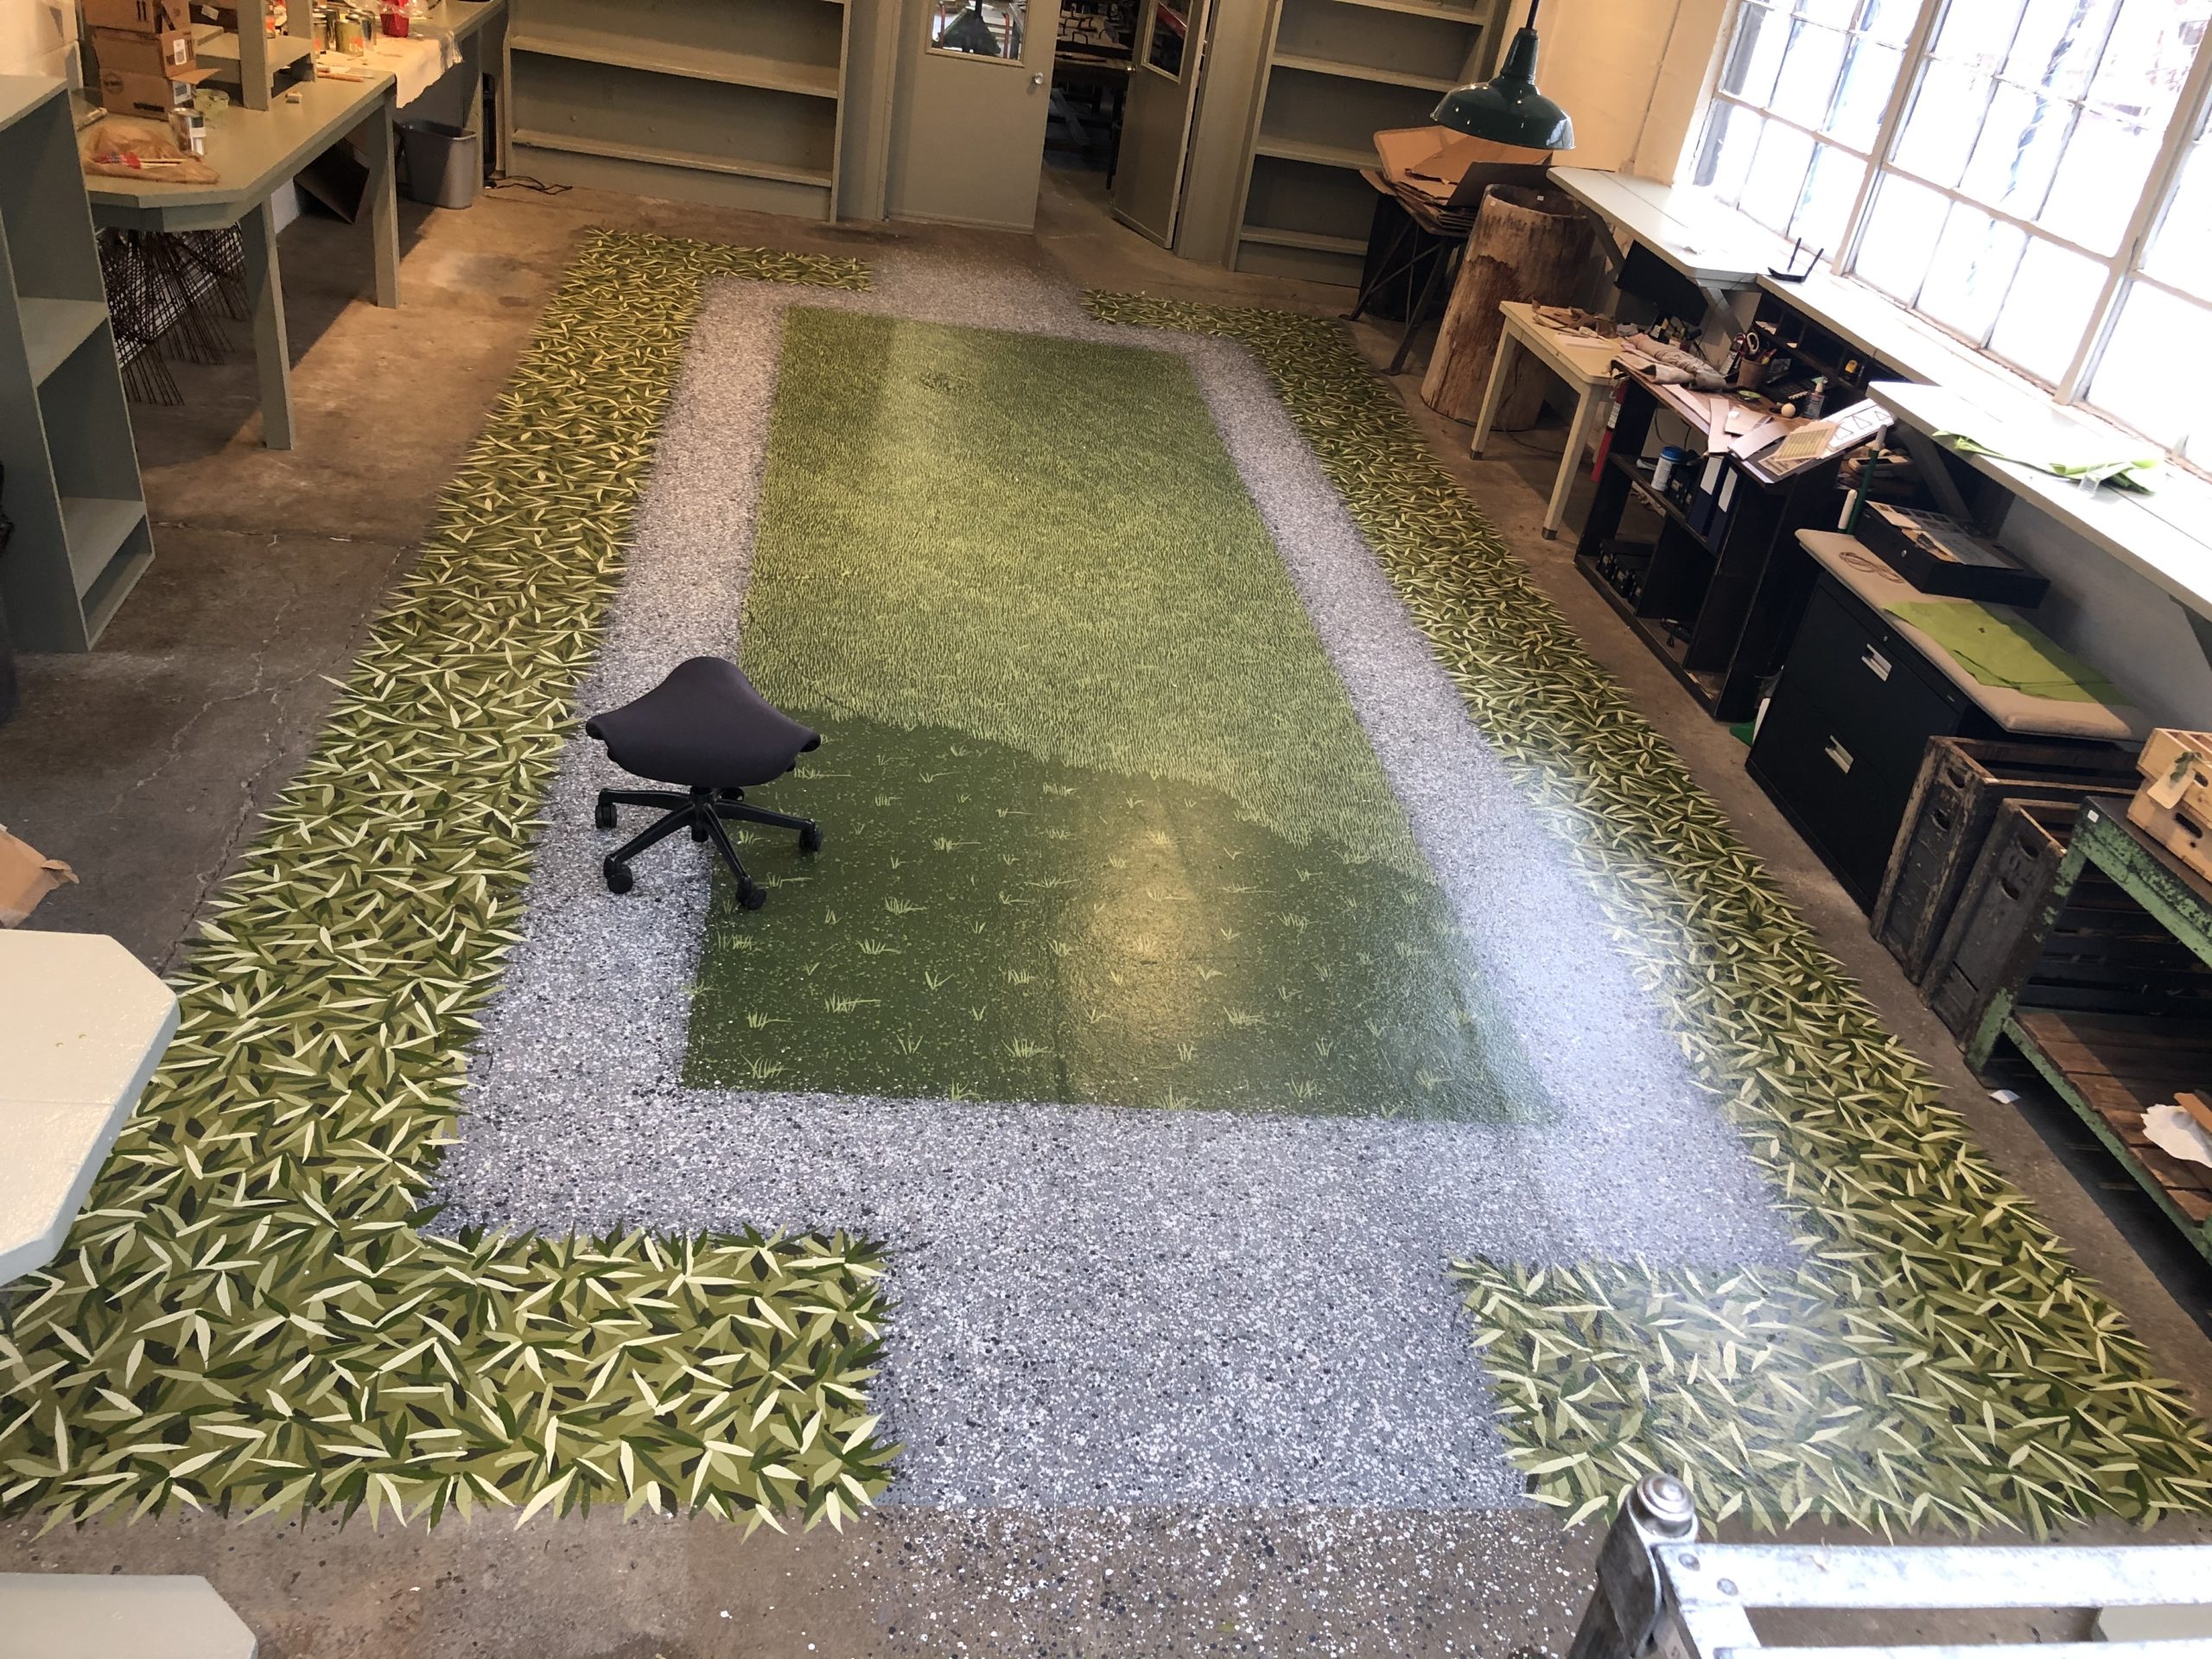
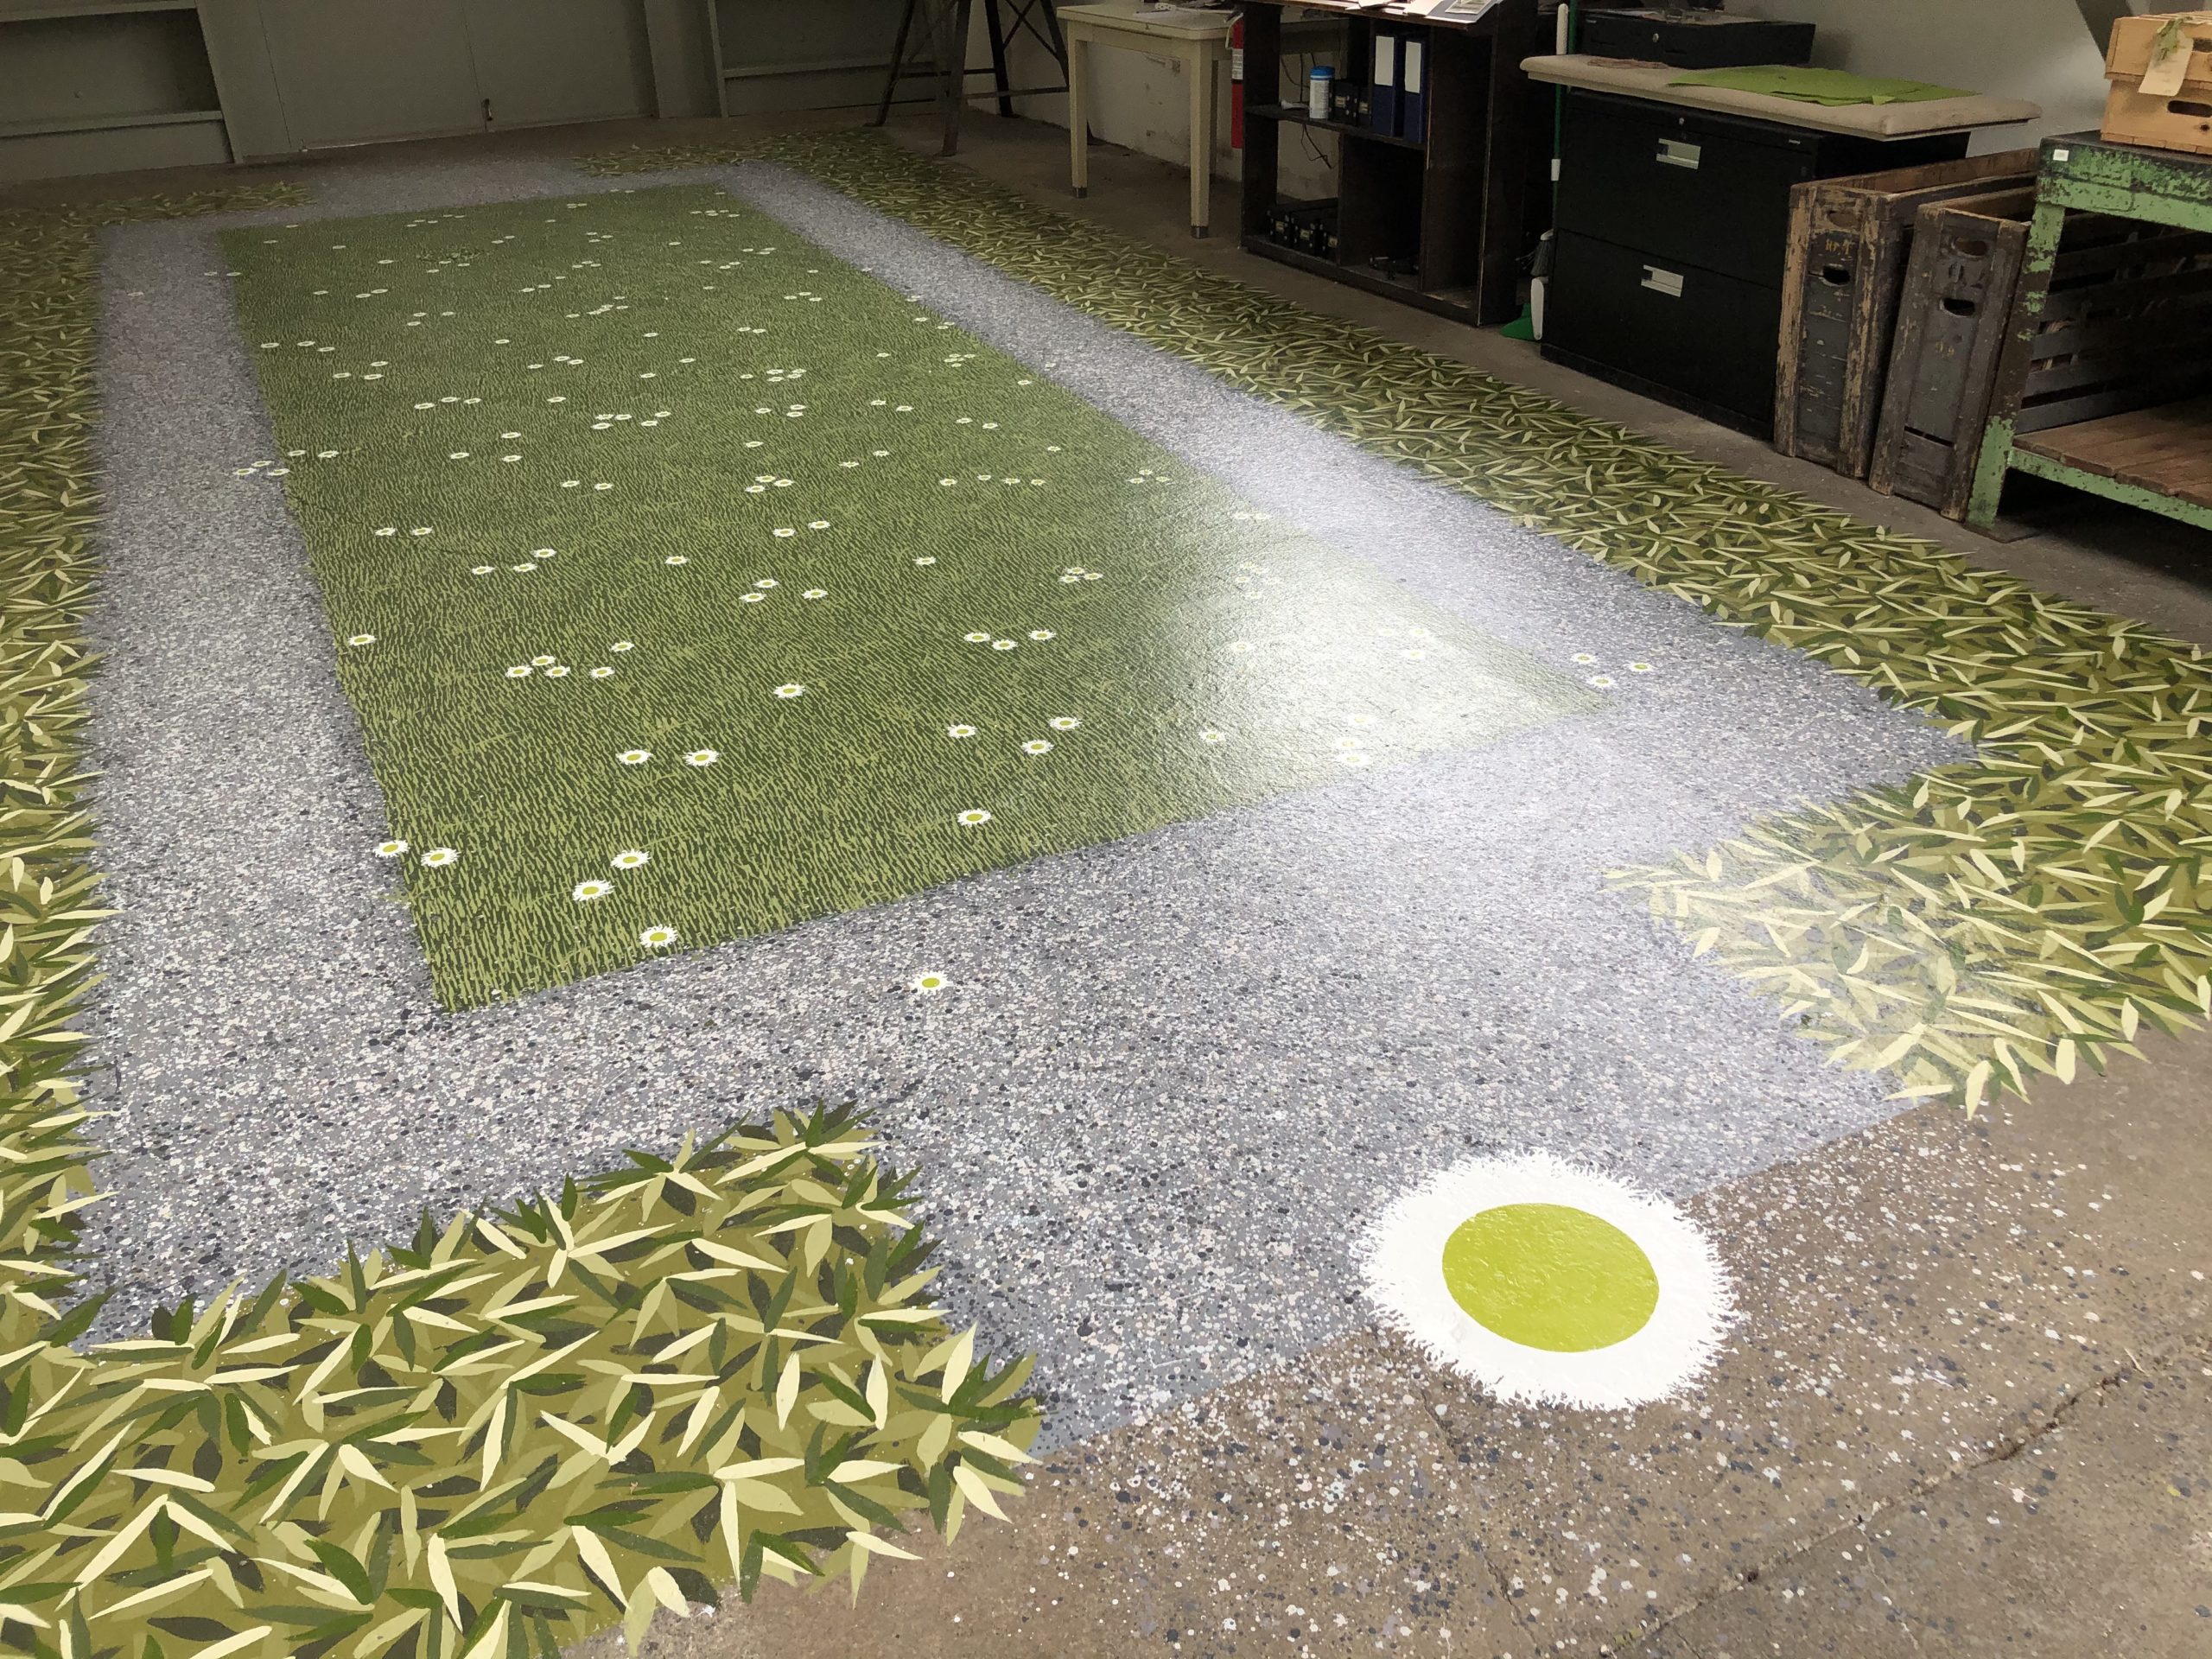
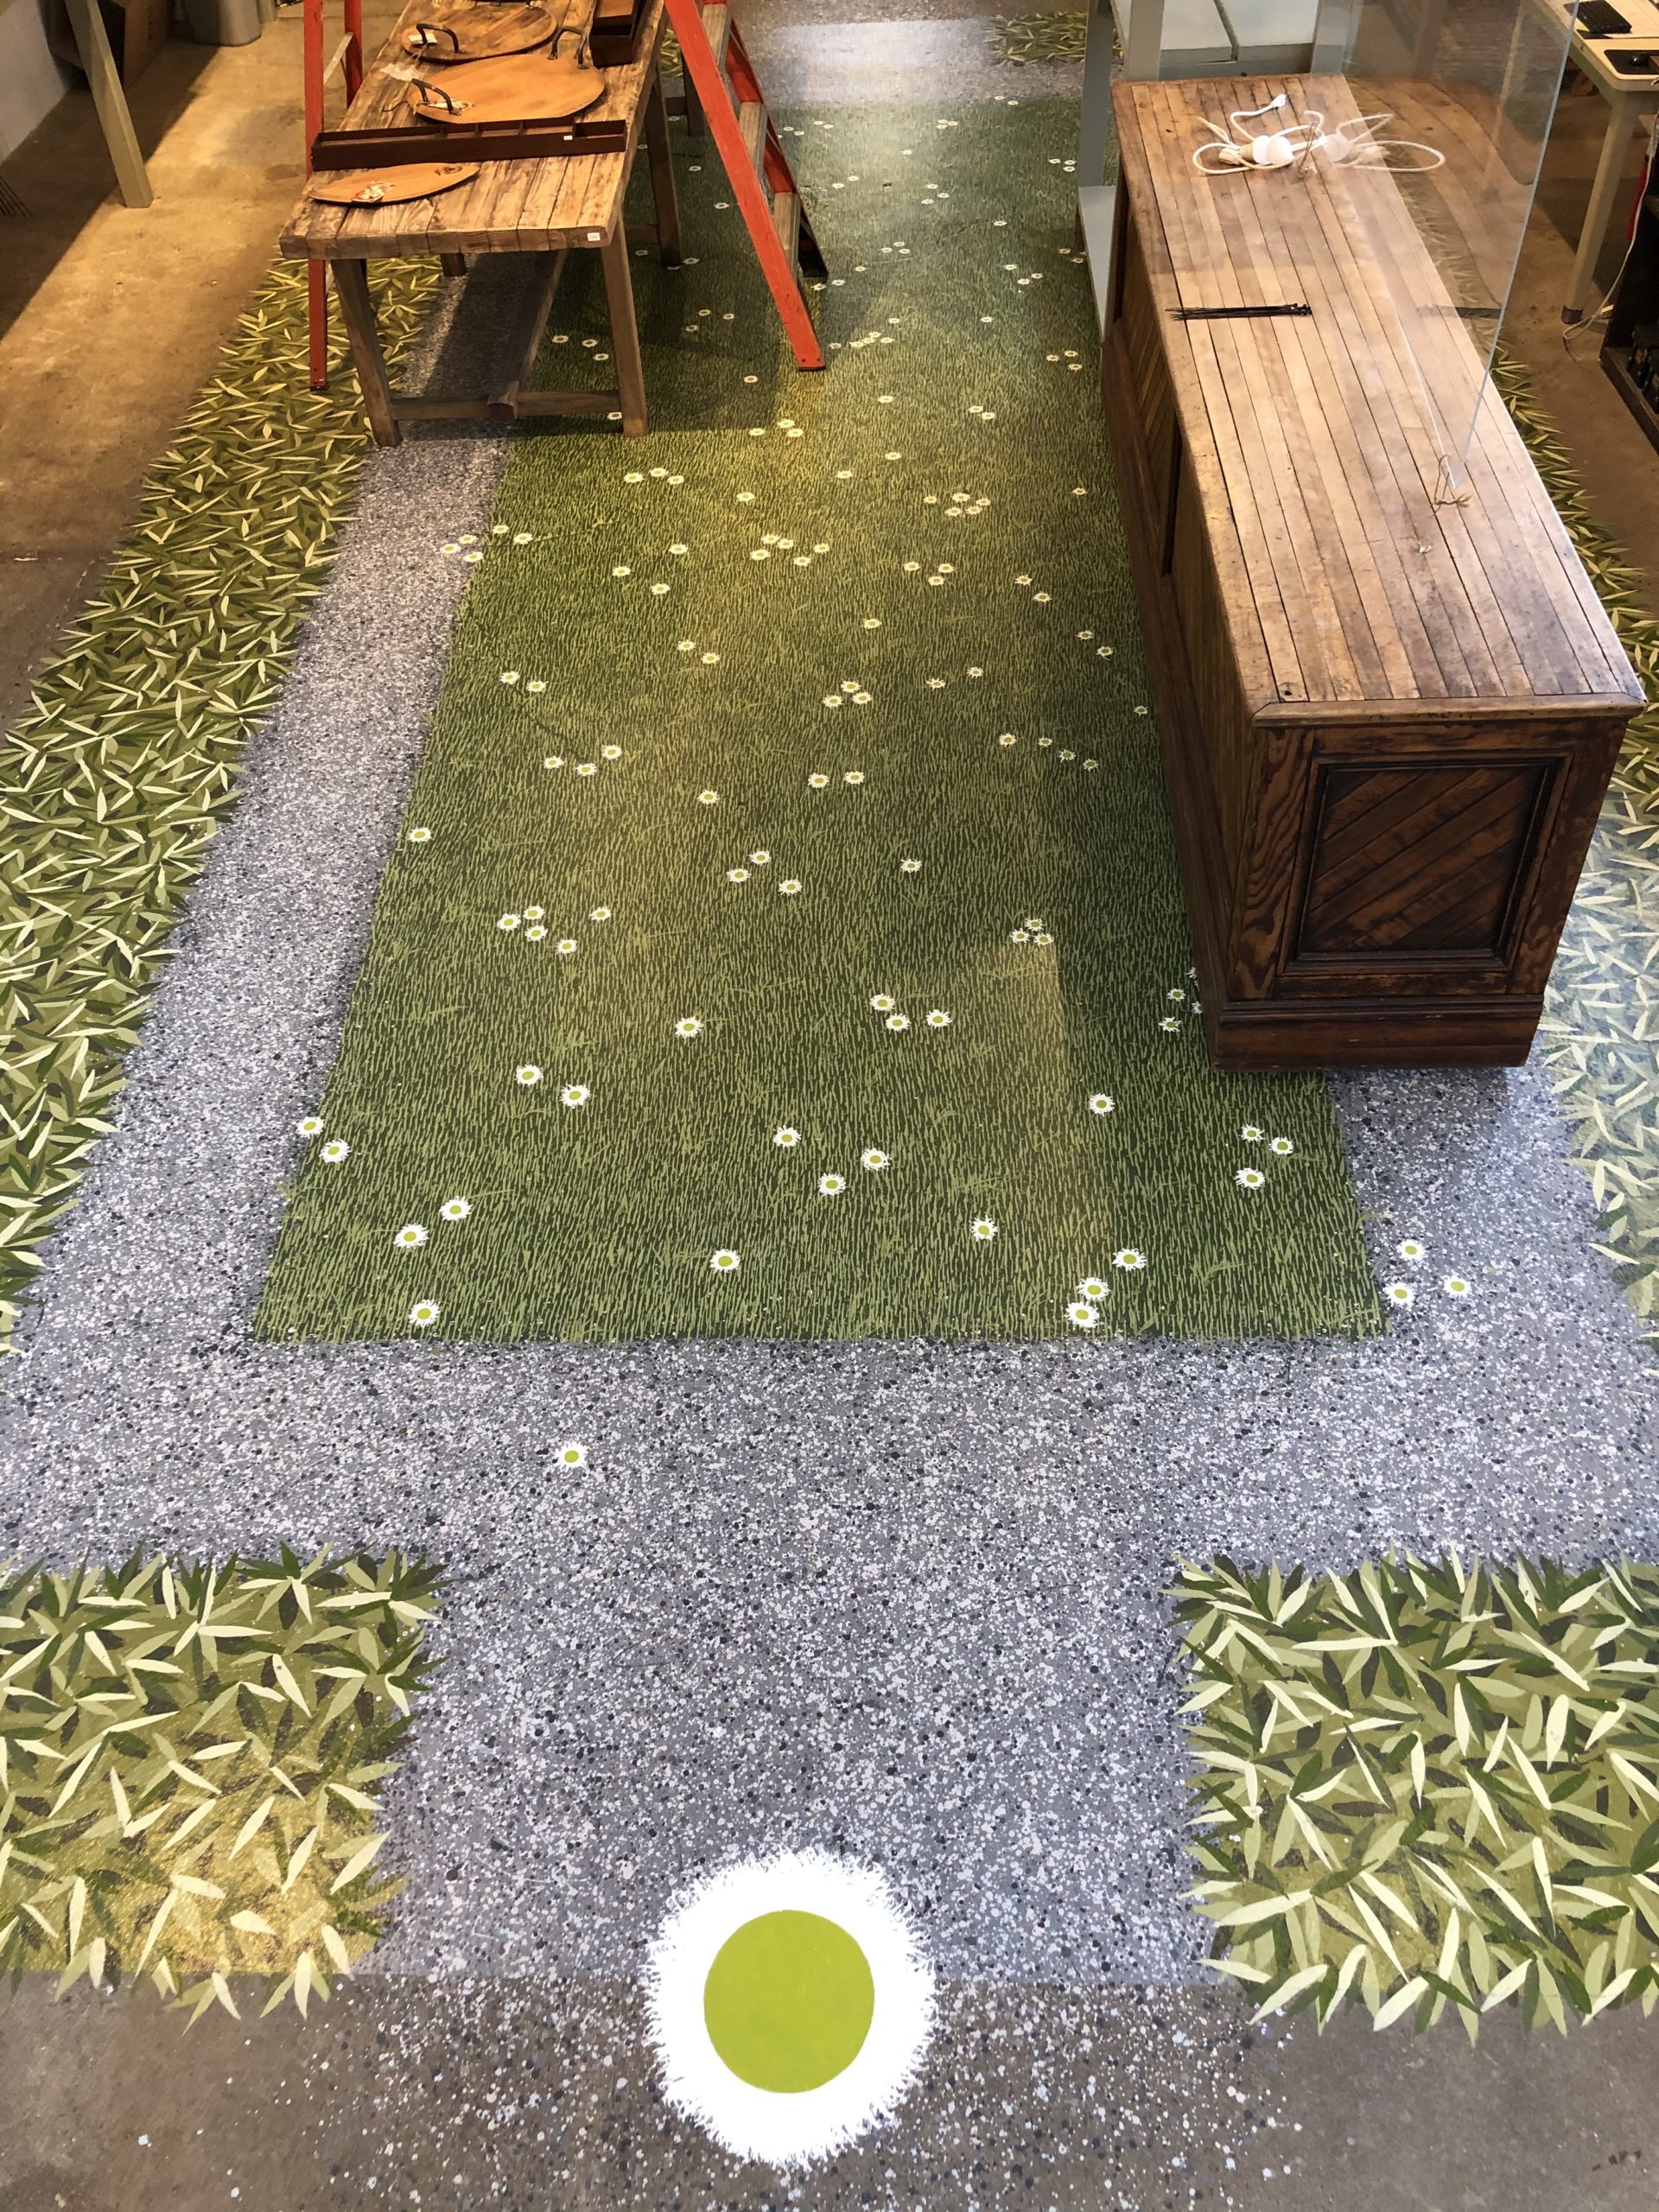
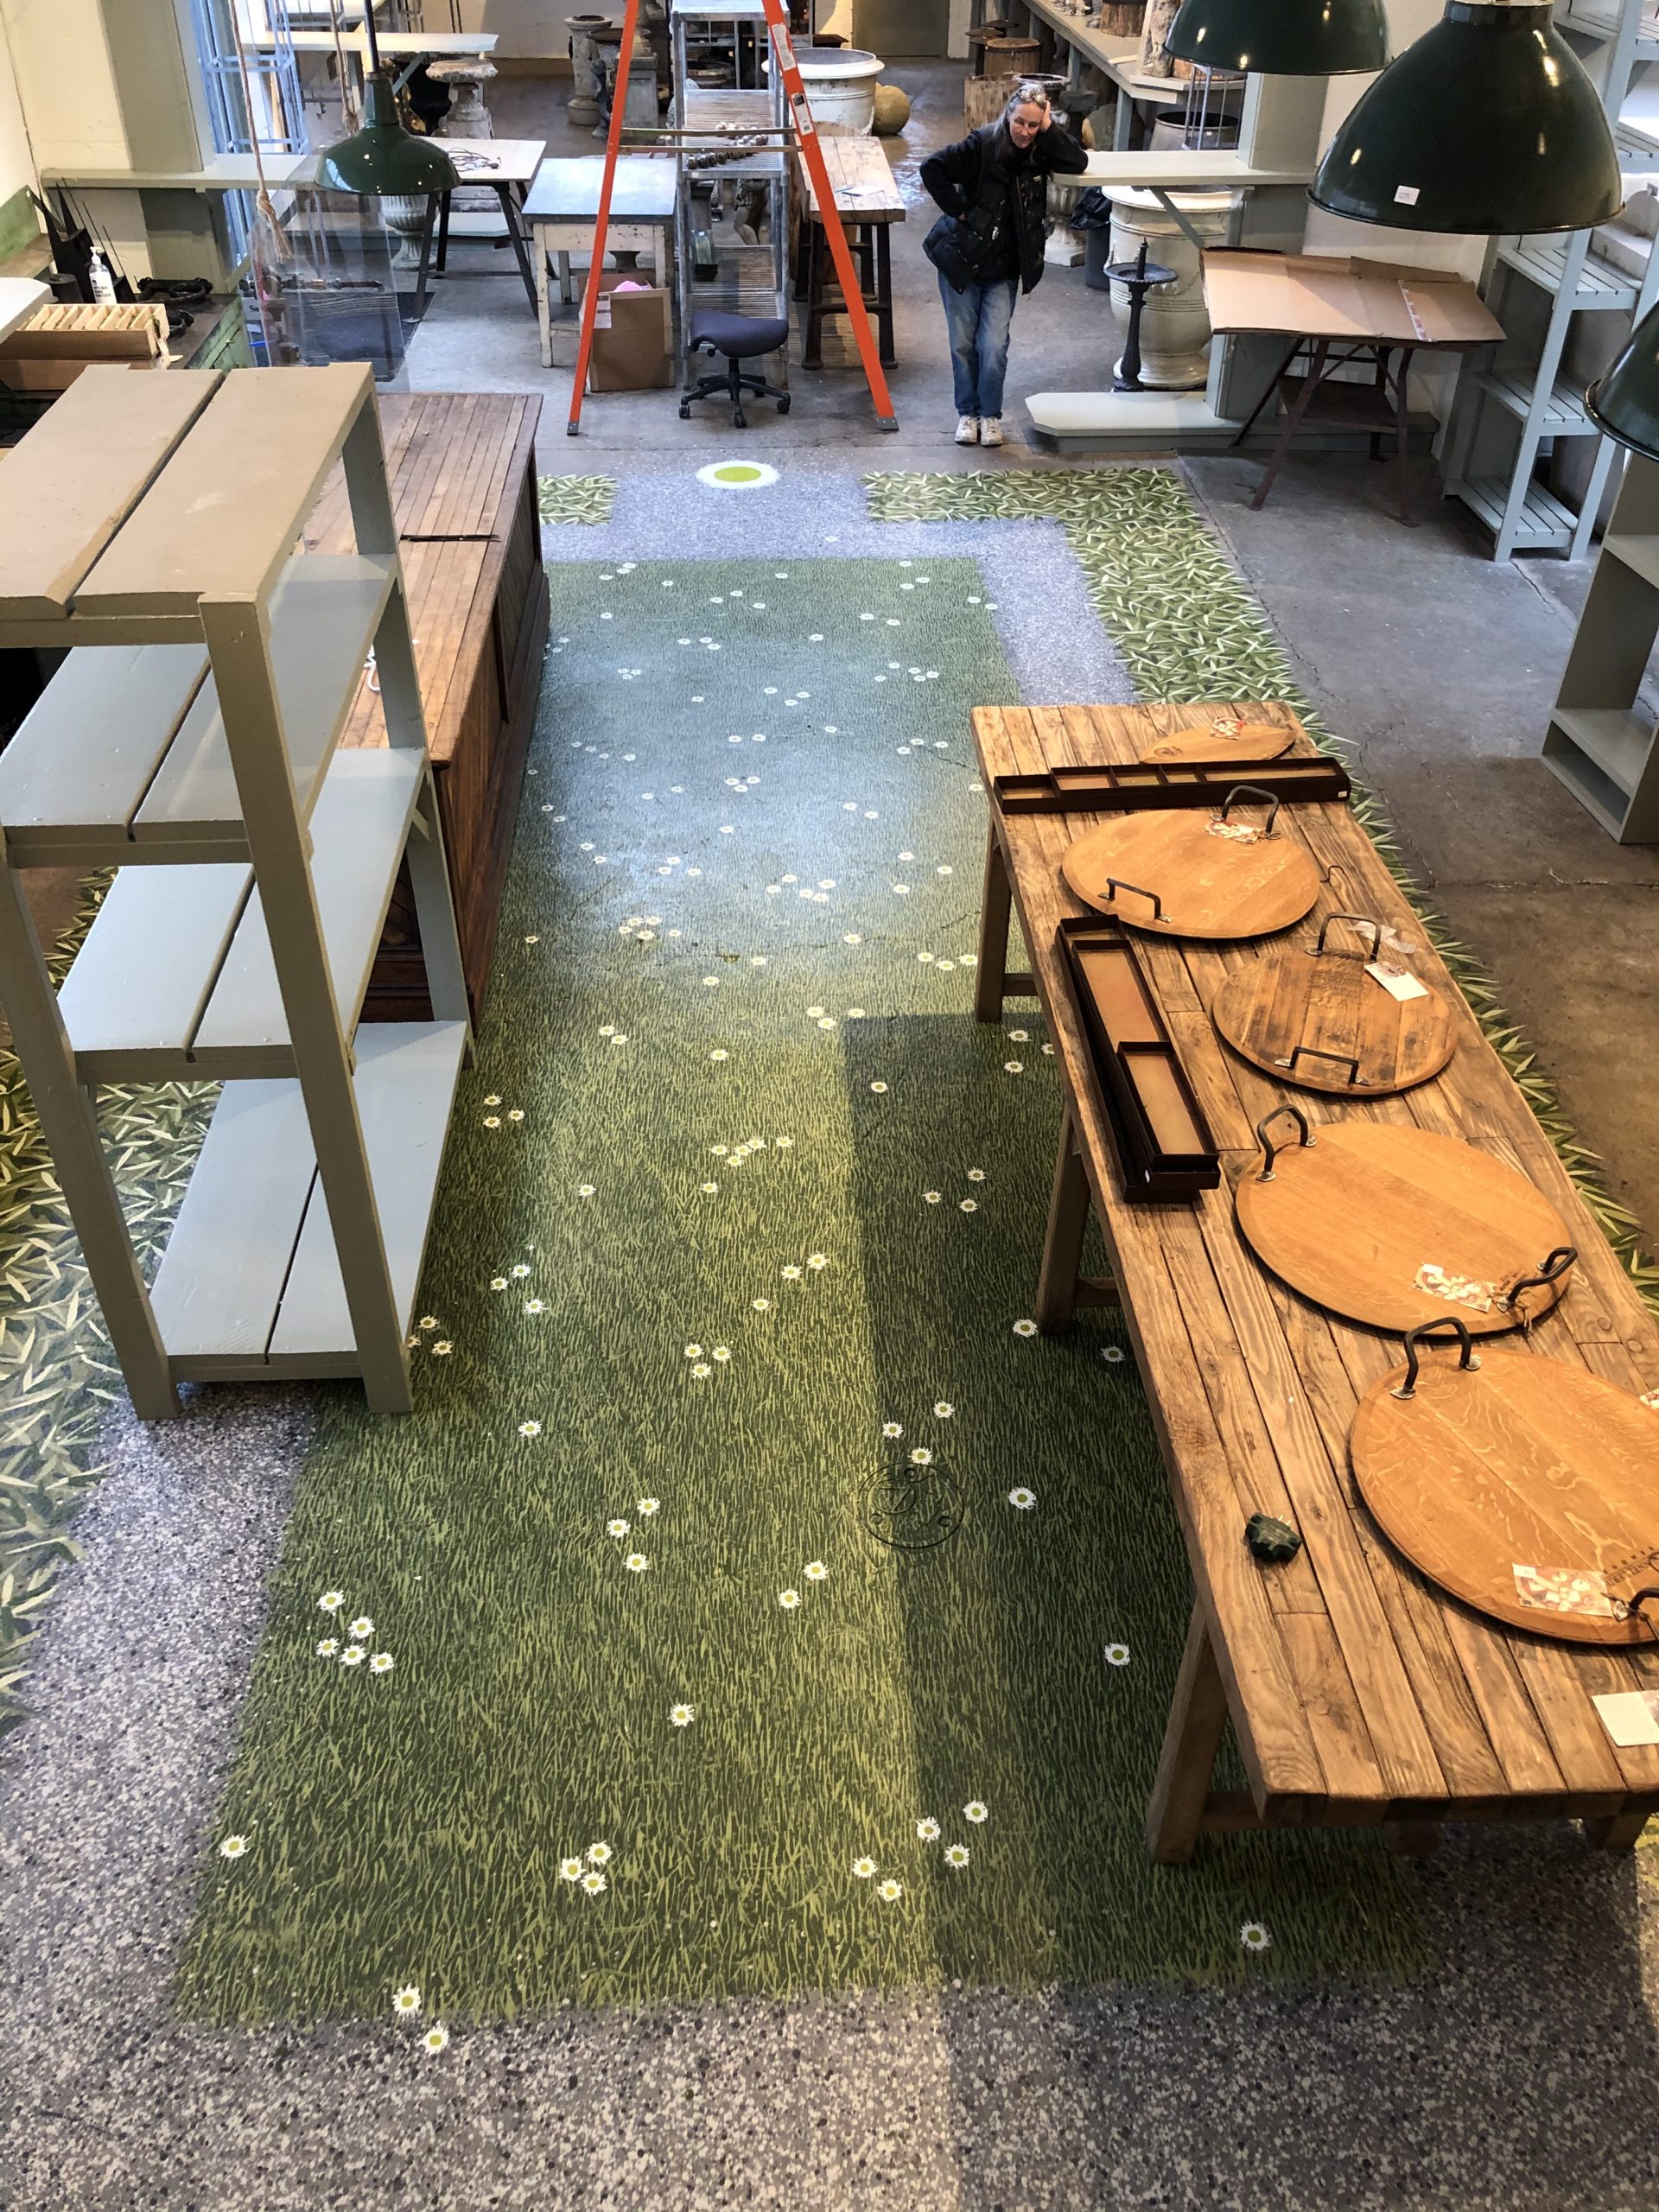
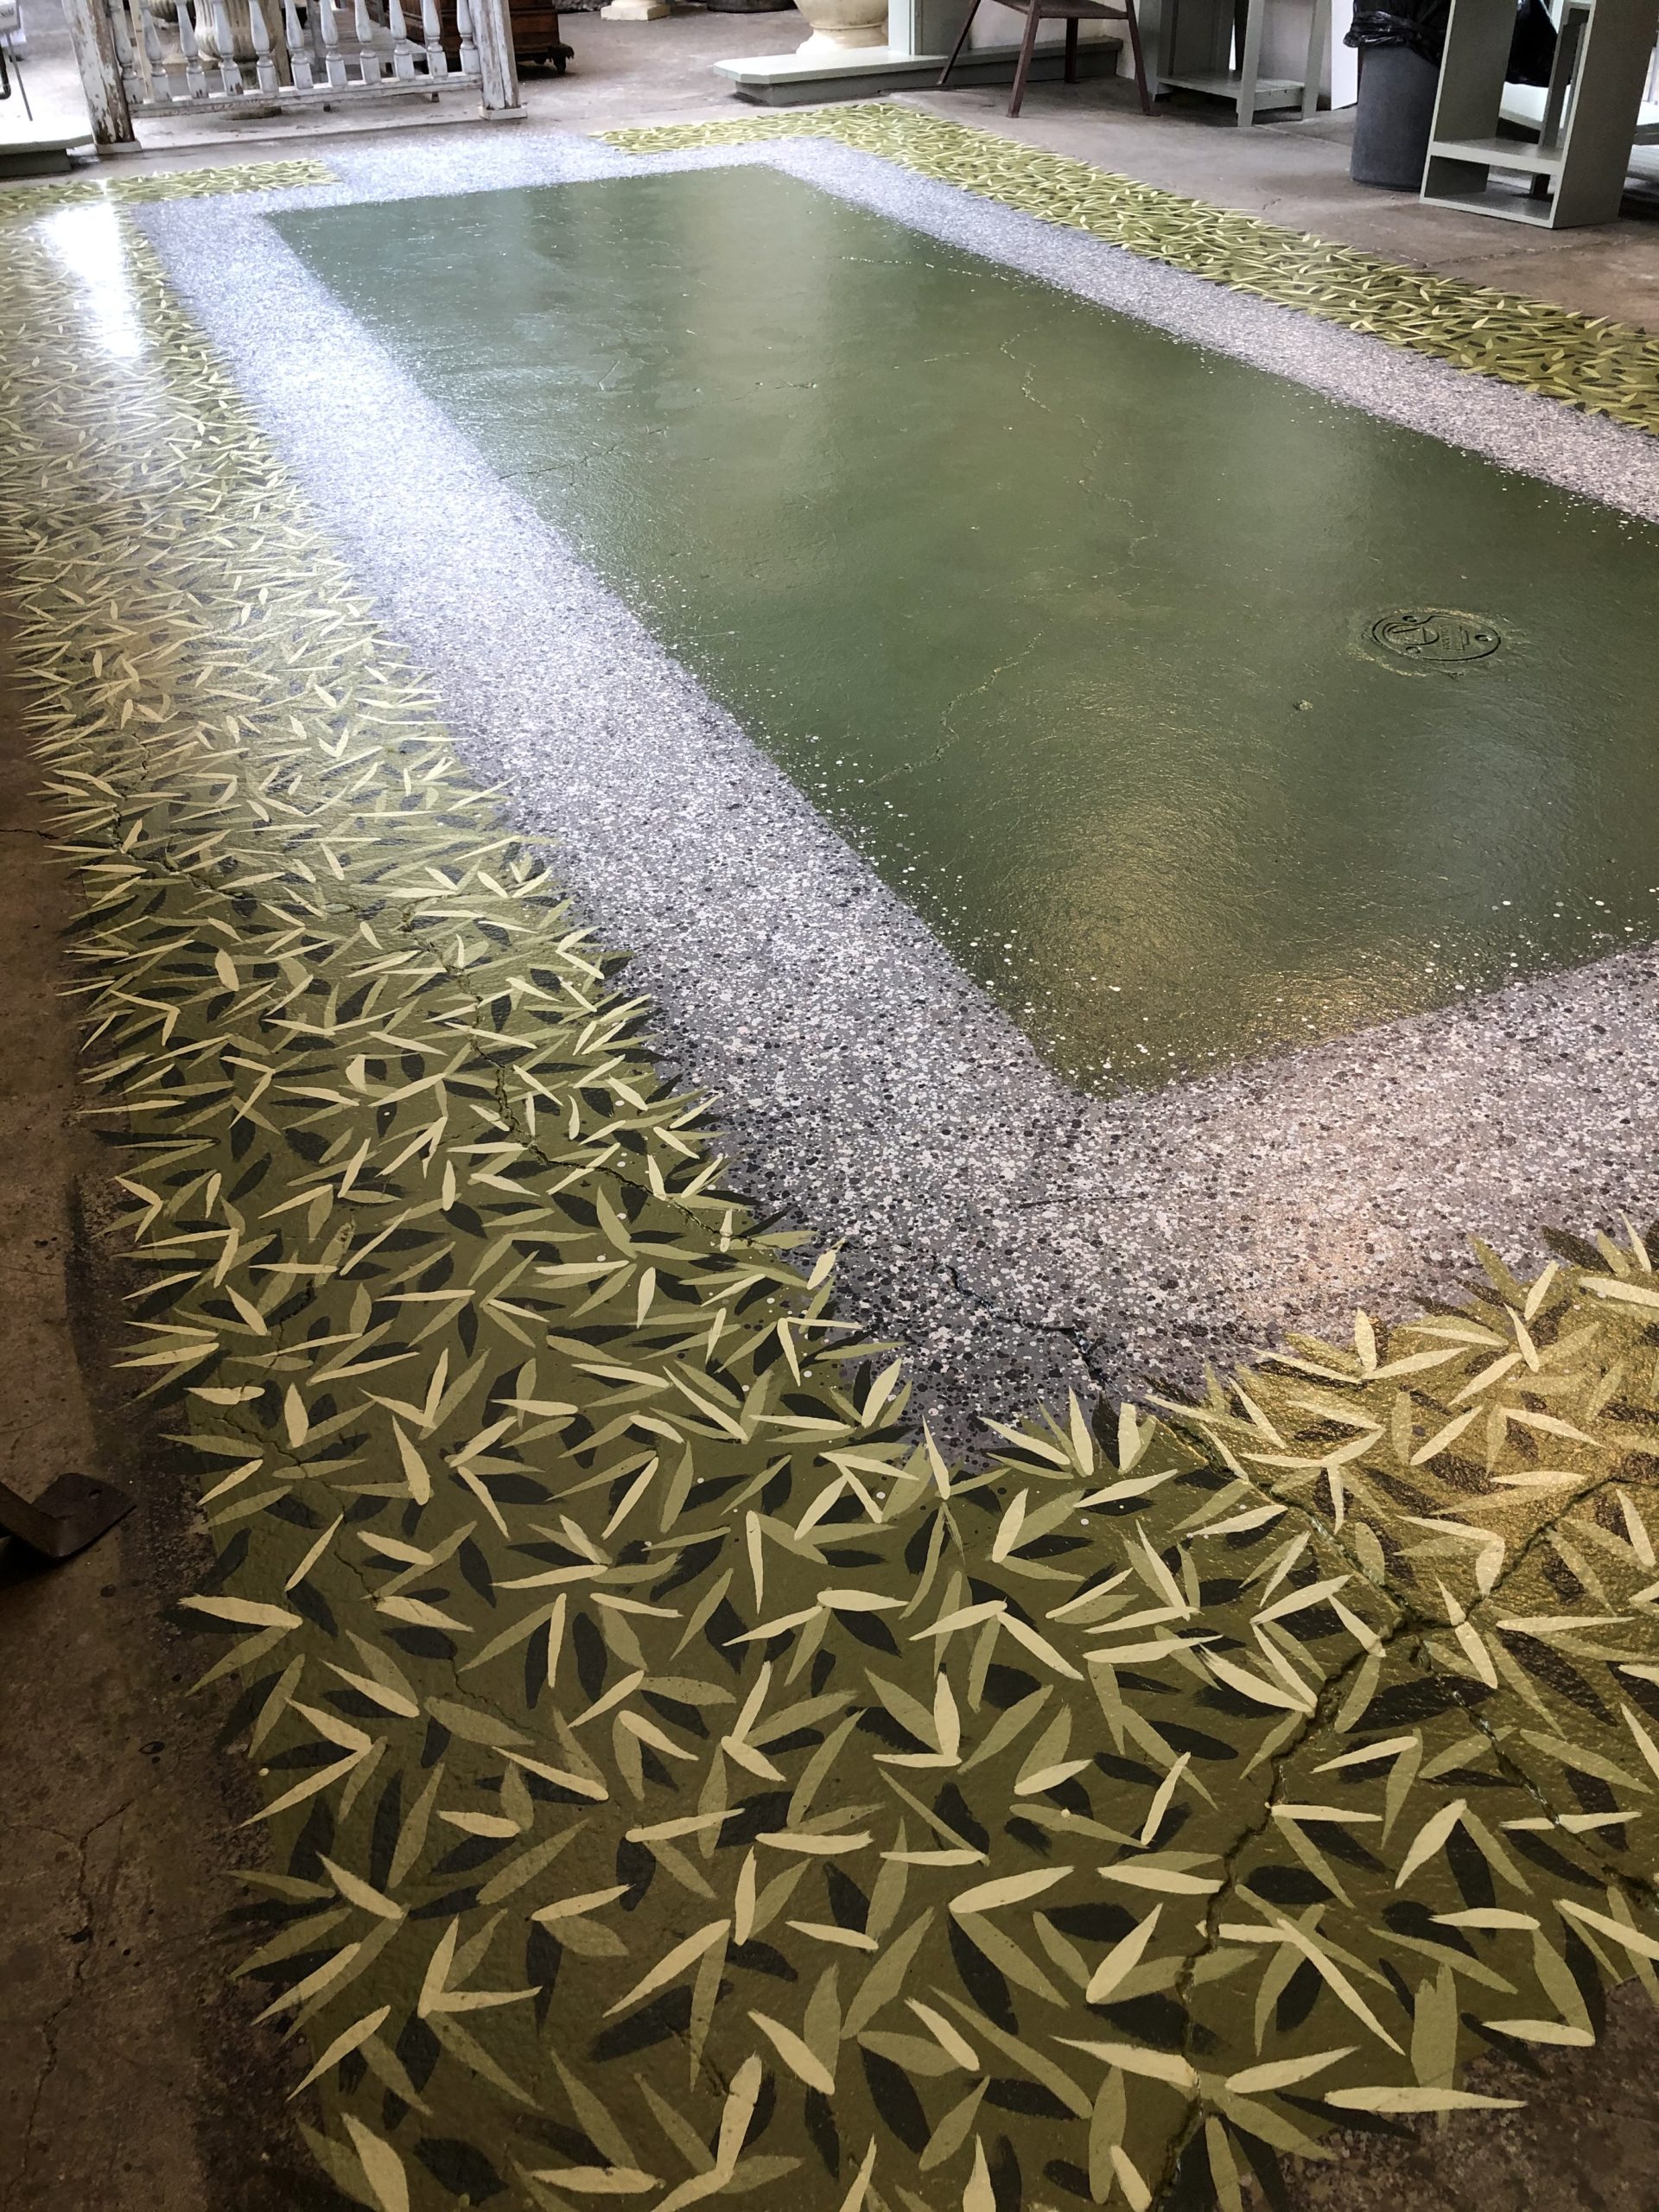
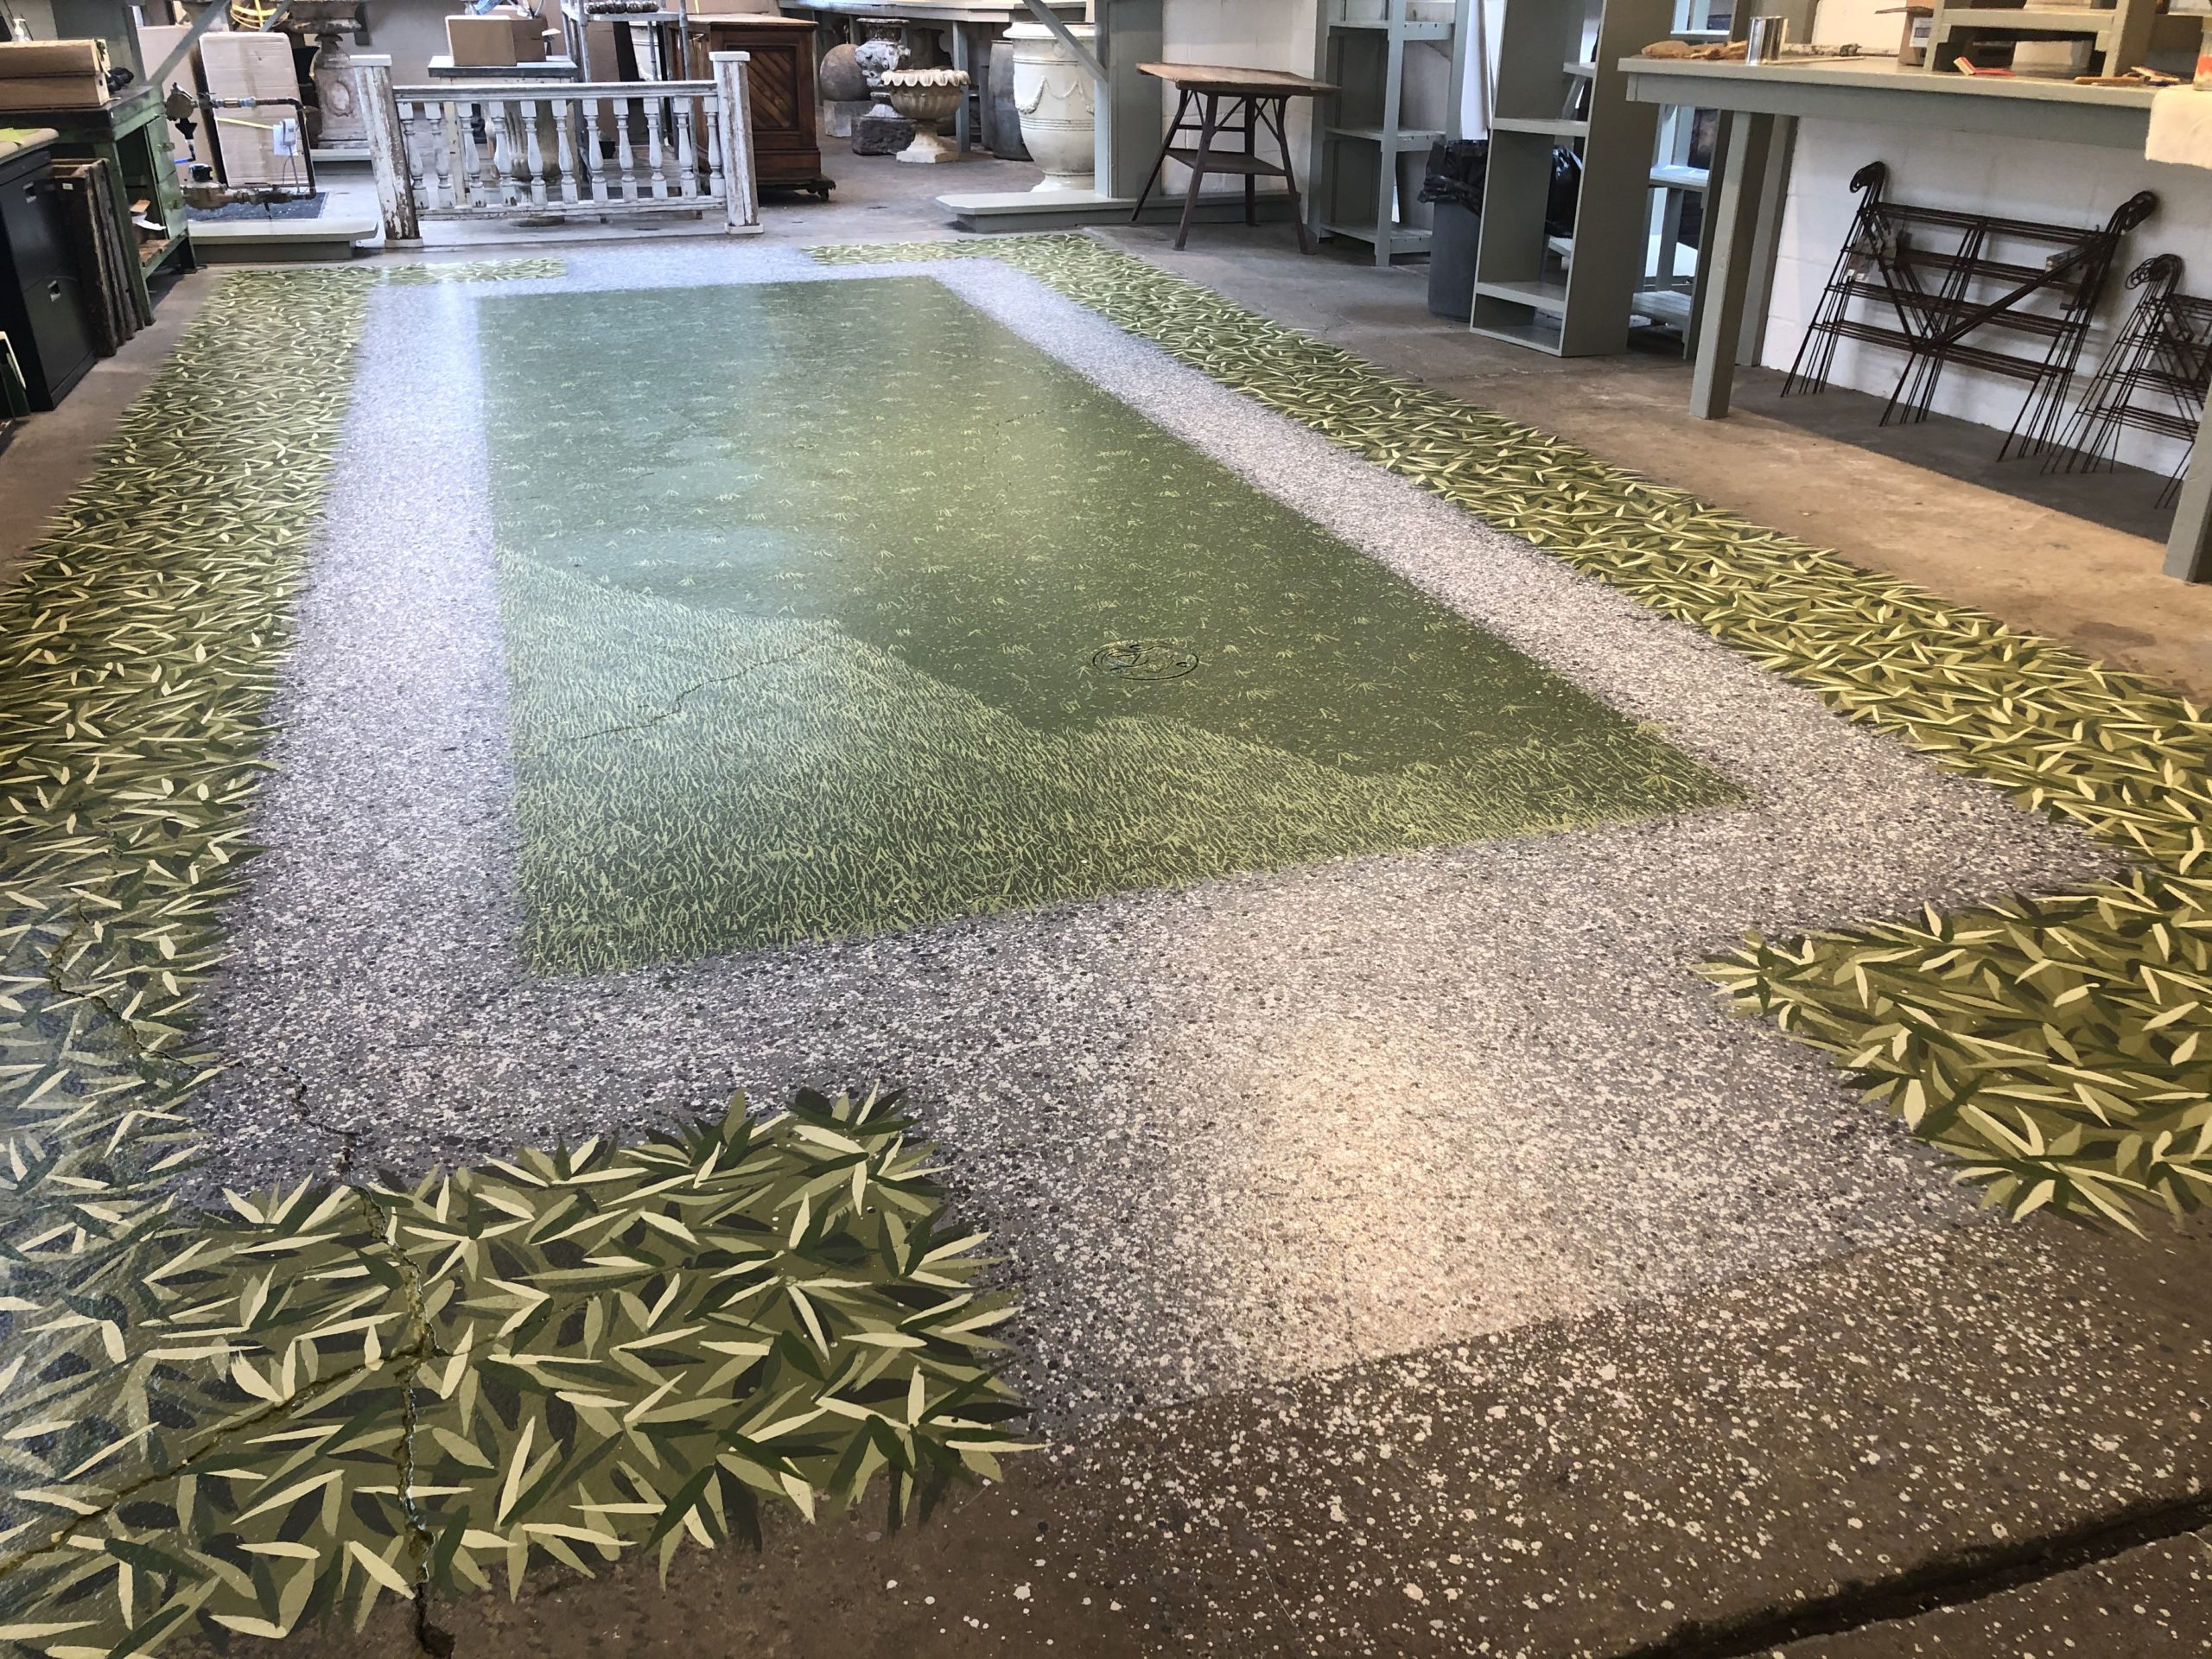
 This picture clearly shows the largest area of wear sustained by the previous floor. Part of our concrete block wall sprung a leak, and water had been sitting in this spot on and off for several years. The rest of that floor was in remarkably good condition. I ascribe that in total to the quality of the paint. Porter Paint, routinely used by sign painters, comes in a 100% acrylic formula which hardens much more than latex paint. Owned by PPG, Porter’s exterior Acri-Shield paint is exceptionally durable and comes in a vast number of colors. It is eminently strong enough to use as a floor paint. Happily, one of a few paint stores in Michigan that carries this paint is near us. See more about this great paint store here:
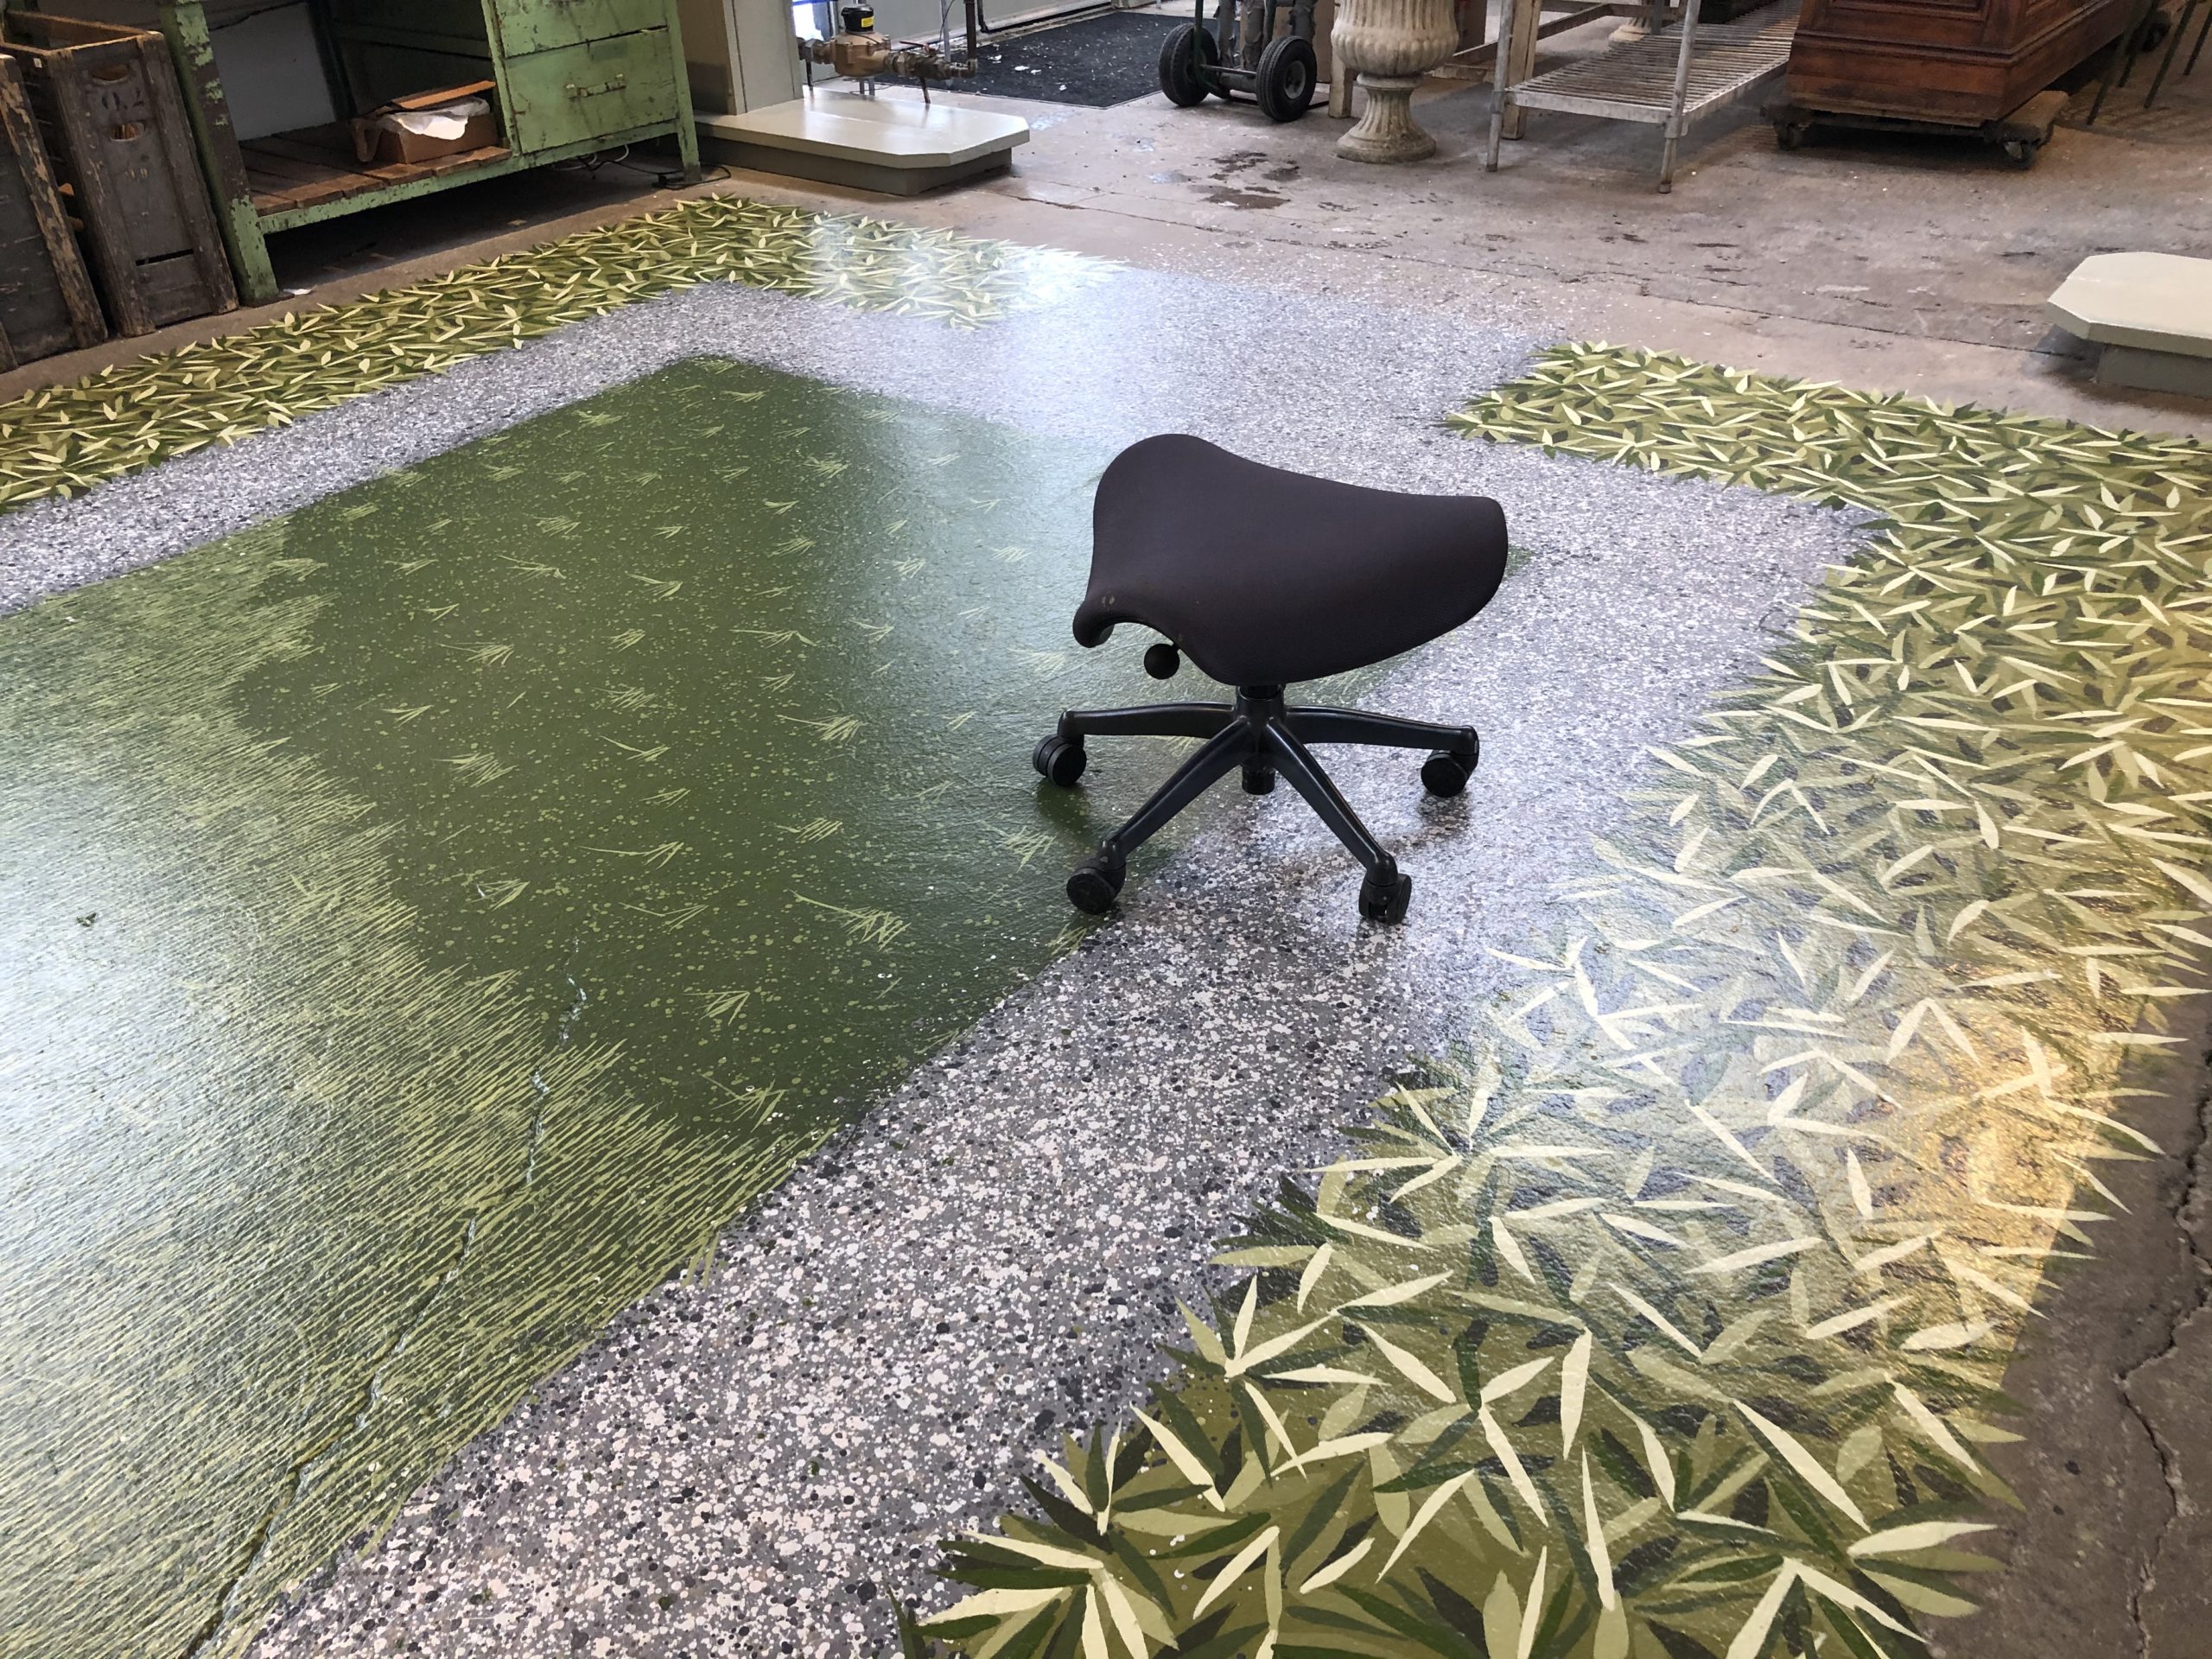
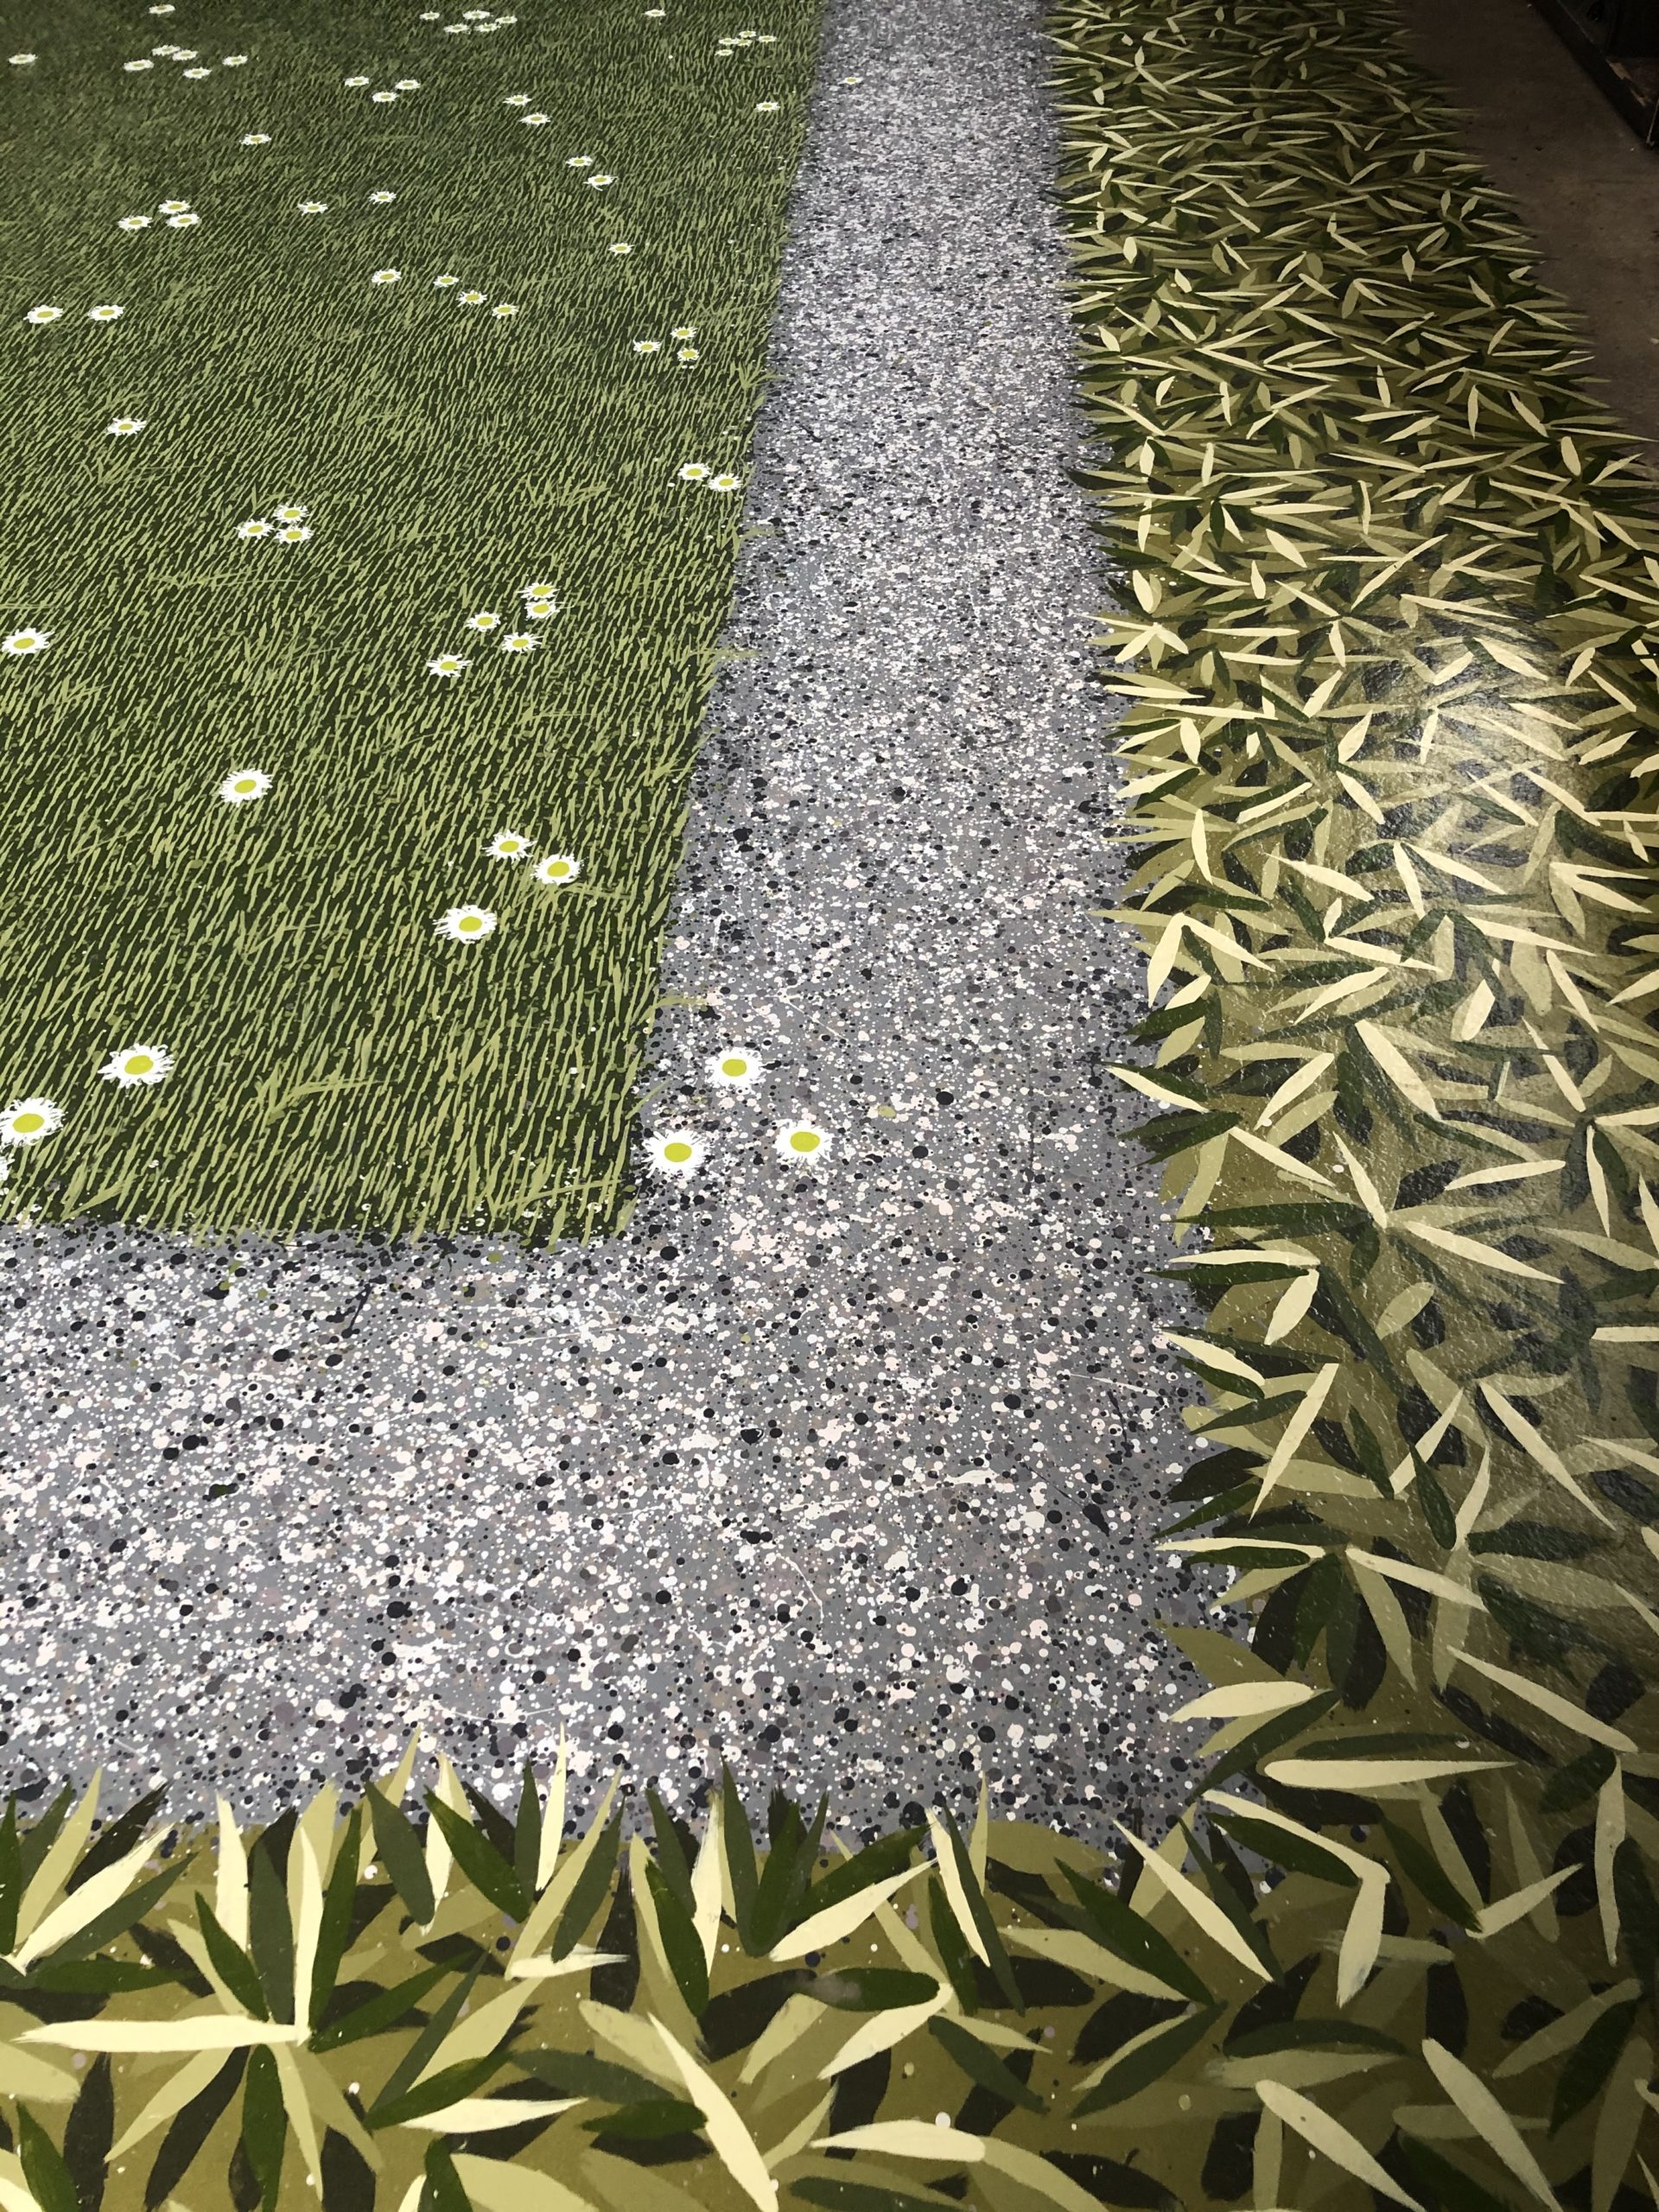
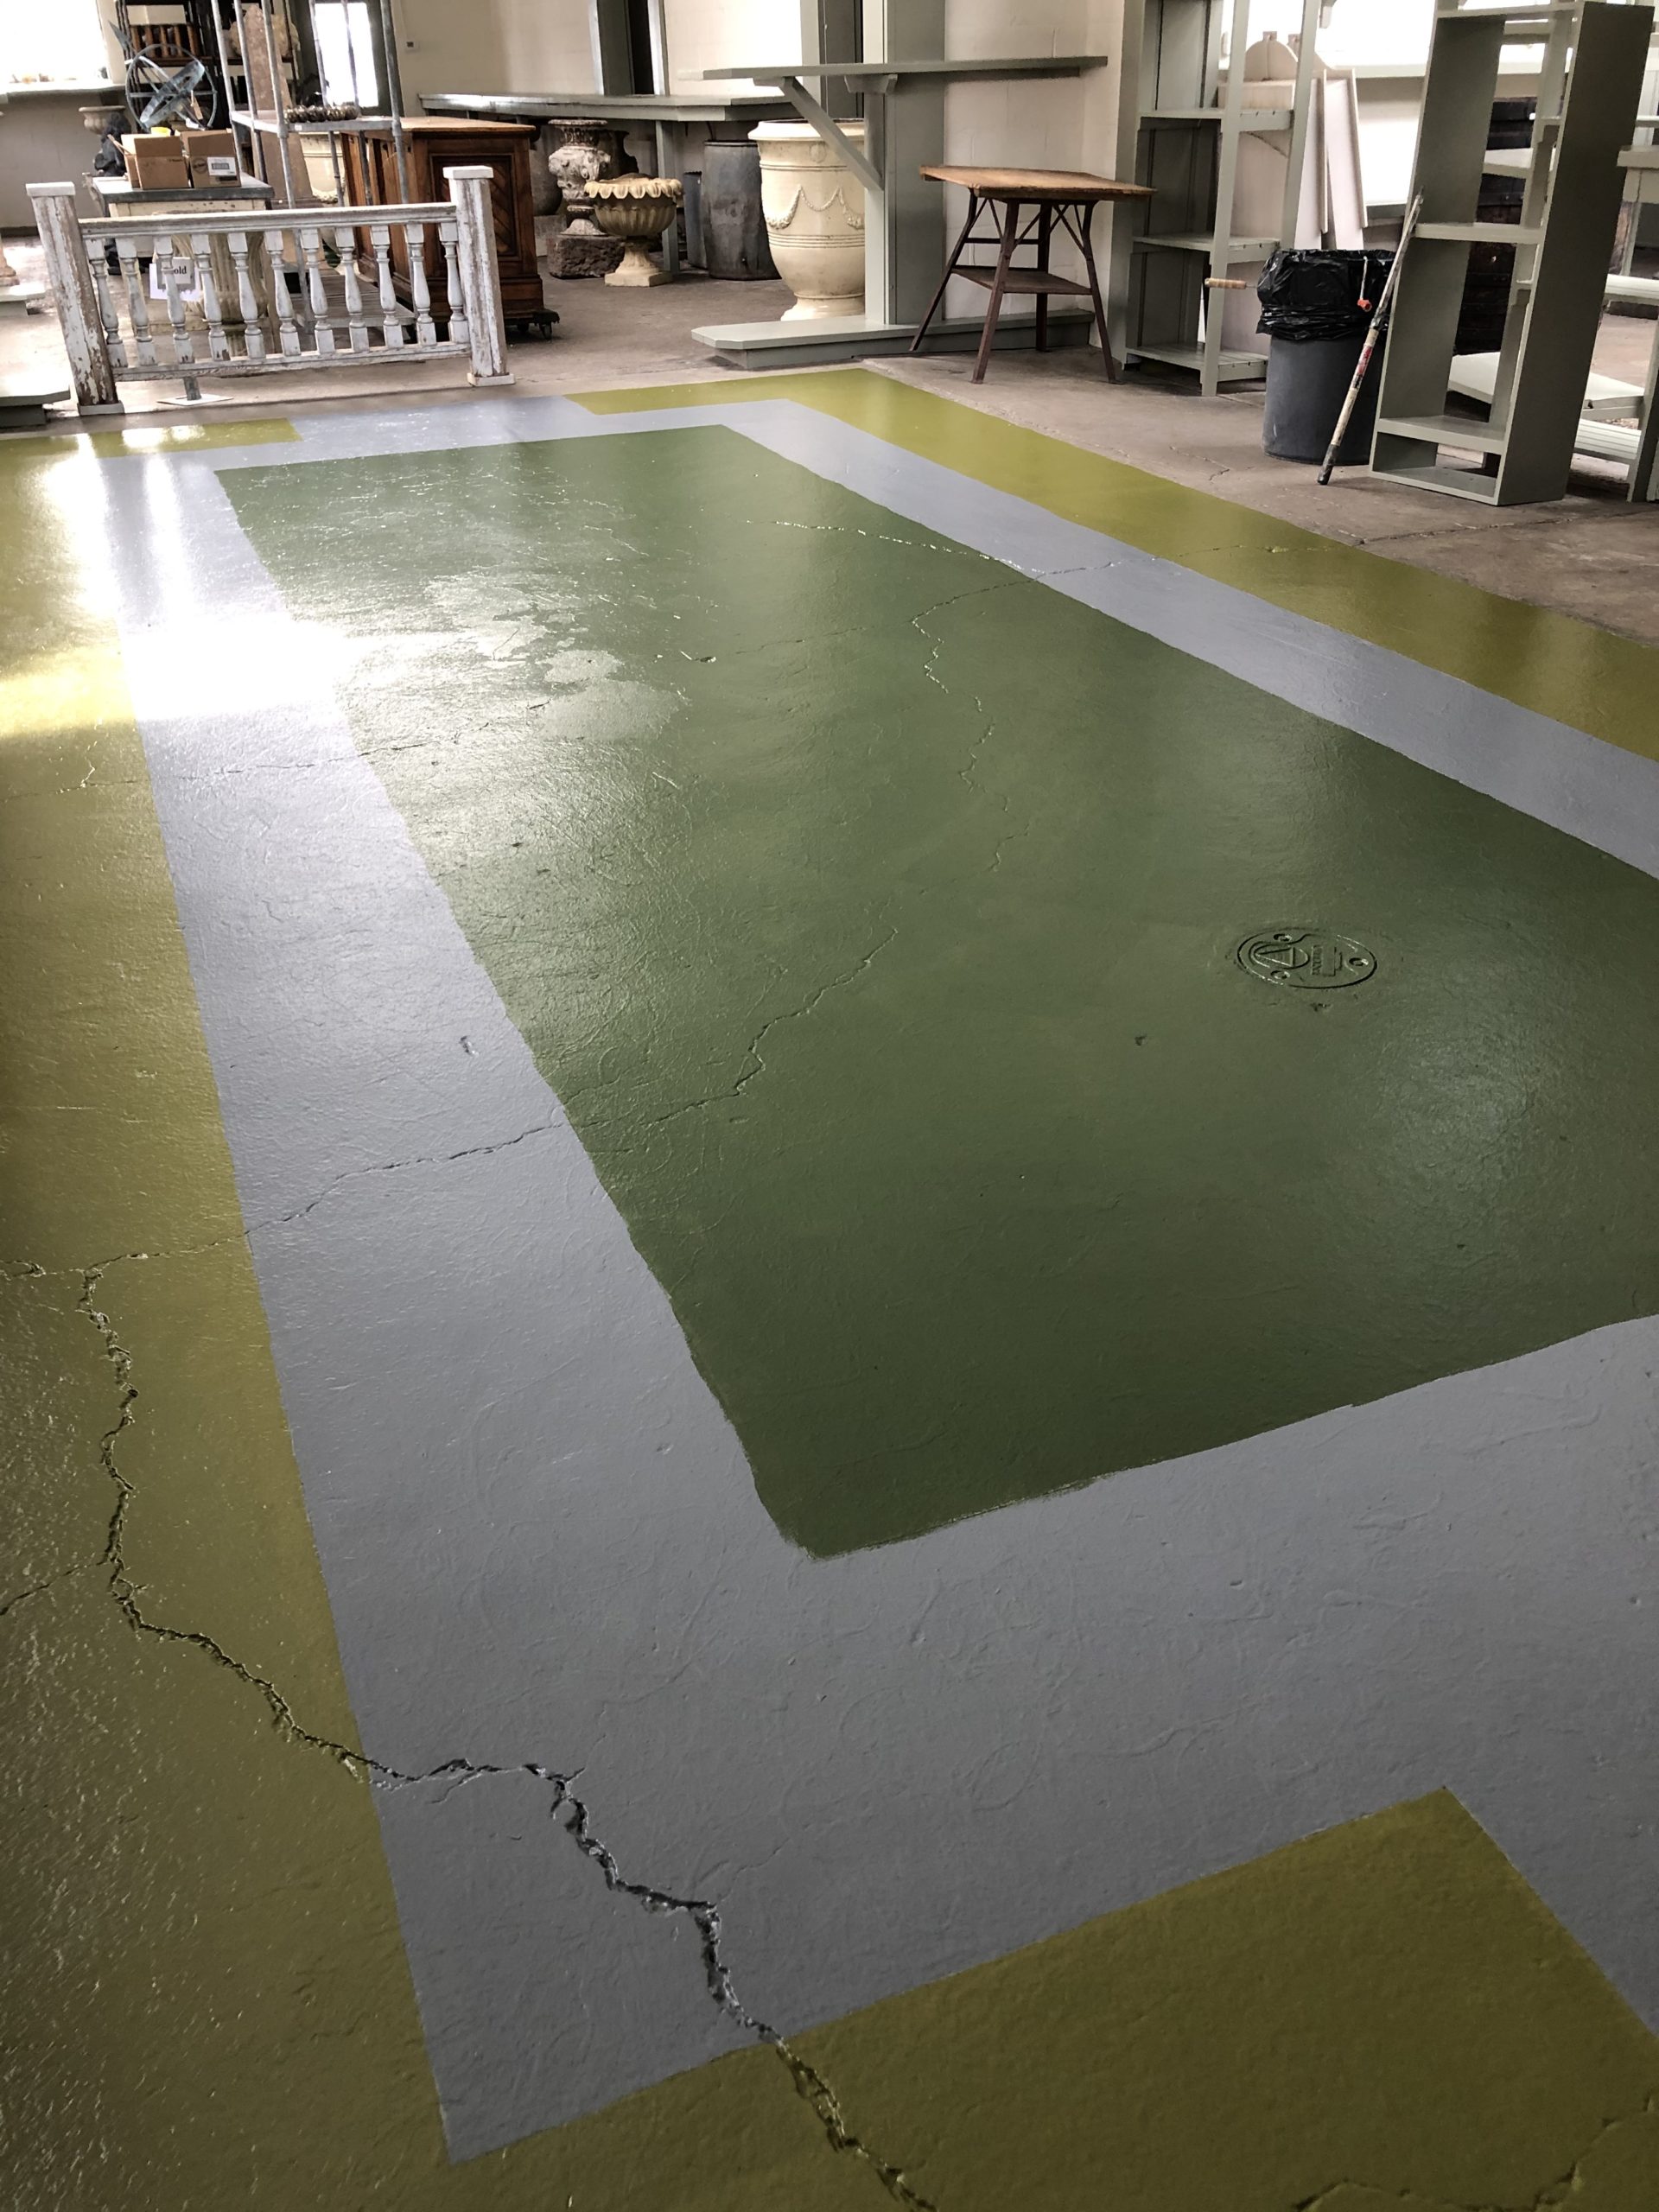
  The floor would have but a few elements. A grassy plane, admirably described by the French as a “tapis vert”, is as elemental a garden as any. And it is the starting point for any number of more elaborate expressions. That green square is a prominent part of the logo for the Works. In additional to the green plane, there would be a surrounding gravel path, and a planted area marked by large leaves to enclose that gravel. Painting the gravel was the first order of business, as plants from both sides would likely overlap onto it.
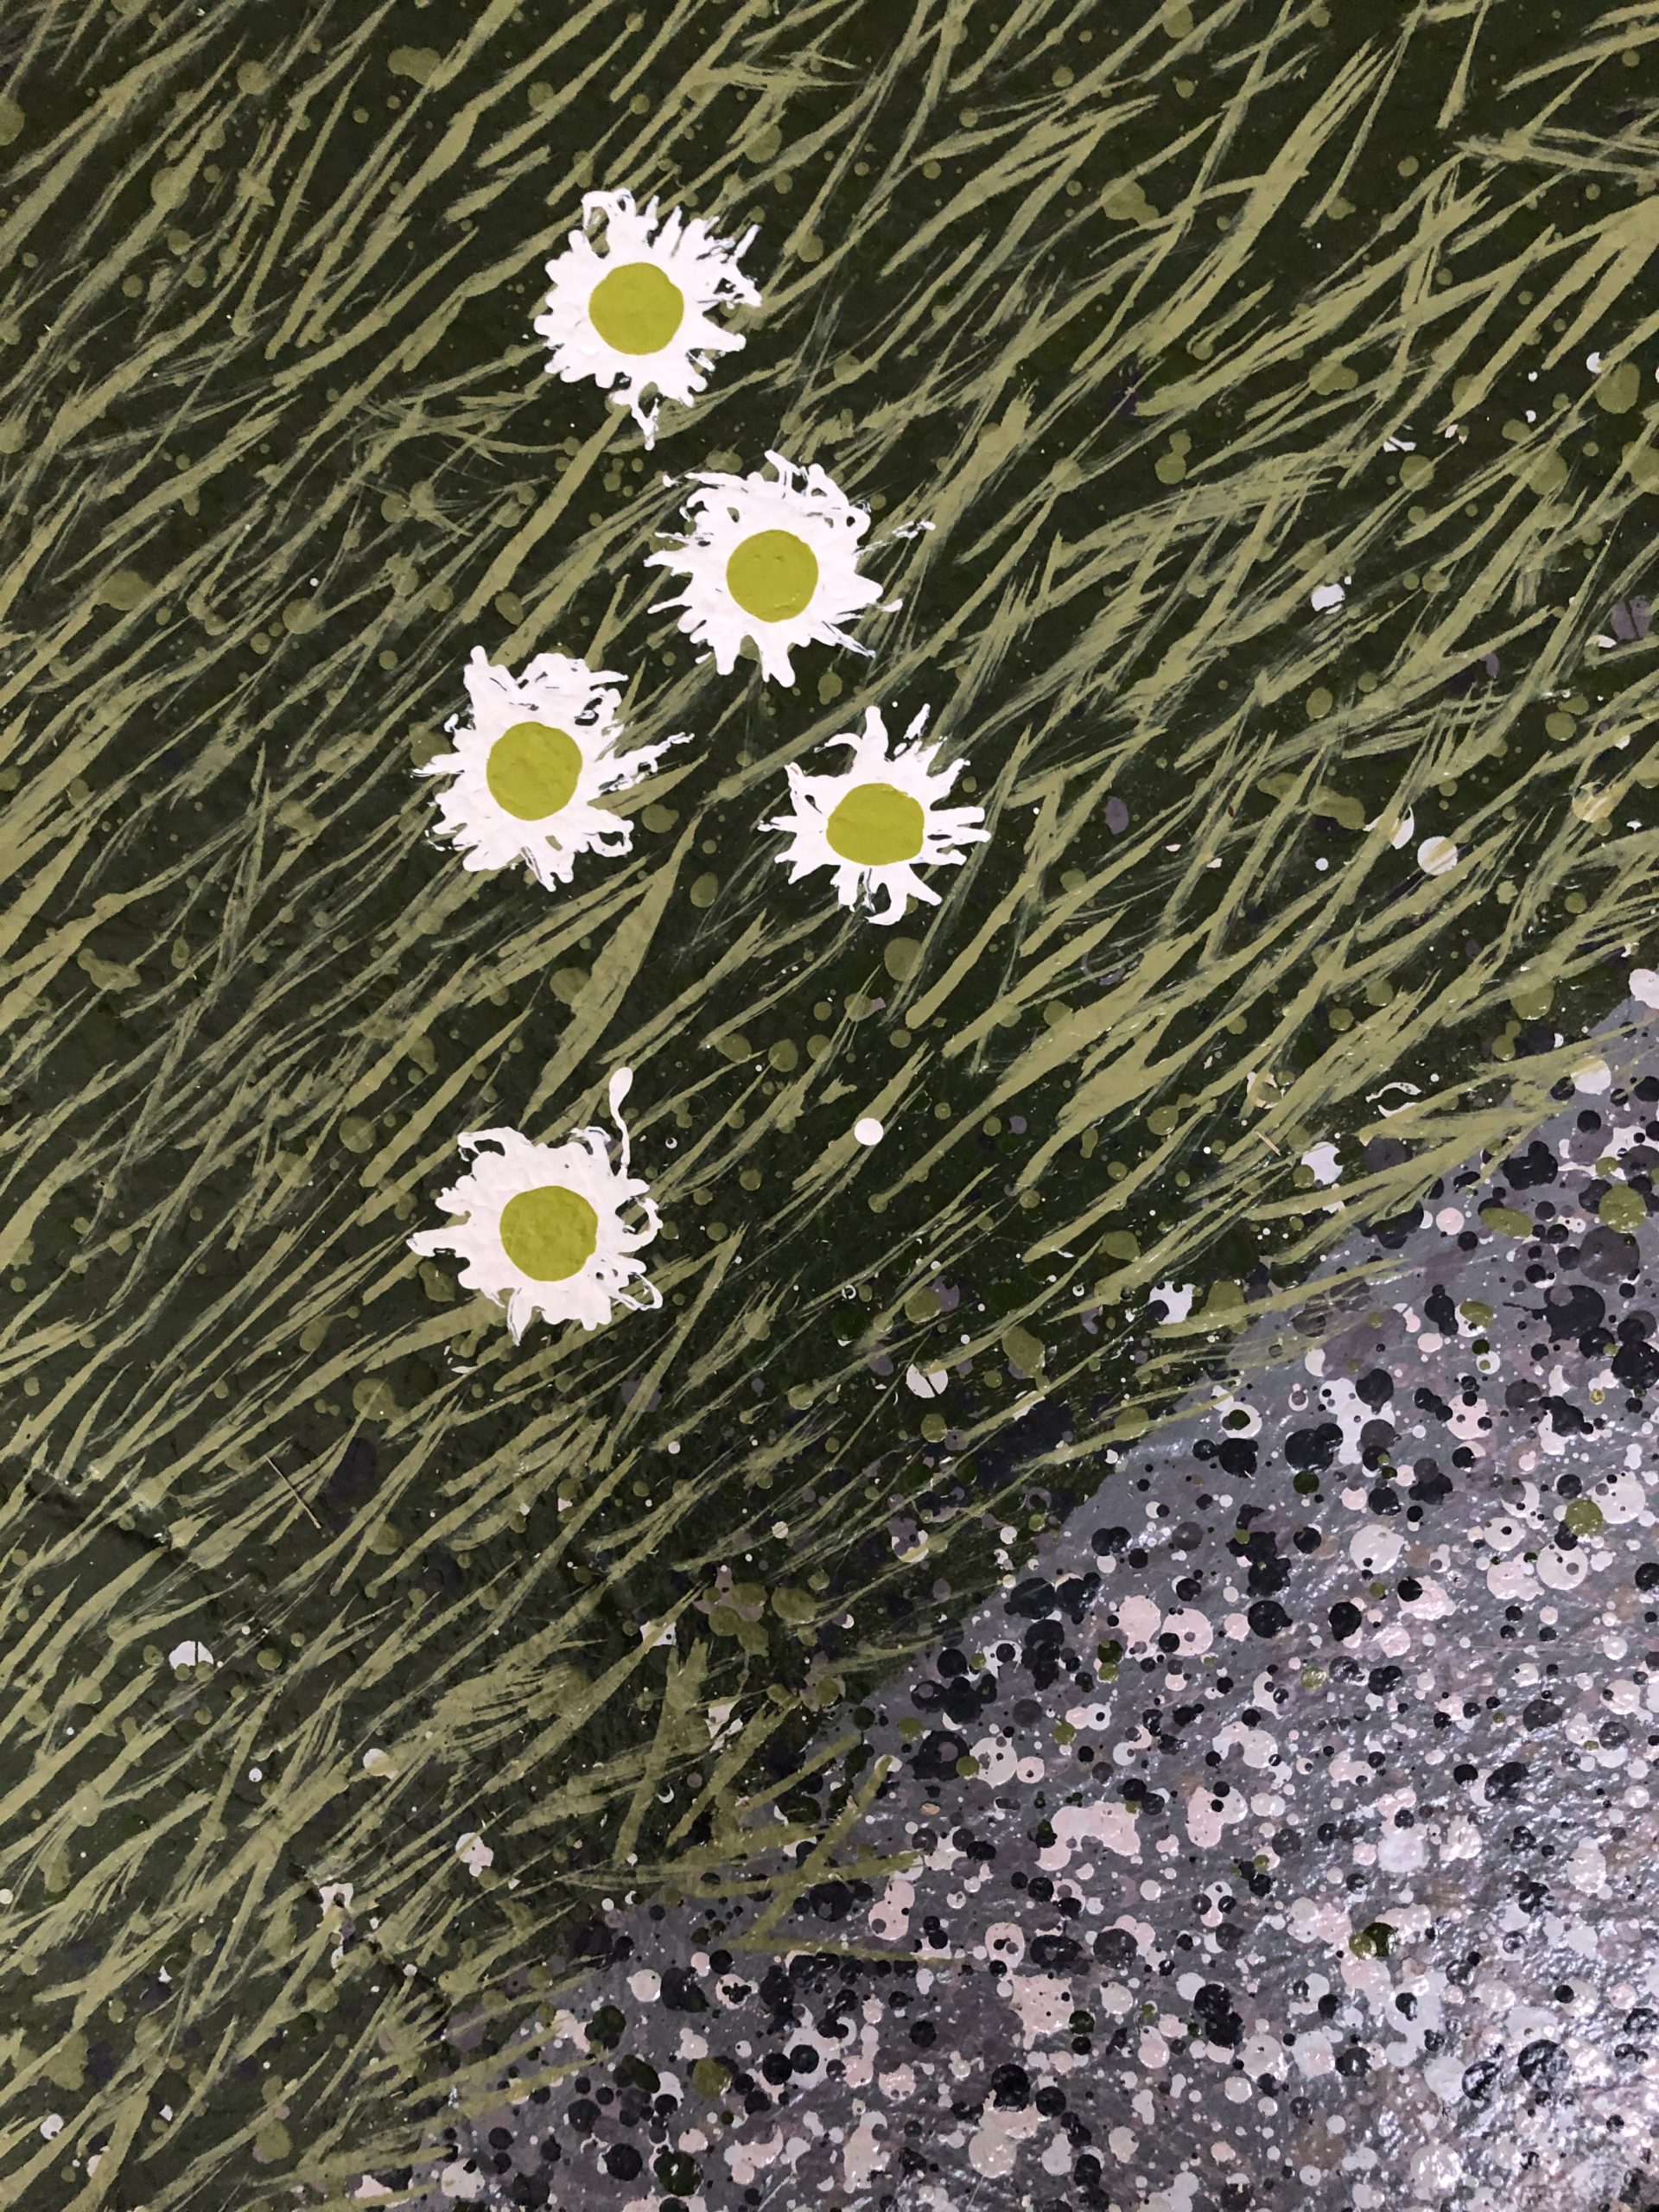
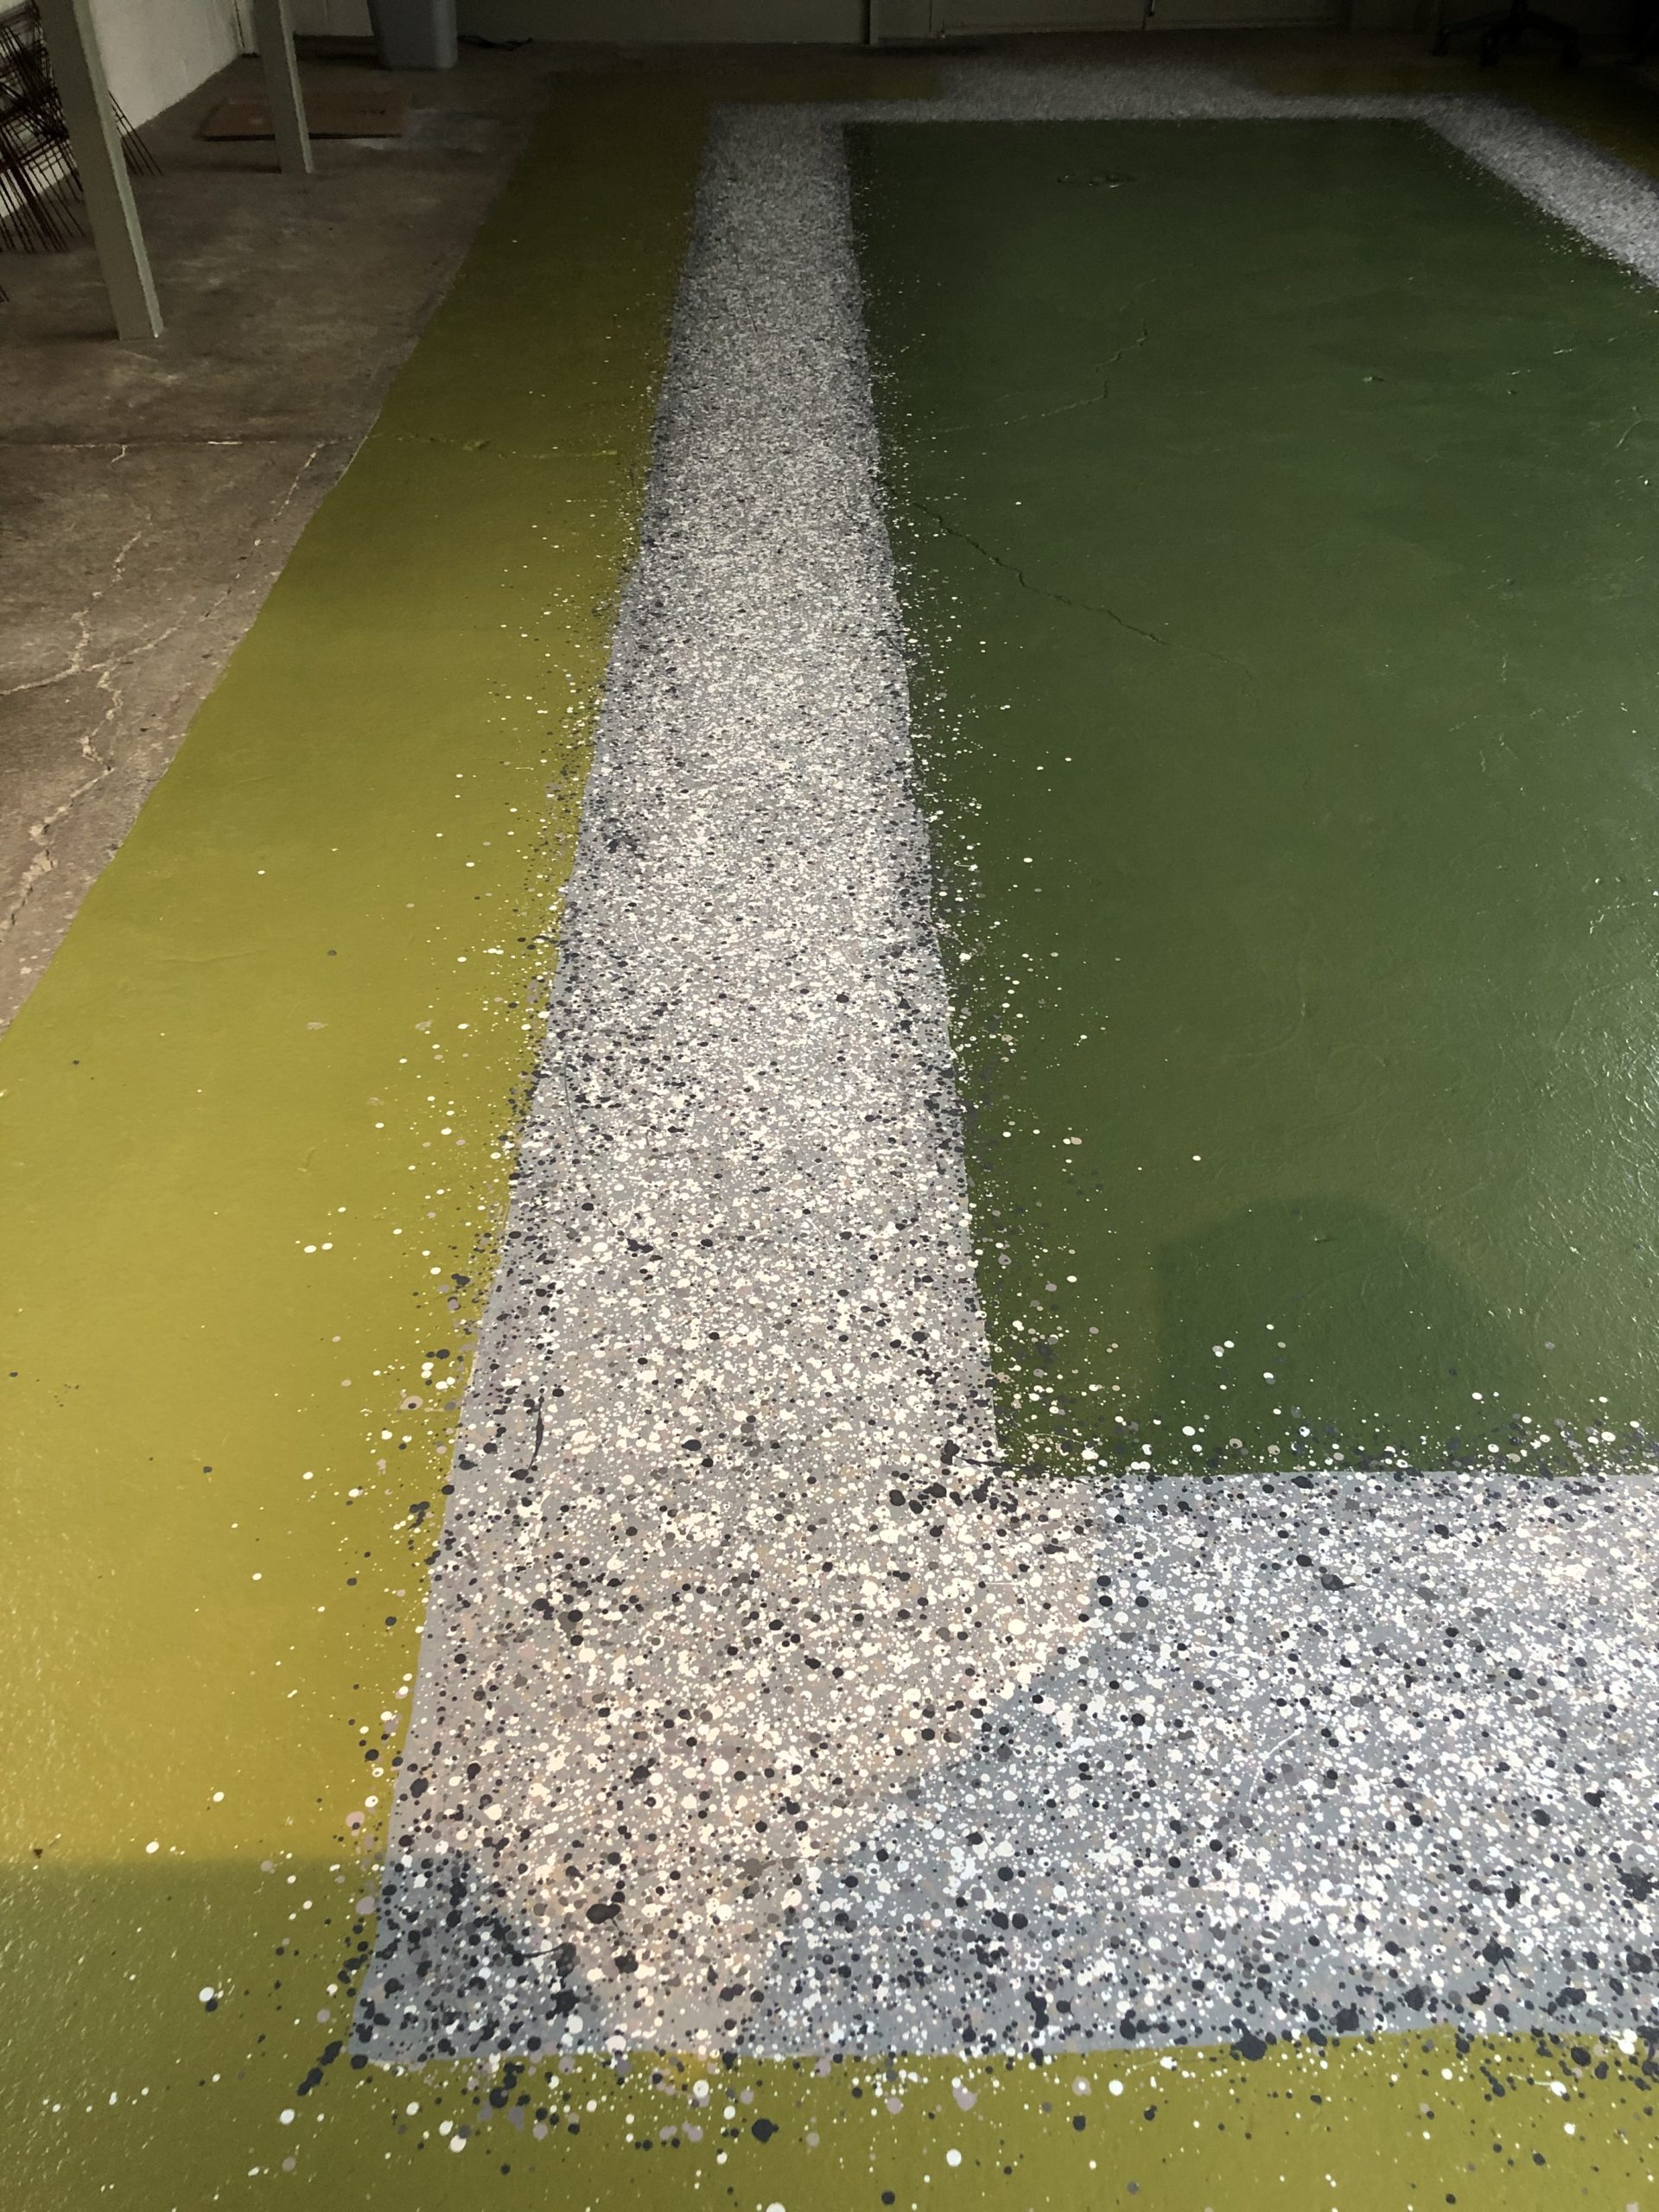 This would be the easiest part of the painting. A series of colors would be dripped on to the floor surface from a wood plant marker. The only finesse to this part would be slowly thinning the paint so it would drip at a reasonable rate-not too slow, and not too fast. Of course there was plenty of wrist and shoulder action, so the drips would be spaced out.
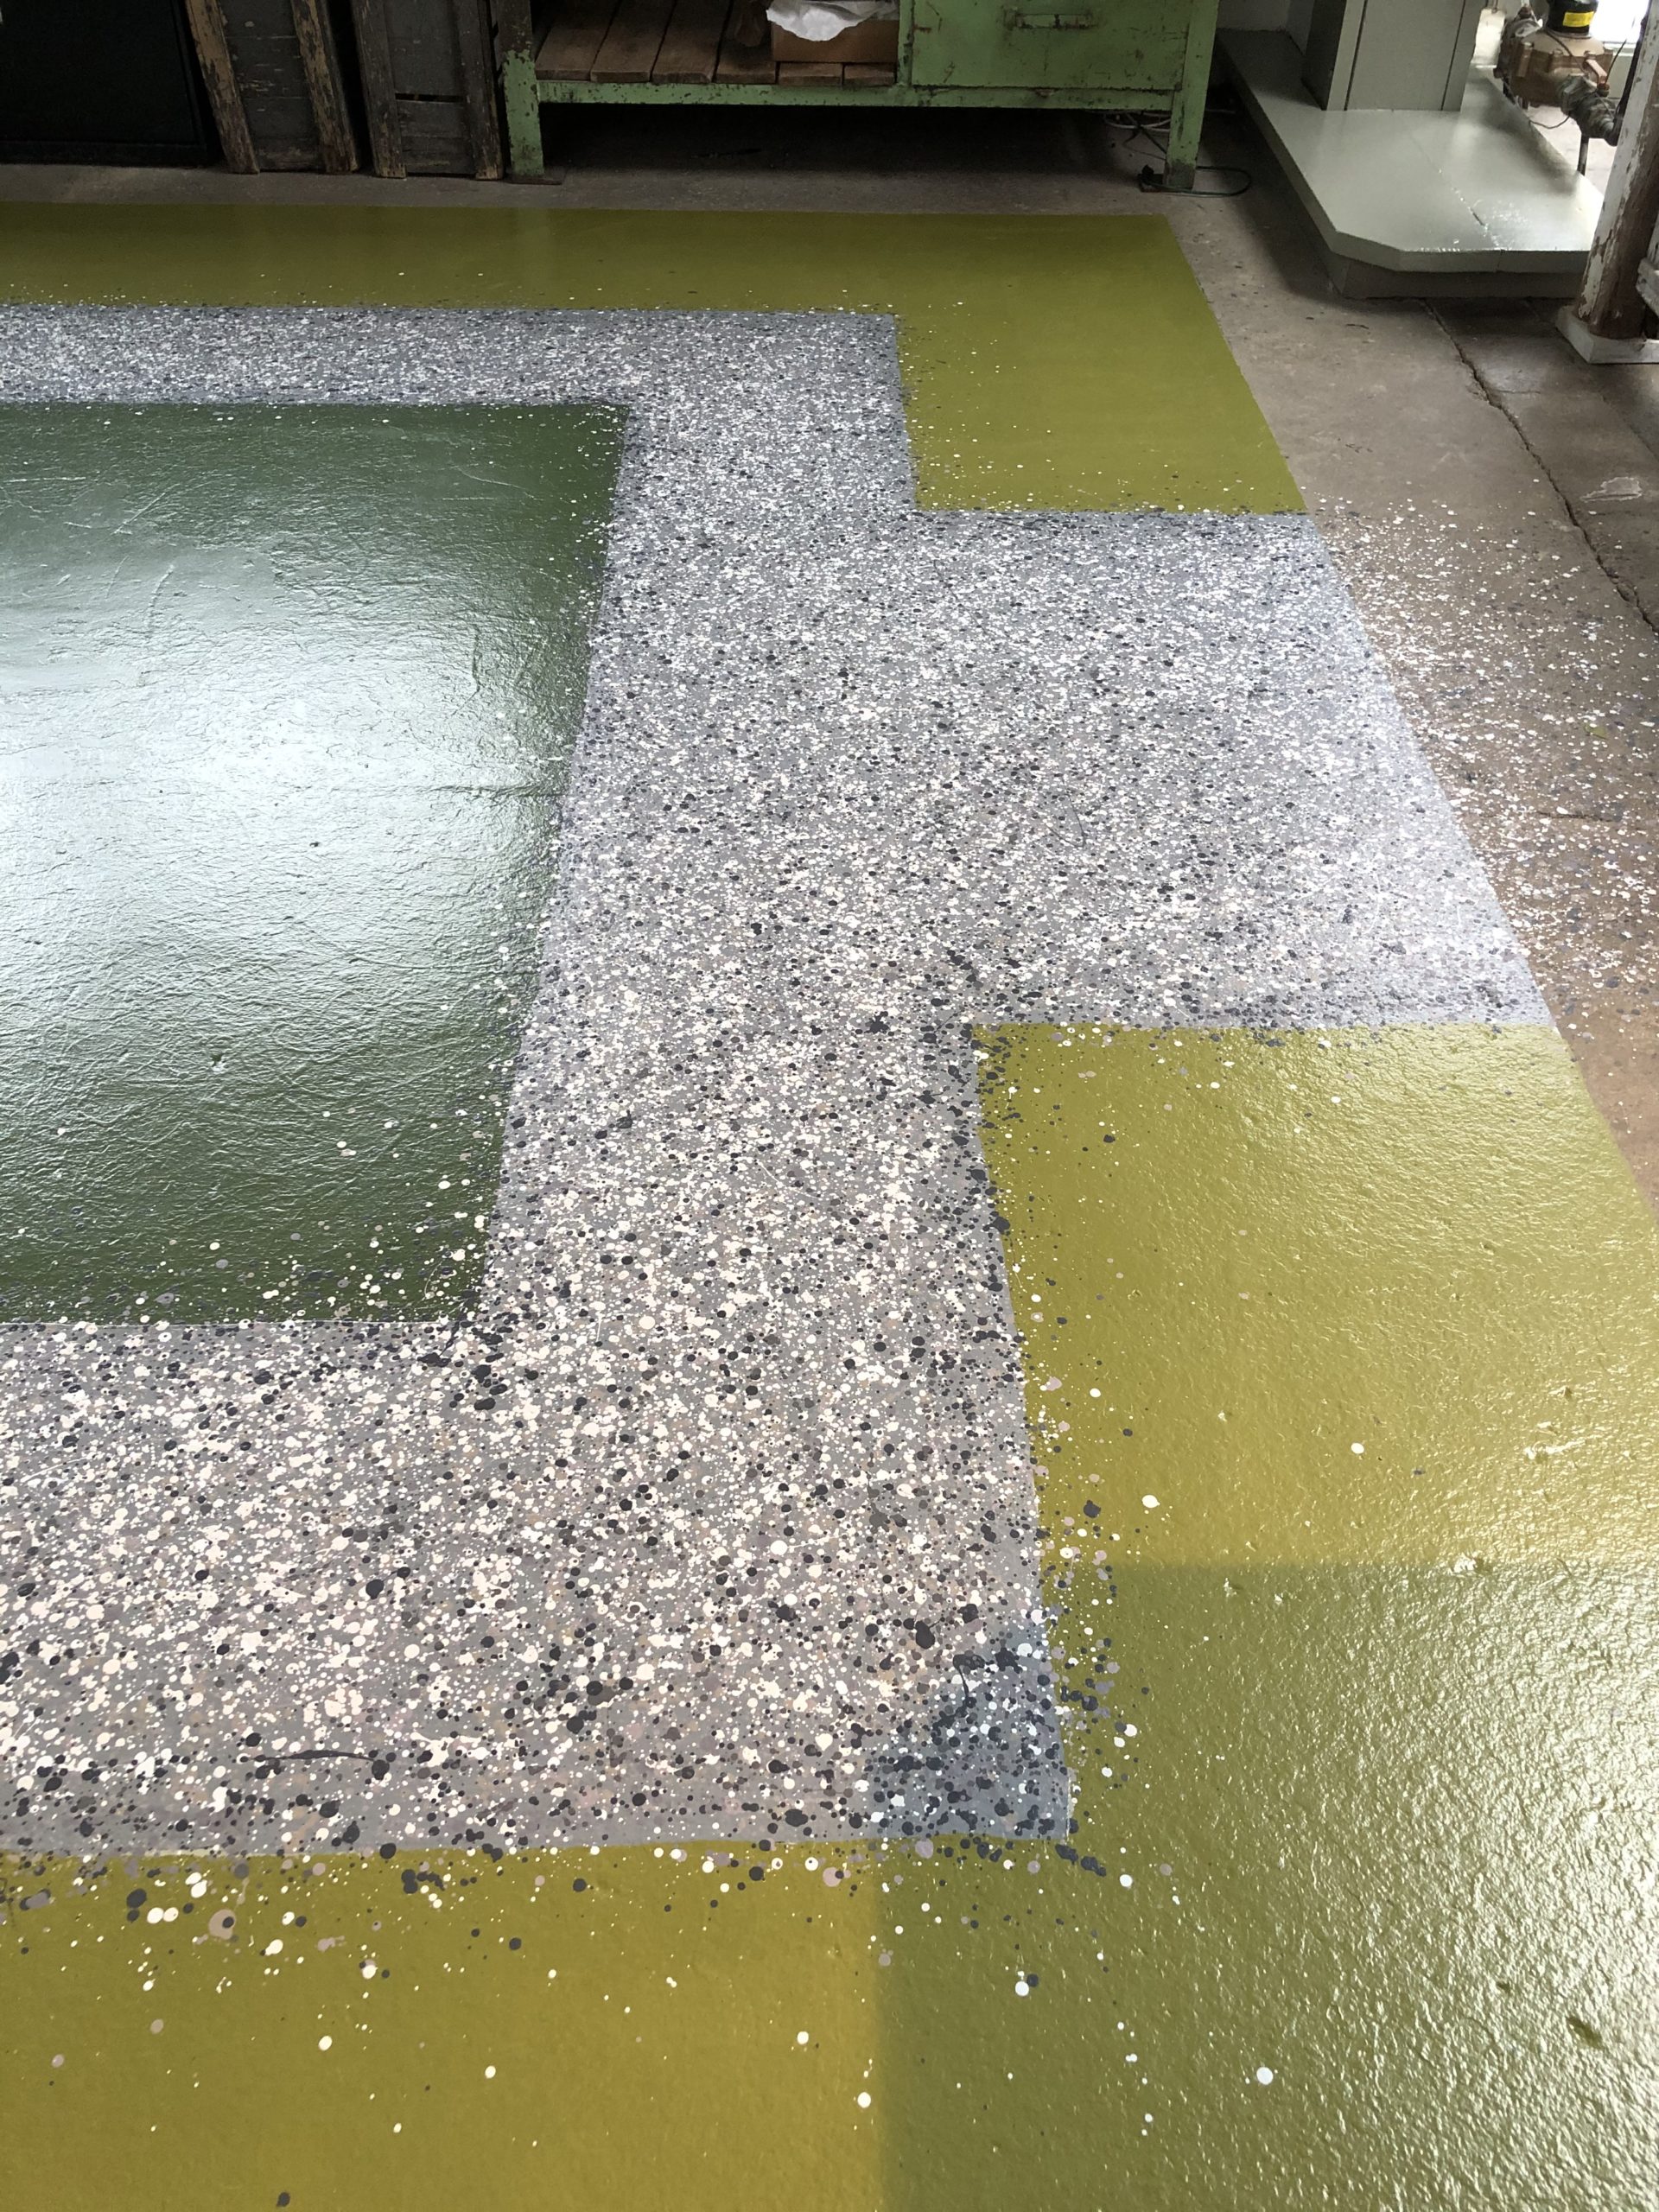
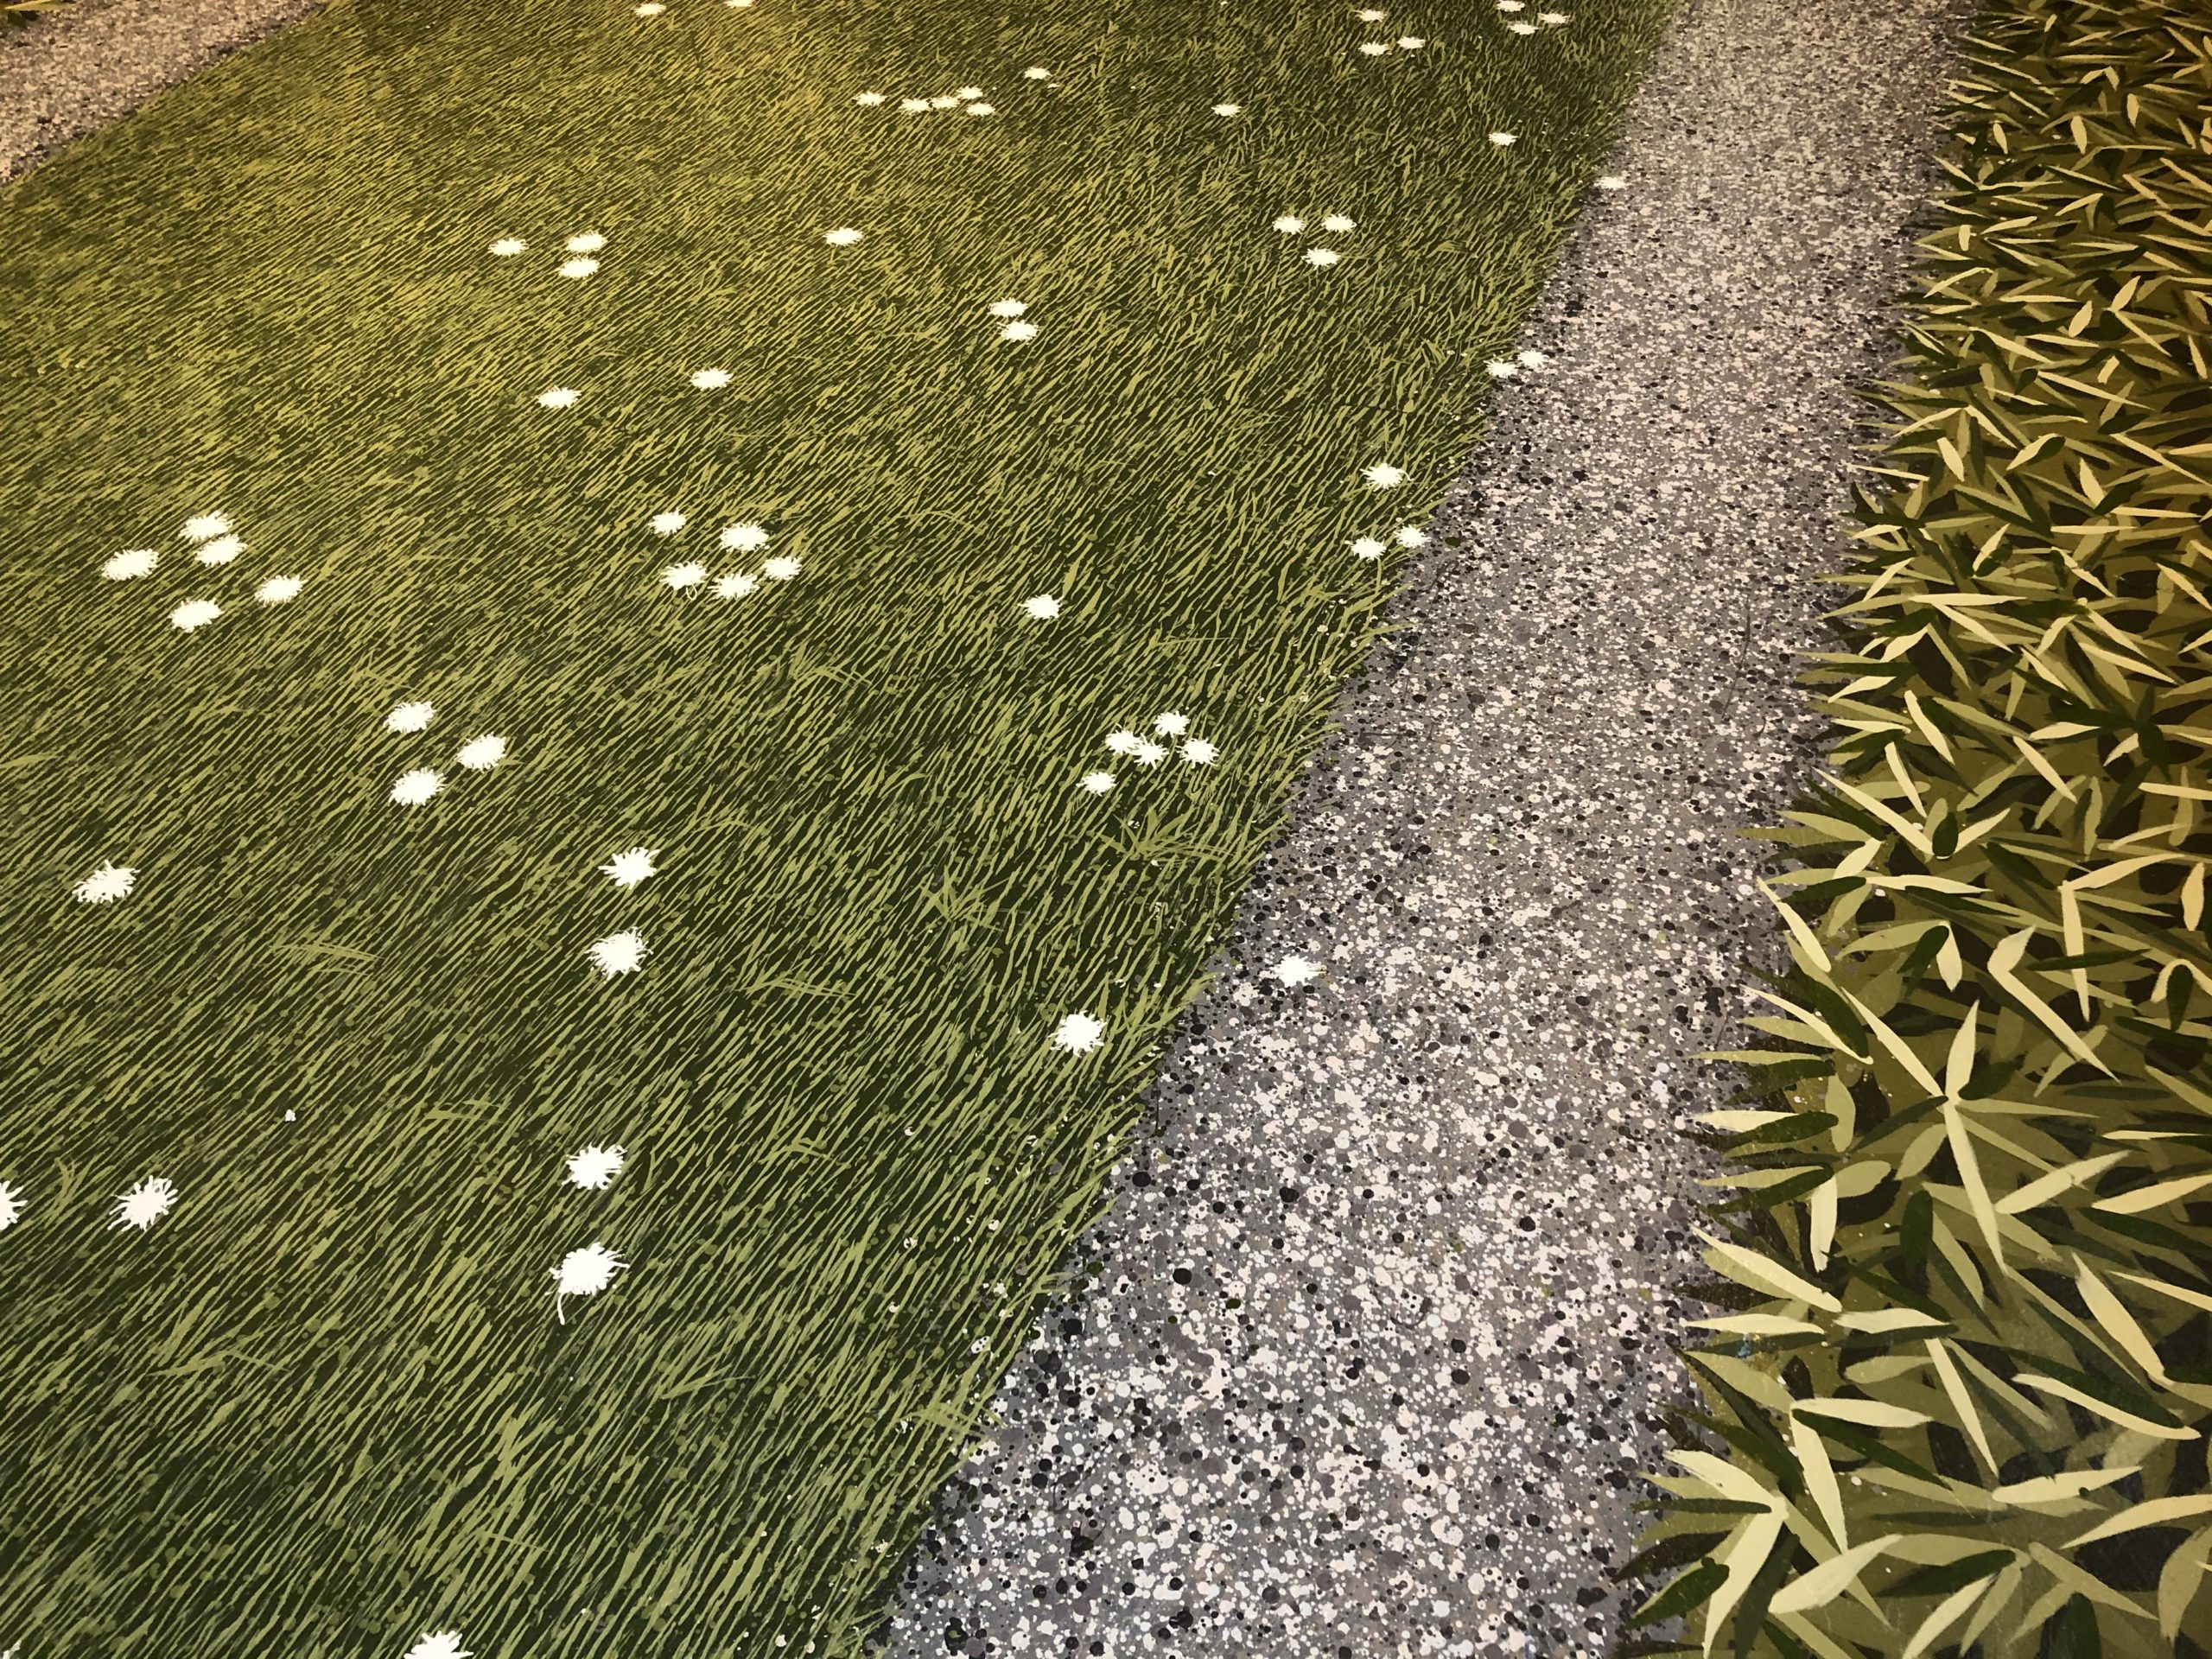
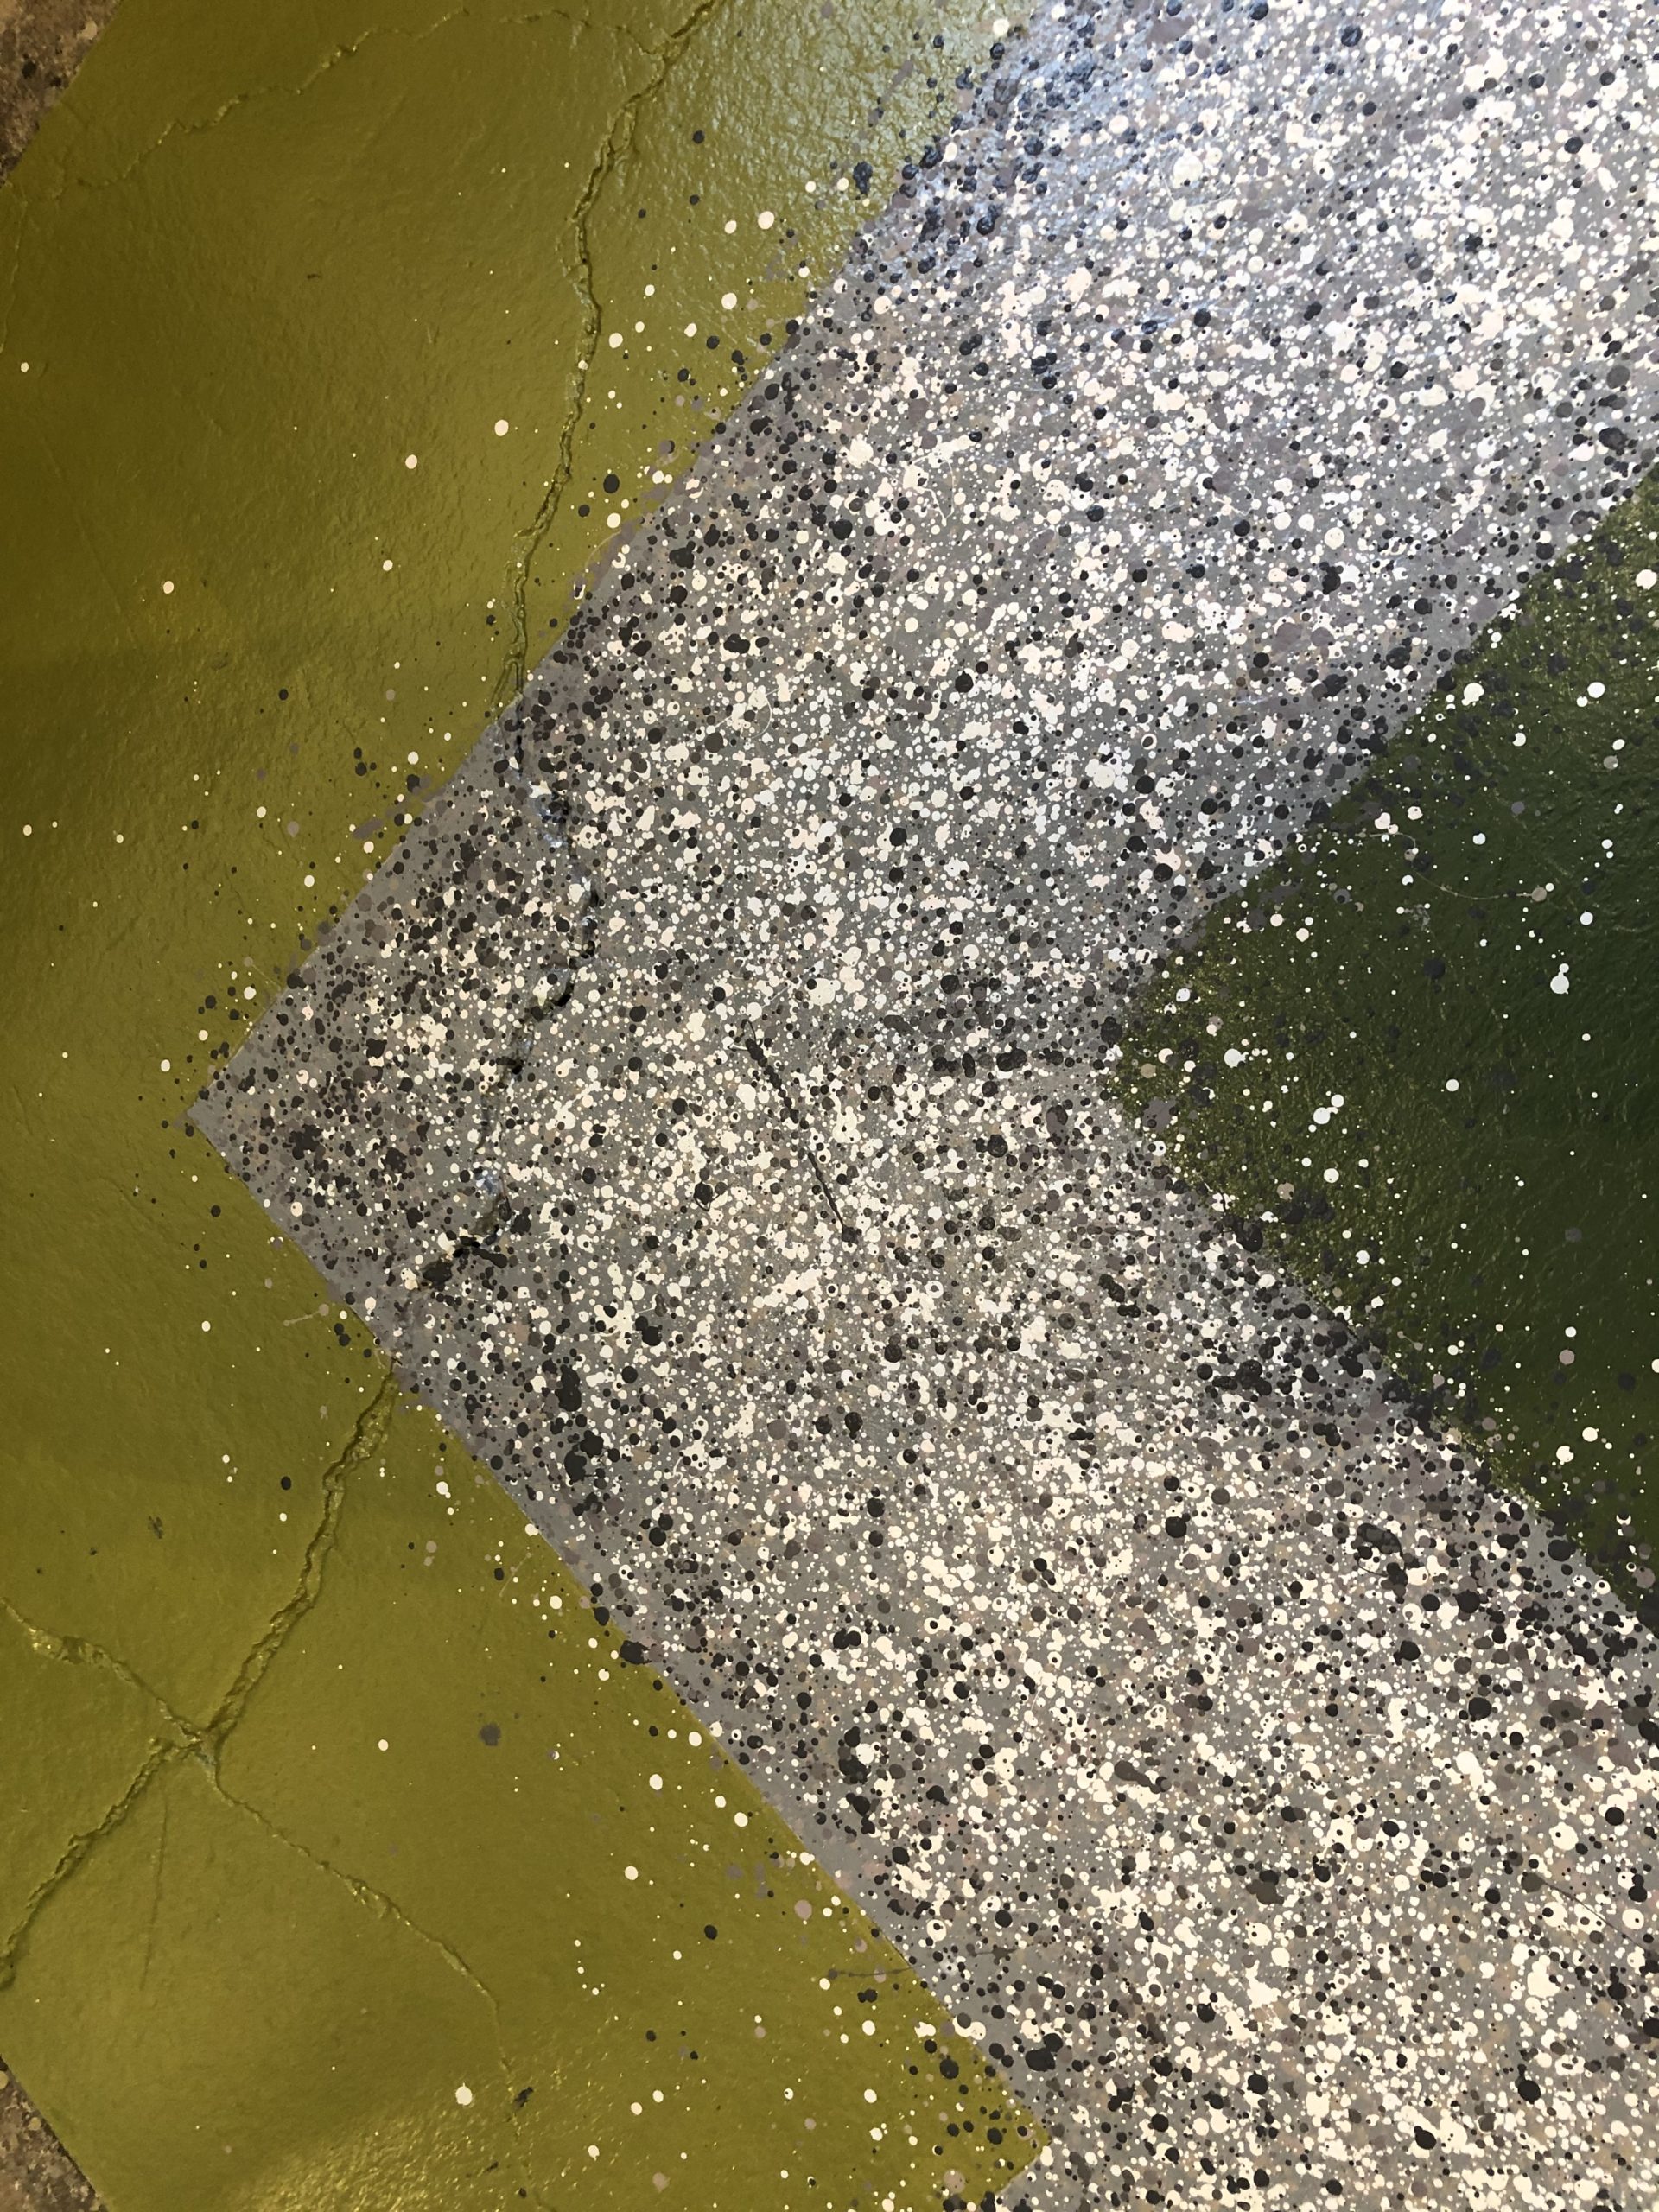 Some effort was made to keep the gravel darker and less detailed on the edges. Once the leaves to come were painted over the edges, that would help create a little sense of depth. This is decorative painting-not fine art. But a nod to composition and technique gives the mural a little more polished look.
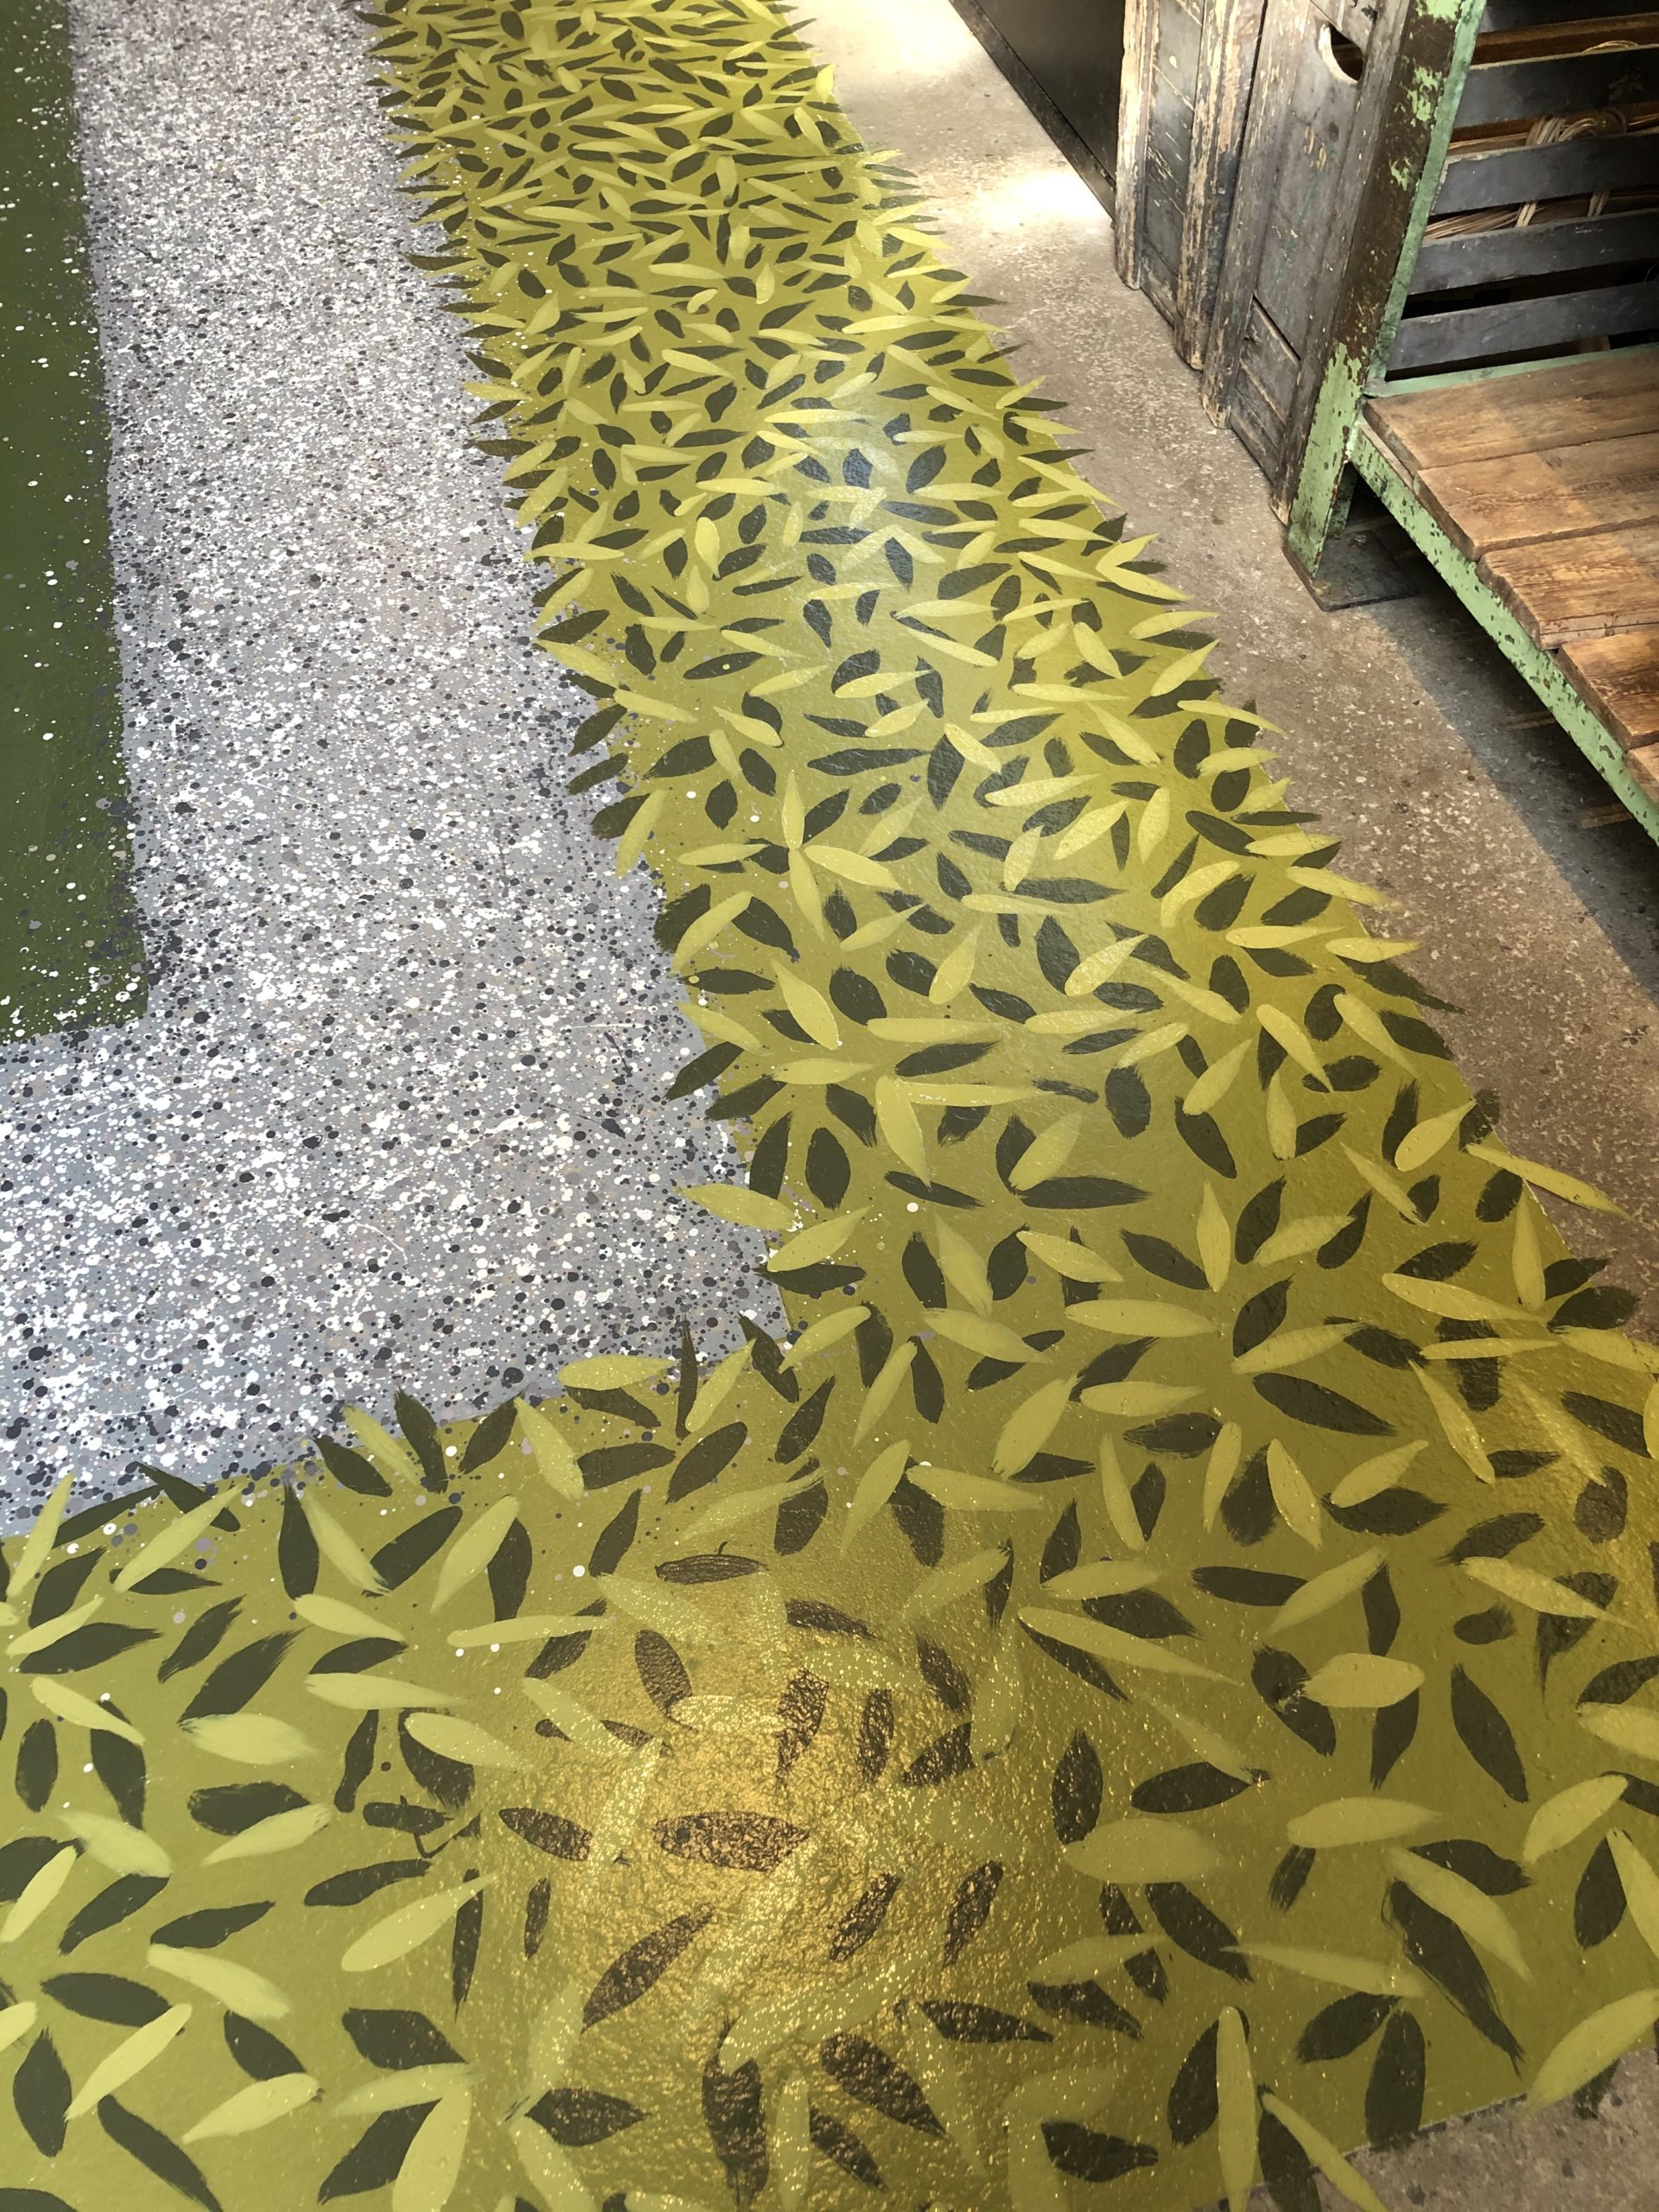
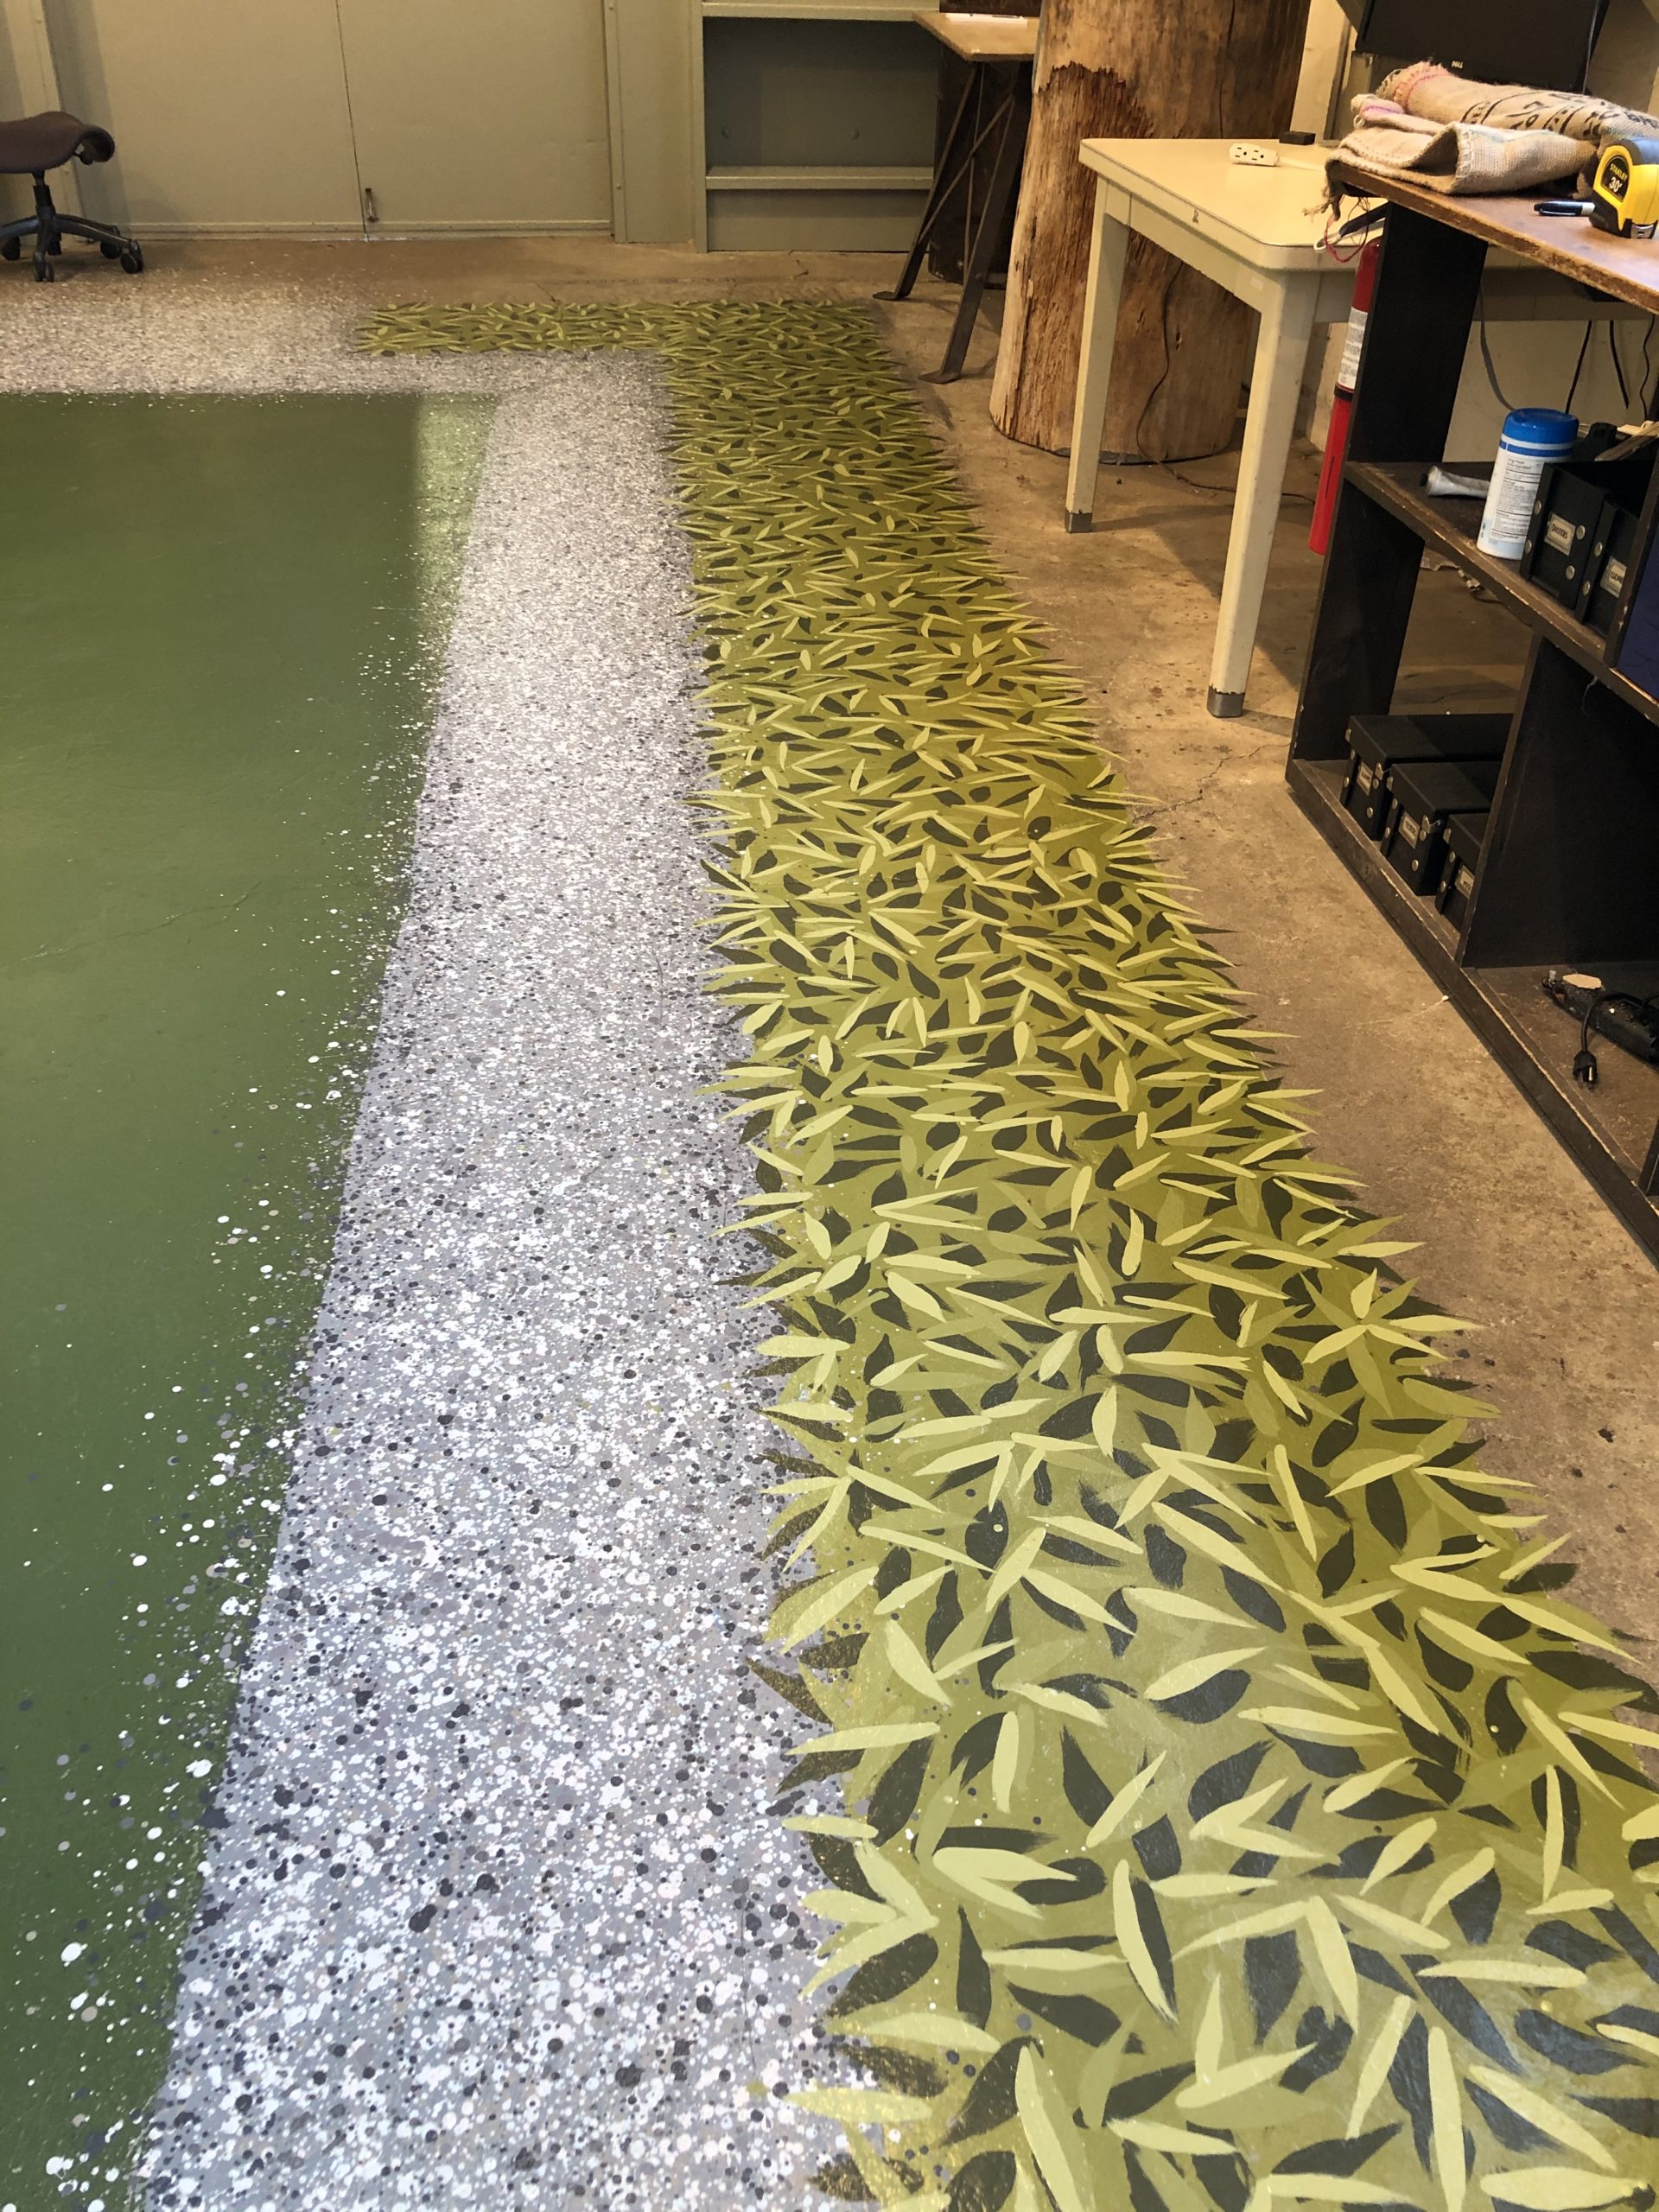
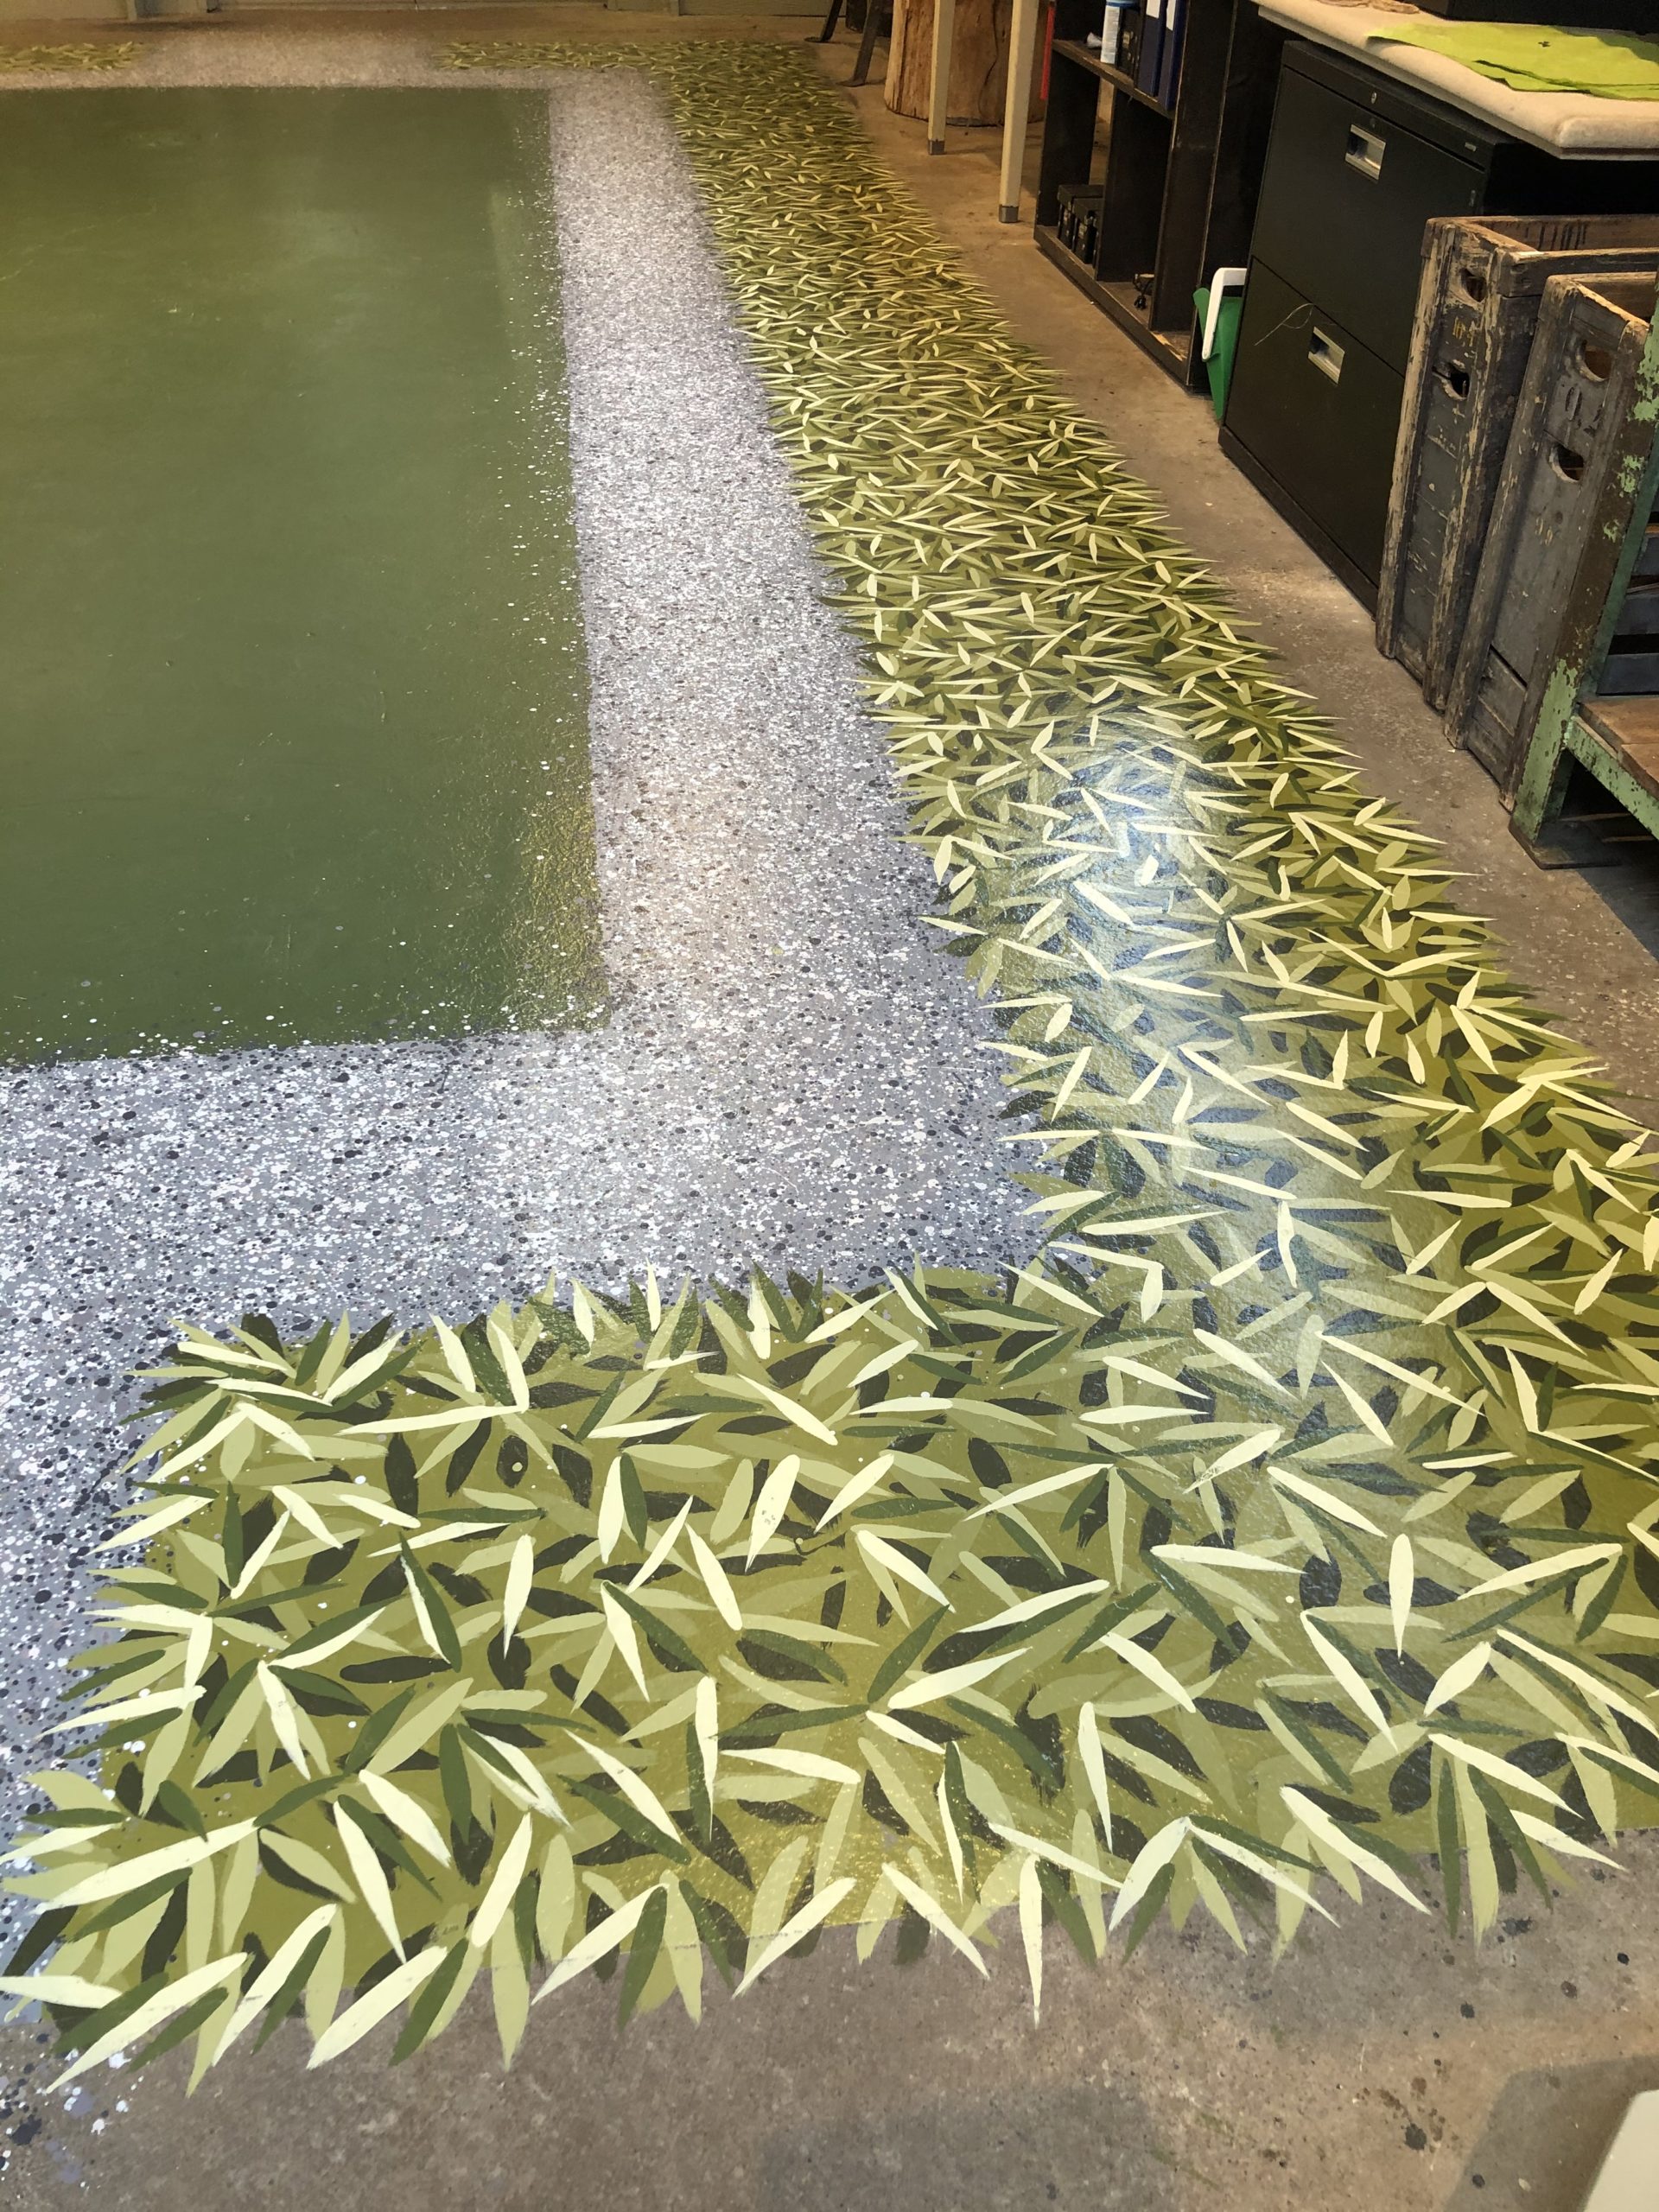
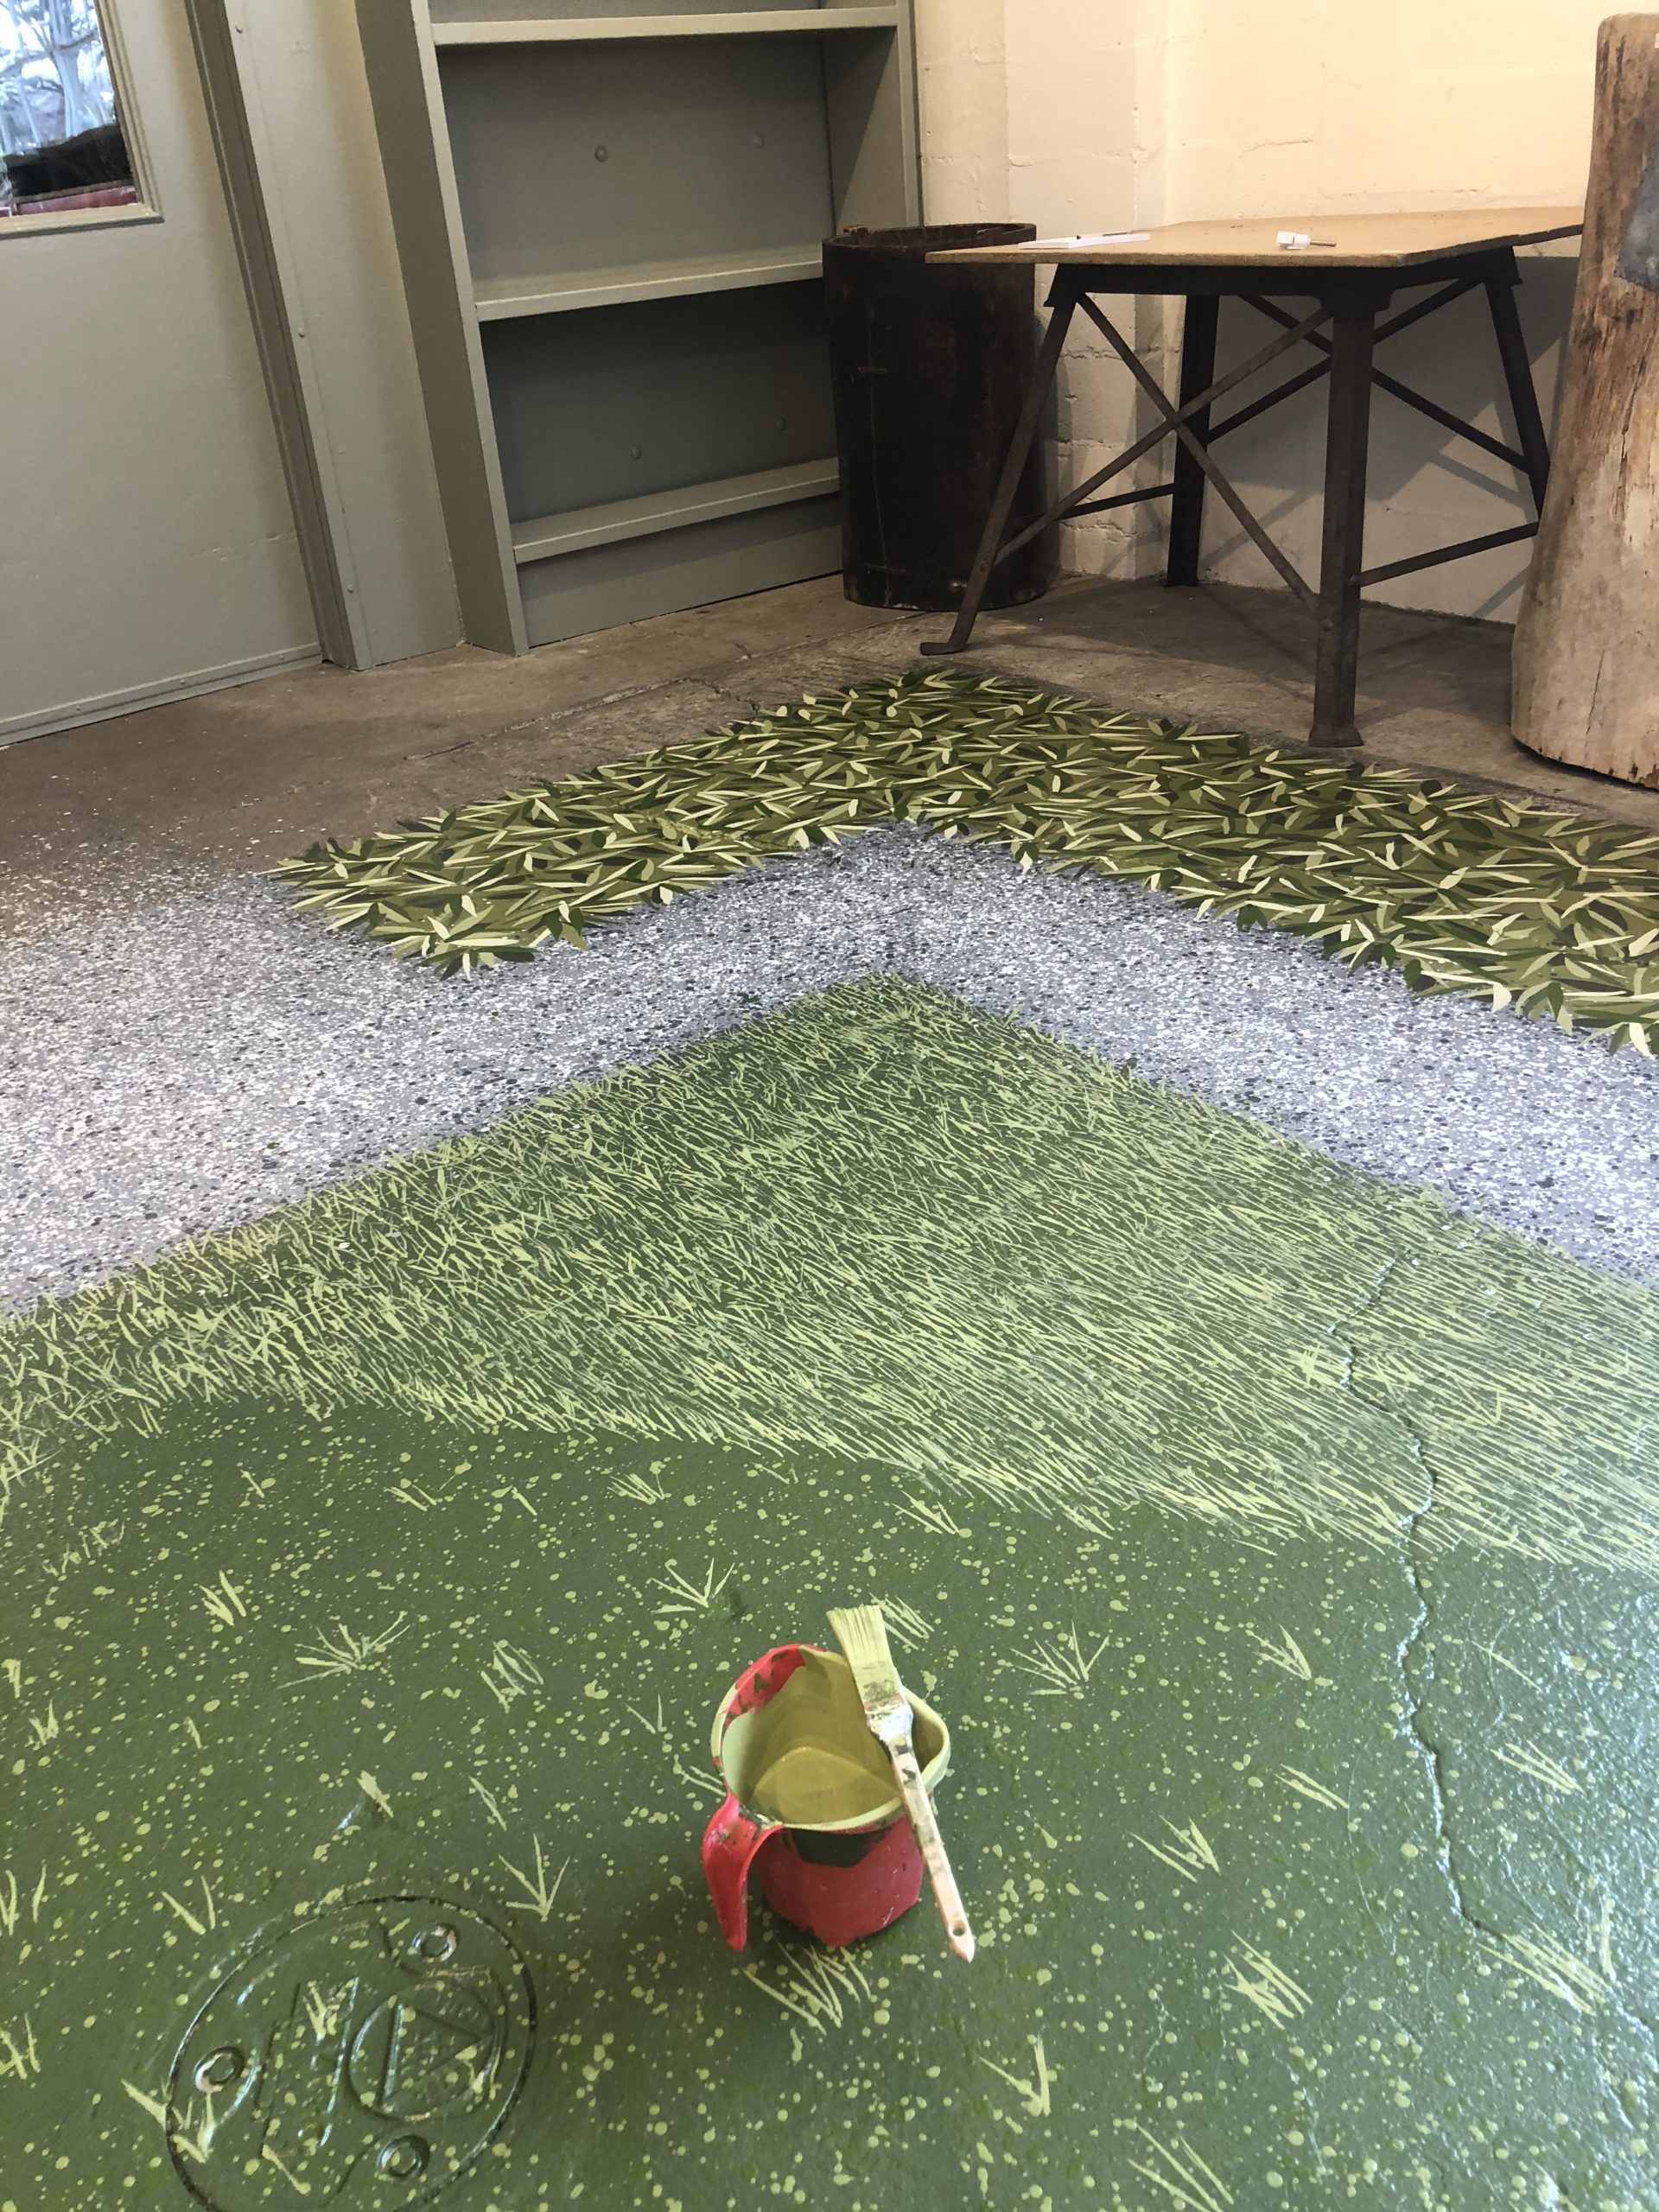
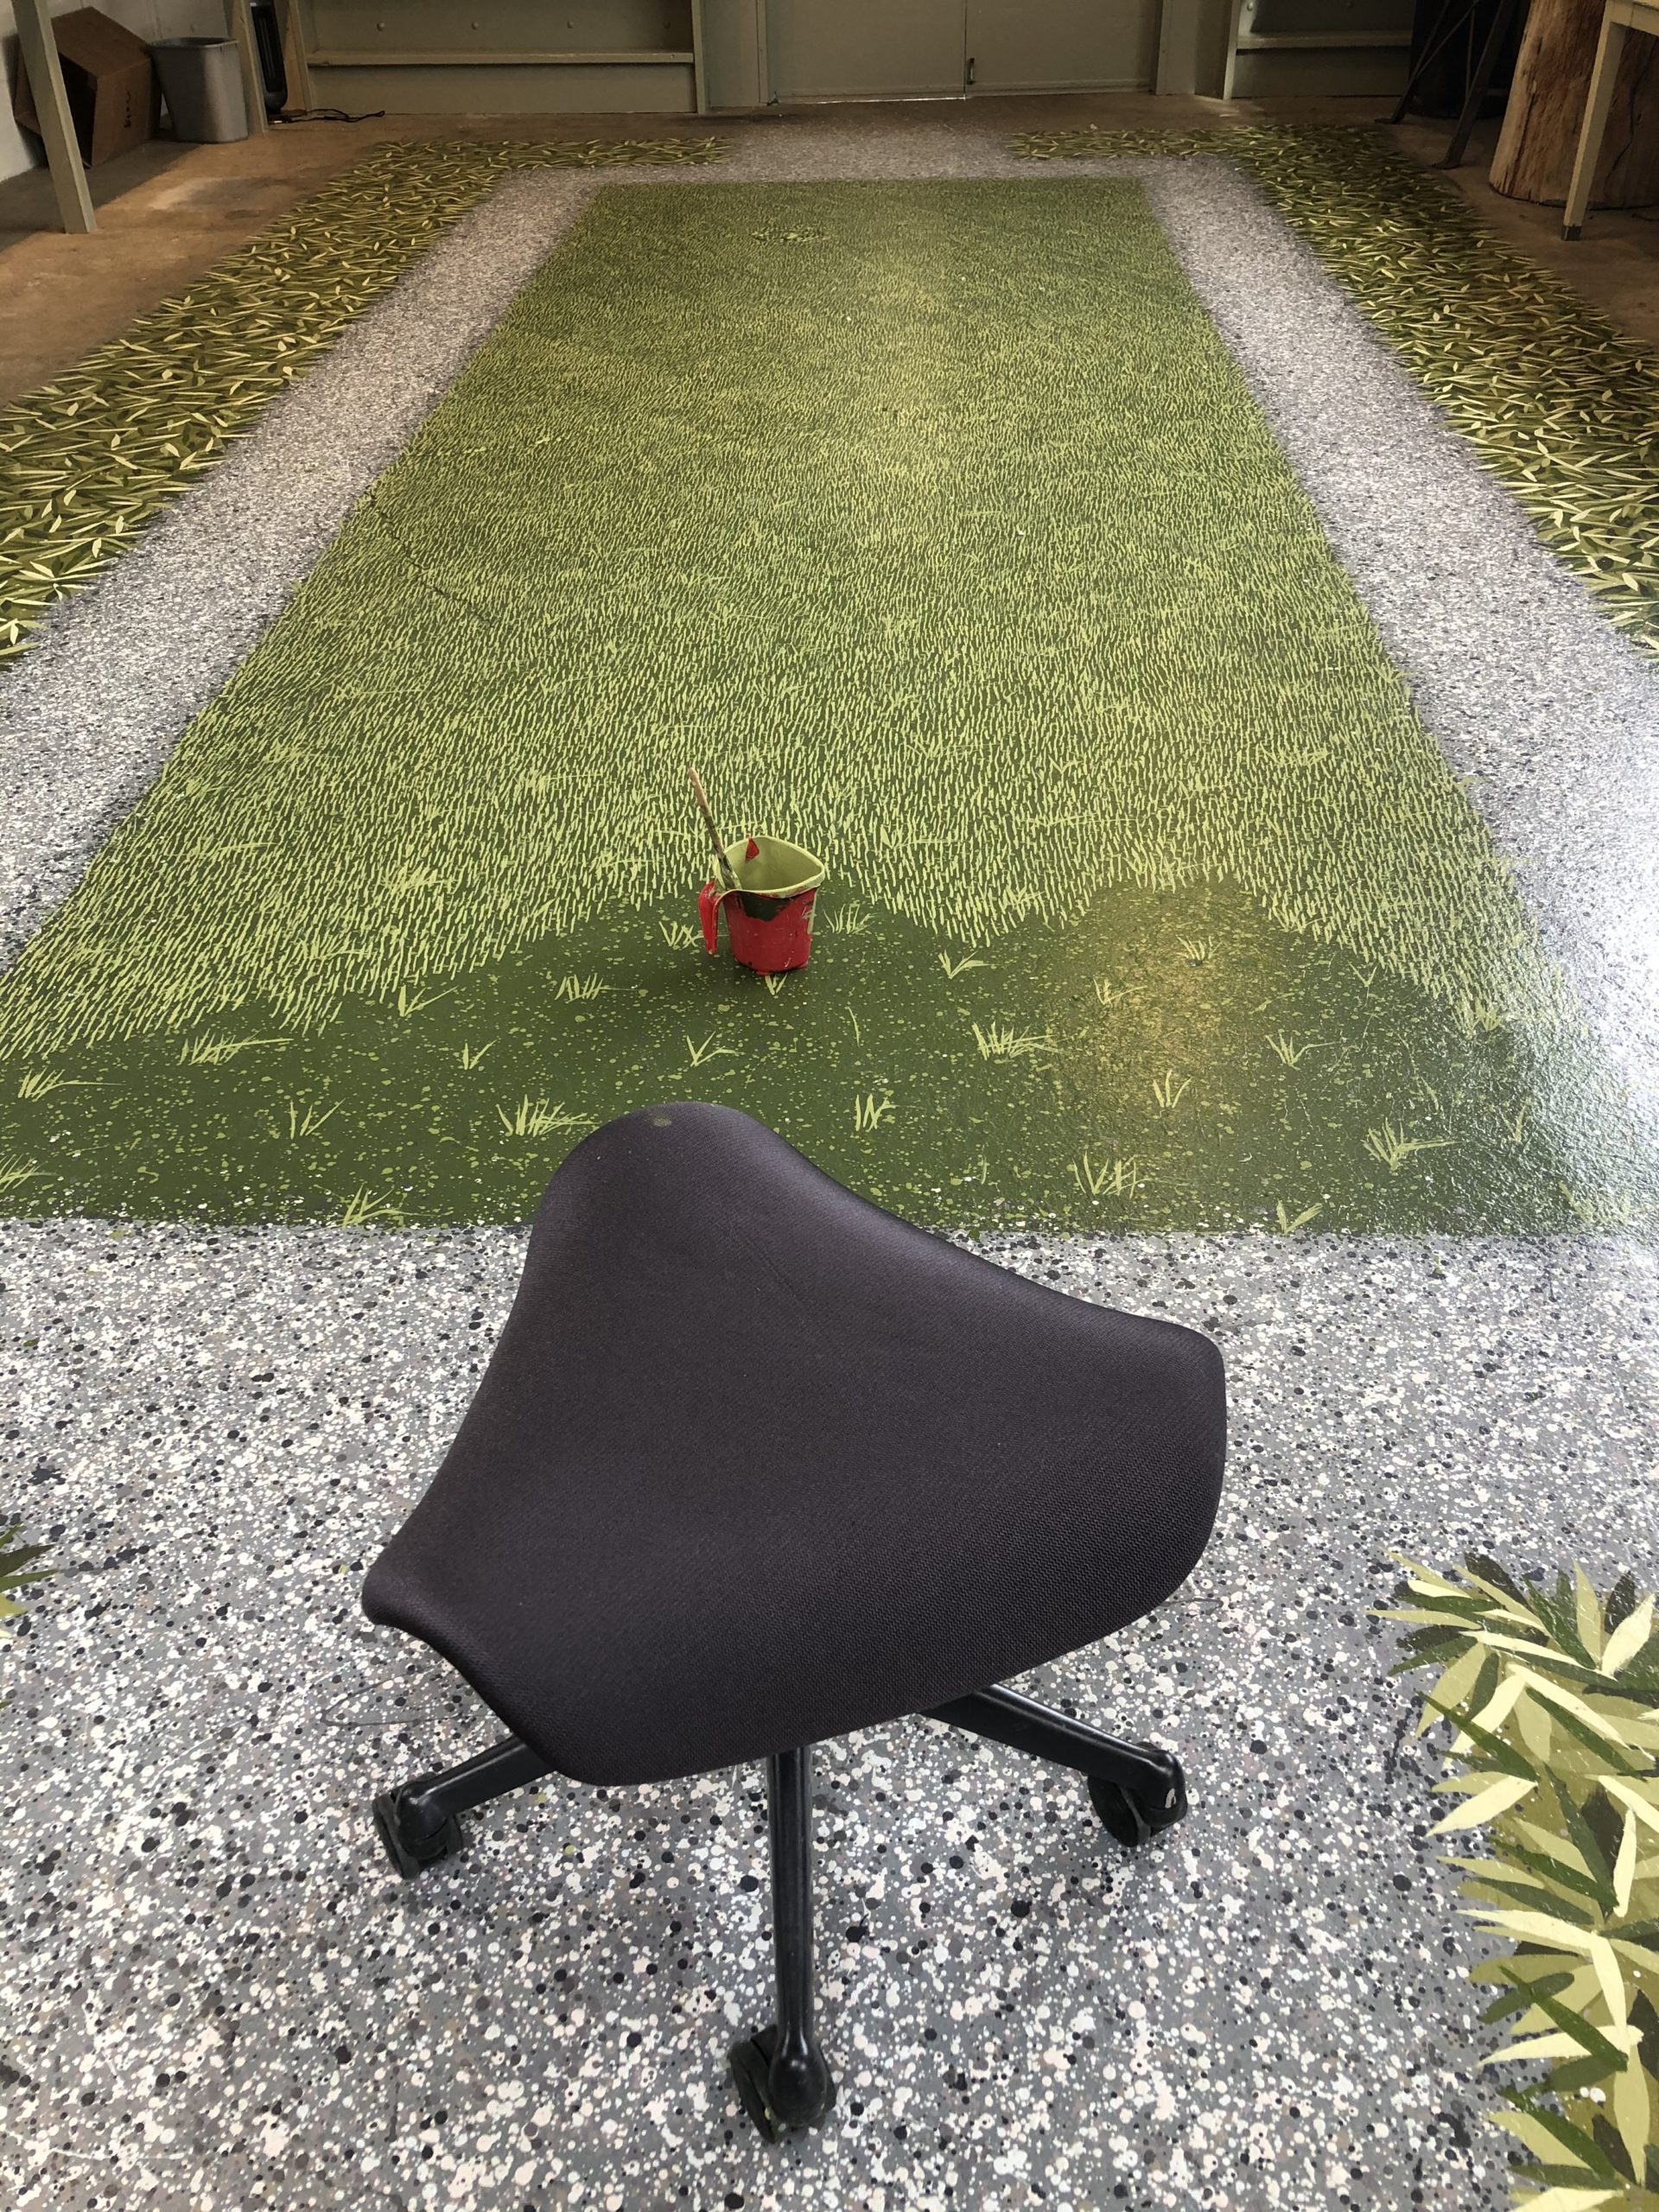
 Those marks were very lively. They brought the dark center up to the same visual plane as the gravel. Eventually I settled in to the job, and two days later that portion was finished.