Archives for August 2017

Hydrangea Time

I am somewhat embarrassed about how many posts I have devoted to hydrangeas over the past 8 years. Probably too many. The varieties, the care, the pruning-I have covered this shrub as if I were a preteen age groupie. I am embarrassed about my love for the whole lot of them, but so be it.  Show me a hydrangea – chances are I will fall for it. Nothing says summer in Michigan so clearly and grandly as the hydrangeas in full bloom. Once the hydrangeas come in to bloom, I am not my usual self. My love of geometry and simplicity fades away. The romance of hydrangeas is tough to resist. It is impossible for me to be critical of any summer blooming hydrangeas. Even those that flop over at the slightest threat of rain. Do not count on me to detail what is not to like about hydrangeas. I like them all without reservation.

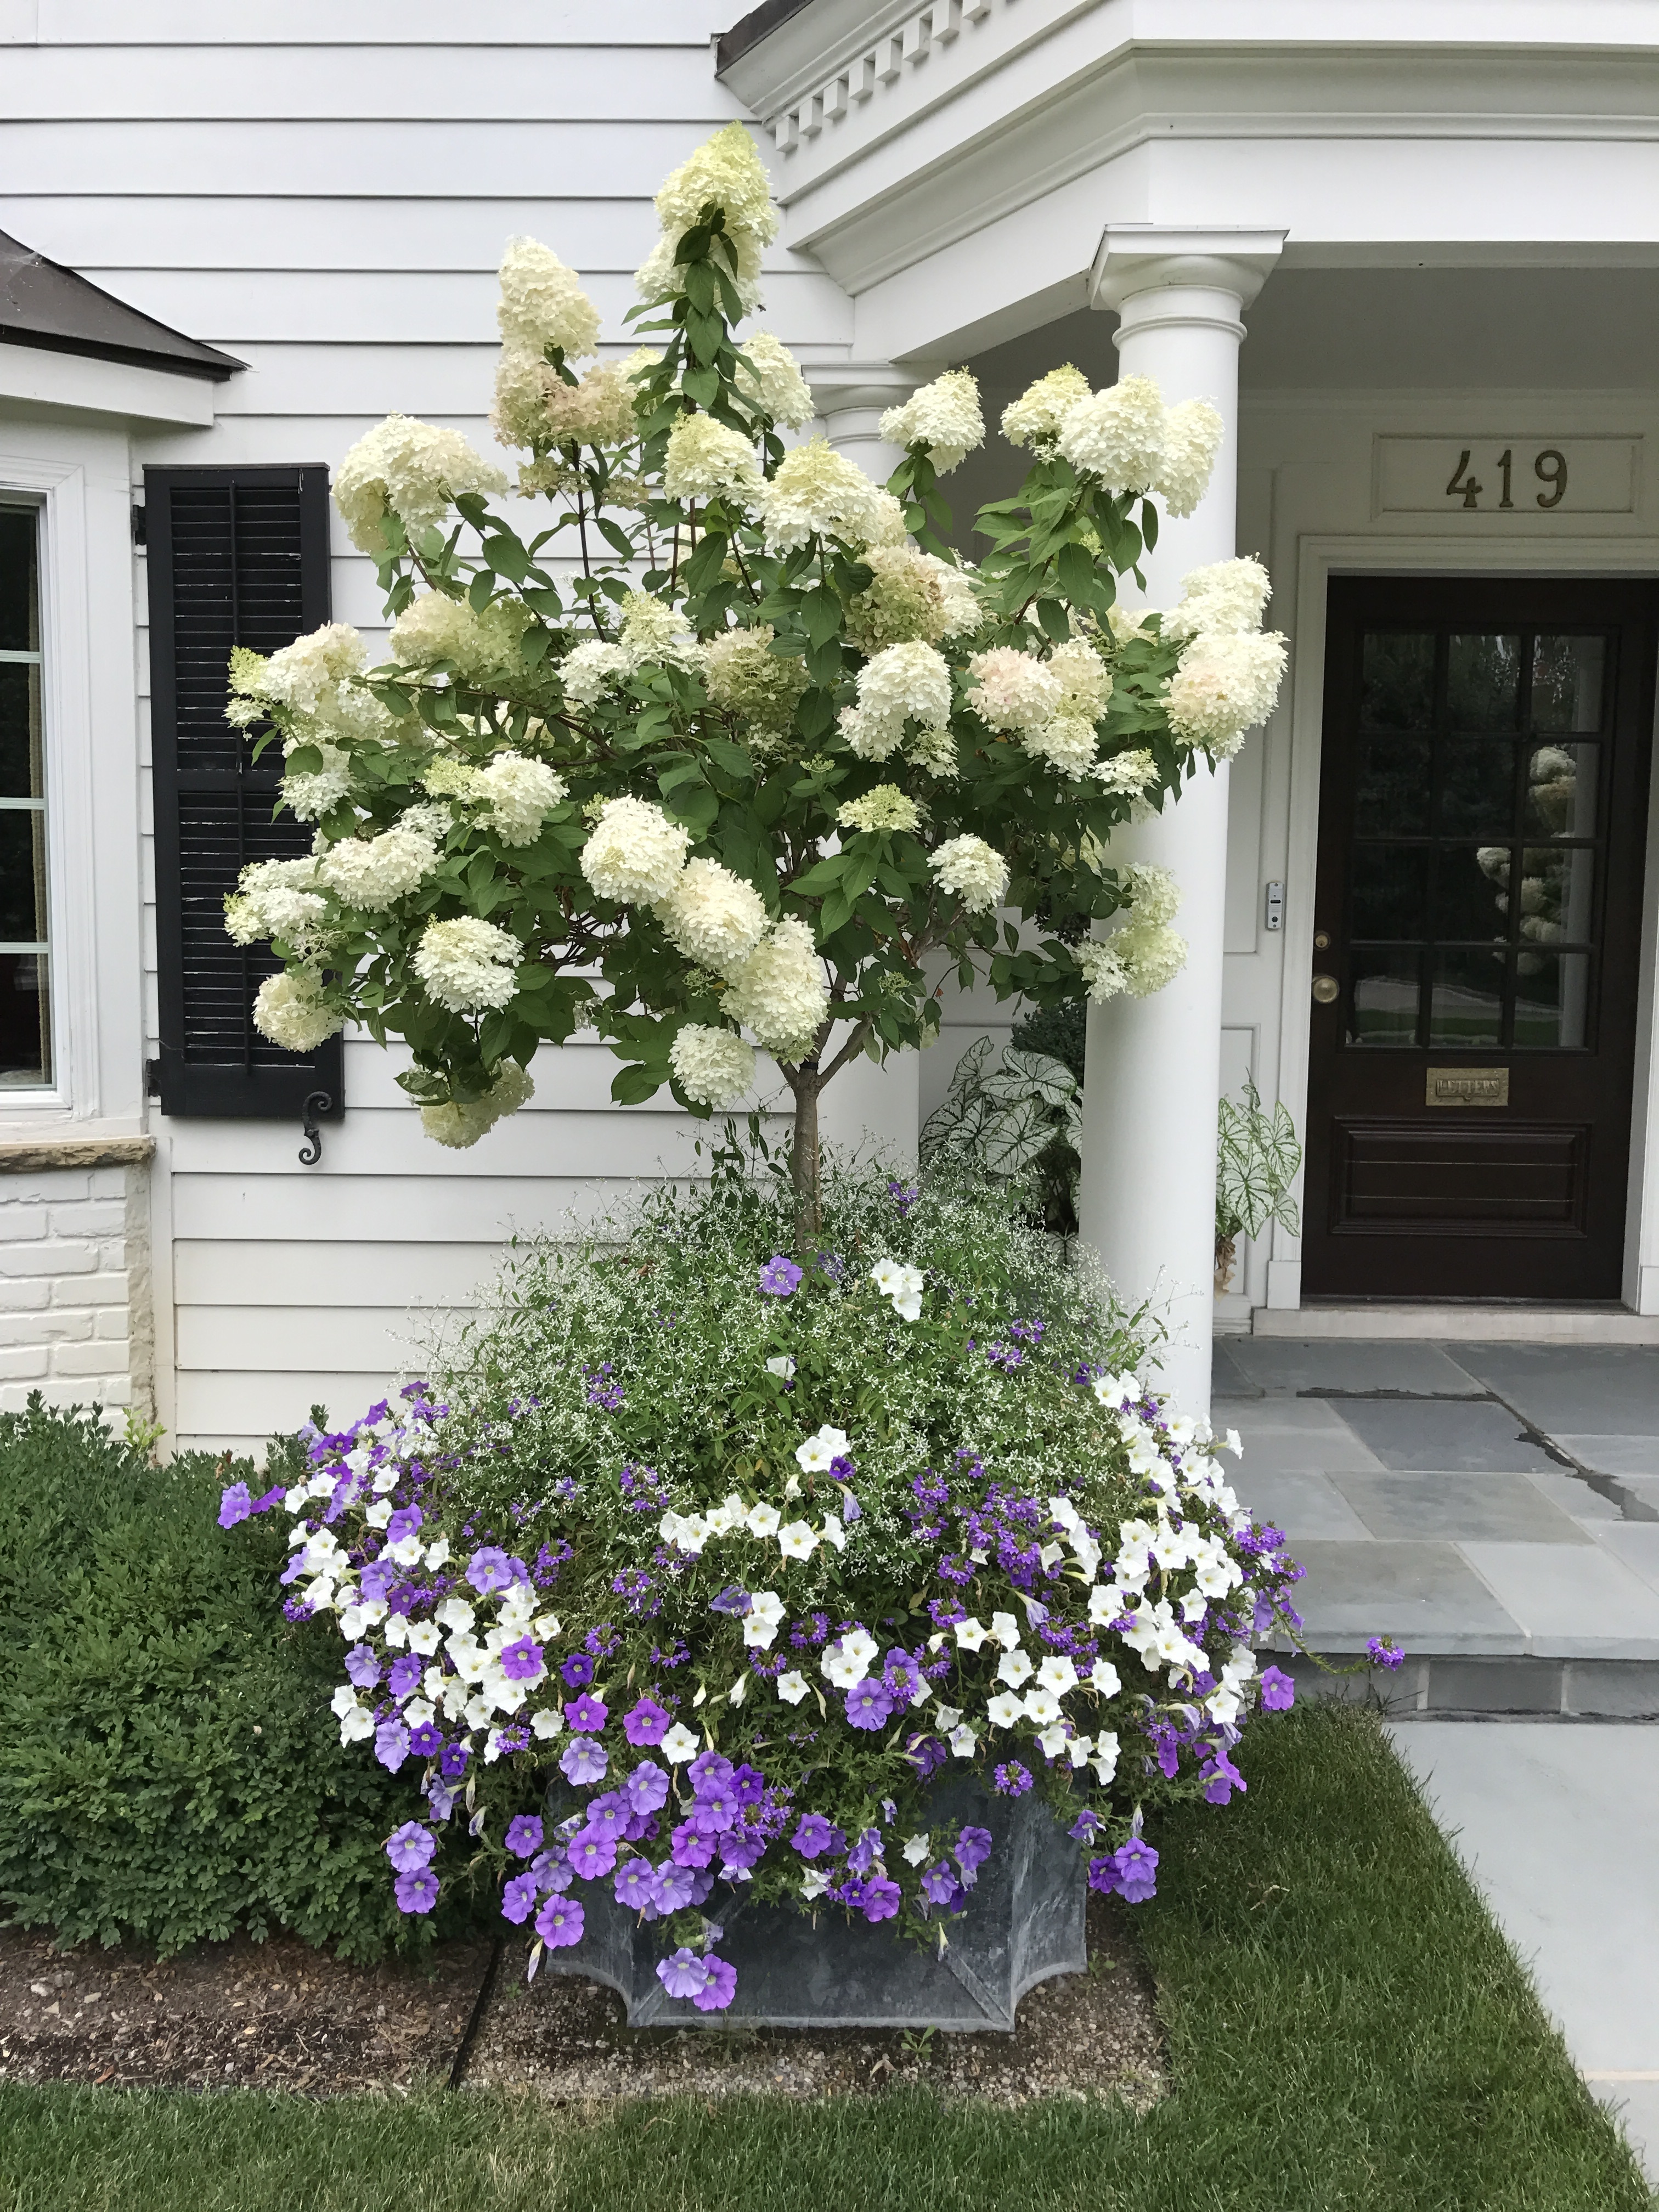
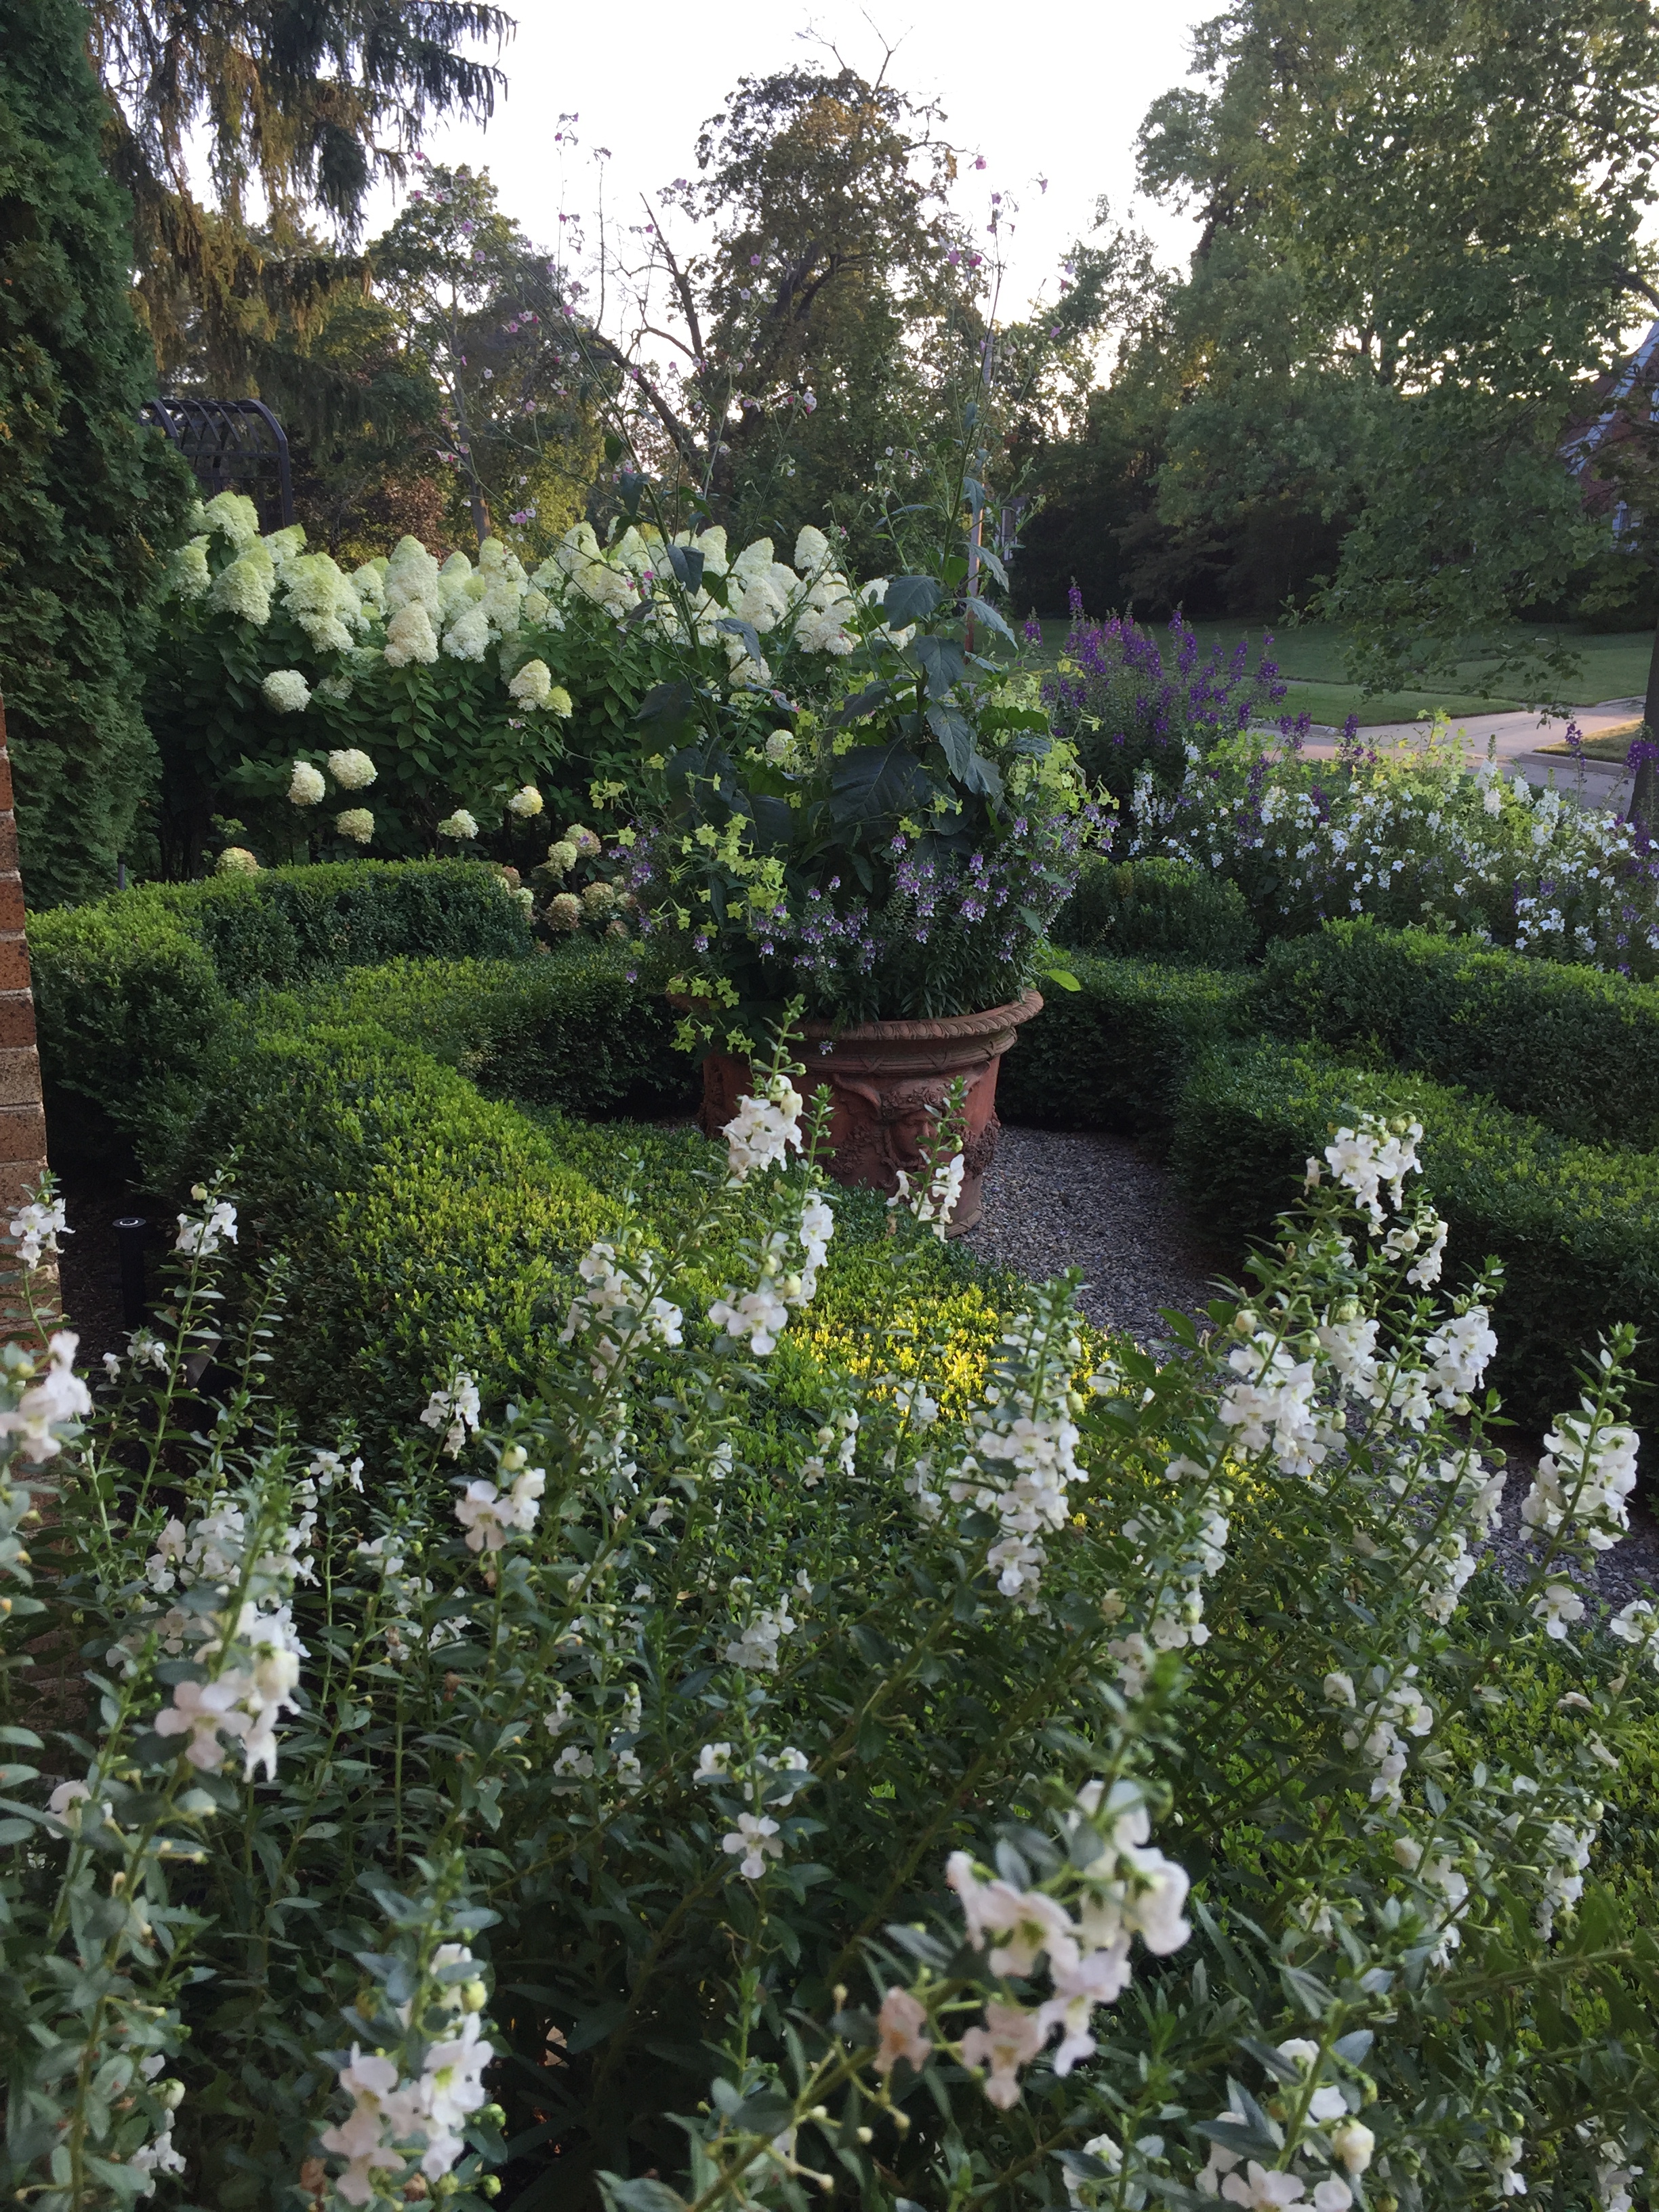
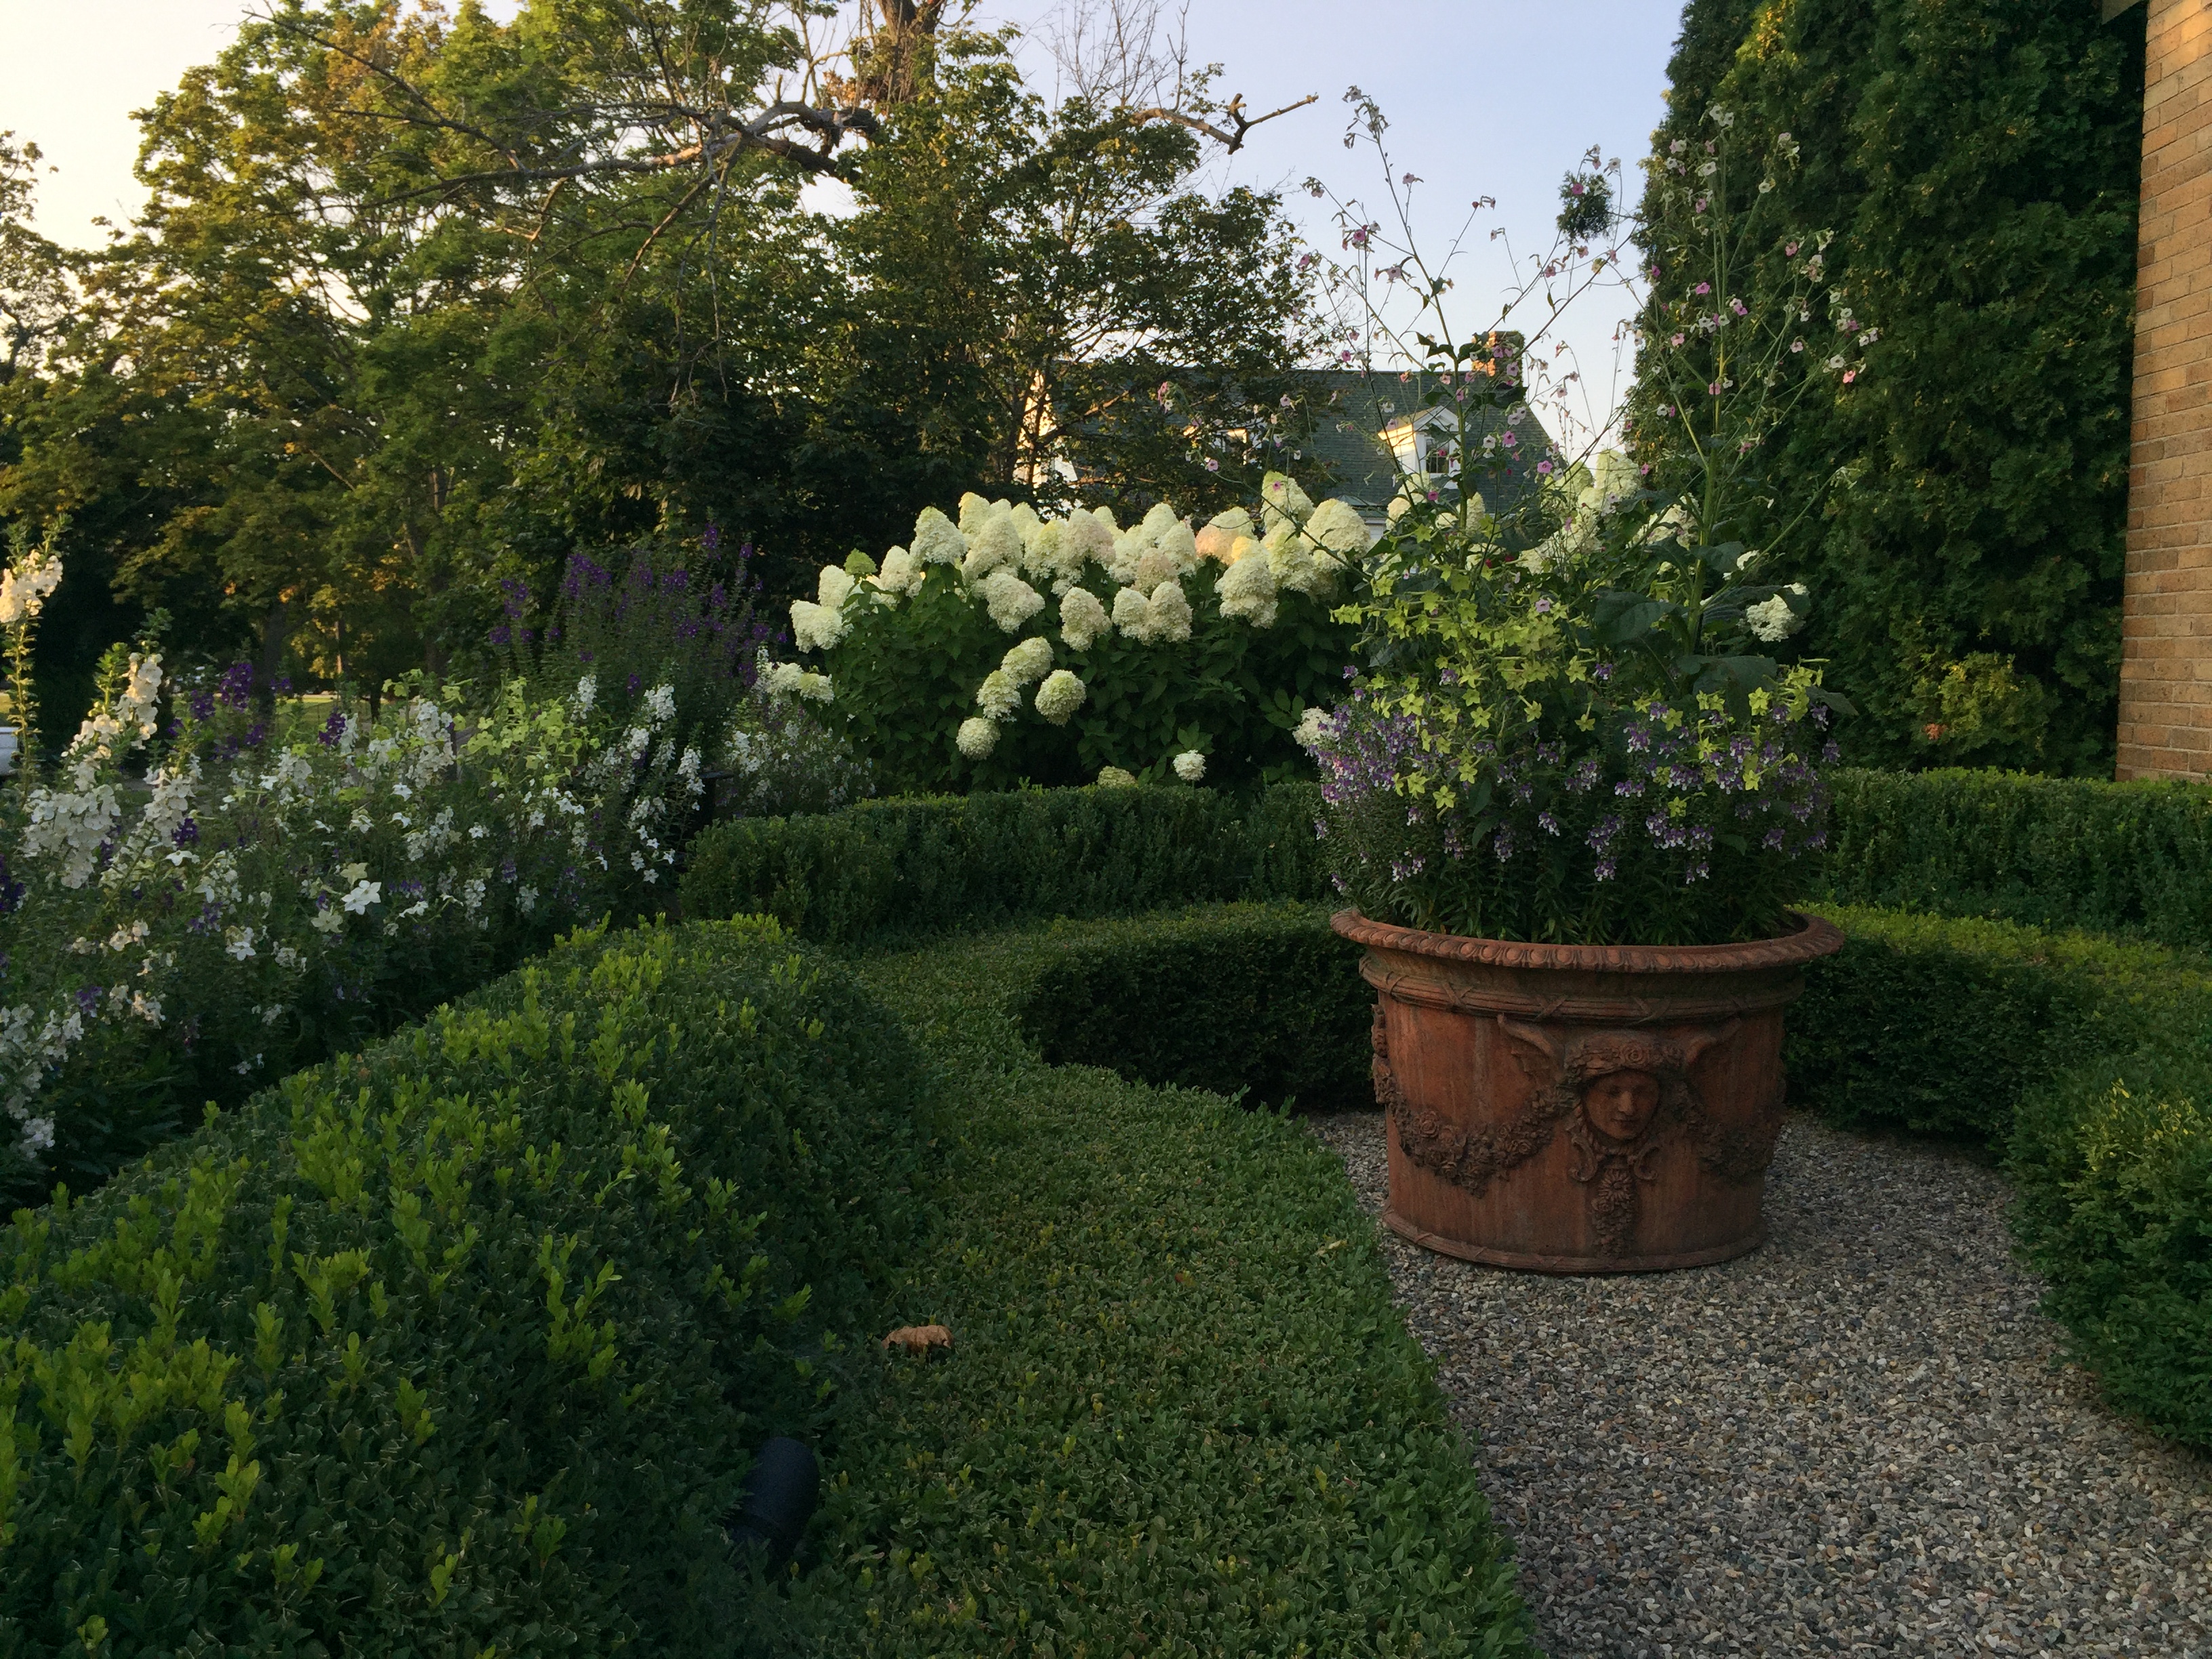
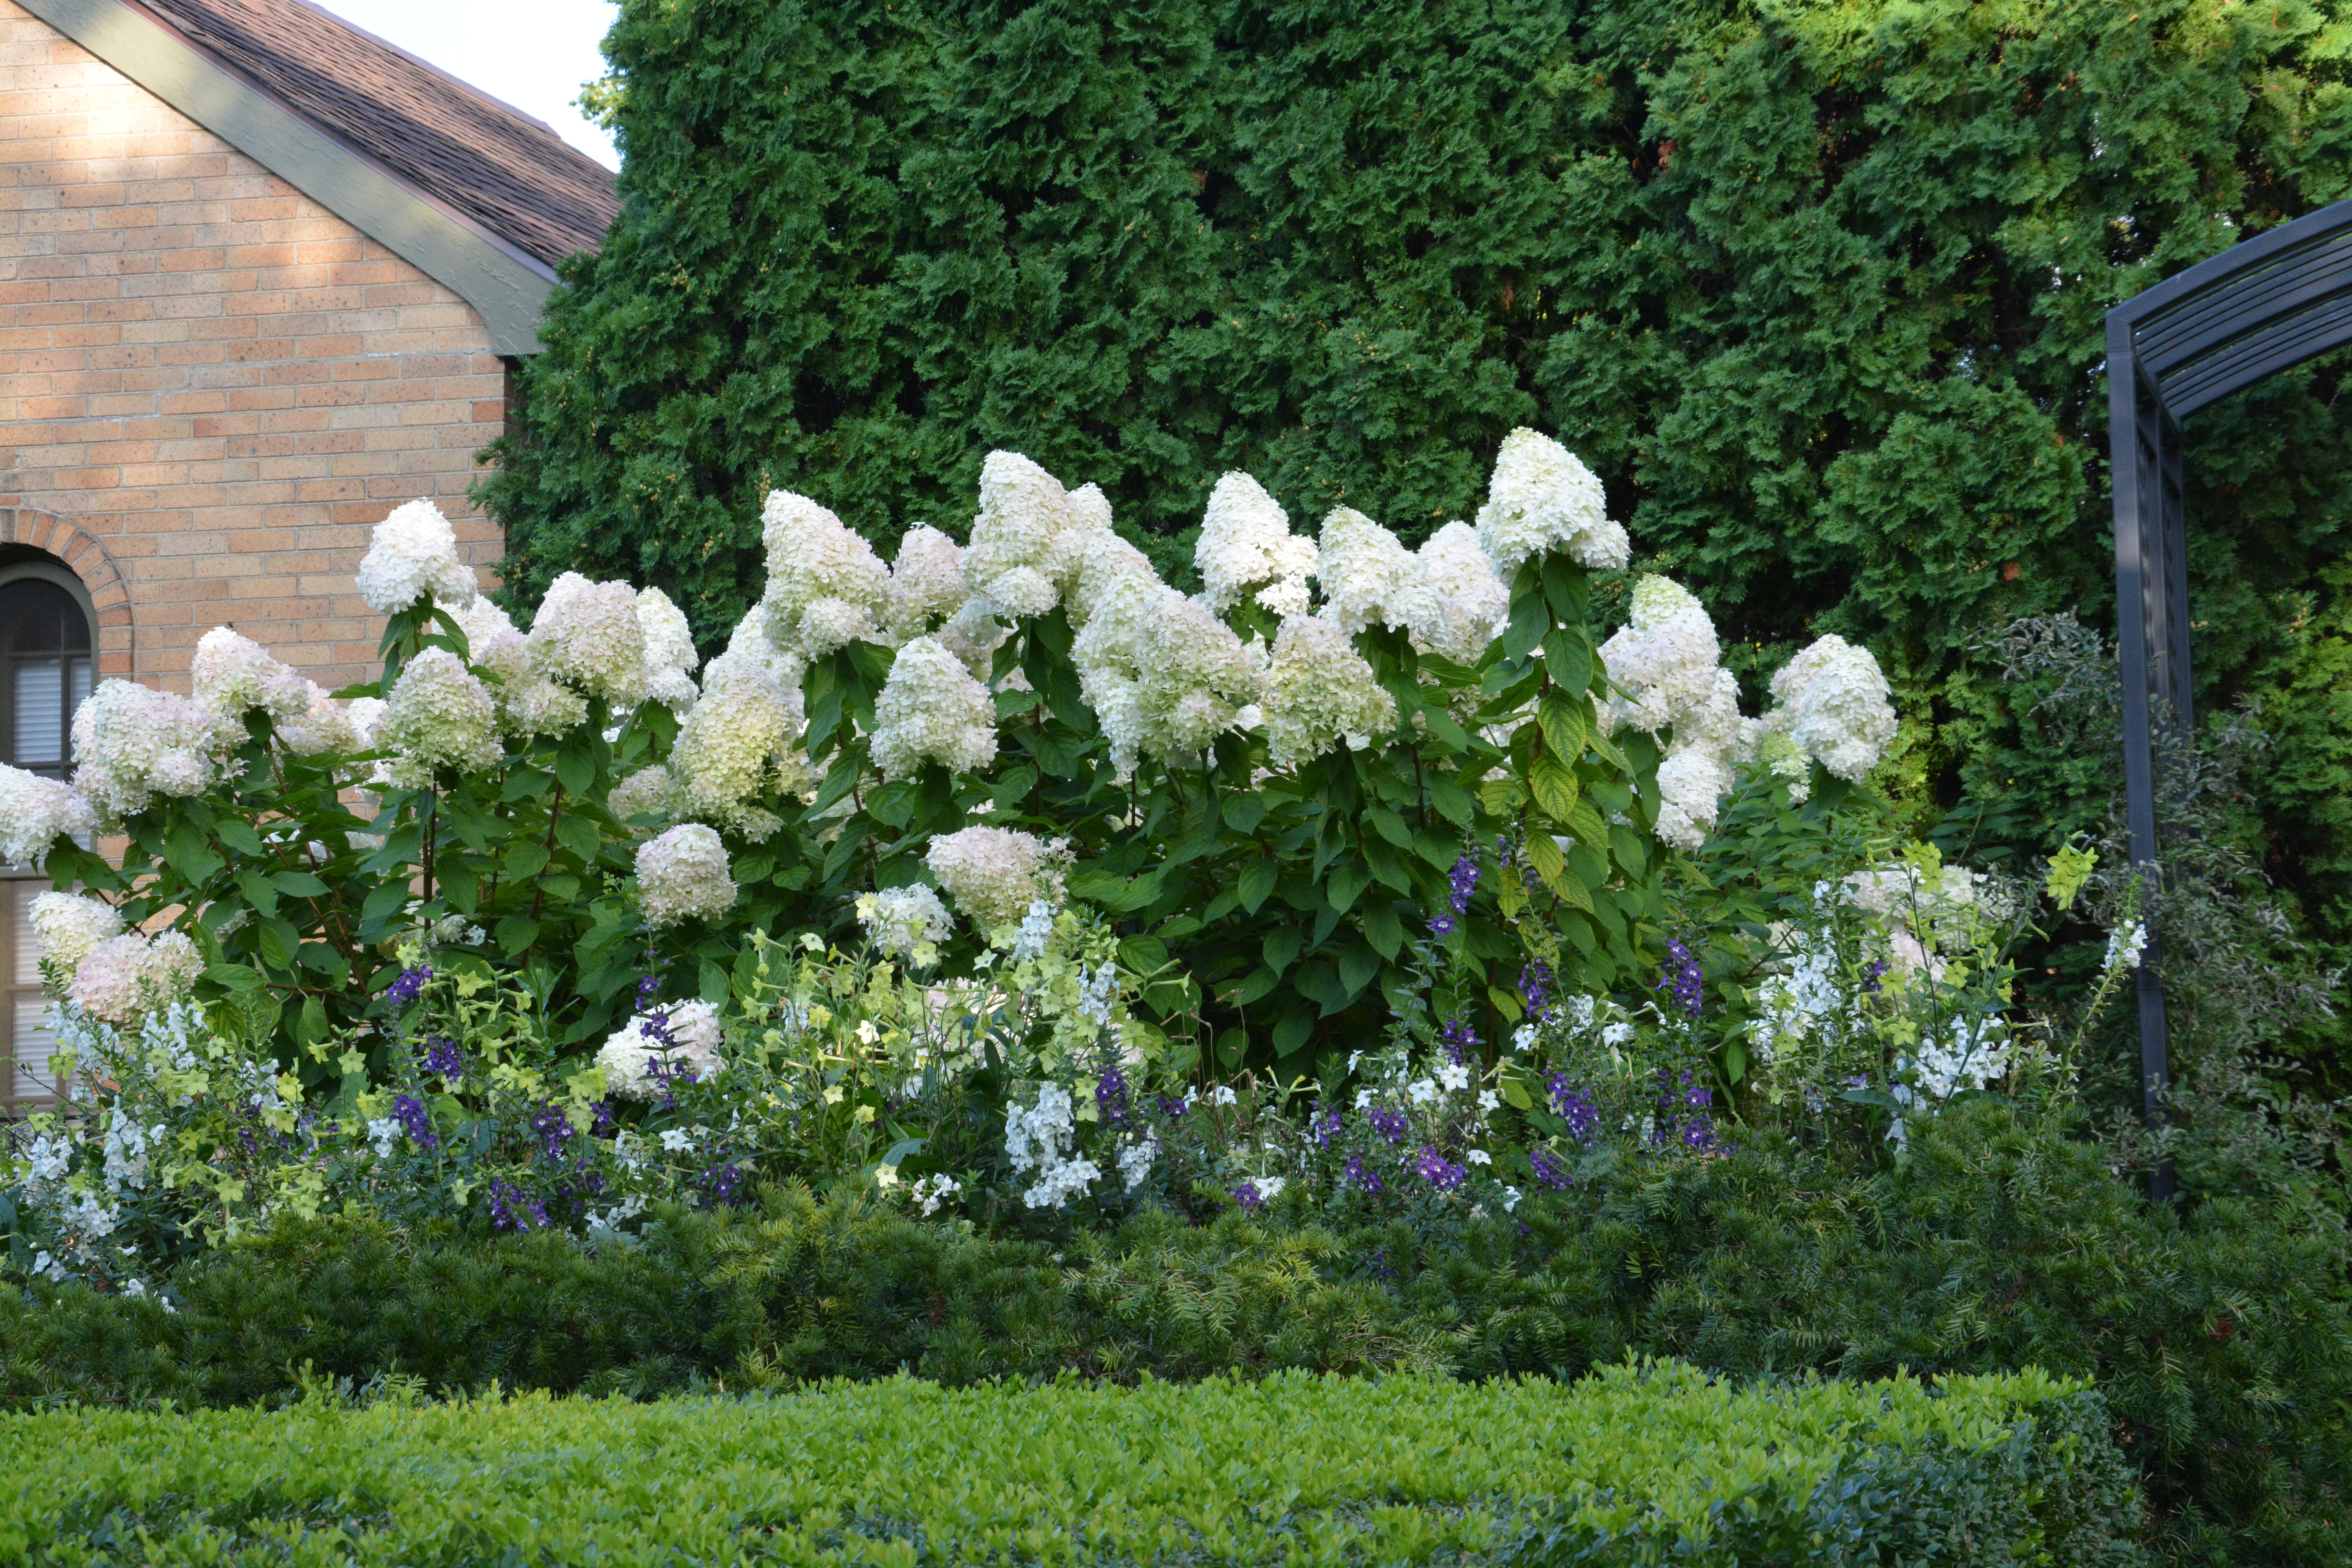
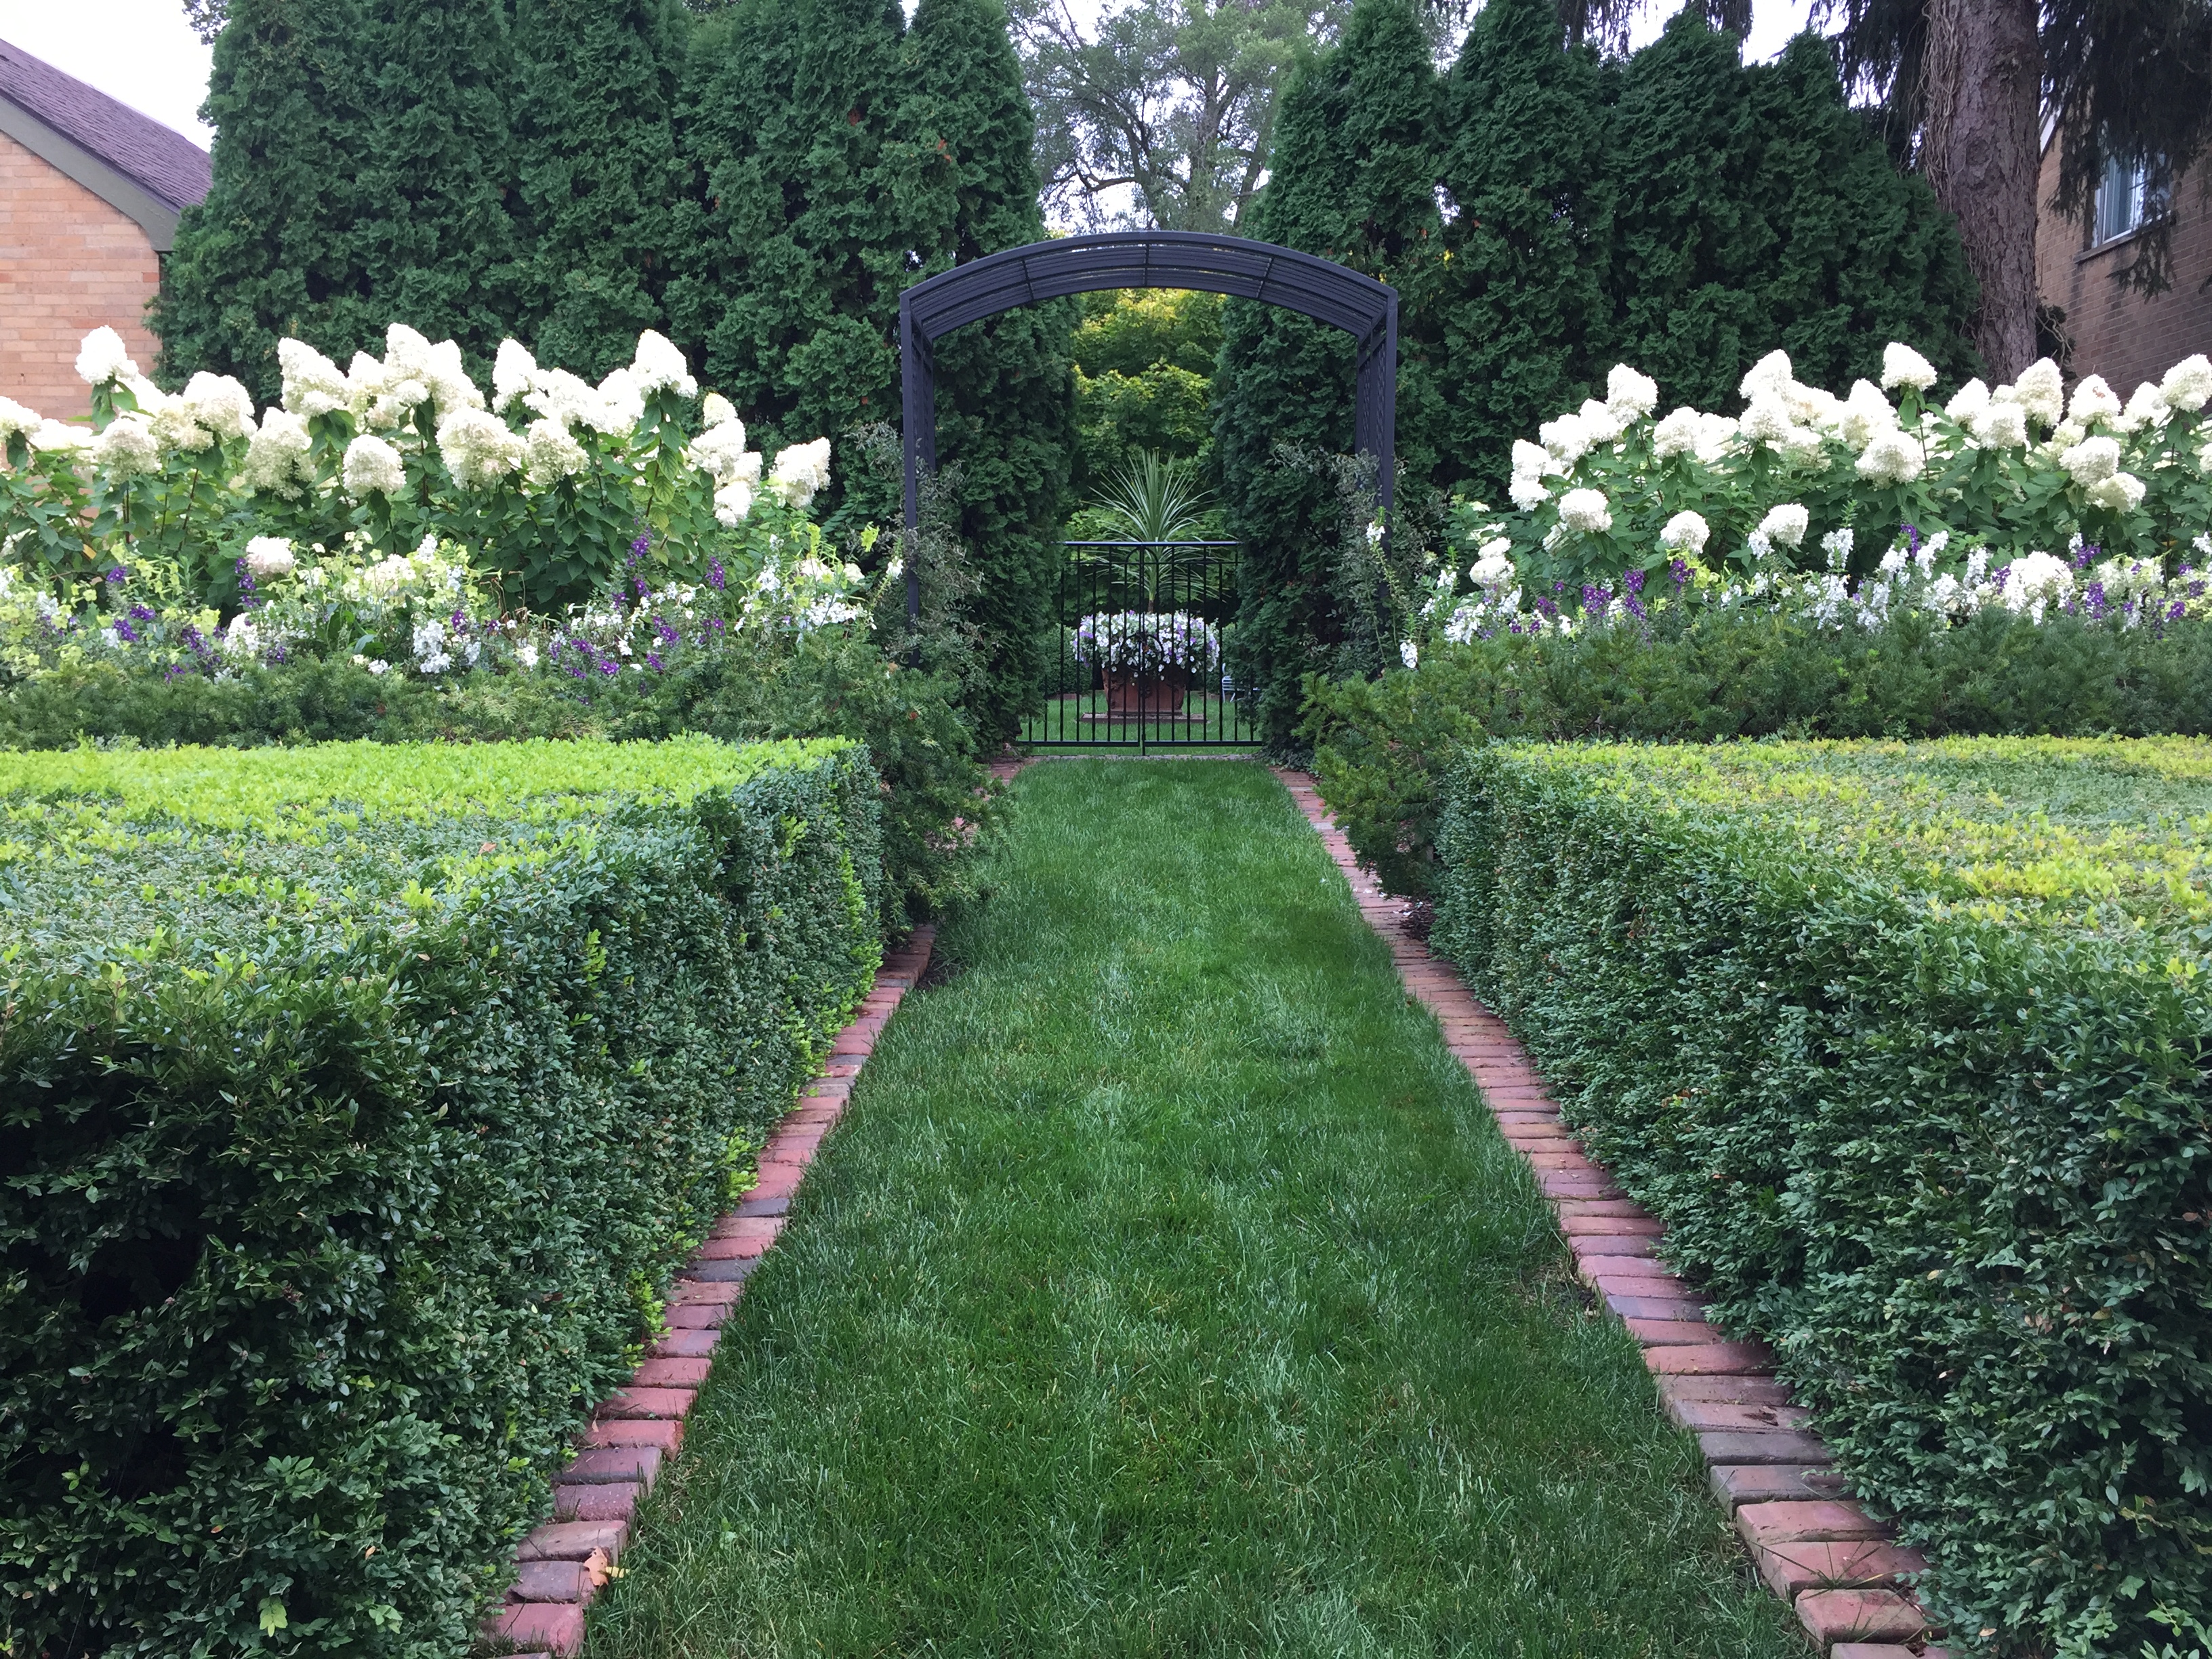
I grow Limelight hydrangeas at home. They are so showy in bloom, and so easy to grow. Mine are 15 years old. They deliver their gorgeous blooms every year on time, in spite of a lackluster or hurried early spring pruning on my part – or that week that I forgot to water them. They are forgiving of any bad move on the part of a gardener. They thrive with a minimum of care. They give so much more than they ask. They endow my August garden with that special garden magic I call summer. I would not do without them.

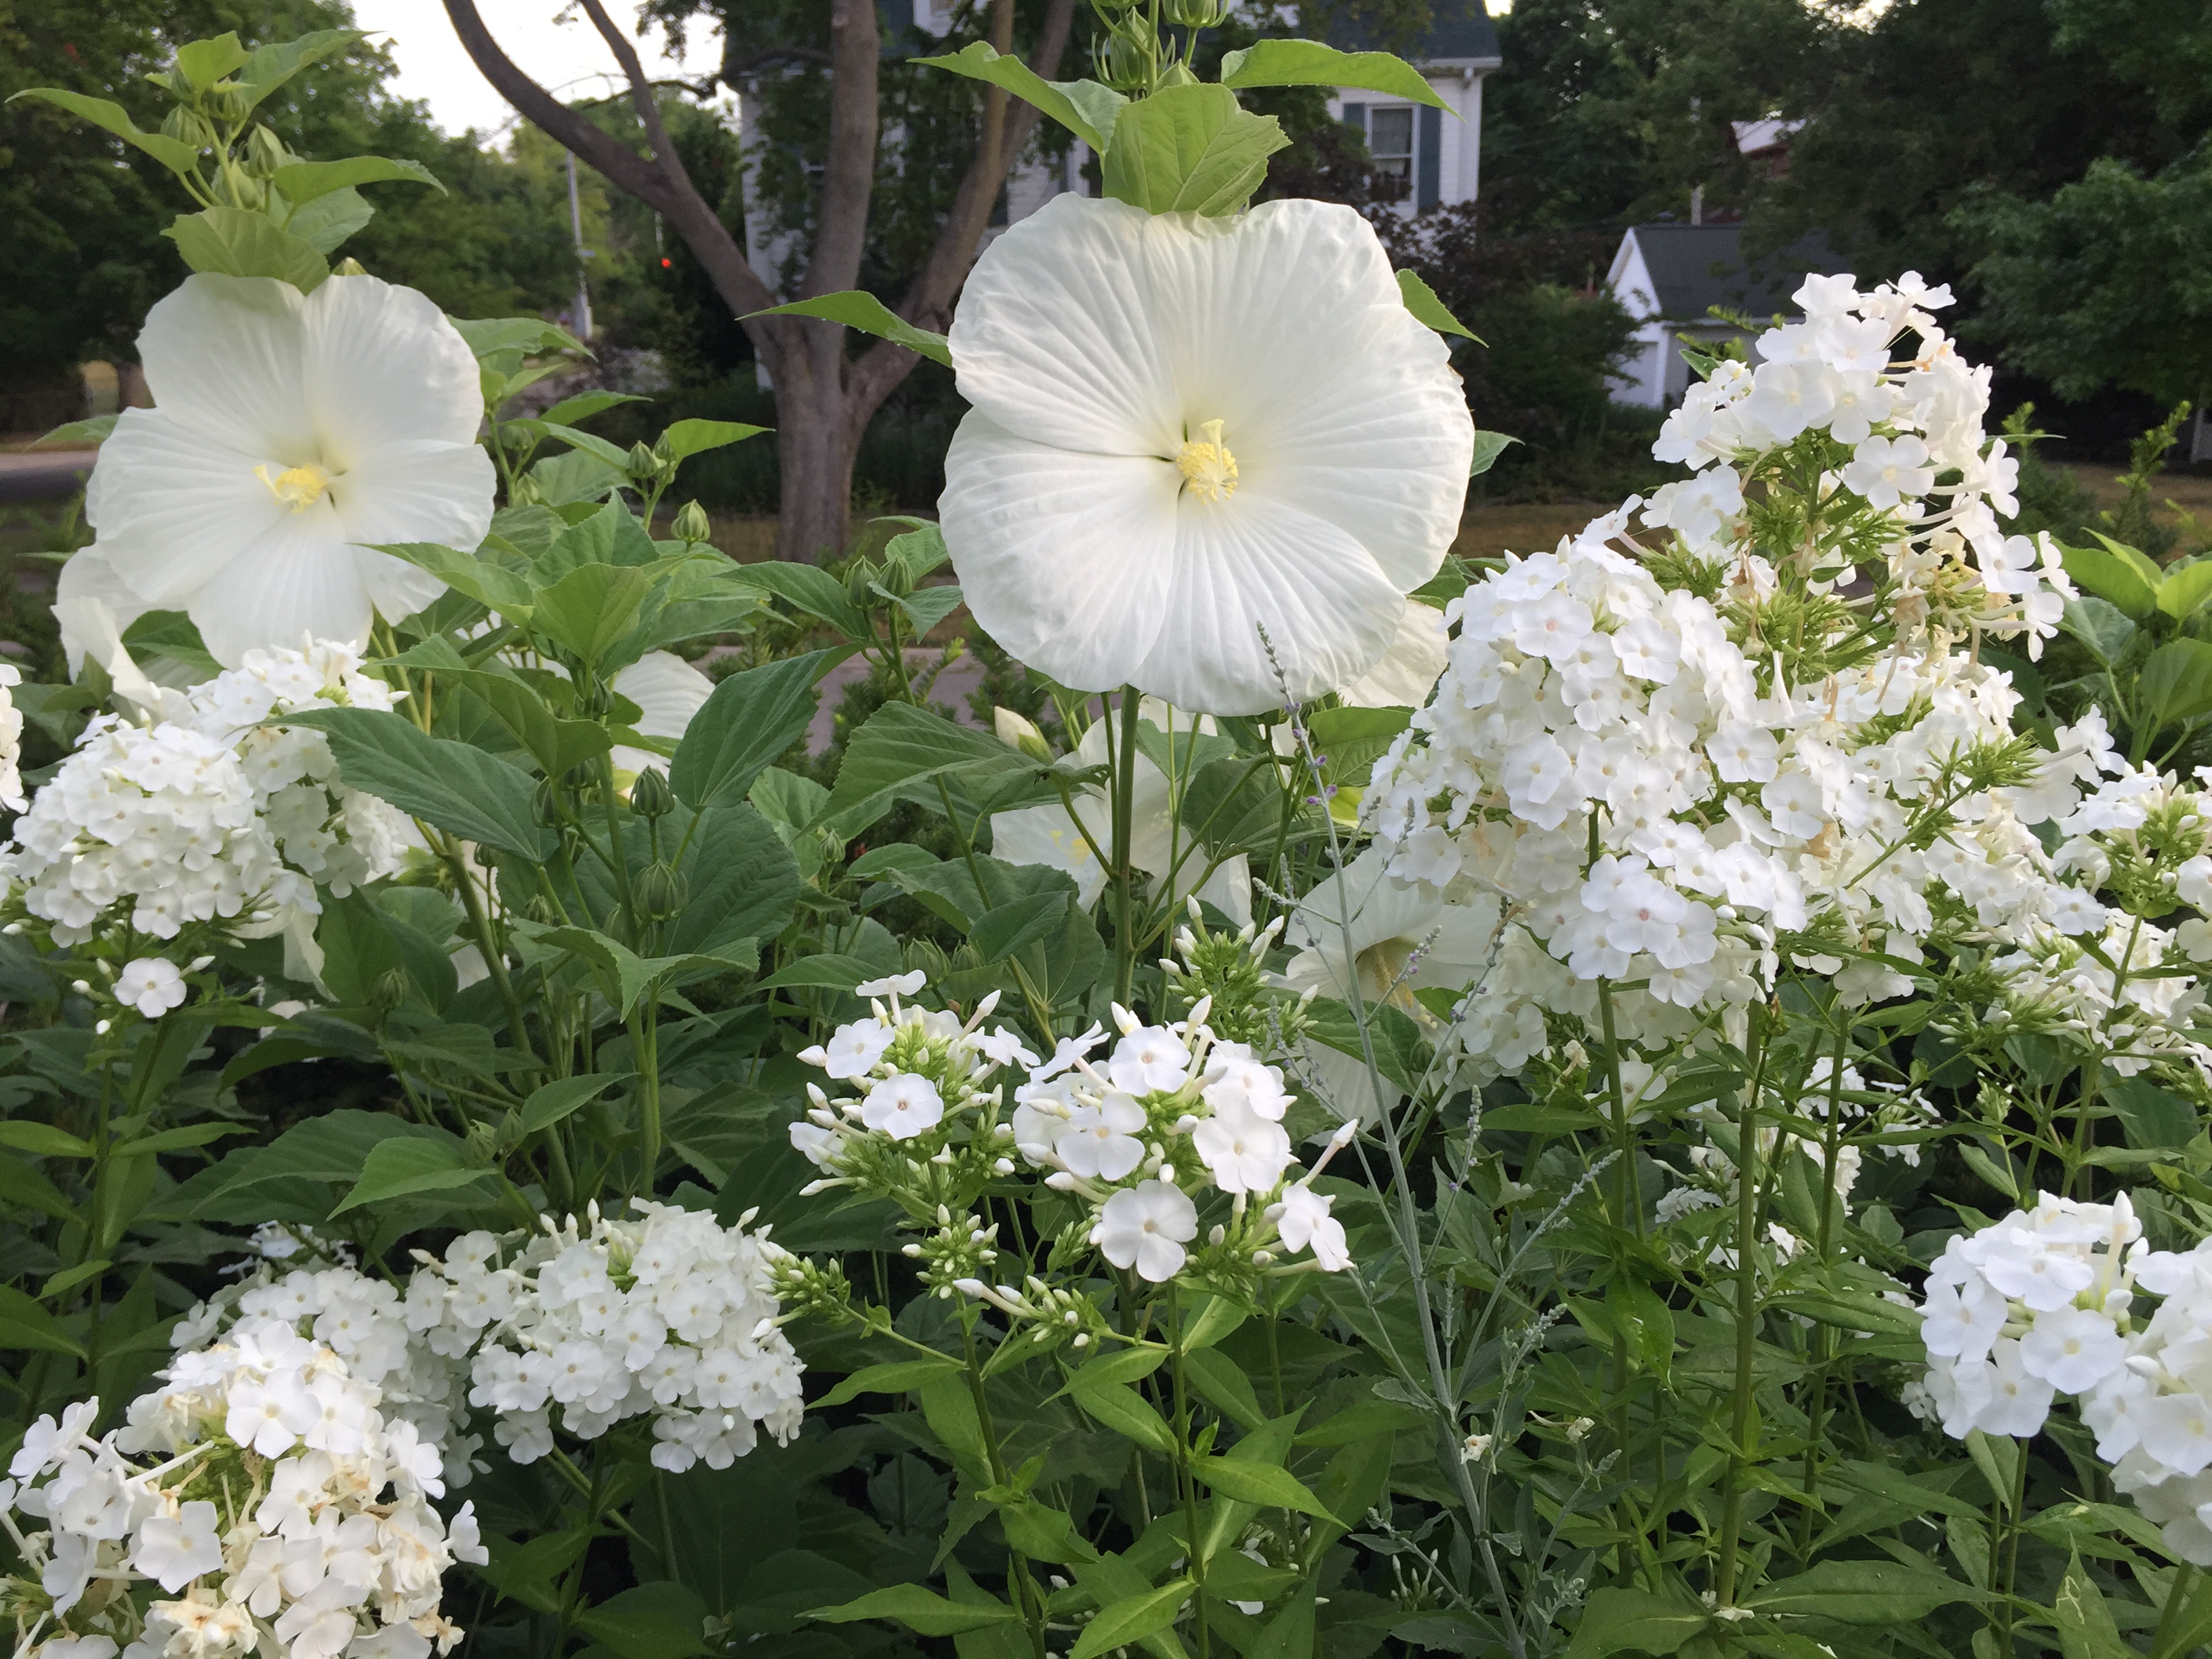
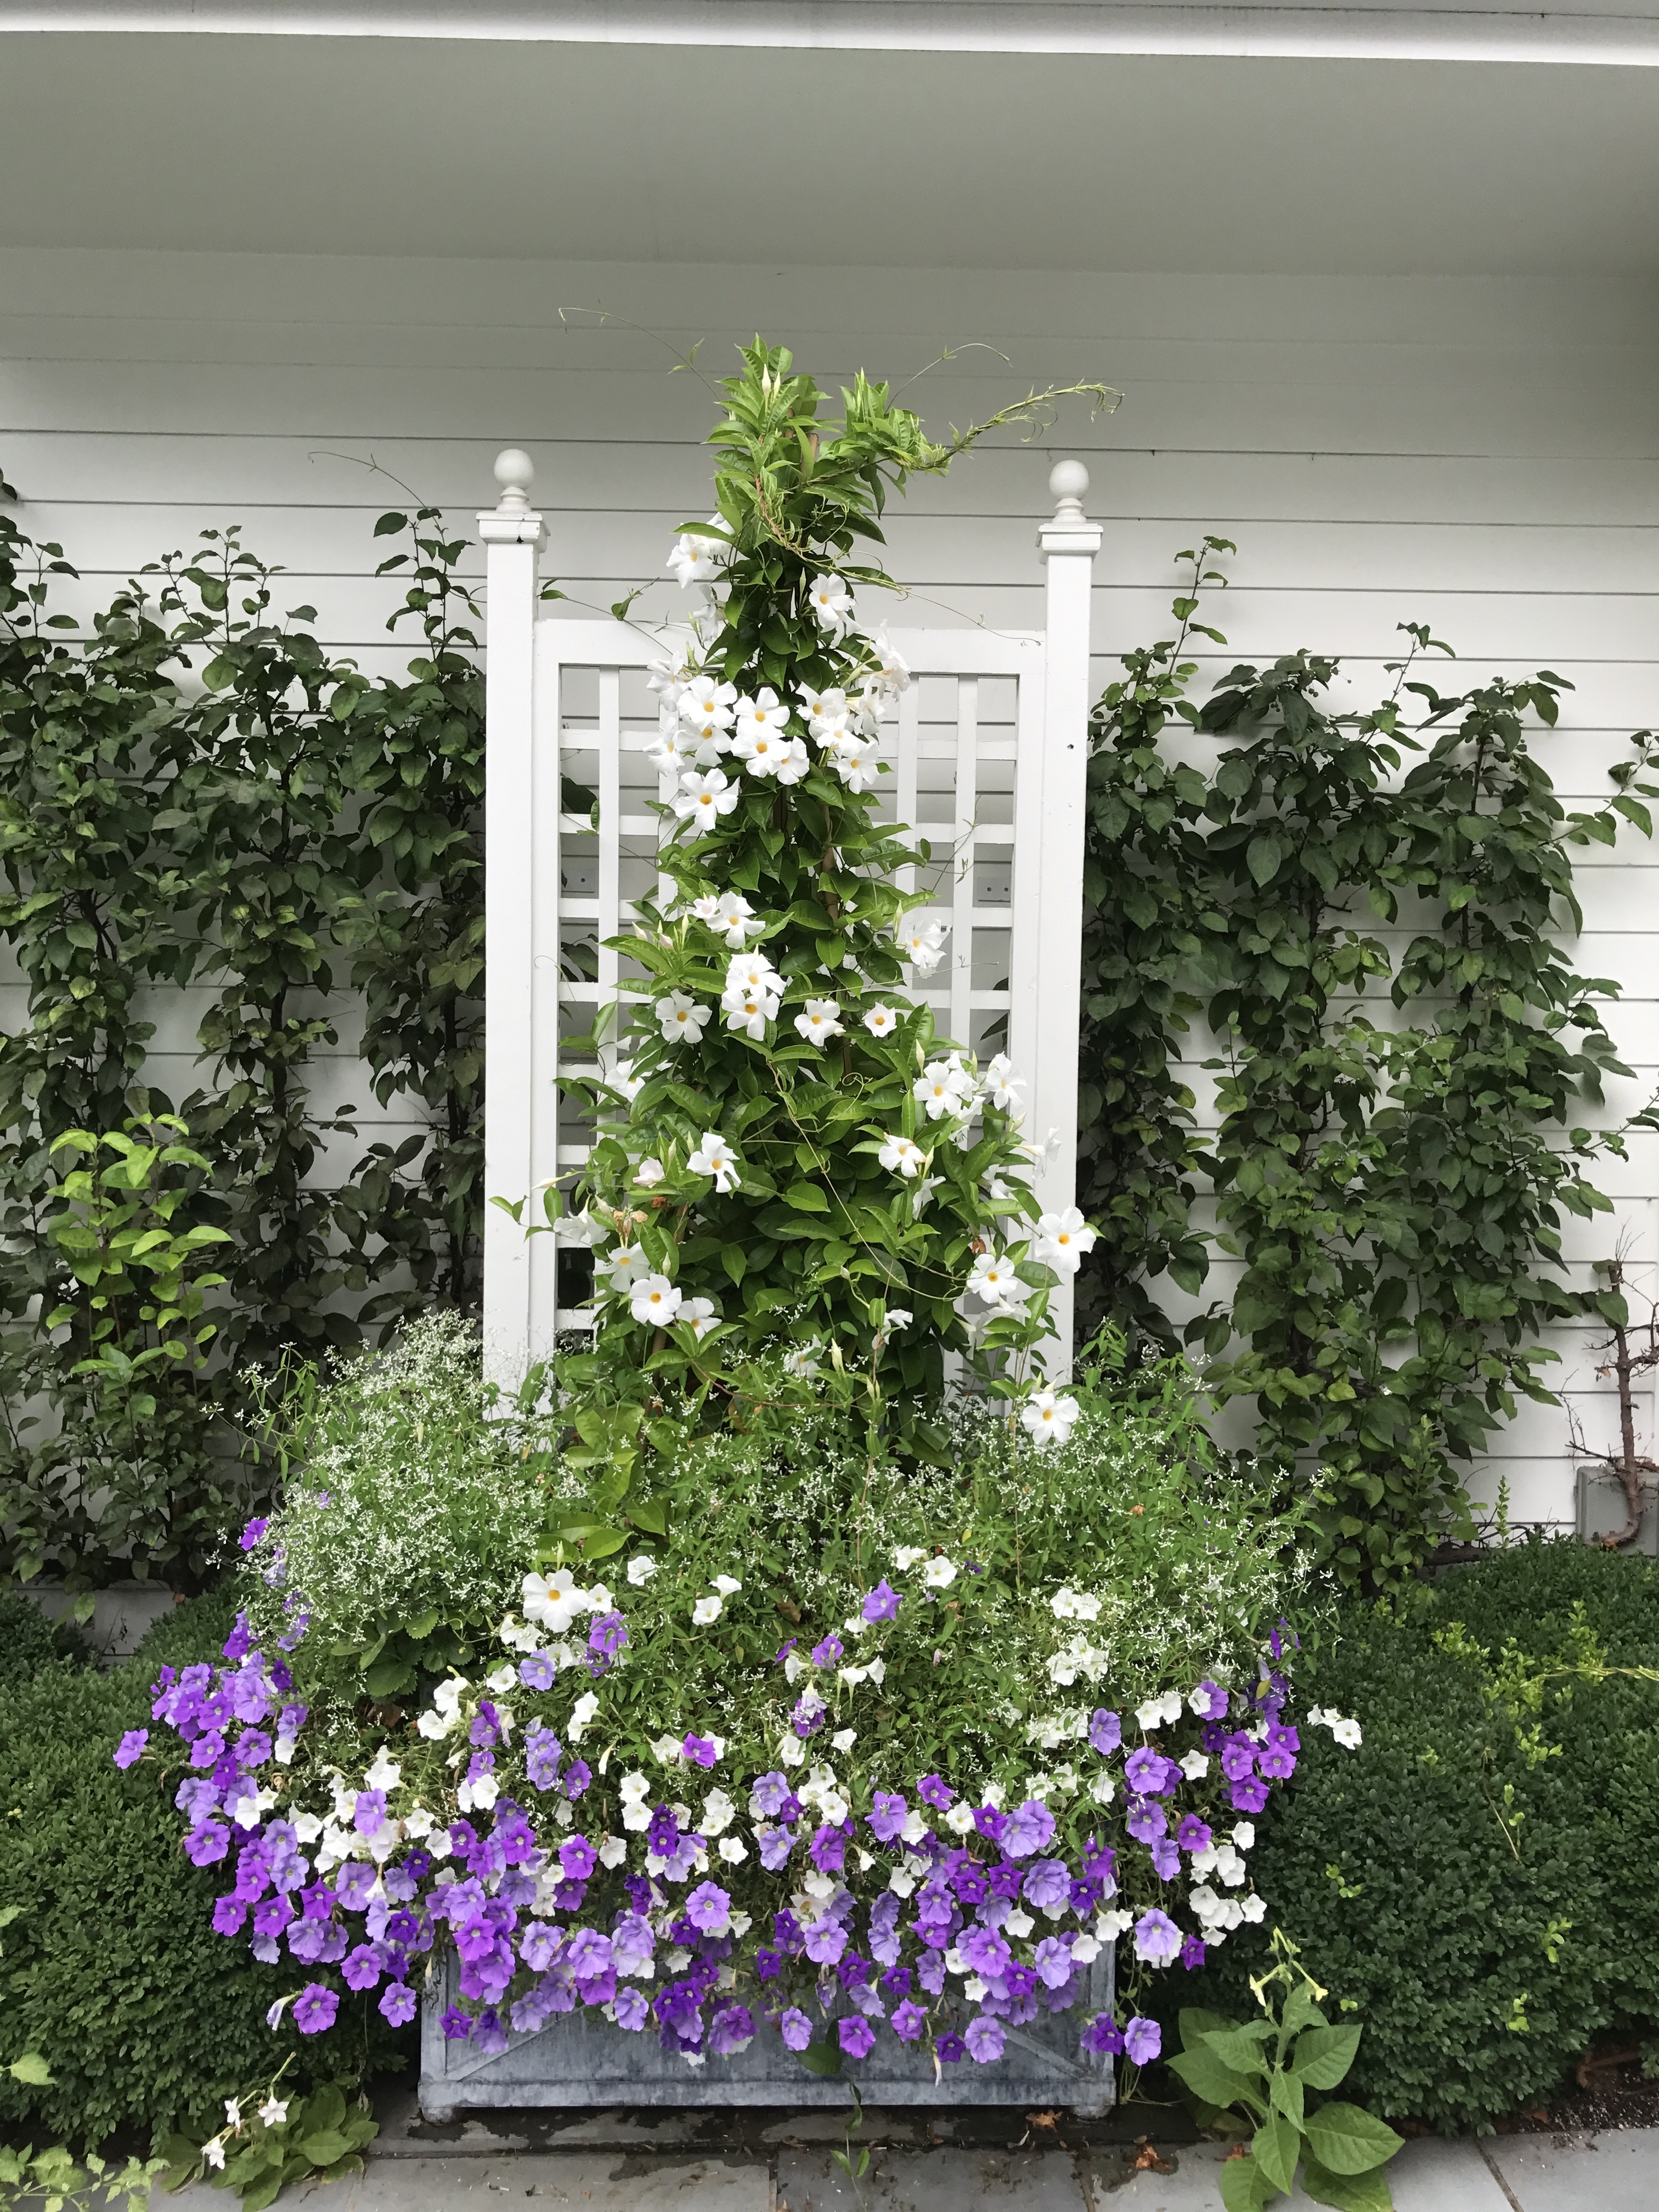
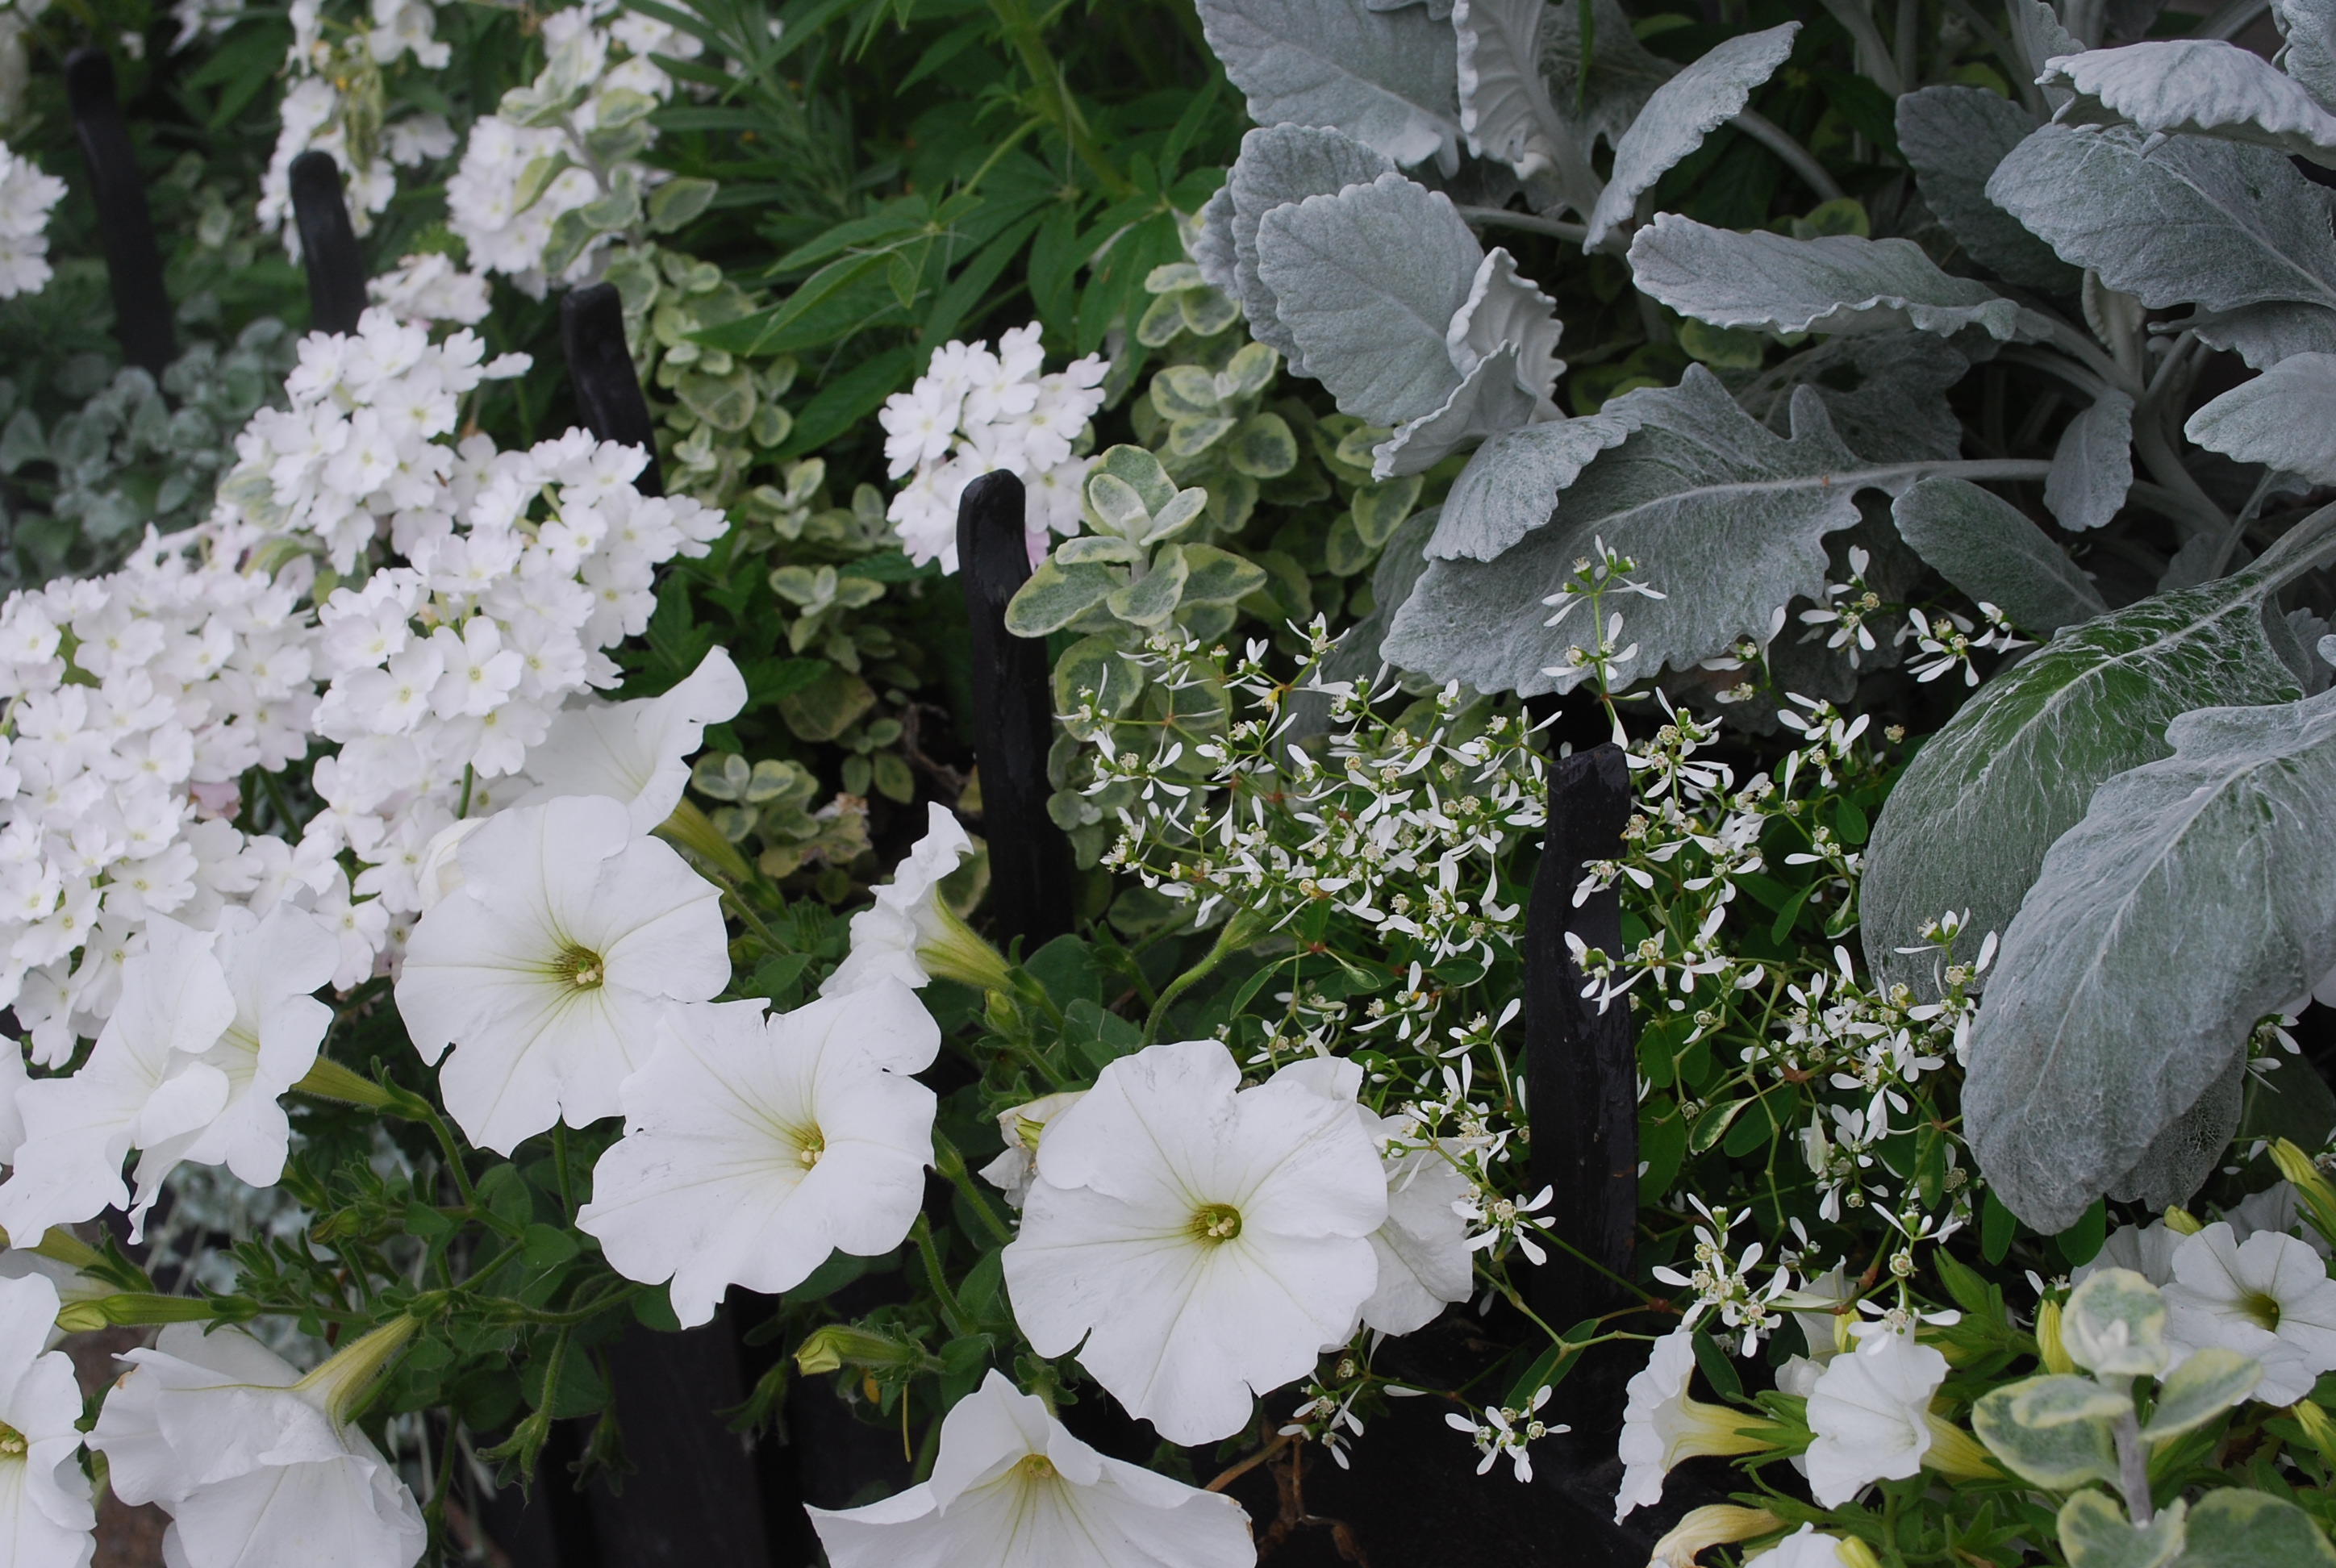
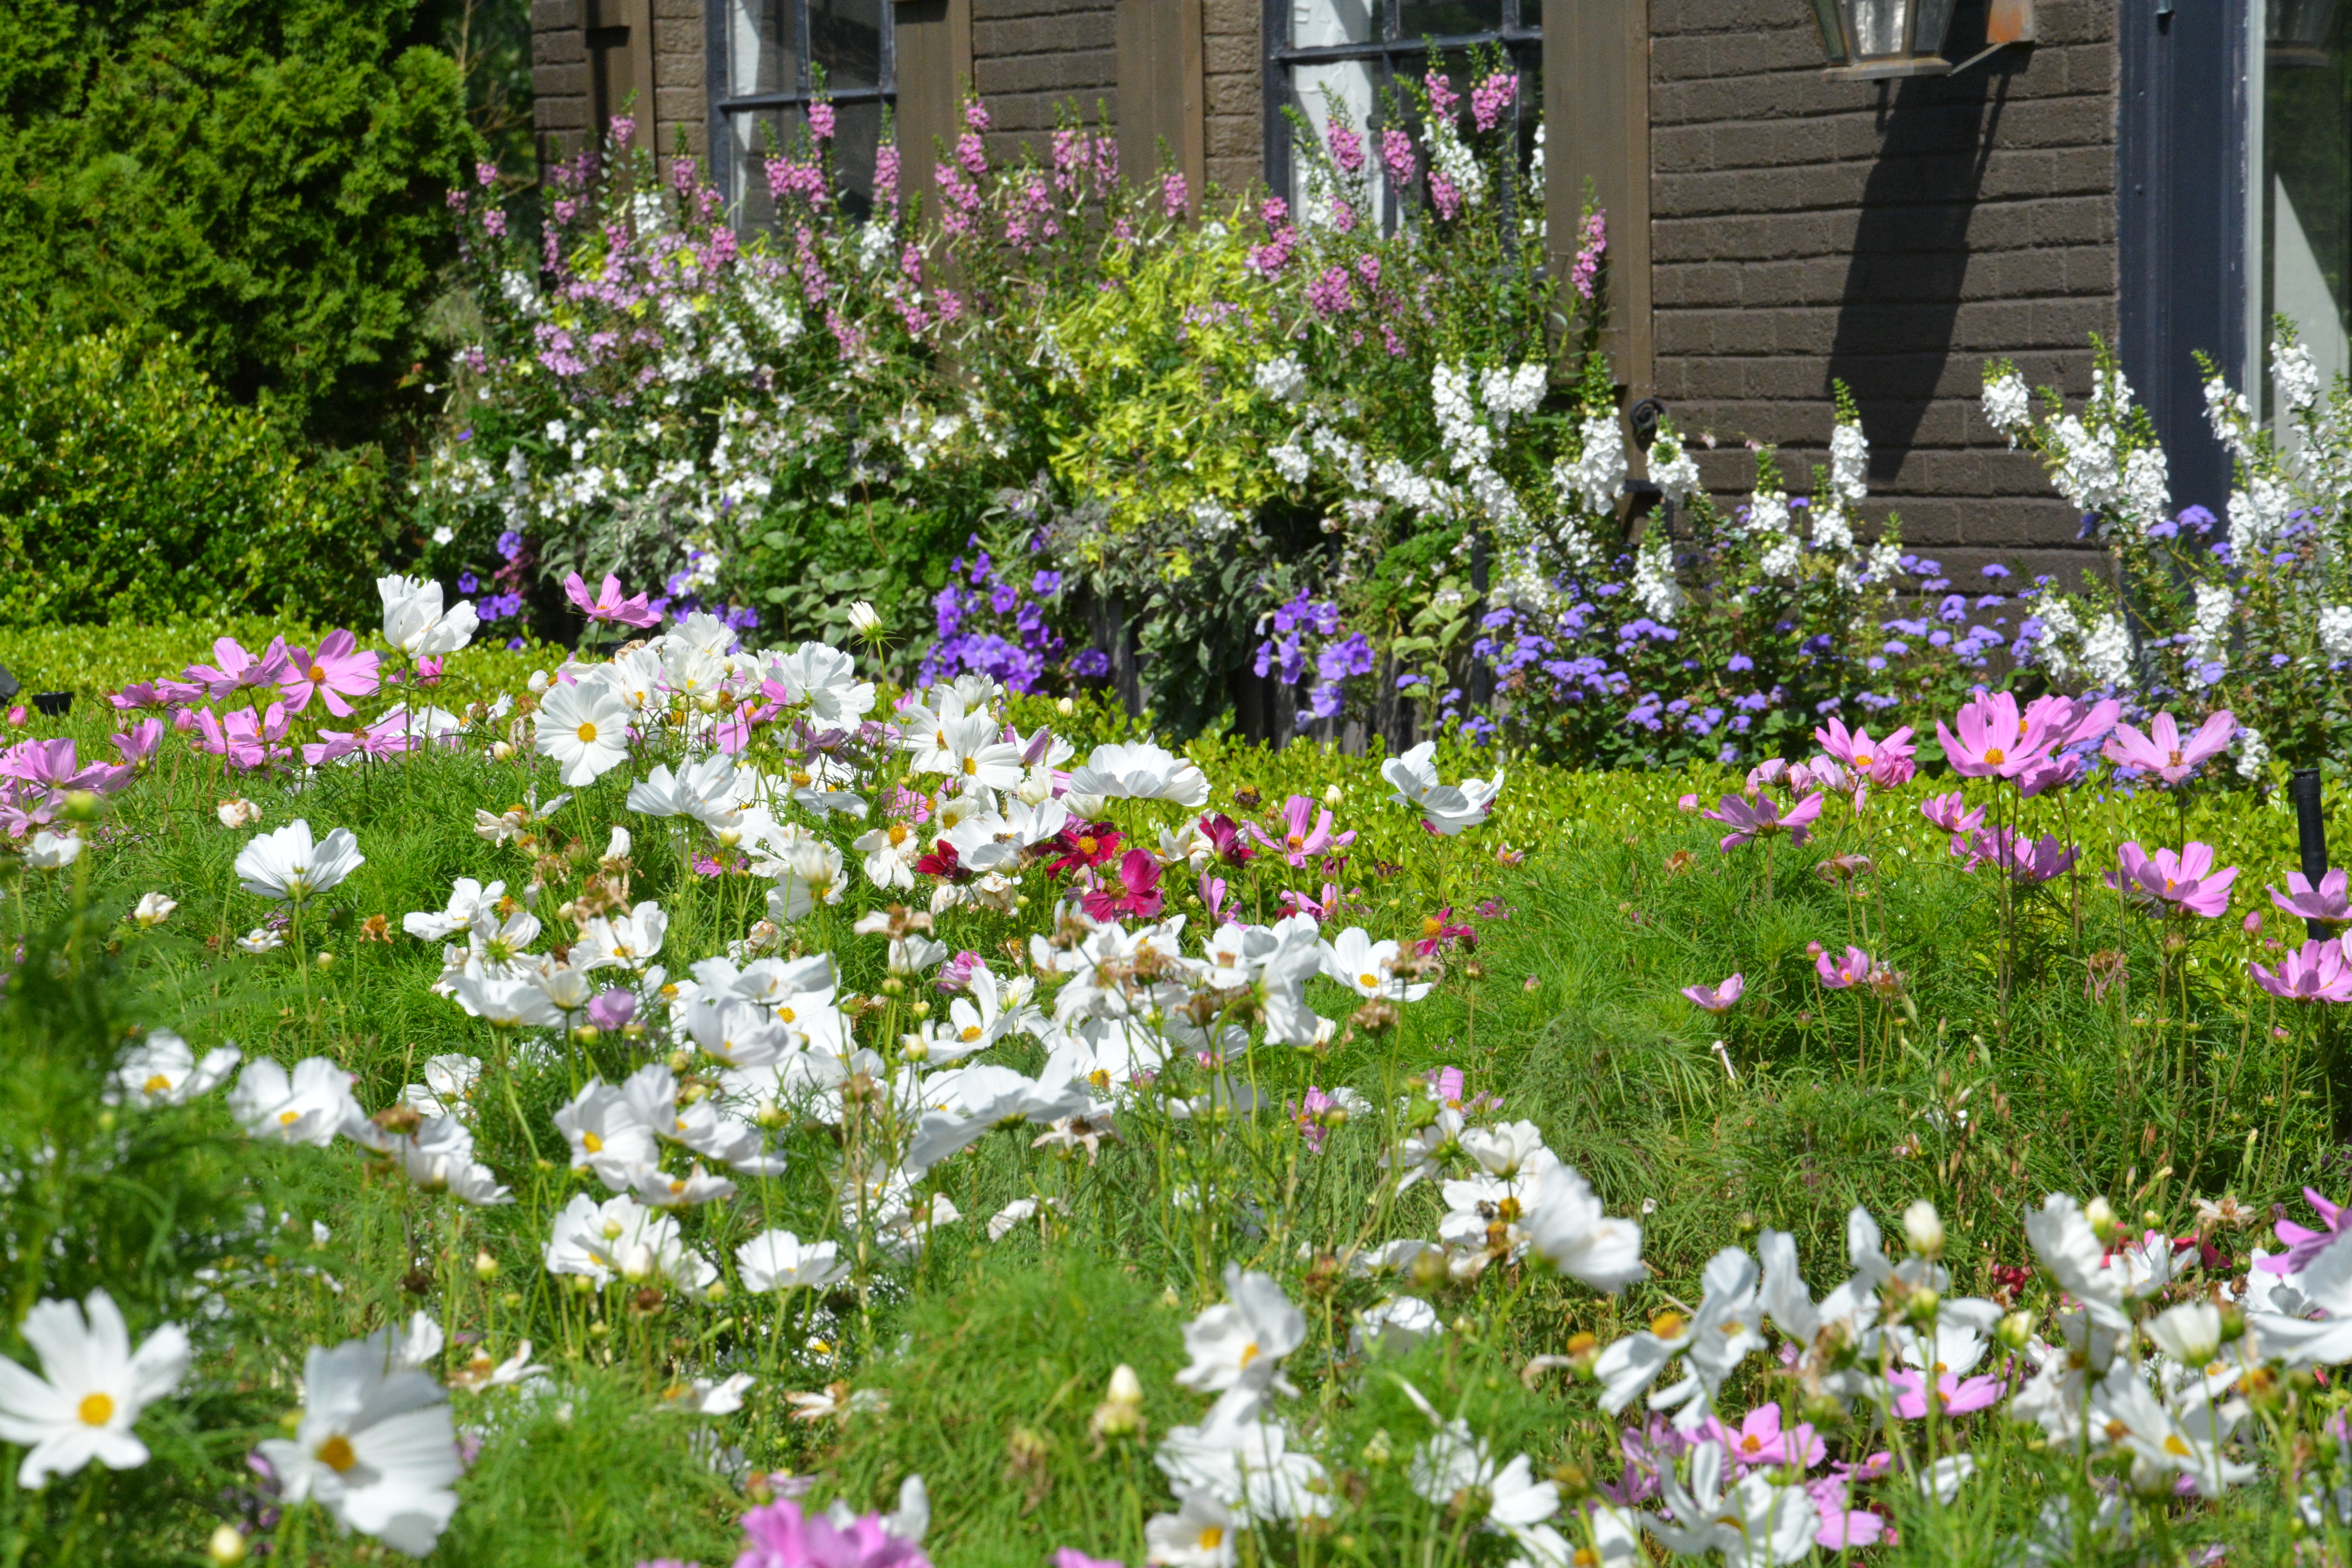
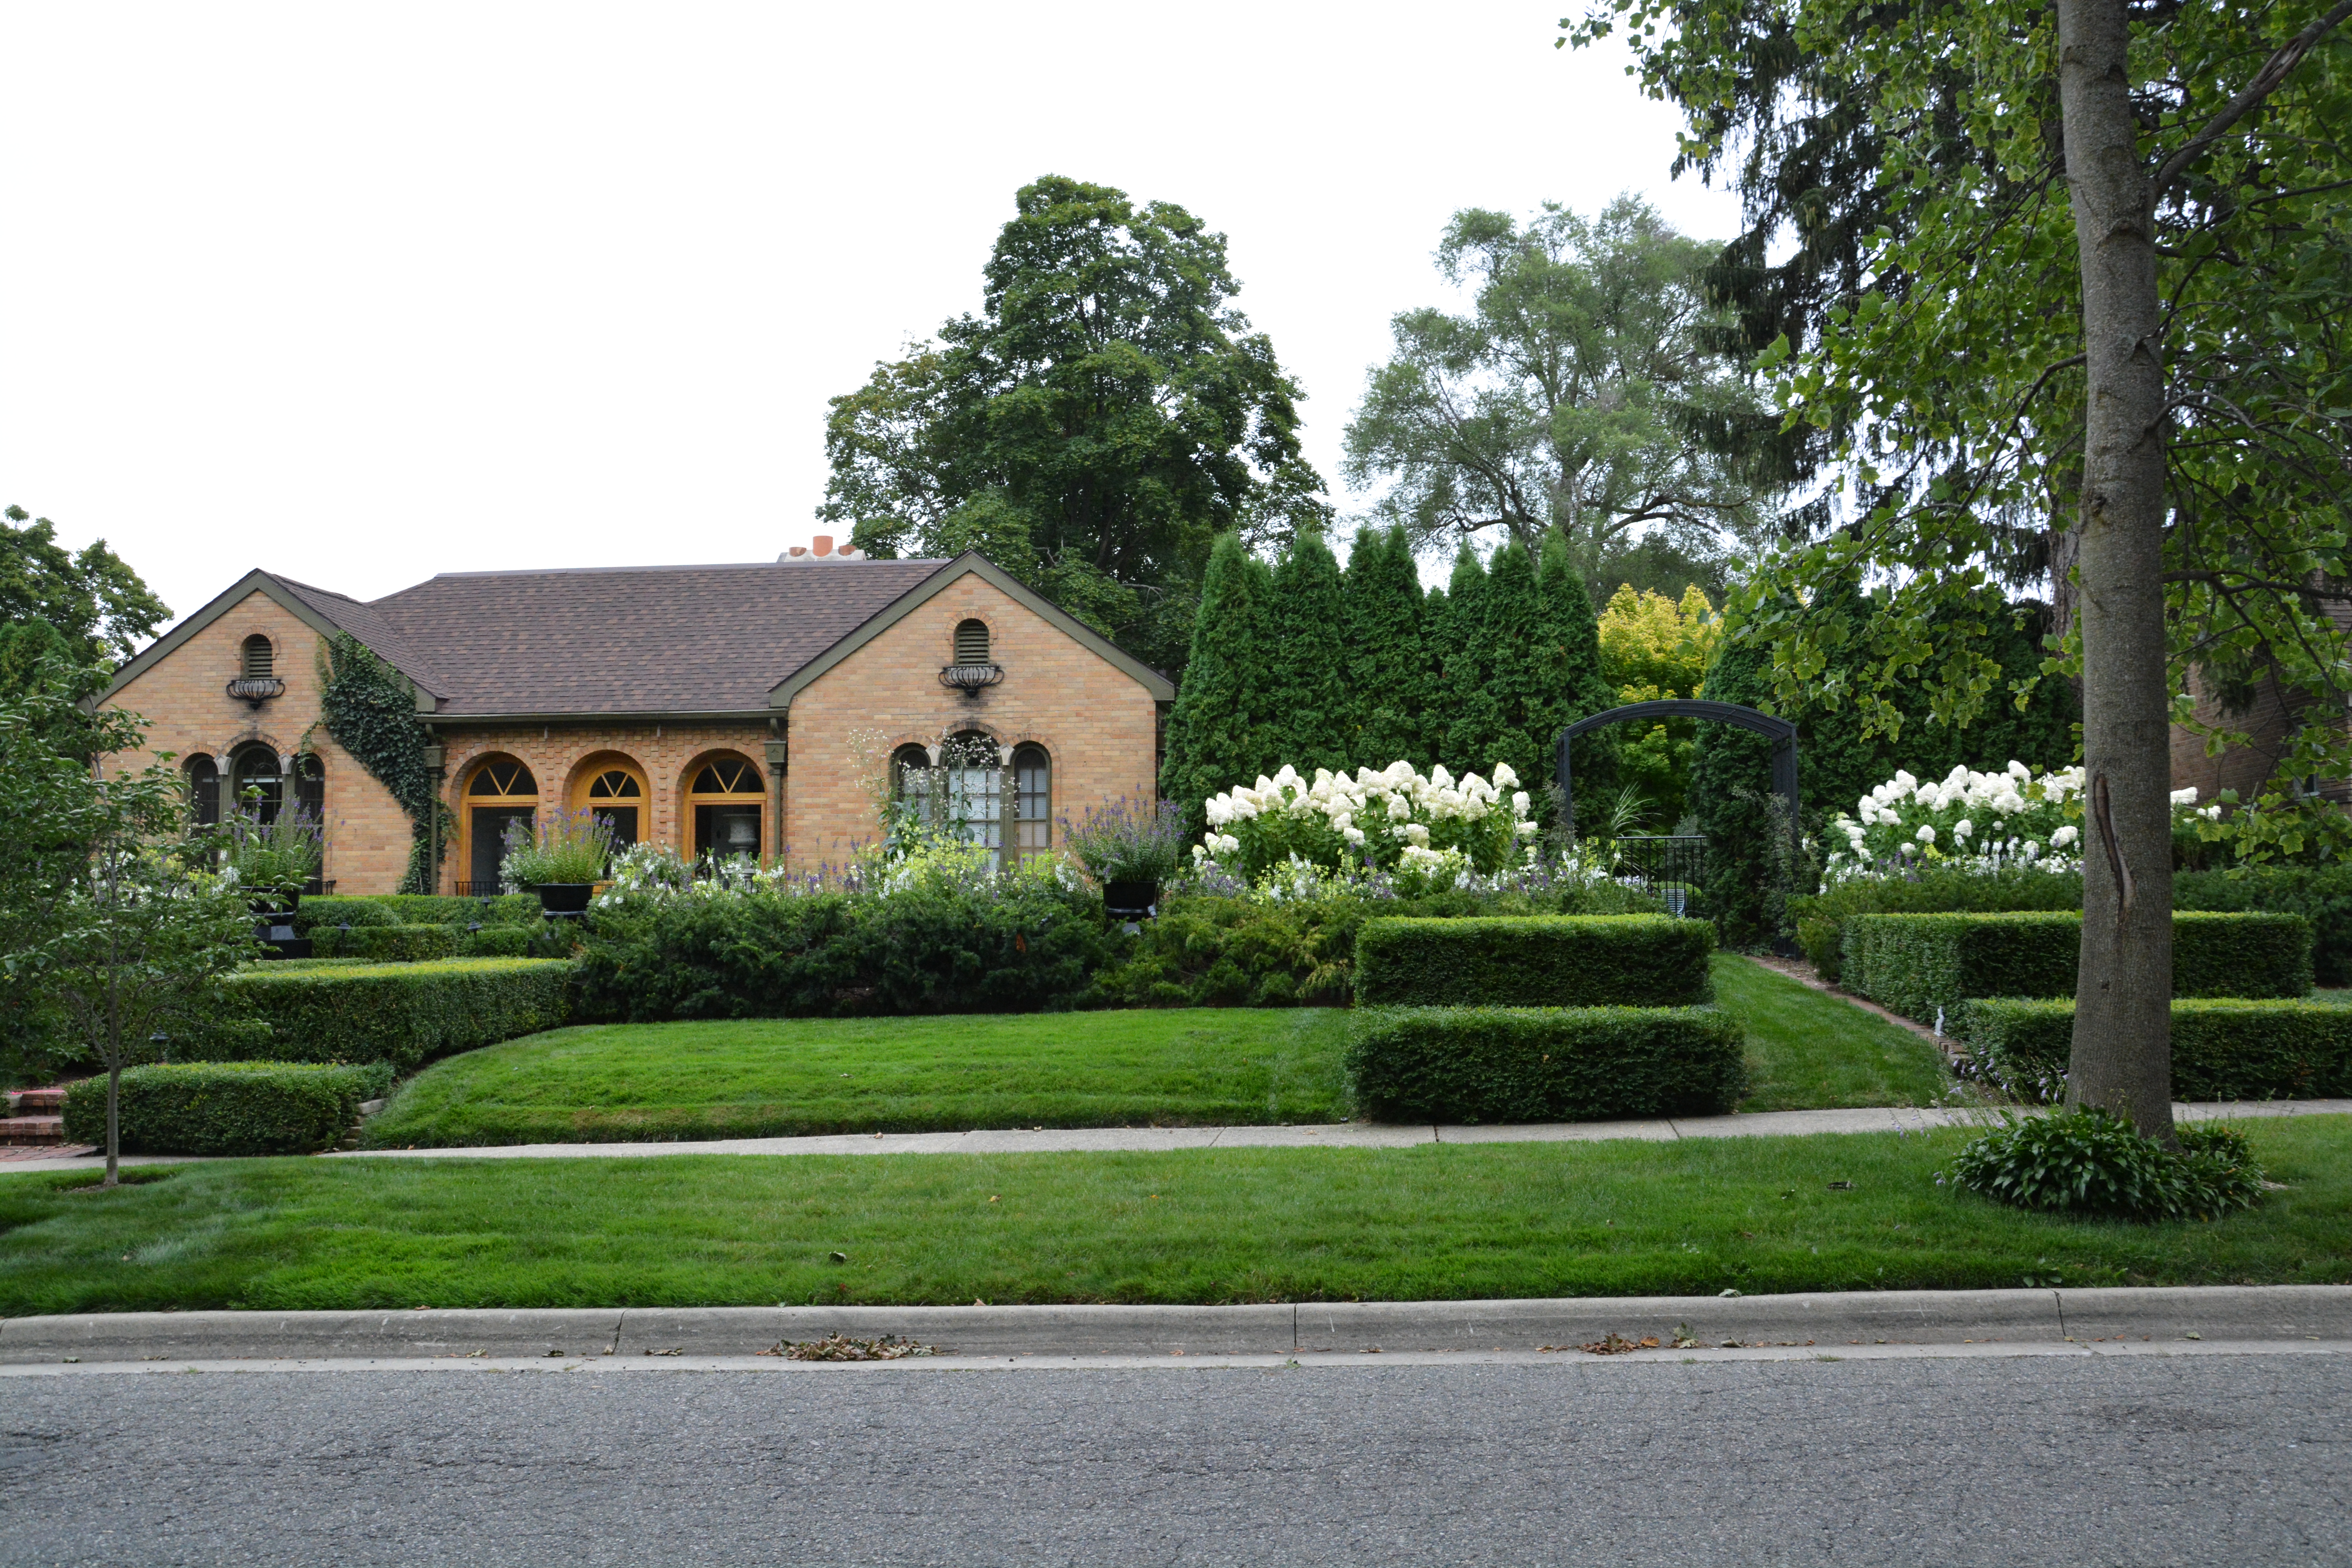
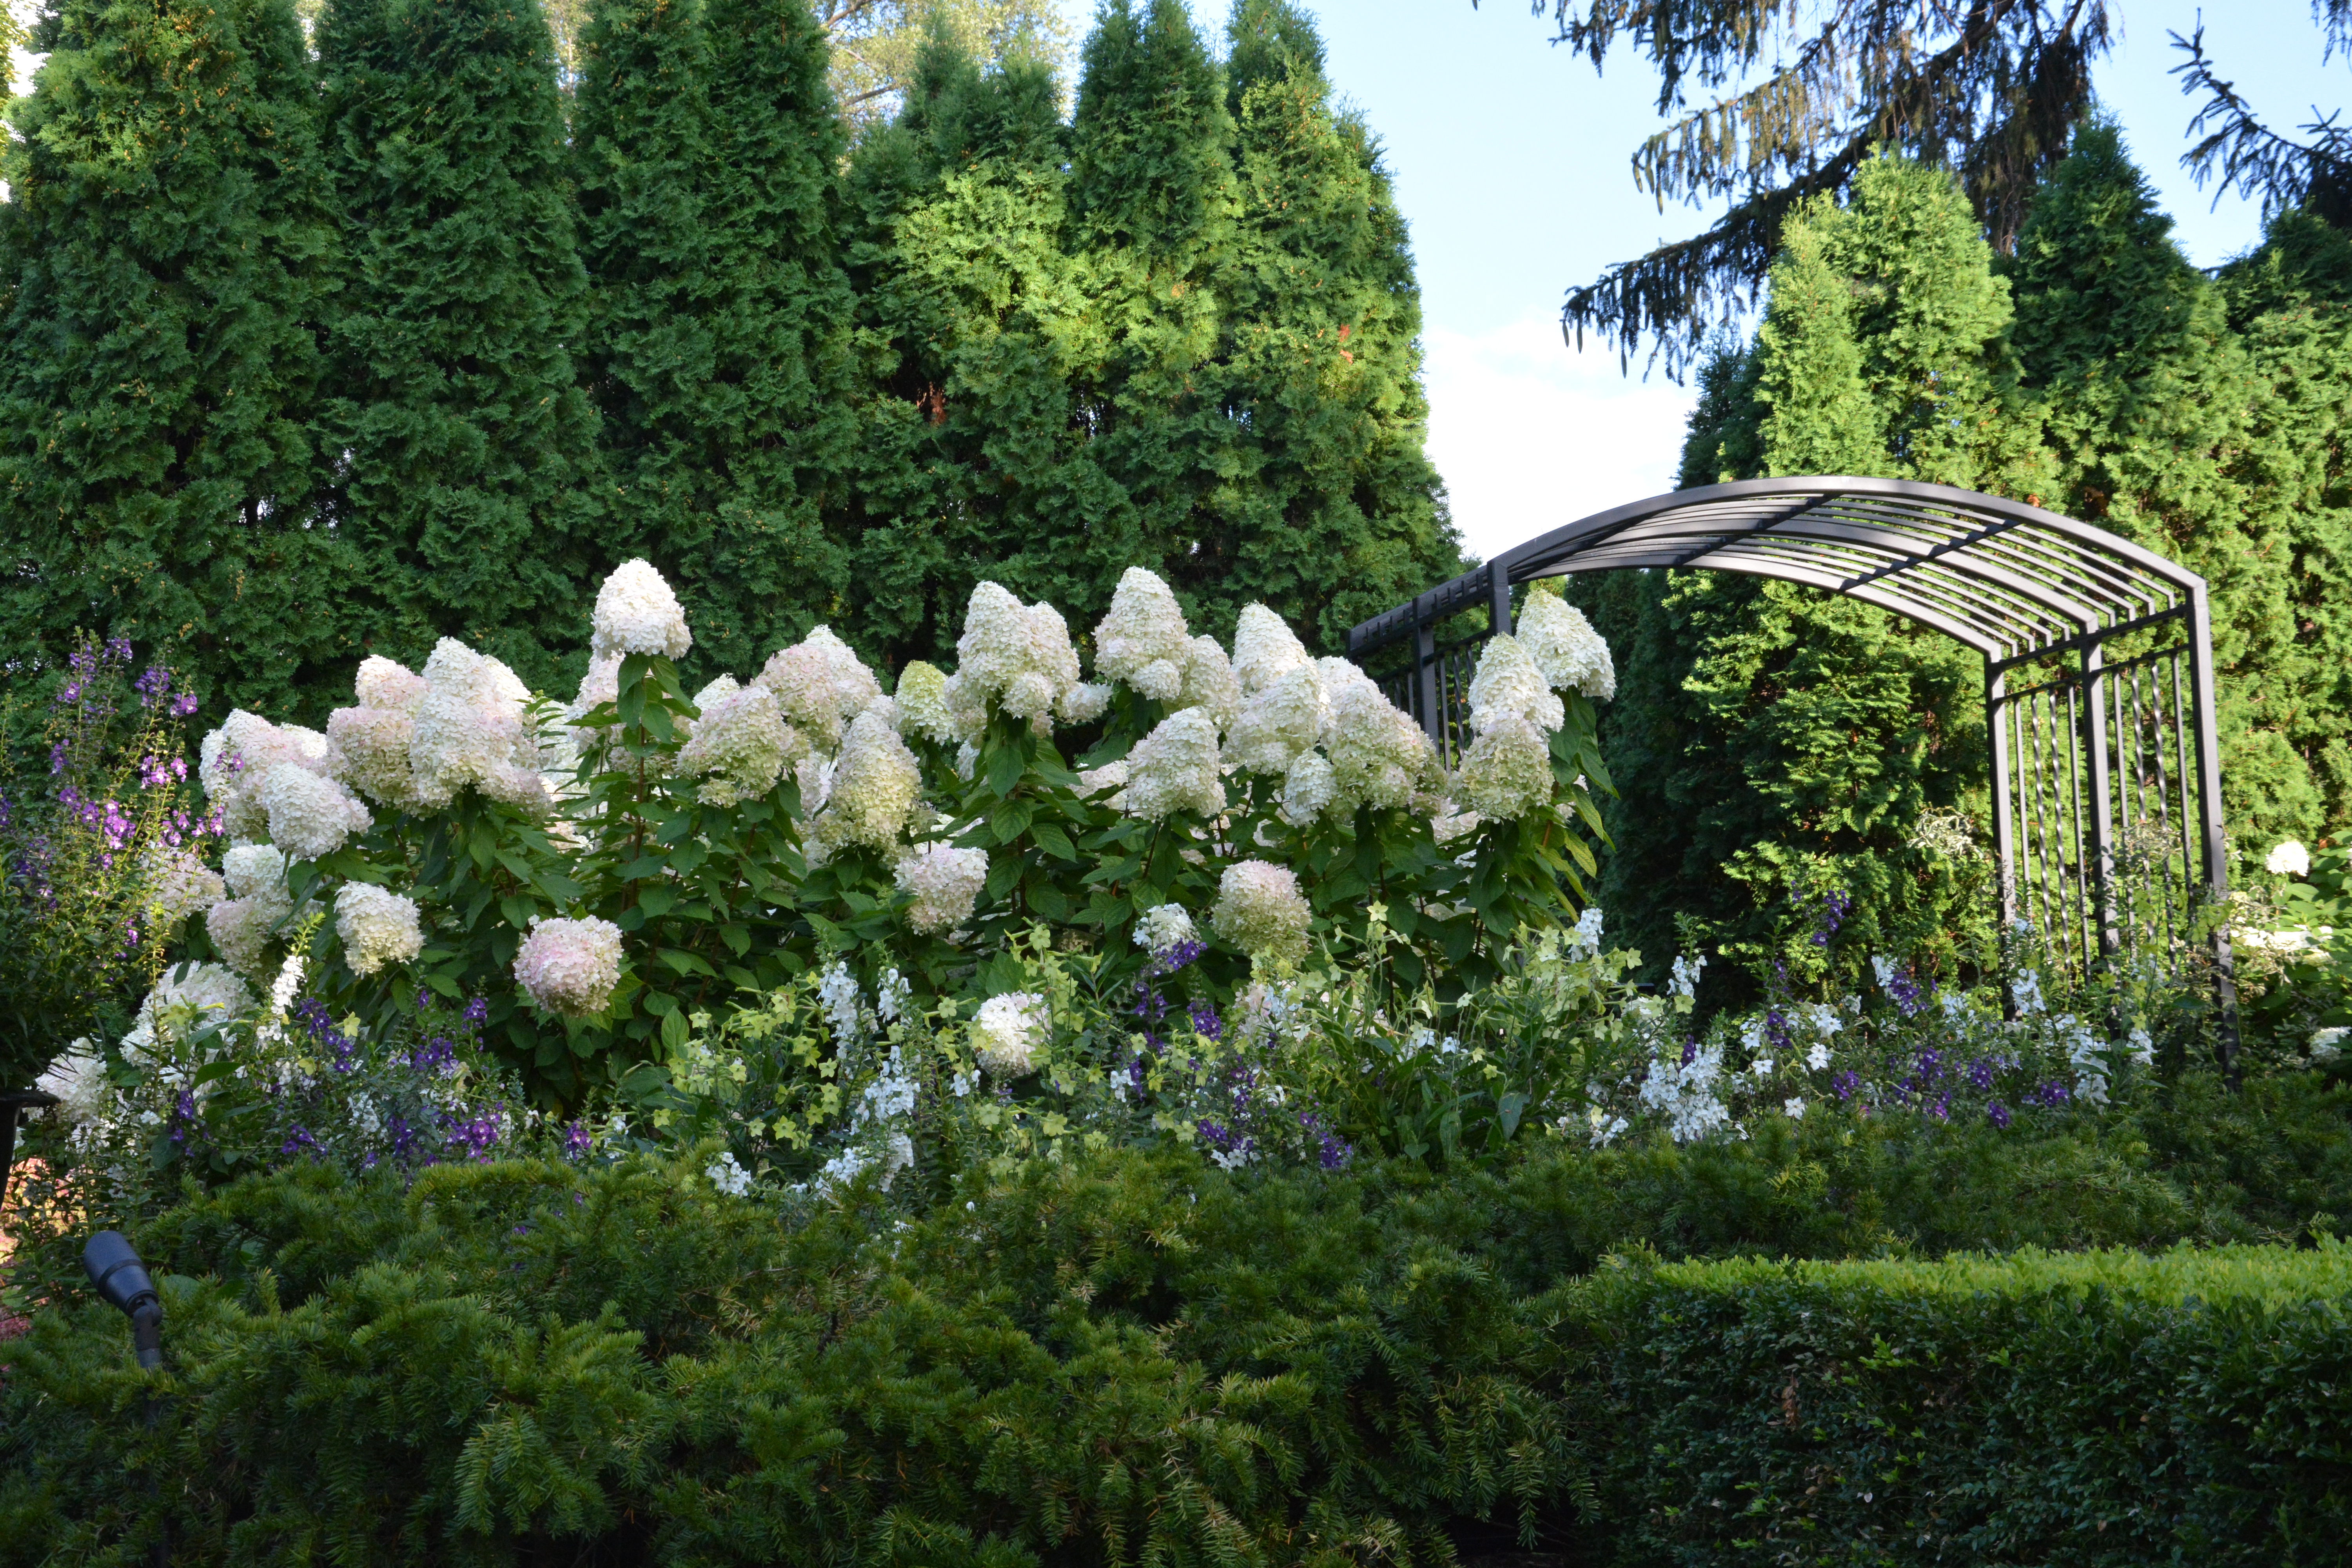
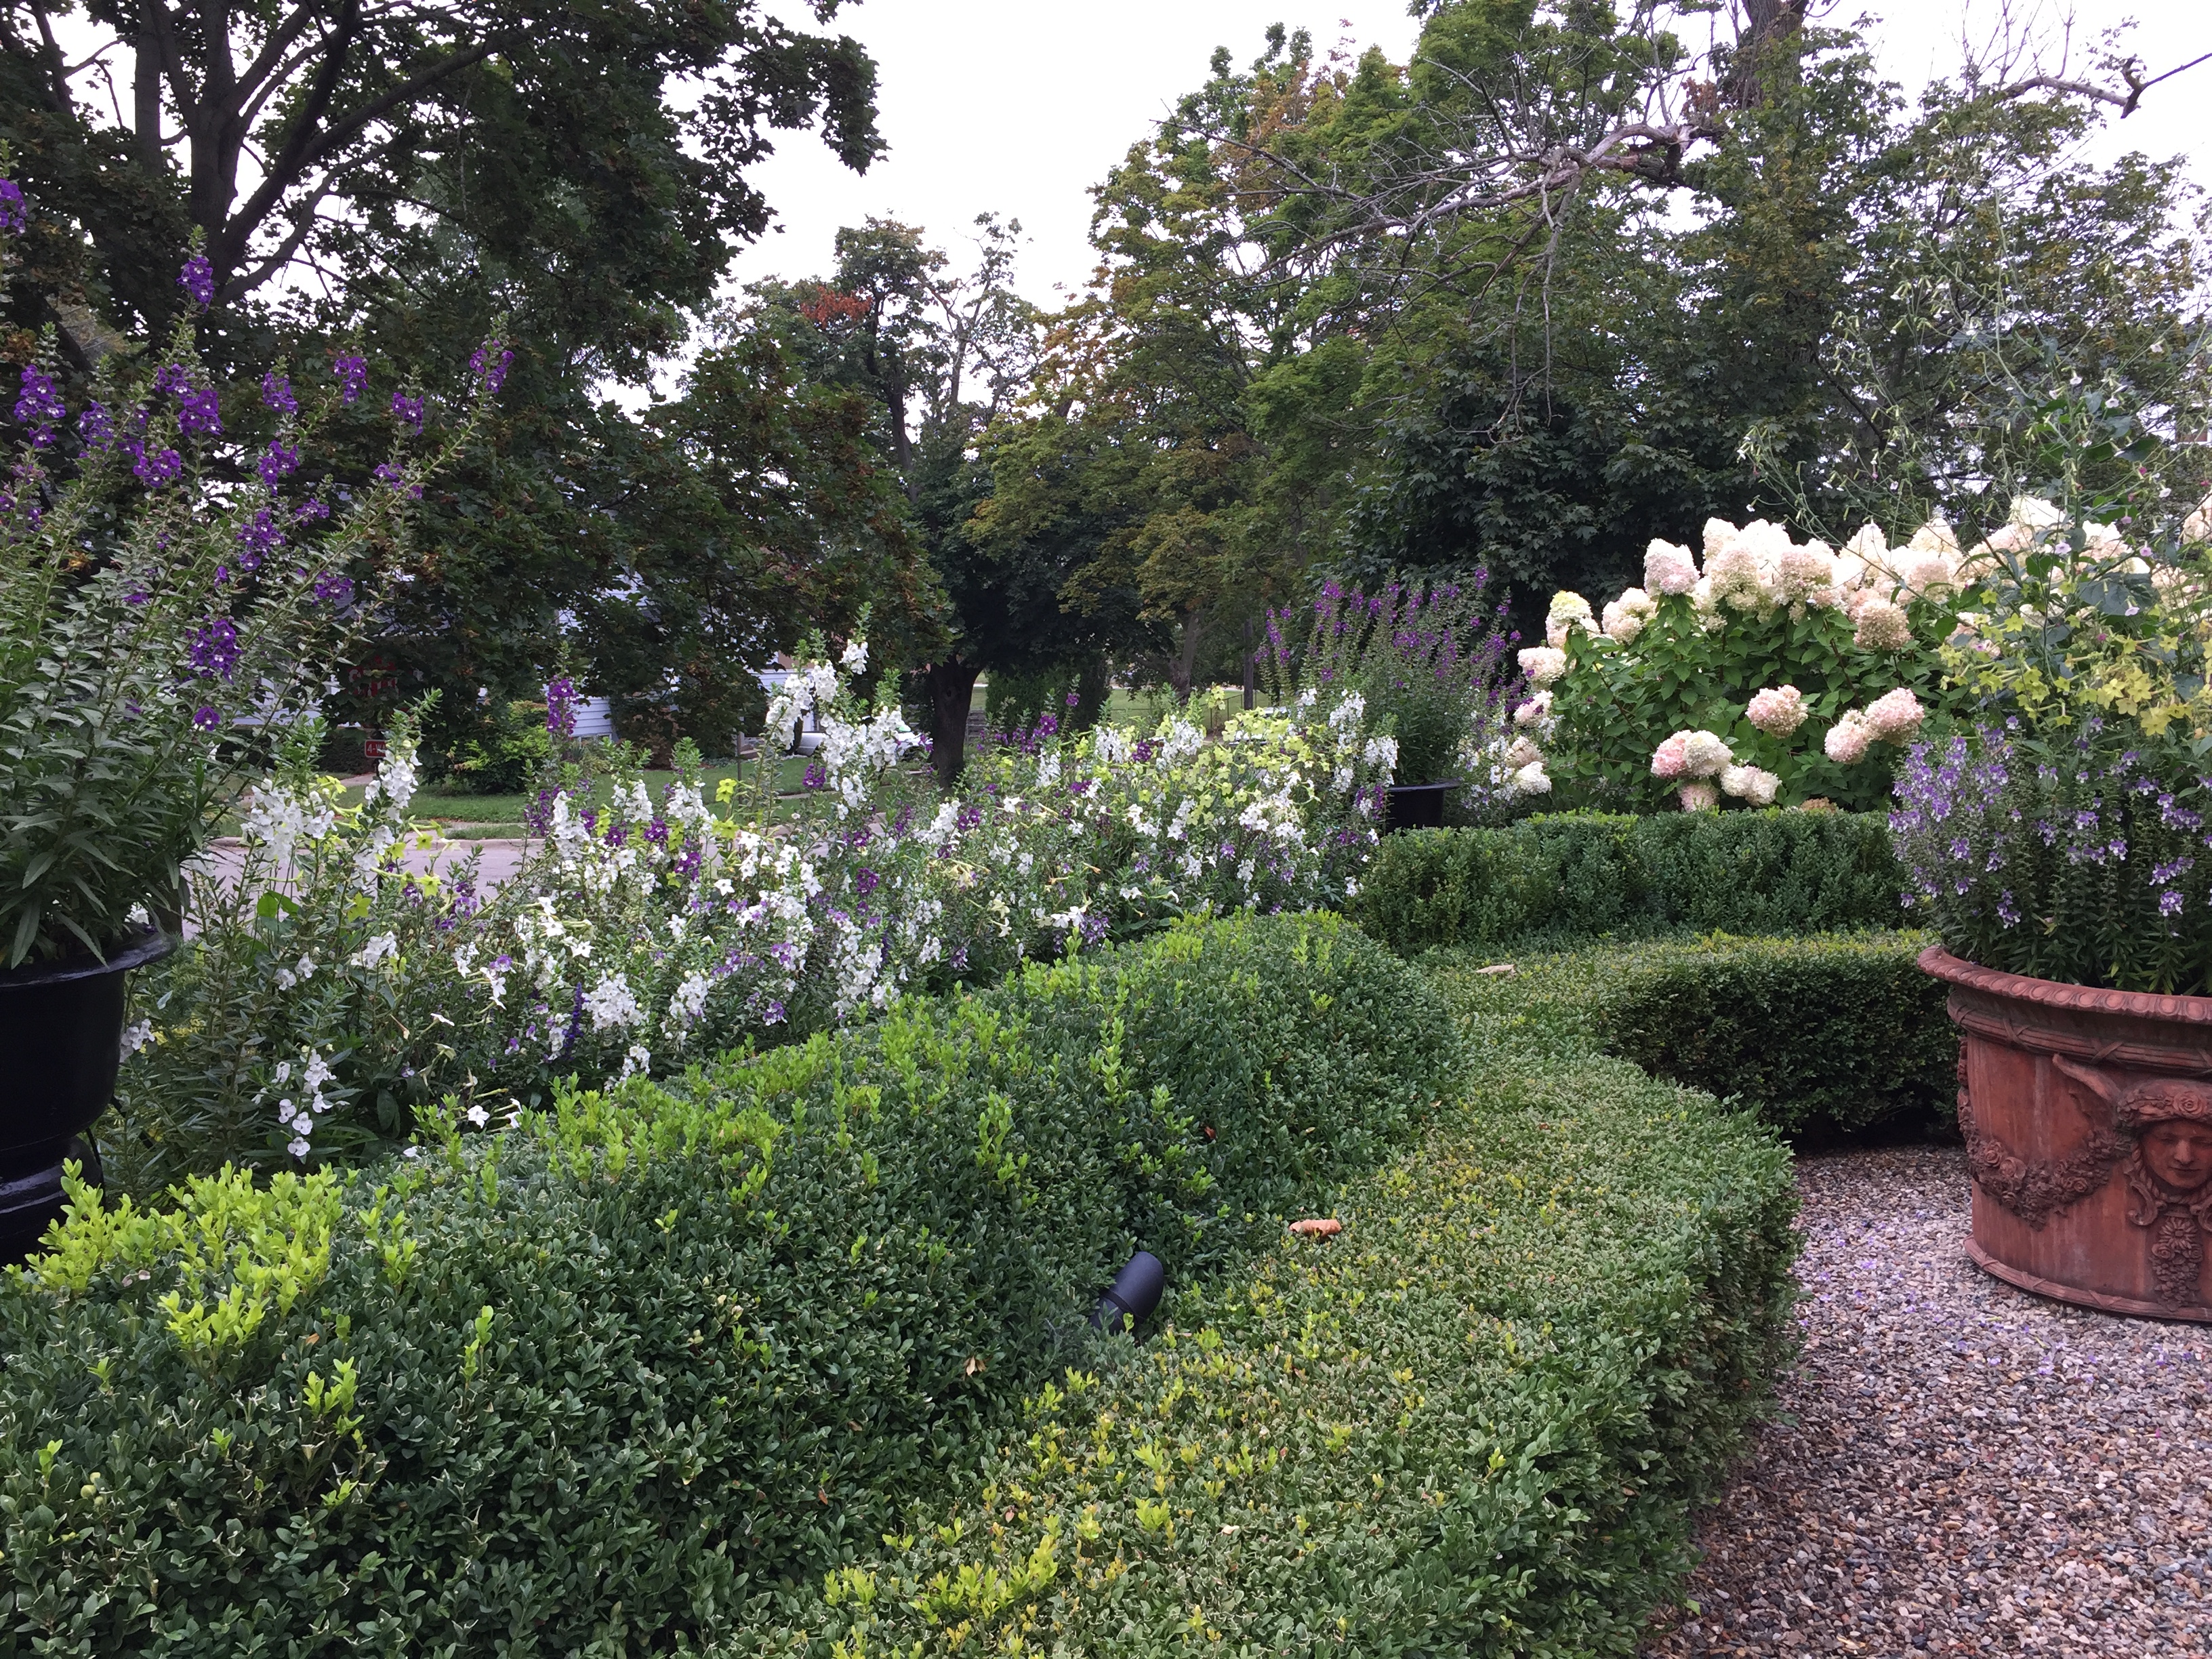
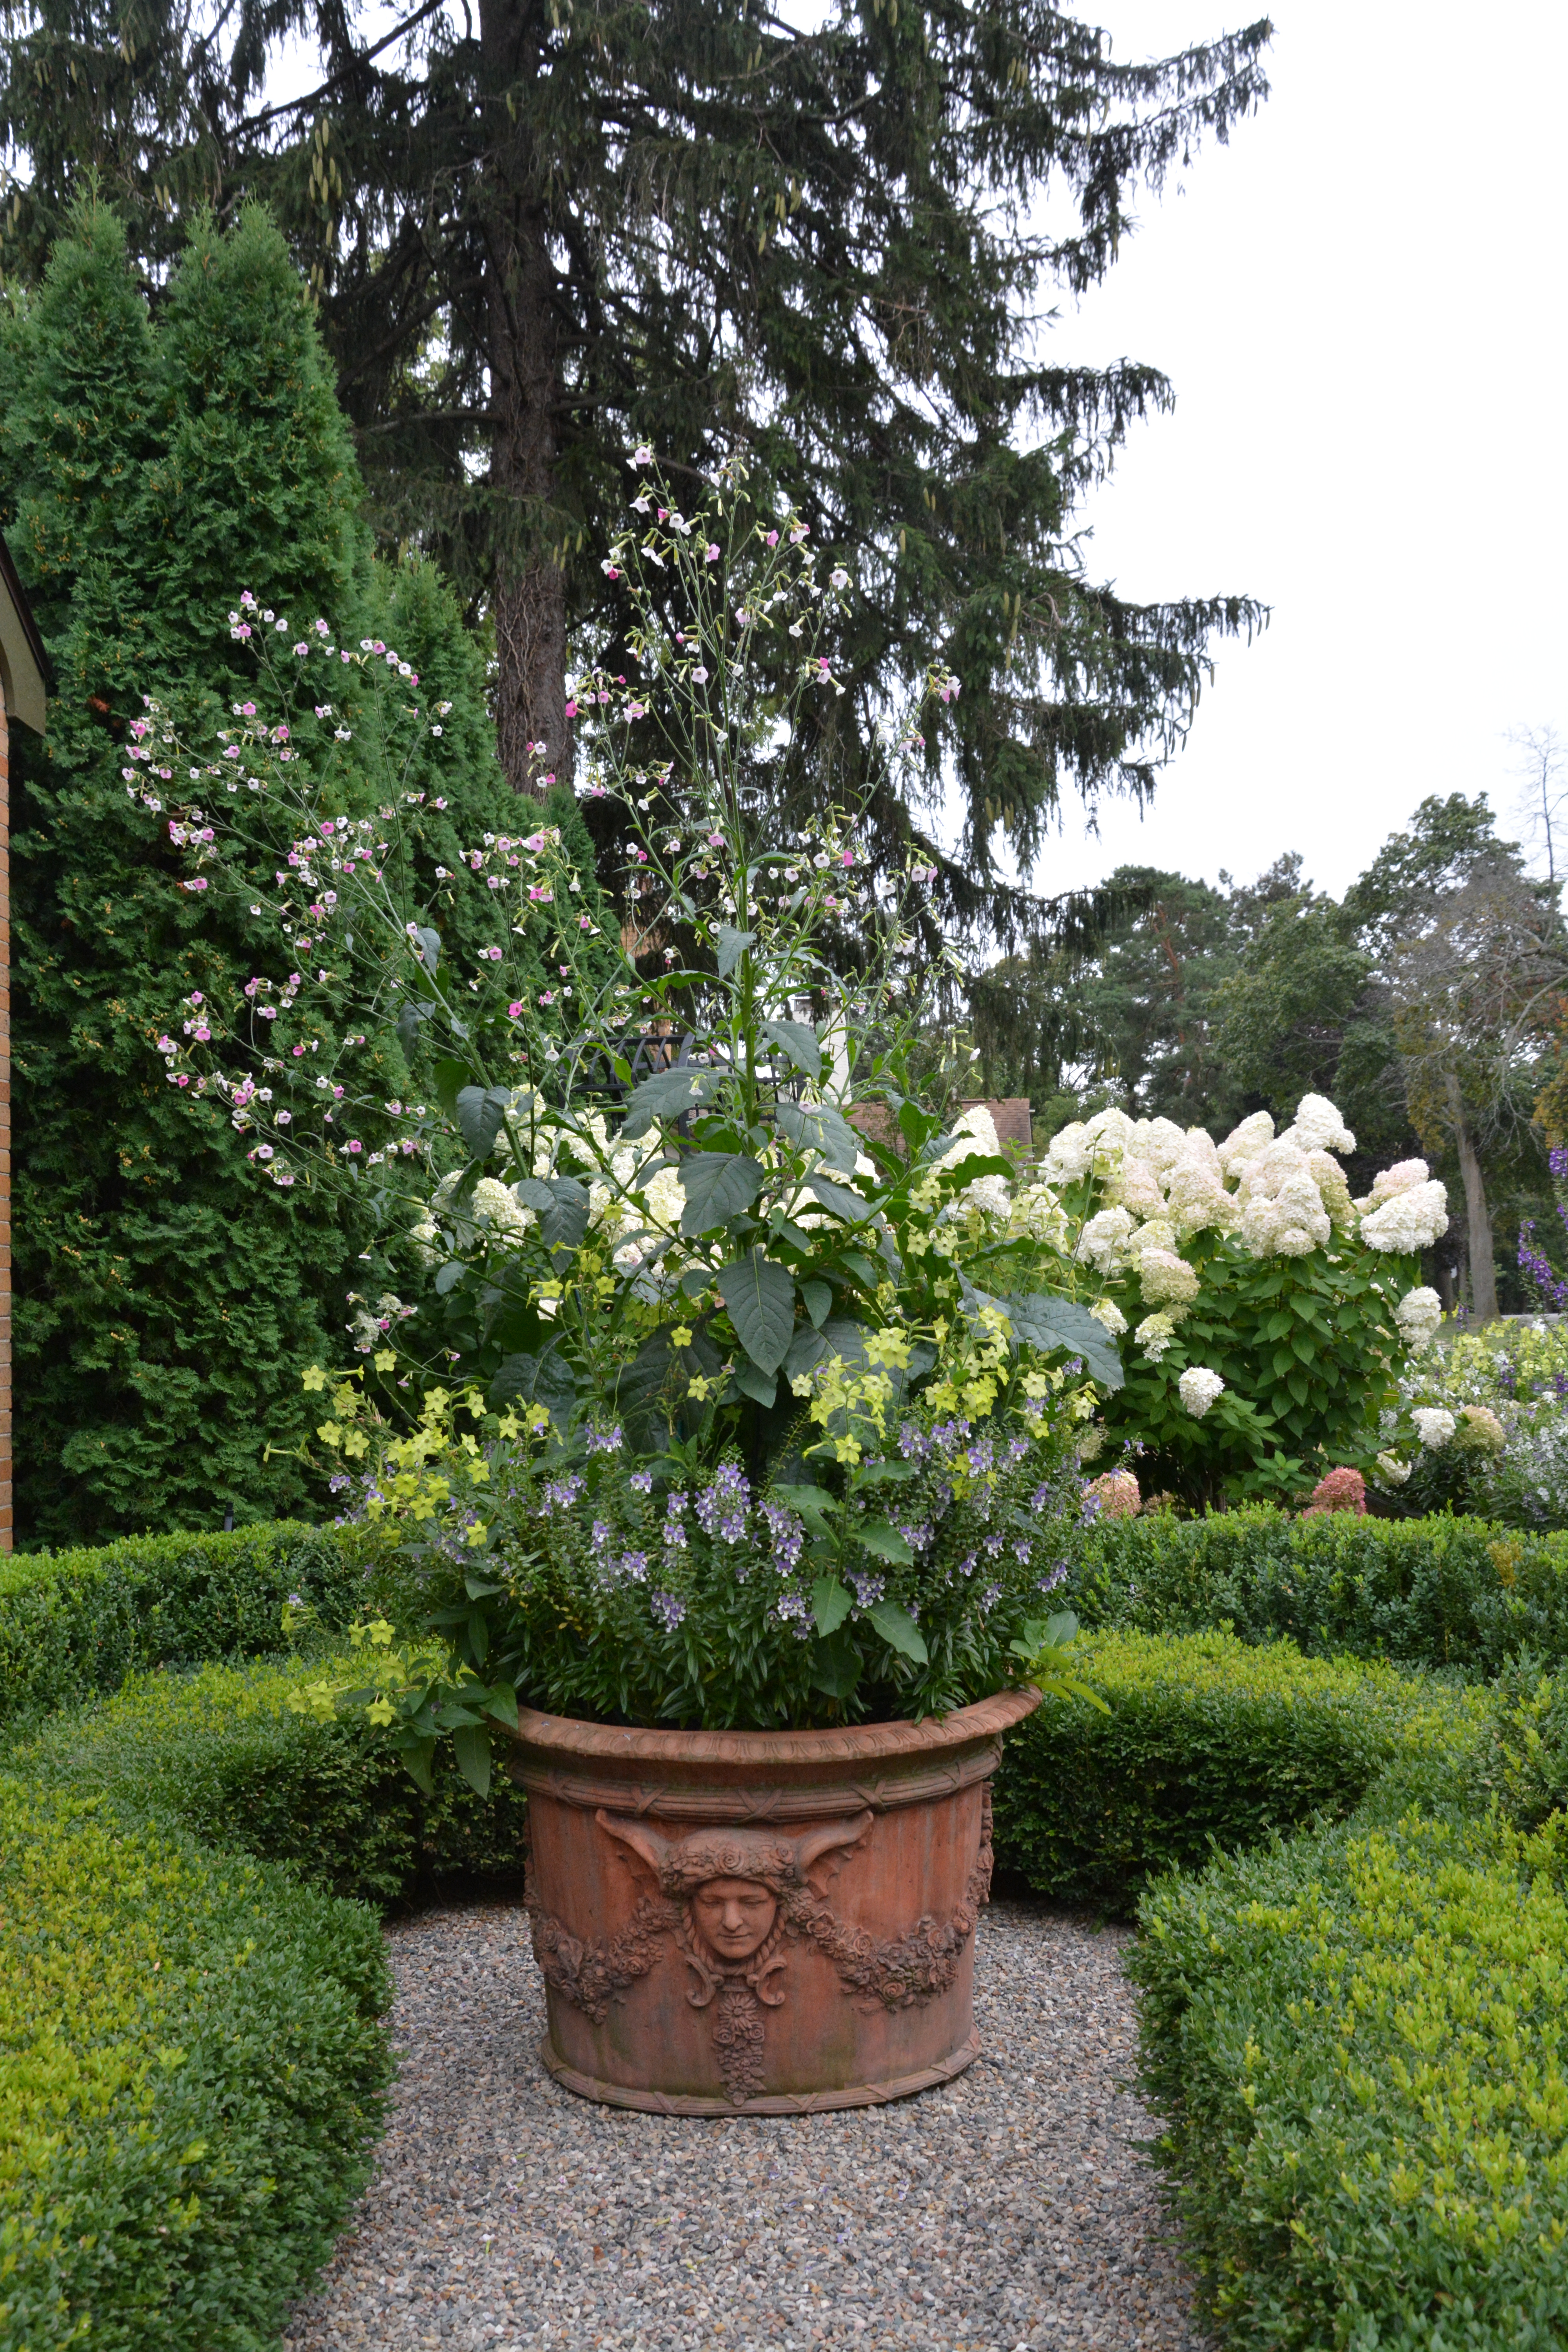
My landscape is primarily evergreen.  I like that structure that is evident all year round. But the hydrangeas blooming in my garden speaks to the blooming great Michigan summer. To follow are pictures of my hydrangea bloom time at home.

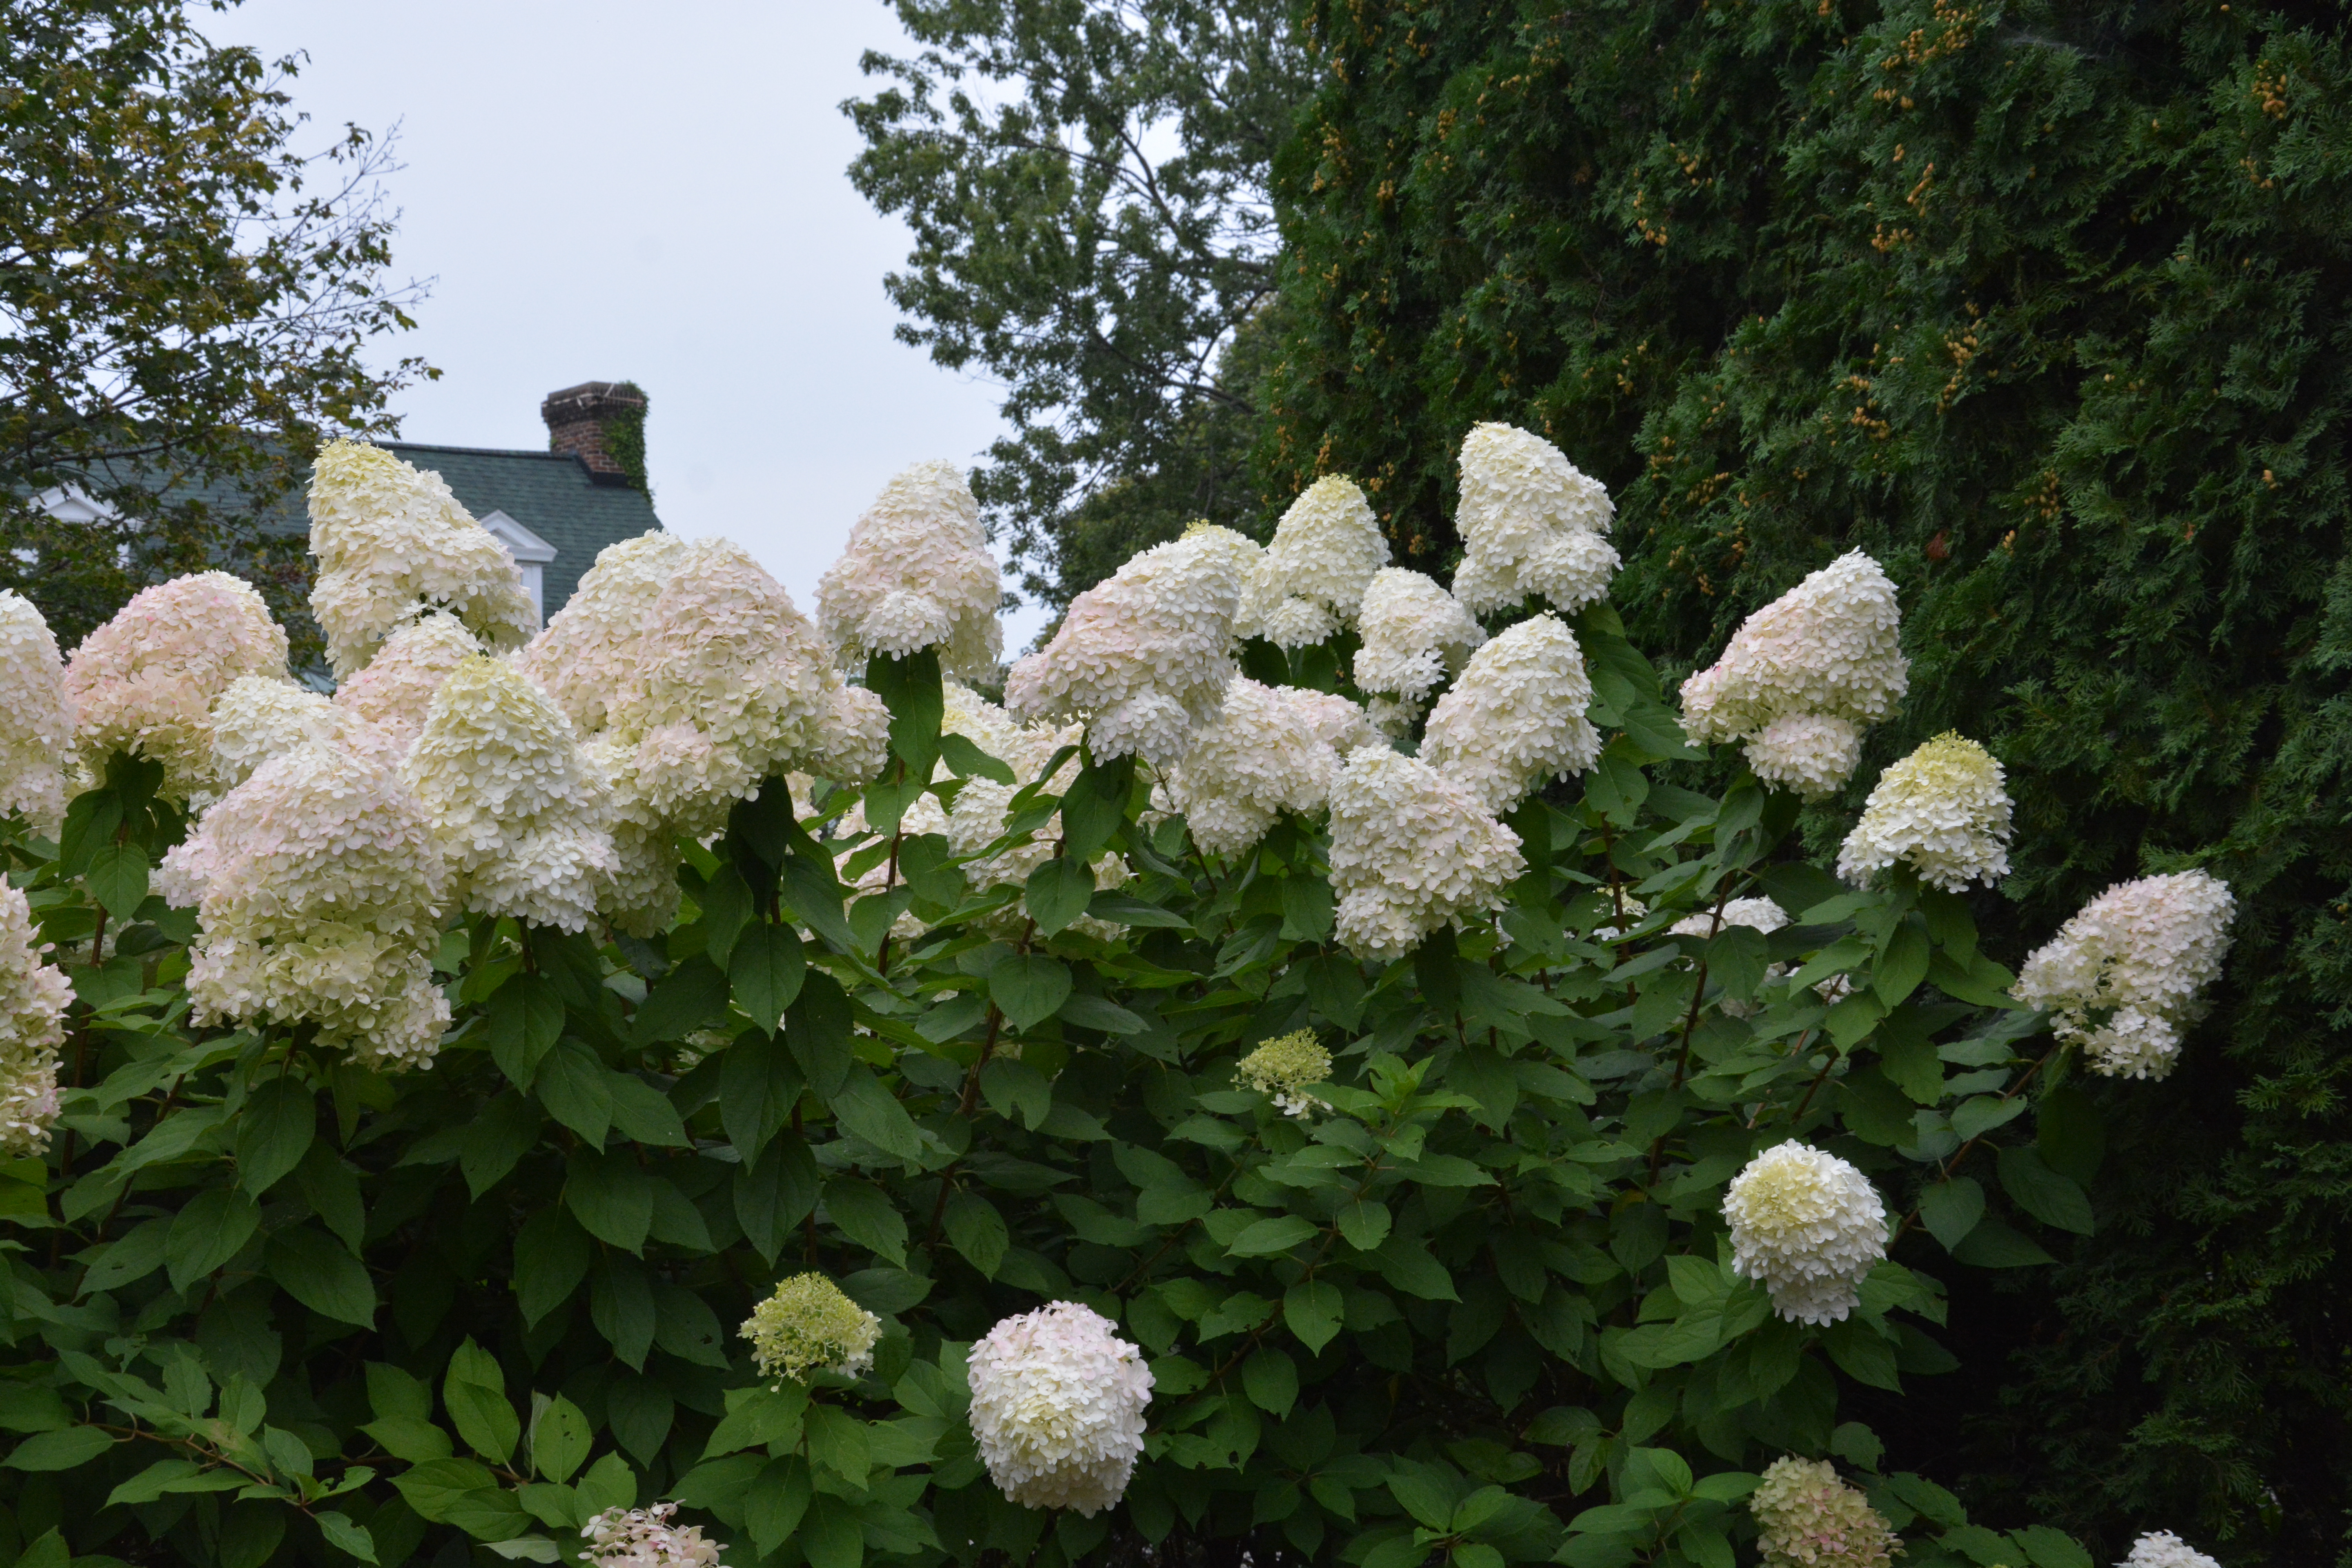
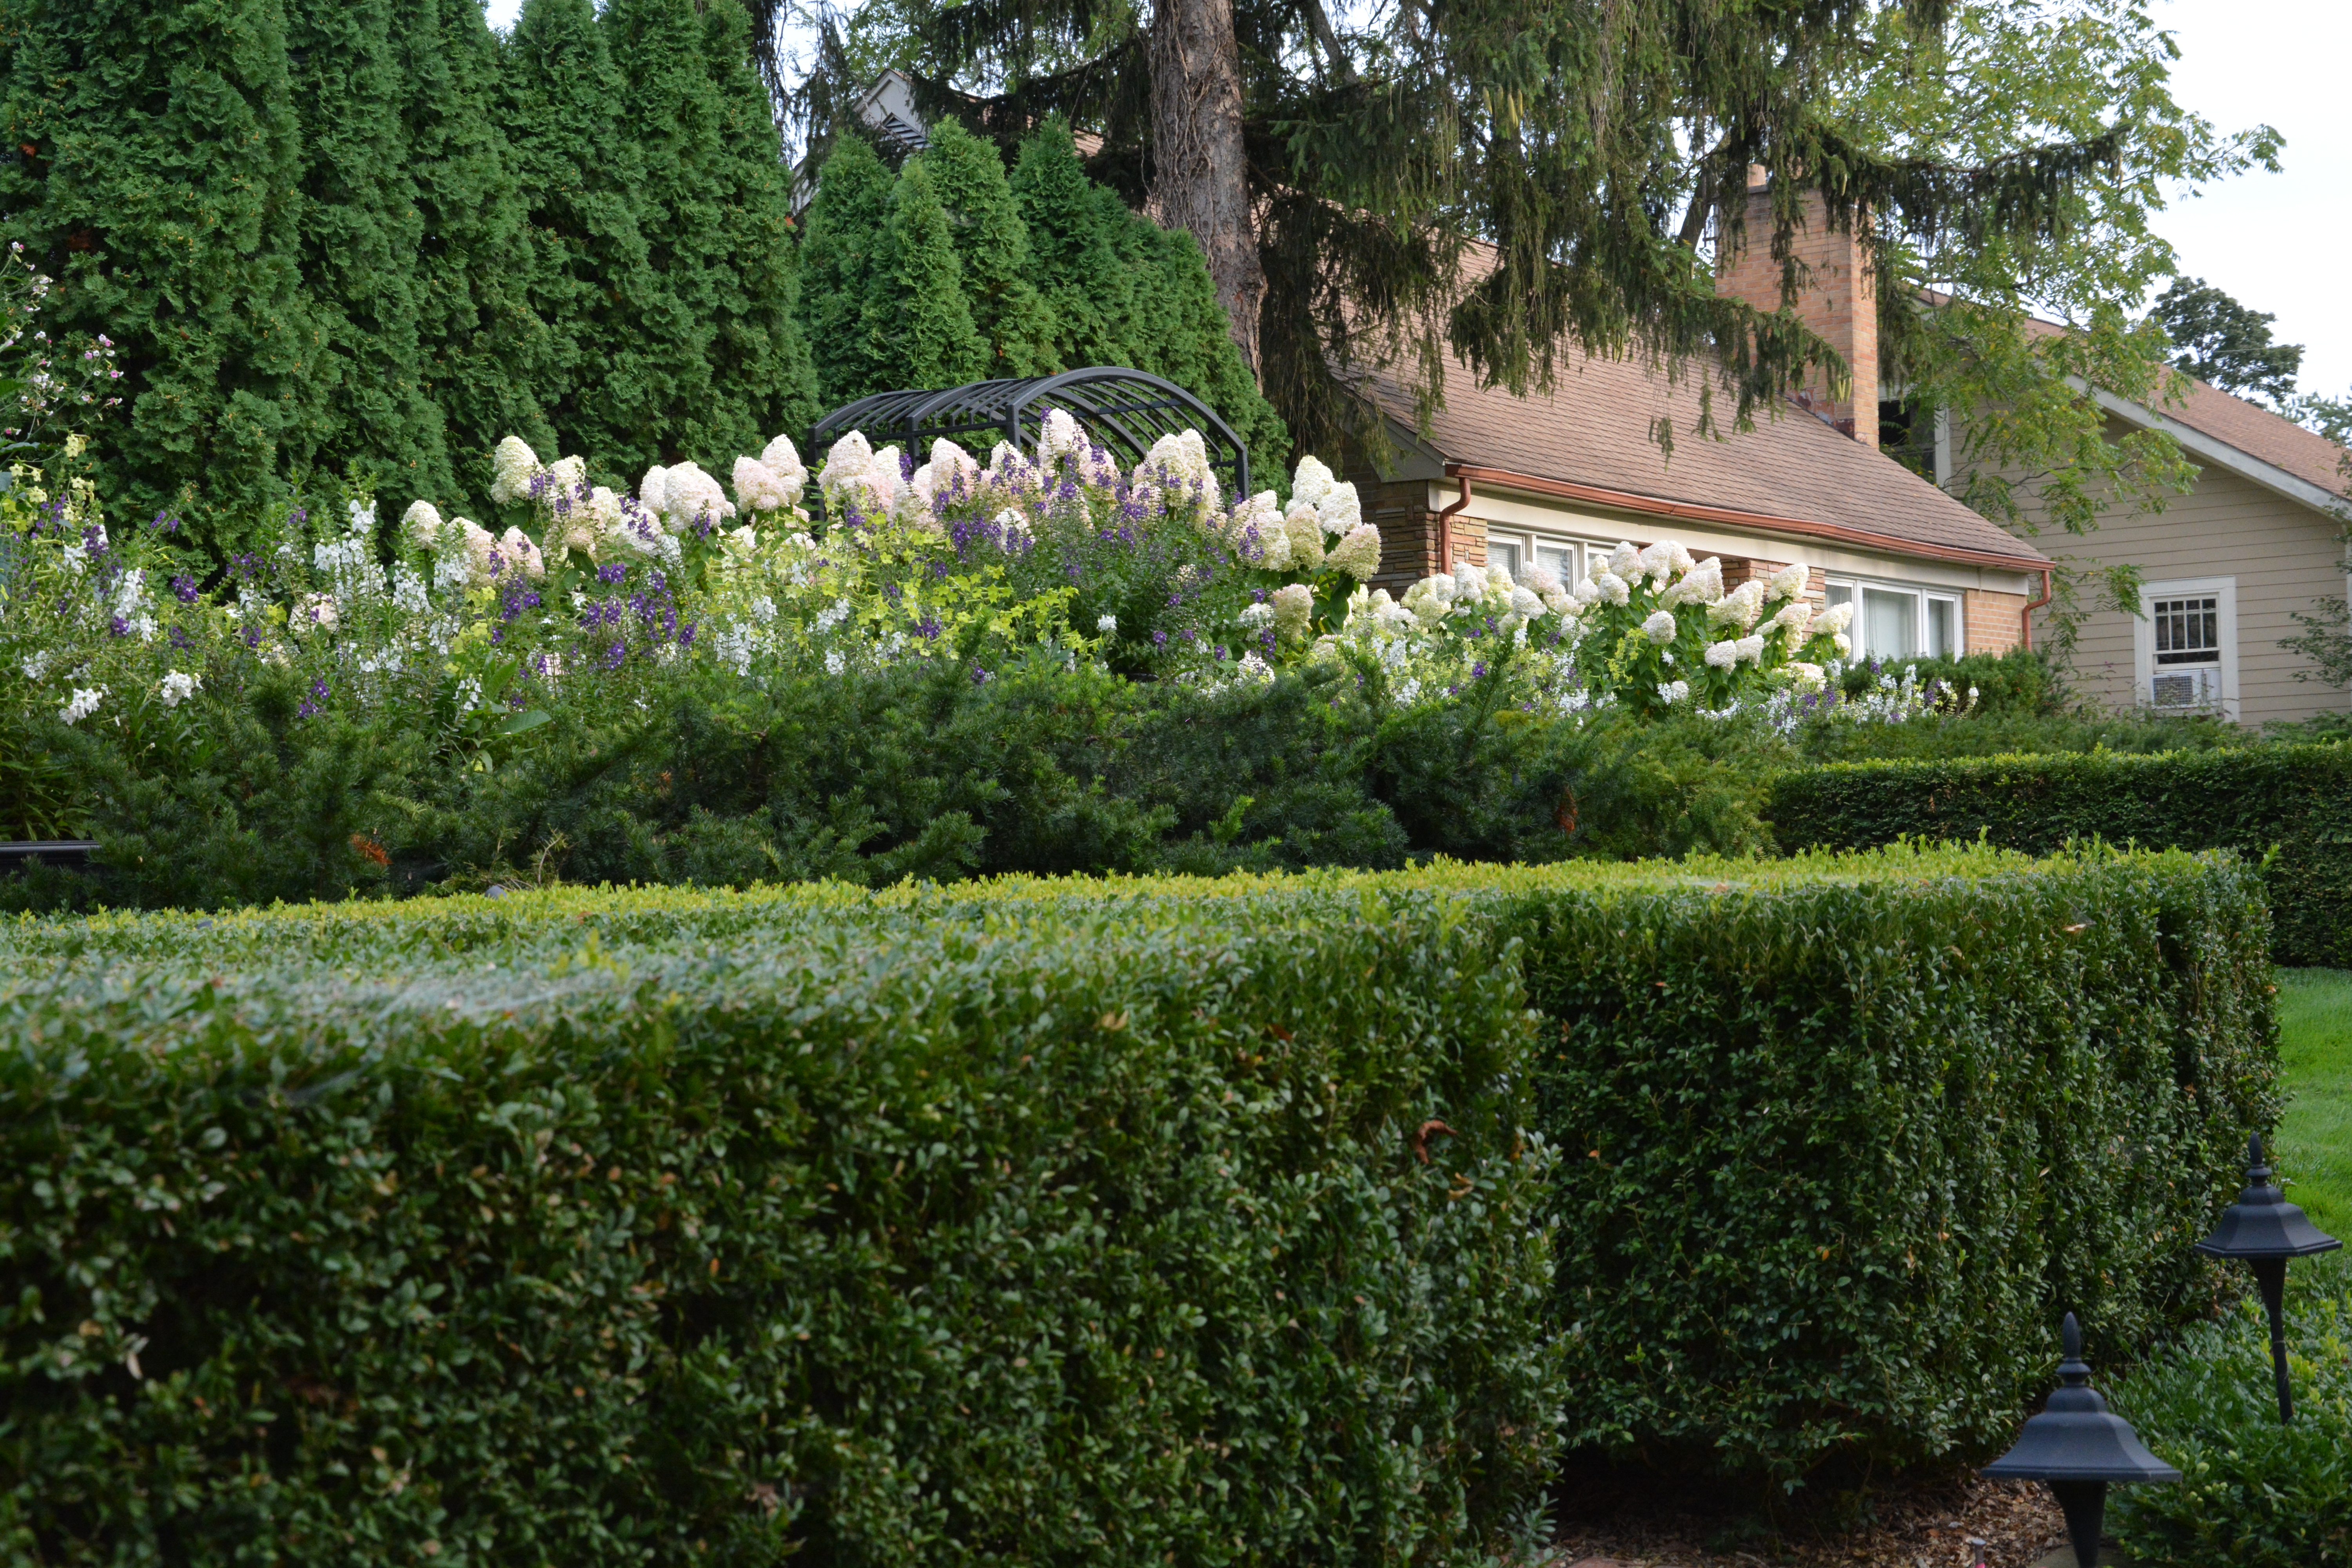
The Limelight hydrangeas take my late summer garden to another level. I am sure there are other hydrangea cultivars that are ready and willing to take a garden and its gardener in charge over the moon. Do the research, and choose which cultivar fits in your garden. In general, I like shrubs. They provide mass and texture, bloom in both the spring and summer seasons, and fall color. If you are looking for some great shrubs for your landscape, the hydrangeas are a good place to start. Shrub it up – that garden of yours.


Save

Save

Save

Save

Save

Save

The Garden In August

I have a hot mess of a perennial garden at home. I have tinkered with it for 20 years, and it still is a hot mess. Not that I mind the mess. Minding a garden is an ongoing experience like no other. The moves I have made towards a reasonably good design are as follows. My work life is incredibly busy in the early part of the season. I realized I have little time to tend or appreciate a perennial garden at home until later in the summer season. A summer or late summer garden would better suit my life. A garden that would look good very early in the morning, or very late in the day would even better suit my life. I go to work early, and come home late. Given this, I have been aiming for a late summer flowering garden replete with white flowers. I did cheat a little by planting some white David Austin roses, Winchester Cathedral, that bloom in June, but the majority of this garden looks its best in late July. That part makes sense. But why white flowers? White flowers shrug off the heat. They look cool and collected, even on a 90 degree day. They never look frazzled. I would not want a garden that looked like me at the end of the day. White flowers read beautifully from a distance.  And they are showy at dusk. This means that when I am fixing coffee at 5:00 am, I can see through the window what is happening in that garden. I might take a second look when I am cleaning up after dinner-at dusk.

I do have clients that favor white flowers in their containers, for no other reason than they like white flowers. I understand this. The white is crisp, and cooling to view. They are as striking and simple in a contemporary garden as they are in a traditional one. White in the garden provides a beautiful and strong contrast to every shade of green. The purple petunias in this container are more visually lively, given some white.

This Limelight hydrangea standard has flowers that are a creamy pale green. The bright white background provided by the house makes the subtle color of the hydrangeas pop. Pale and pastel flowers can provide the same punch as white flowers. Pale colors read strongly; the eye spots them first.  Containers to be viewed from the street, or gardens to be viewed from a distance benefit from the inclusion of some pastel blooming plants.

To my mind, nothing says summer in Michigan better than white petunias. They always look fresh.  Though some gardeners find them pedestrian, they can provide strong visual support to a composition.

Euphorbia Diamond Frost has to be one of the most beautiful and versatile white flowered annual plant for containers that it has ever been my pleasure to plant. I love how light and lacey it is. The thin stems and diminutive flowers lighten and loosen every plant in its vicinity.

See what I mean? Double petunias are scraggly and awkward growing plants. The euphorbia hides all of those ungainly stems. It could be that the pale green buds of this petunia are more beautiful than the flowers. The white helps that subtle color read clearly.

My color scheme for my containers this year was lime, pink-and white. These begonias are called Apple Blossom. The reverse of the petals is pink. The yellow centers of the white begonias relate to the yellow brick behind them. Pink and white begonias, white and pink Gingerland caladiums, lime green dieffenbachia, lime green ferns and variegated tradescantia – I have so enjoyed the various shades of green, the white, and the dashes of pink.

This color scheme is interesting and restrained.

apple blossom  begonia

I planted this annual garden at Cranbrook in 2005 for an evening event. At dusk, the forms of the plants and the flowers were easy to see.

white annual garden

white caladiums in the late day sun

The white caladiums highlight the dark rose pink color of the nicotiana in front of them, don’t they? White flowers and leaves in the background will highlight and better describe and illuminate darker colored plants placed in front of them.

This photograph of the front of the shop taken yesterday is not so sharply in focus. But that soft focus illustrates how white flowers can punctuate and enliven a garden.

Night before last I was late to tour the garden. The white and light flowers lighted my way. Truth be told, there was a time when white, light and pastel flowering plants did not much interest me. I am sure every gardener has that moment when their taste changes. White flowering plants in the landscape is an idea that has become more important to me, especially given my aging eyes.

So pleased to be able to see this.


Save

Save

Save

Save

Save

Save

Save

Save

Save

Save

Save

Save

Save

Save

Save

Save

Save

Welcome Home, Boxwood

My last two posts about this project might make you suspect that my primary interest in this landscape has to do with hard structures. Not so. The hard structures just need to be installed first, as they set the grade and determine the location of all of the plantings to come. I can move a tree or shrub-but not a swimming pool. Every landscape project is governed by those immutable issues. A driveway, a fire hydrant, a house, a city sidewalk, an electrical pole, a stone terrace – these landscape elements are fixed, for better or for worse. Every landscape contractor on a new house or extensive renovation project would prefer to have the immutable elements established up front. A landscape installation of this size requires an order of events. Hard structures, first. Once the new dock, retaining walls, pool and pool terrace were done, it was our turn. GP Enterprises plants all of my big trees for me. They have an installation of trees going on in the front yard of this project which I will get to later. Once it was time to transport 420 36″ diameter Green Gem boxwood from my yard to a project over an hour away from our yard, GP stepped up and sent two trucks, 2 trailers, and 4 of his people to give me a hand. It took 8 people, 4 trucks, and two days to bring the boxwood due to be installed in the back yard to the site.  My client texted me late that day, “Welcome home, boxwood”.  Loved that from her.

She knew the back story. Though we had procured the plants, and were ready to plant last fall, a fall planting proved to be out of the question. A new dock installation was beset with problems and significant delays. The stonework on the retaining walls took weeks and more weeks. It looked as though the entire back yard was filled with big trucks, and pallets of stone. Bad weather helped to seal the deal. Late last fall, all 420 of these boxwood were moved inside my landscape building, and set on top of 6″ of mulch spread over the concrete floor, for the winter.  Why the mulch layer over the concrete floor?  Concrete can absorb and draw the moisture out of a root ball. A dry plant coming out of winter storage would most surely be a dead plant. The effort was worth it. These 420 strong survived the winter indoors without any problem, but a very cold and relentlessly rainy spring pushed our installation date back much further than I ever imagined. Once the middle of May arrived, I knew this installation would need to be pushed into July. The day I finally had those boxwood on site was a day many months in the making. Dan and his crew measured and set the dig lines. We only needed to make one small change. 10 inches to the south. The walls and stairs had been built very close to the measurements called out on the plan. We went over and over the lines. It took less than 2 hours for me to sign off on the layout.

Once every line was set and checked, the planting would be underway. This is a very formal and geometric landscape. The precision of the layout took a good bit of time, as it should. Insuring that they would be planted in the right place involved a lot of stakes and lines, and twice as many measurements. Once a boxwood went in to the ground, I would be very unhappy at the prospect of having to move it. My crew would be even more unhappy.  Each root ball weighs 235 pounds. Sliding a 235 pound root ball into place is vastly less work than lifting 235 pounds out of the ground.

It was not my idea to dig individual holes for each boxwood. Oh no. We dug overscales trenches with an excavator that would allow us to place and level each double row of boxwood.  Our 420 boxwood were graded at 36″ tall, by 36″ wide. But that grading is a loose business. Some were taller, and shorter. Others were flatter, or more ball shaped. Some were decidedly lopsided. Of course we would sort through and select the plants that would be neighborly in shape and height. The oversized trenches would permit moving the boxwood this way and that, up and down, in service of the precision asked for by the design. A planting of this scale and scope asks for some mechanical help. We use our front end loader frequently, but I rarely have a need for an excavator. Dan decided to rent that machine for a month. That proved to be an excellent decision. We were able to spend more time on the plant selection, placement, and planting, and less time hand digging.

The contrast between the boxwood and bare dirt was extraordinary. I was so pleased to see these gorgeous plants going in to the ground. Welcome home boxwood, indeed.

Once Dan had a day under his belt, he was able to establish an approach to the work that would make the best use of everyone’s time, and move the project forward in the most efficient way possible. He would plant the entire south side, before moving to the north.

The plan calls for three gardens. I find that woody plant material is much more easy going regarding conditions than perennials. I have planted countless shrubs and trees and seen them readily adapt to their home.  Perennials are much more sensitive to poor living conditions.  Dan saw fit to provide 18″ of good soil, and install drainage for good measure.

I suppose it is time to discuss the design for this part of the property. This lower terrace is the mid ground space from the house looking out to the river. Dan took this picture from the upper pool terrace level. It is clear that the landscape not only needed to be proportional to the size of the property, and the walls and stairs, it needed to read from a distance. The second floor of the house is slated for a large terrace situated on the roof of the rear porch. The view from that upper level balcony is an important view. An every day view. It will be a beautiful view, no matter the season or the weather. These boxwood are massive, and the shapes designed are simple and on an appropriately large scale. Their formal arrangement is in beautiful contrast to the amorphous quality of the water, and the wild landscape in the distance.  As a mid ground feature, it introduces and enhances the views out. The views from the river towards the house would be equally dramatic. A 14 foot long gas firepit whose flames will be enclosed by glass will provide a place for my clients and their friends to gather and relax. The bluestone coping is set at seat height.  Glass enclosing the flames?  This is a very windy location.  My clients expressed an interest in the classical and formal landscape. They were interested in gardens, and the seating to go with. They went so far as to tell me that the landscape part of their renovation to their home and property would be their favorite. They were interested in places they could view from afar, and places they could be. They wanted to live outdoors exuberantly, and entertain privately.

These pictures taken from the upper level do not express the enclosure and intimacy created on the ground floor by the boxwood.  Once my clients and their company are seated in this lakeside garden, they will have a quiet and private place to be. Given the many conversations I have had with them, I understand that they want strong and beautiful views from afar, and intimacy and enclosure up close. The design is my response to that request.

This view from the south towards the north does not describe the gardens to come. But it does do a good job of describing the structure of the landscape.

I do believe that the first step with any landscape design is to establish some structure. I have the idea that my relationship with these clients is a long term relationship. What we have done here is a giant first step. But a first step, nonetheless. I am certain I will hear more from them, as the landscape progresses. Who knows where we will be in 5 years. I do favor an initial landscape design that is all about creating some structure.  Any client that wants to go beyond establishing that initial structure will let me know. To follow are drone pictures taken by my clients from last week.

As Mary Keen says, “Nostalgia in gardening often surfaces as a longing for that older, deeper relationship between person and place that we rarely achieve in modern life.”

Save

Save

Save

Save

Save

Save

Save

Save

Save

Save

Save

Save

Save

Save

Save

Save

Save

Save

The Stonework

Once the pool construction detailed in my last post was in a reasonably finished state, a substantial amount of stonework would be required to finish terracing this steeply sloping yard. The drop from the pool terrace to the lower terrace is about 5.5 feet, meaning stairs would be necessary to access the lower level. A pair of 10′ wide stone staircases flanking the pool would permit easy access and flow from the upper to the lower terrace. Mike Newman, stone contractor extraordinnaire, and owner of Mountain Paver Construction Co, sent numerous drawings of these stairs to me over a period of a few weeks, until every detail was worked out.

Though the plan I had drawn was to scale, it was necessary to produce specialized drawings of these stairs. The pool was a given whose dimensions could not be changed. Everything to come would have to be adjusted to meet those “as built” dimensions. Producing a precise drawing can help mitigate problems later. He would have to order stone cut to specific dimensions. Surprises can be great, but not so much for a stone structure that would take months to build. My drawings of the stairs were place holders, and nothing more. The stairs would be built from his drawings.

Mike and I did research and send for a number of stone samples. Pictured above is what was eventually presented to my clients for the wall stone veneer, the pool deck and stairs stone, and the bluestone dots. Veneer stone is available in many different color mixes.  It was eventually decided to use 25% of one mix, and 75% of another. Once stone is chosen, it takes time to get an order processed and shipped.  The stone for the pool deck was special ordered in 2′ square pieces that are 2 1/4″ thick The pool deck stone was mortared to a concrete substrate.  The stone for the stairs was custom cut for this particular project.To follow are pictures that detail the work on the walls and stairs that took the better part of 7 months to complete.  Every piece of stone that went on the wall had to be cut so they would fit together smoothly without any mortar joints. This was an aesthetic decision, not a construction decision. My clients liked the look without.

The concrete for the north and south staircases were poured adjacent to the lower pool. All foundations and stonework that was part of the pool and the lower pool were done by the pool contractor.

I had hopes of beginning the rear yard landscape last fall, but that was not to be. The trucks and equipment necessary to complete the stone work occupied a a lot of the back yard space.  An earth ramp had to be built so equipment and vehicles could be driven to the rear yard.  Building anything is a big messy business. All of those vehicles and pallets of stone made me wince-the compaction of the soil would be an issue we would have to deal with later.

The dark stones you see in the wall above are from the second mix. That darker color would add some interest to these big walls. A table full of stone enabled Mike to pick and choose the shapes and colors as he saw fit.

fall 2016

late November, 2016

Eventually it became necessary to tent and heat the area around the construction of the final staircase and retaining wall, so the work could continue. Continue it did, all winter long.


veneer stone being applied to wall

valders stone treads and risers in place

The return on the final and bottom step of the staircase was a complex shape, so Mike built a template so I could see what it would look like. Sometimes a drawing is not enough information. That piece of stone would be radiused and bull nosed at the stone yard.

By spring, the south retaining wall was done.

staircase done but for the curved lower step returns

finished staircase

Just a few weeks ago, we were finally able to begin laying out the landscape for the lower level. The concrete block structure in the middle foreground is a firepit under construction. Once that foundation and block work was done, it was time for some green. My superintendent Dan thinks a good bit of this lower level landscape will be finished in a few days. Needless to say, I have pictures.

Save

Save

Save

Save

Save

Save

Save

Save