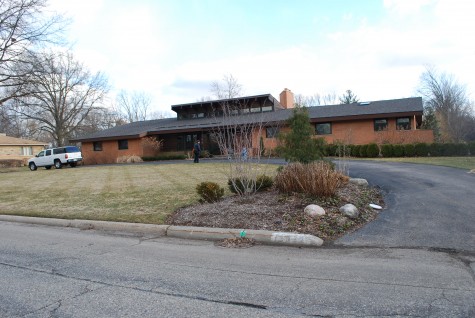
 Some of my before and after projects are about such fine tuning, that you have to be there to see it. This landscape is so dramatically rearranged, you will have no problem sorting it out. This mid 1960’s modern ranch, belonging to a young couple with small children, had been gutted, remodelled, and added on to in the early 2000’s with the help of architect Michael Willoughby. The landscape had been renovated, but without much regard for the striking architecture. From the street, a small bed anchored by a beautiful chamaecyparis, an amelanchier, a few boxwood, and an assorrtment of perennials had suburban landscape written all over it. A big hedge of globe arborvitae on the right side obstructed any street view of what was planted behind it. There were boxwood on the left side of the front door, but no answer on the right side. The left side landscape trailed off in the winter-nothing evergreen going on there. All of the plant material was good-I just needed to transplant-and transplant lots.
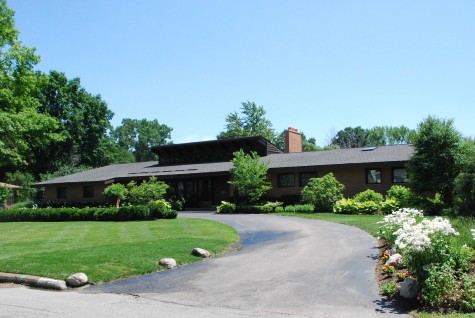 This picture I took today shows the globe arborvitaes moved to the center of the yard on the street side of the drive; they now enclose a perennial garden that can be seen driving up to the front door. The small marooned bed on the left side of the drive was removed; that space was sodded over. The chamaecyparis, and the perennials were moved to the right side of the drive. The fabulous collection of mature Sum and Sunstance hostas are now visible from the street, given the globe arb move. I am liking the long low slung look of the architecture-punctuated by a few well placed vertical elements.
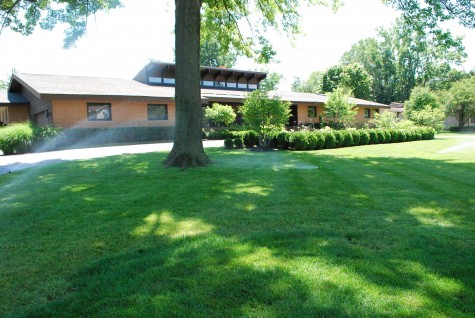 The driveway was the primary element of the front yard. But for 2 small and disconnected beds, the majority of the front yard was home to a single large tree, and lawn. The majority of the landscape was confined to the house side of the driveway. Beds on one side of the drive-grass on the other. A drive that appears to intersect a large bed makes the landscape more important visually. Anyone who drives to the front door now has a landscape all around them. This is very friendly and welcoming to company.
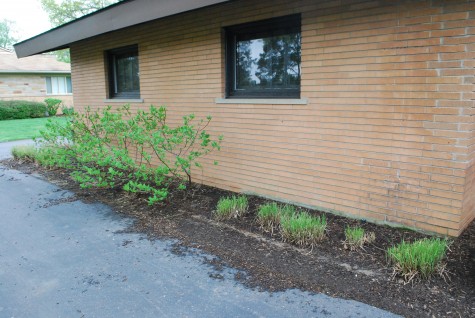 Homes of this vintage-my clients wanted to get rid of the gutters in favor of a cleaner more modern look. Rain chains would be installed where absolutely necessary. However, heavy rains pour off this roof. A barked bed of hydrangeas struggling in the shade, and ornamental grasses do not make a good winter presentation. The spring look-not so swell either. There is a lot of wall here-a wall that seemed to be asking for something evergreen.
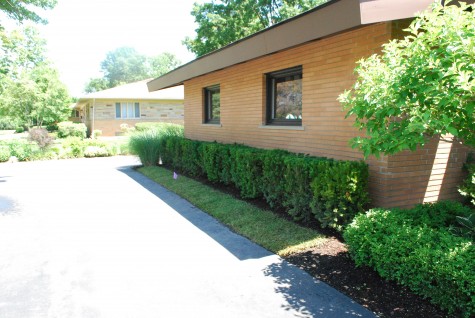 I know we have not gotten to the back yard yet, but the yews in the back yard were suffering in poorly drained soil. We dug them up, and moved them up front-to higher ground. Yews respond almost instantly if the unwelcome water gets drained away-this group of yews are looking great. The grass patch in front of them-a raincatcher. At some later date, another solution might present itself. In two days, I moved most every shrub on this property to different locations. My quick idea here-get rid of a barked surface in a place that would get pounded by a heavy rain.
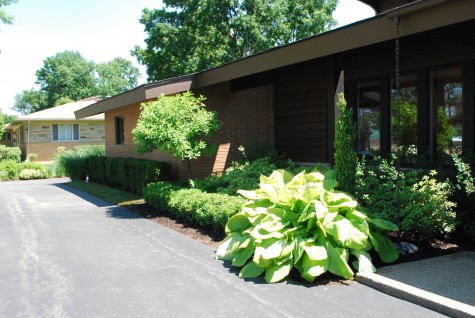 The best part of this redo-a substantial evergreen presence on the left side of the front door. All of the rest of the existing plant material was beautiful, and very well cared for. The challenge of this project-designing a renovation that would take full advantage of all of the existing plants.
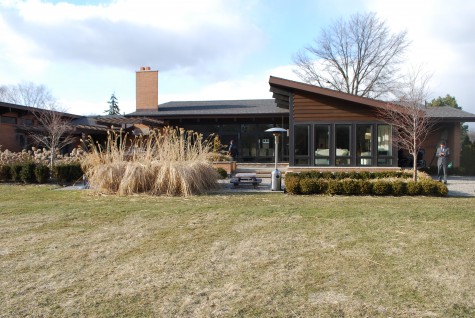 The rear yard was dominated by tall ornamental grasses, and limelight hydrangeas. I am all for both of those plants-in the right place. My clients have 2 acres of property. Their view out to that property was completely obscured from their terrace by plants that grew too tall.
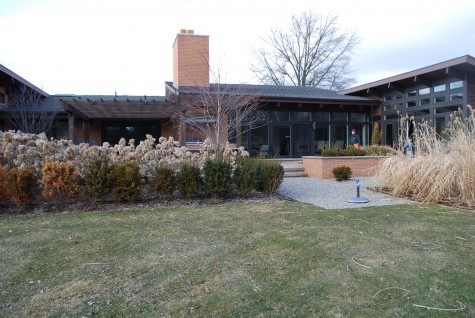 A beautifully long and low slung house from the seventies asks for a landscape that respects the gestures made by the architecture. The hydrangeas were a strongly vertical mass in a spot that asked for a view out. The yews were suffering in the watery soil.
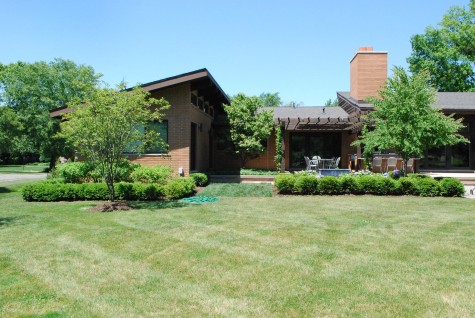 I moved all of the yews to the front yard. I realigned the beds off of the terrace. The limelight hydrangeas off the terrace I moved to stage left, to in front of the bedroom wall. The short All Summer Beauty hydrangeas planted in front of the left bedroom wall, I moved to the center. I recut the three boxwood beds so the lined up with one another, , and rearranged the boxwood in a symmetrical way. A grass panel between the beds permits a great view of the dogwood on the terrace level from the yard. My idea? A crisp and clean landscape. And a great long view from the terrace to the far landscape.
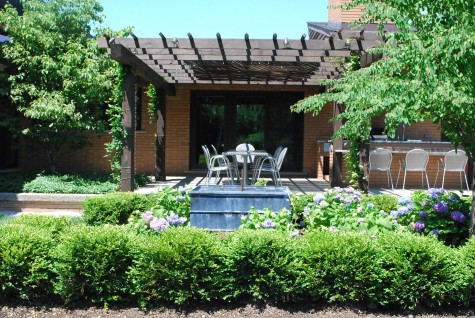 Minus the yews and limelight hydrangeas, there was space for a fountain cistern. We placed and installed it today. I hear tell there will be water next Tuesday. The scale of the landscape here is better in keeping with the terrace.
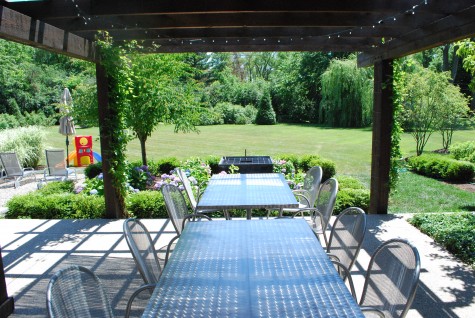
Last summer, my clients had a view out of of the sides of a big block of limelight hydrangeas. Today, they have a a great view of their yard from their terrace, outdoor kitchen, and a pergola. A great pair of modern dining tables and chairs are just asking for friends and family; everyone has something to look at now. The fountain cistern is a mid-ground focal point; the sound of water will be lovely. I could not be more pleased about the great views they now have of of their property. All of the effort that has gone into the far landscape can be seen now. A good bit of their shrubby plant material found homes where they could better be appreciated.
