Archives for November 2018

RED

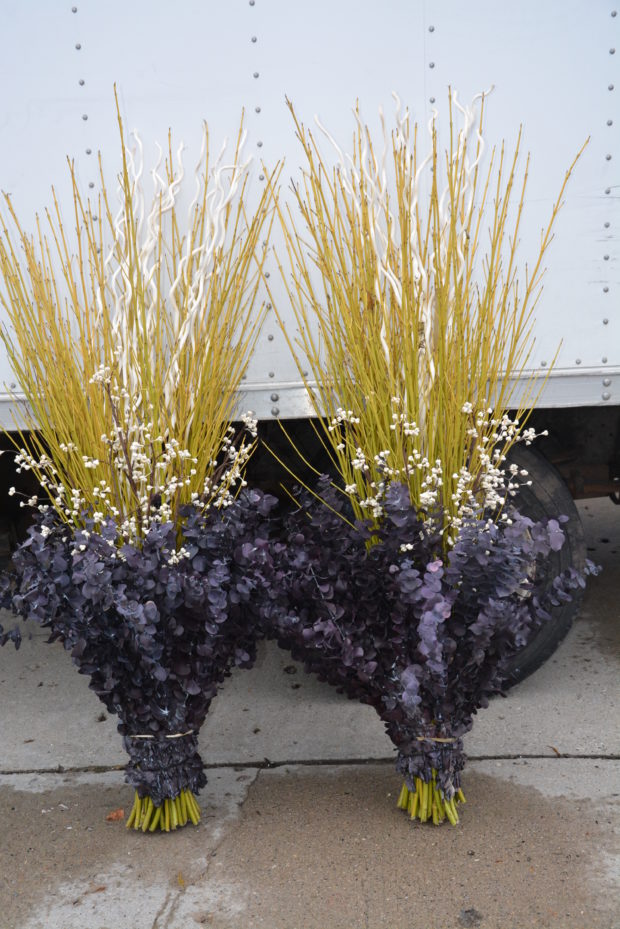
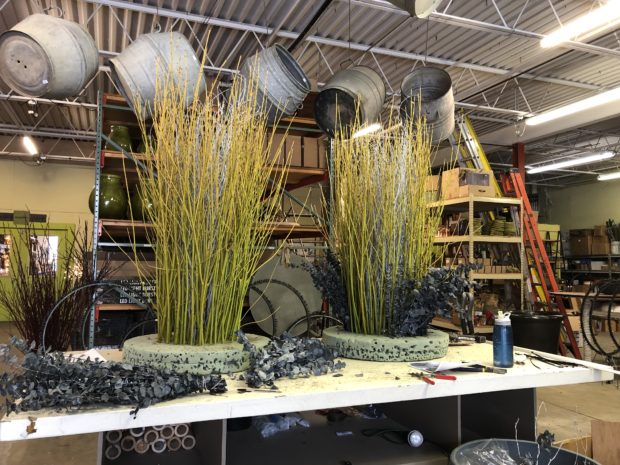
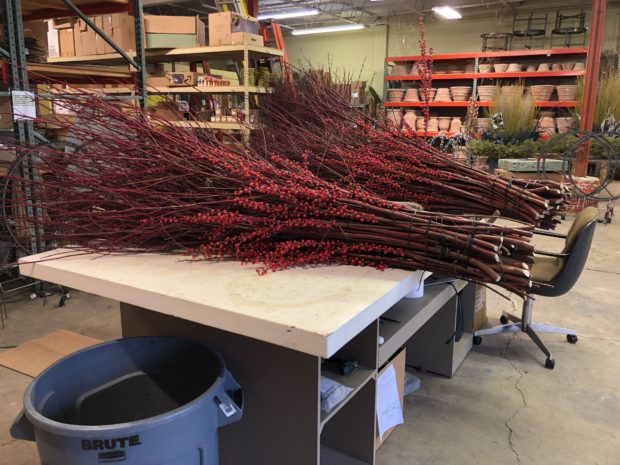
There is nothing that provides a better shot of B-12 to a winter landscape than some red. And no material provides that color better in our zone than red twig dogwood. Some of the newer hybrids, such as “Cardinal” have an even lighter and brighter red than the dark red of the species. I love that red! If you are like me, you do not have room to plant and maintain a hedgerow of red twig dogwood. There are other options for red in the winter. The cut branches can endow a winter garden with a little electricity. It was our good fortune this year that Rob was able to secure 50 bunches of red twig branches that were 2 years old. This means they have great size, and are well branched. Pictured above are 2 of 6 centerpieces destined for some very large lead pots. We had just the pots for these large scale branches.
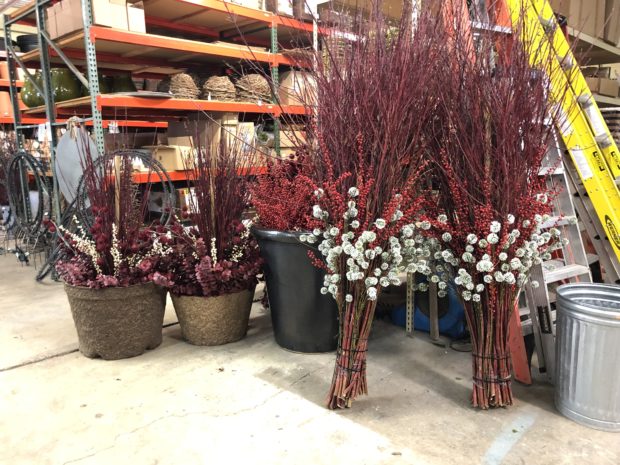
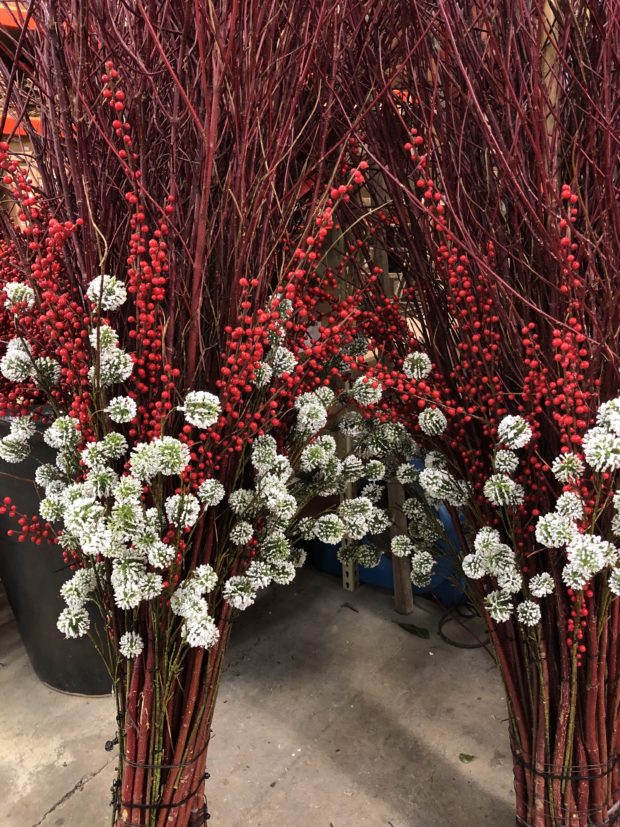
This client is interested that their pots represent the holiday as well as the winter. The red twig does well in either scenario. It can be dressed up with holiday style picks, or made more wintry with the addition of berries. In any event, the red twig will look just about as good in March as it does now. On more than one occasion we have found that the cut stems have rooted into the soil over the course of the winter. Amazing, that.
Like all of our centerpieces, the true center is a stout bamboo pole which will be driven down into the soil as ballast. Nothing worries me more than a winter centerpiece that gets blown over by our winter weather. I like winter pots that can stay the course until March. We make sure that the winter pots are as beautifully constructed, as they are beautiful.

It is a process – creating a centerpiece for a winter or holiday container arrangement. That second year dogwood had other materials added to it. It took plenty of time to get them road ready. If you have a pair of pots that need to be dressed up for the winter, it can be hard to tell how much material you need. More than any other season, filling the winter pots asks for a liberal hand. A skimpy display looks cold. An overflowing look is warm and inviting. No winter container arrangement grows. The look on the day you install is the the look you have all winter long. My advice? Take your own advice.  Start small, and see if an austere look is to your liking.  If not, add more.
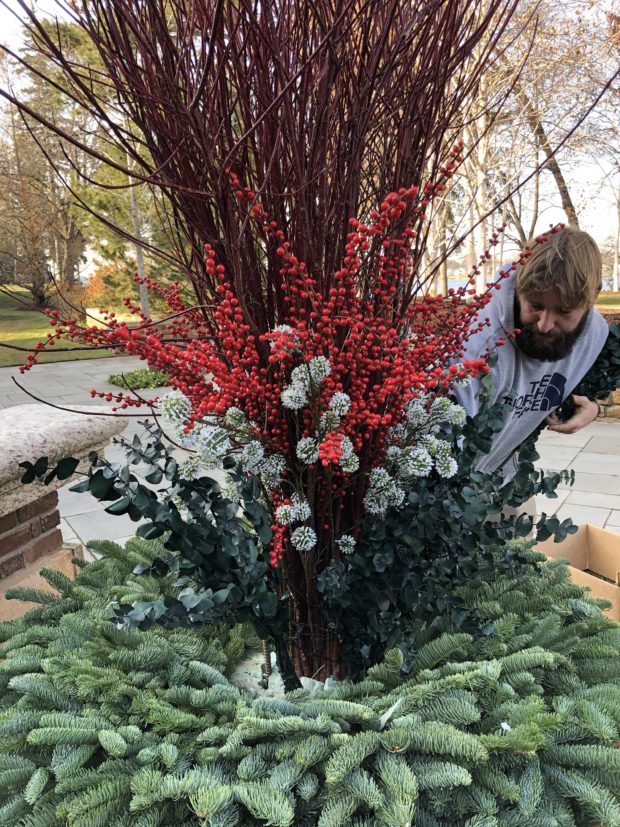
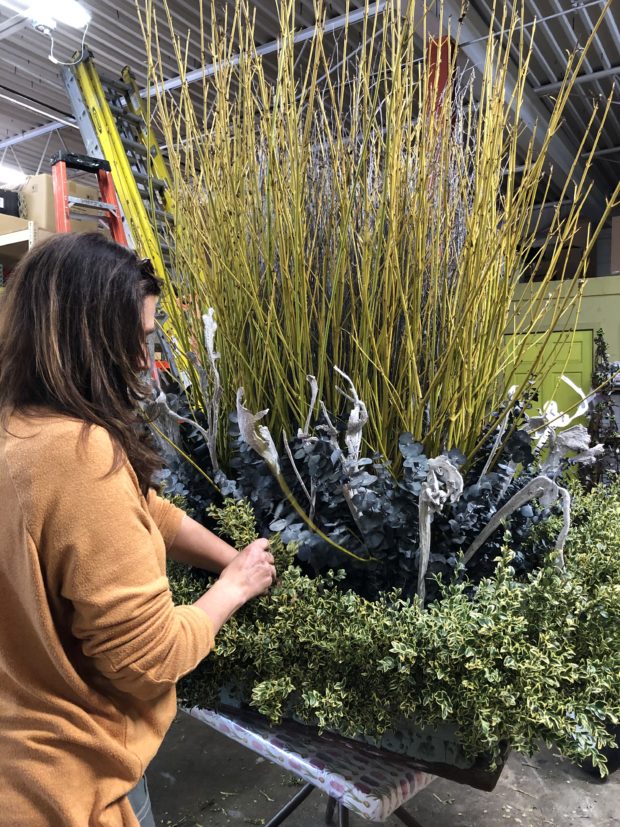
This winter pot has a very tall centerpiece. Visible in the above picture is a length of steel rebar pounded through the foam and into the soil below.  Four of them will be wired together with concrete wire.  The steel provides more stability to a centerpiece that is tall and heavy. Another option to provide volume to a centerpiece is to hand stick each of a number of branches into a foam form or the soil, one at a time. If I were constructing pots on my own, this would be my technique of choice. Lifting and securing a big centerpiece is a job that takes a lot of strength. The eucalyptus in this arrangement is added last. It has an important job visually. It softens, integrates, and relates the vertical elements to the horizontal ones. Sticking each eucalyptus stem into the foam is too flimsy to handle a snow load.  So we zip tie, in two places, 4 or 5 stems to a small bamboo stake. Lots of them. The stake gets pushed through the foam and into the soil.
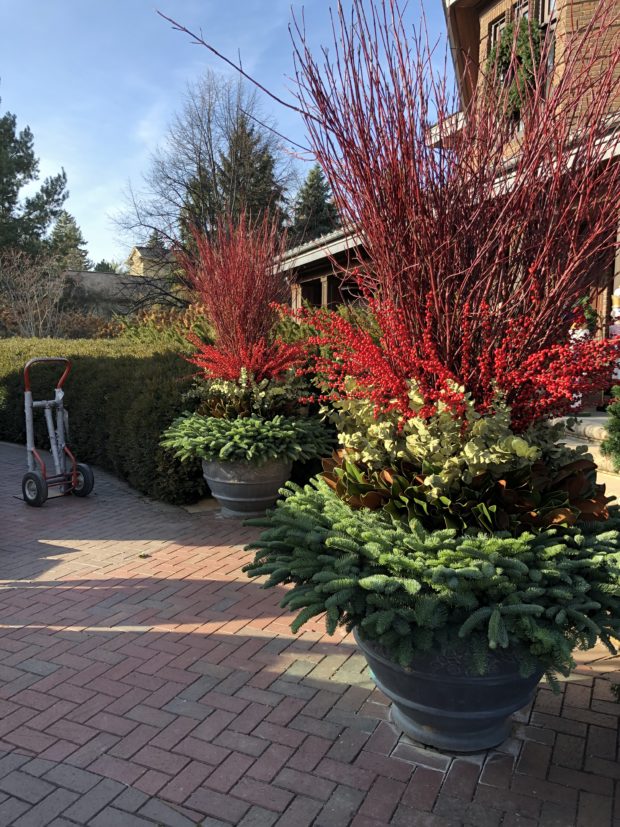
Arranging the materials is a matter of personal choice. Grouping like materials together into a defined shape or layer is a more formal look.  This densely layered arrangement will also keep its shape in spite of wind, snow and ice. We’ve been known to broom off a container arrangement after an exceptionally heavy snow. The width and density of the branches in the above container helps to break the snowfall. The red twig branches are admirably suited for this job. They will retain their flexibility throughout the winter. The faux red berries will slowly fade over the course of 4 or 5 months, but the red twigs will retain their gorgeous color for the duration.

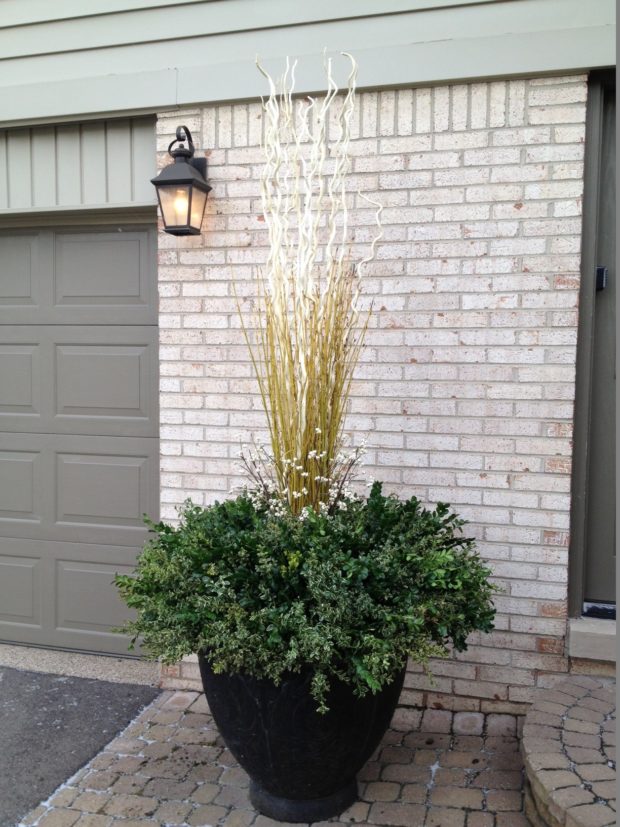
Curly copper willow applied over red twig takes on a red cast. The colors do not mix to make orange. They interact.
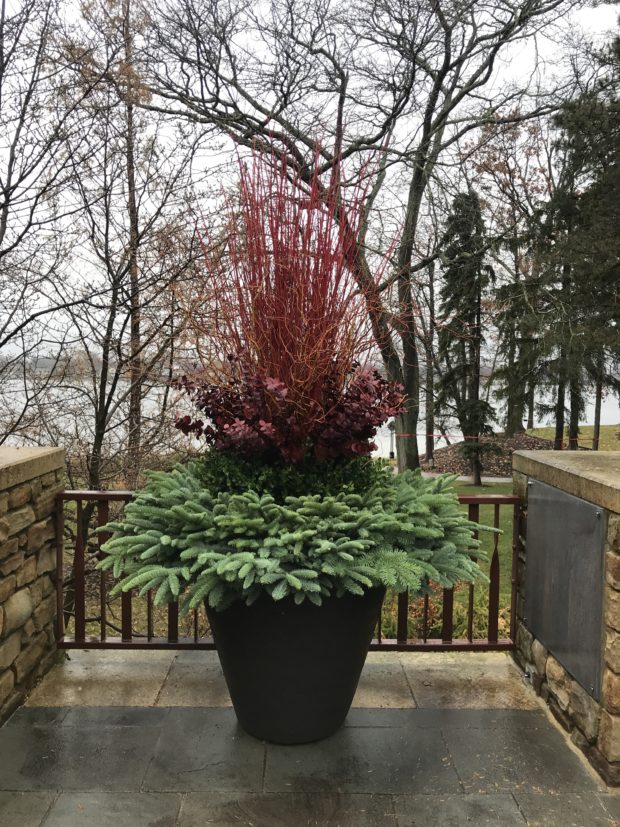
The finished container features a number of shades of red. The base layer of noble fir features a ring of German boxwood at the center.
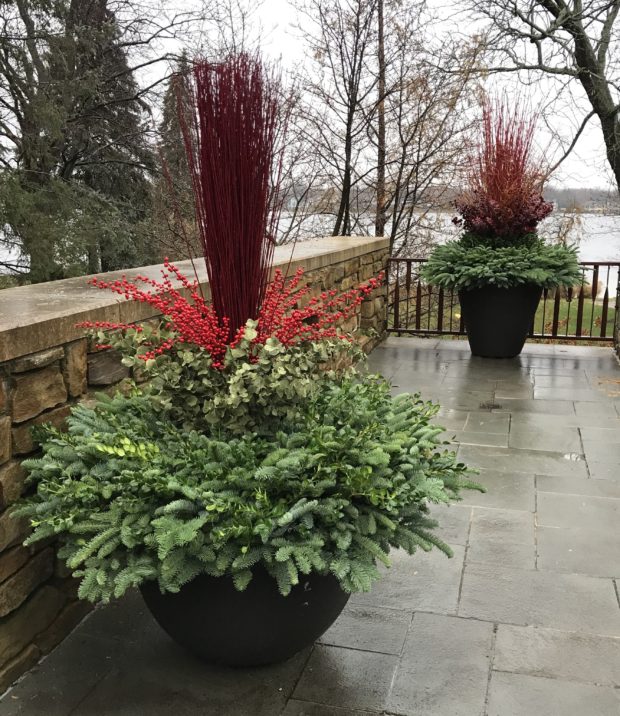
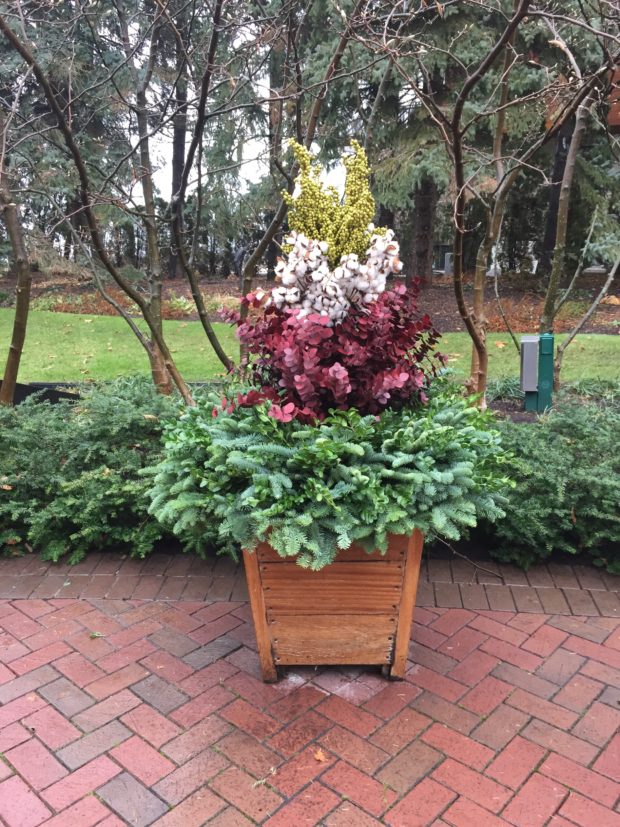
The foreground pot features dried red Asian willow, faux red berries and green preserved eucalyptus.
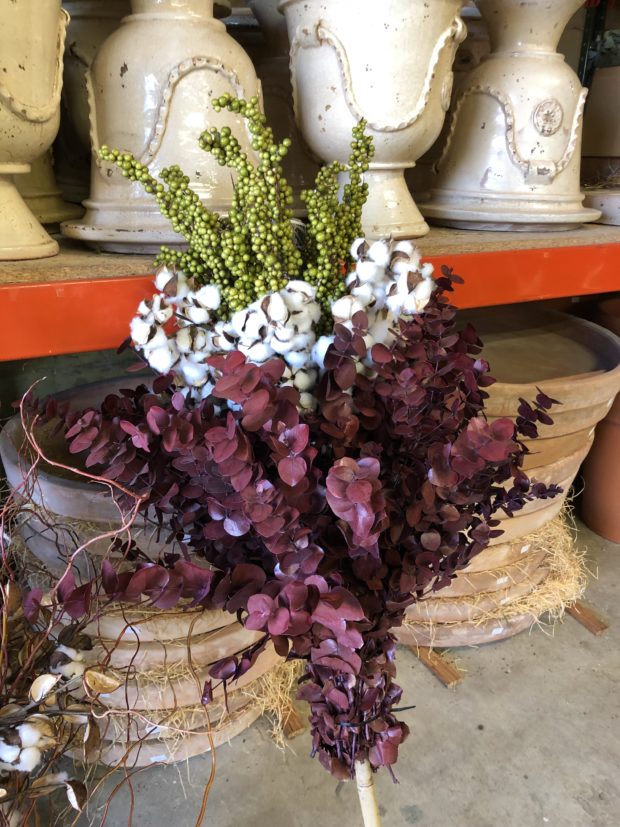
I have previously written that our supplier of eucalyptus closed his business.  We bought all of the red that he had left in stock, so Detroit Garden Works does have some available.
ready for snow

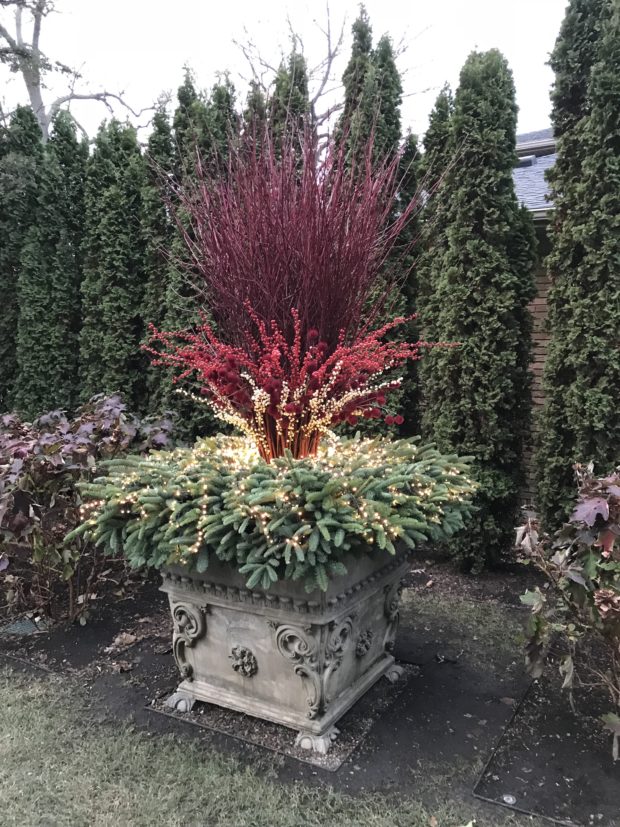
The last bale of the 2 year old red twig branches went in this pot, which measures 43″ square at the top. The mass of dogwood looks remarkably graceful, given that it has a very trim waist line. Ha. That was an engineering feat which makes for a satisfying overall shape. We did put a long string of pearl lights in the center, so that red twig will glow red at night. Dressing pots for the season is a way to keep gardening for a little while longer.
At A Glance: The Yellow Twig Winter Installation

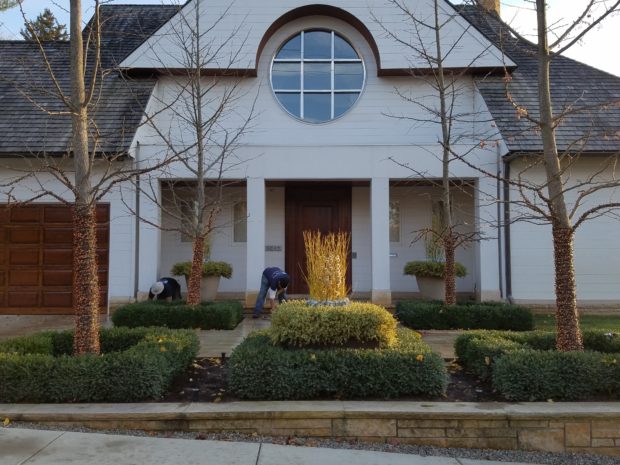
The previous post was all about the construction of a winter arrangement for a pair of pots and a sizeable planter.  To follow are pictures of that installation. This is a look see post. I do not much see the need to write any more than what I have already written. Except to say that fresh cut yellow twig dogwood is a most beautiful material that I welcome to our winter season.
The following pictures capture the installation of what we constructed in the shop. Keeping that construction mess in the garage is just about the best idea I ever had. Fabricating arrangements outdoors in the freezing cold means the cold has the upper hand. Creating winter arrangements in a warm and wind free space makes for better arrangements. And so much less mess. Sweeping up outdoors in freezing weather outdoors is frustrating.

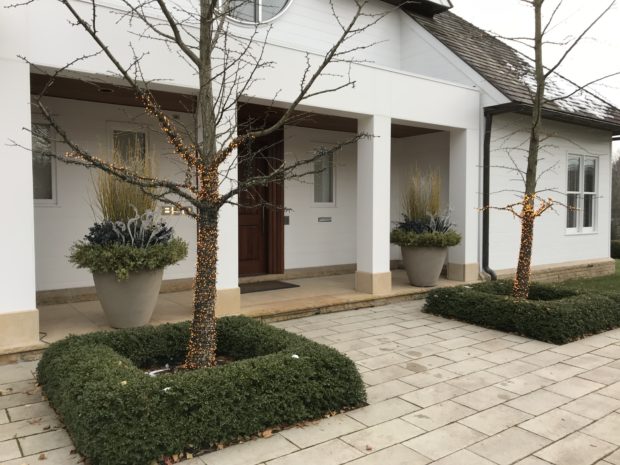
This front porch is neat and clean. All of the debris inevitable during construction was swept up off our garage floor, and deposited in our dumpster or in our compost pile, before we ever came to install.

We design and construct our winter arrangements such that they will still look this good in March of 2019. The winter is very long and tough in Michigan. We have endless snow, wind, and ice. So to follow is our answer. Equal parts beauty and durability.
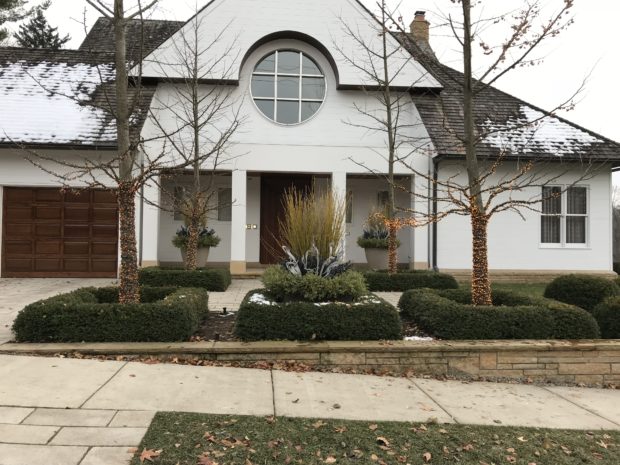
Welcome to the winter on its way

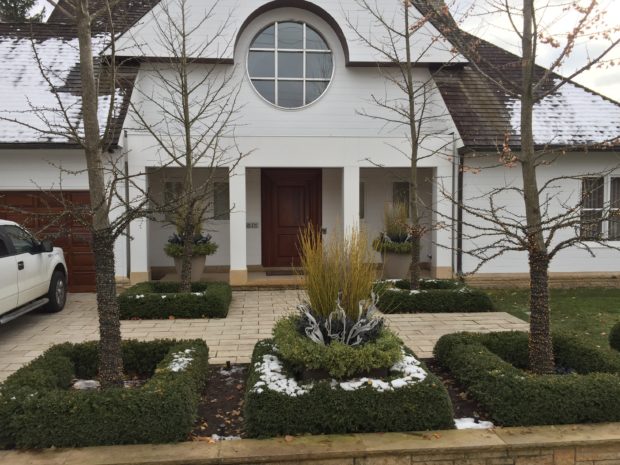
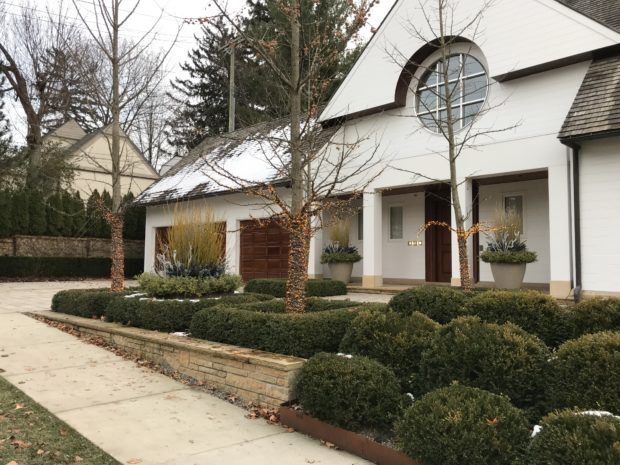
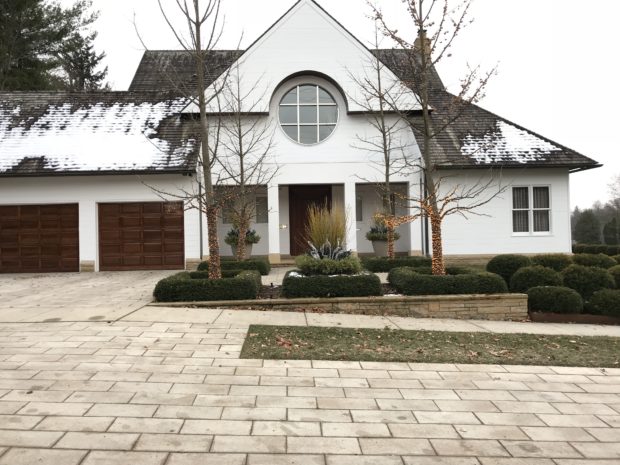
The street view of a front door dressed up for winter.

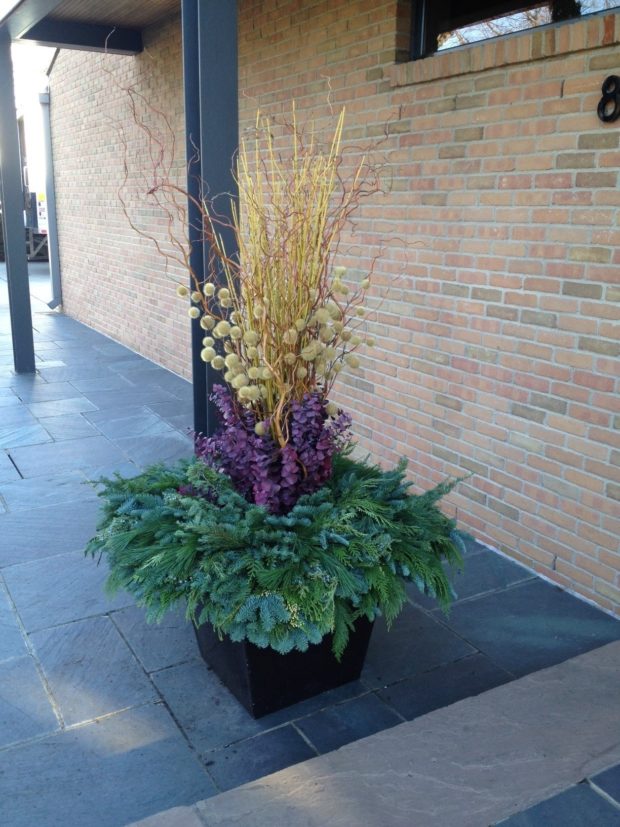
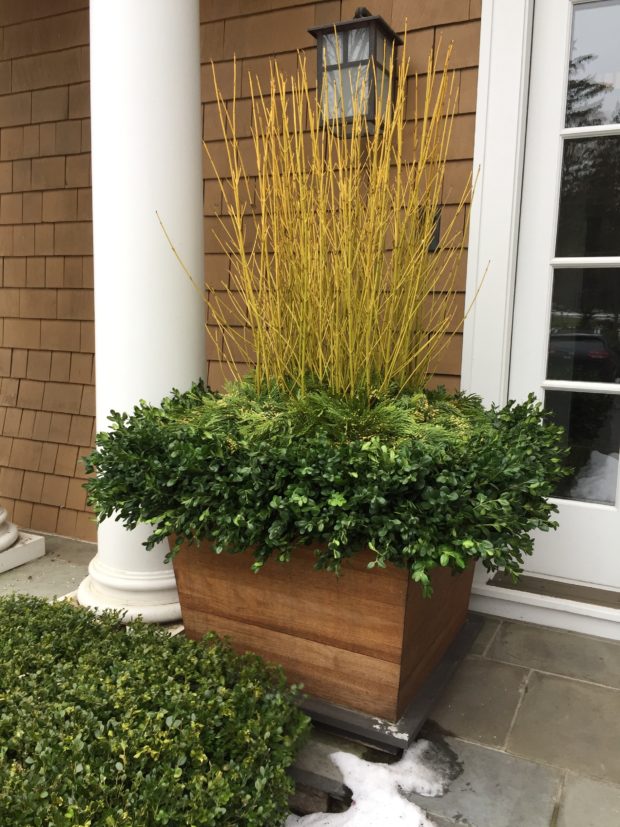
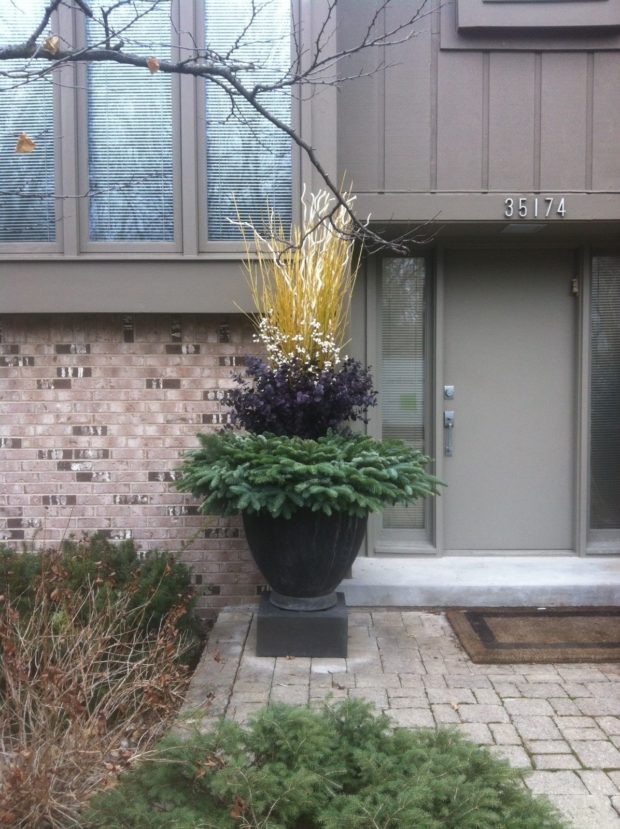
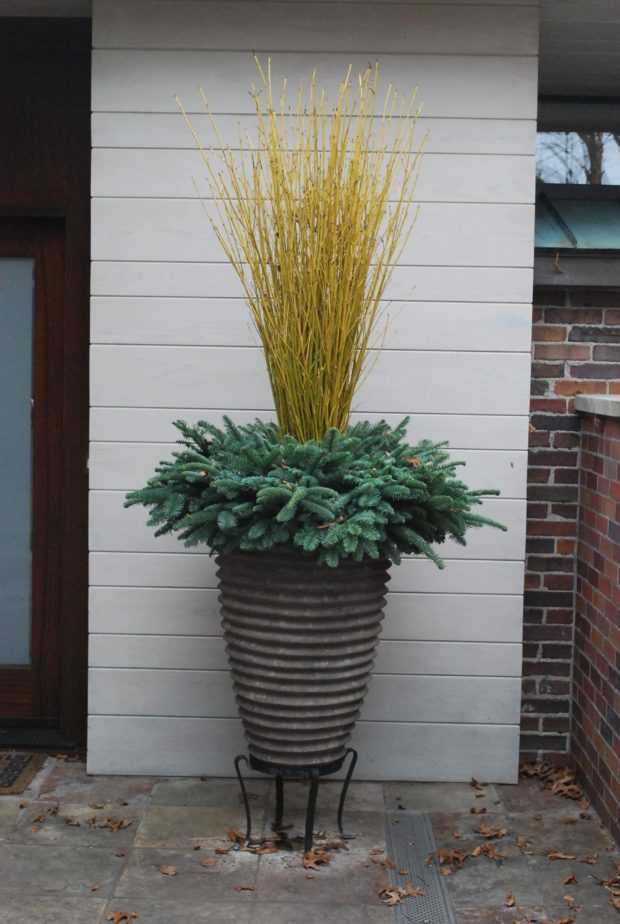
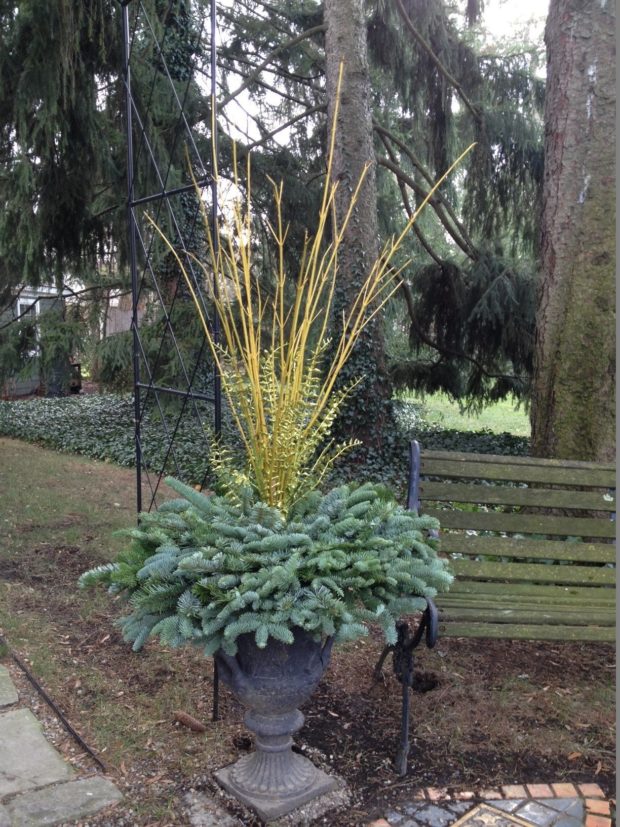
Yellow twig dogwood is a material I treasure for winter. The low winter light sets those yellow stems on fire. To follow? A look at the yellow twig we have used in winter container arrangements in the past.  Enjoy!

yellow twig stuck one stem at a time

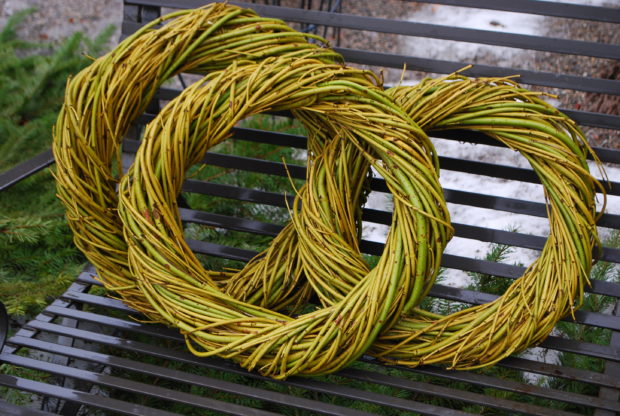
yellow twig wreaths

yellow twig centerpieces

winter pots

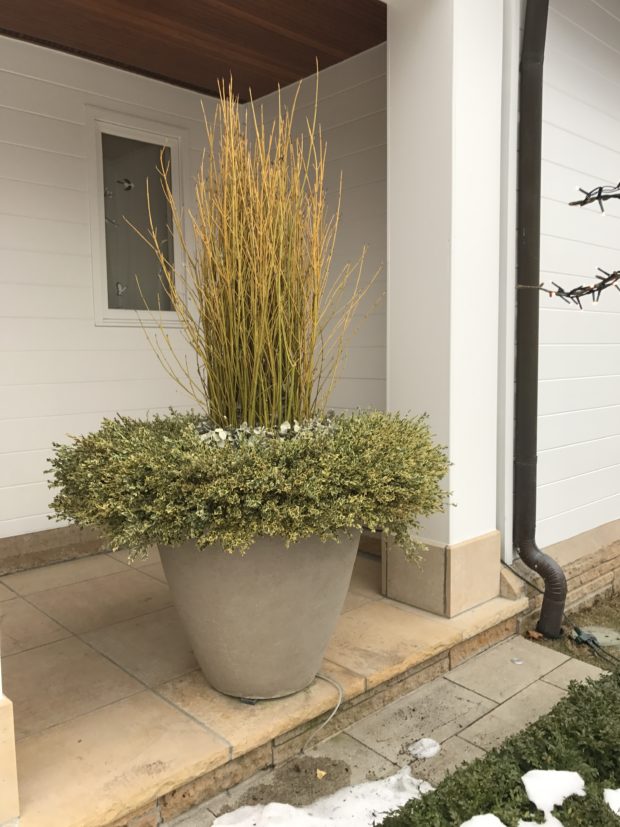
winter pot

winter pot

winter pot

contemporary winter container arrangement

the pot next to the bench

Few gardeners have the room to plant a stand of yellow twig dogwood. I know I don’t. But I love those cut branches of yellow twig dogwood placed in pots for the winter. They indeed make our long winter worth weathering.

Fabricating Arrangements For The Winter Pots

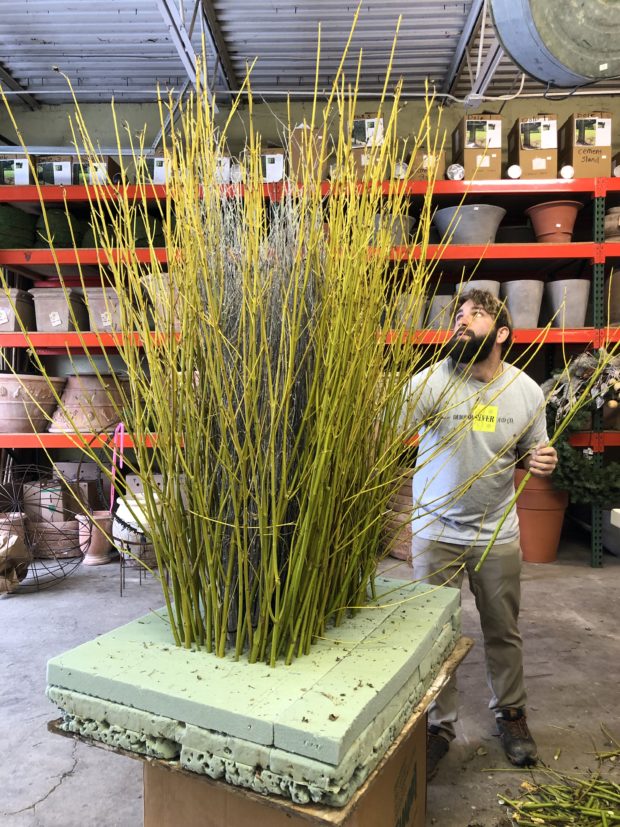
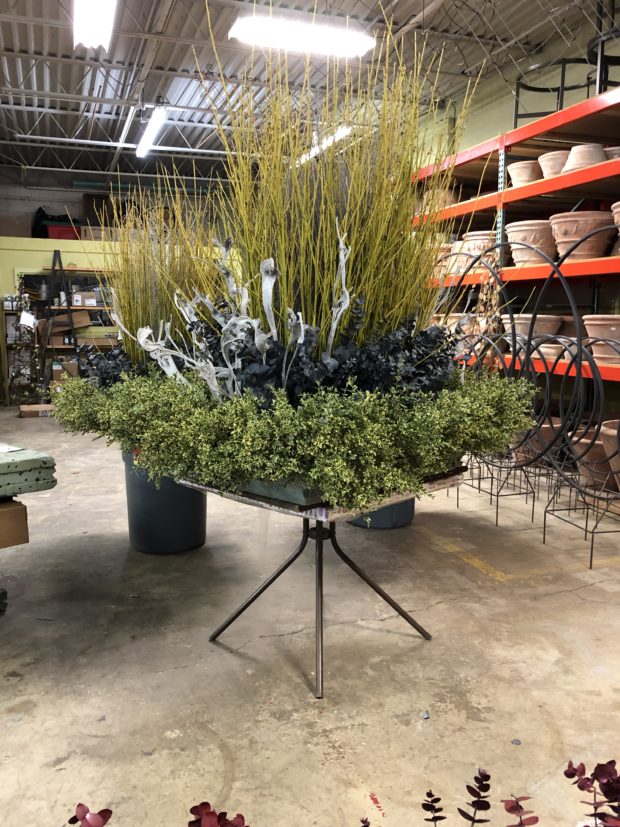
It is indeed that time again. This past Friday we swept out the garage at Detroit Garden Works, and set up our fabrication shop. The most useful and best part of the shop is its heat. Warm space to work makes for good and thoughtful work. So does good materials.  Rob works his heart out to be sure we have a huge selection of materials for our winter and holiday installations. His fresh cut twigs are the best I have ever seem. Farmed twigs, grown on great soil, mean all the dogwood and willow cut branches we have to offer have superior color and form. Every bunch features unblemished stems typical of the current years growth. Ron snapped up some very tall second year growth red twig which is equally as spectacular. Those glossy colorfully barked stems makes our winter container work easy. We construct forms that fit tight into the intended containers from large sheets of dry floral foam, layered up via hot melt glue.  One layer of foam goes below the surface. The upper layer gets stuck with greens, and whatever else we have in mind. At exactly the angle we like. Of course we save client’s forms from year to year. The above form is for a very large planter box. Note the exterior grade plywood at the bottom. That plywood enables us to transport this arrangement safely. As last year’s form had been reused for the past three years, we added a new layer of fresh foam to the top. The degraded foam goes to the bottom, into the pot.  The new foam gets top billing. This client has a decidedly contemporary view. Their winter container arrangements will follow suit. The center of this form was filled in with dark gray birch branches. More on that decision later.  David stuck every stem of fresh yellow twig dogwood, one stem at a time. I managed to capture him in the act. He is an accomplished fabricator. He knows to look to the airspace to tell him where he needs a branch. Once he claims a visual space for his branch overhead, he inserts that branch in that spot in the foam that puts his branch where he wants it. Does he ever look down at that branch is going into the foam? No. He is always looking at the overall shape from above.

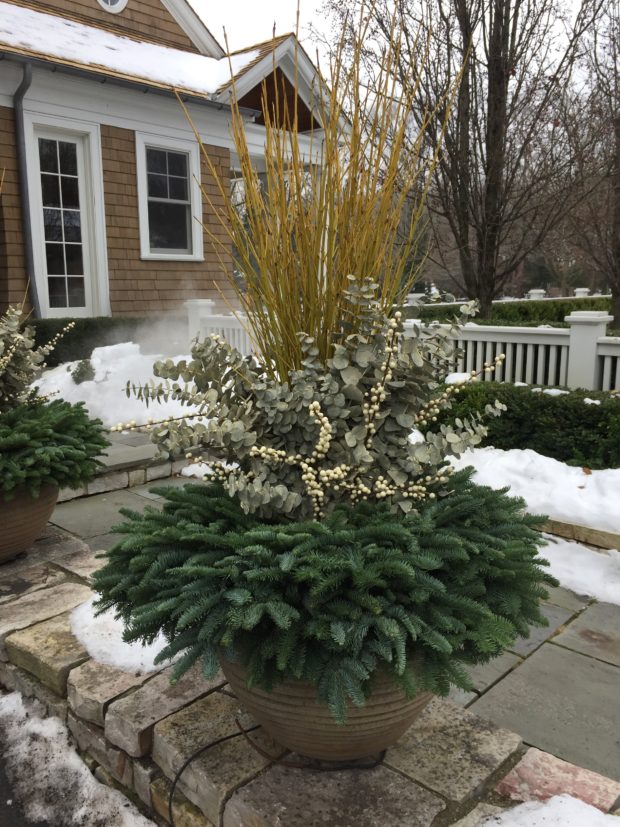
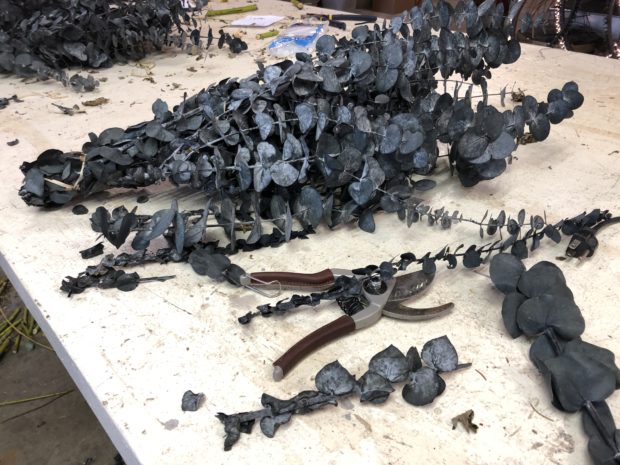
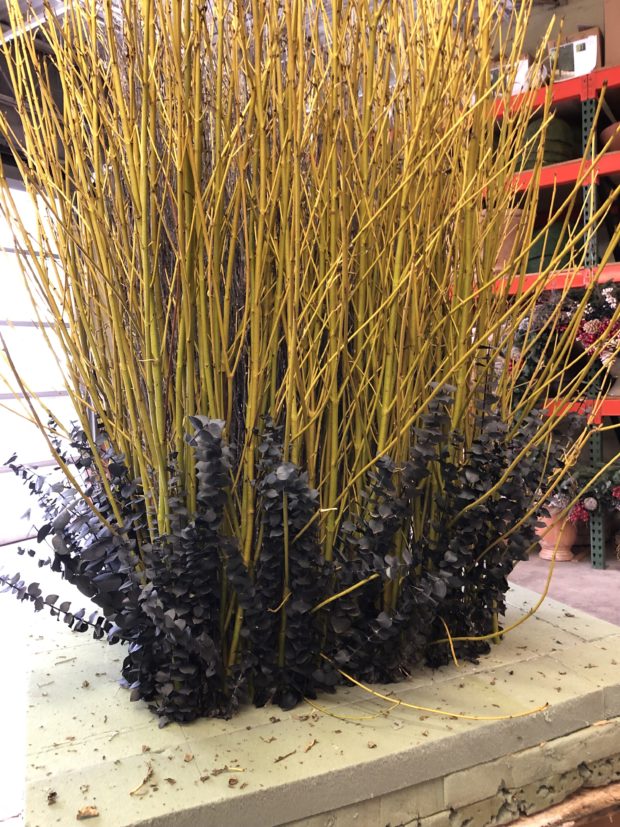
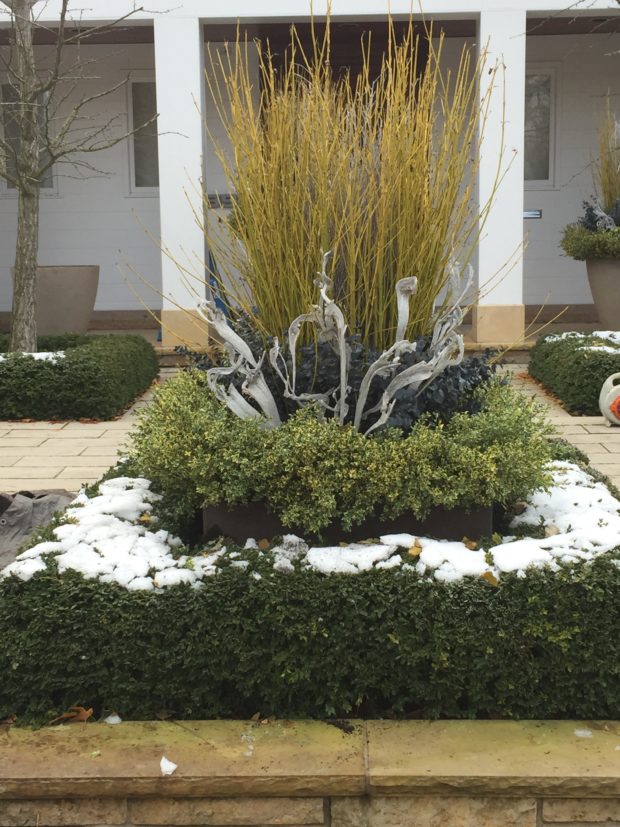
I regret to say that our supplier of preserved and dyed eucalyptus has closed up shop. We bought out every bunch he had available, once we knew he was closing up.  We did have a few barrels of the color “Rain” available.  I liked the idea of those yellow twig branches faced down by this dark blue gray eucalyptus.

I decided to use the materials in a less formal way this year than last. This is a color palette I know my client will like, but changing up the style can make the most familiar materials look fresh and different. Winter arrangements with a simple and sculptural quality look great in all kinds of weather. In addition, this volume of branches will help to shed the snow, or at least keep it from damaging the overall arrangement. This is by way of saying that designing winter arrangements that can withstand snow is a good idea in zones that can rack up the inches in the winter. We will not dismantle this arrangment until mid March, so it has to be winter weatherproof.

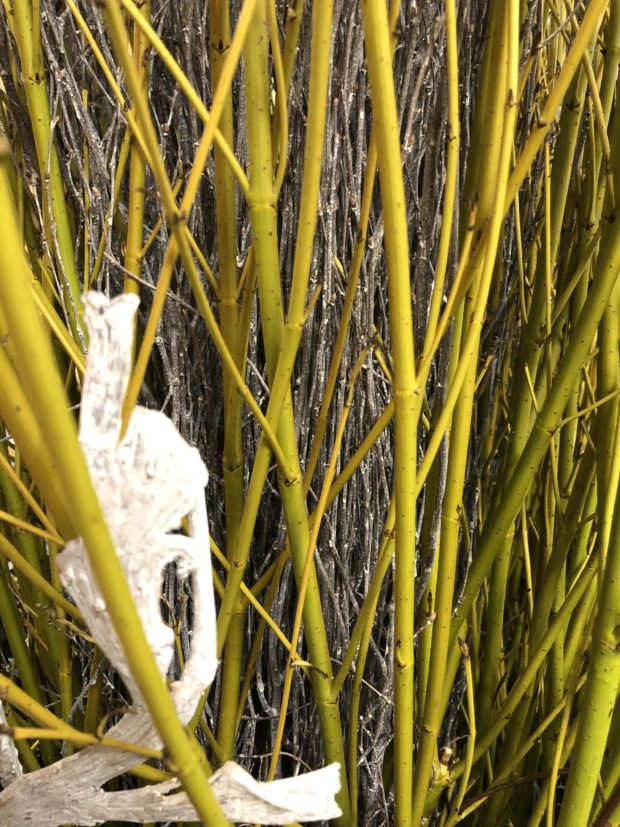
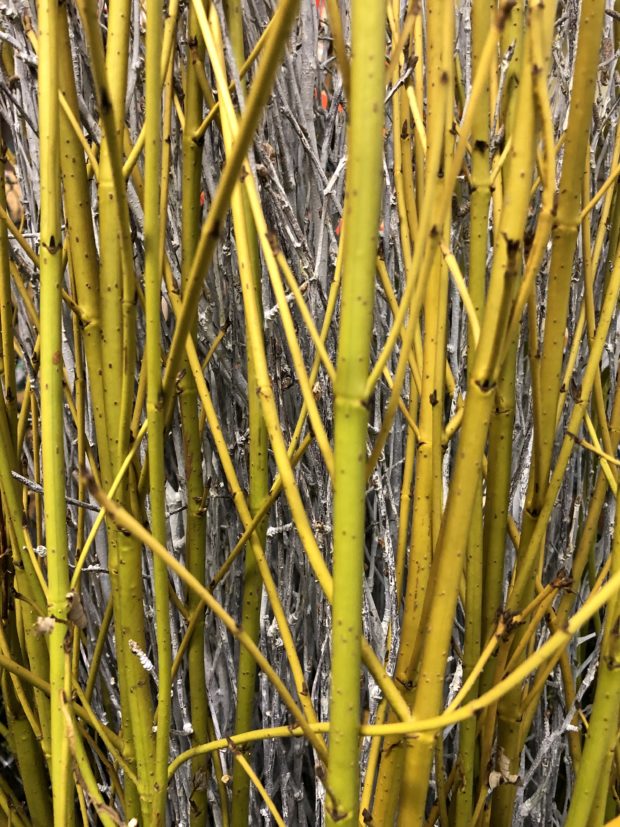
This close up of the yellow twig set against the dark gray brown birch bunches on the interior illustrates how the effect of the color can be intensified by way of a contrasting backing. The addition of branches on the interior create the illusion that the form is tightly packed with yellow twig stems. The reality is quite different; there are just 2 rows of them. The matte birch stems also help make the yellow twig bark appear all the more glossy. A third reason for that dark interior?  In a subtle way, their darker color provide a transition from the dark of the blue gray eucalyptus, to the bright of the yellow twig.

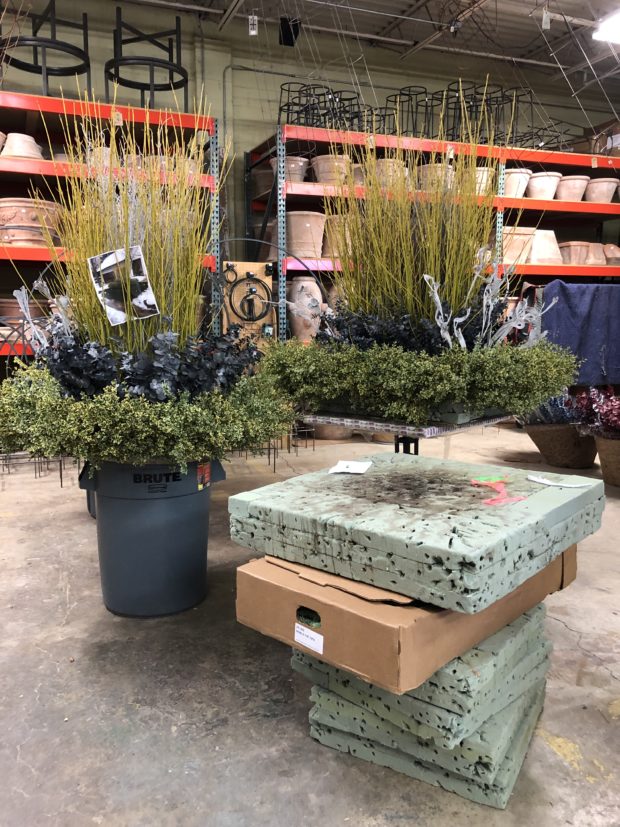
A pair of round pots are further from the road, and nearer the house. I want the arrangements in the pots to appear brighter than the planter box. The interior branches in this case are whitewashed birch.

This yellow twig looks brighter yellow to my eye. That brightness will be compounded, once the arrangements are placed in the pots.

It made sense to stuff the rest of the form with variegated boxwood. This green comes to us in 40 pound boxes. The branches are long and densely twiggy. All of our greens are premium grade, like this.  It  means there is great scale, size and volume to every branch, and almost no waste. Greens intended for interior winter and holiday arrangements are generally small, and do not translate so well to use in pots.  We try to keep each stem intact, rather than cutting it up into smaller pieces. For a less formal arrangement, we let the natural grown branch be what it is.

The light gray branches are called natrag. That is the sum total of what I know about them, except that they have a very sculptural and exotic appearance.

The natrag was introduced into the arrangement only on the front and back.  They are so strong visually that more of them would dilute their overall effect.

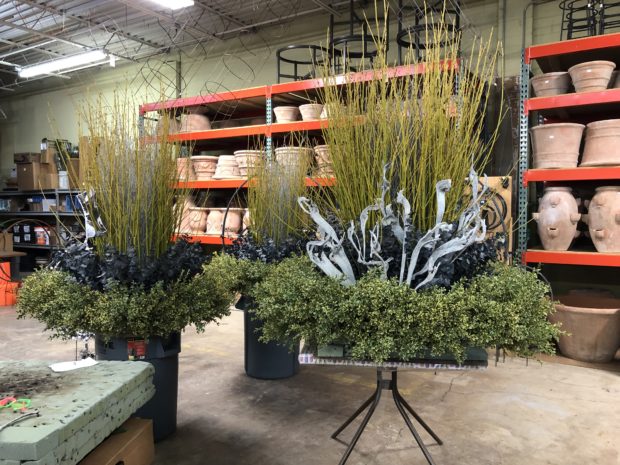
The arrangements were done and ready to be installed this morning. In the foreground, the forms for our next project. My landscape crew generally handles the installation.  They have a great eye for positioning plants in the landscape.  This skill translates into installing these arrangements so they look like live plant material. If you look at the larger arrangement in the above picture, you can see that the blue gray eucalyptus looks almost black at the base. Part of the design was to deliberately create a shadow, and a sense of depth between the boxwood and the eucalyptus.

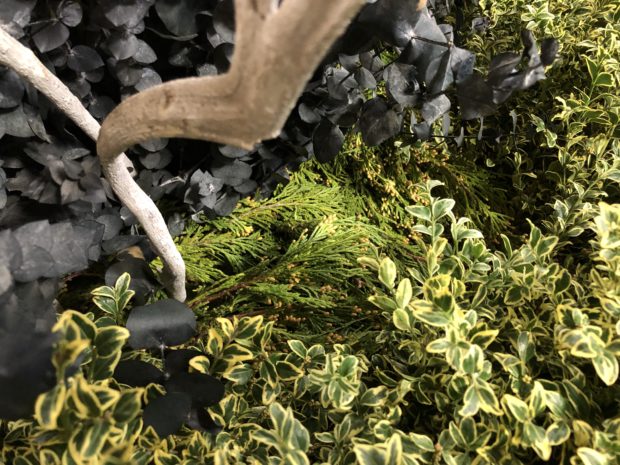
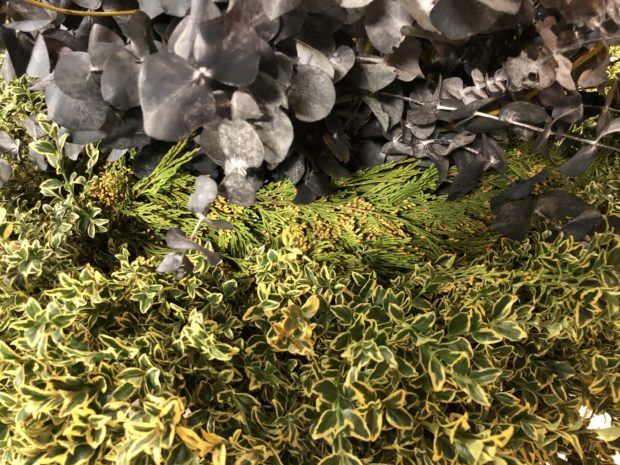
How we do this is very difficult to photograph, so suffice it to say that there is a 4″ wide band of incense cedar that is installed flat to the base of the form. An incense cedar moat, if you will. That space is what creates the shadow.

The eucalyptus and boxwood are both fairly tall. The cedar is inserted into the form on a horizontal angle, so it is barely an inch tall. I will post pictures of the finished installation tomorrow. For anyone who is new to our work, or has questions about the construction, I have posted many times over the past 9 years about them. You can click on and read my November posts from past years, if you are so inclined.


Part Three: The Pergola

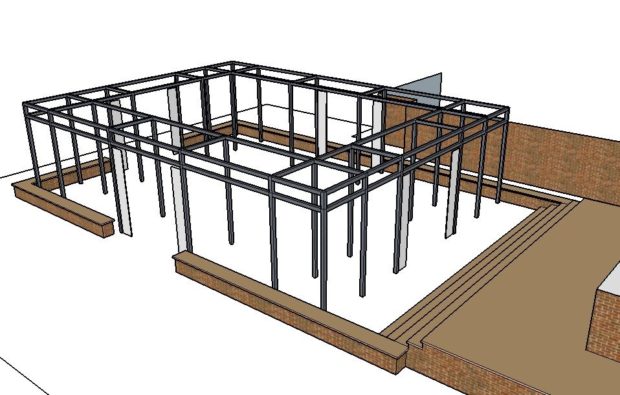
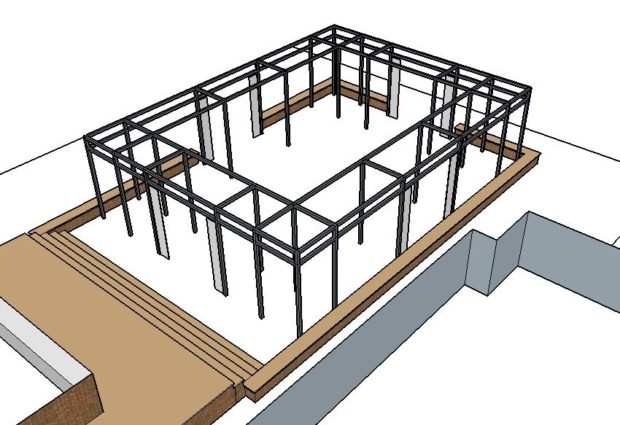
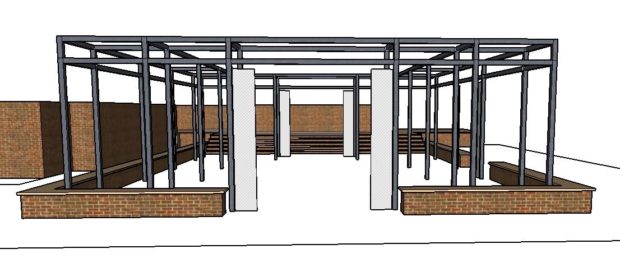
If you  have been reading this series of posts, you will recall that my landscape design called for a rectangular cloister style pergola to be built off my client’s sun porch and garage. That shape was dictated by an L shaped space established by the sun porch, and the long back side of the garage.  The center of that cloister would be a fountain pool. My drawing, pictured in the previous post, was schematic, meaning that drawing was a generic structure, just holding a place on the page.  Once she indicated an interest in a pergola surrounding the fountain, I went to work to actually design that structure.


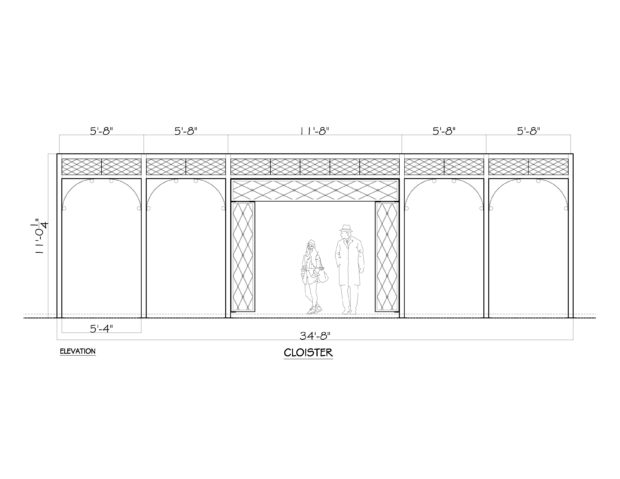
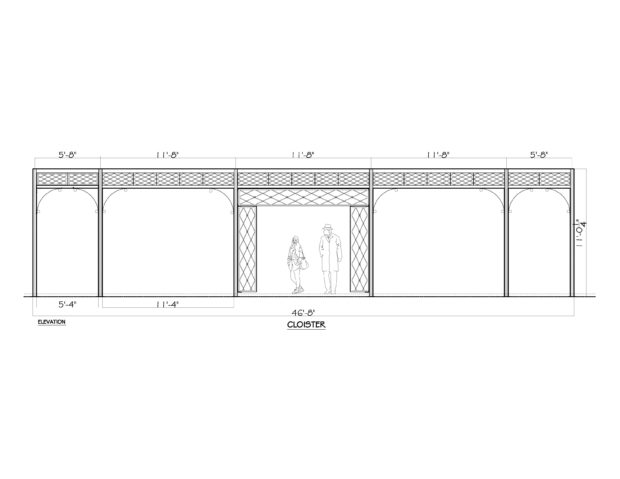
So what is a cloister?  A cloister is a covered walkway, frequently surrounded by a building or buildings on all four sides. Historically, it was an architectural feature common in monasteries and courtyard spaces in universities. The design for this pergola is predicated on a 6 foot wide covered walkway which would provide overhead structure to the fountain pool. The photo above shows Buck’s CAD drawing of the long side, which is almost 47 feet long. The design revolves around a series of elongated diamonds of different sizes, and steel spheres of 3 sizes. Buck added some figures to his drawing, so I could see what the relationship would be between person and structure. A good part of the reason it is 11 feet tall is its placement. Standing at the bottom of five steps from the sun porch grade, it was important that the roof did not appear too low from that vantage point. That height will also give it some presence from the upstairs windows, and the balcony which is on top of the sun porch roof.

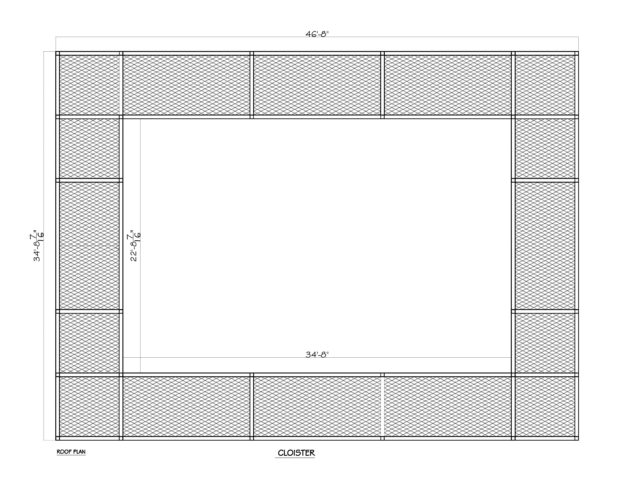
This drawing of the roof panels makes clear the idea of a covered rectangular walkway. And that the interior space would be open to the sky. It was almost a year ago that we ordered the John Davis roses that would be planted on the pergola columns. I still have hopes of putting them in the ground yet this year, but if not, we can winter them over in our landscape building.

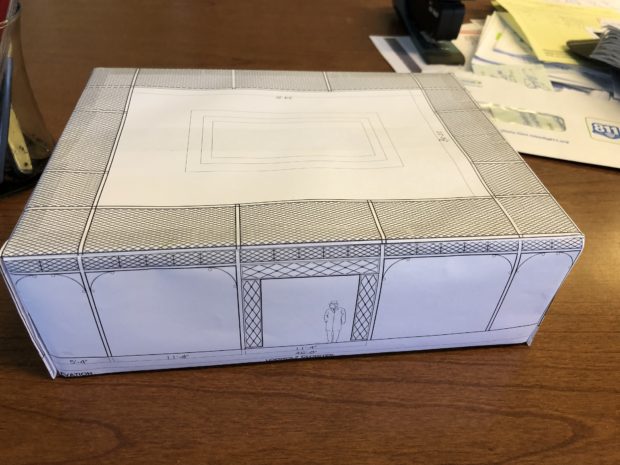
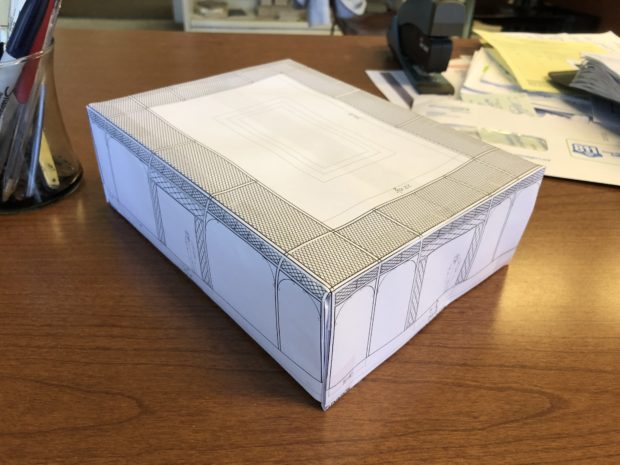
The drawings are useful to a designer, but maybe not so much to a client. Buck figured out how to scale the three drawings the same, and I built this model from sheets of copy paper. Buck drew the schematic for the pool on the roof plan. All of the white spaces on the paper will be open spaces.


This model came months after the presentation of the original plan. Once my client approved it, there would be much more work to come. Not only were there engineering issues to sort out, all of the dimensions would have to be coordinated with Mike Newman, as his steps and walls were an integral part of the installation. The following drawings were passed back and forth between Buck and Mike, so all the the locations and dimensions could be mutually agreed upon before anything was built.

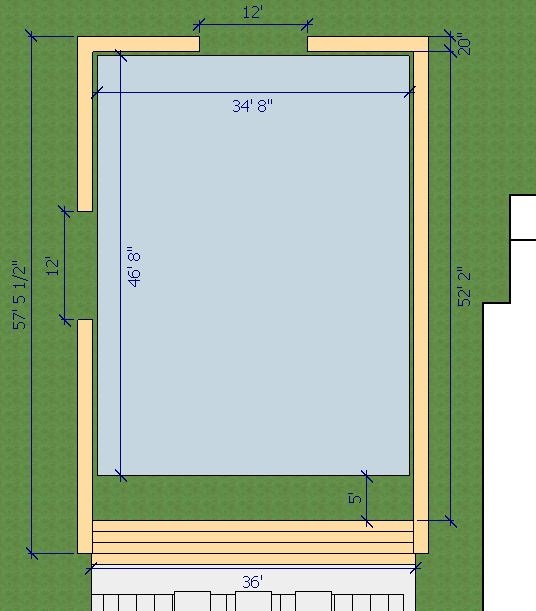
This plan view of he steps, walls, and pergola show the relationships between the various elements. The walls would have 2  12′ wide openings that would provide access to the back and side yards. Upon reaching the bottom of the stairs, there would be 5 feet of open space before reaching the pergola.

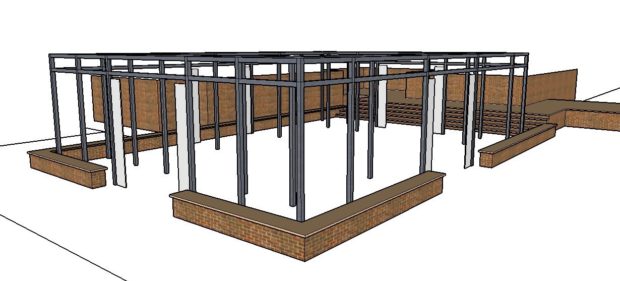
These drawings do the best job of illustrating the fact that there are pairs of columns that would hold up the roof. There are 32 in all. And the columns are round.  I designed as much of this pergola to feature round shapes, as opposed to square or rectangular. The round shapes seemed less industrial, and more fitting to the period of the house. Buck said this decision made the engineering much more difficult, but I think it will prove to be well worth the trouble.

view from above

view from the far end

the view of both exits

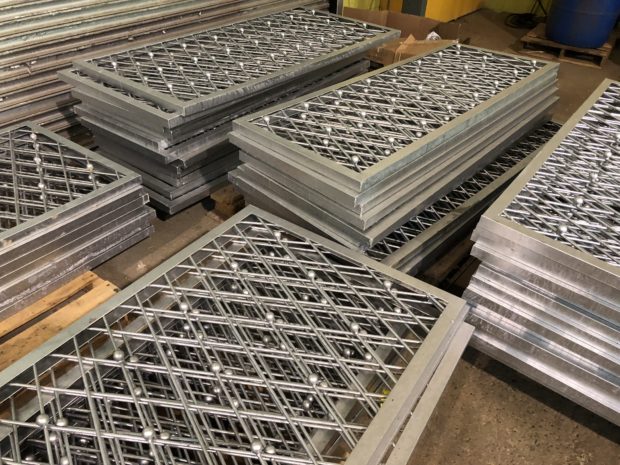
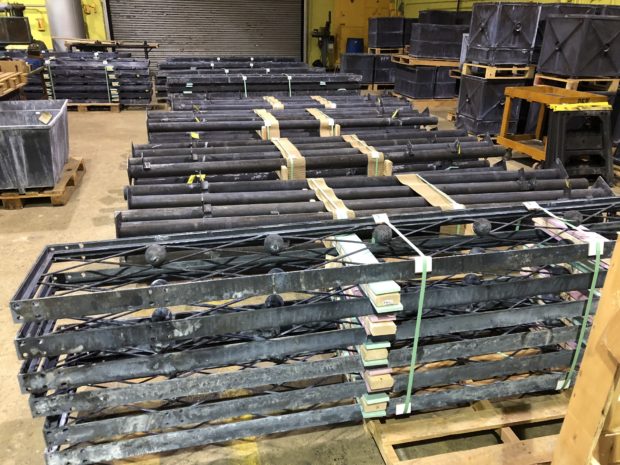
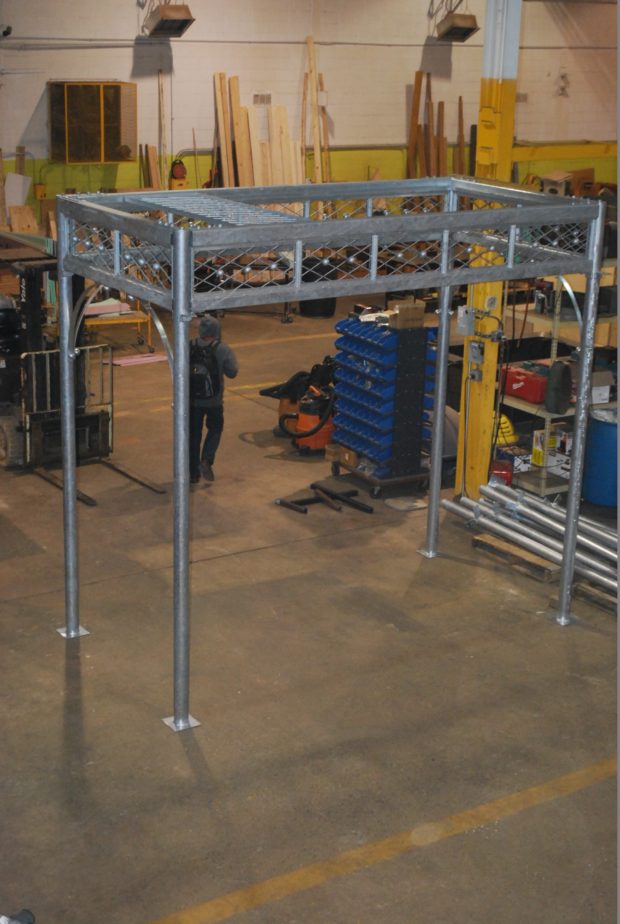
Pictured above is a group of the roof panels, after the galvanizing process. The round rods are captured in a square steel channel. The solid steel spheres, welded at the juncture of every other diamond, will face down. There are 2000 of them, in all.

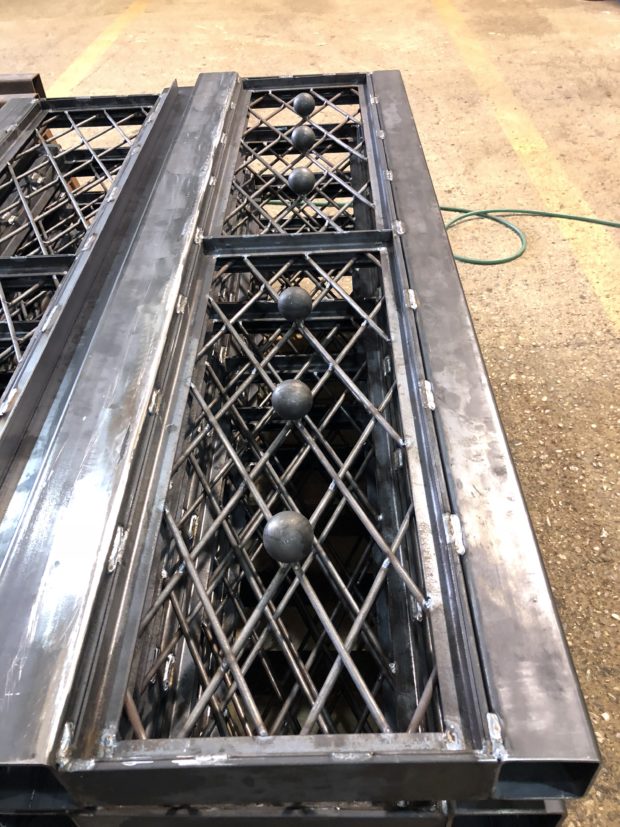
These fascia panels feature a larger gauge steel rod, and 2″ diameter solid steel spheres. These are finished panels in their raw steel state.

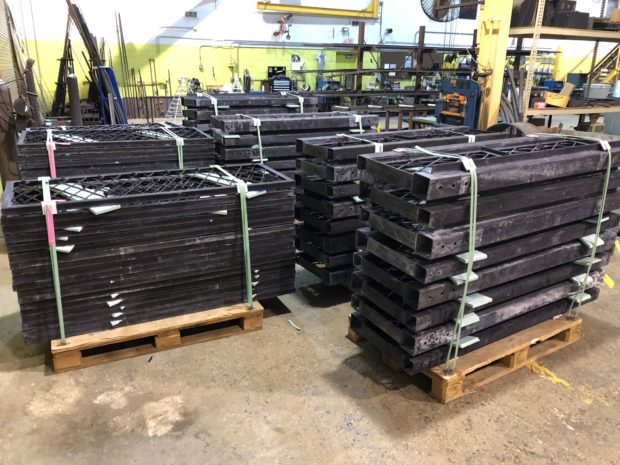
The pallet in the foreground is stacked with the pergola entrance panels. These have the largest diamonds, and 3″ diameter steel balls. In the background, pallets full of columns.

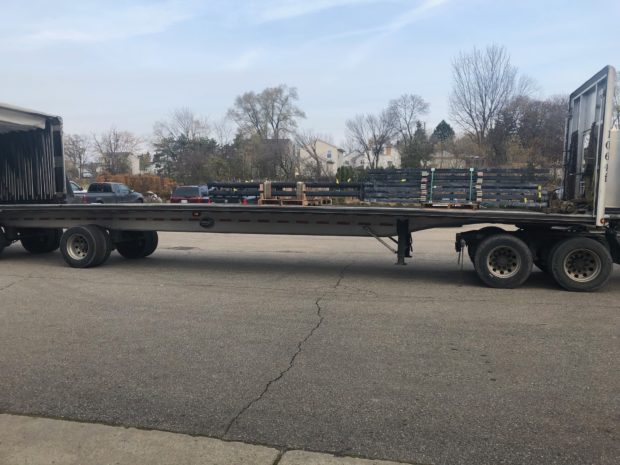
Branch limited the weight of every pallet so it would be easy to offload them at the site.

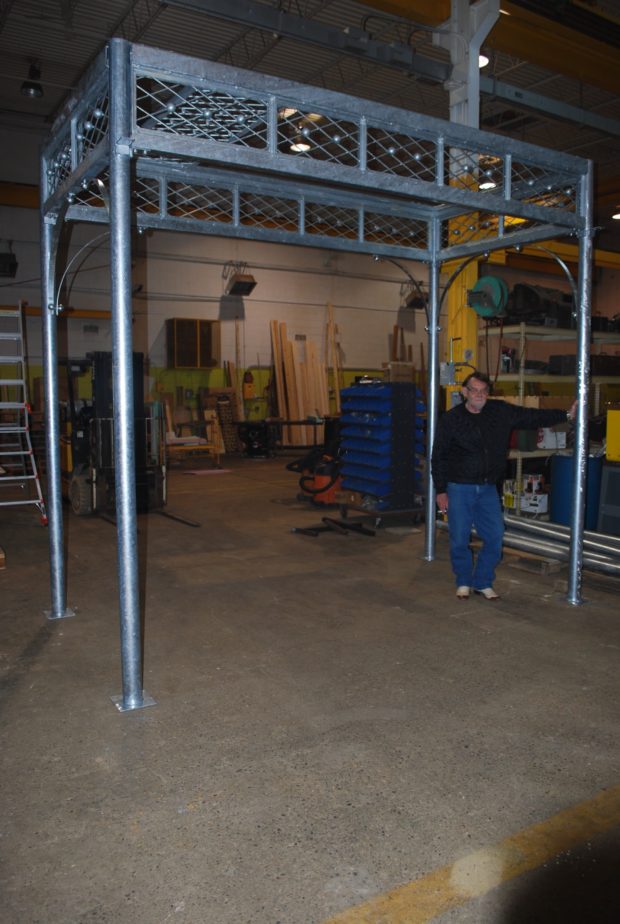
Prior to loading up the pallets, Buck had his guys pick random pieces from each stack of parts, and had them put together one 12′ by 6′ section. He wanted to be sure all of the parts would go together easily. Putting a pergola together in the field is a much different operation than putting it together in a warm dry shop, with a bridge crane overhead. The install will be lengthy, as it is a big structure. Maintaining the precision with which each piece was fabricated was a challenge. That precision is what will make the install go smoothly.

This view from the mezzanine at Branch shows a roof panel set in place.

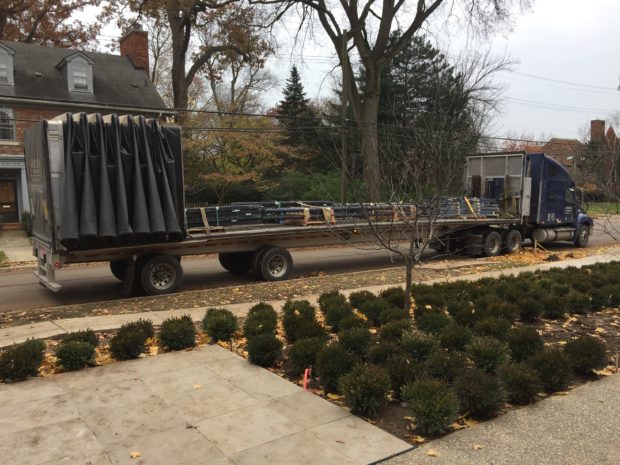
Jackie arranged for a dedicated flatbed truck to transport the pieces to the job. Even so, there were 6 pallets left over that my landscape crews loaded in their trucks. None of the pallets could be stacked.

We had our loader on site, so we could offload once the truck arrived.

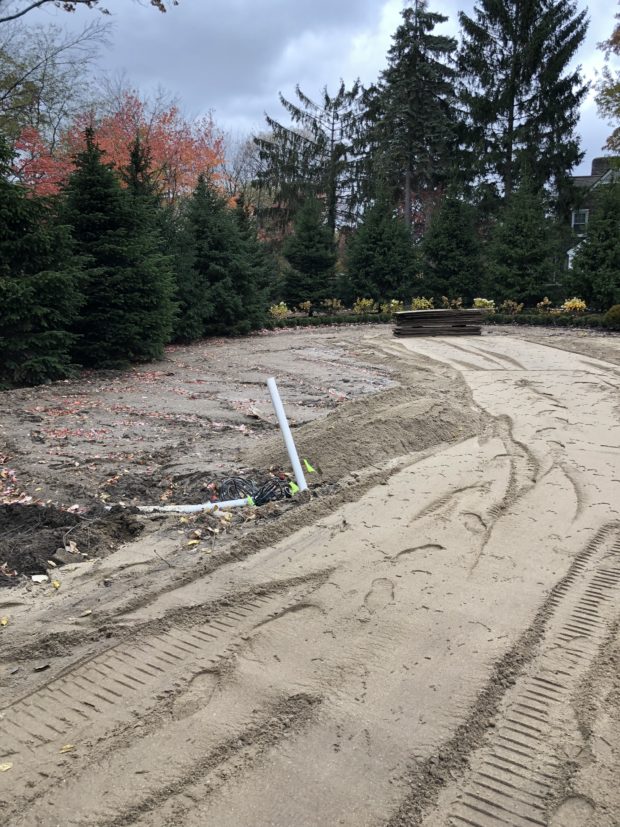
There was one part to the story we did not anticipate.  3.5 inches of rain fell in the area where the boom truck would be located, and those pallets would be staged.  We had not gotten to a finished grade in this side yard. The ground was very low here. Our original delivery and installation date came and went. I was not pleased with the prospect of having to waiting until the ground froze. I put in a call to my large tree contractor, and asked if there was anything he could do.

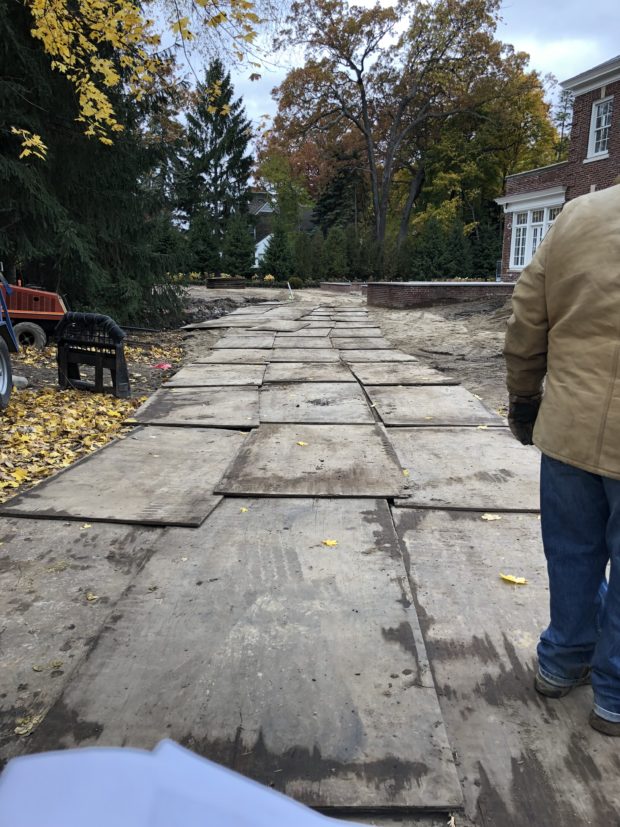
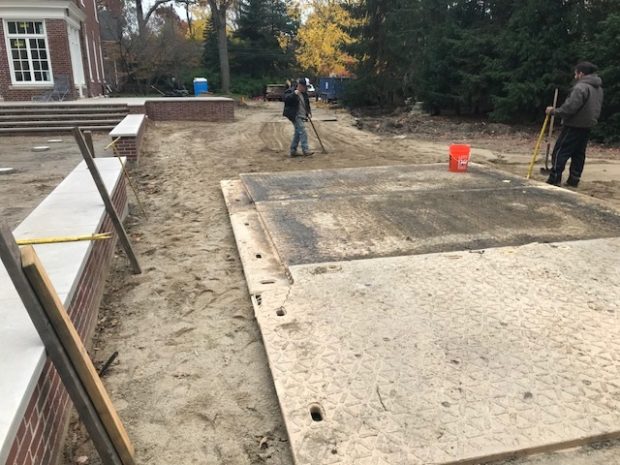
Ralph brought in 80 yards of sand, and 100 sheets of 3/4 inch thick plywood, with the intent of building up the grade such that we could access the site.

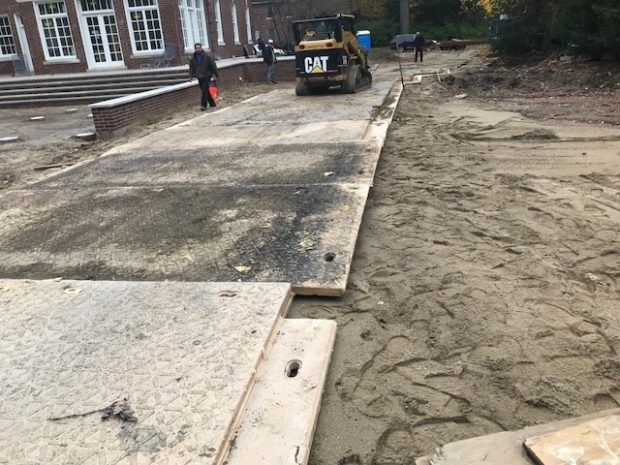
He built a road in that would be able to handle the weight of the pergola pieces, and trucks. Fortunately, this side yard is still so low, that all of that sand will eventually become part of the finished grade.  He is estimating he will need another 200 yards of soil to bring this space up to grade.

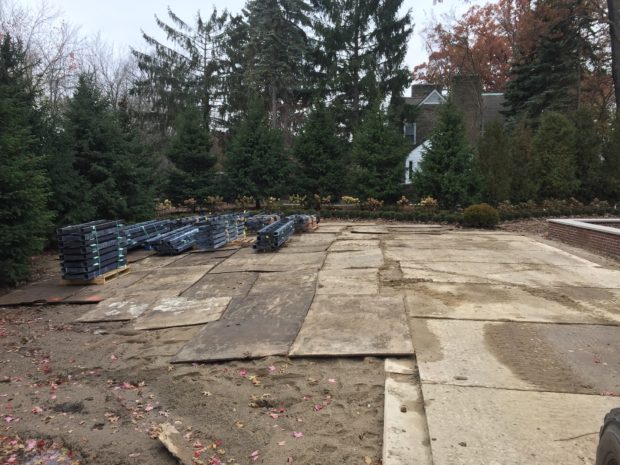
The boom truck is an incredibly heavy piece of equipment, featuring a large arm that will pick up each piece in the proper building order. That truck has huge steel arms that come out, and rest on the ground, to stabilize the truck.  Plywood and sand would not be enough to keep that truck stationary.  The construction mats you see in the above picture weigh 1000 pounds each. Ralph assured me that they would stabilize the ground for any truck we needed to get back there.

finishing up the road in

Sheets of plywood were all we needed to stash the various pallets.  The boom truck operator will be able to pick up any part he wants, when he needs it. It took 3 days to get the site ready. Templeton Building Company will do the actual installation. Buck will be there the first day, to advise.

Everything is ready. The boom truck is scheduled to arrive this afternoon. I hear the scaffolding is going up now. Each column will be bolted to the footings that Mike poured some time ago. The structure will be bolted together, one piece at a time. It could take a week, from start to finish. For now, I am just very happy to know we are in the home stretch.