A good many posts ago, I described a window box as a hybrid vehicle. It is generally more expansive than a pot, but smaller than an in ground garden bed. A window box is an above ground defined space which is large enough to thoroughly explore an idea, and small enough to finish every square inch beautifully. I like any landscape project that is as beautiful and polished at the finish as it was from the design beginning. This means tailoring seasonal efforts to a size that celebrates aspiration, and acknowledges limits. Planting an area in the garden with seasonal plants leaves me cold. There is too much square footage to deal with. More on the knees work than I am willing to do anymore. Too much poor soil and poorer drainage than I want to address. Get me off the ground, please and thank you. A window box is the perfectly sized venue for a bigger seasonal gesture.
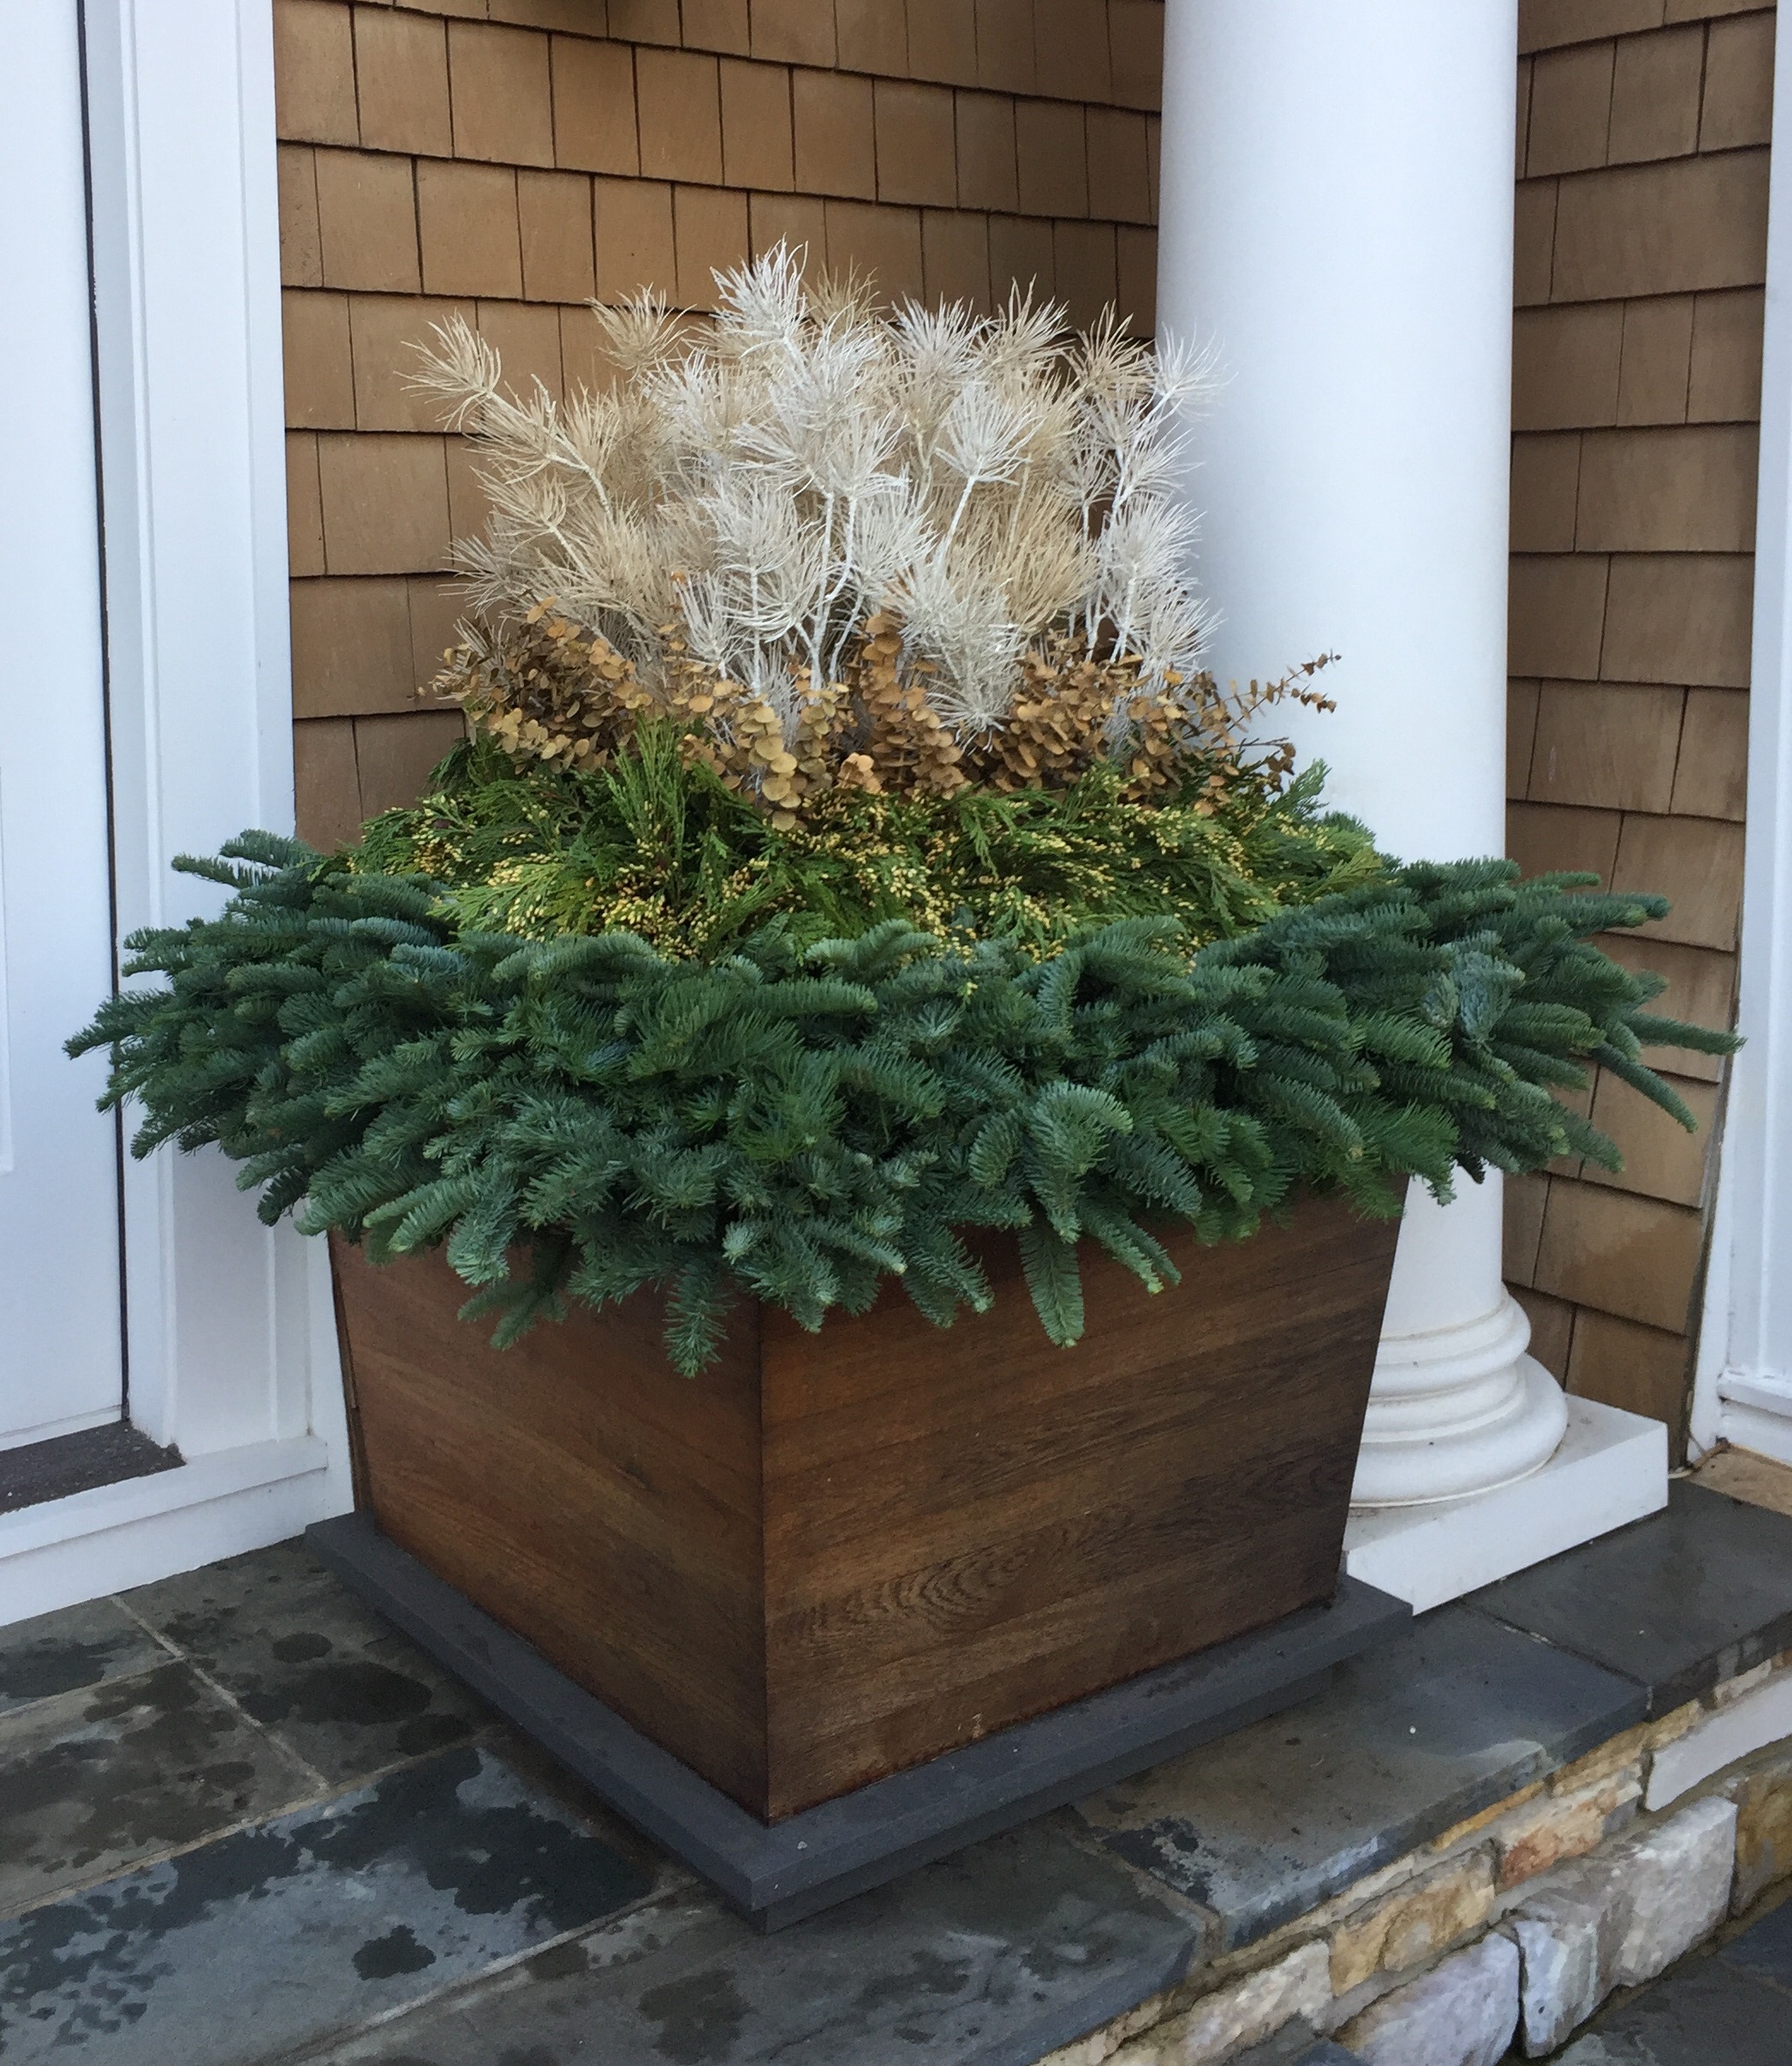
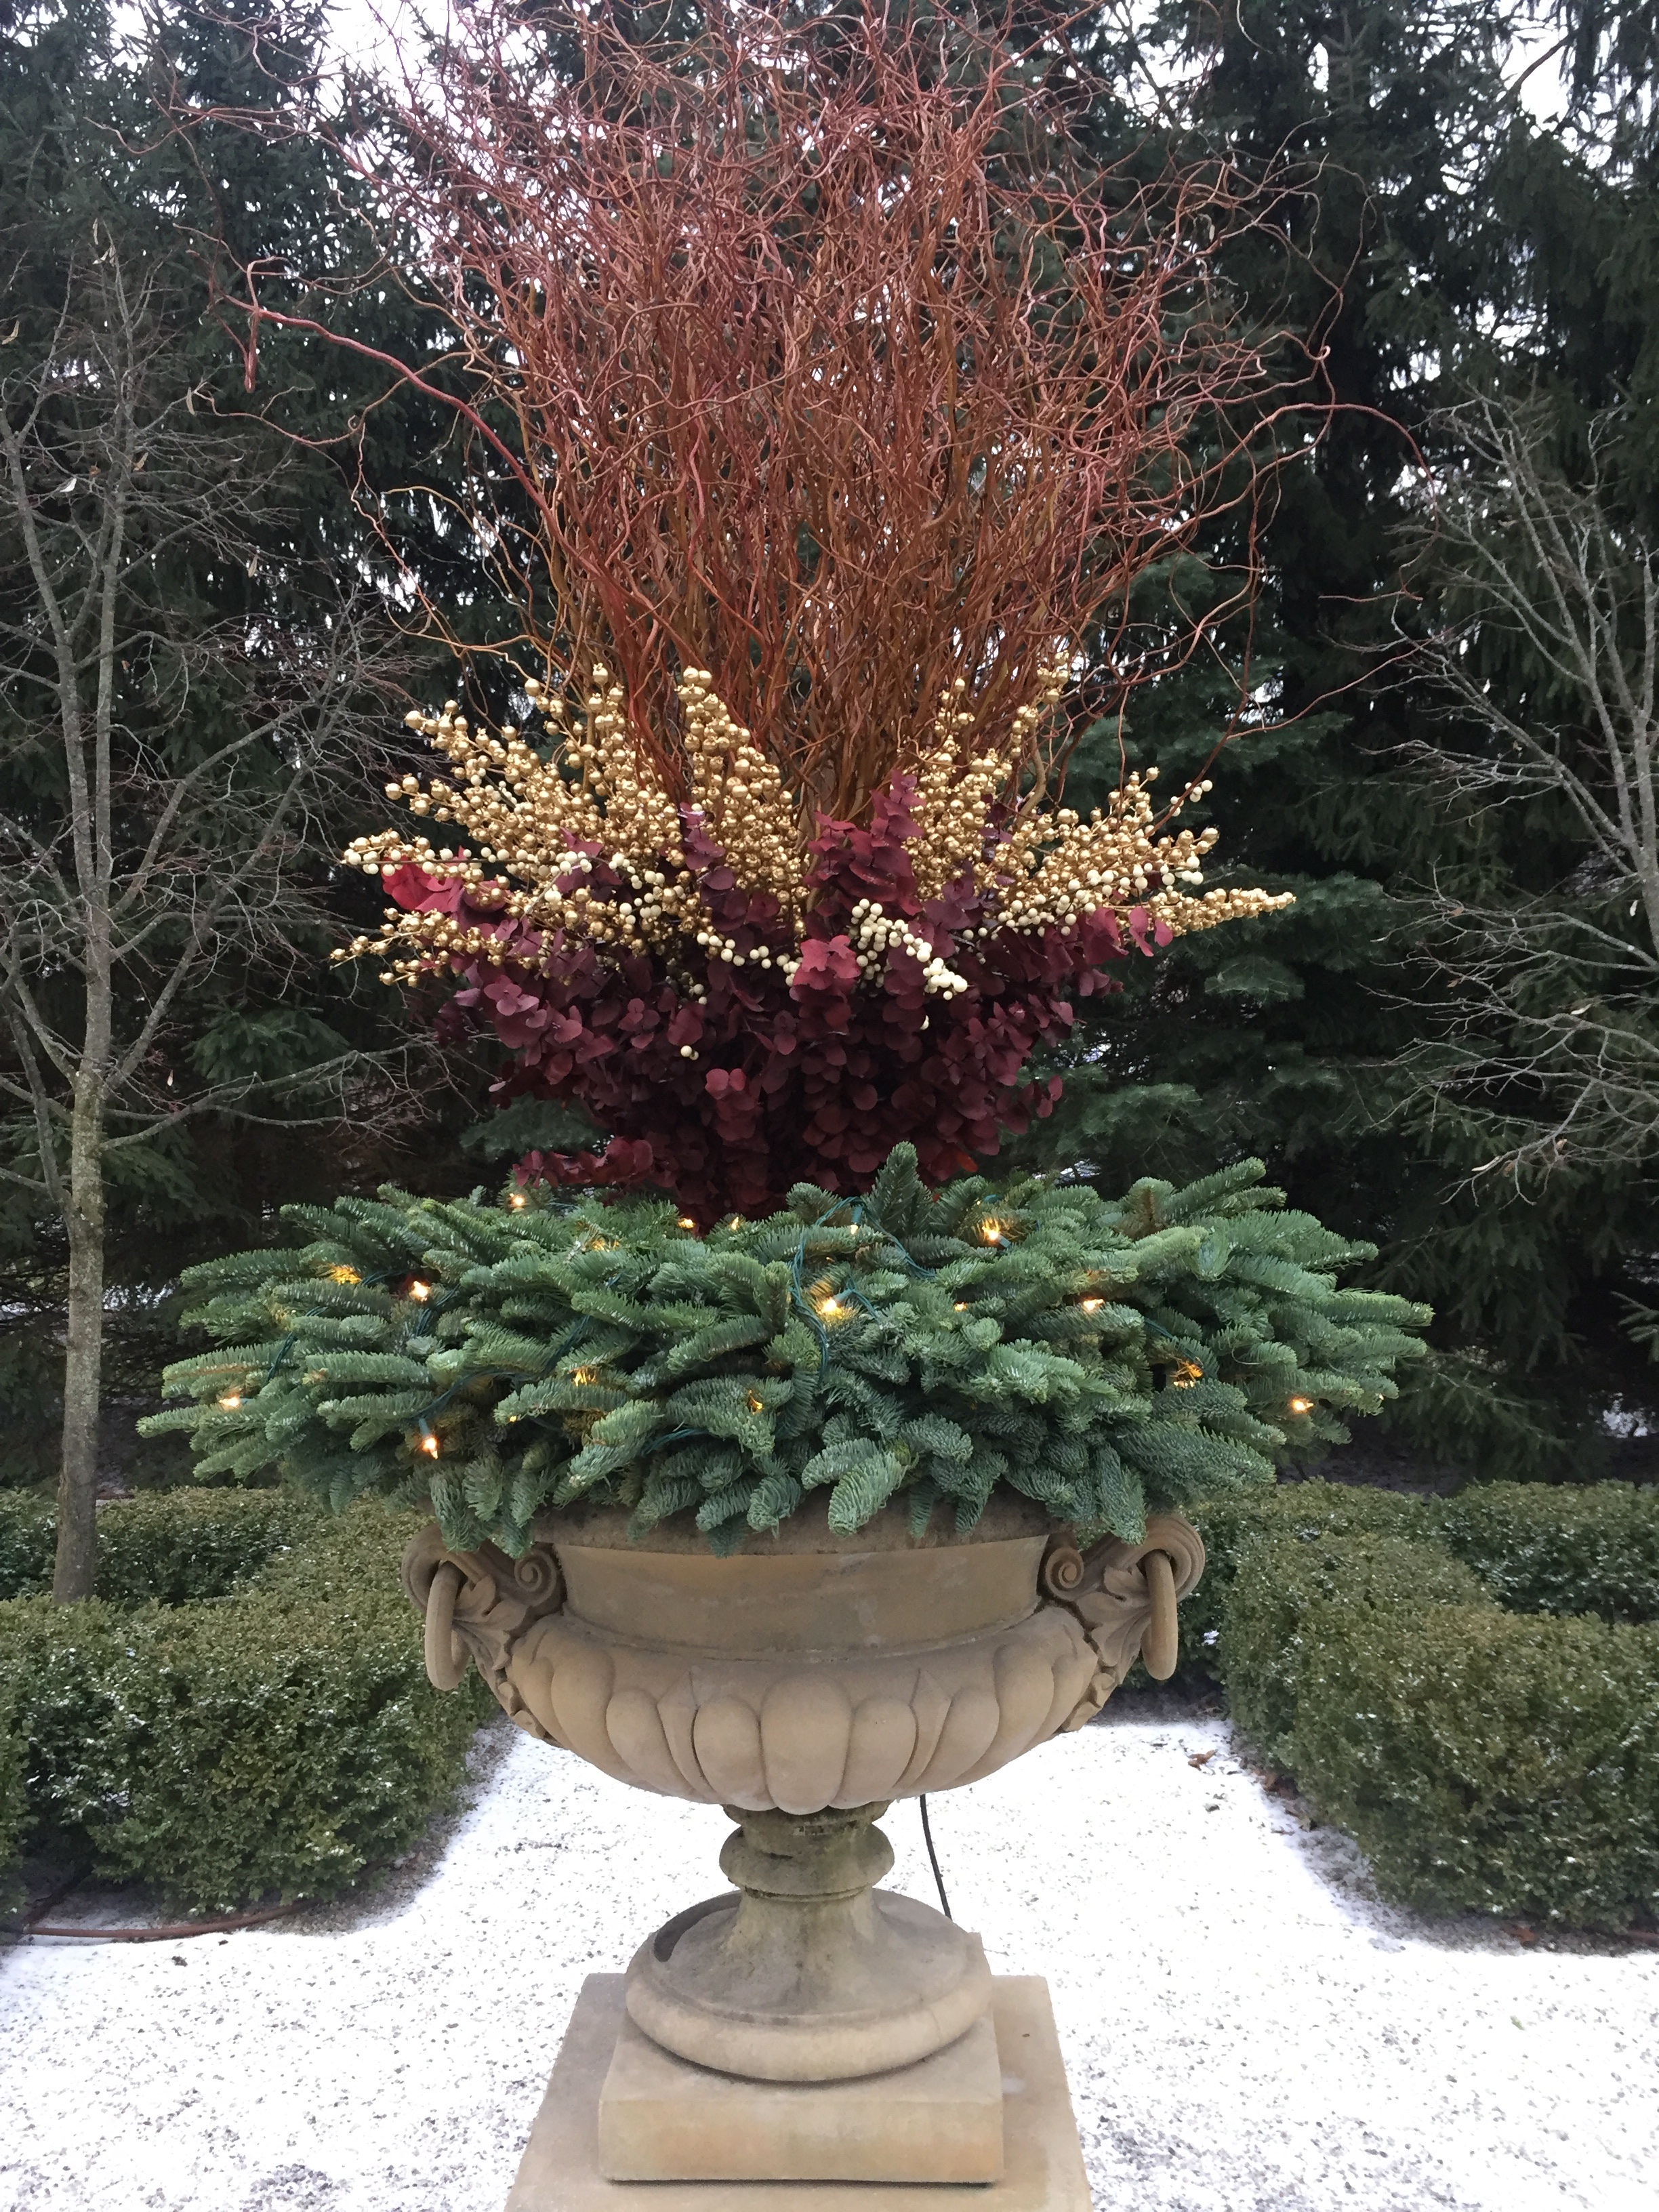
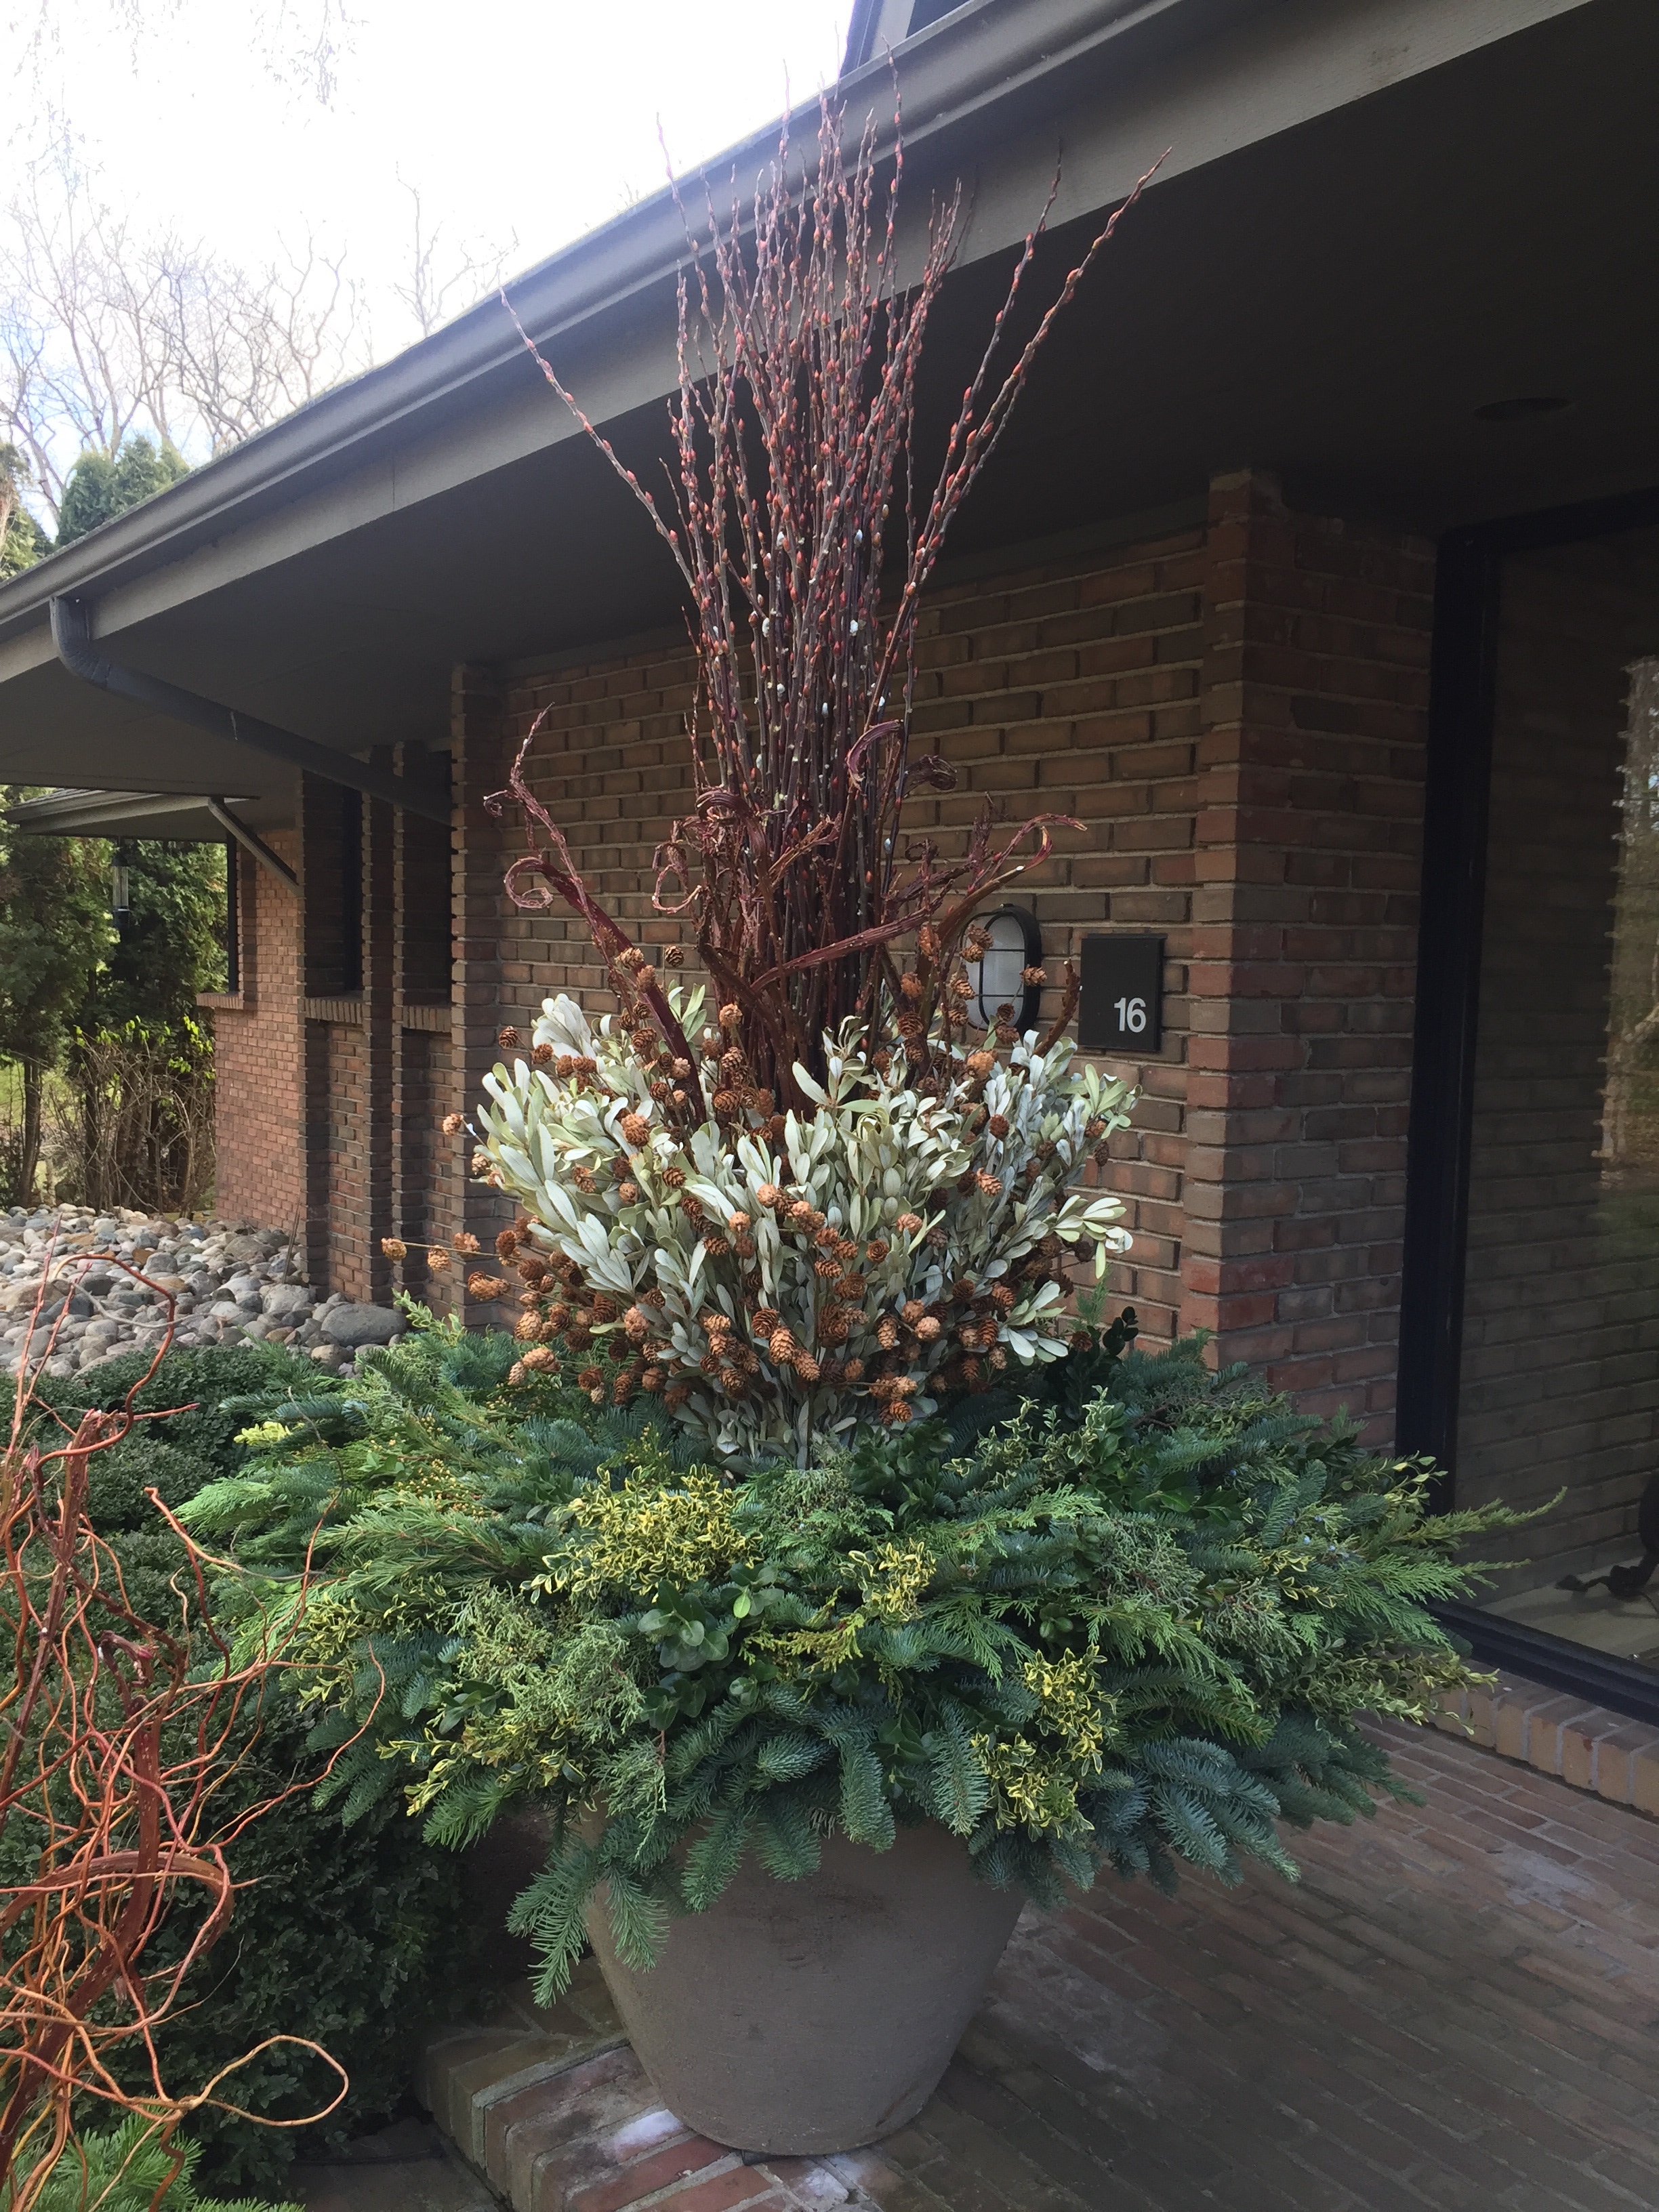
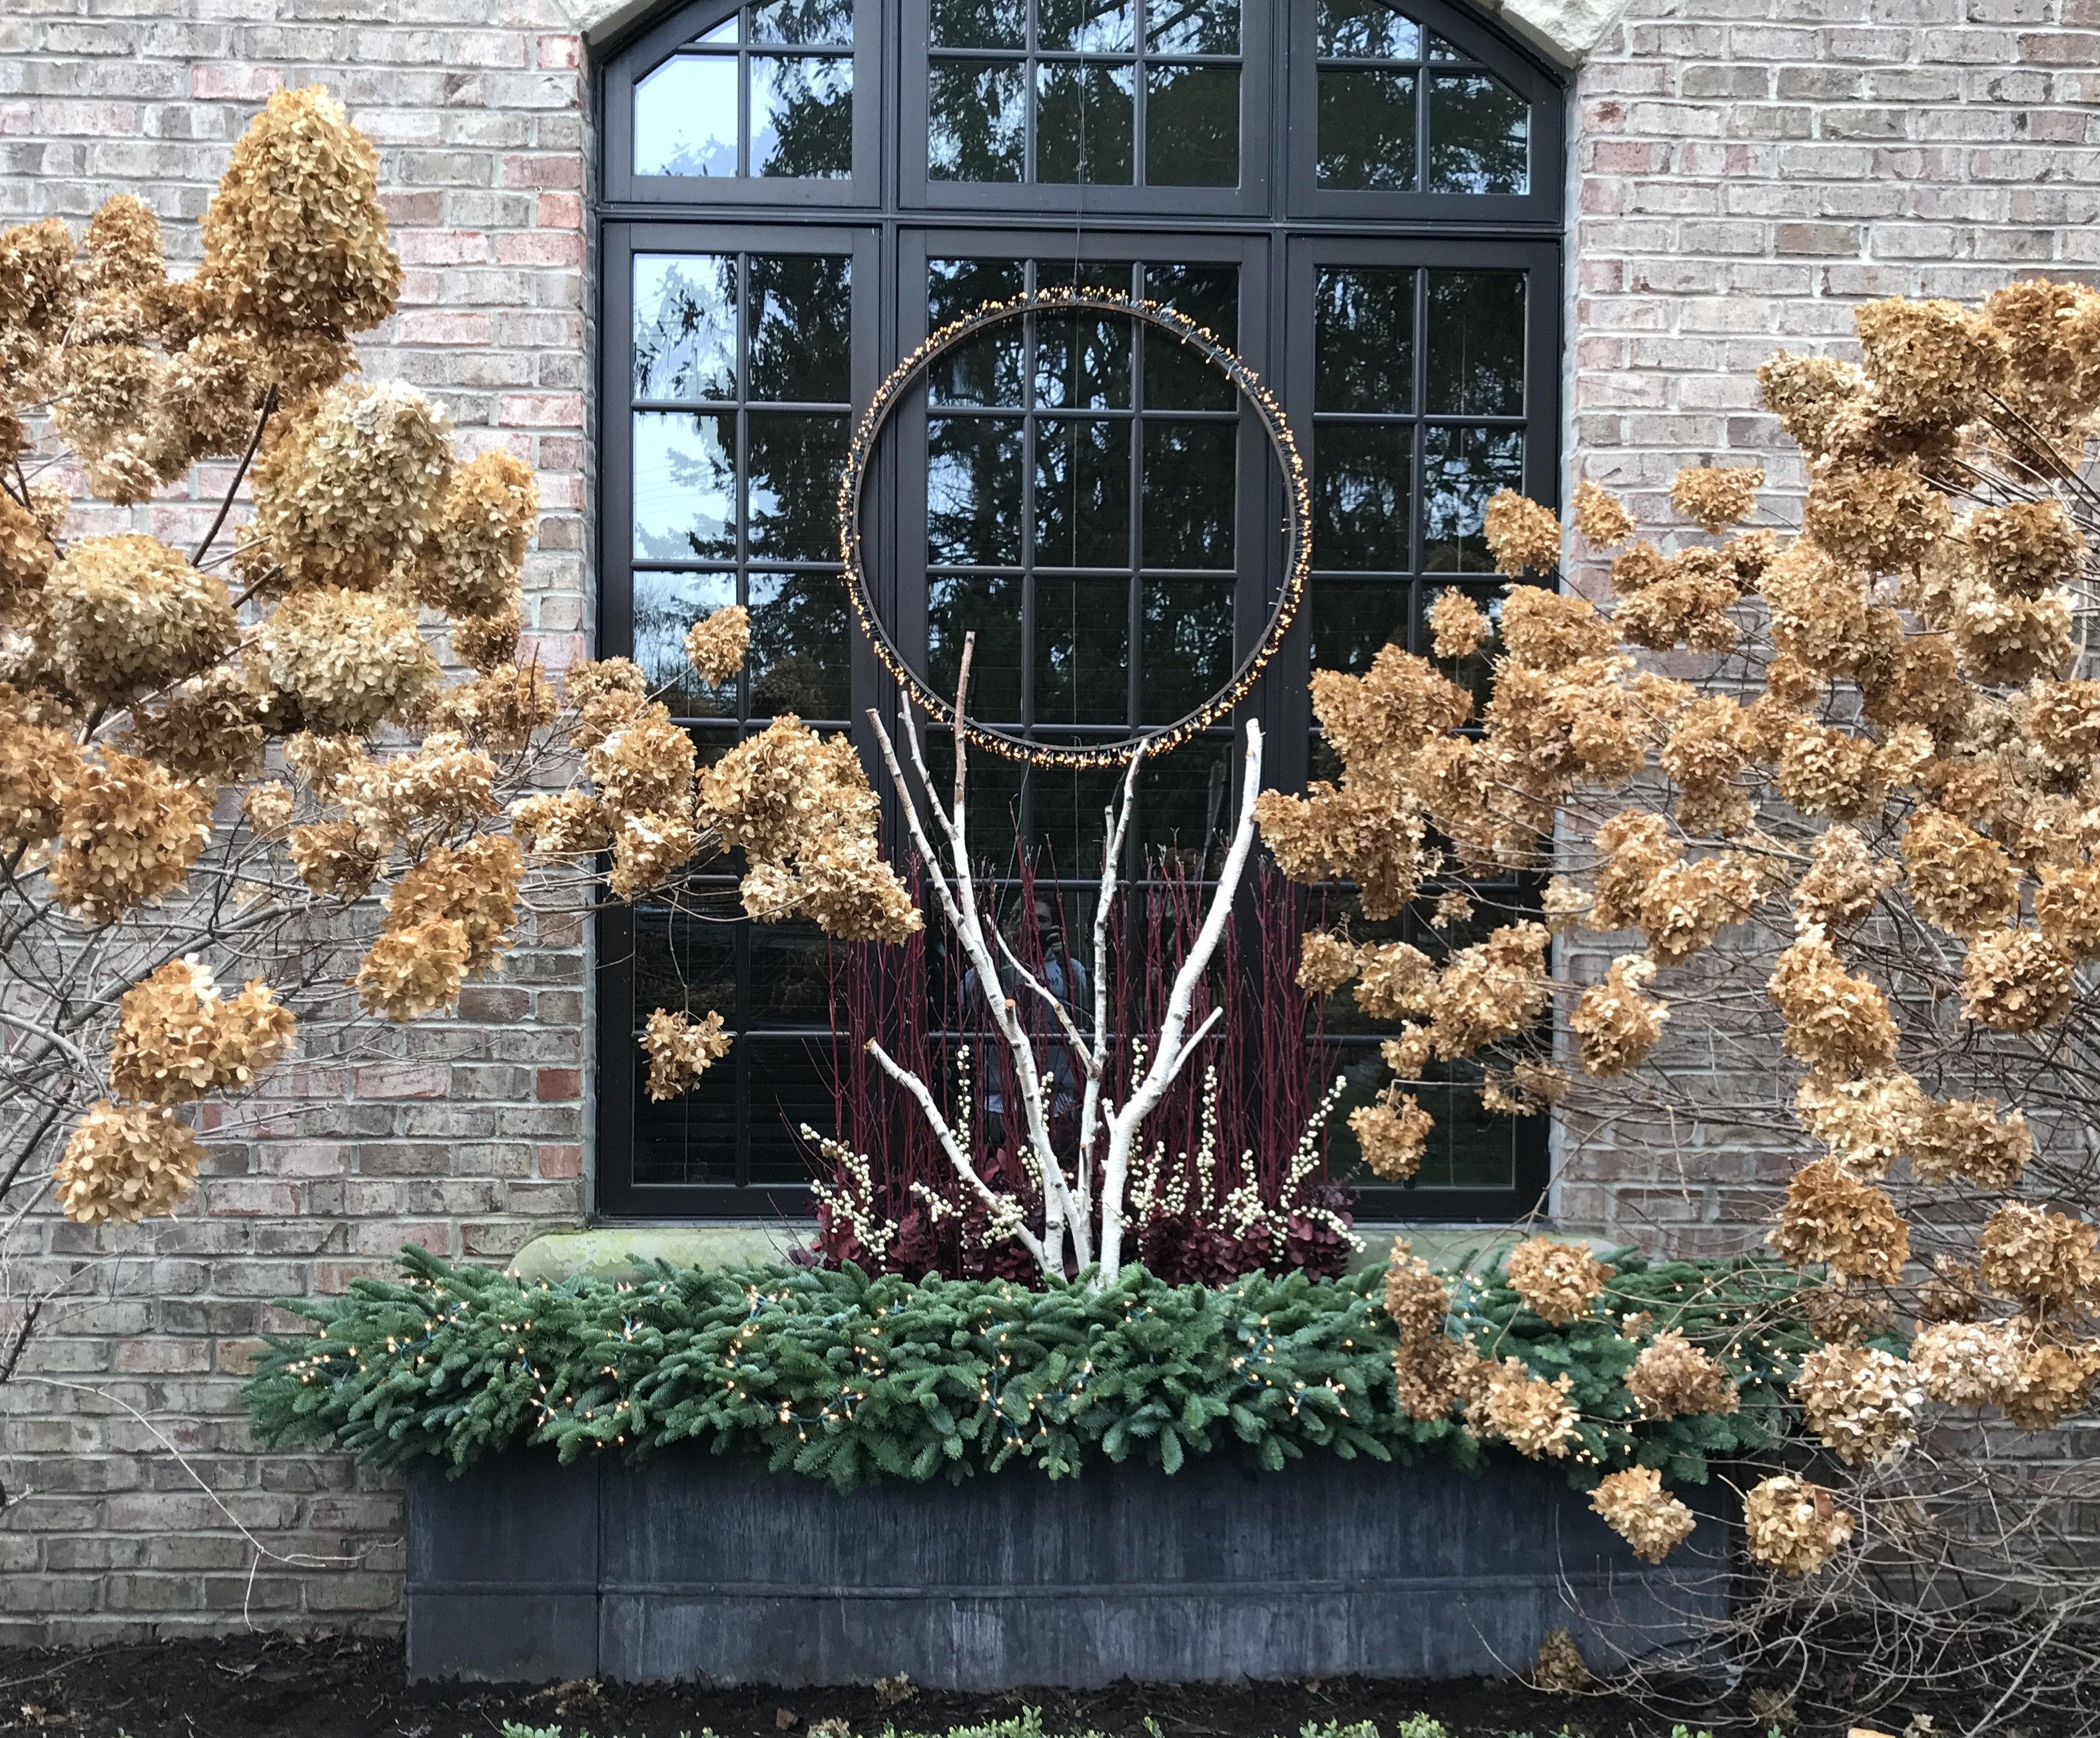
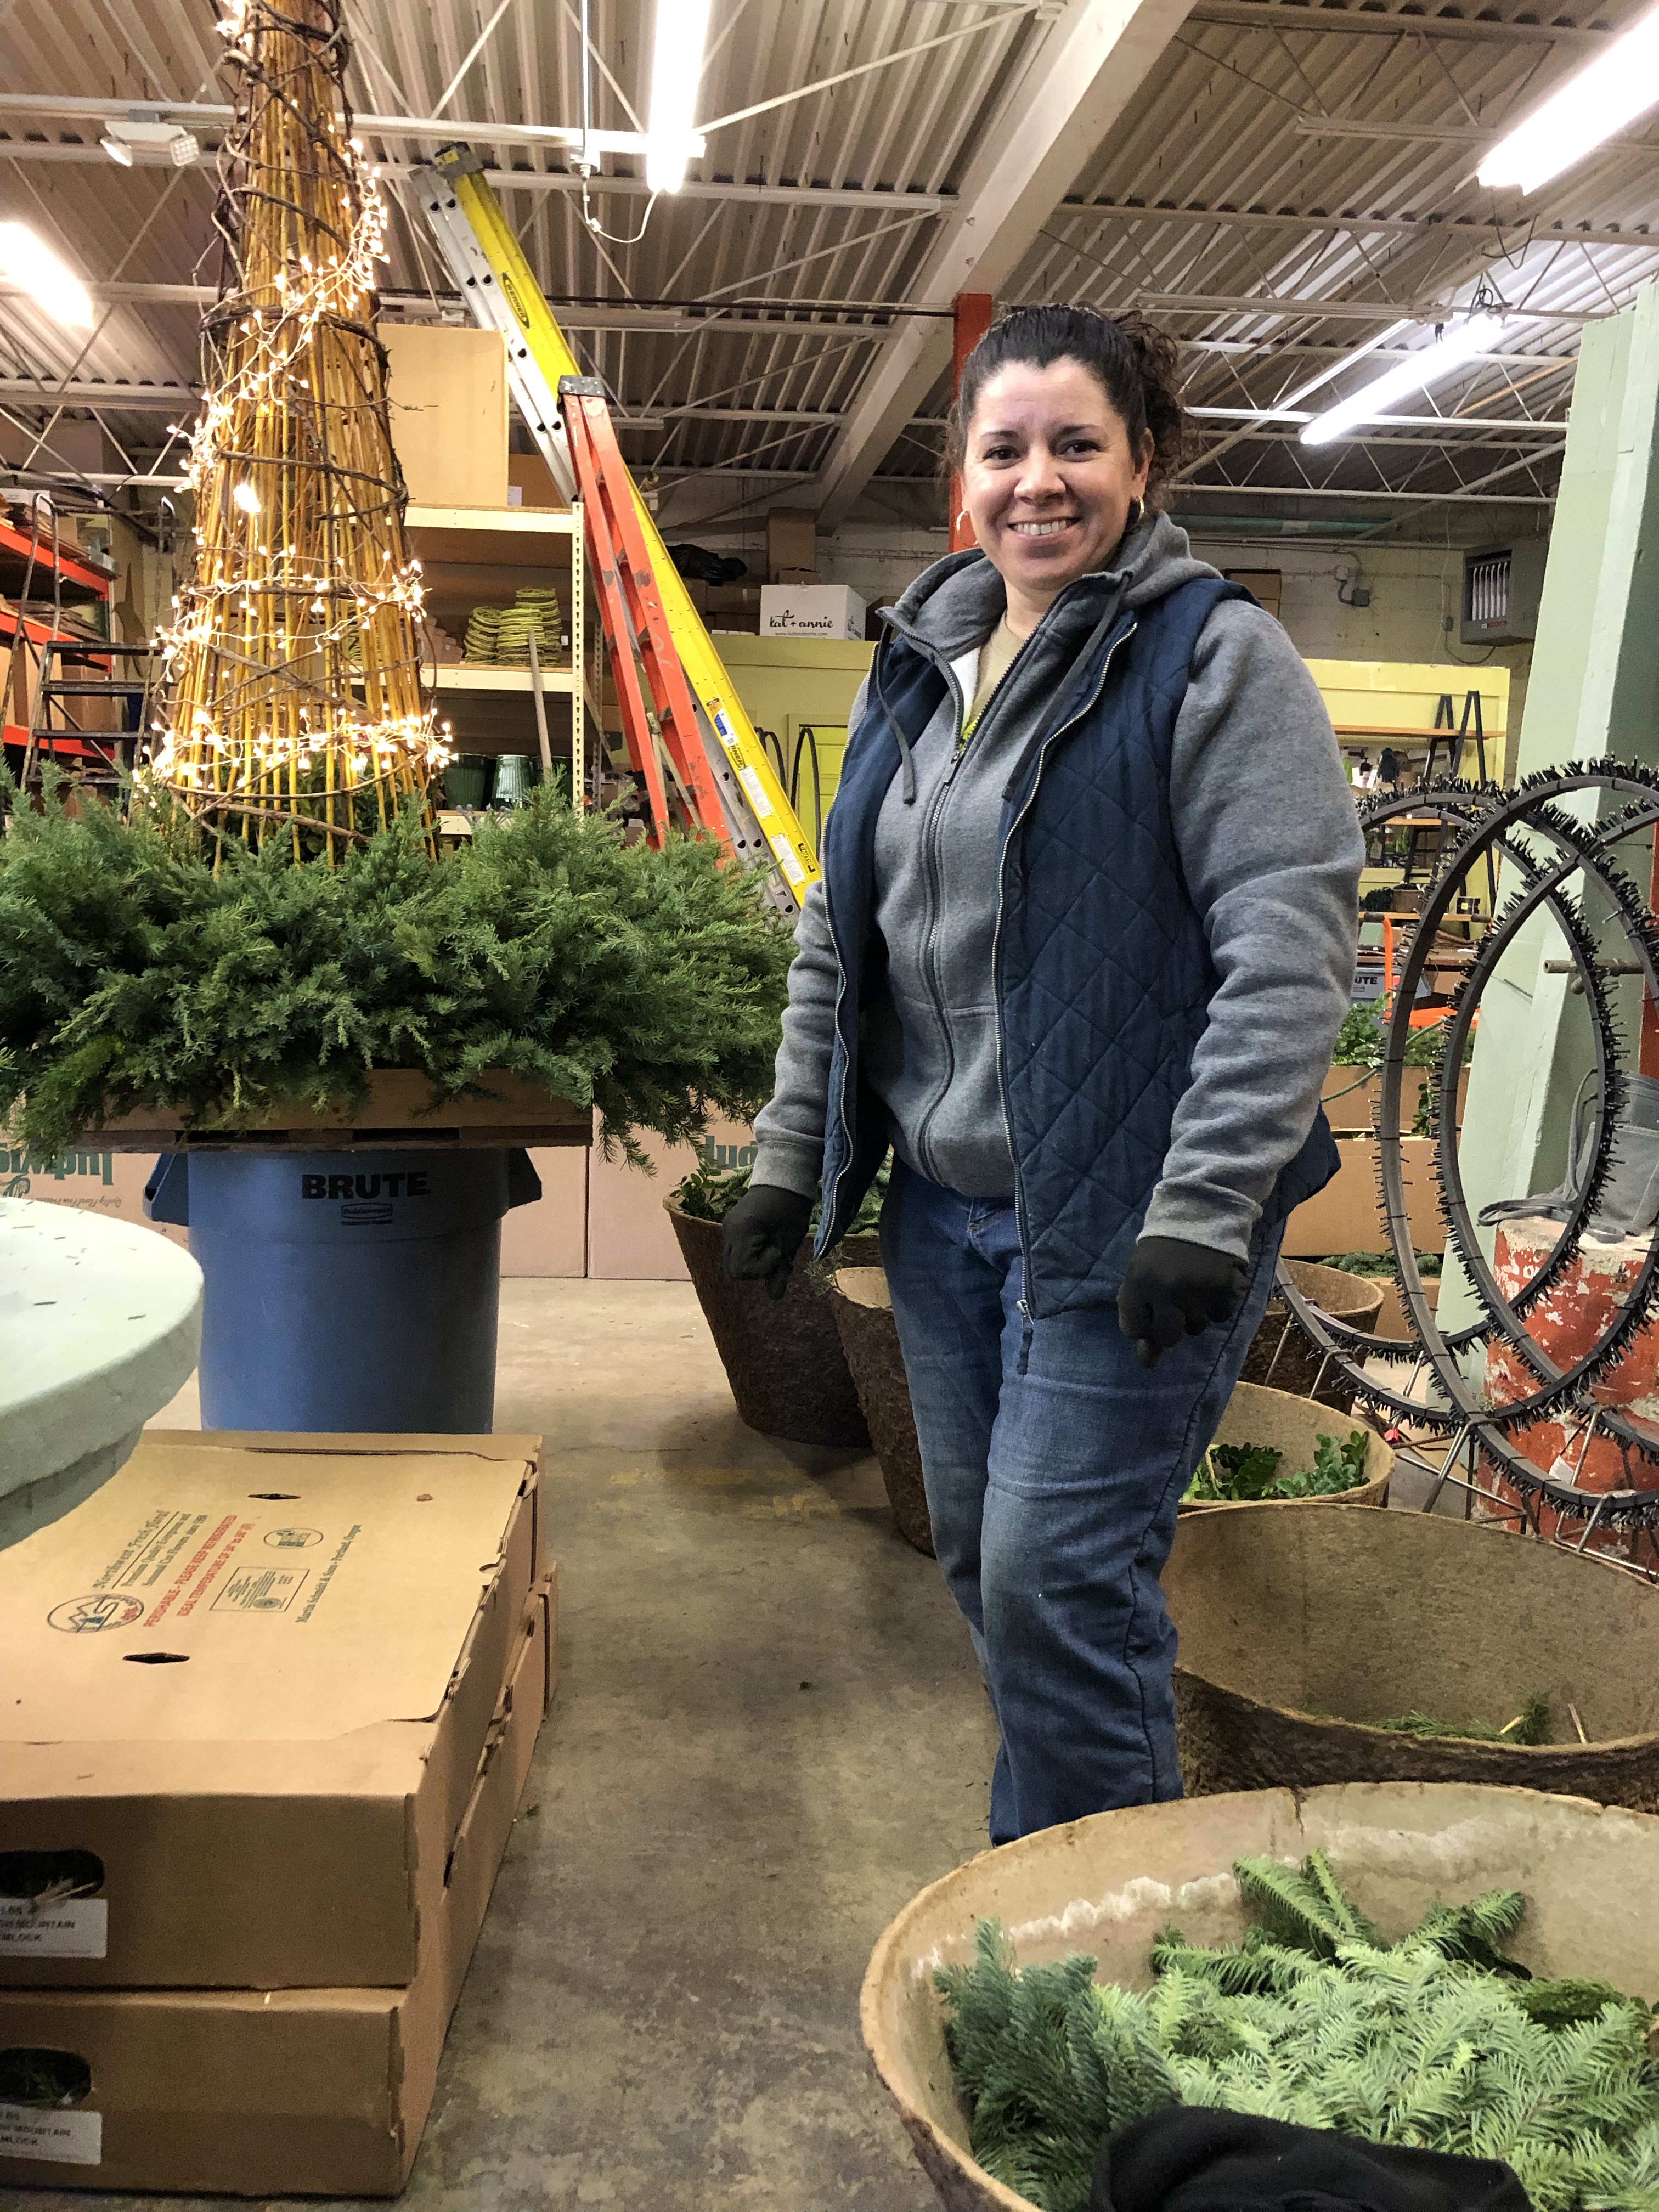
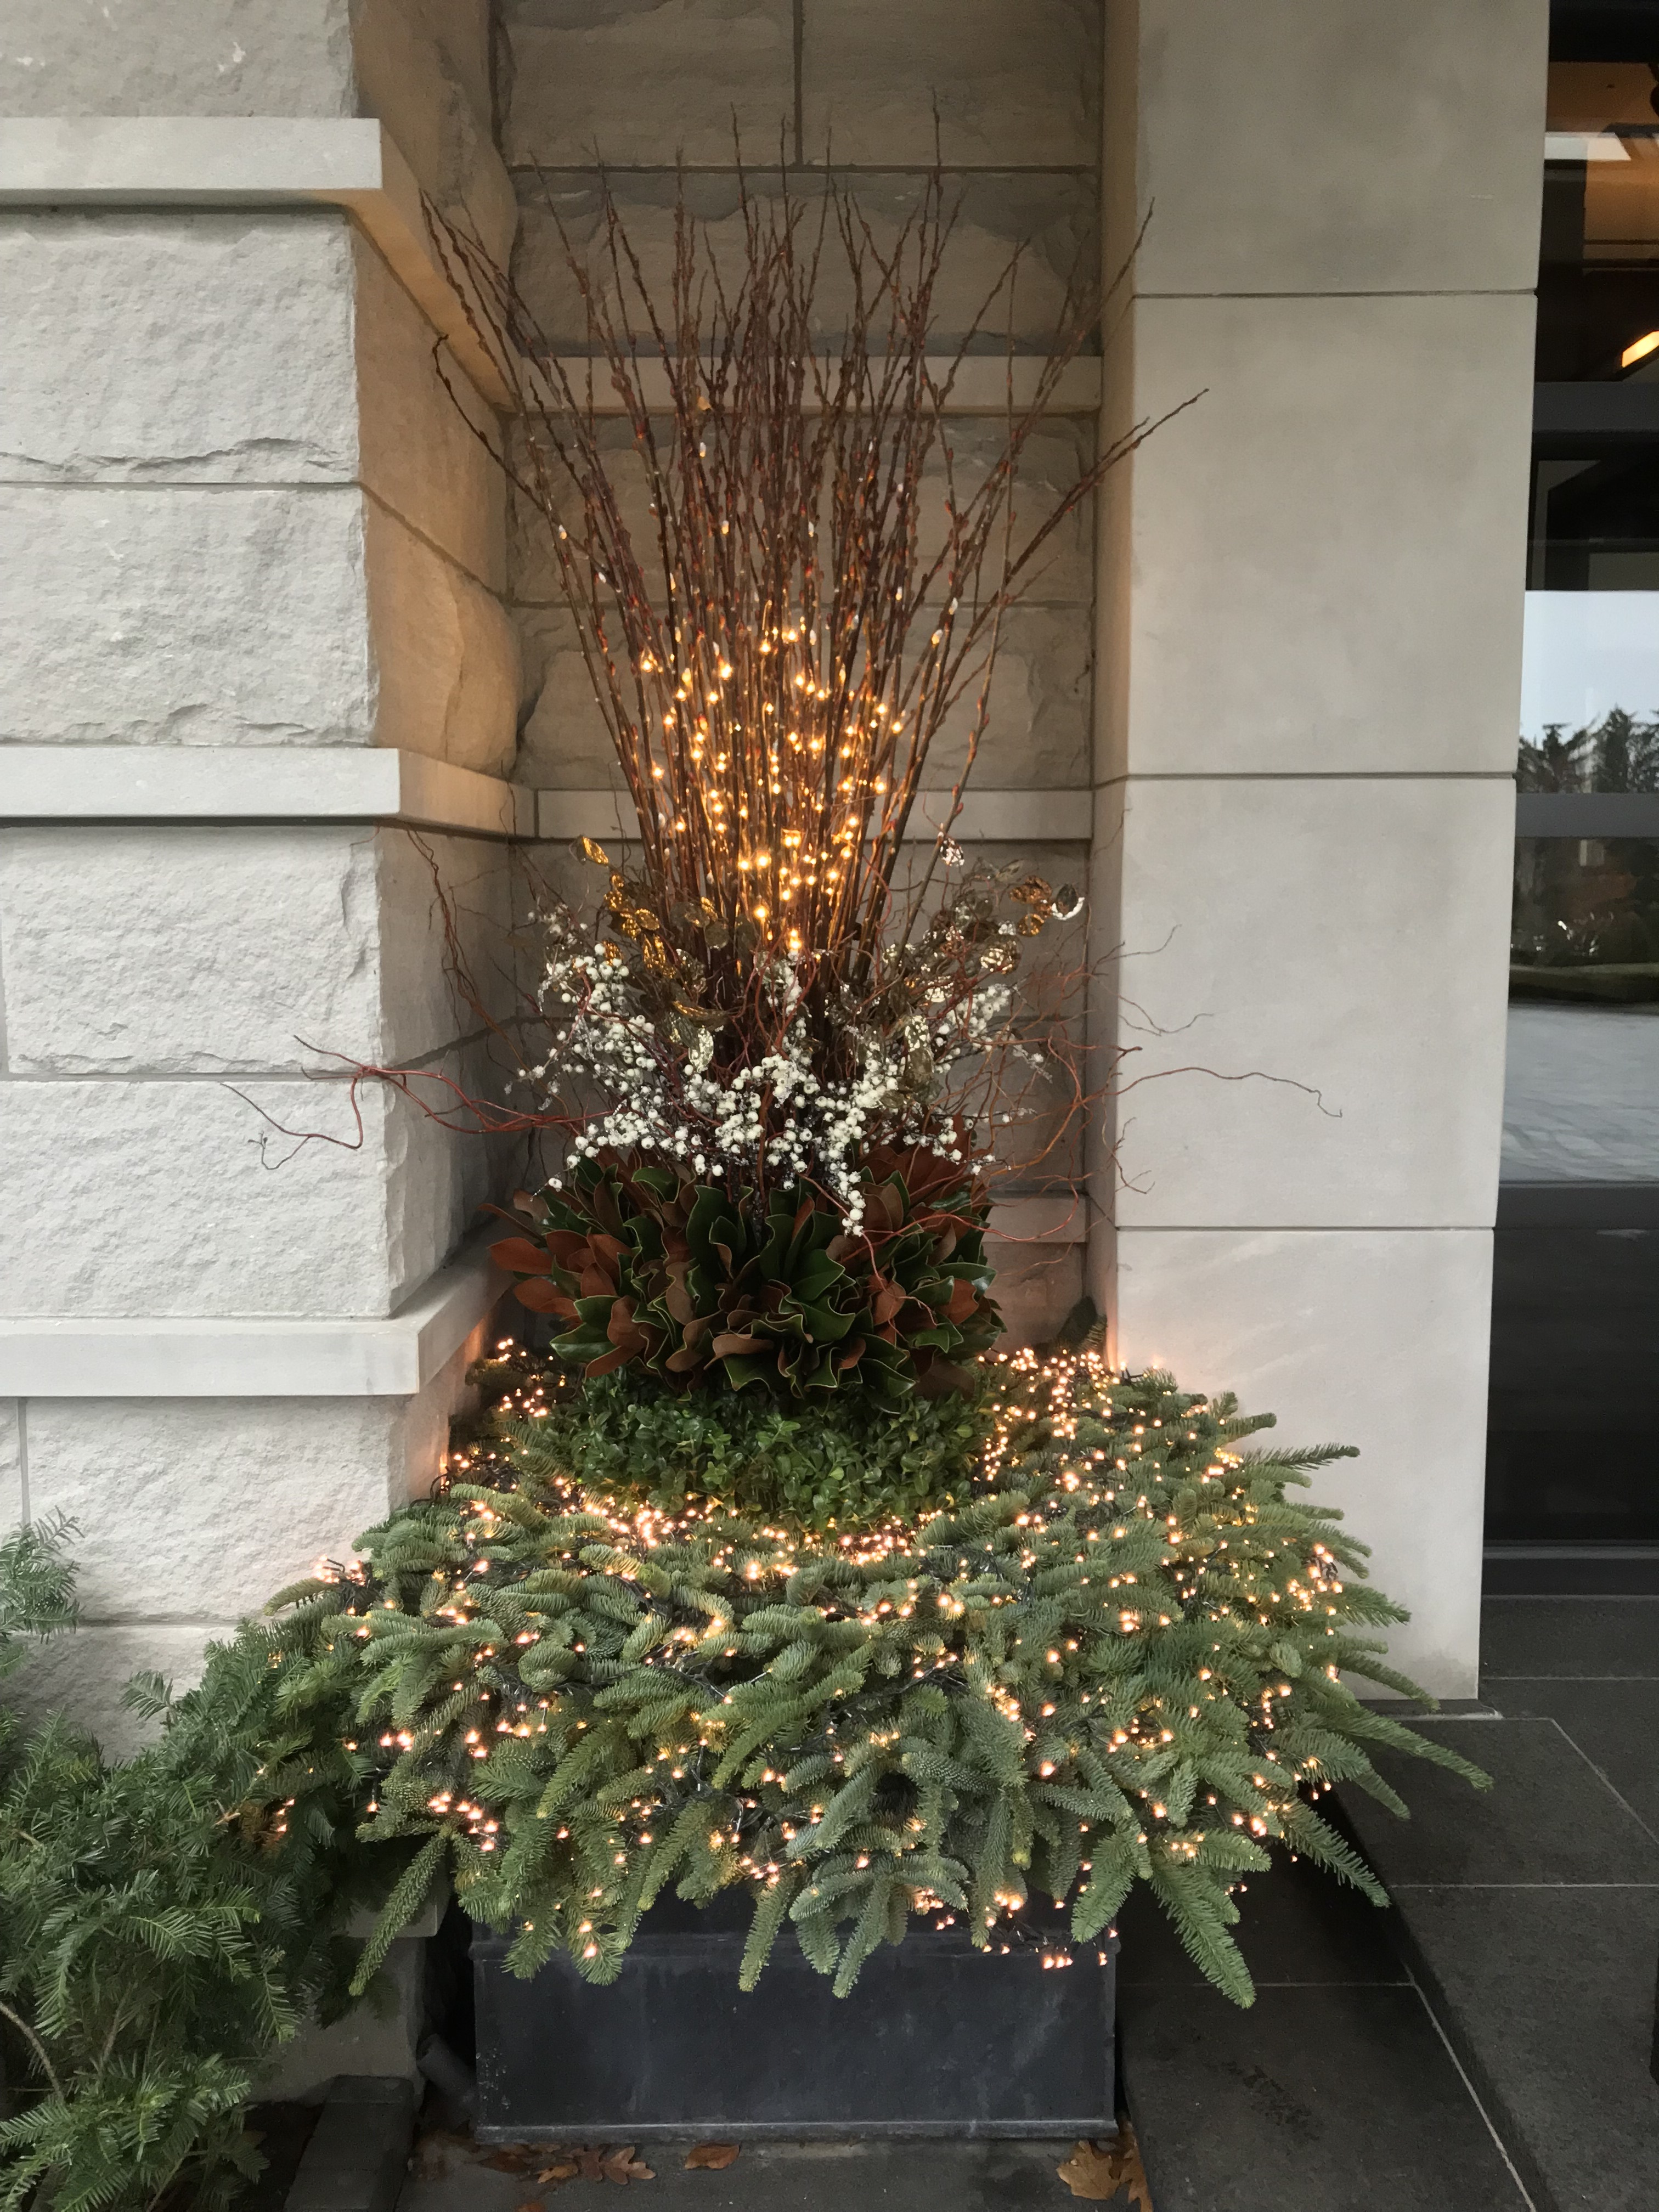
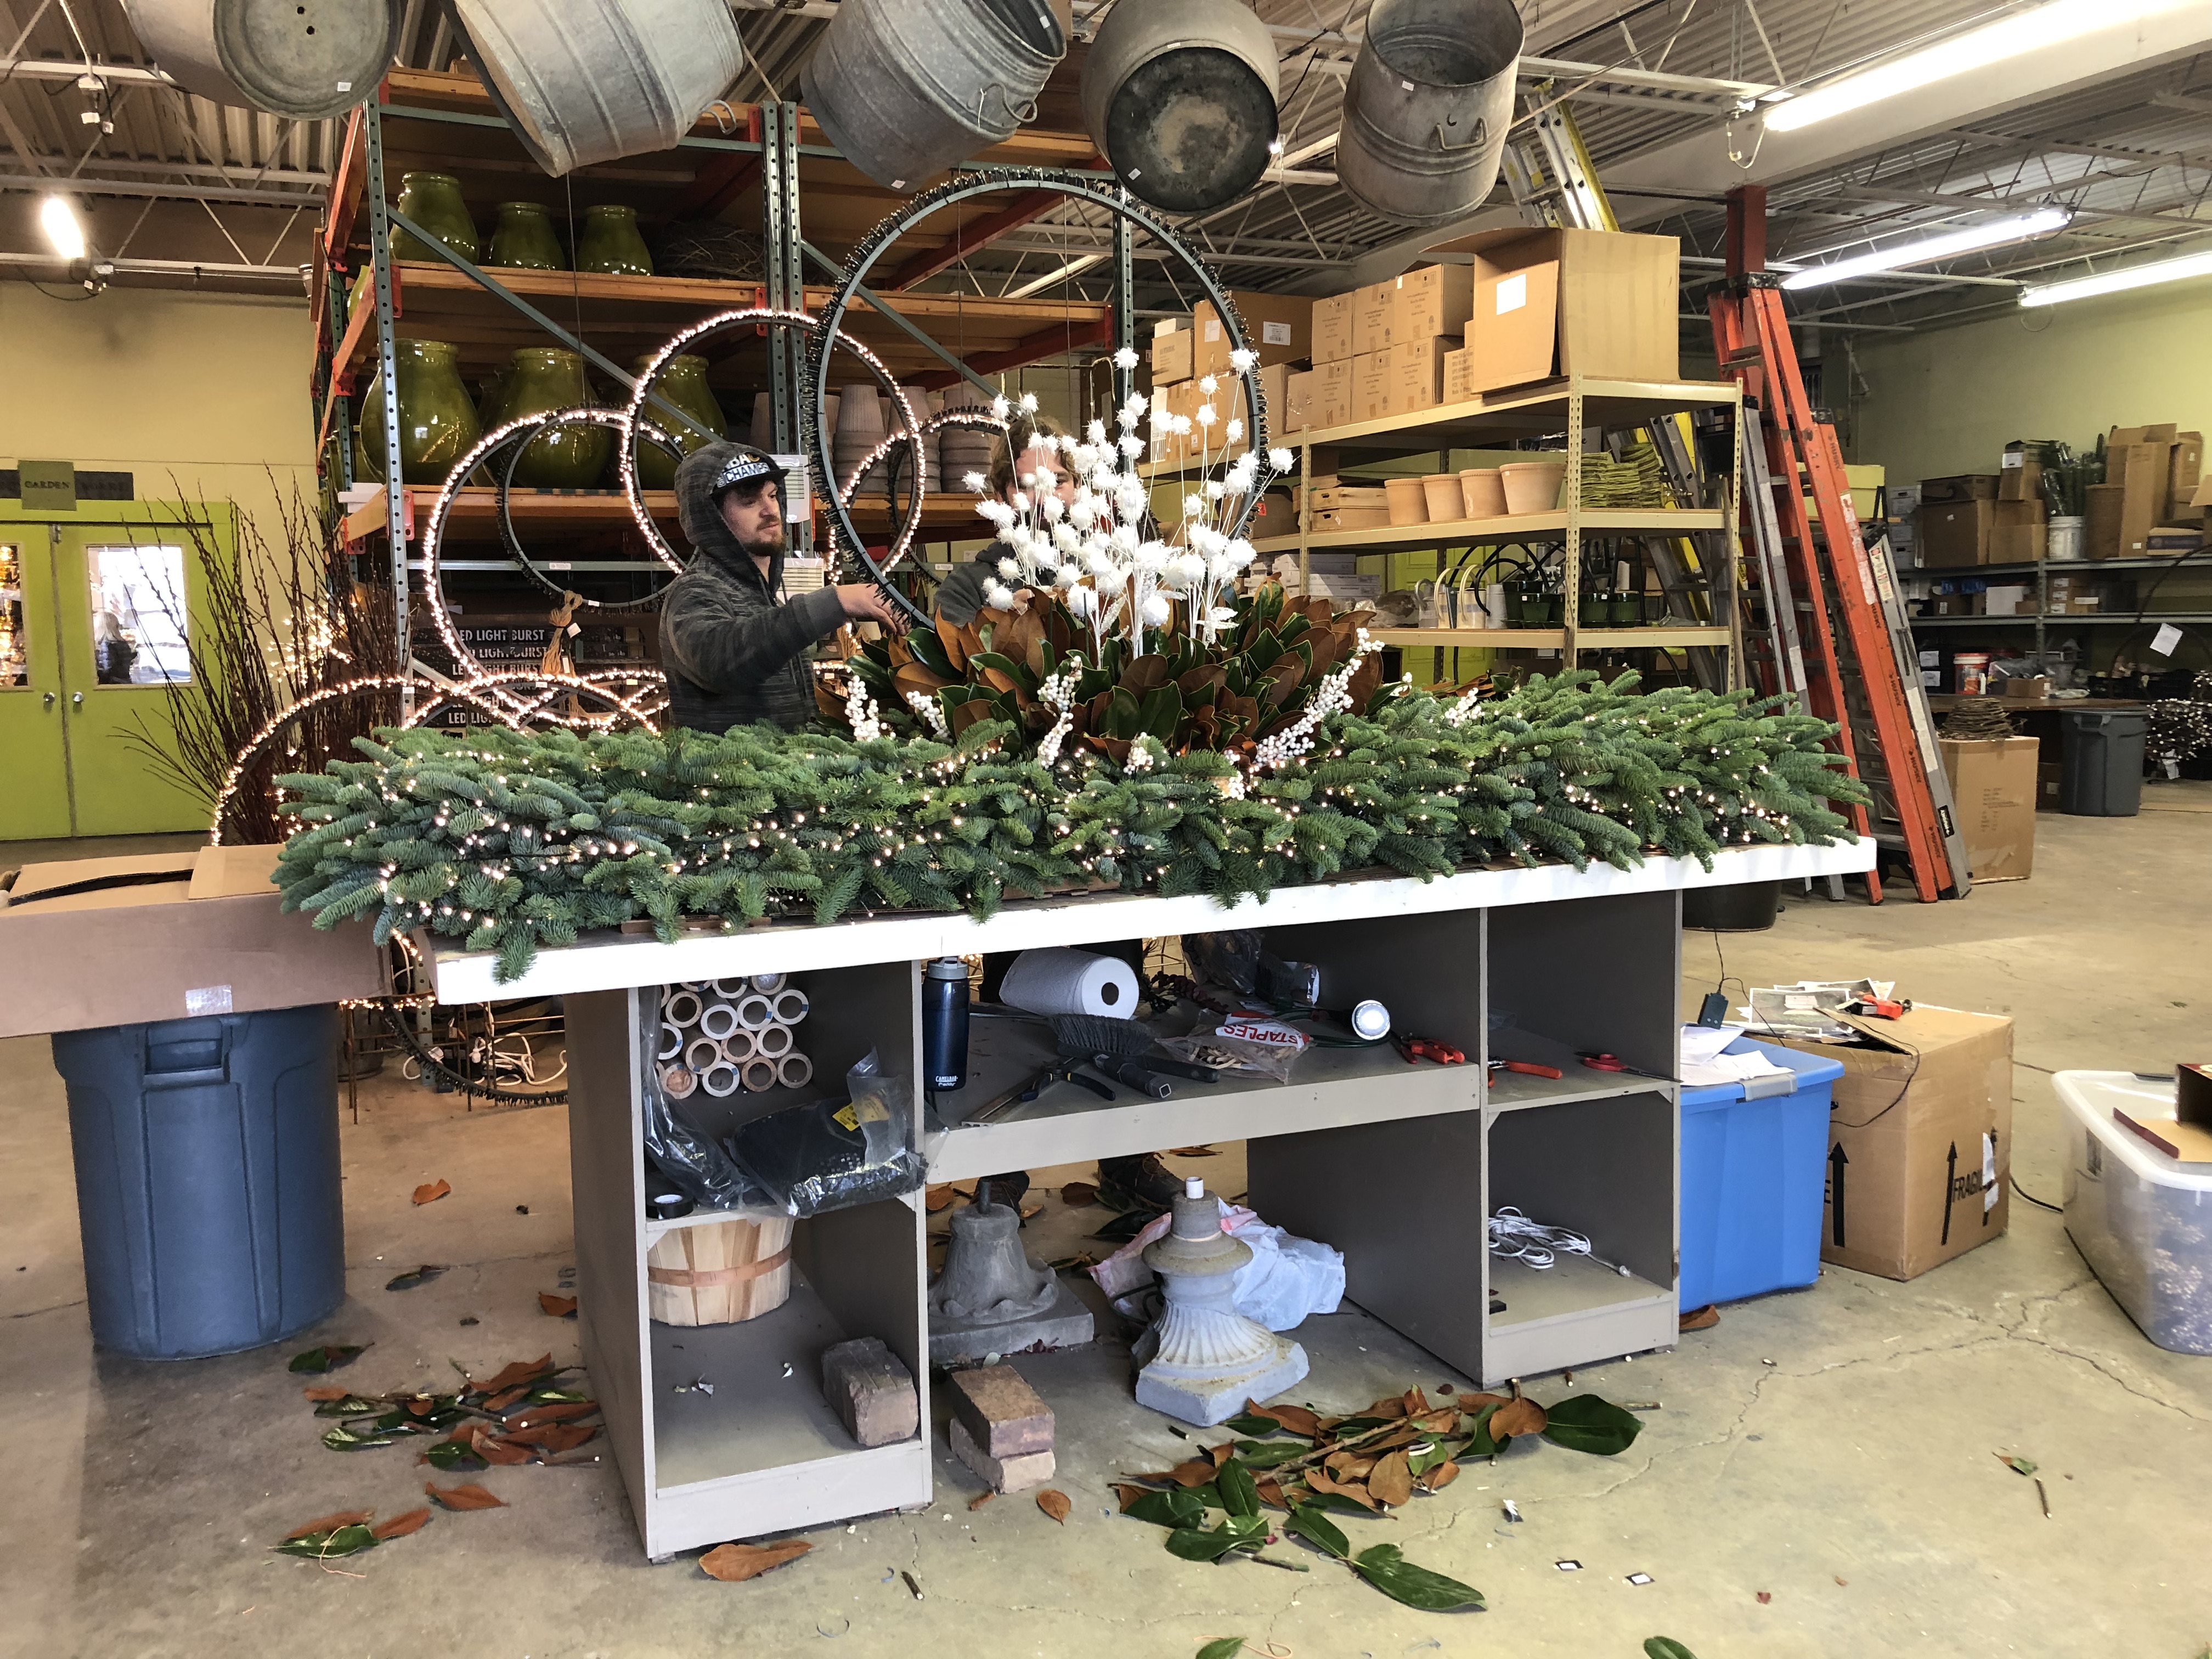 A landscape client with a new house signed up for four window boxes on stands in the front of her house. Branch made them to my specifications. Though the window boxes were fabricated this past summer, it was not until November when the landscape was ready for their installation. Meaning we would address them for the winter season. We made forms for the boxes, and fabricated the winter arrangements in our shop. Dry floral foam forms were a vehicle for a collection of sparkly white picks, cut magnolia branches, faux white berry picks and noble fir. Presiding over all, a three foot diameter light ring.
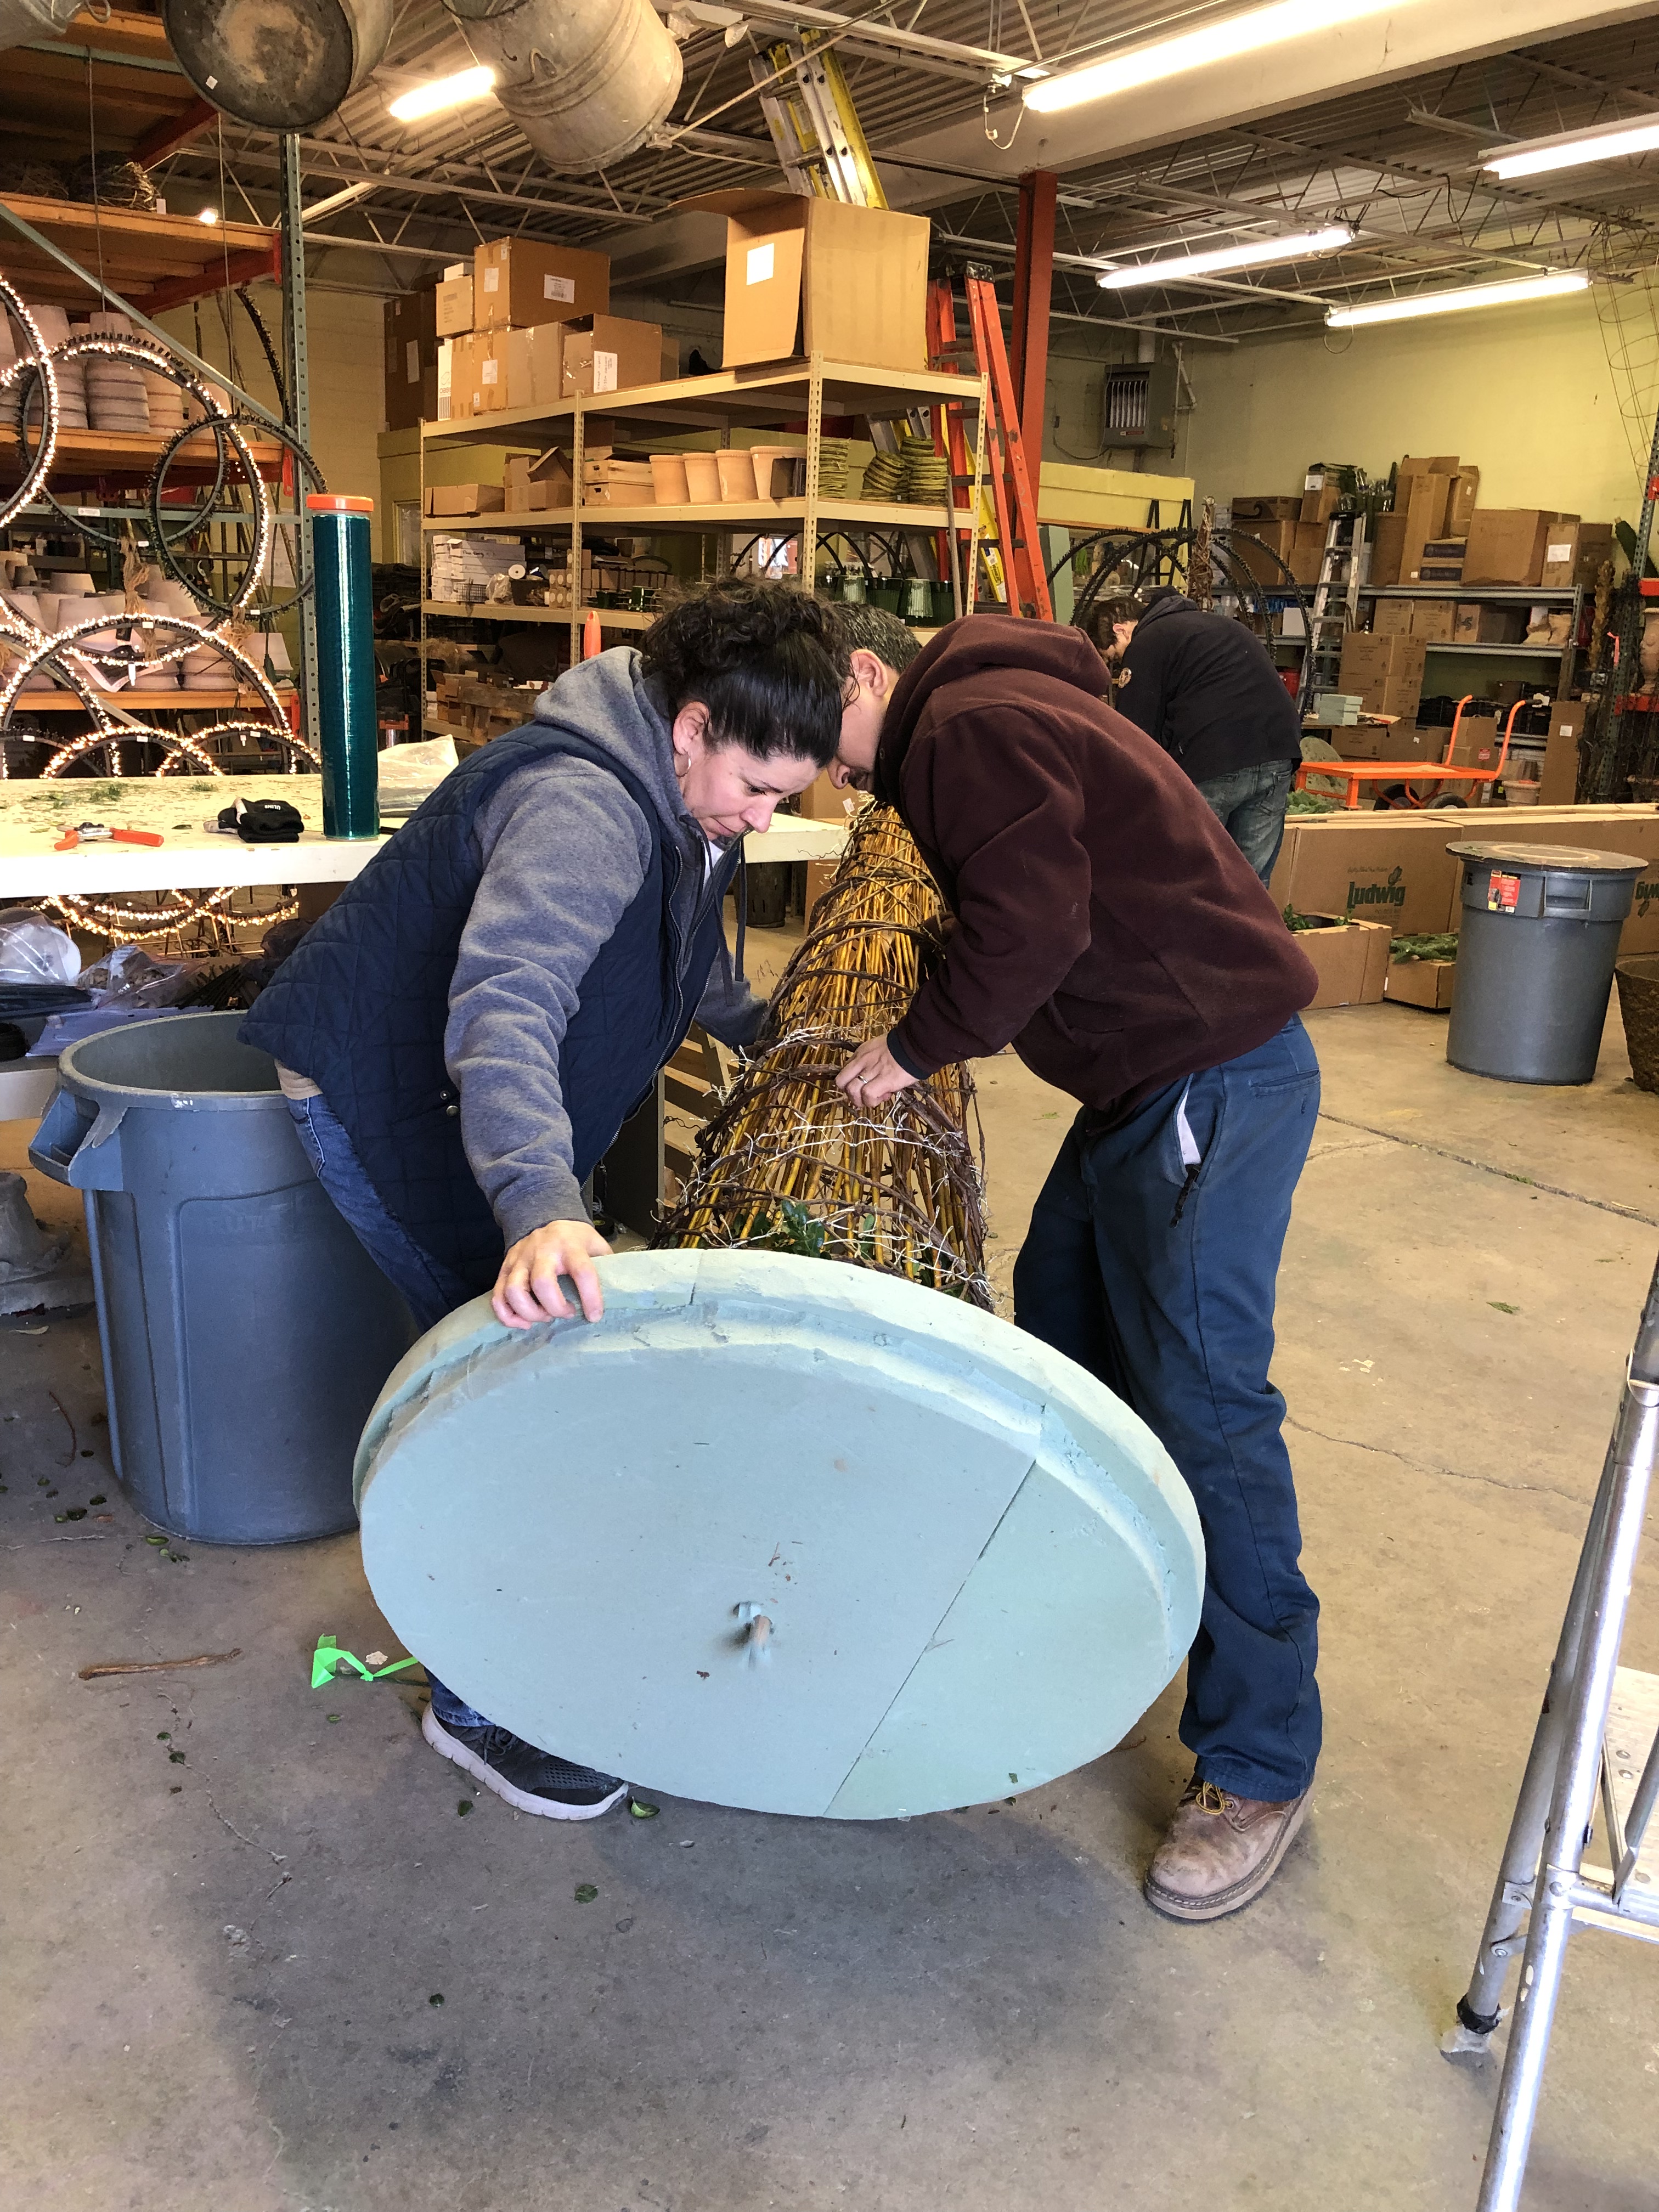
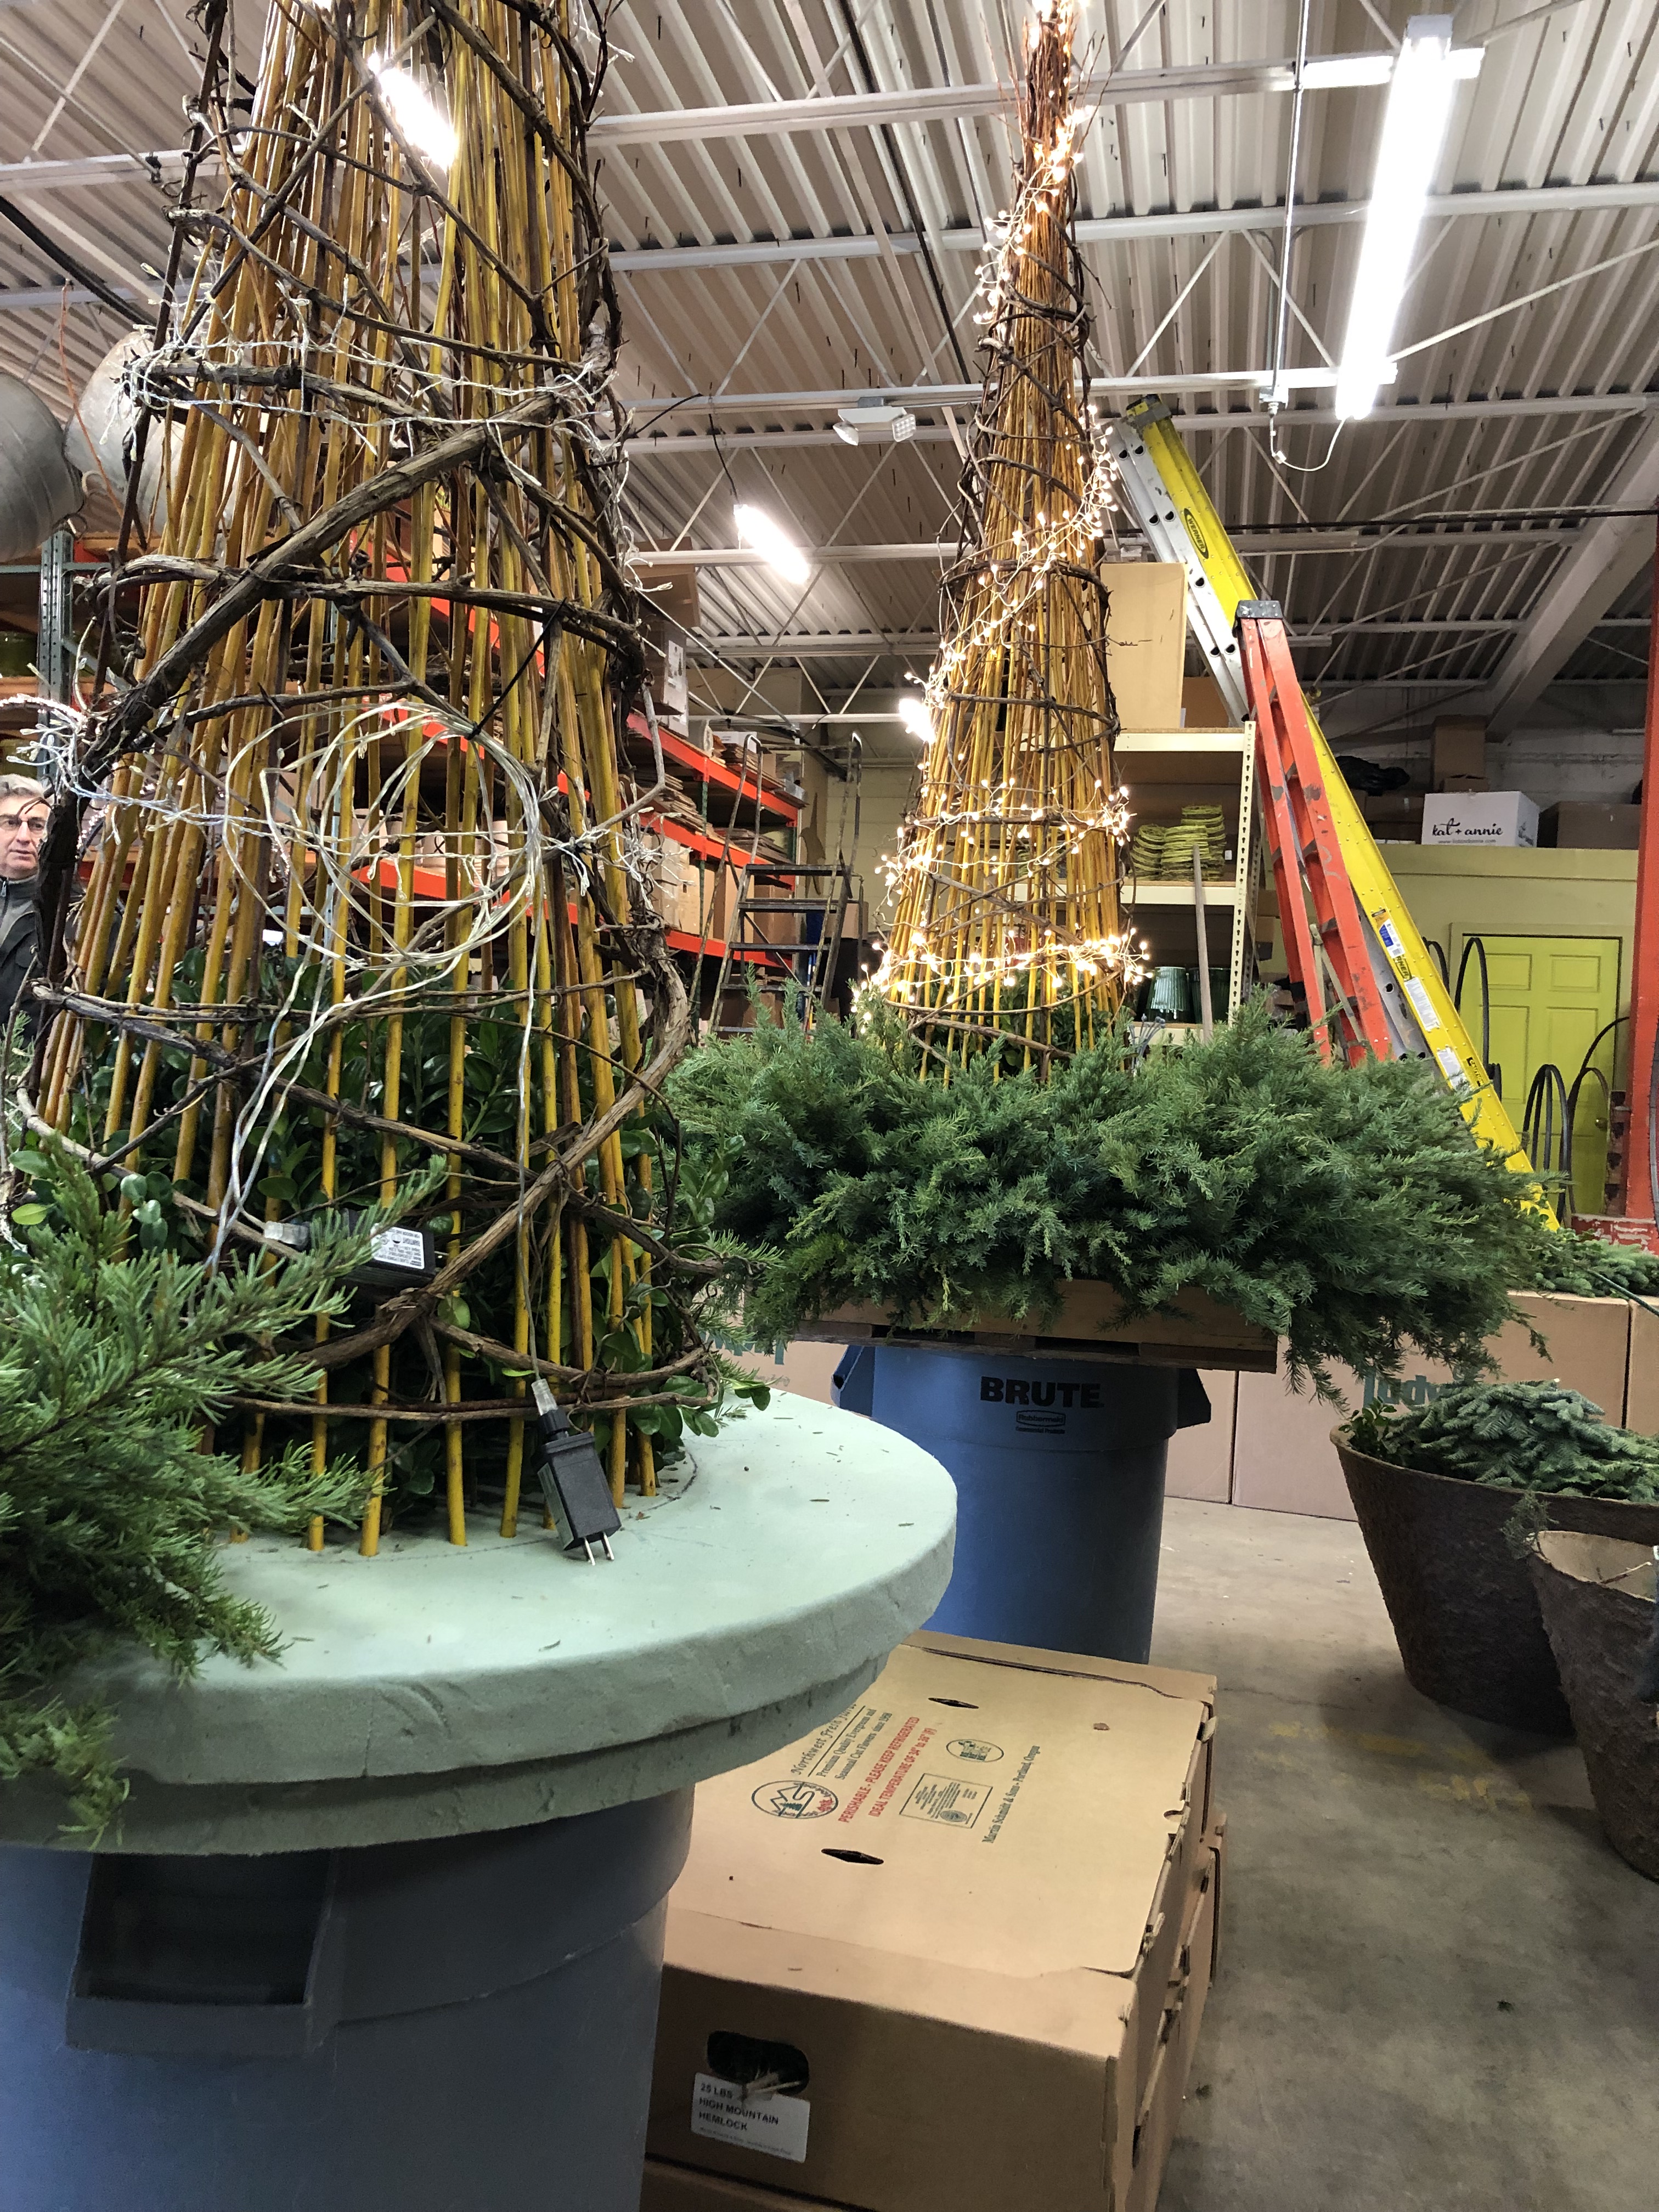
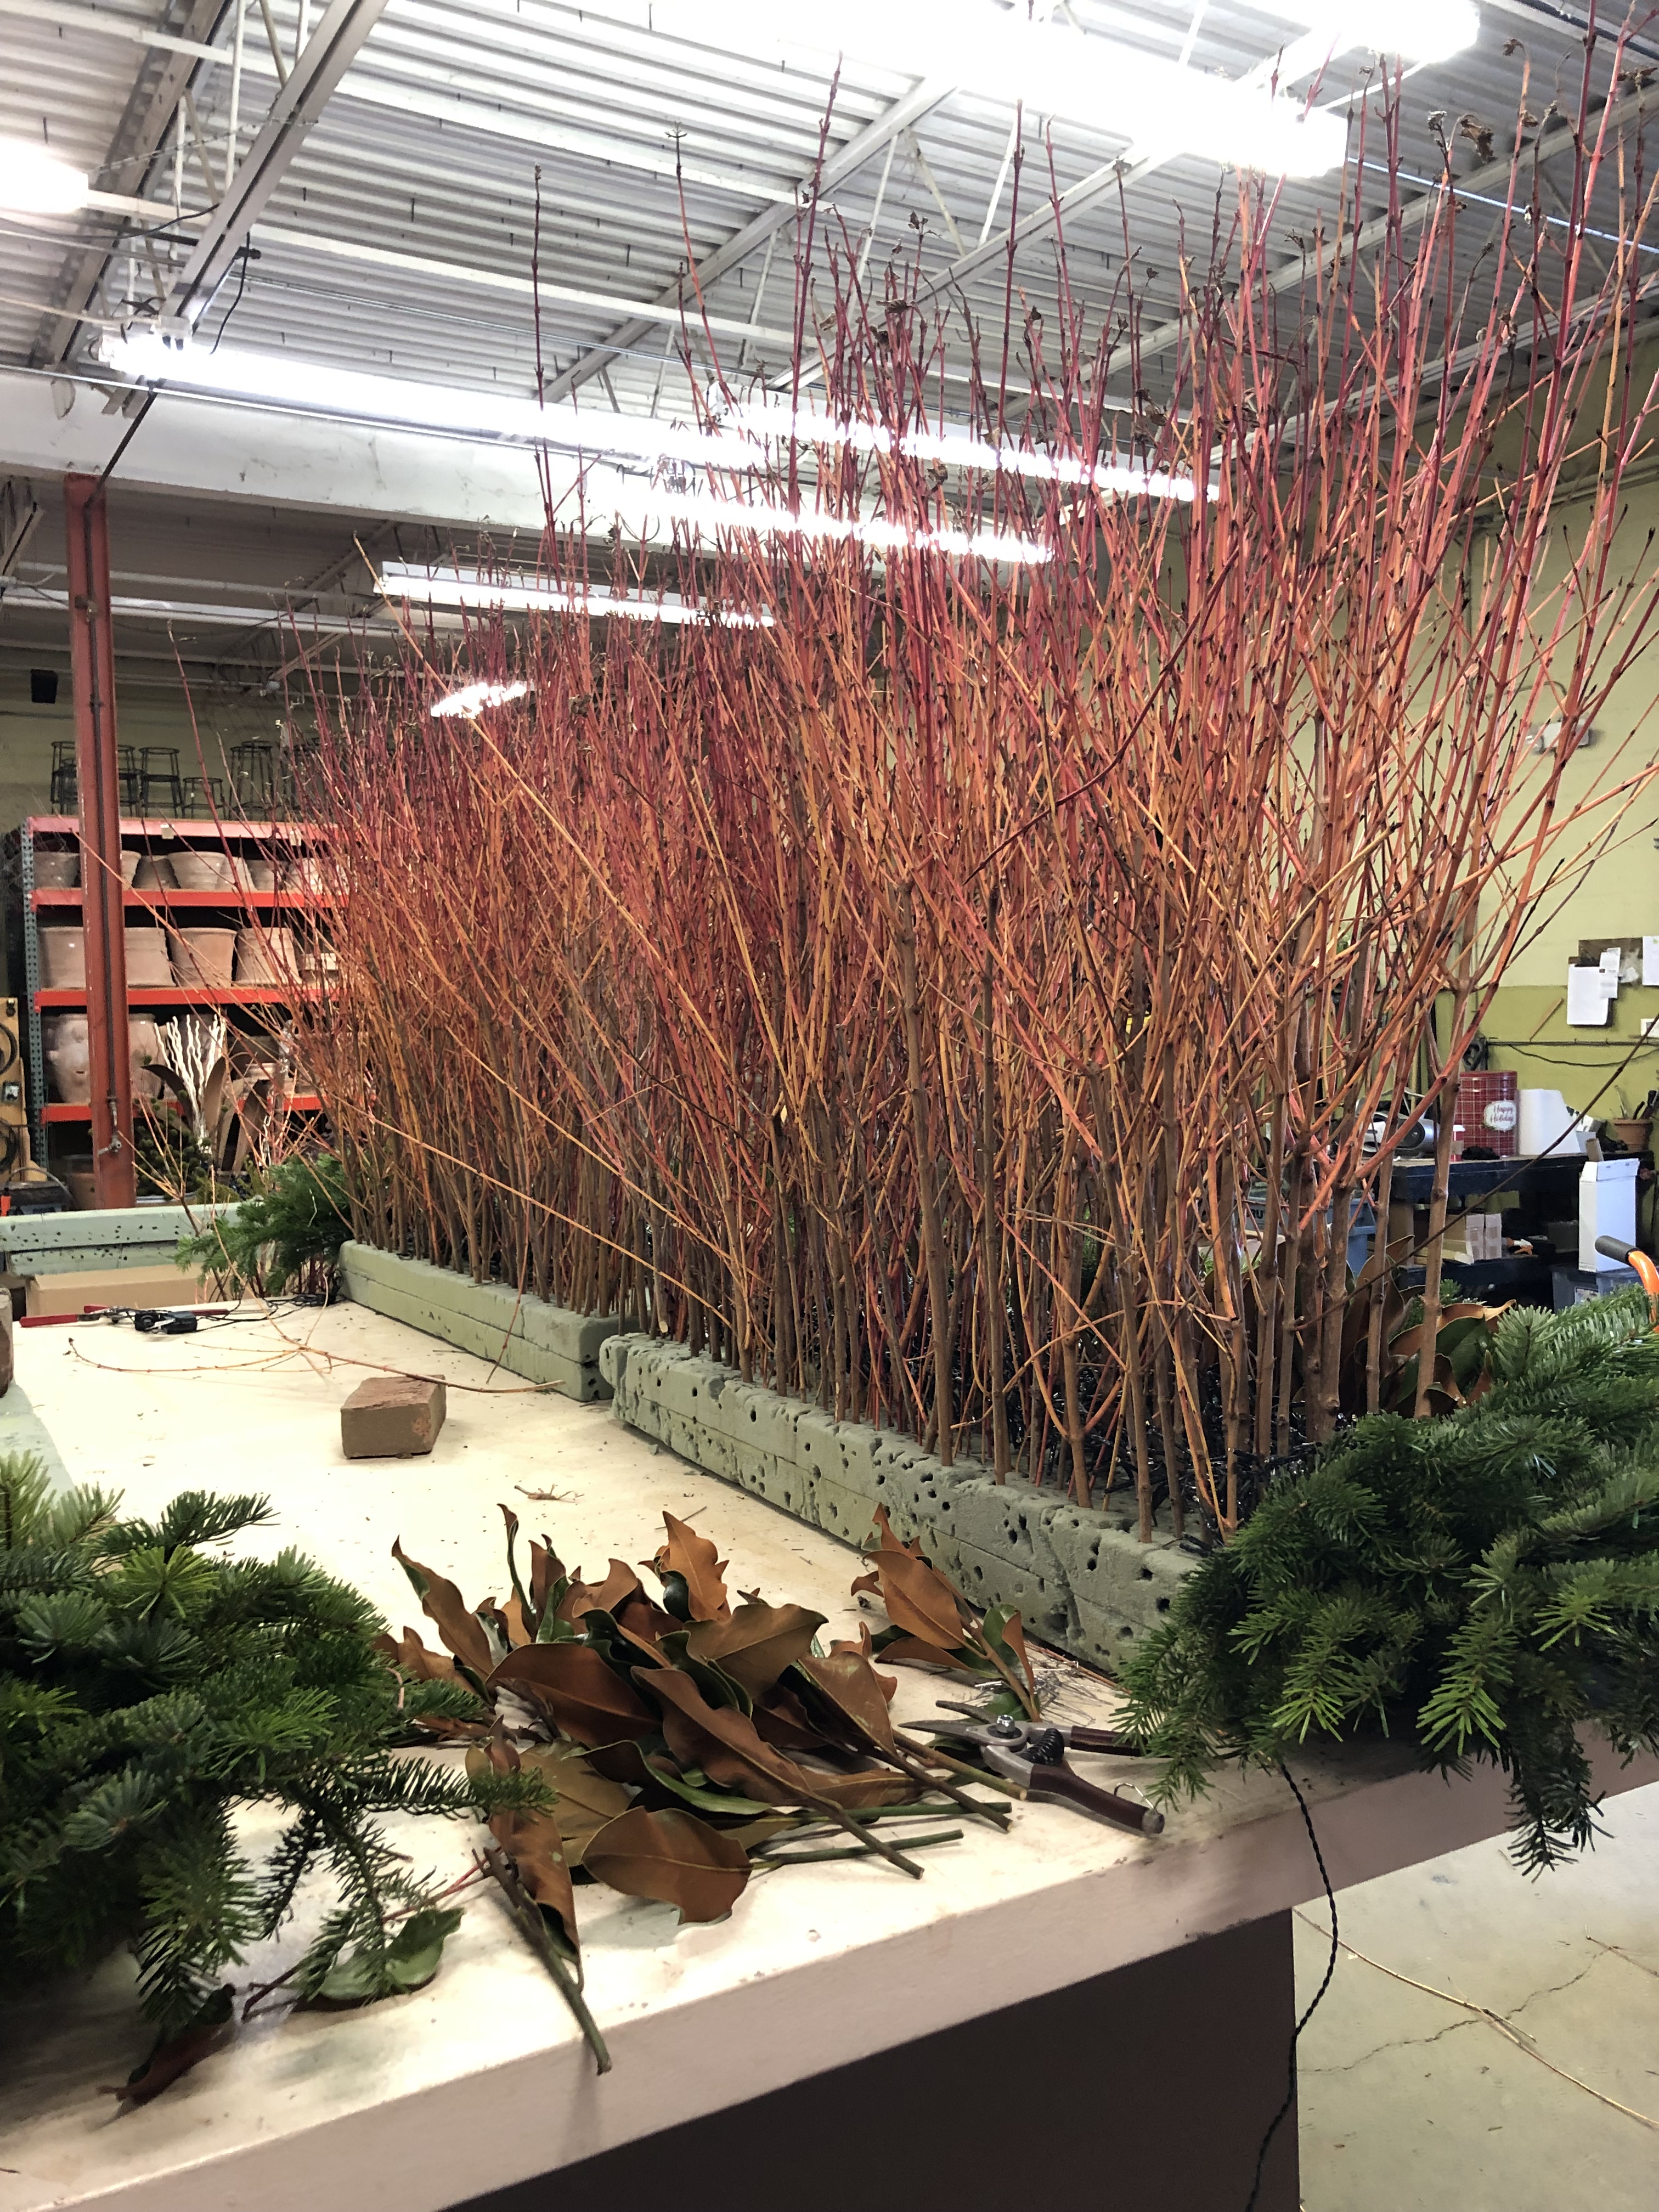
 We do as much of the work as we can, in the shop. We like the better part of the work to be done in a warm space. The construction is faster, and more thoughtful. All of us want to focus on the project at hand, rather than enduring the cold conditions on site. This work included creating the arrangement, and dressing the greens with lights. This layout table was large enough to hold two arrangements at a good height for working.
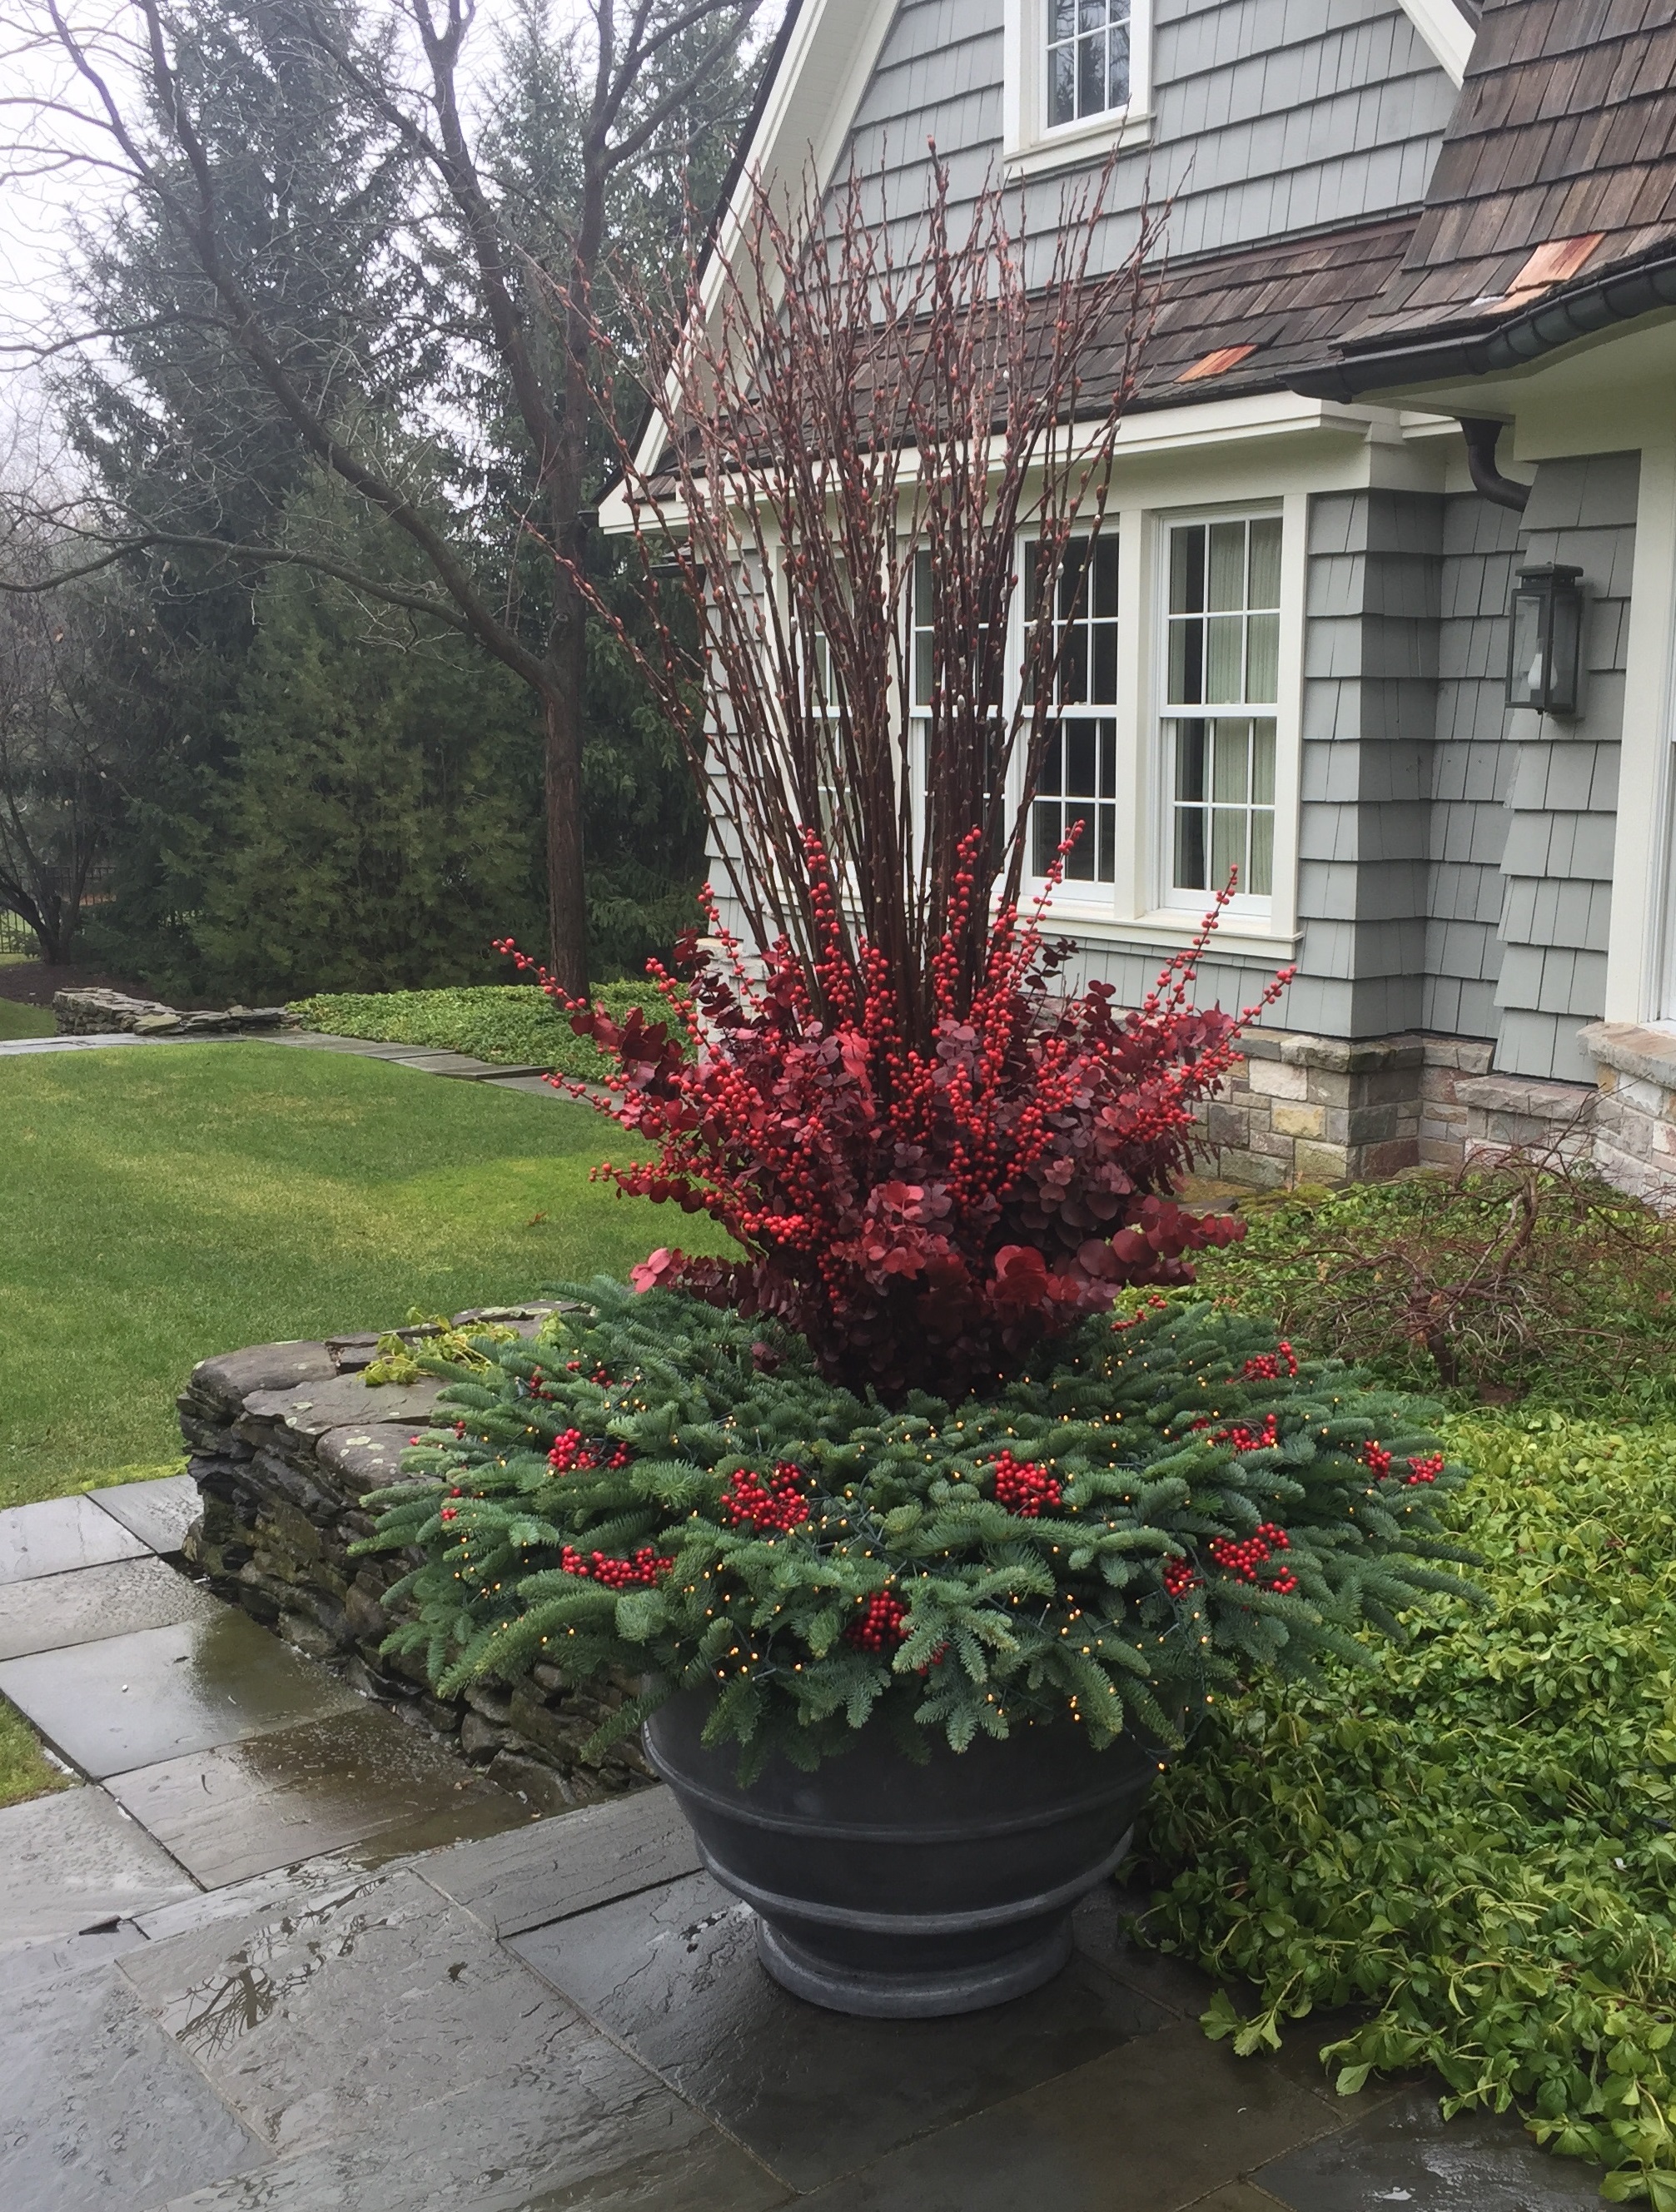
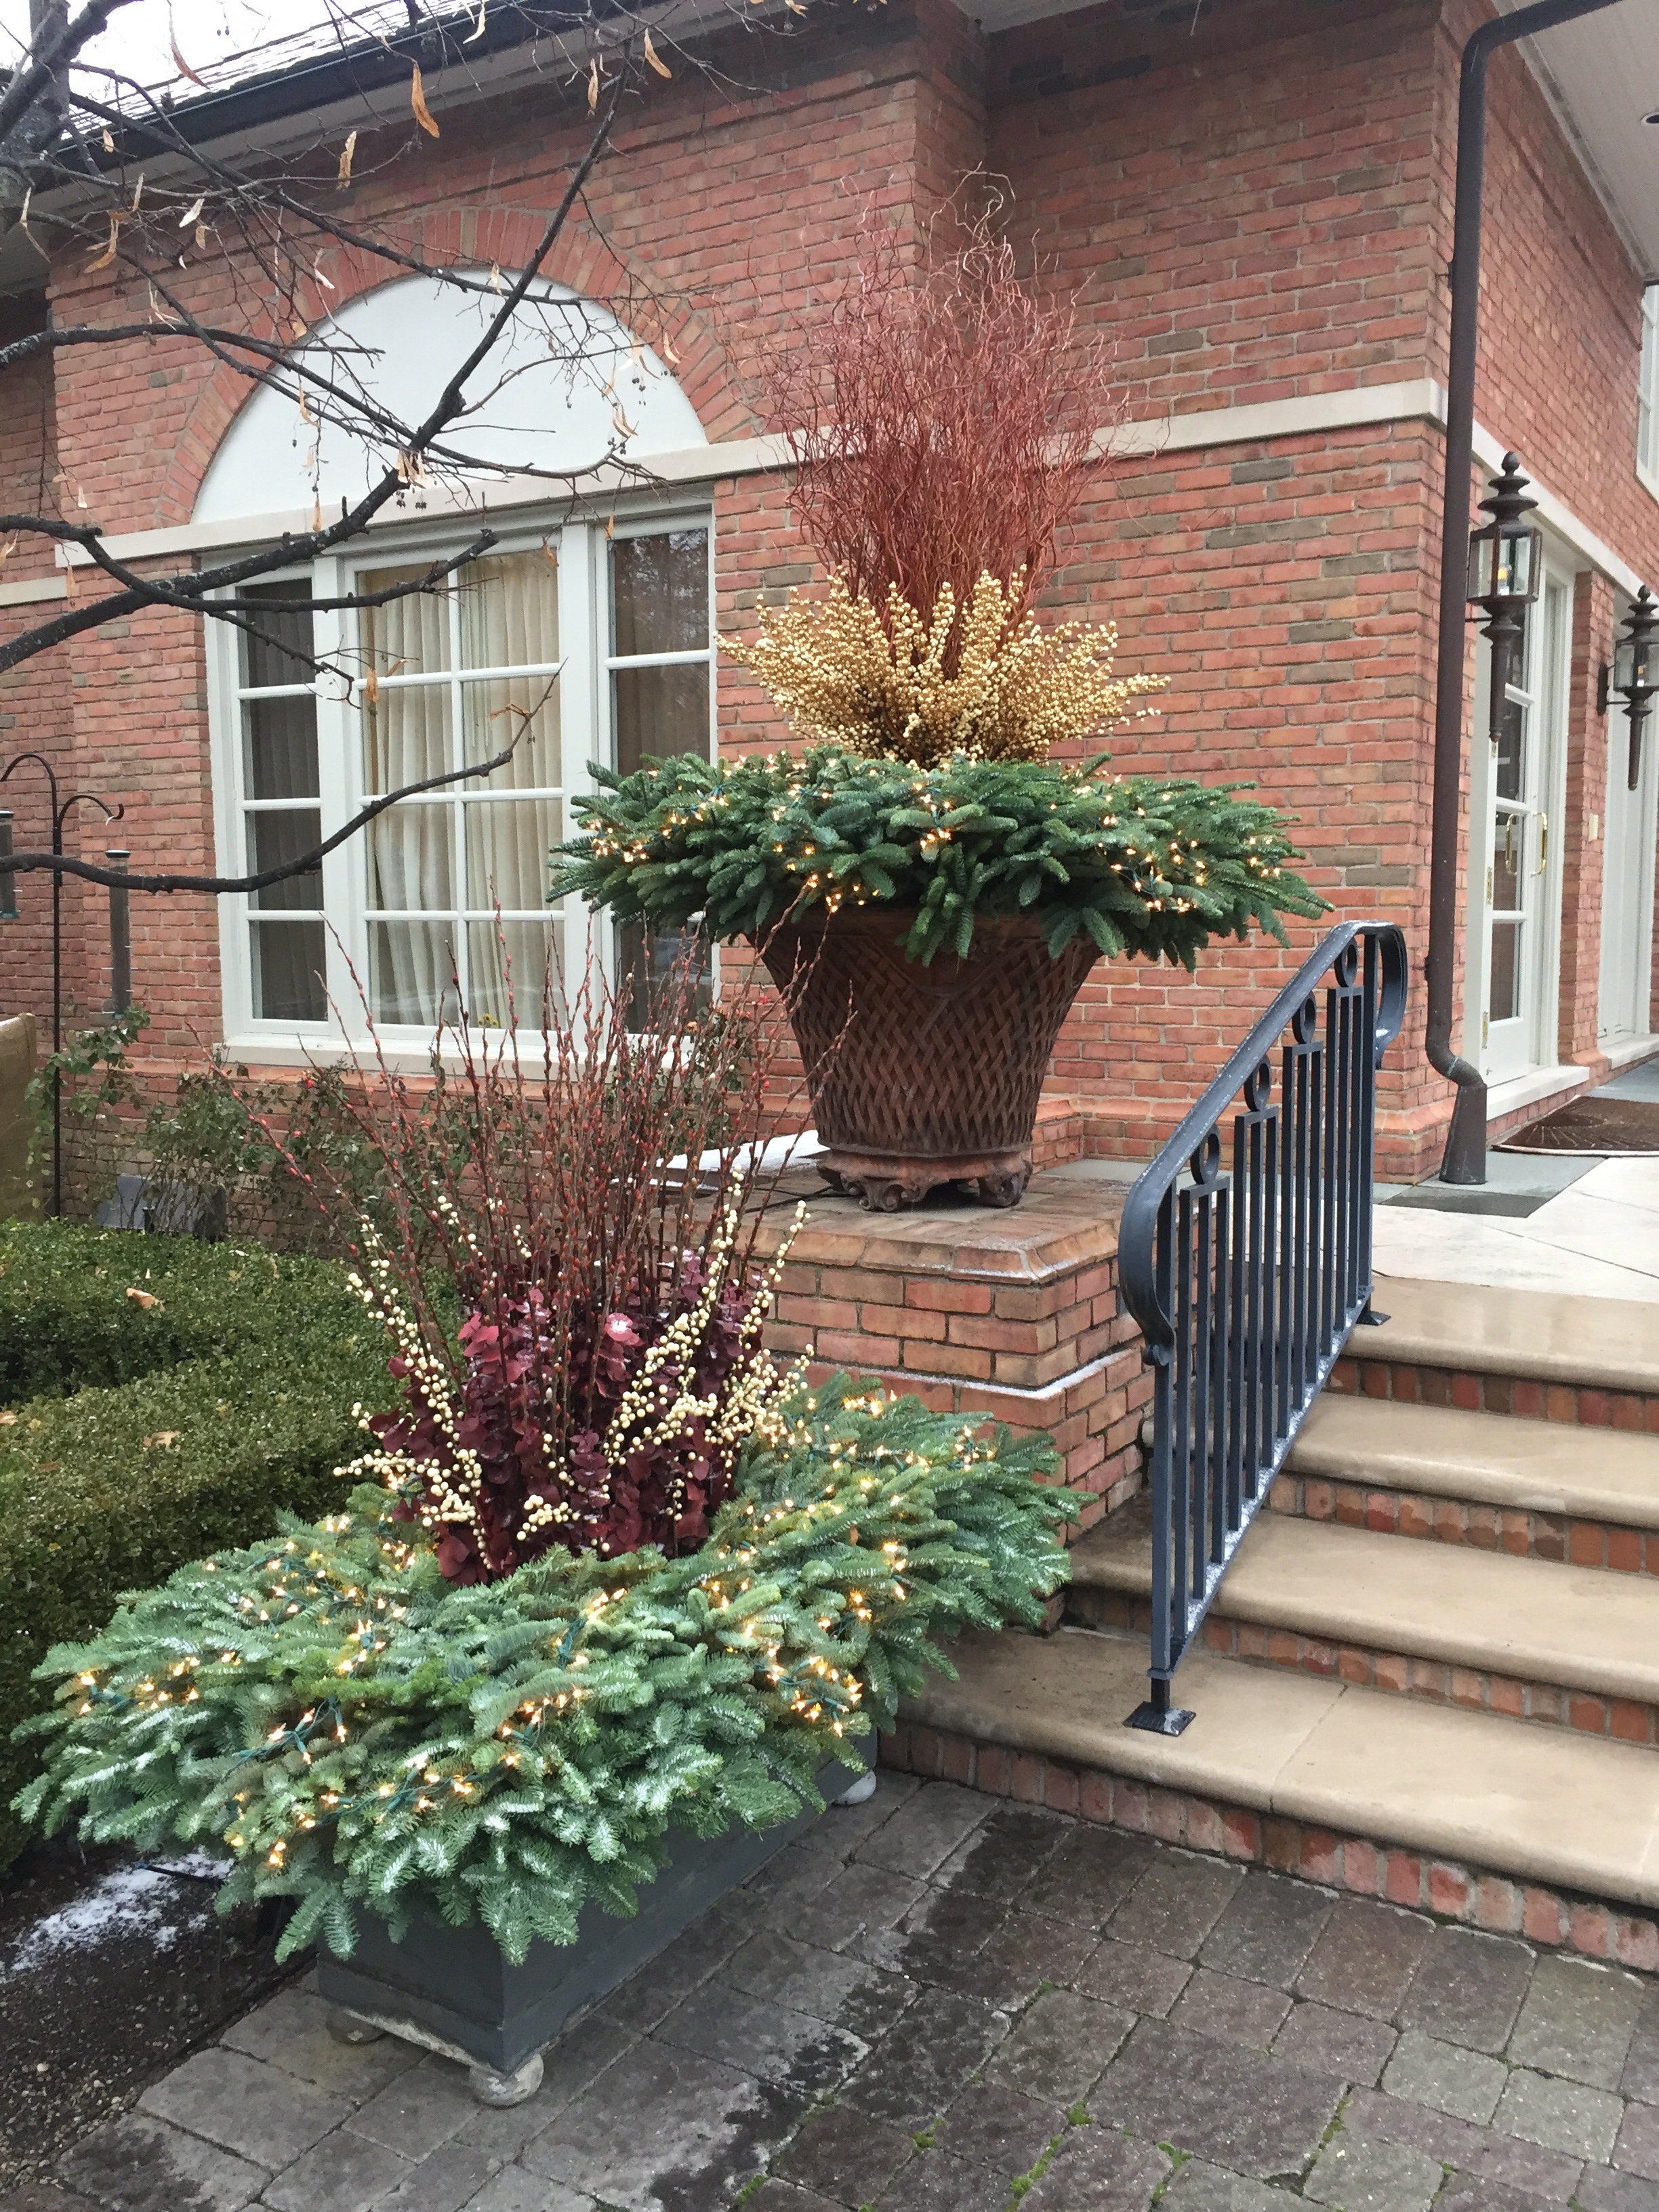
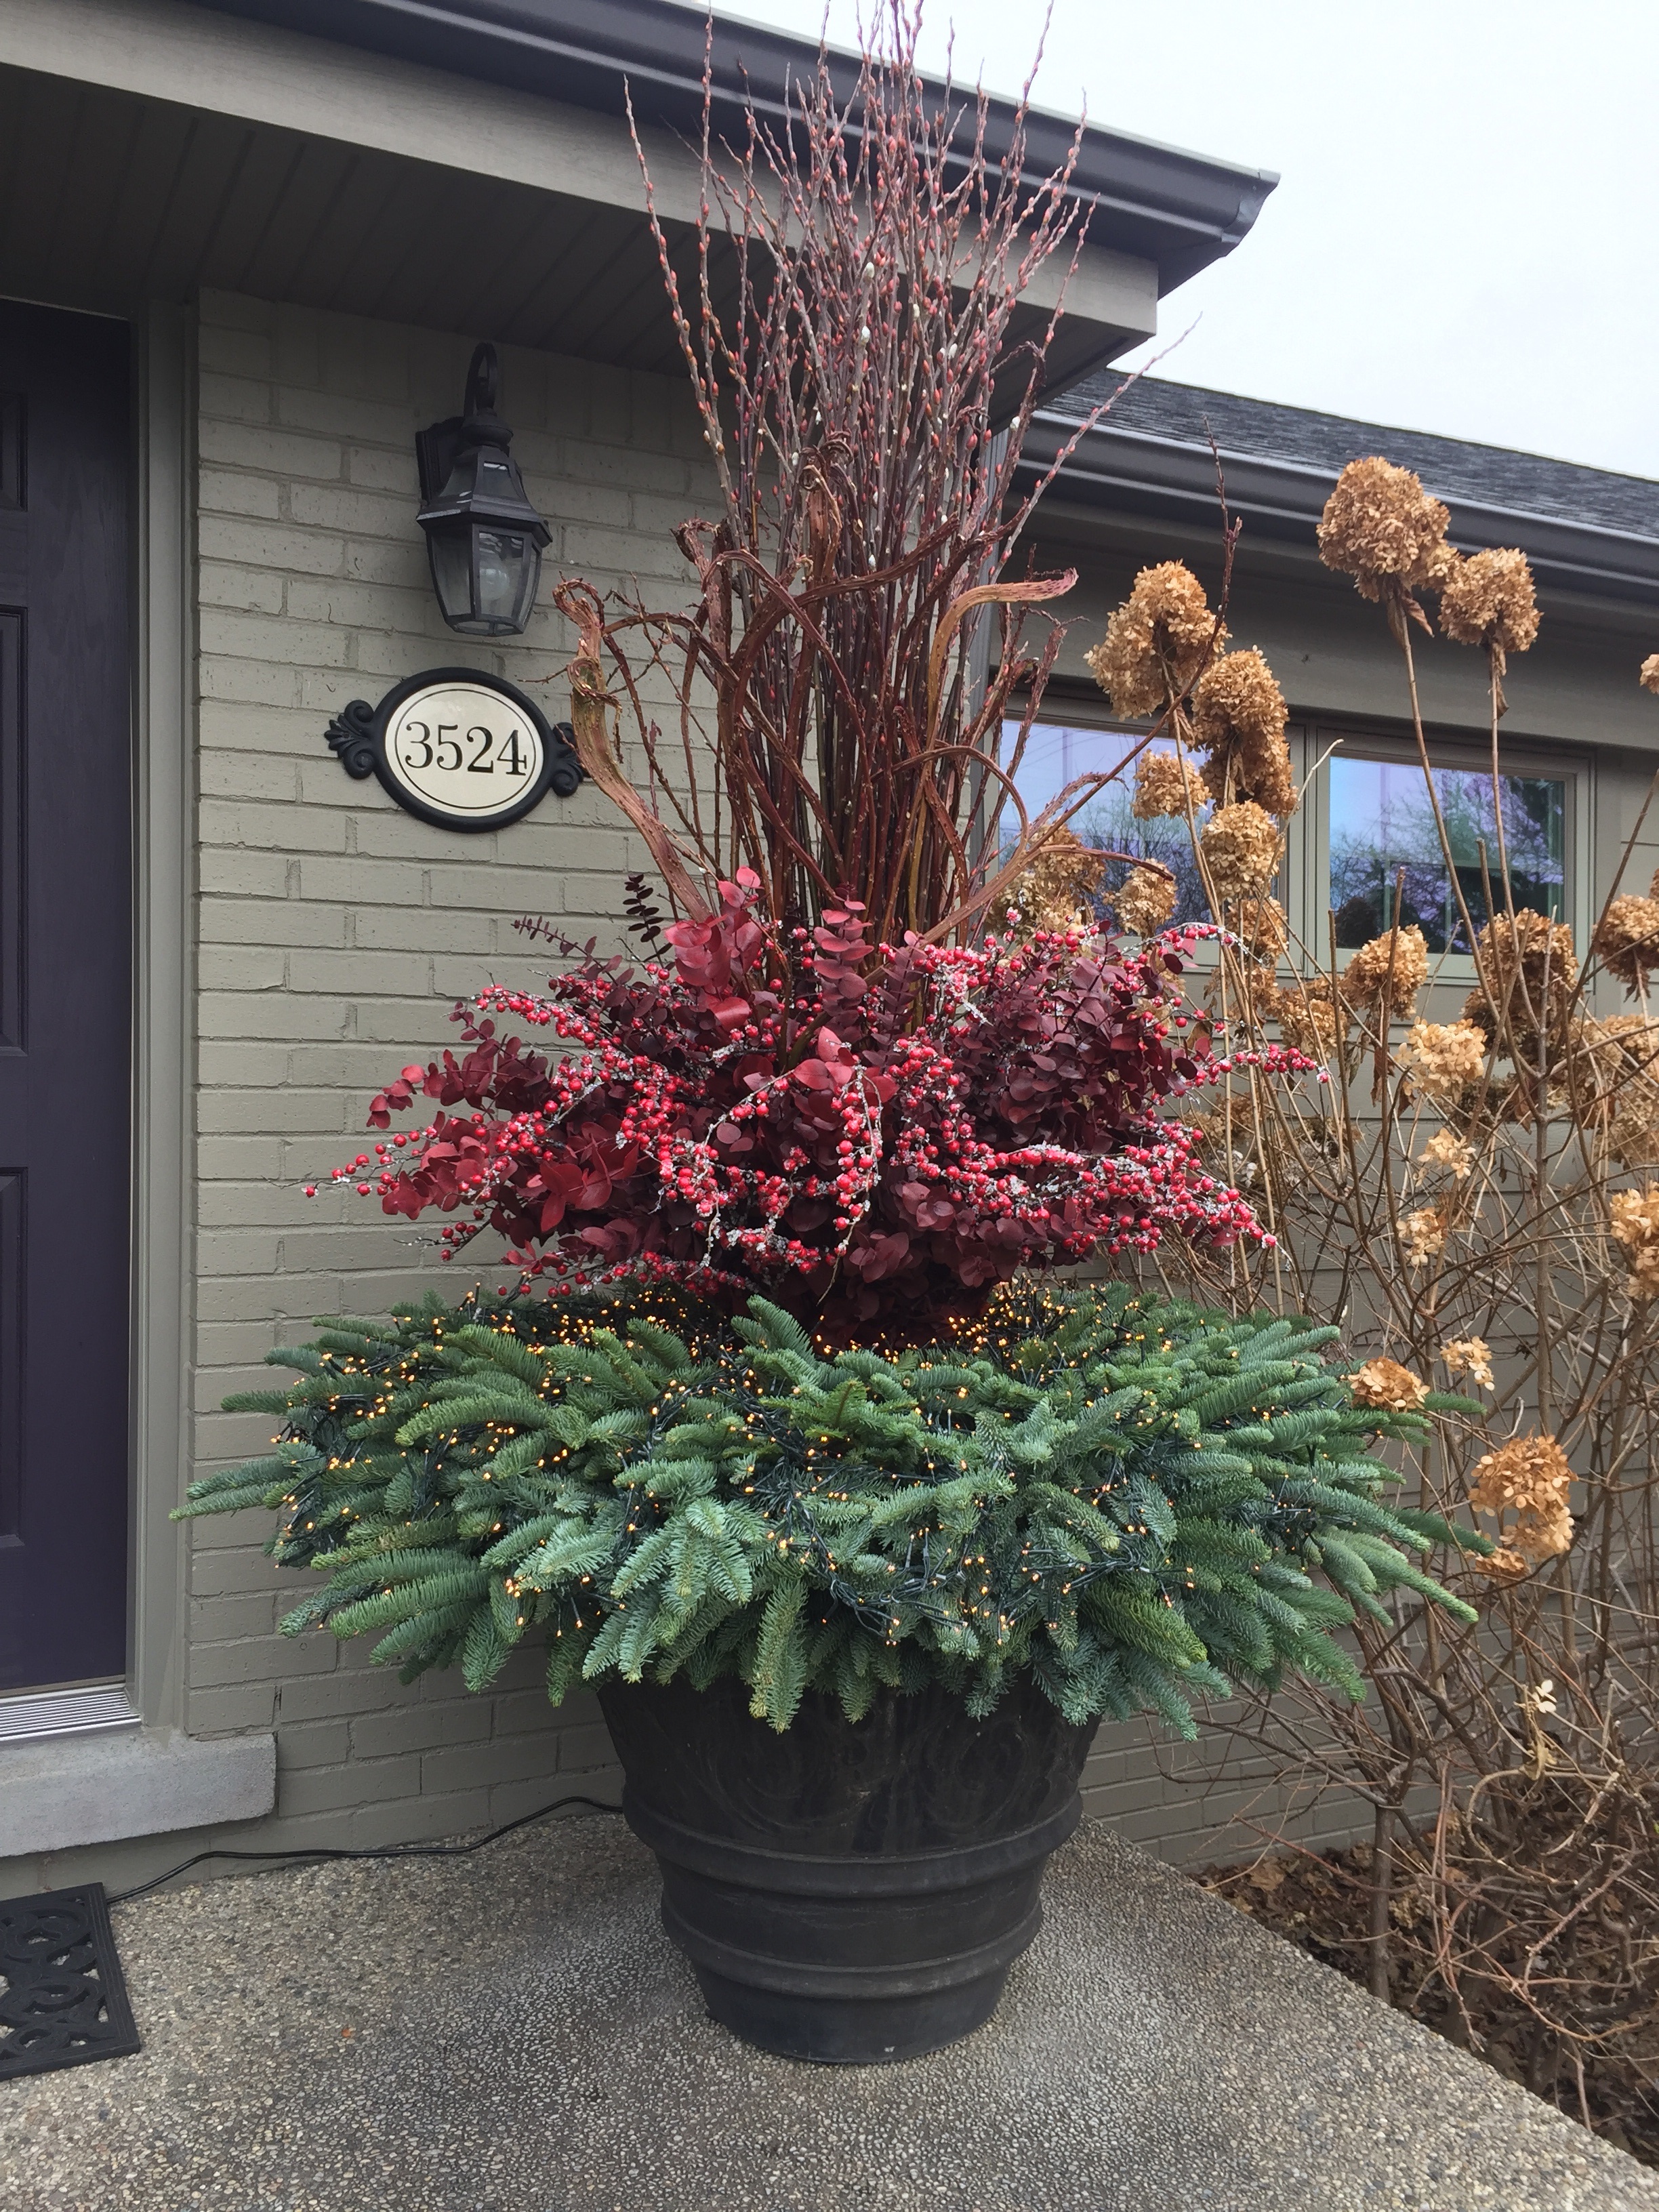
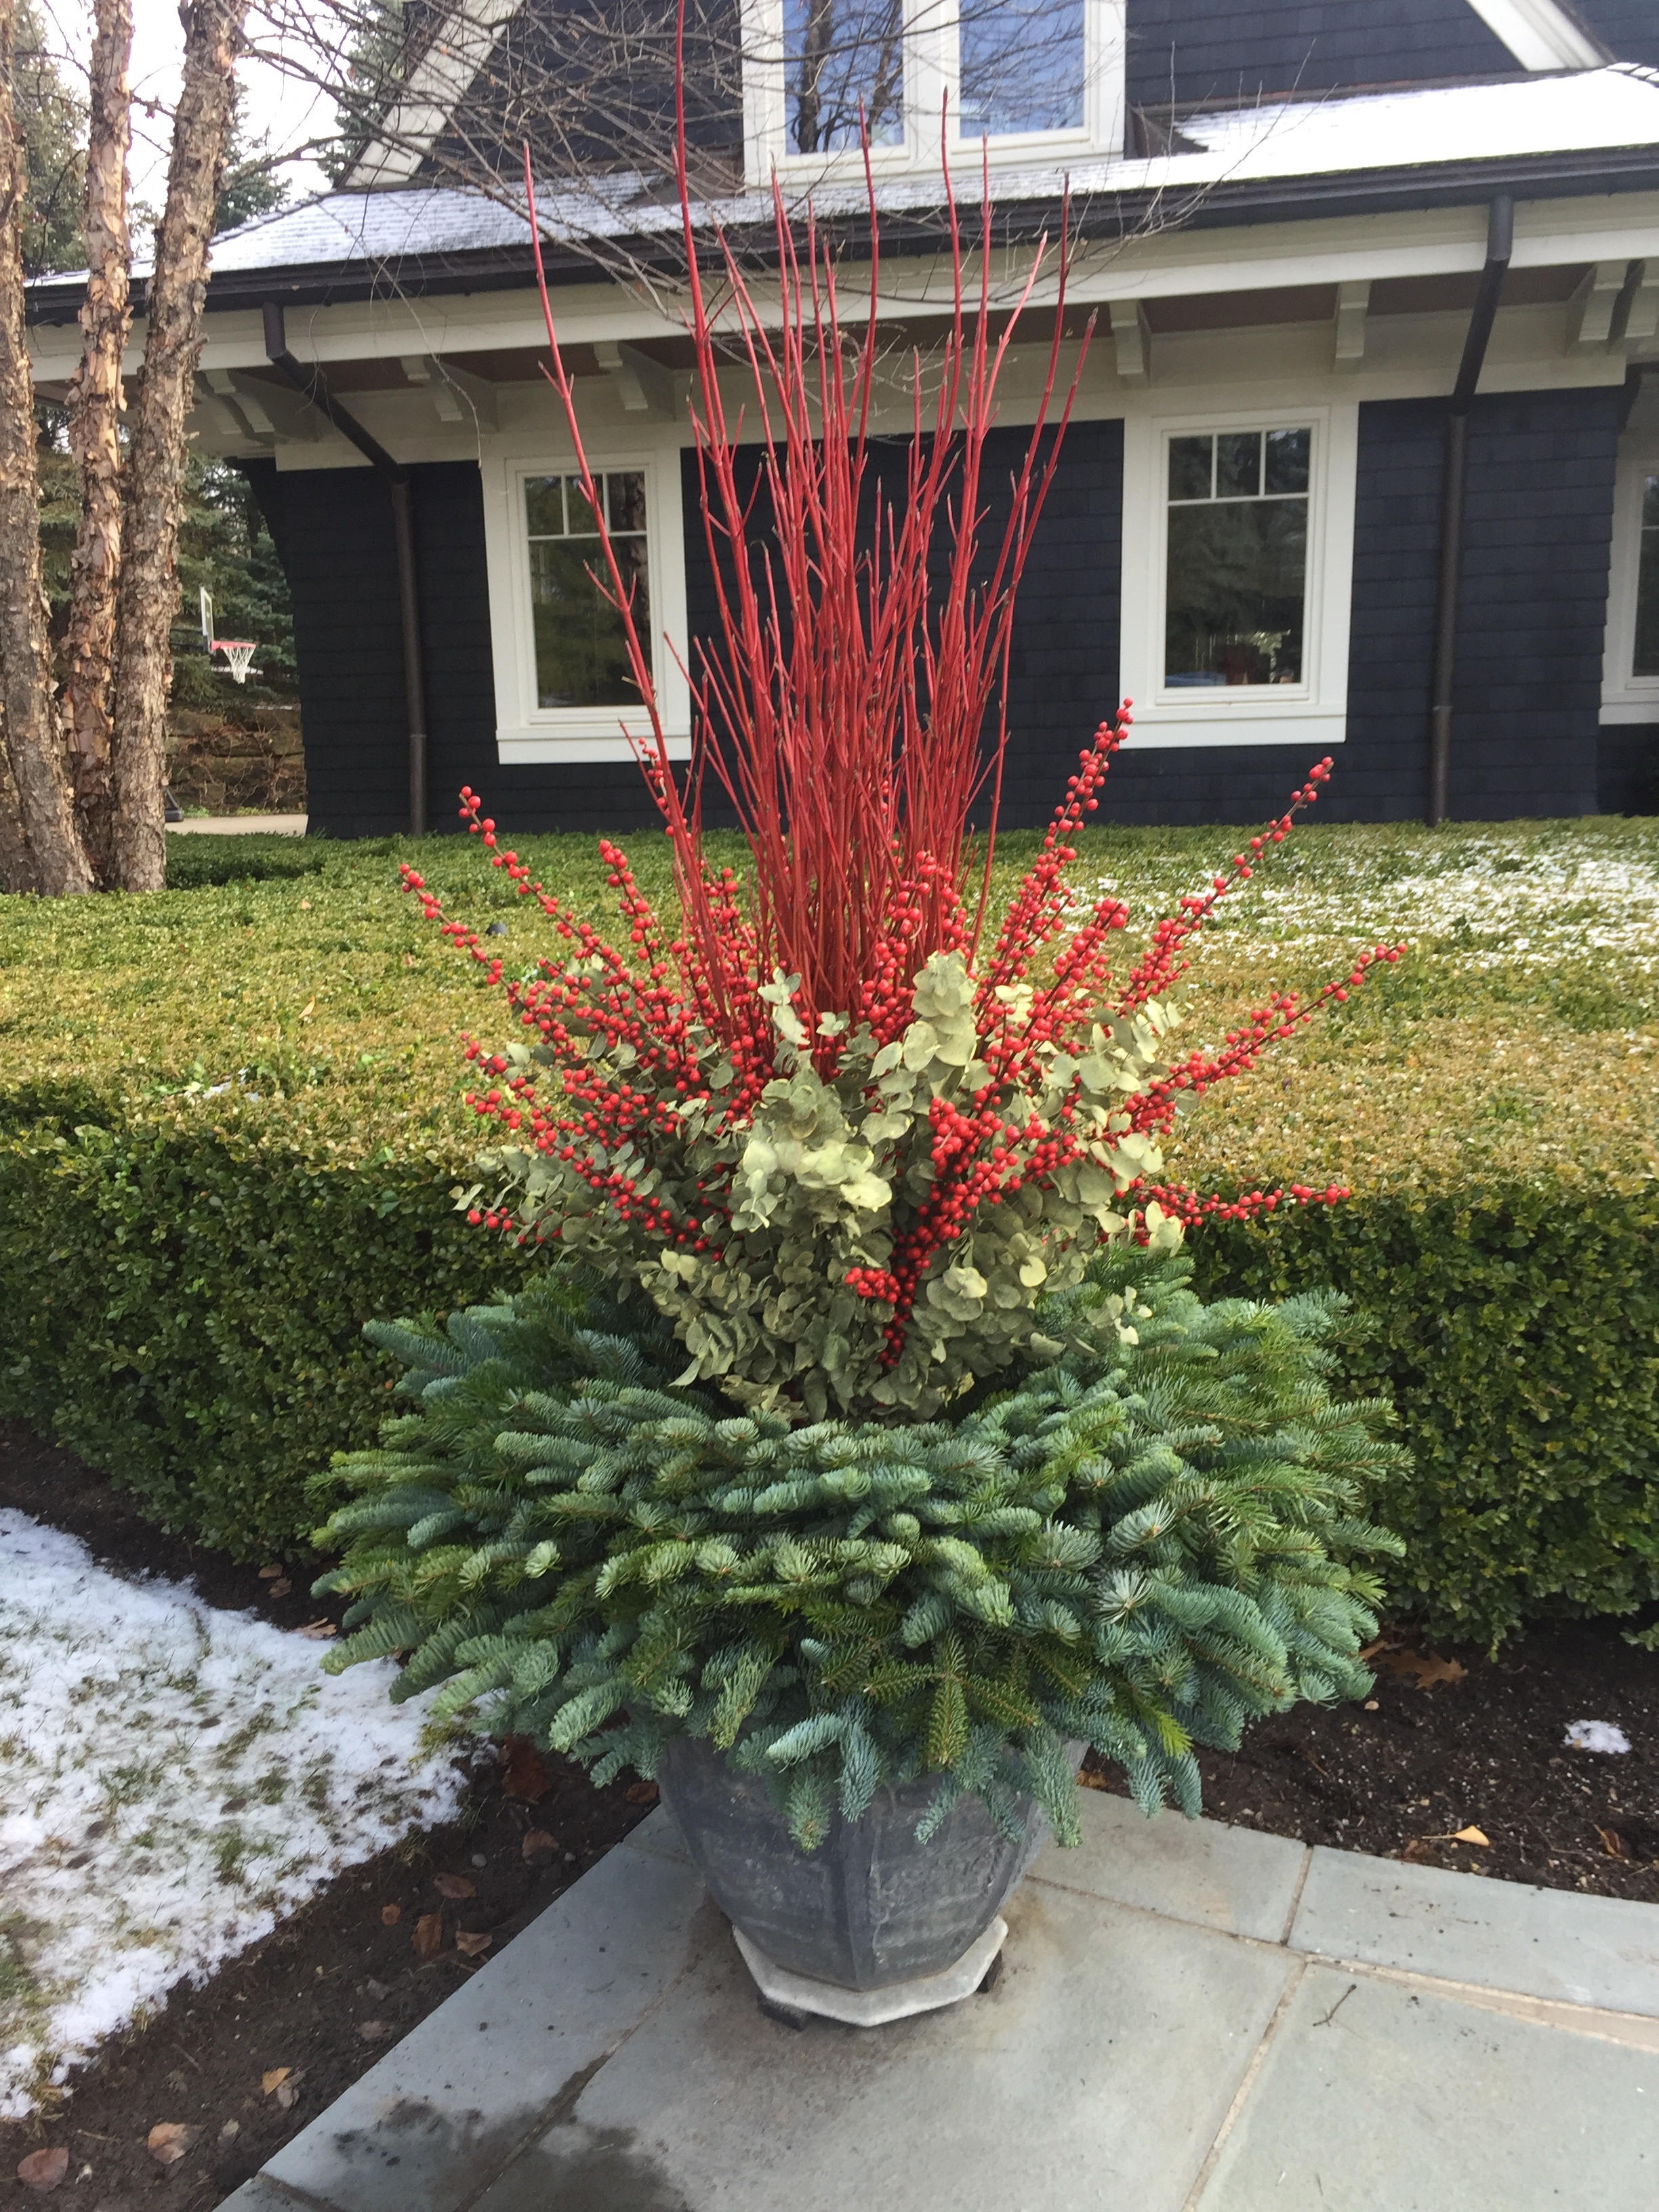
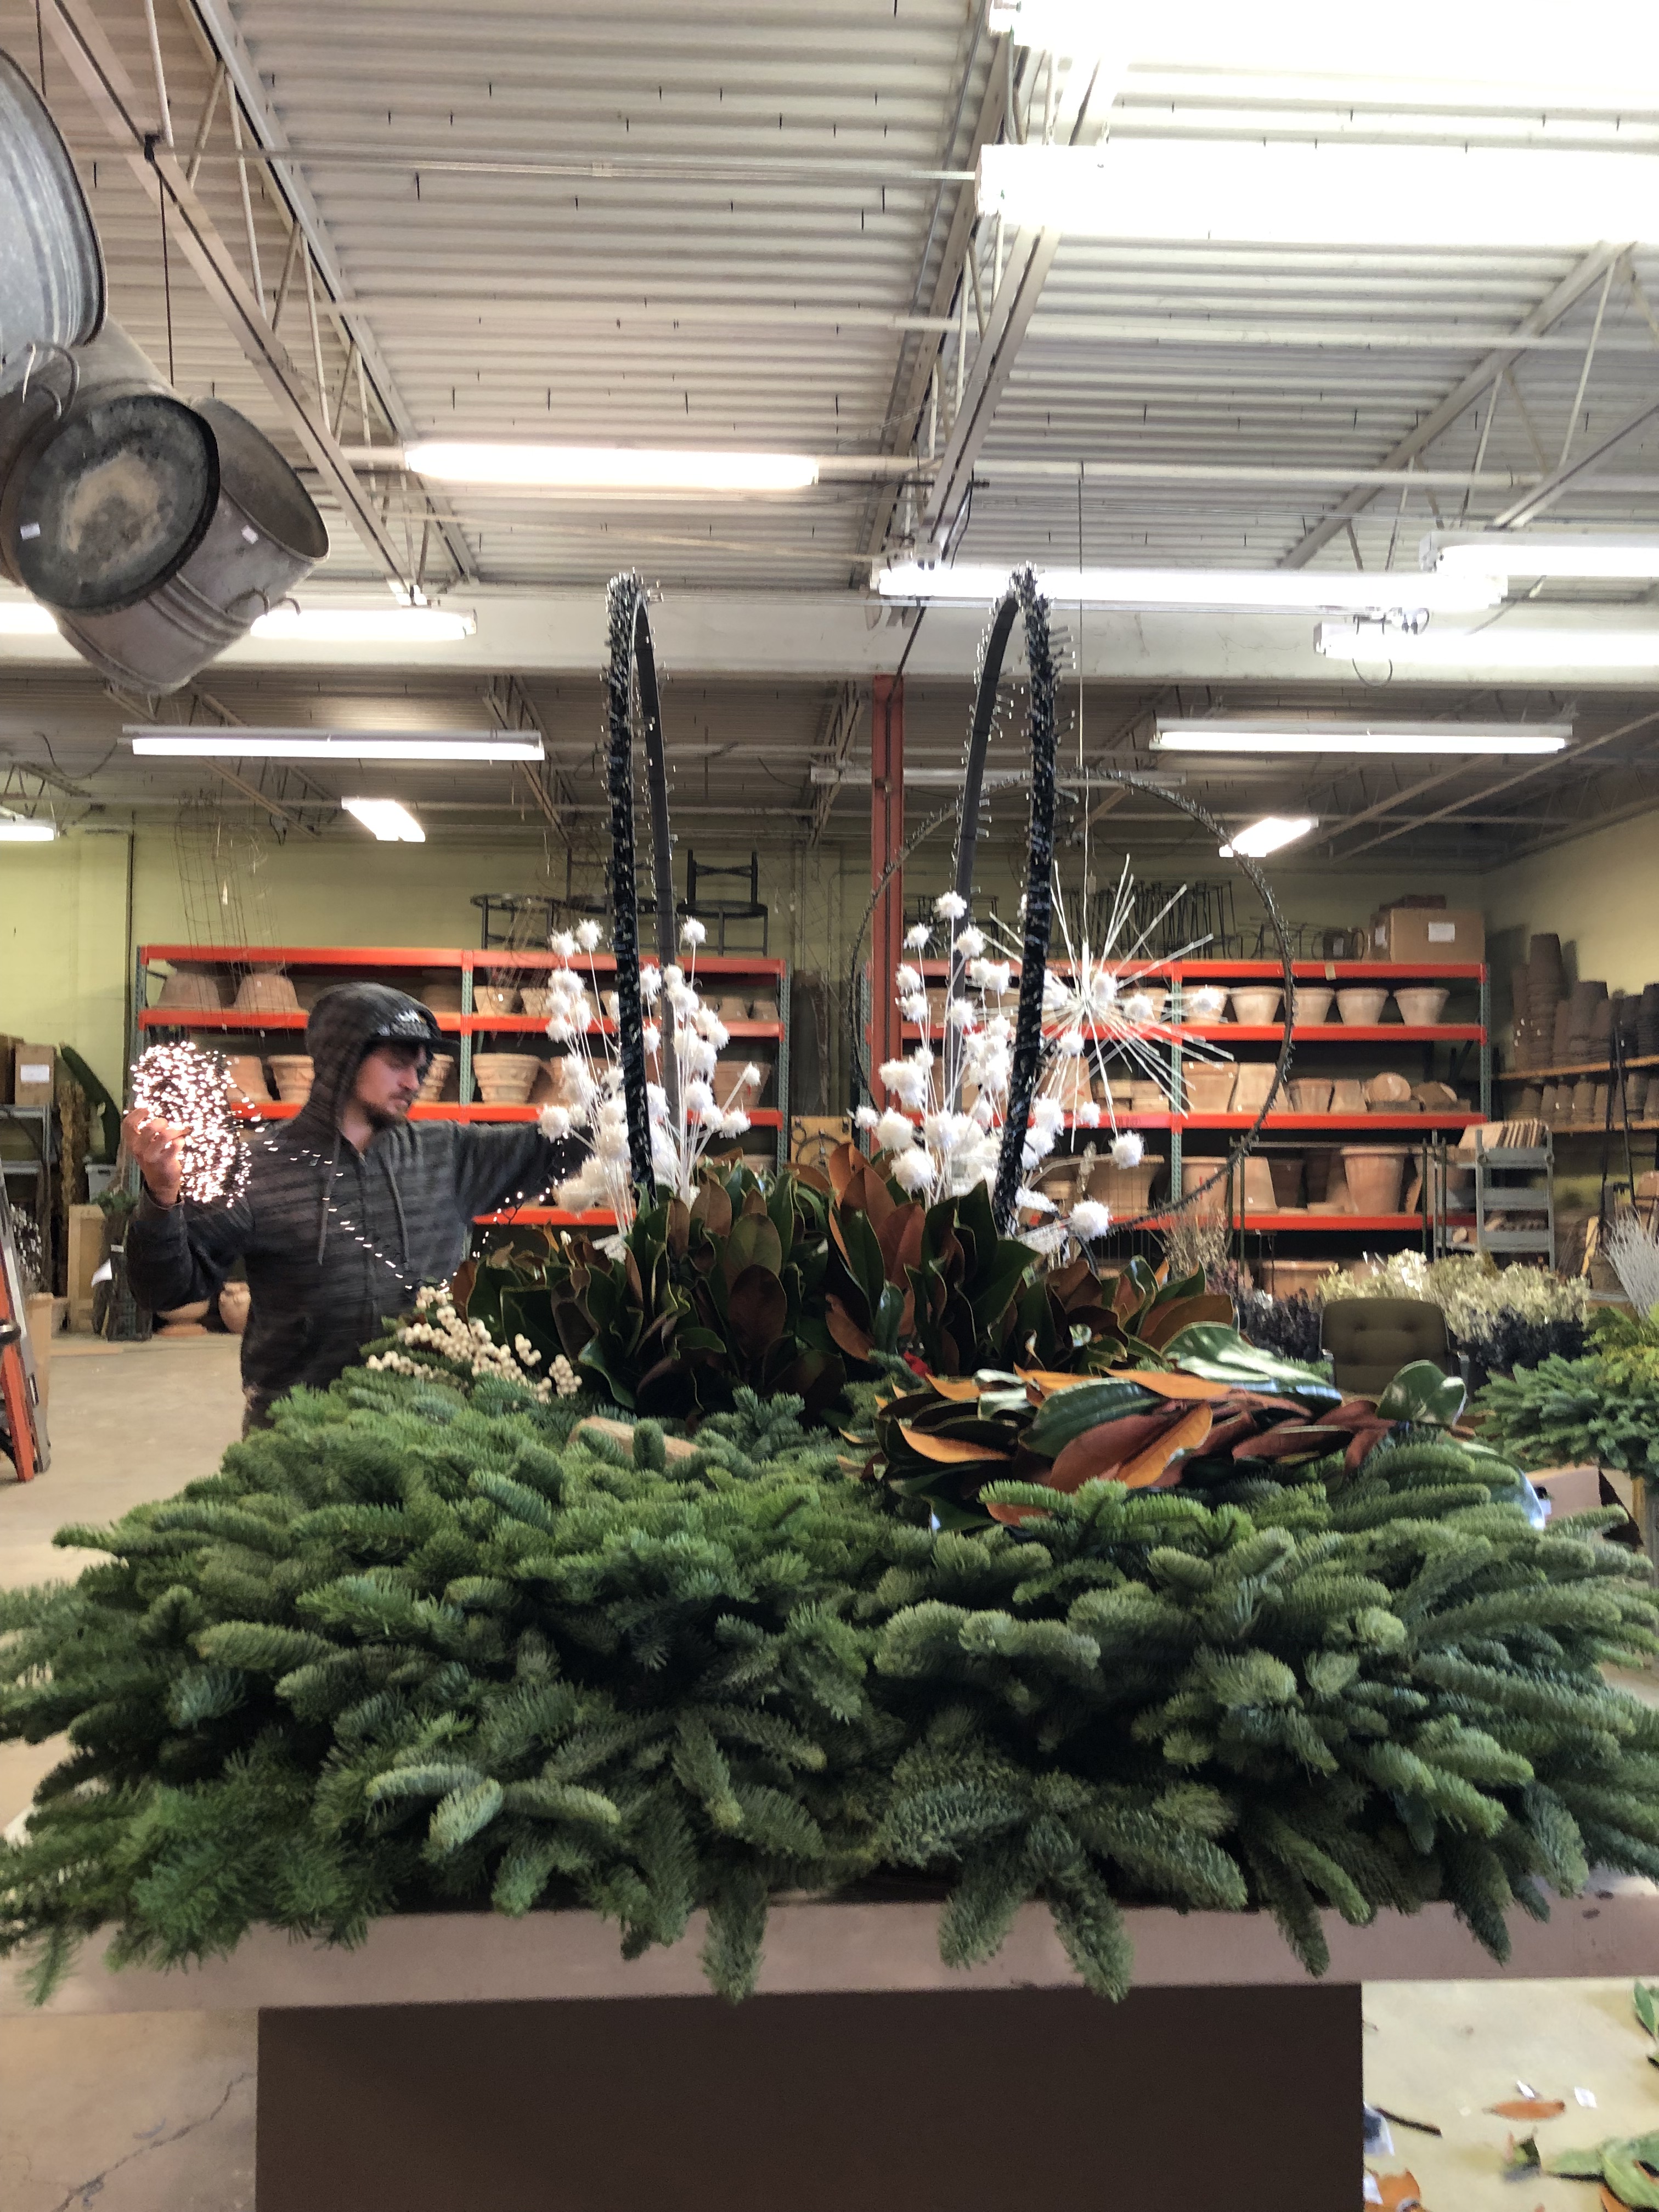
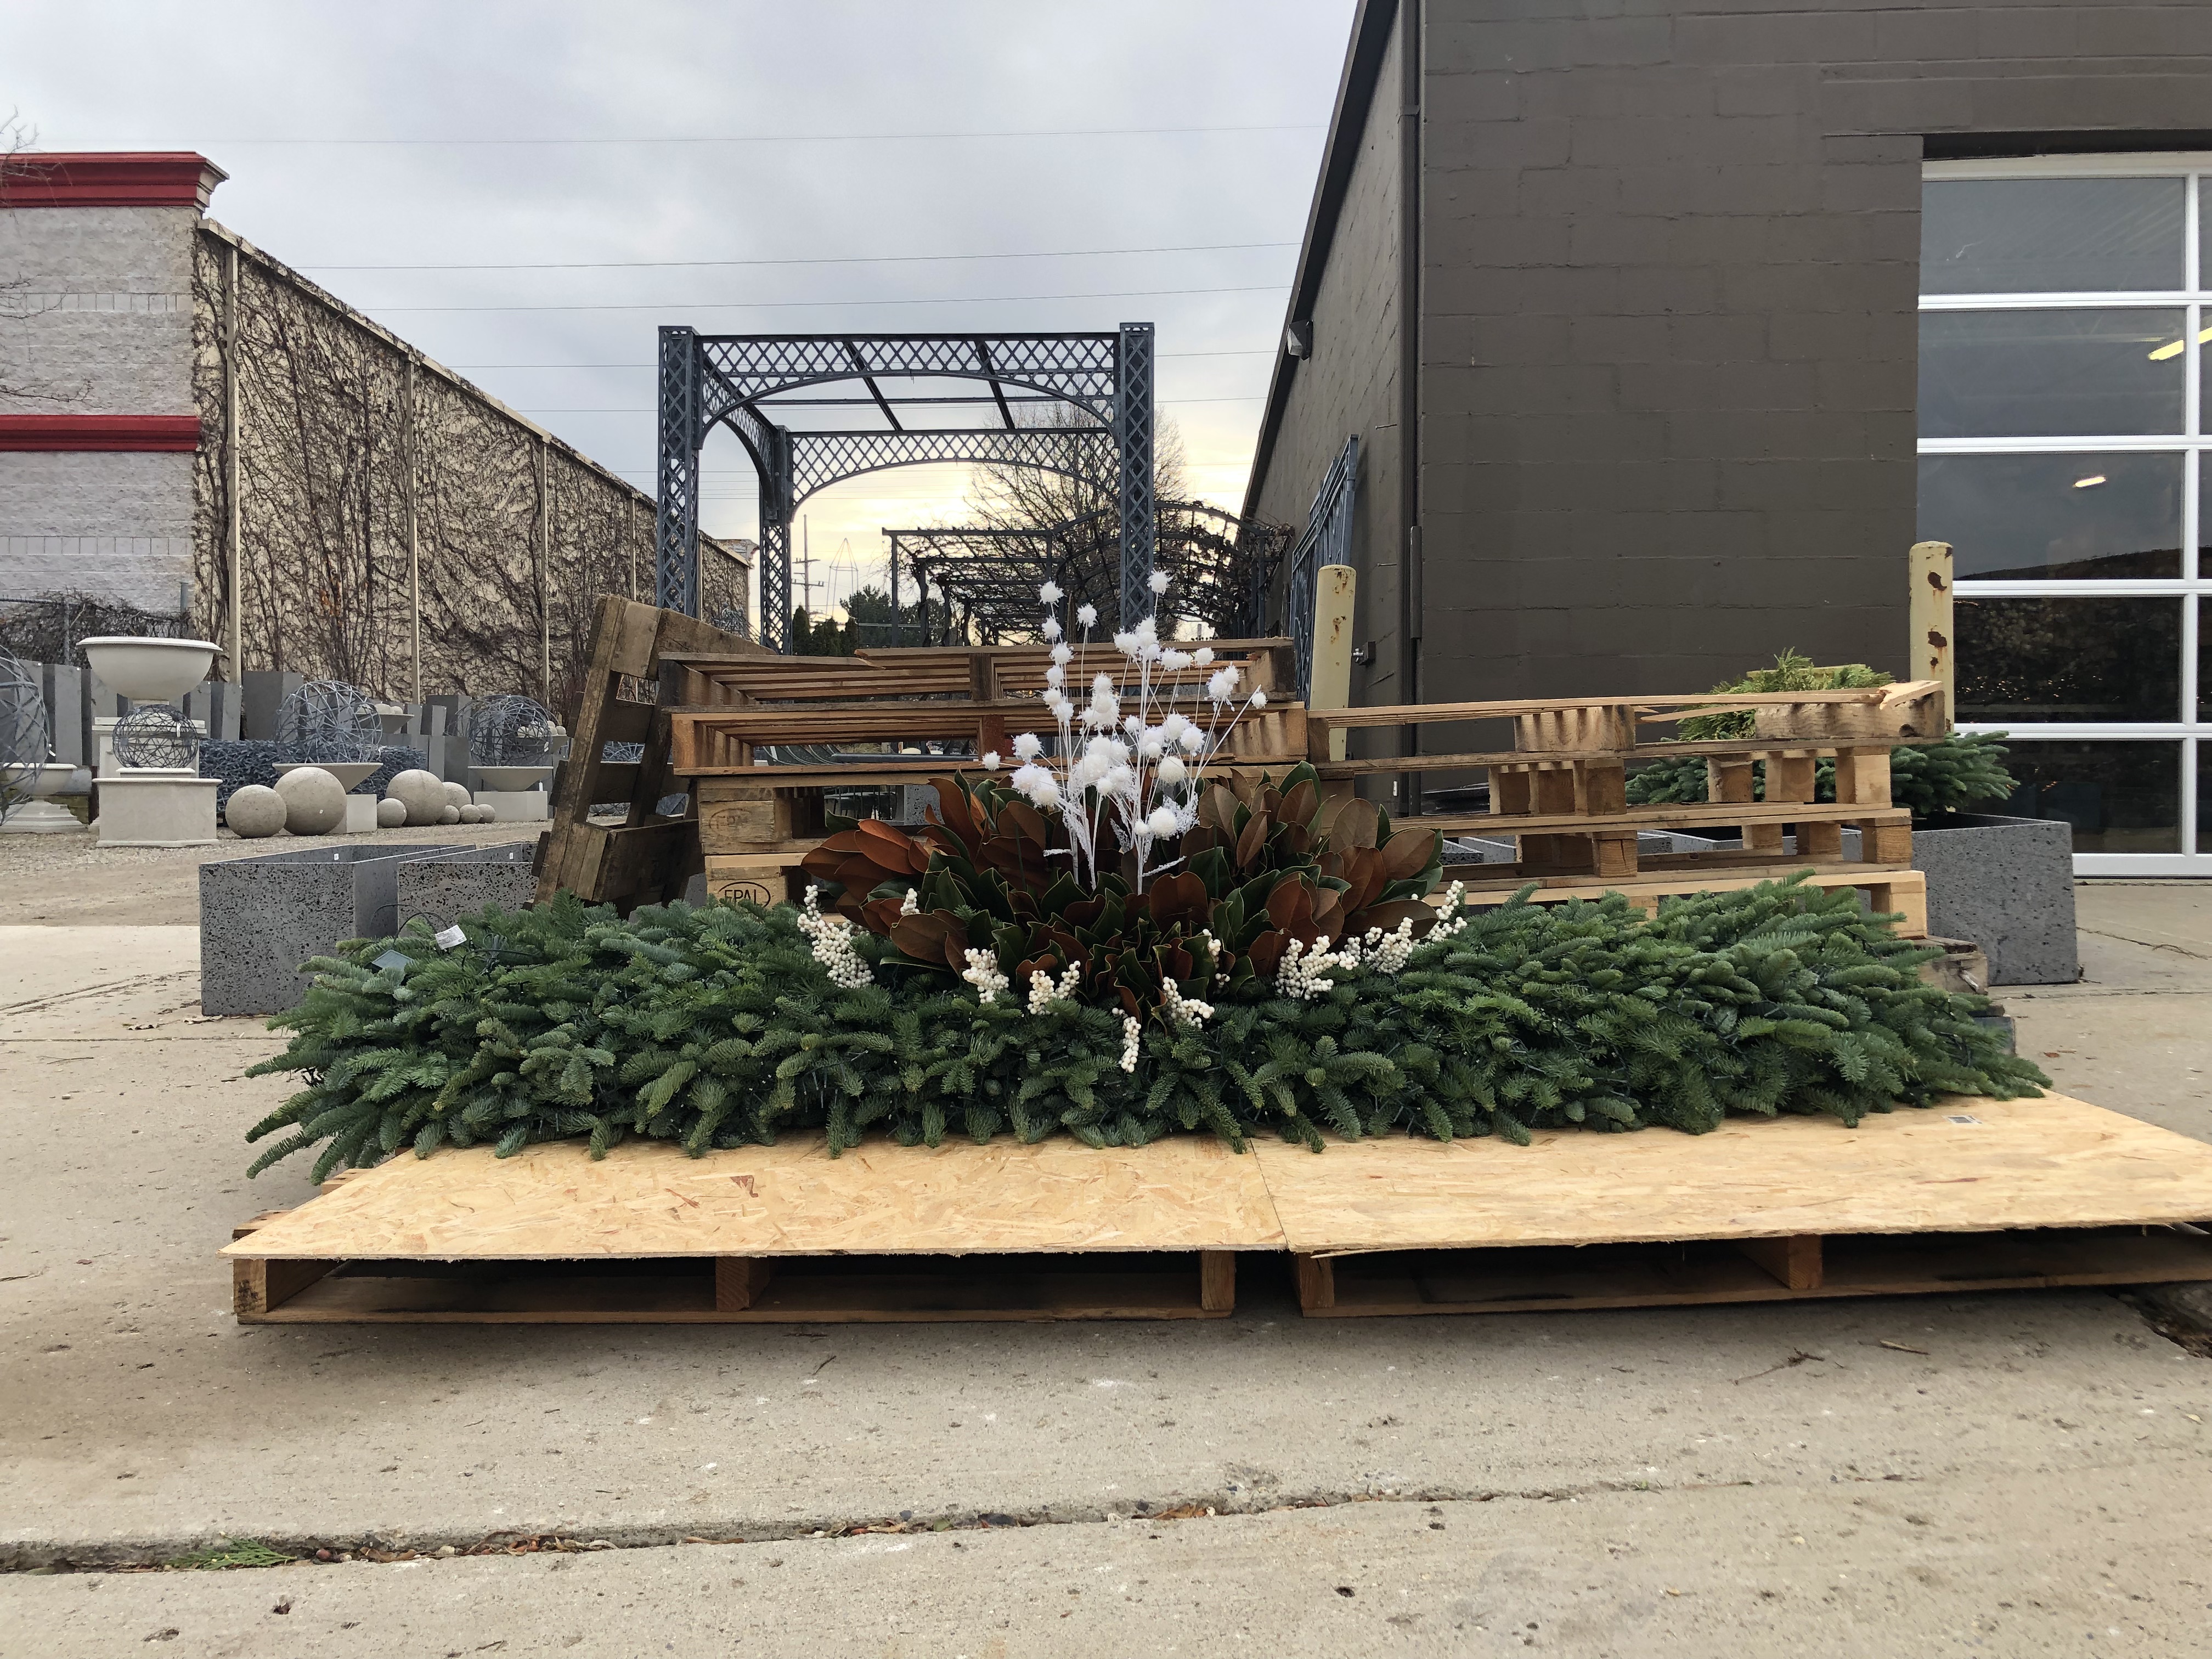 Each form was moved outdoors once it was finished. The cold temperature outside favors keeping the greens fresh. The palette of materials is simple. The volume and texture of the noble fir does a great job of showcasing the magnolia based centerpiece. A form this long needs support when it is moved, although all of the woody stems of the evergreens helps strengthen it. Though the form is long and narrow, we took great care to provide a rolling shape from back to front. A good winter arrangement needs to supply a finished shape from the beginning, and create the illusion of motion and rhythm. Though most of these materials are natural, they will not grow. Creating a sense of growth from cut materials informs the best of winter container arrangements.
 The form is slightly smaller than the interior dimension of the box, so it was easy to drop it in.
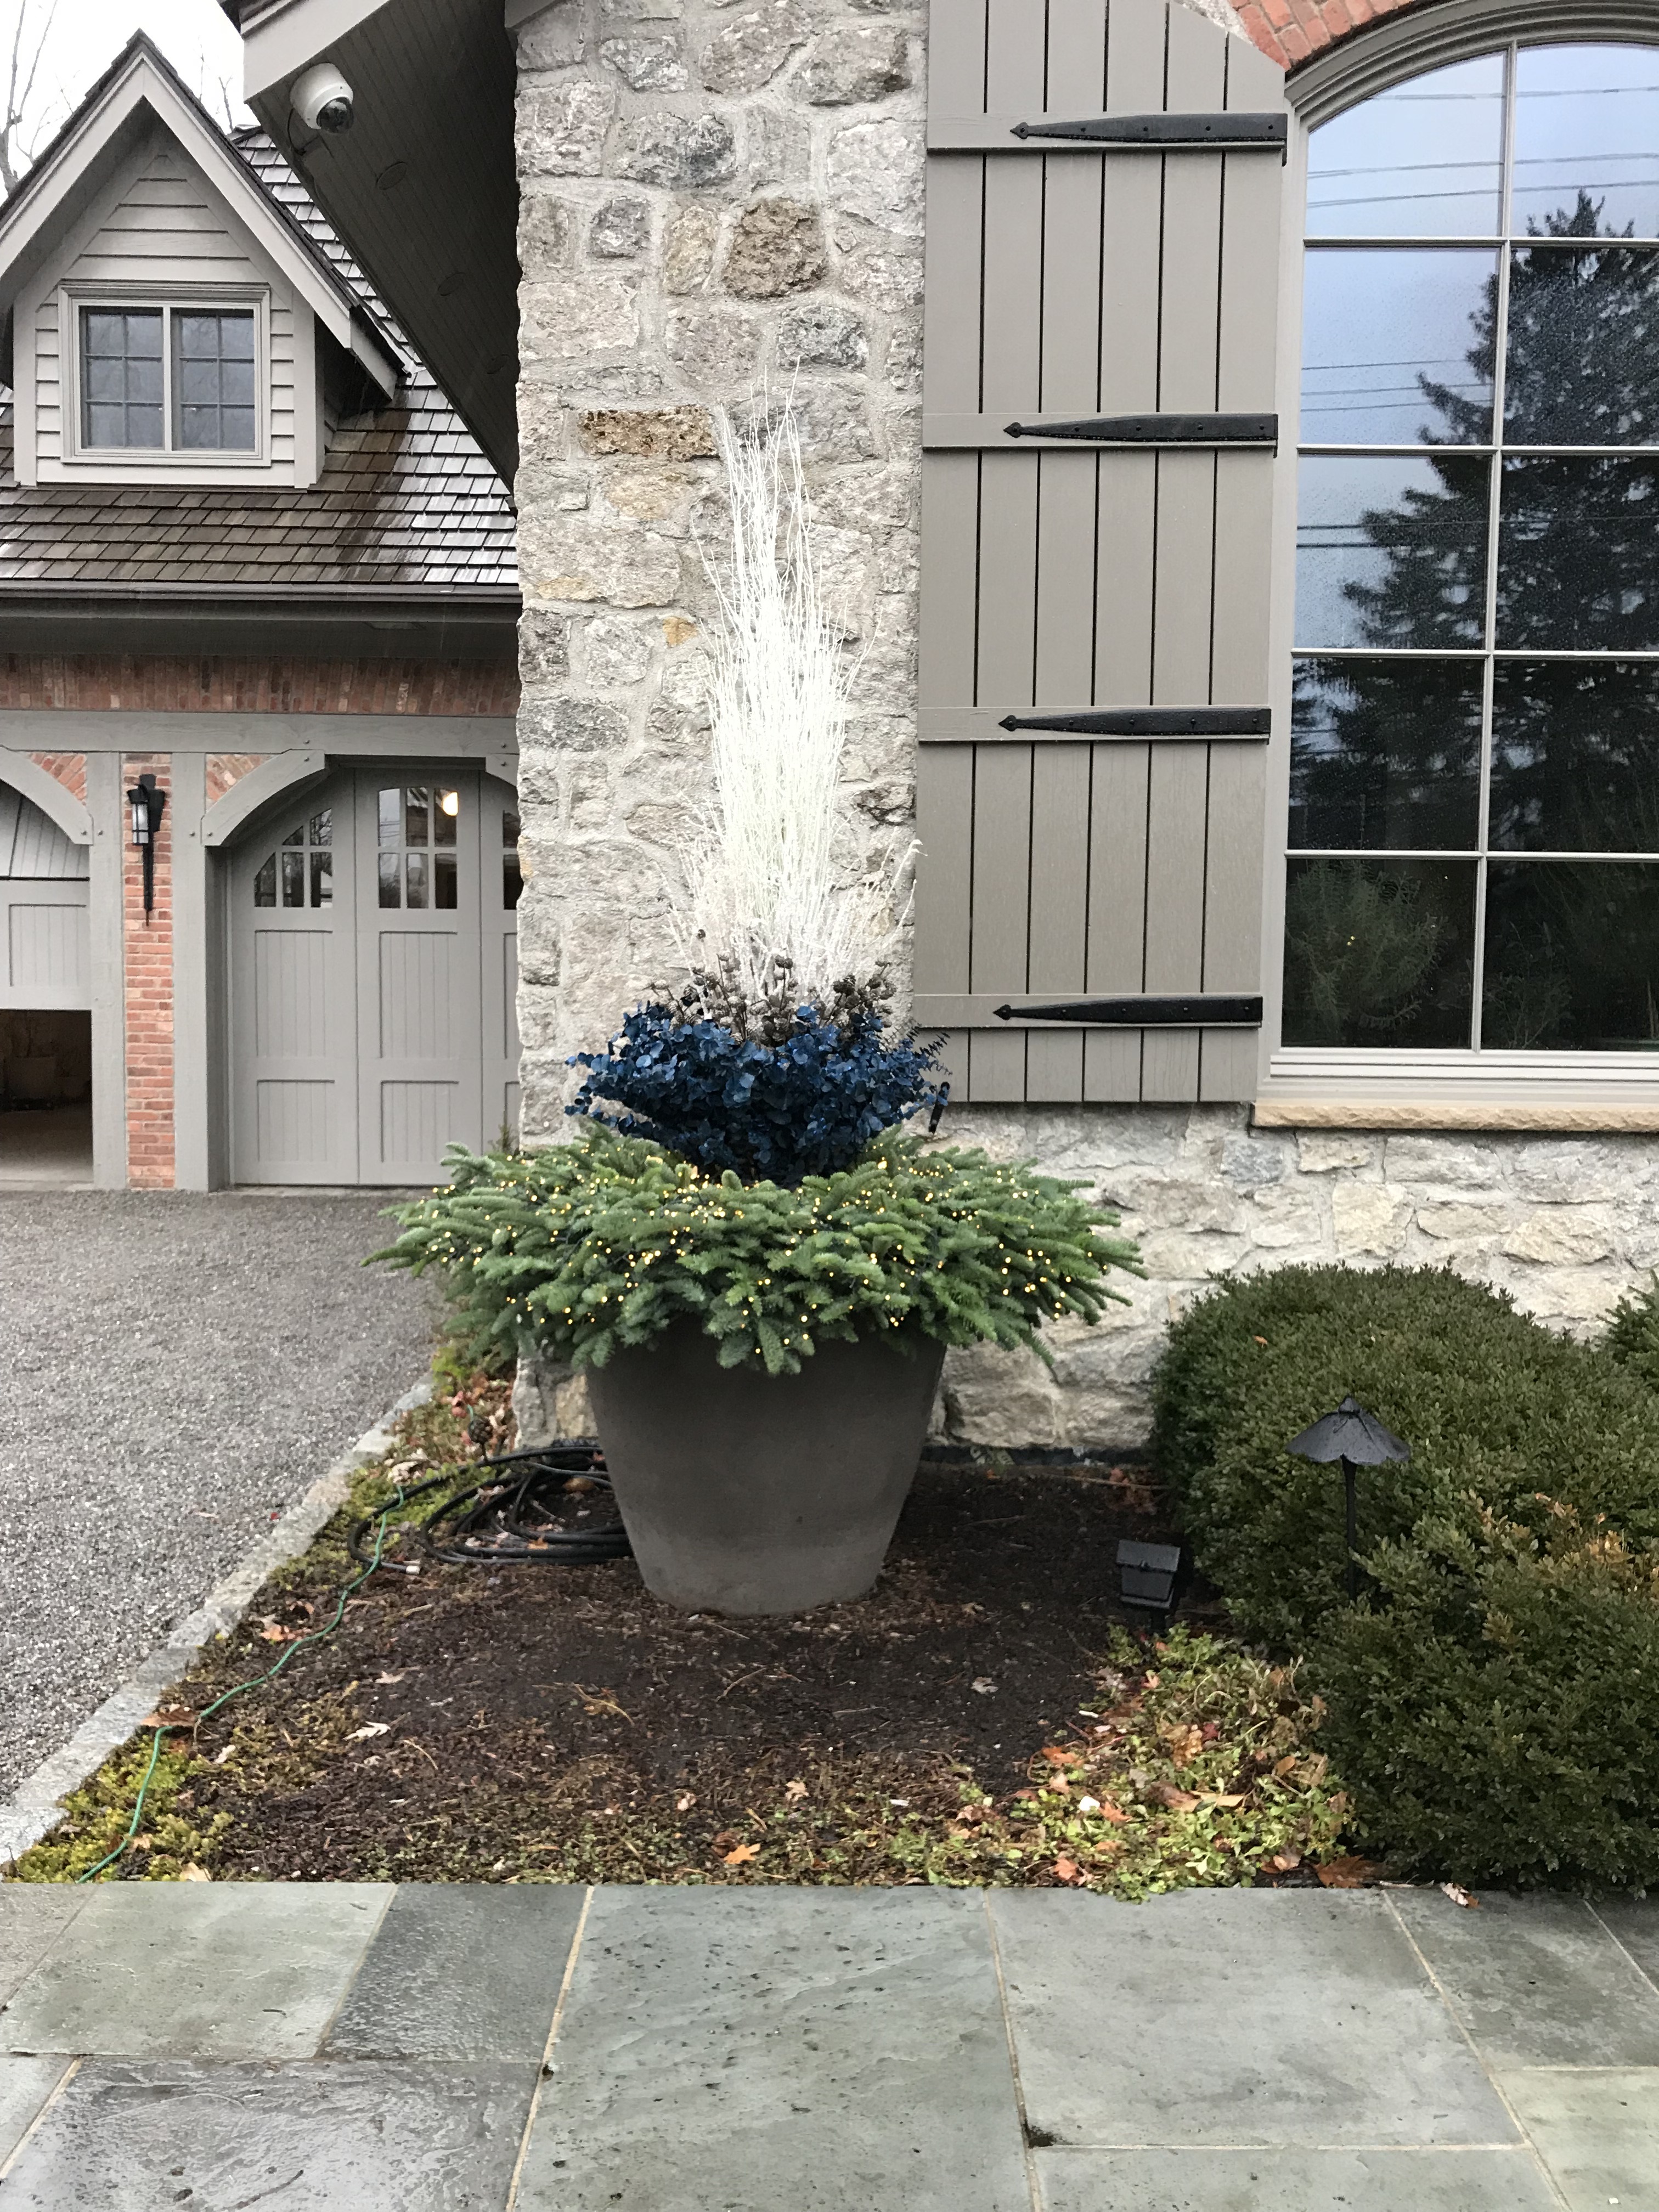
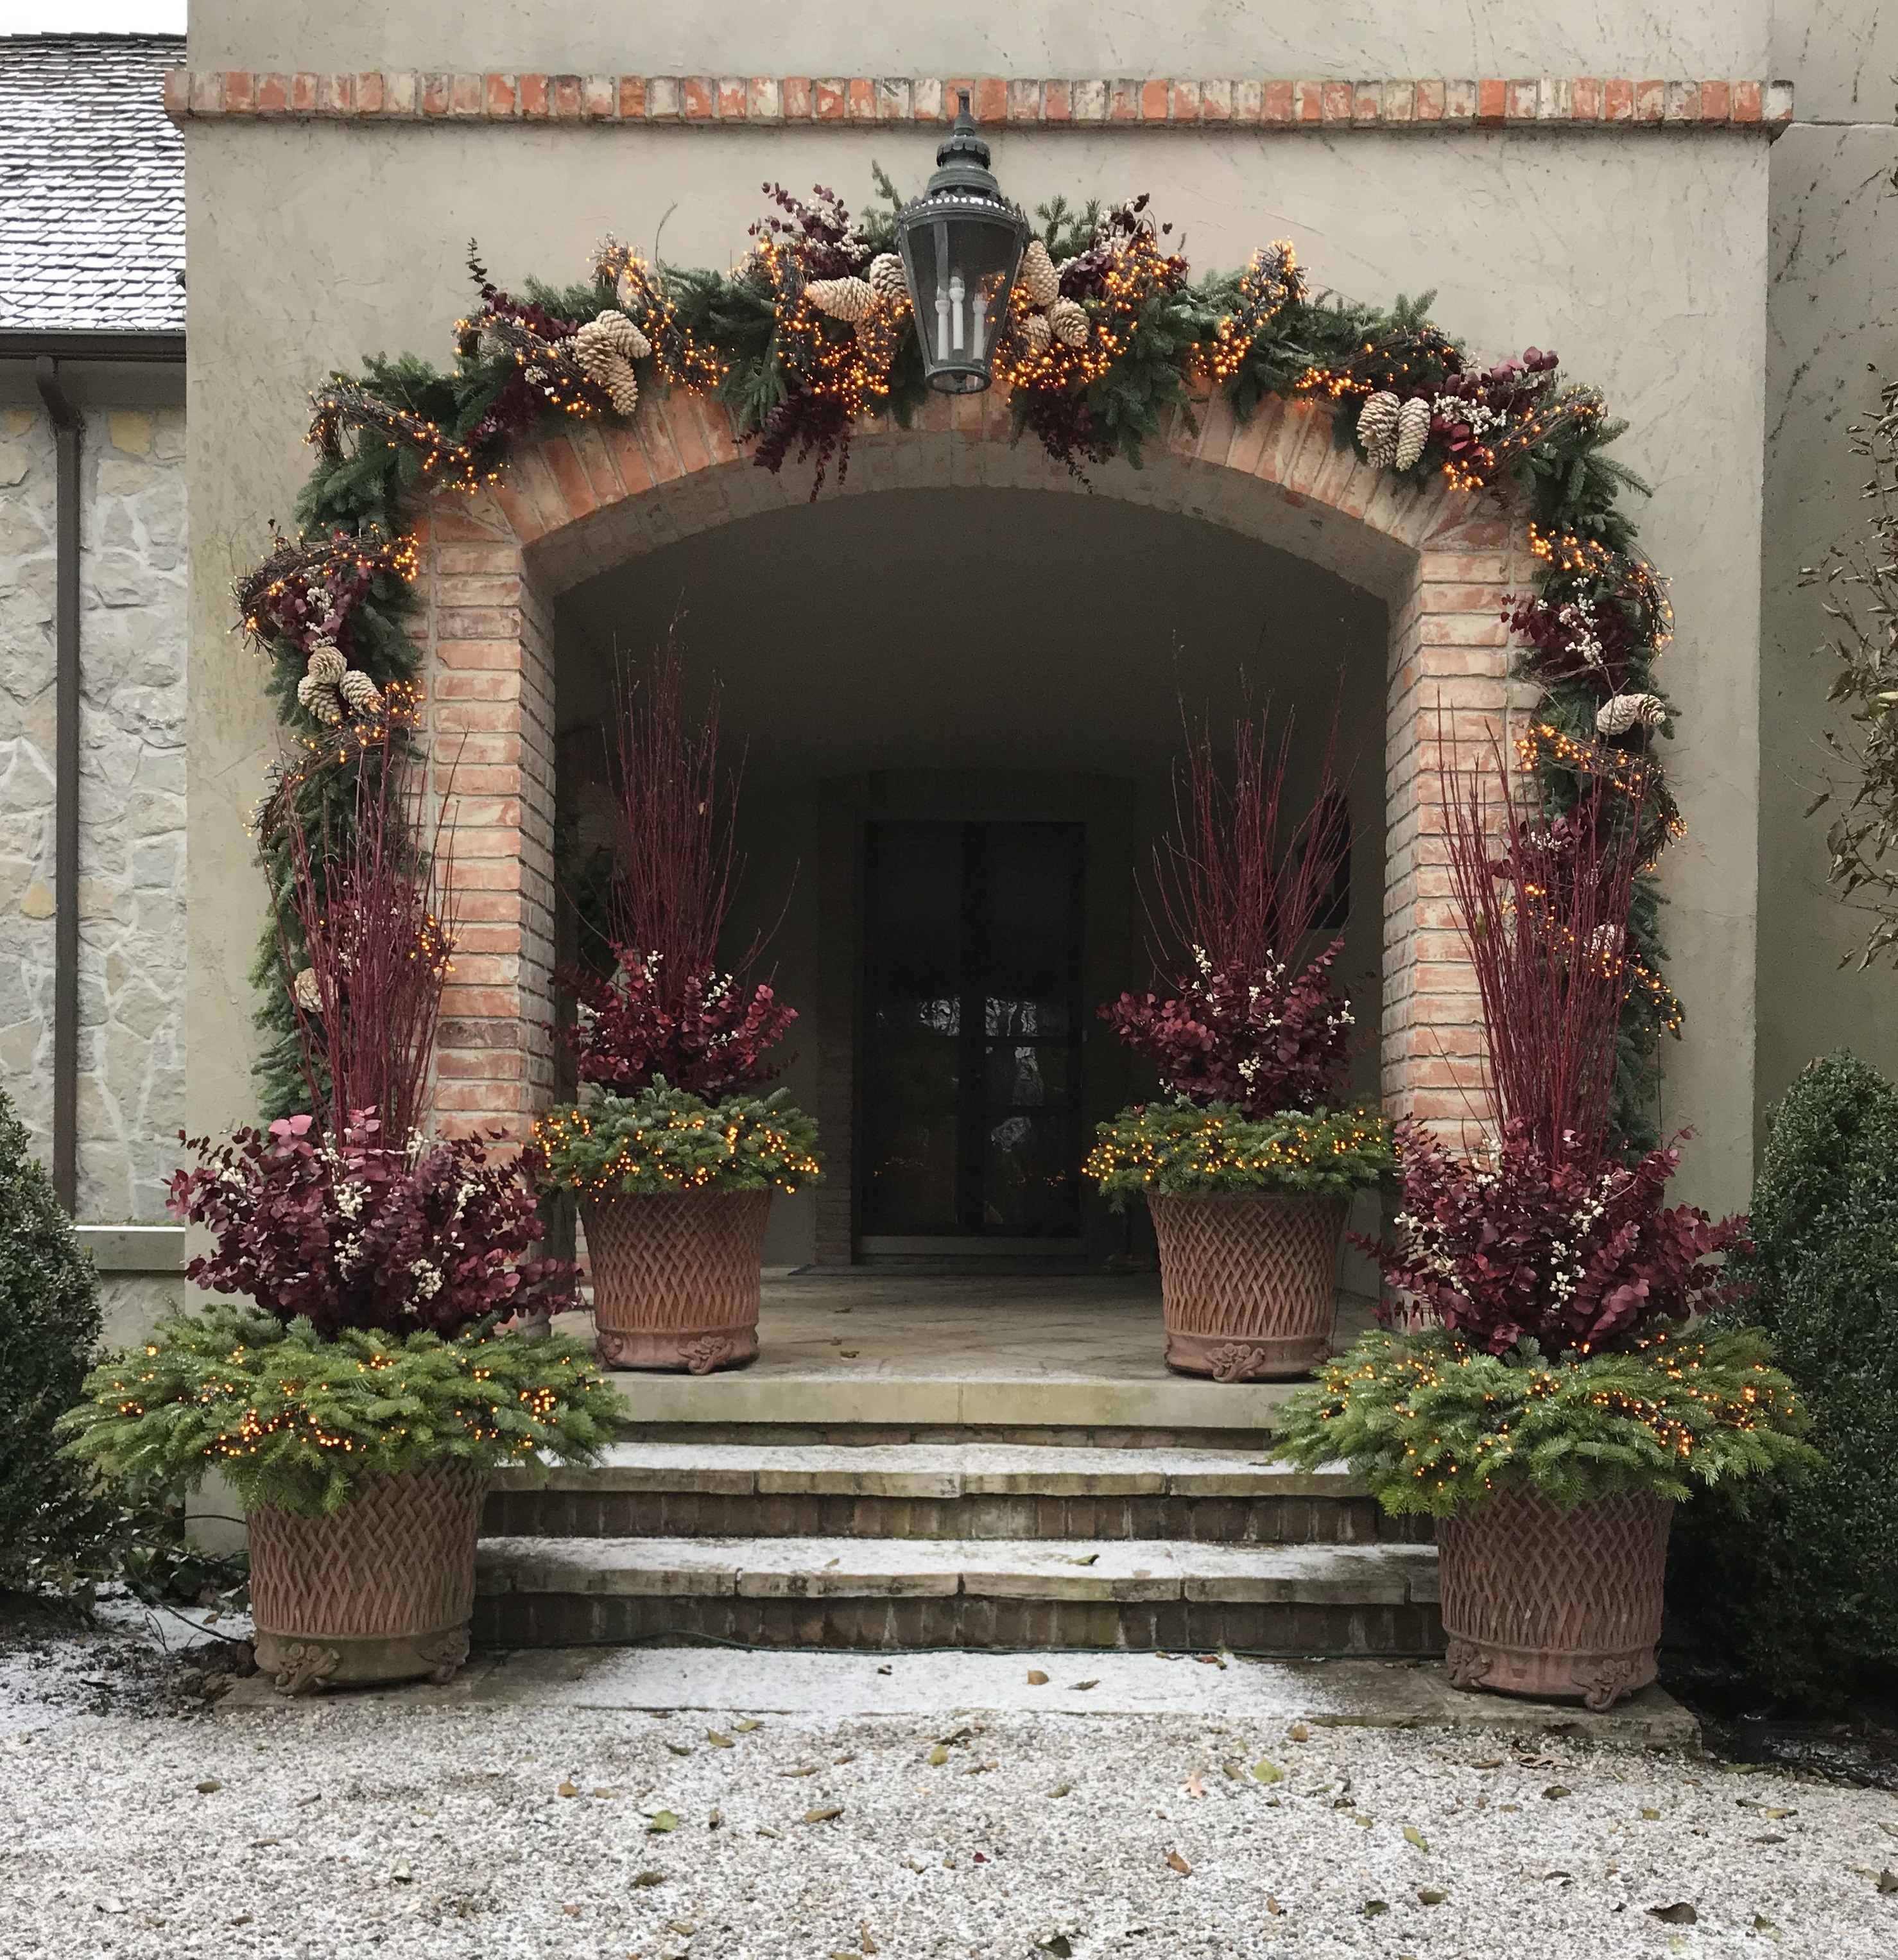
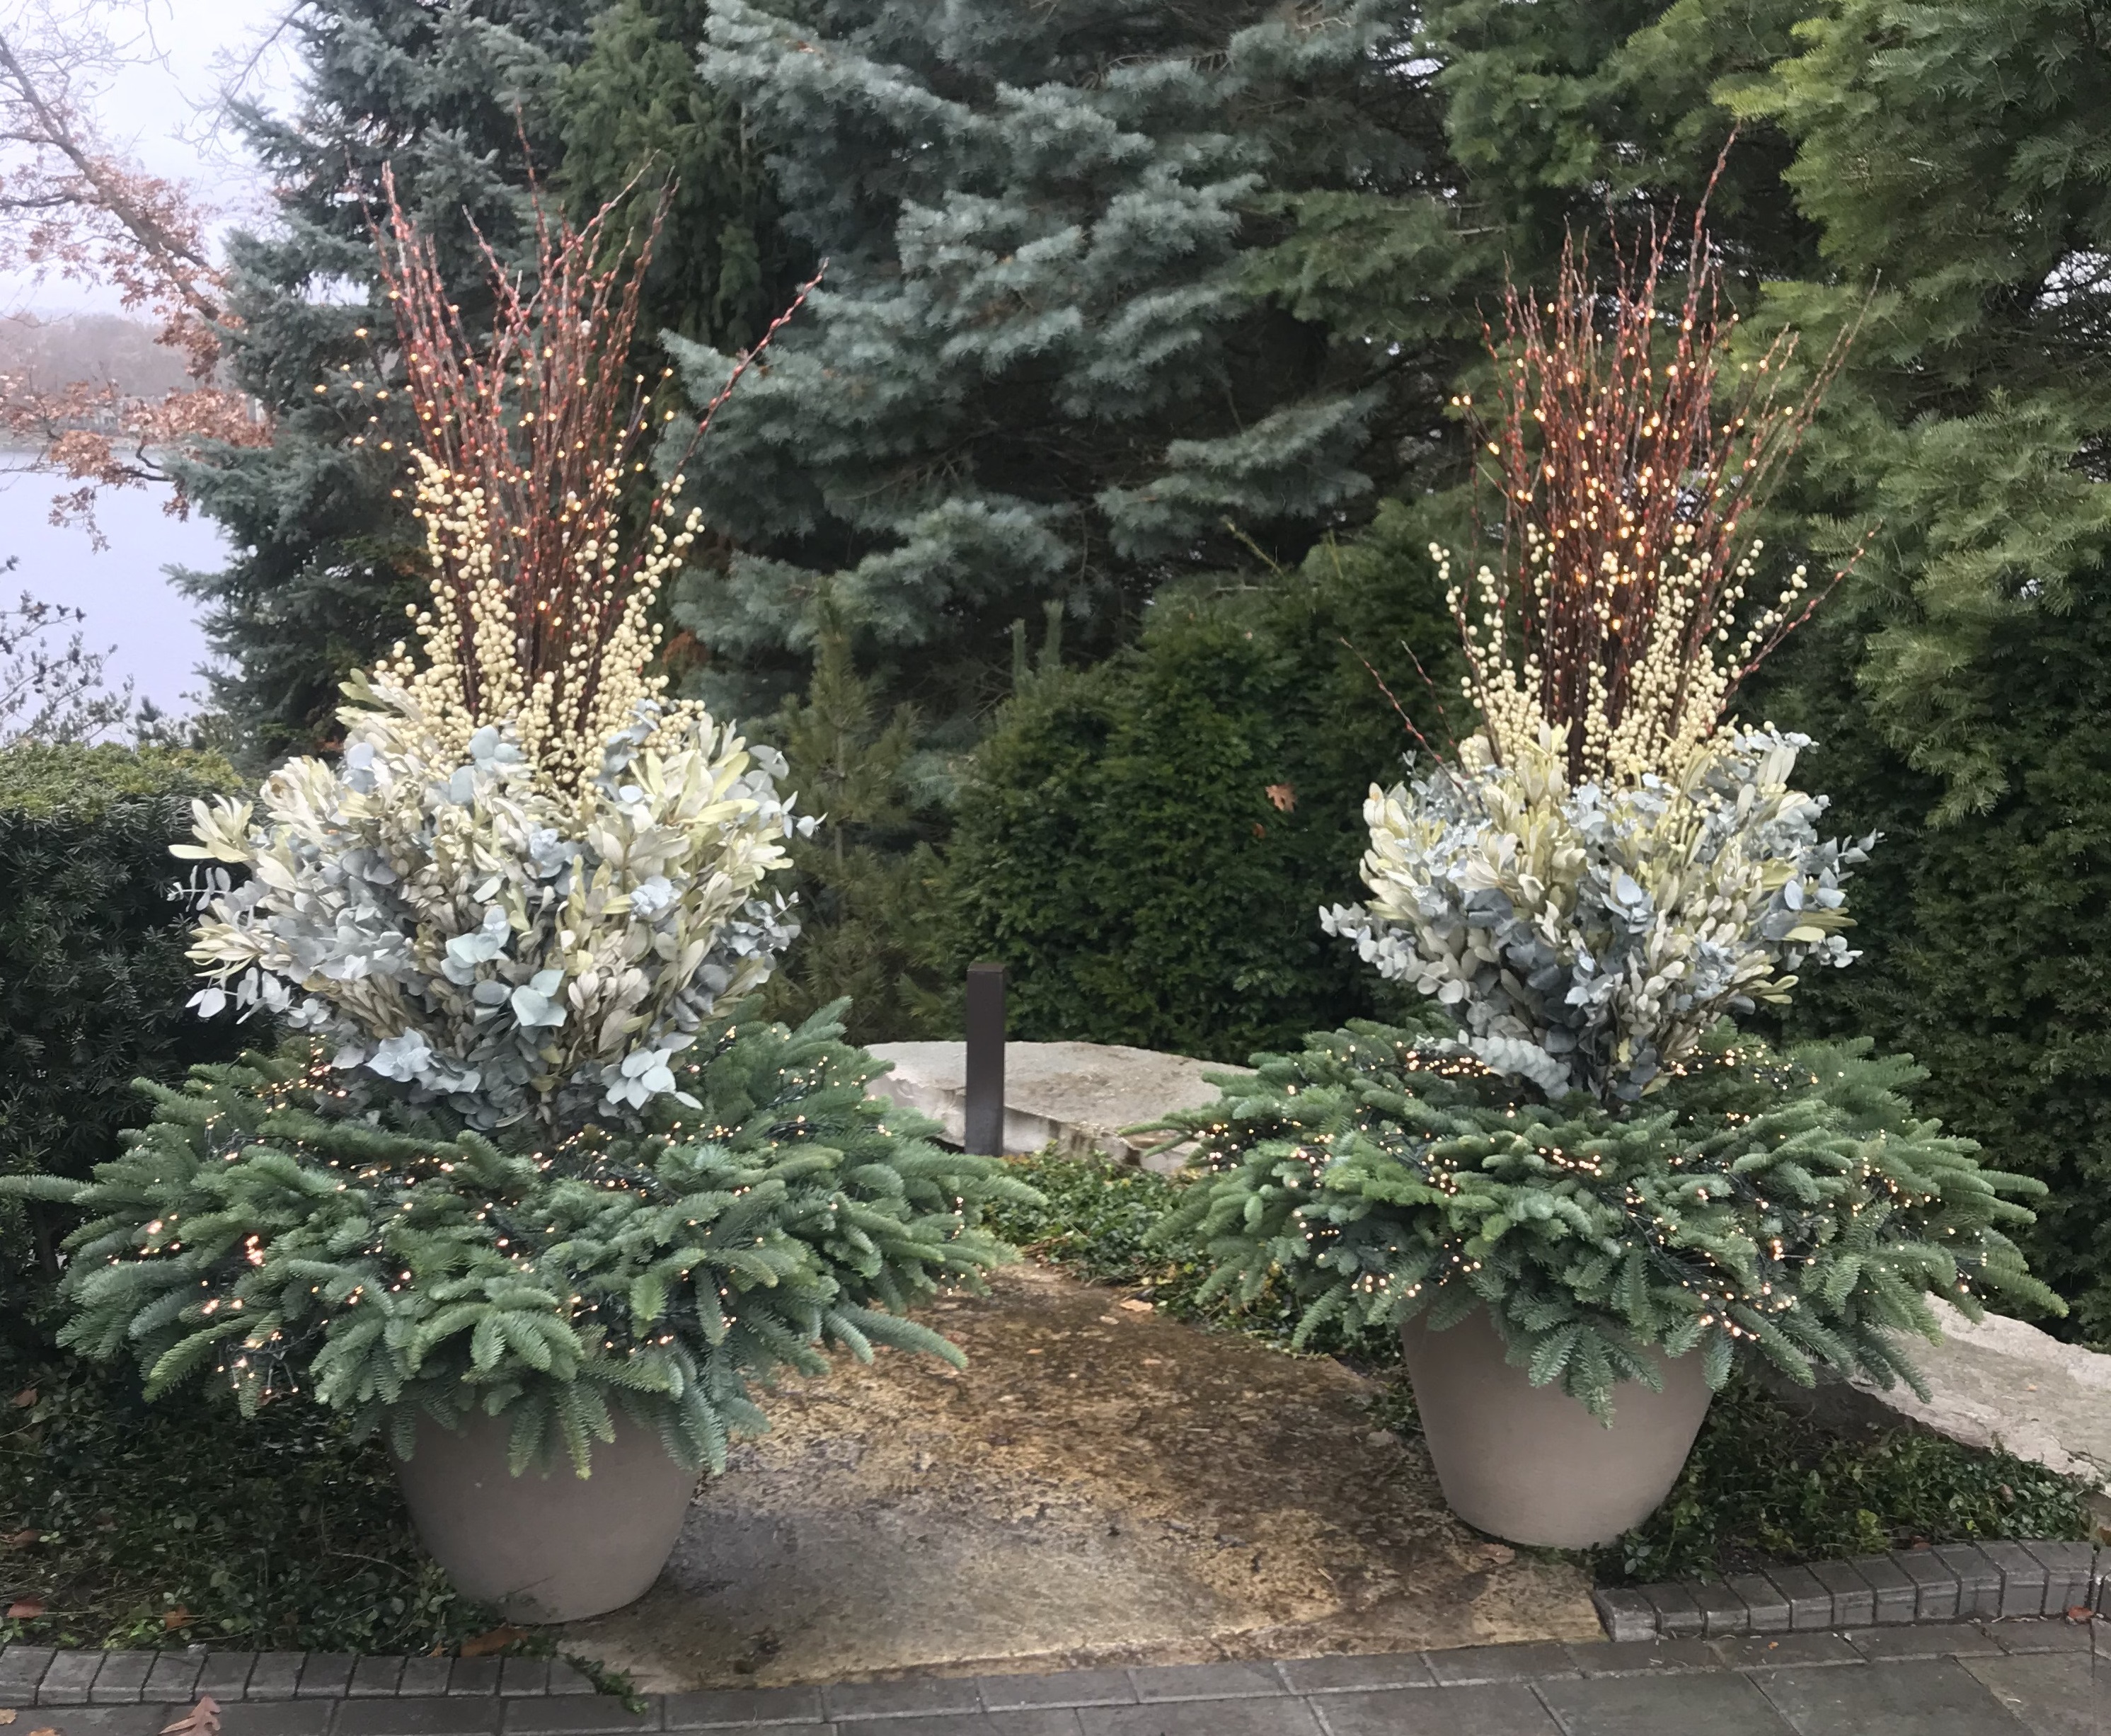
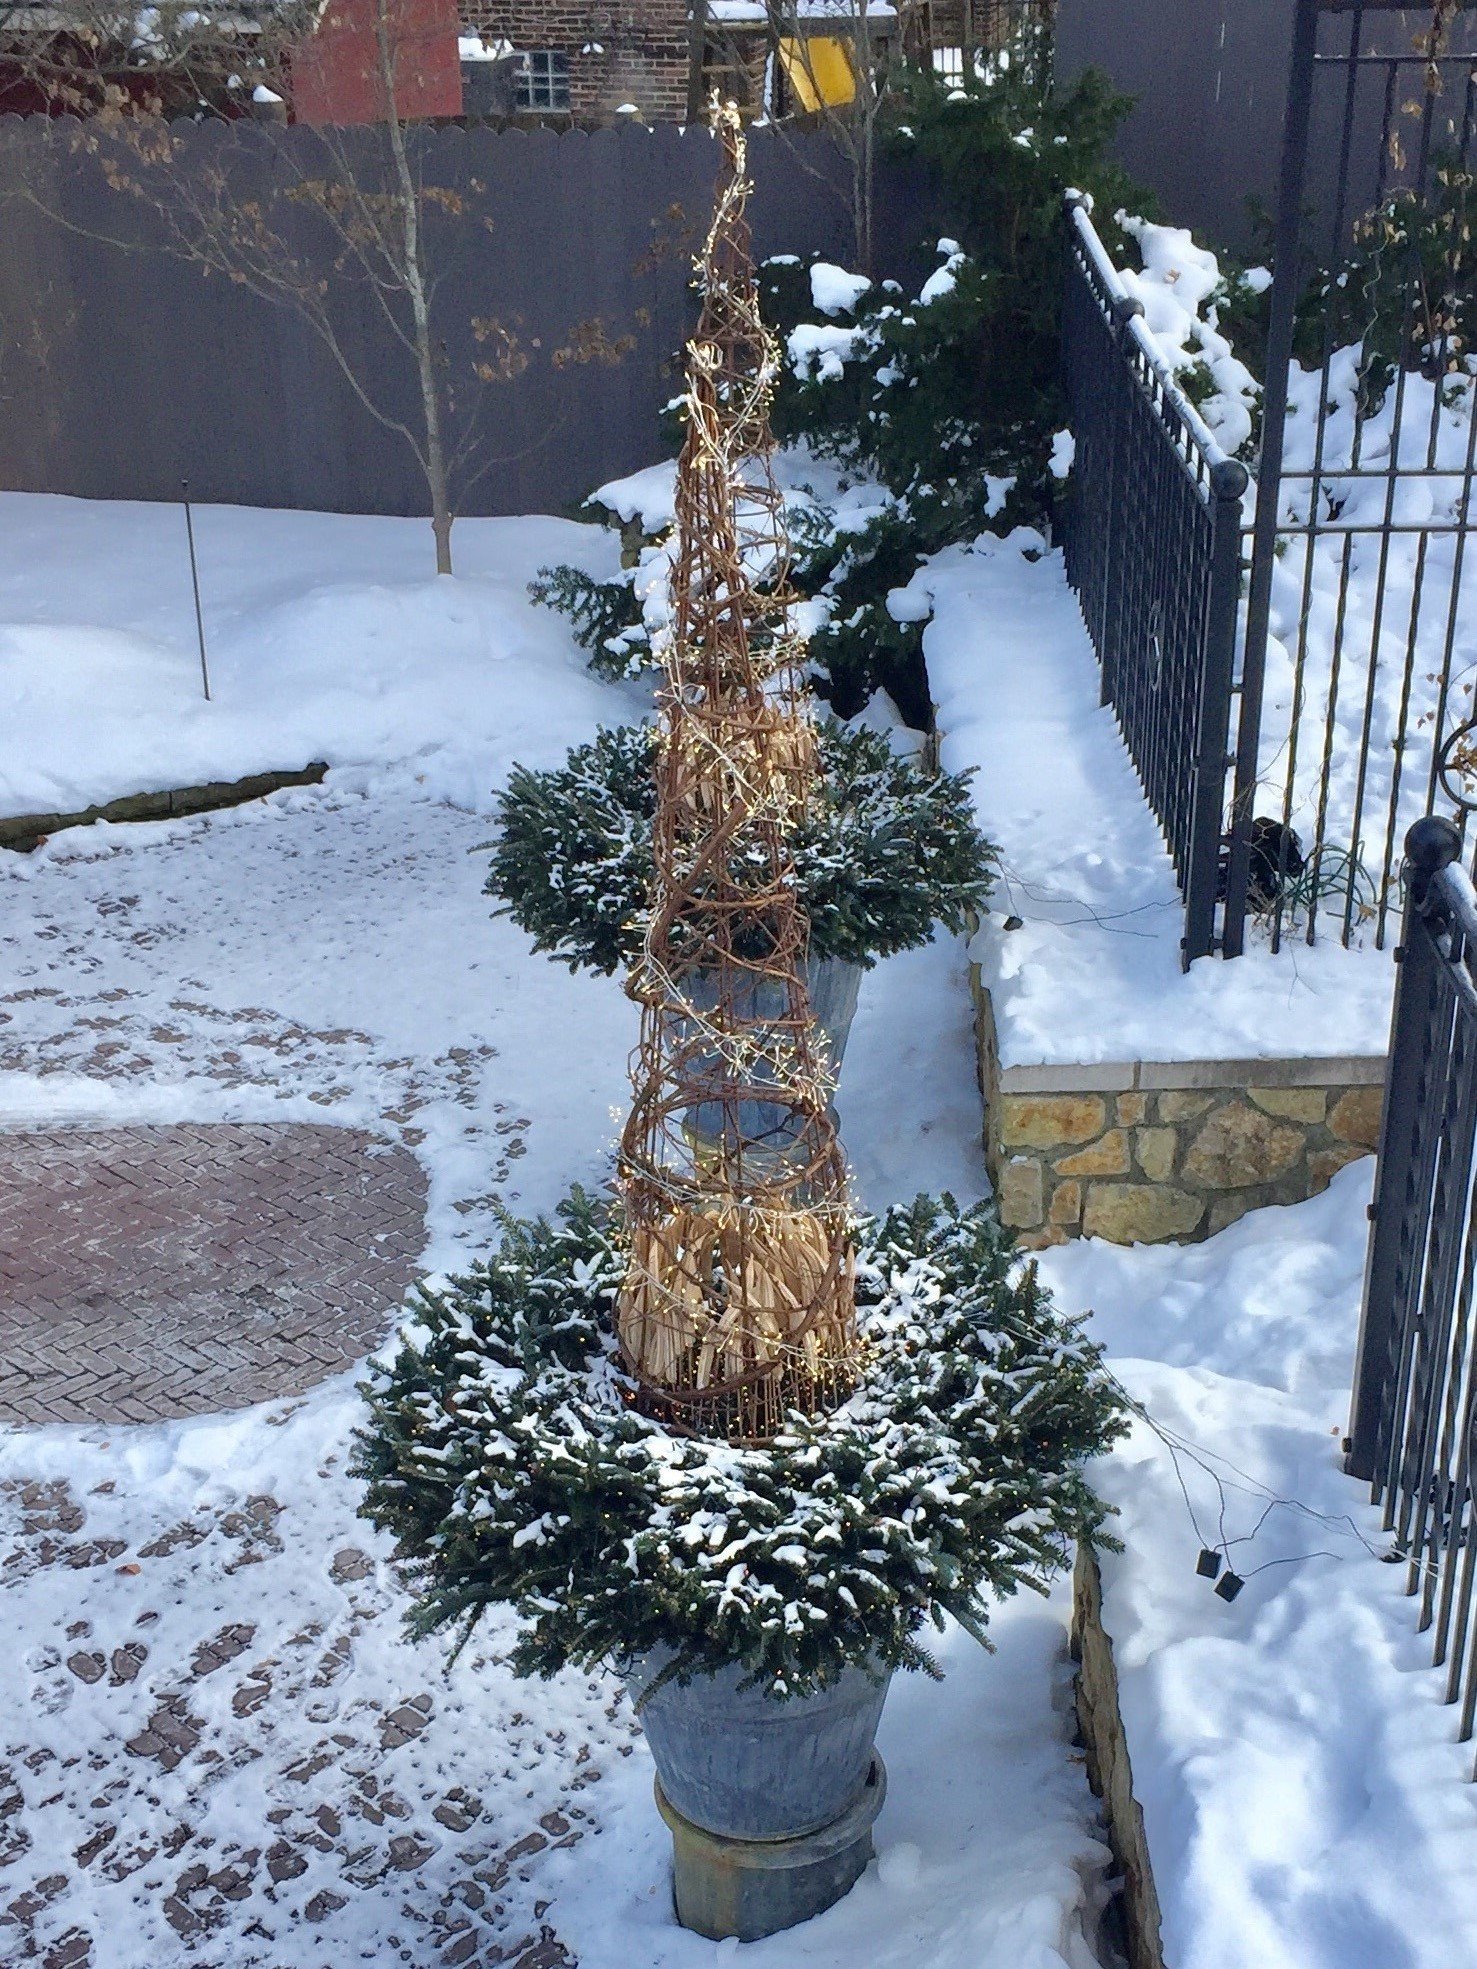
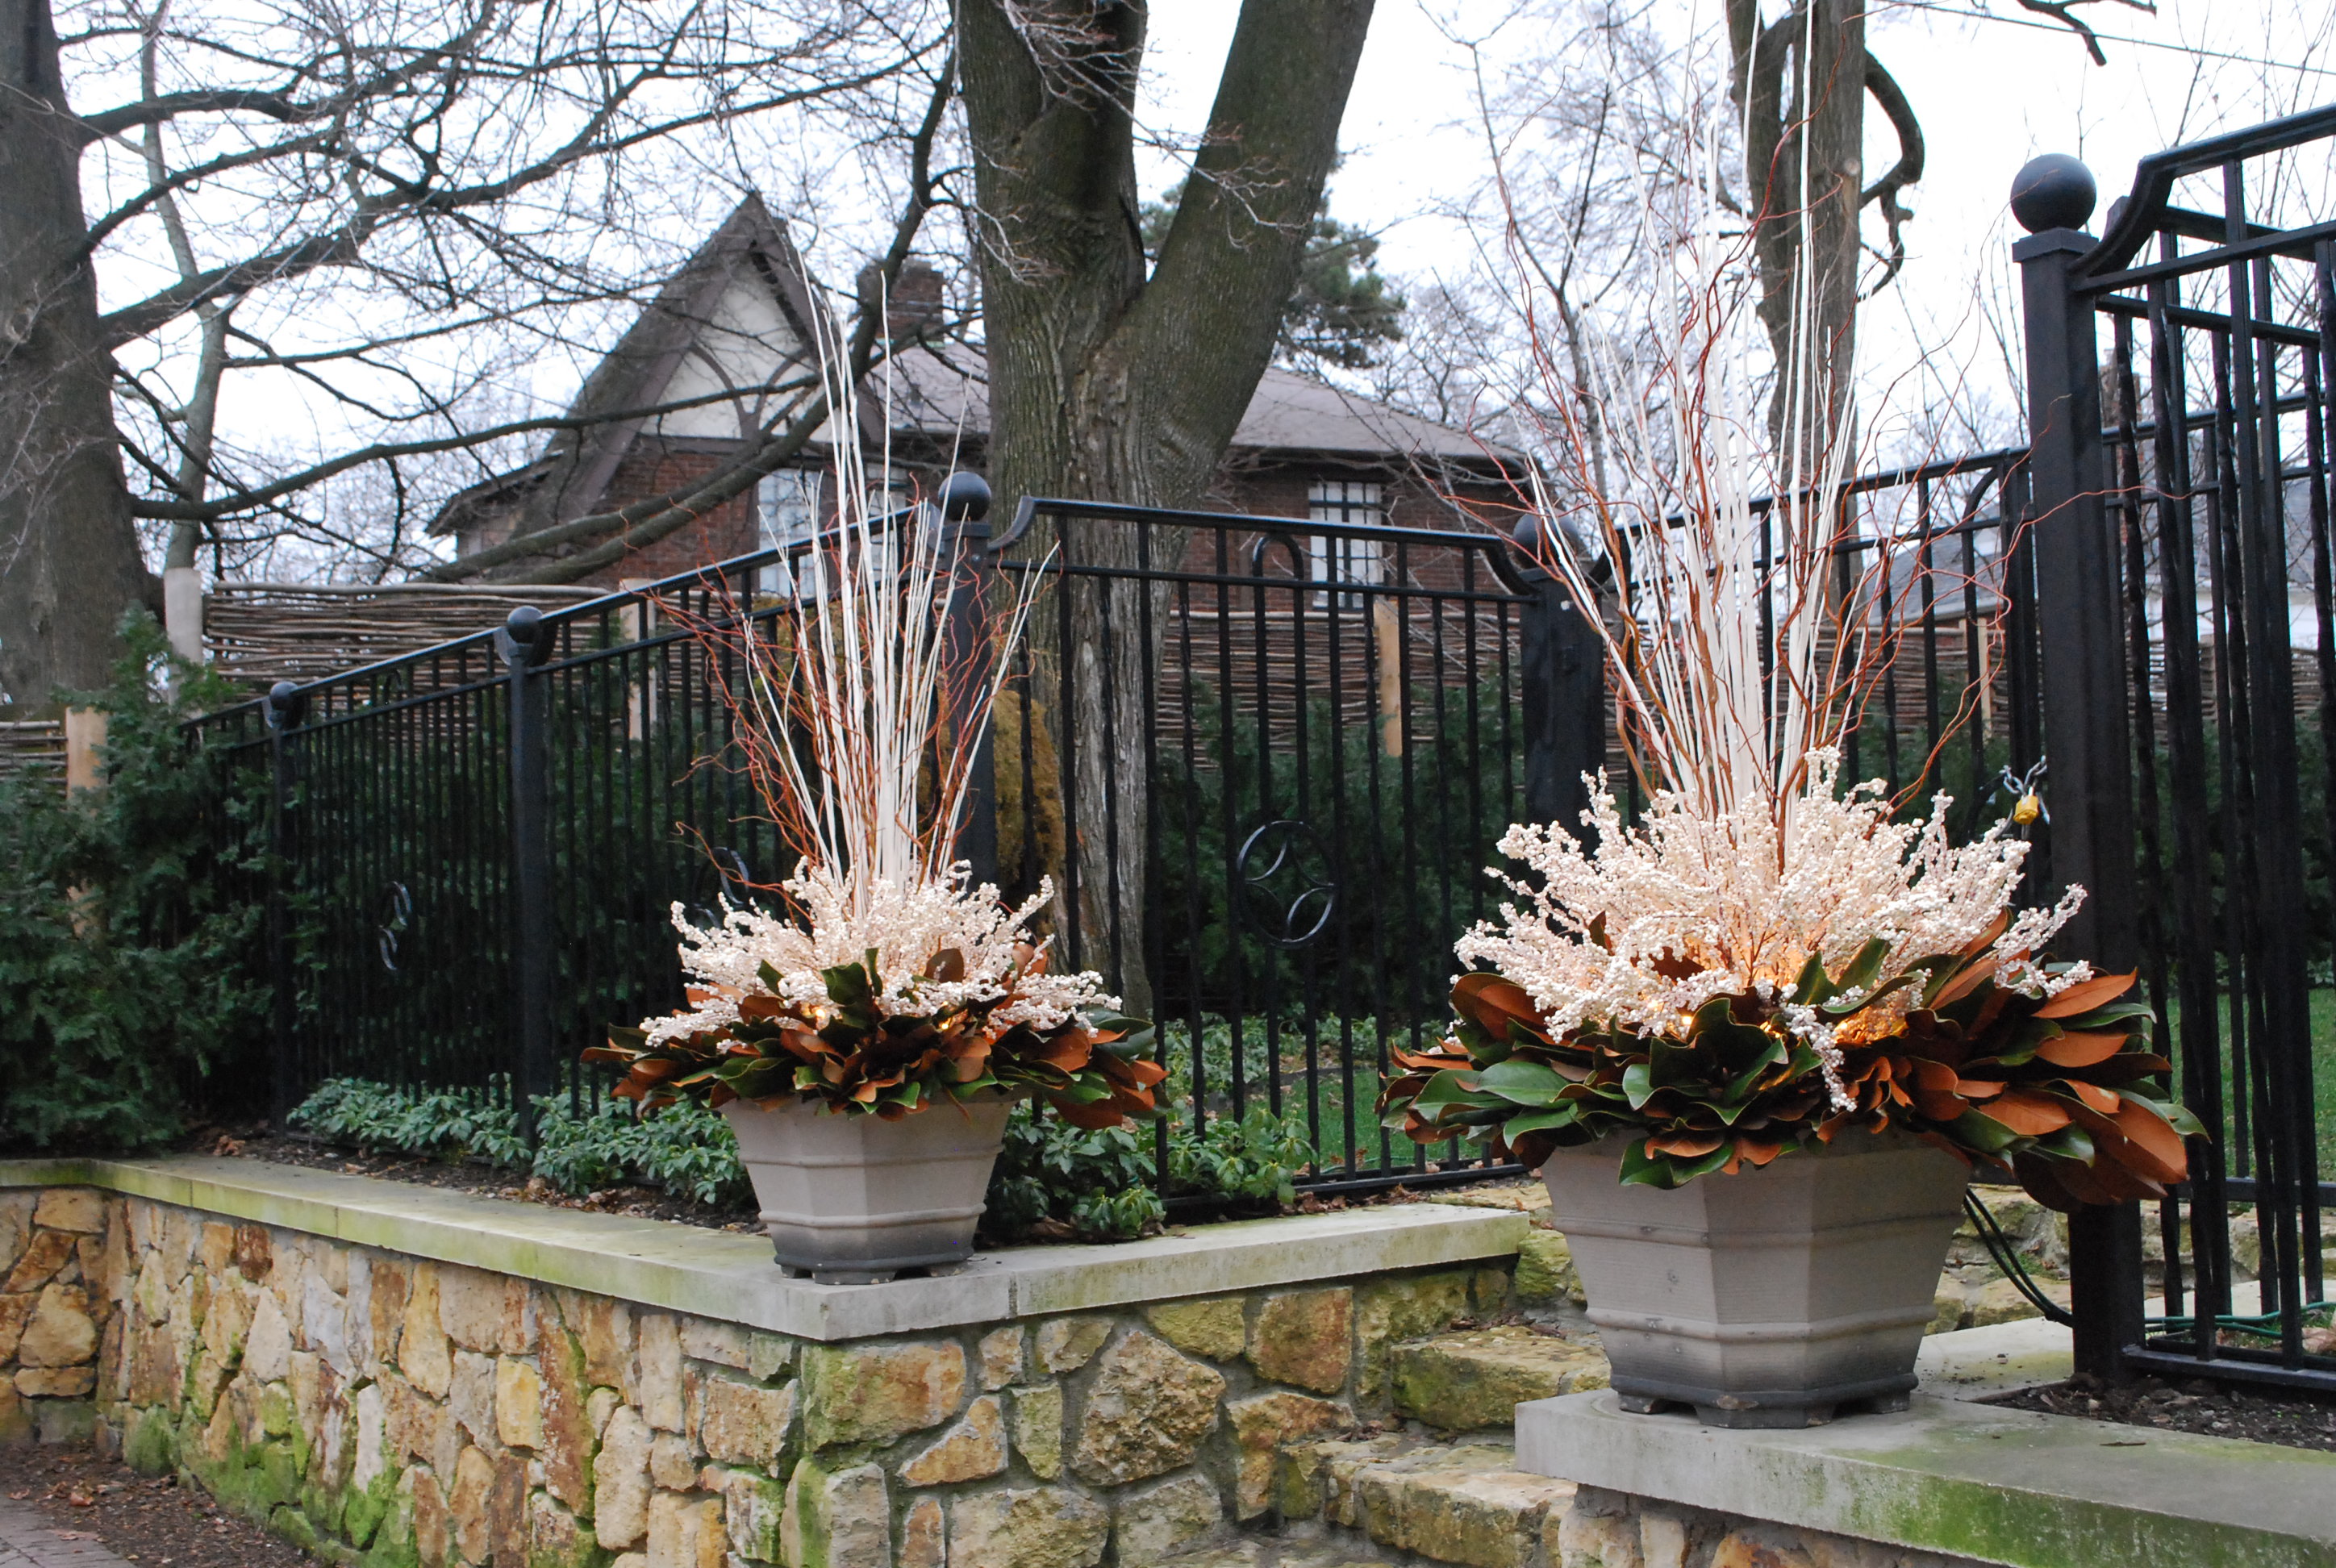
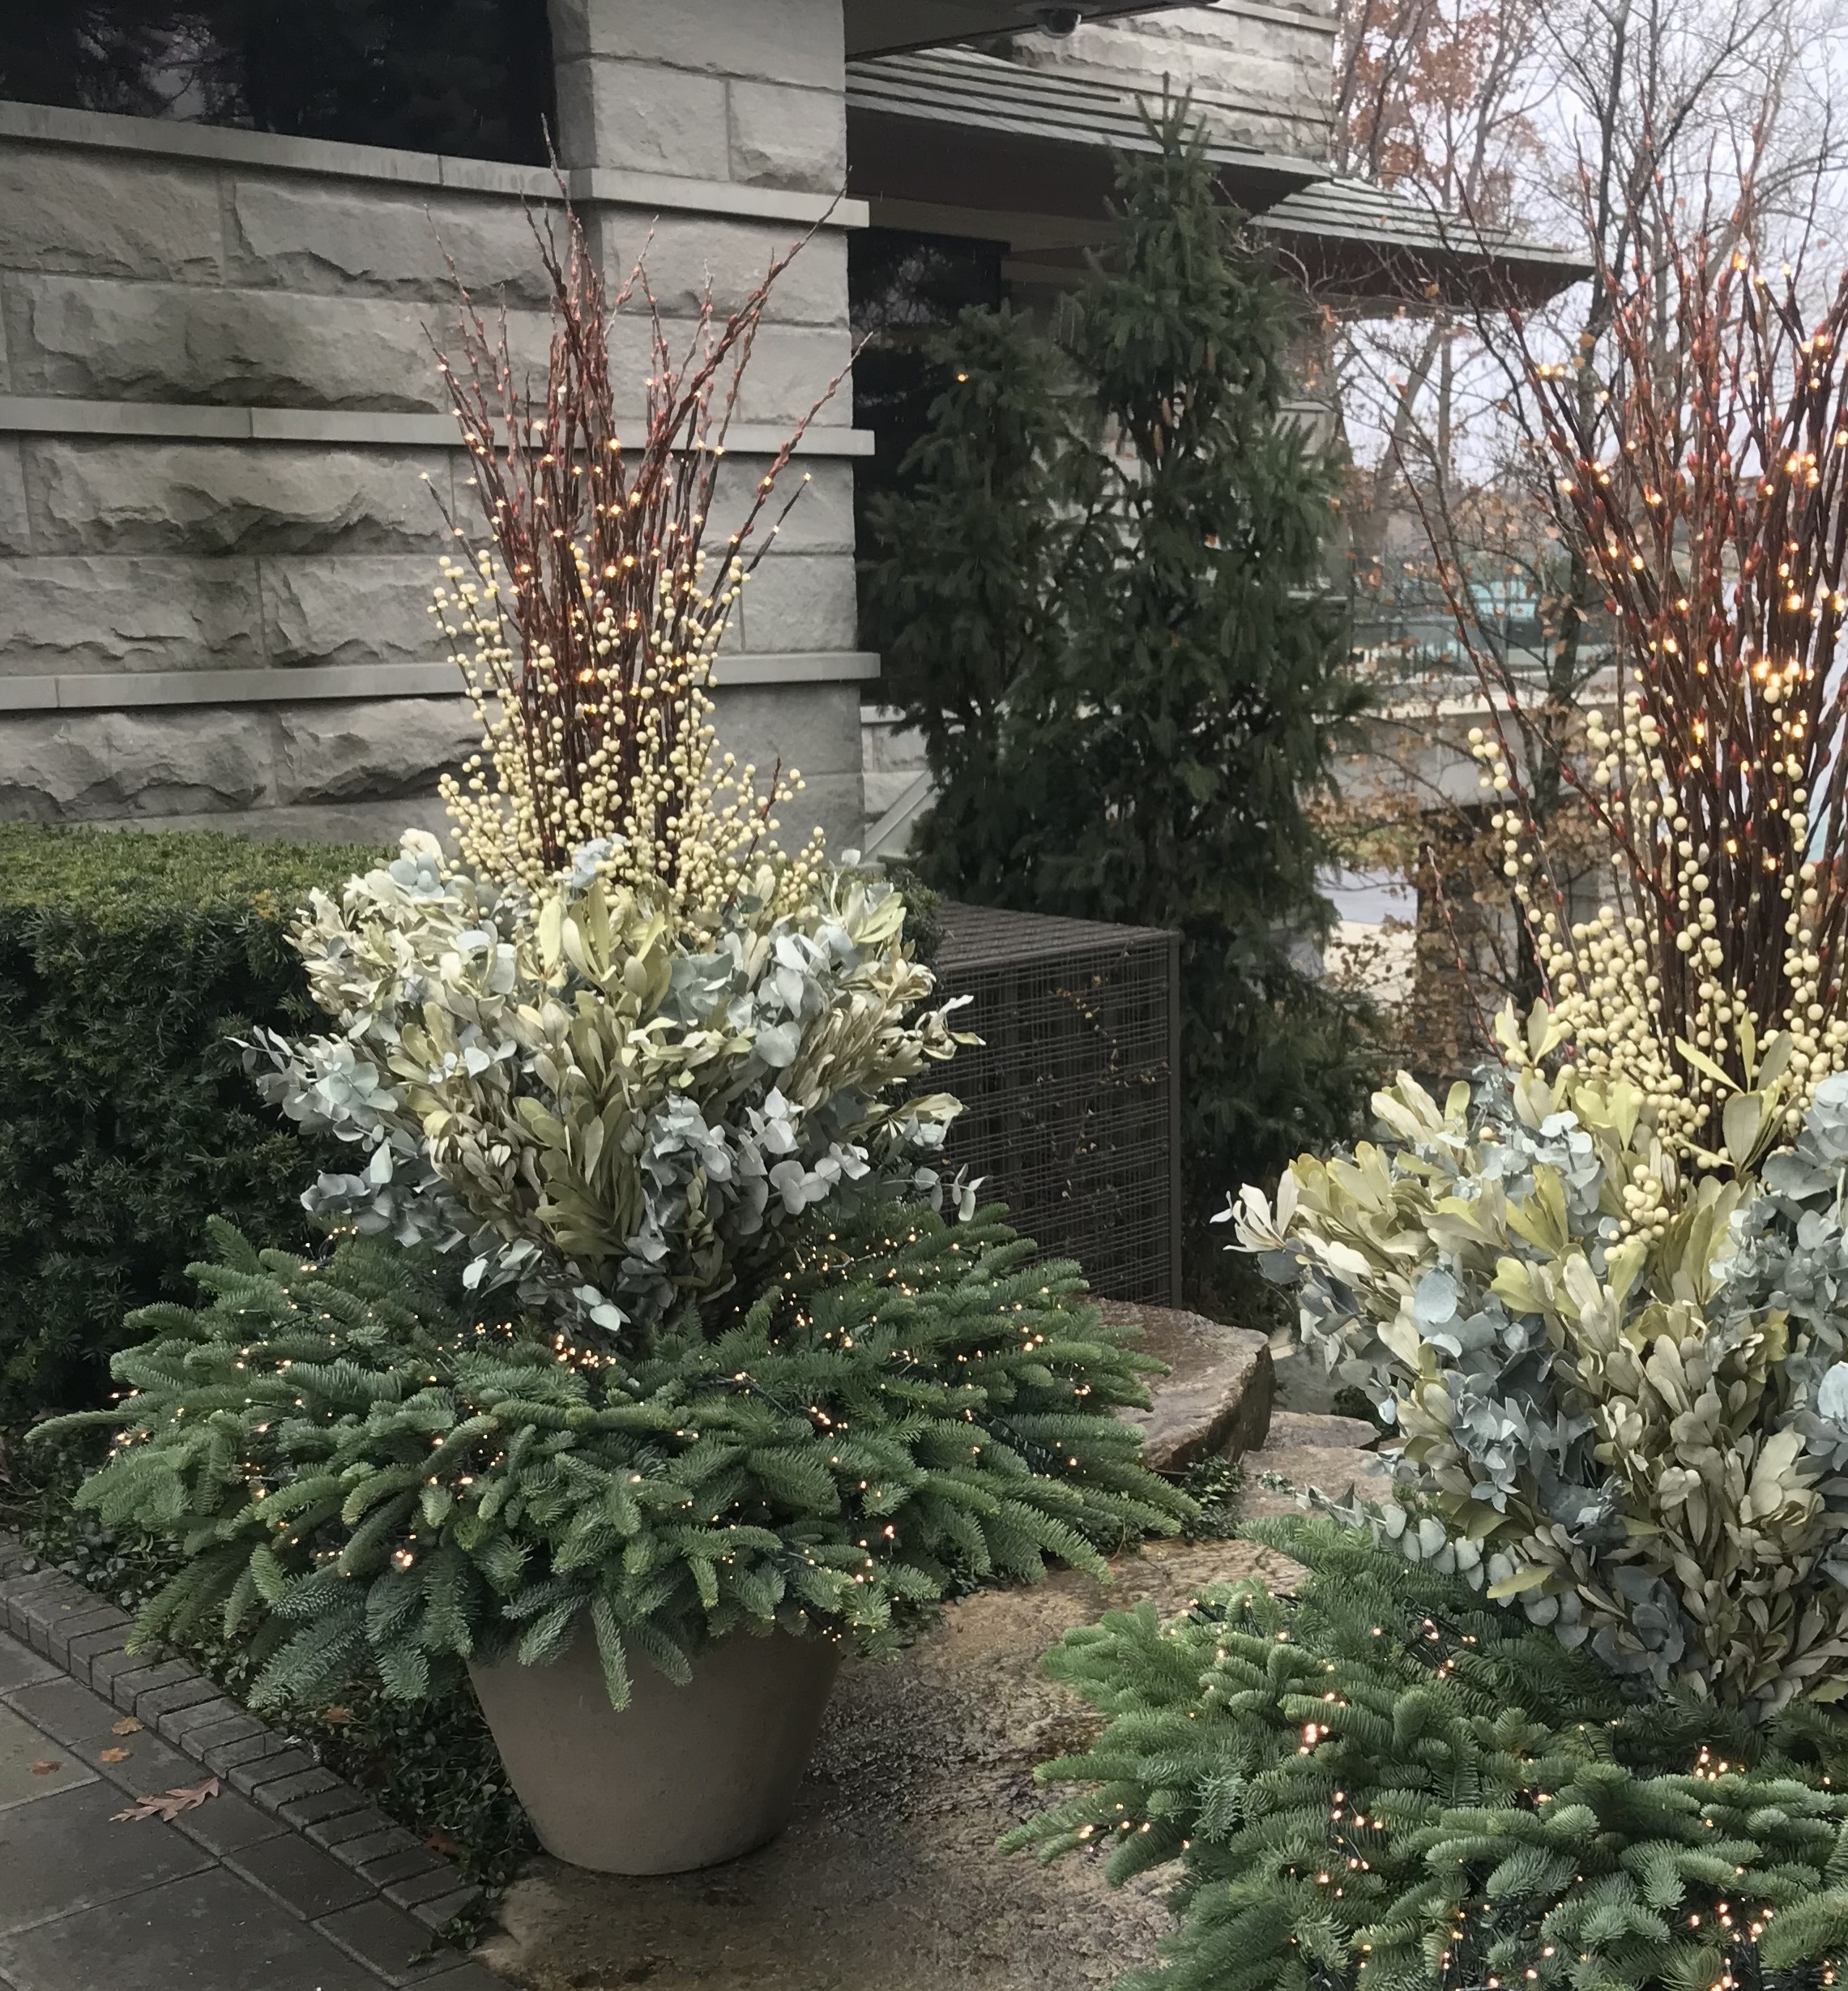
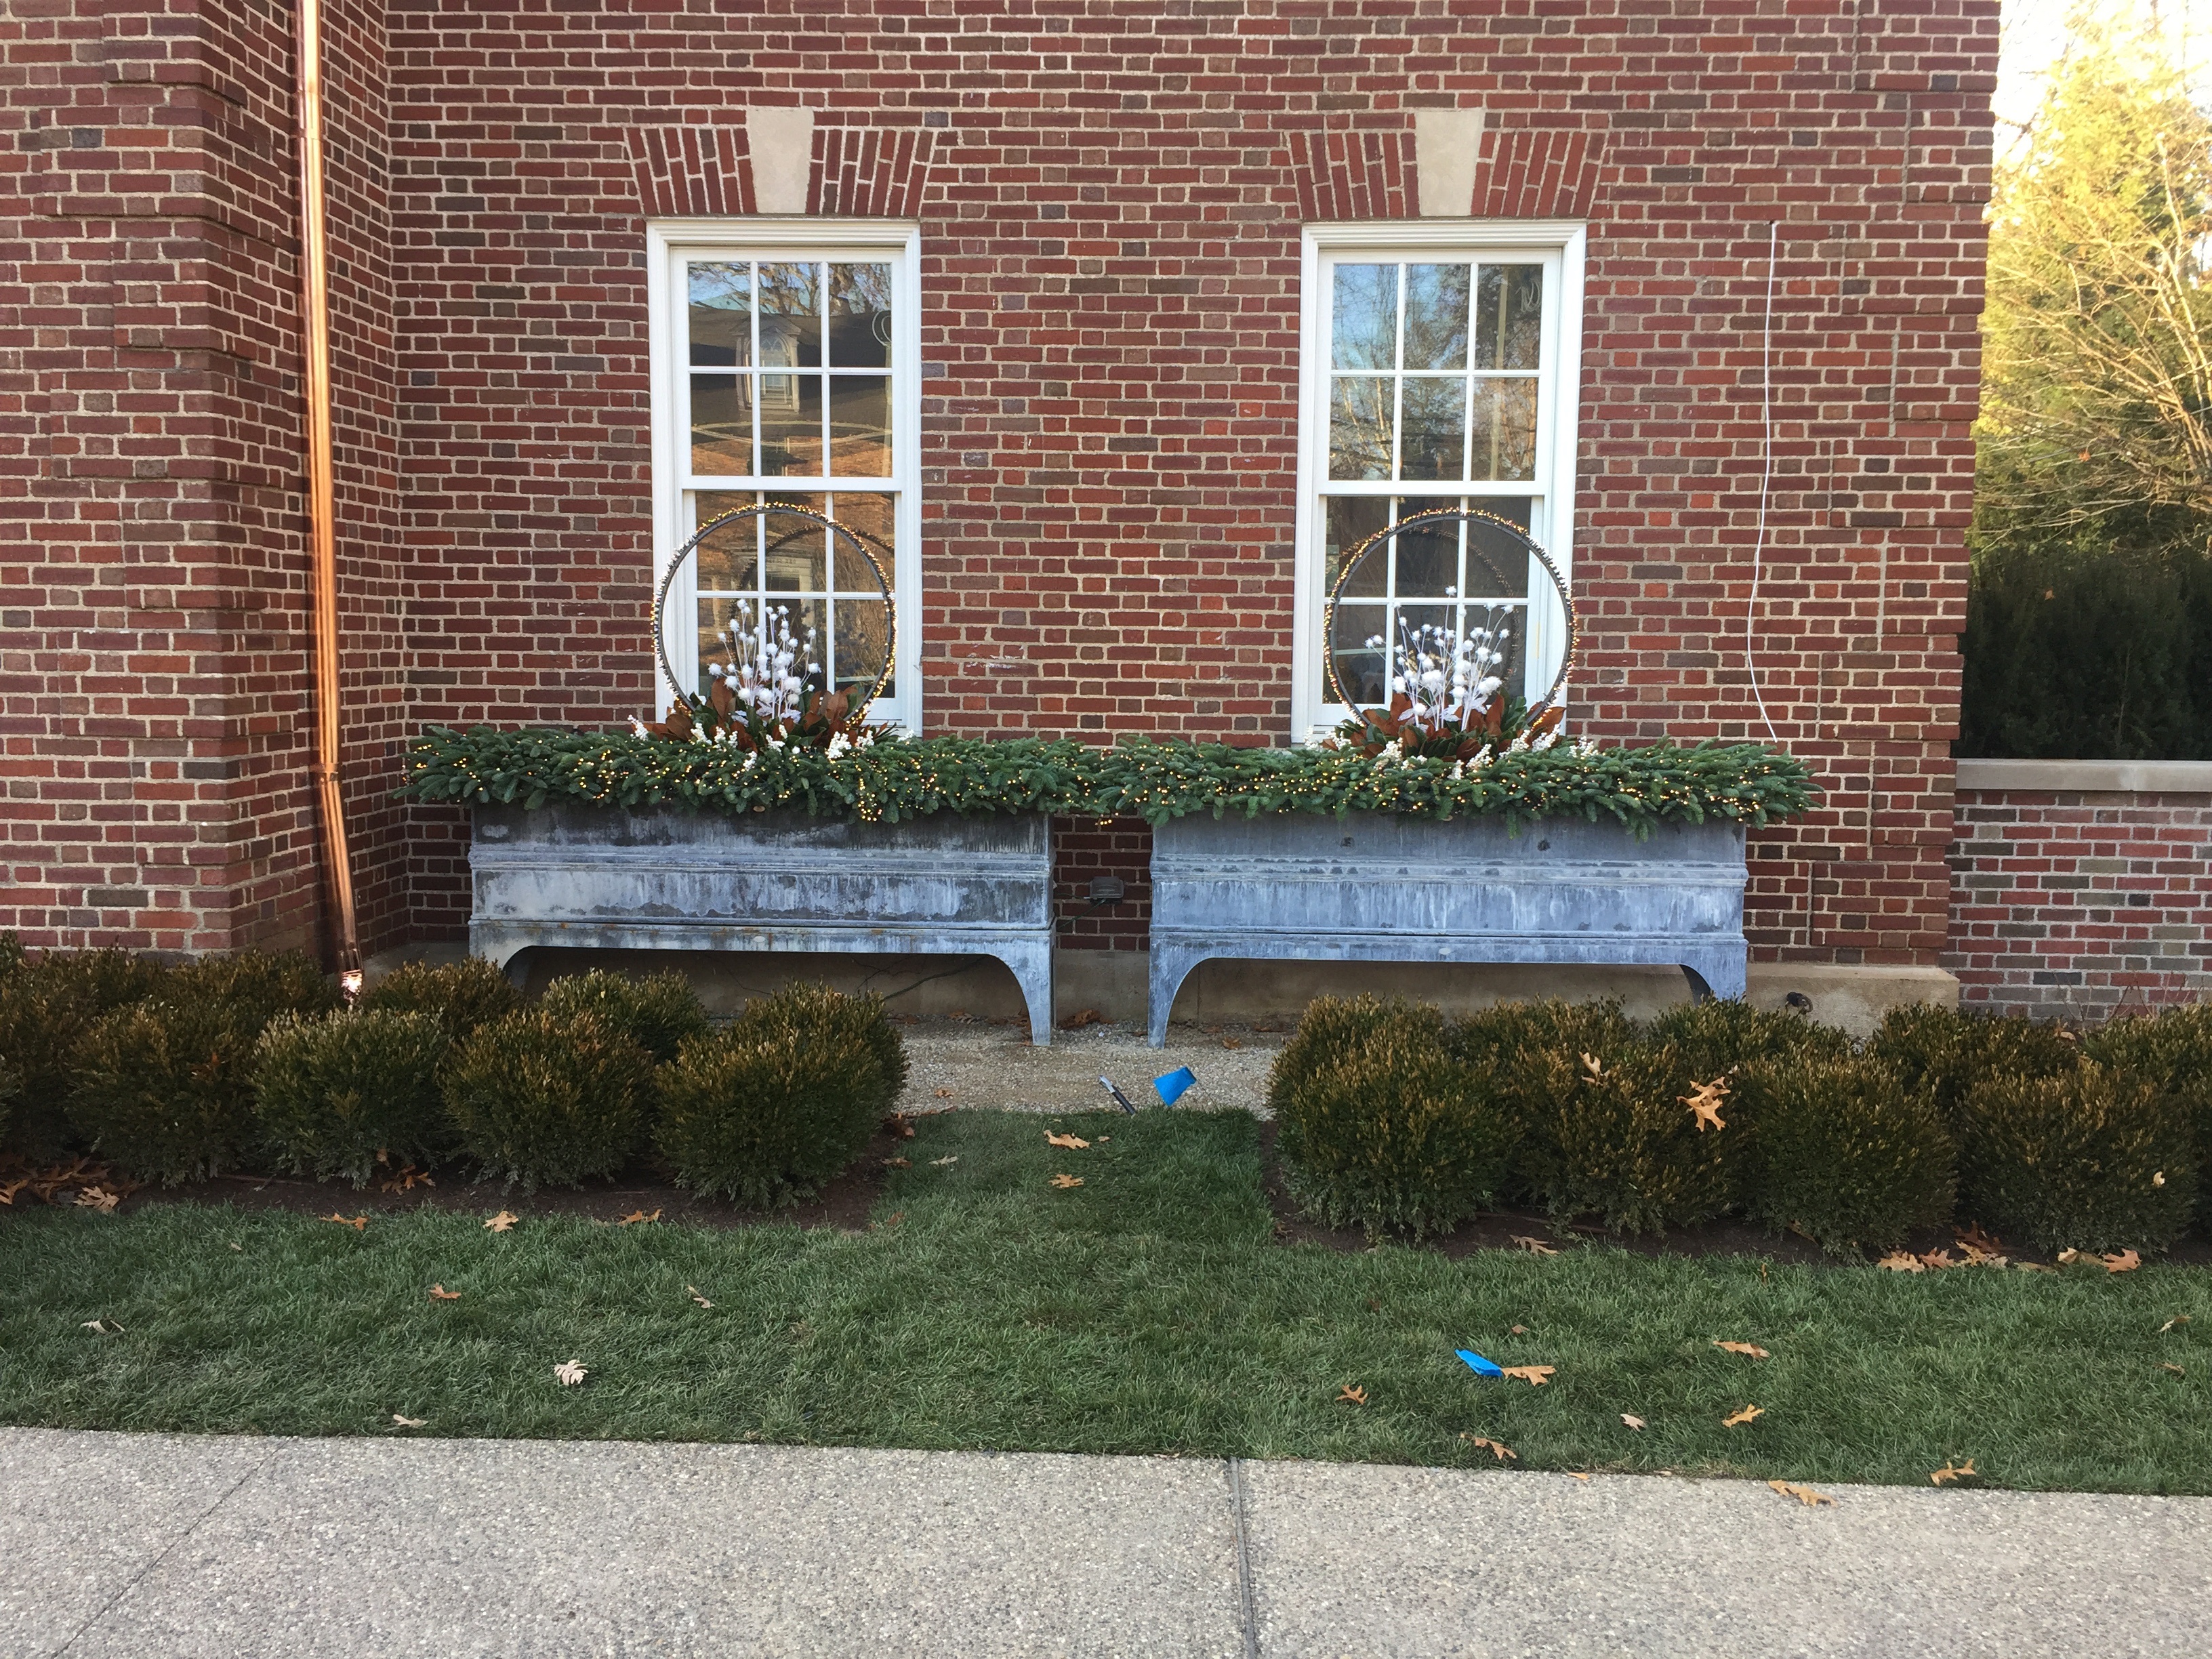 The pots look over scaled for the windows, but that will change once the new shutters are installed. The boxes and their contents have a very formal and dressy look, which is in keeping with the architecture.
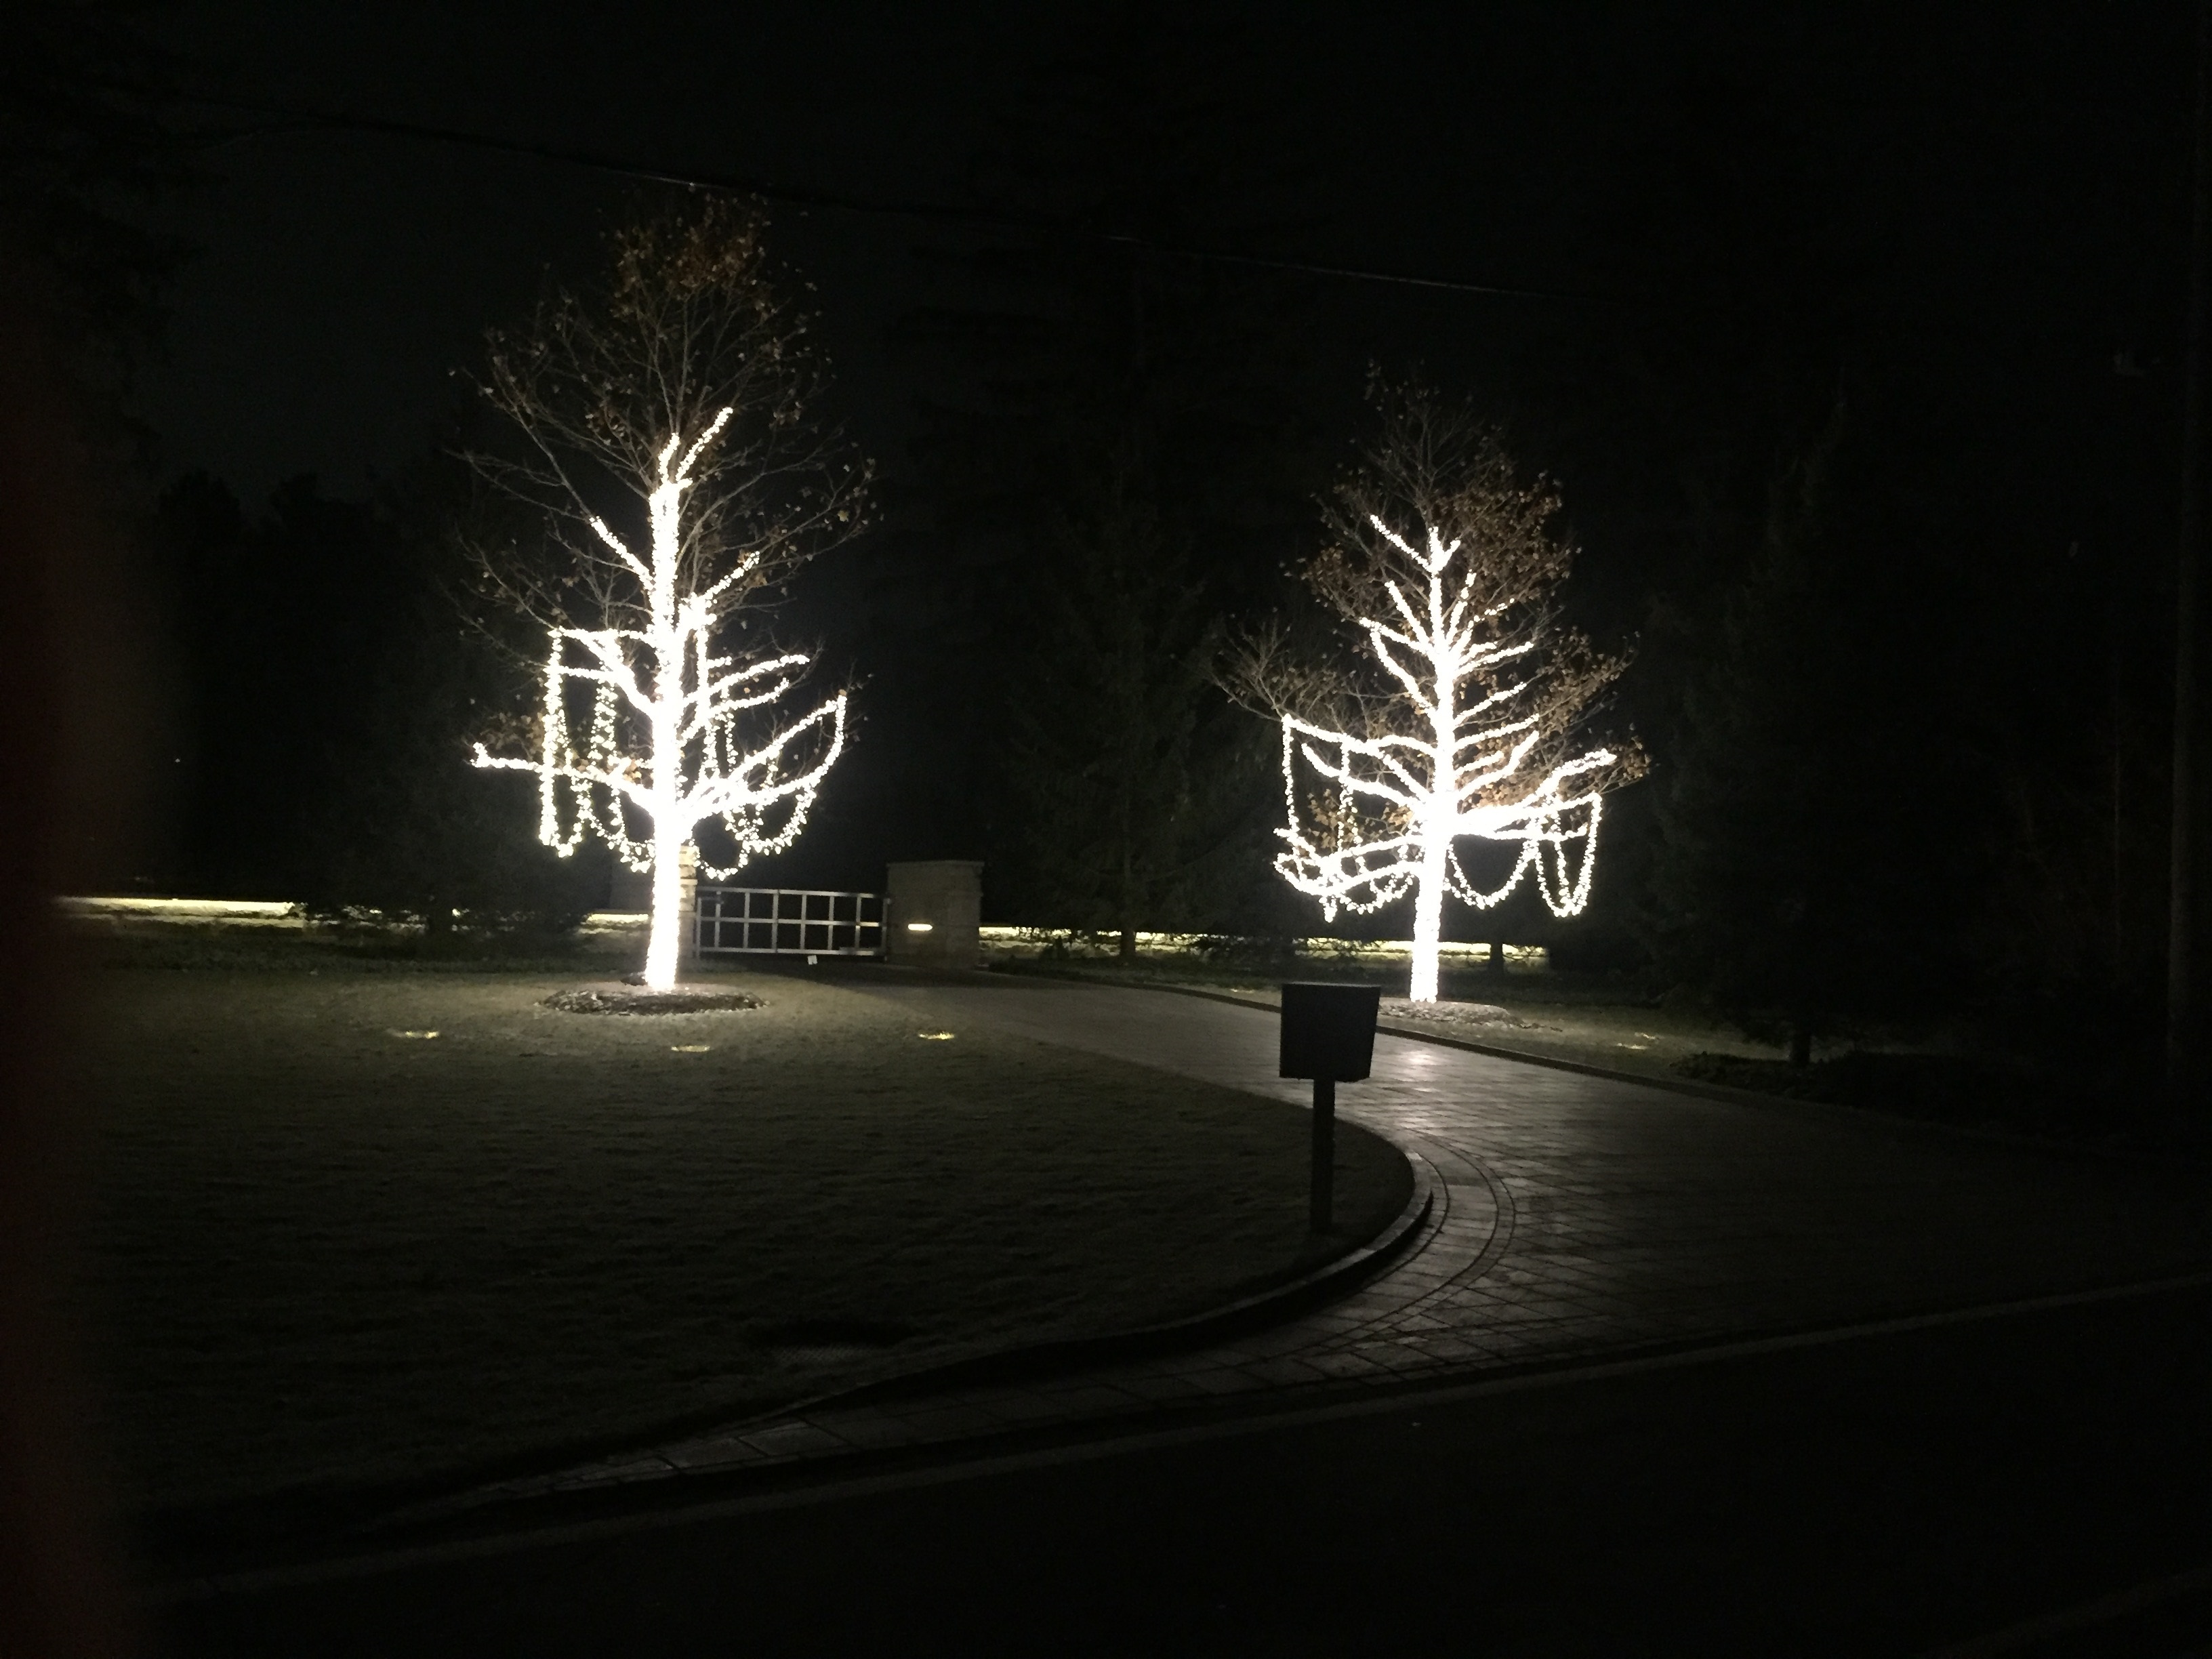
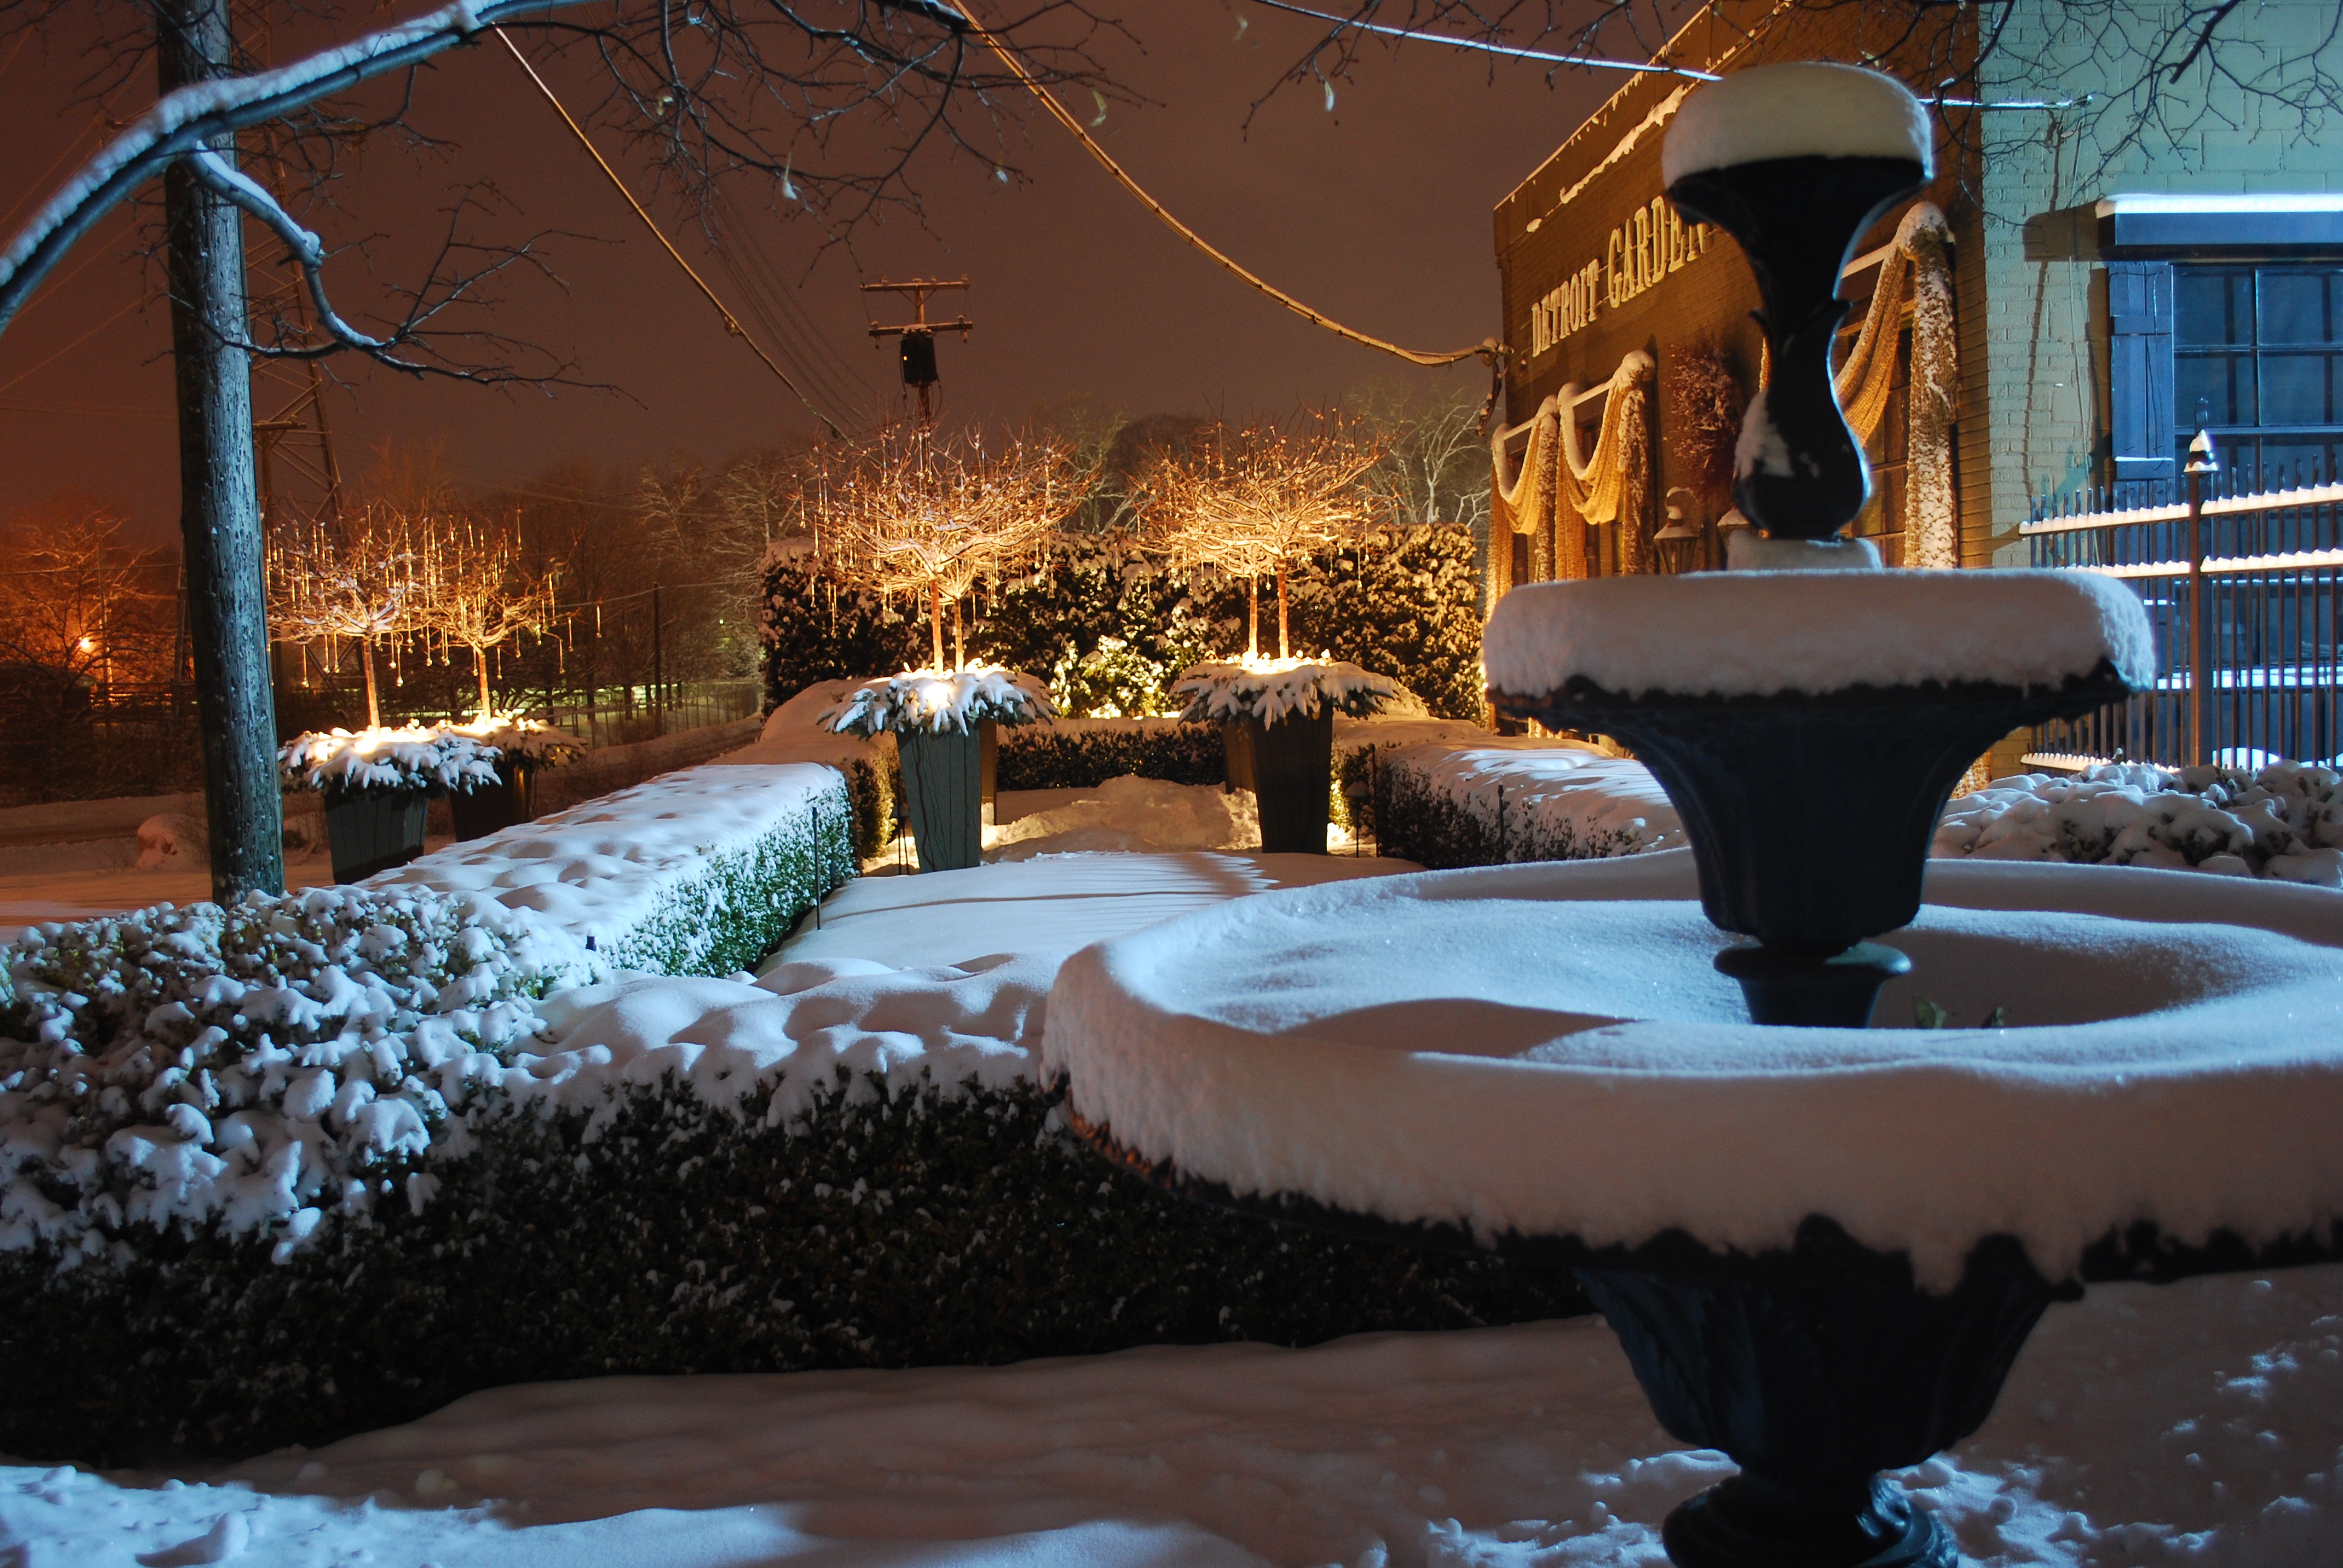
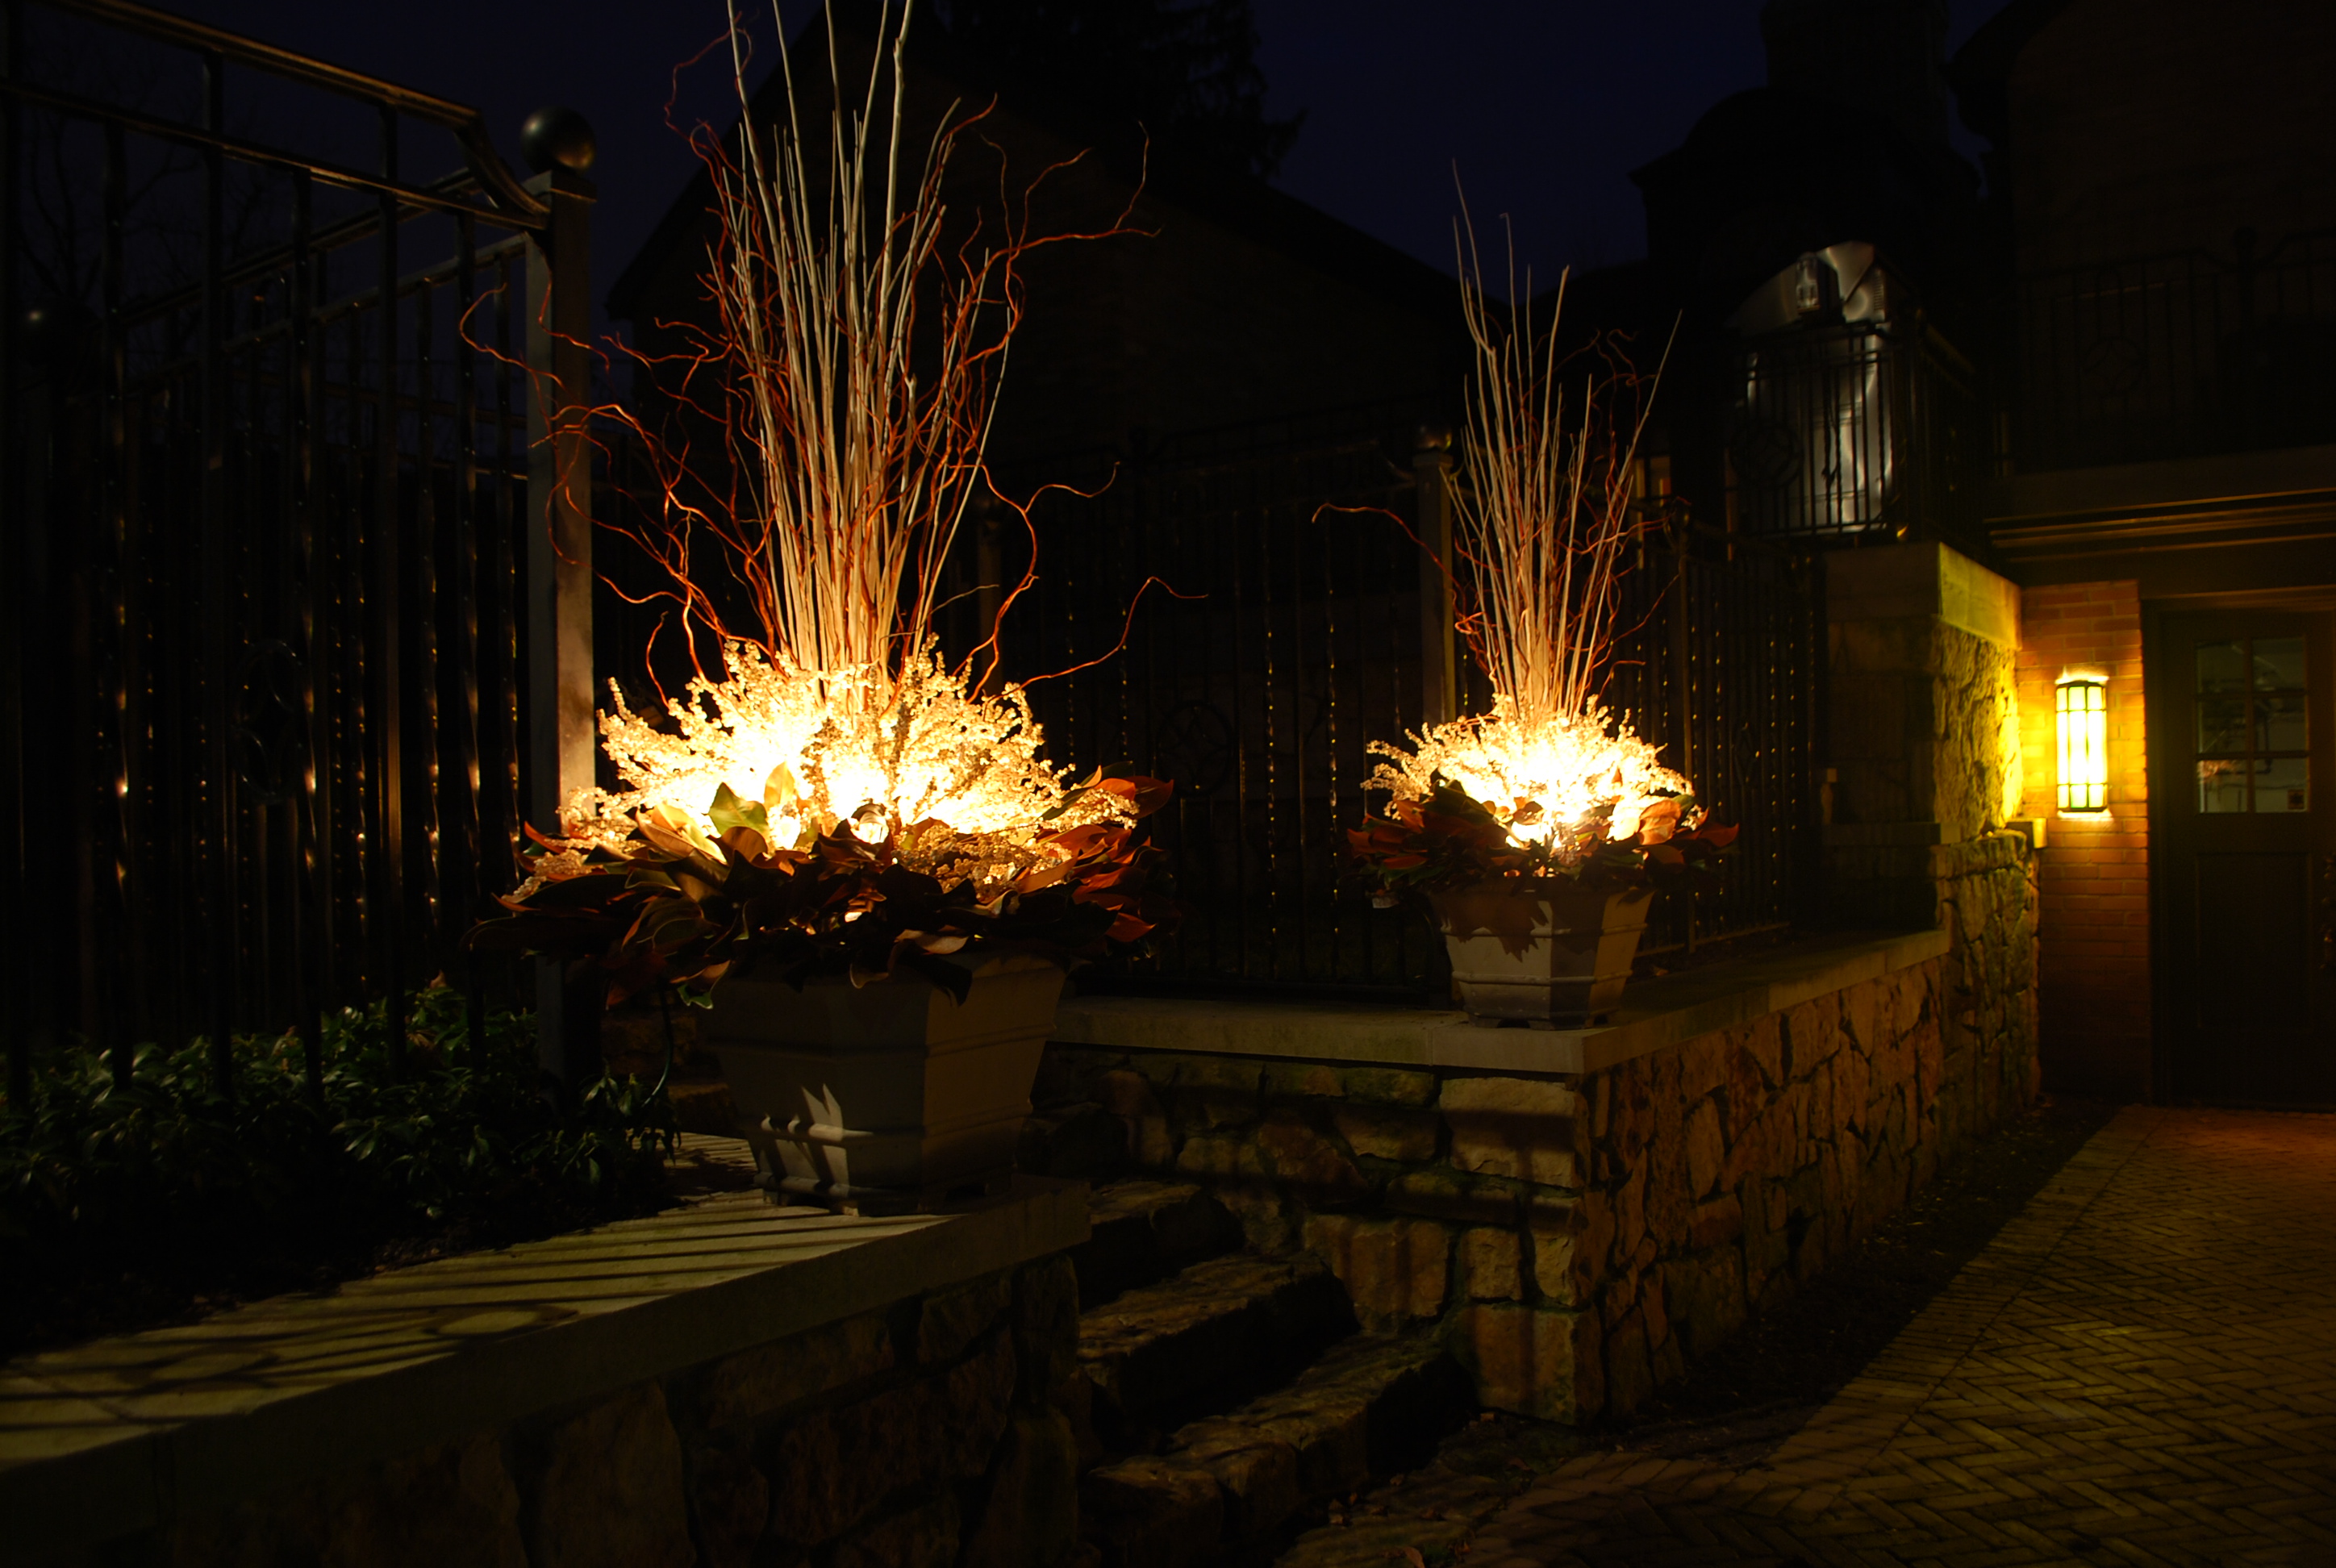
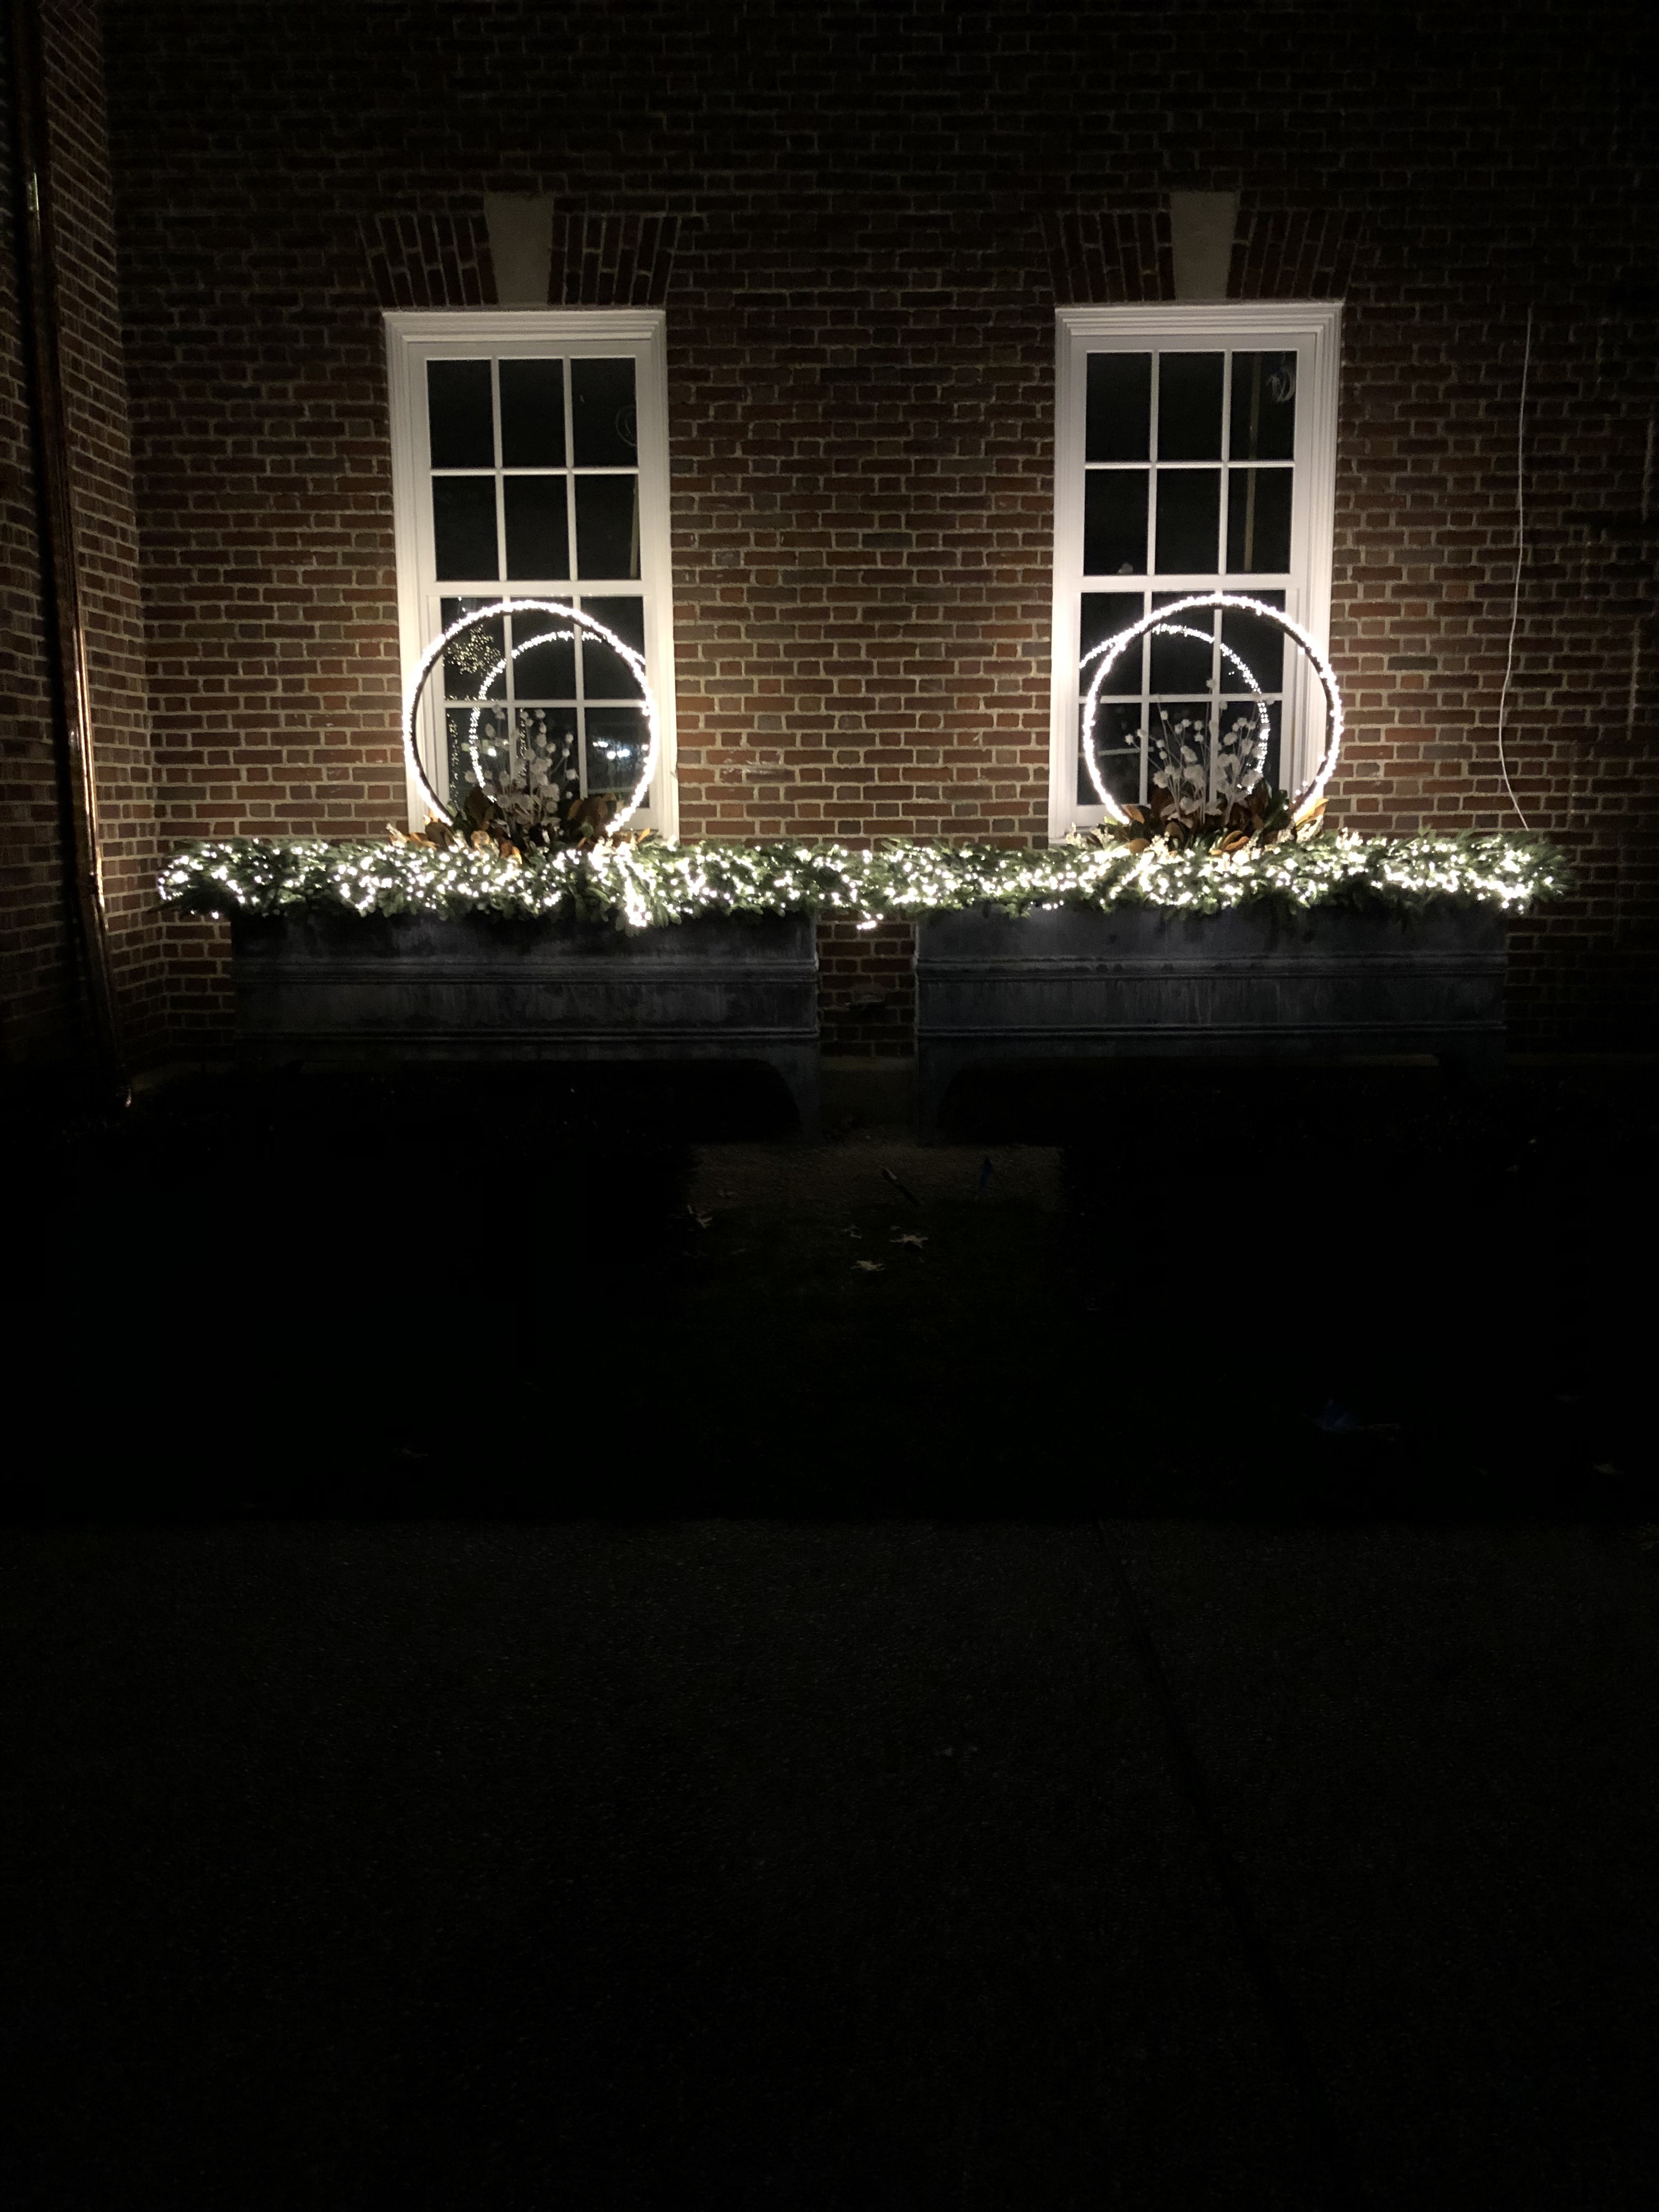 After dark, the lights define the shapes and volumes. The view at night is important in my zone. We have a lot of short days and long nights ahead.
 By this time next year, this landscape project will have landscape lighting. But for now, the window boxes provide some welcome illumination.
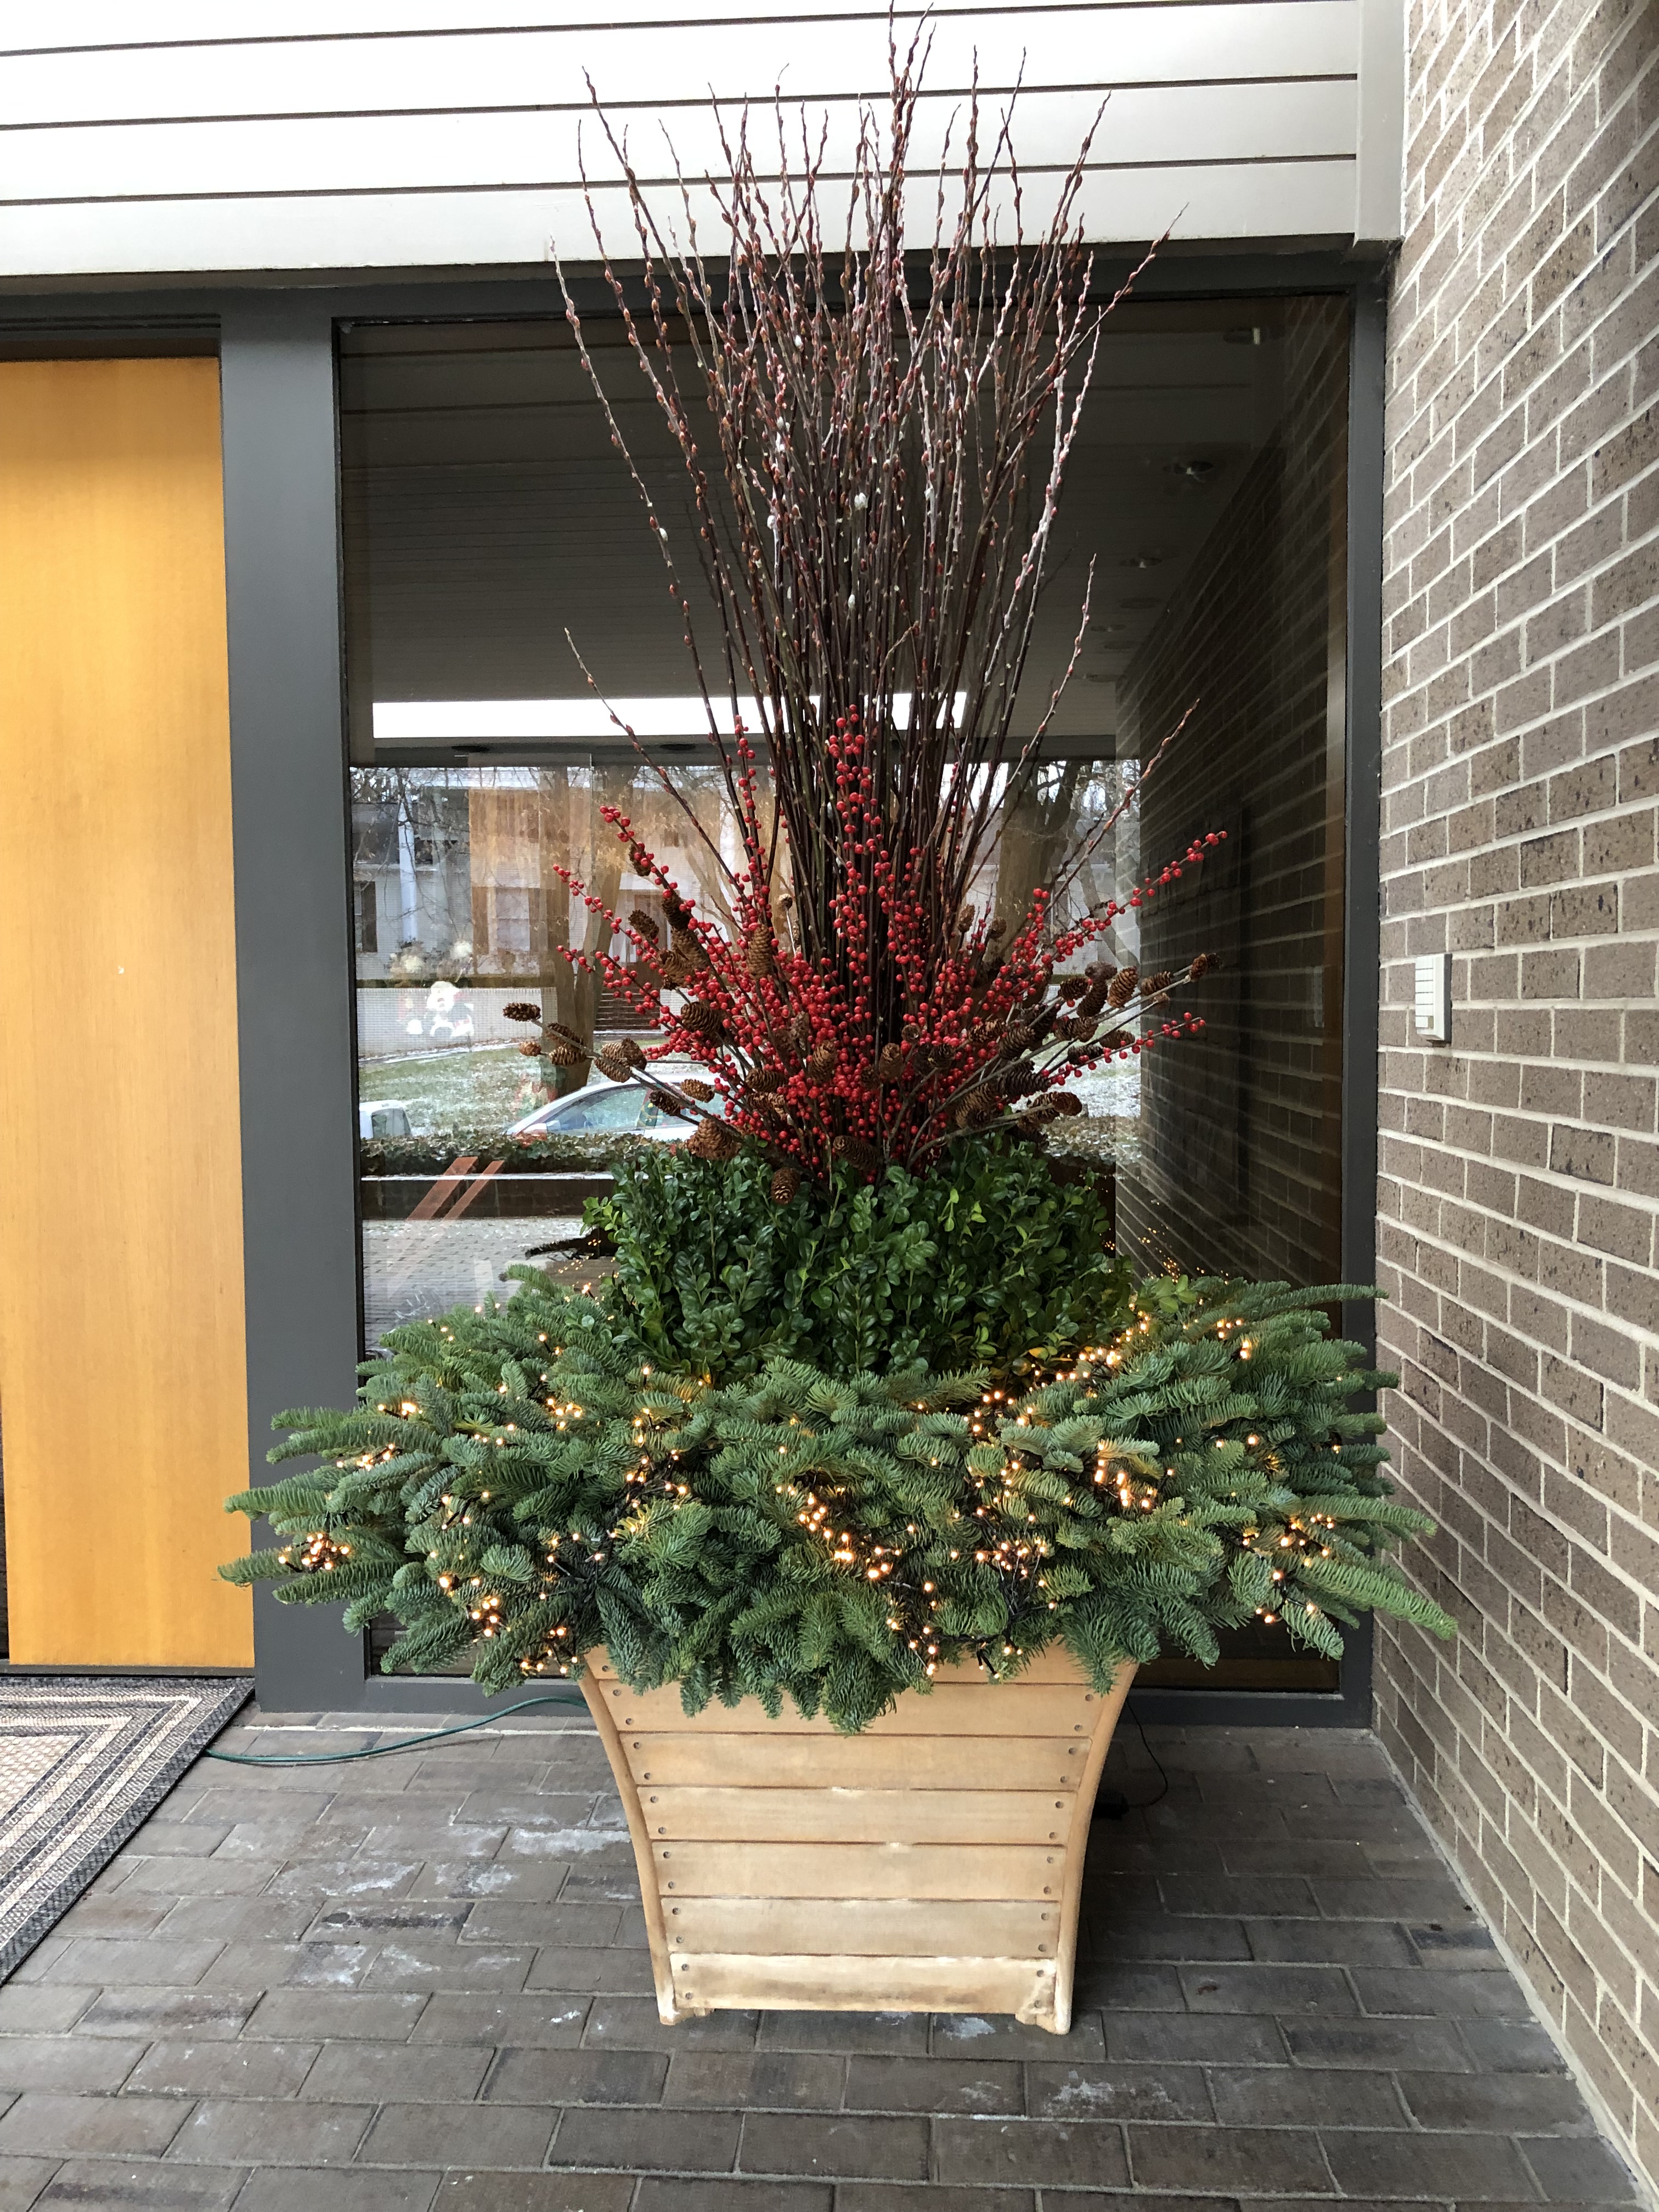
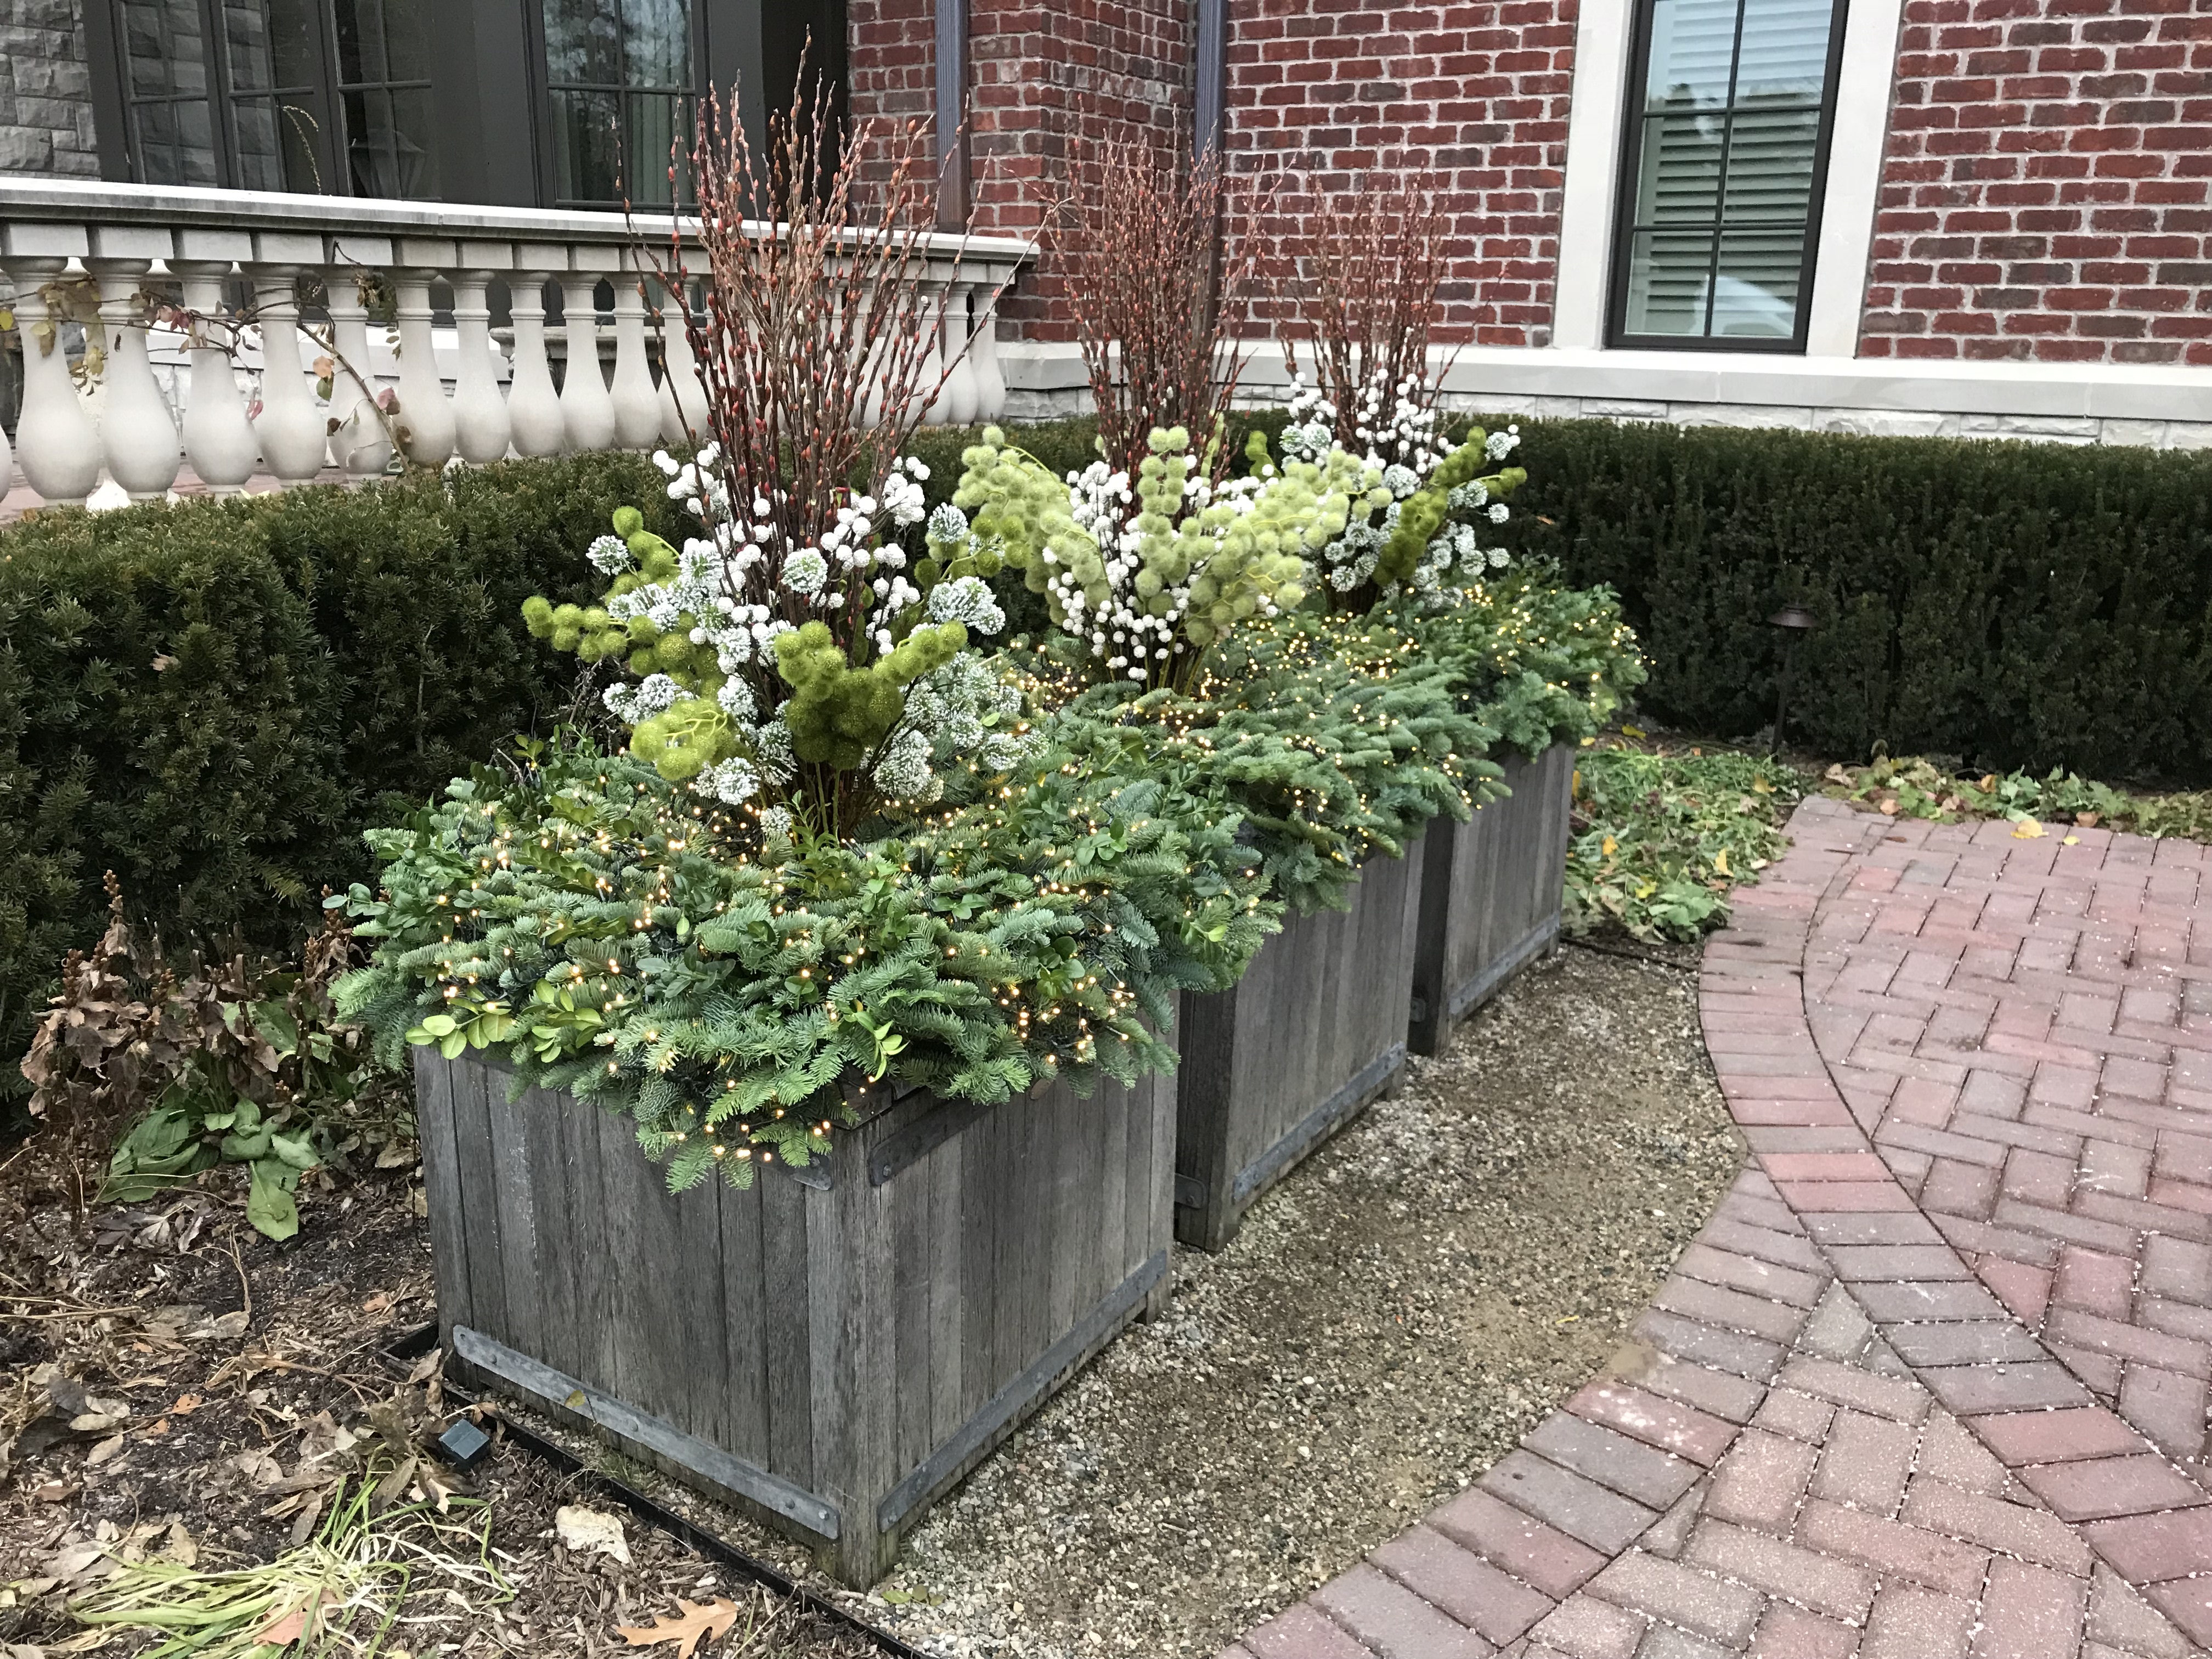
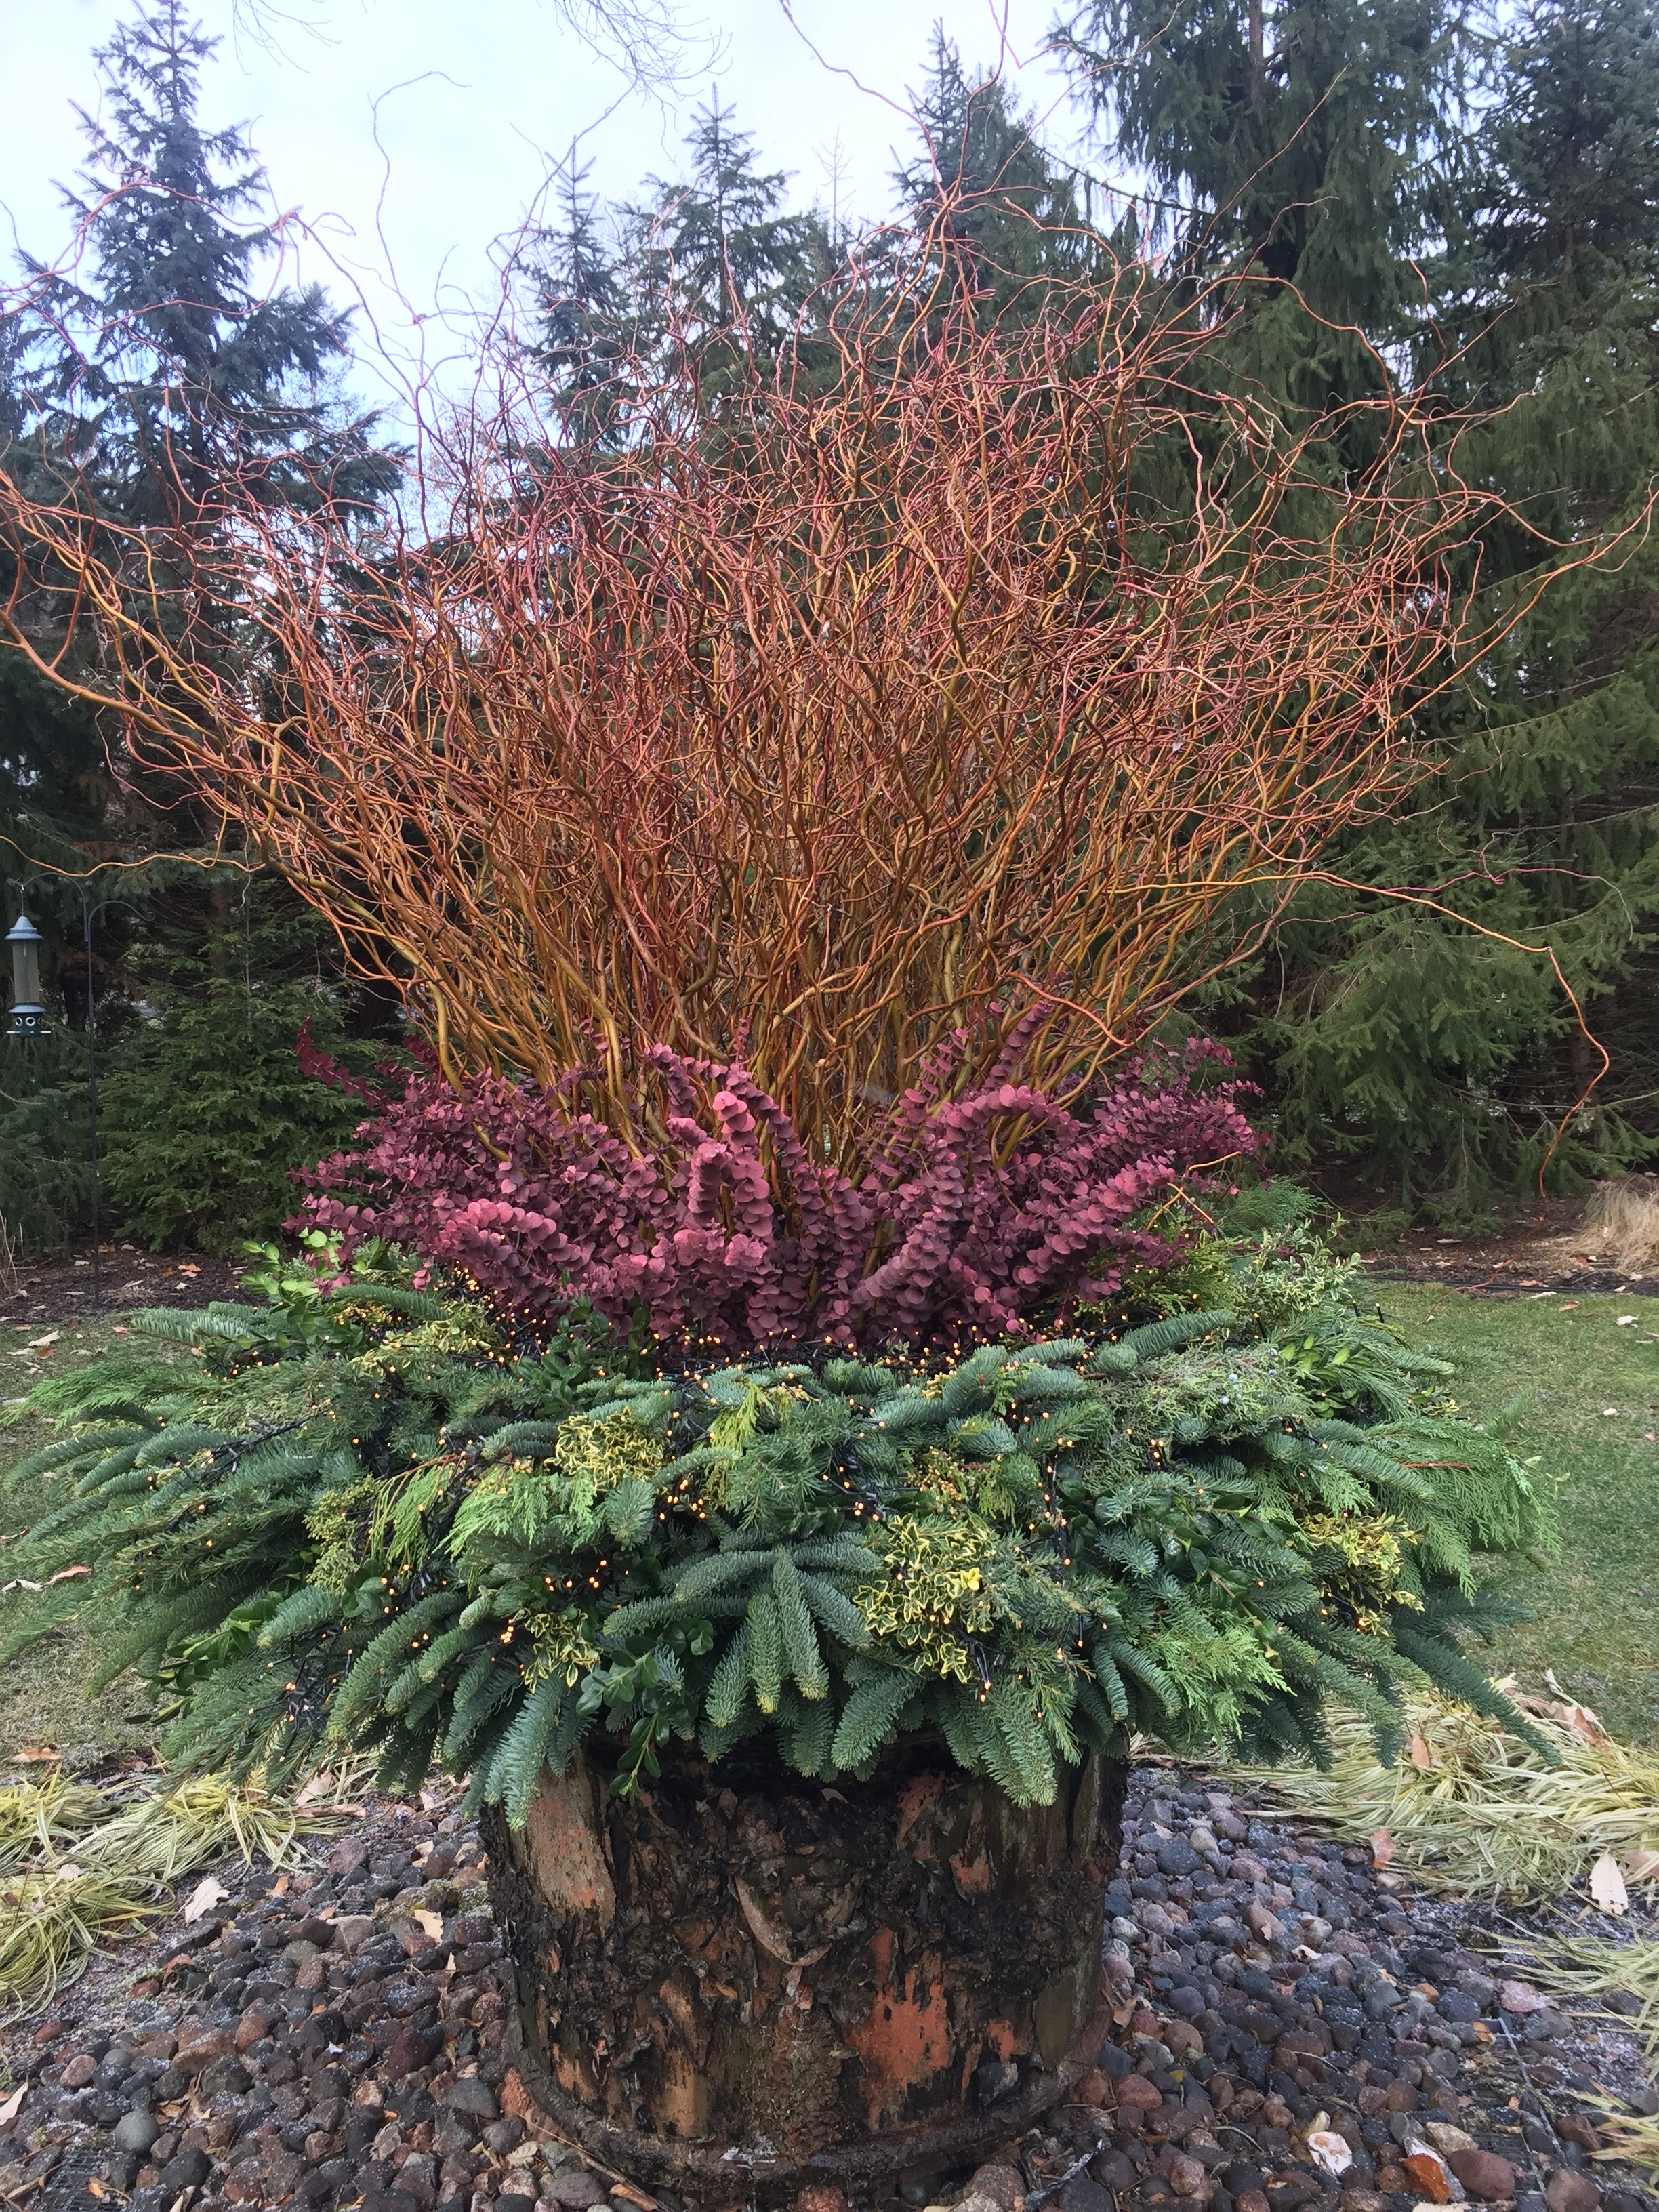
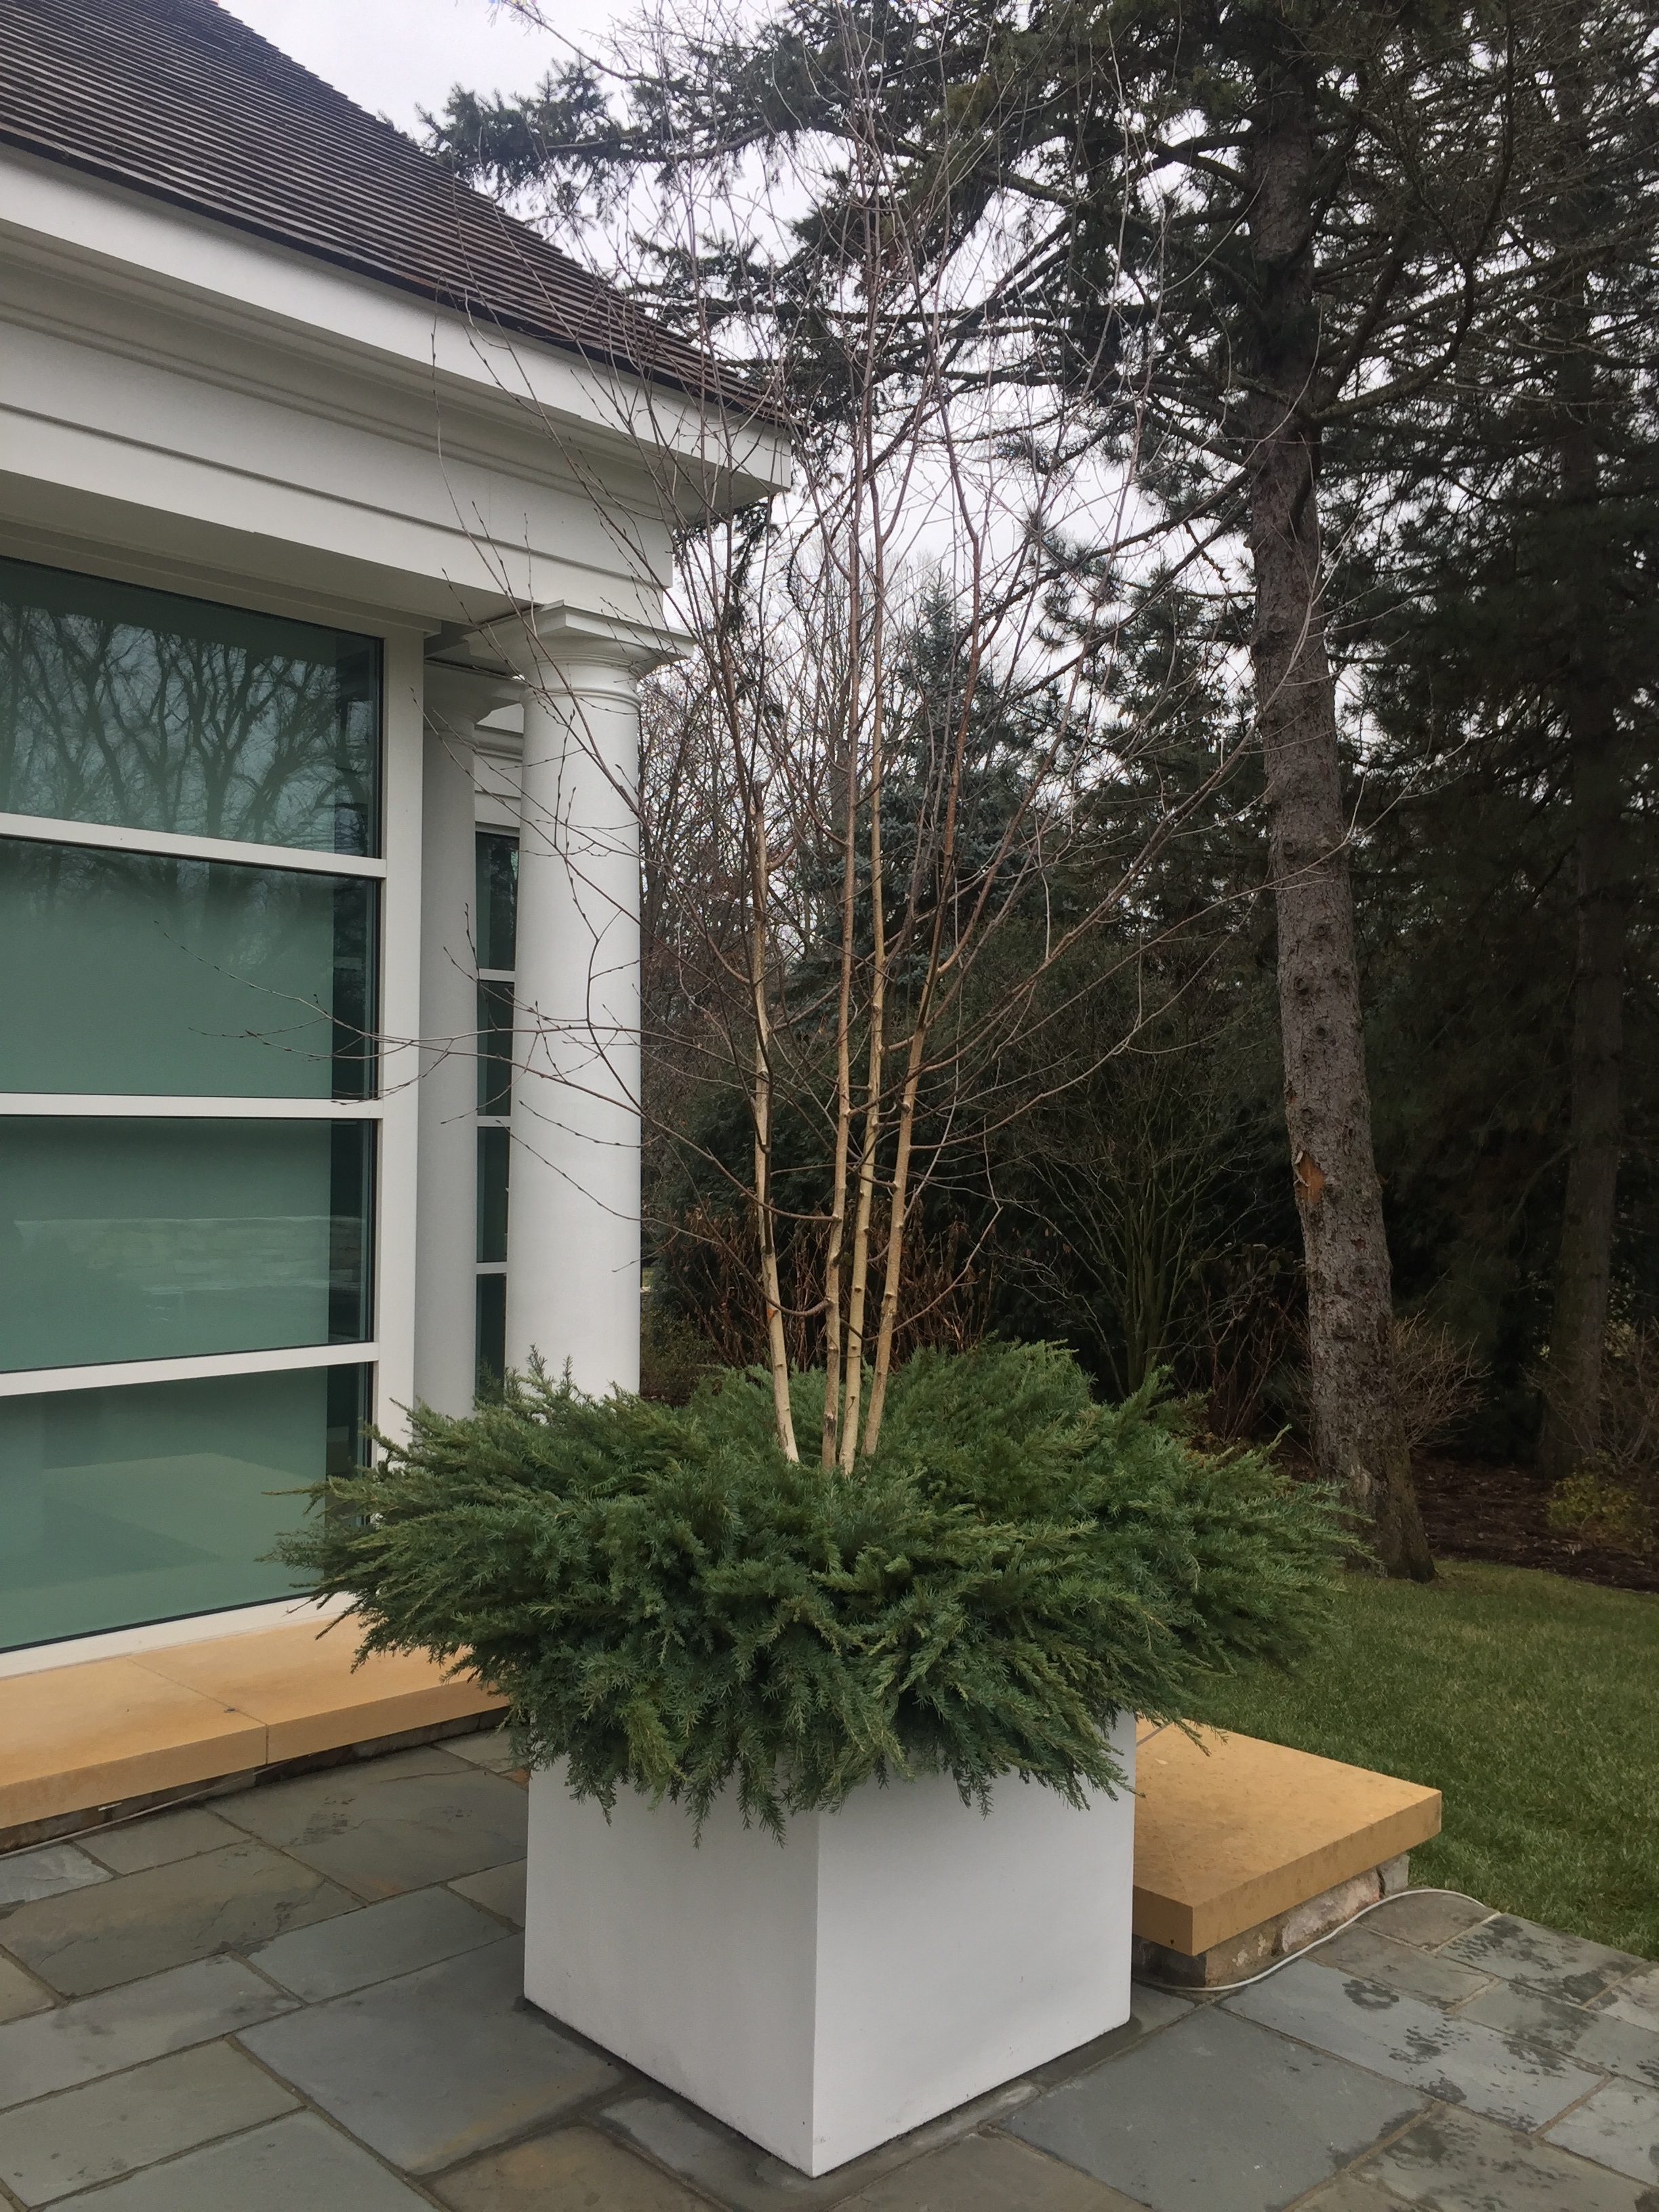
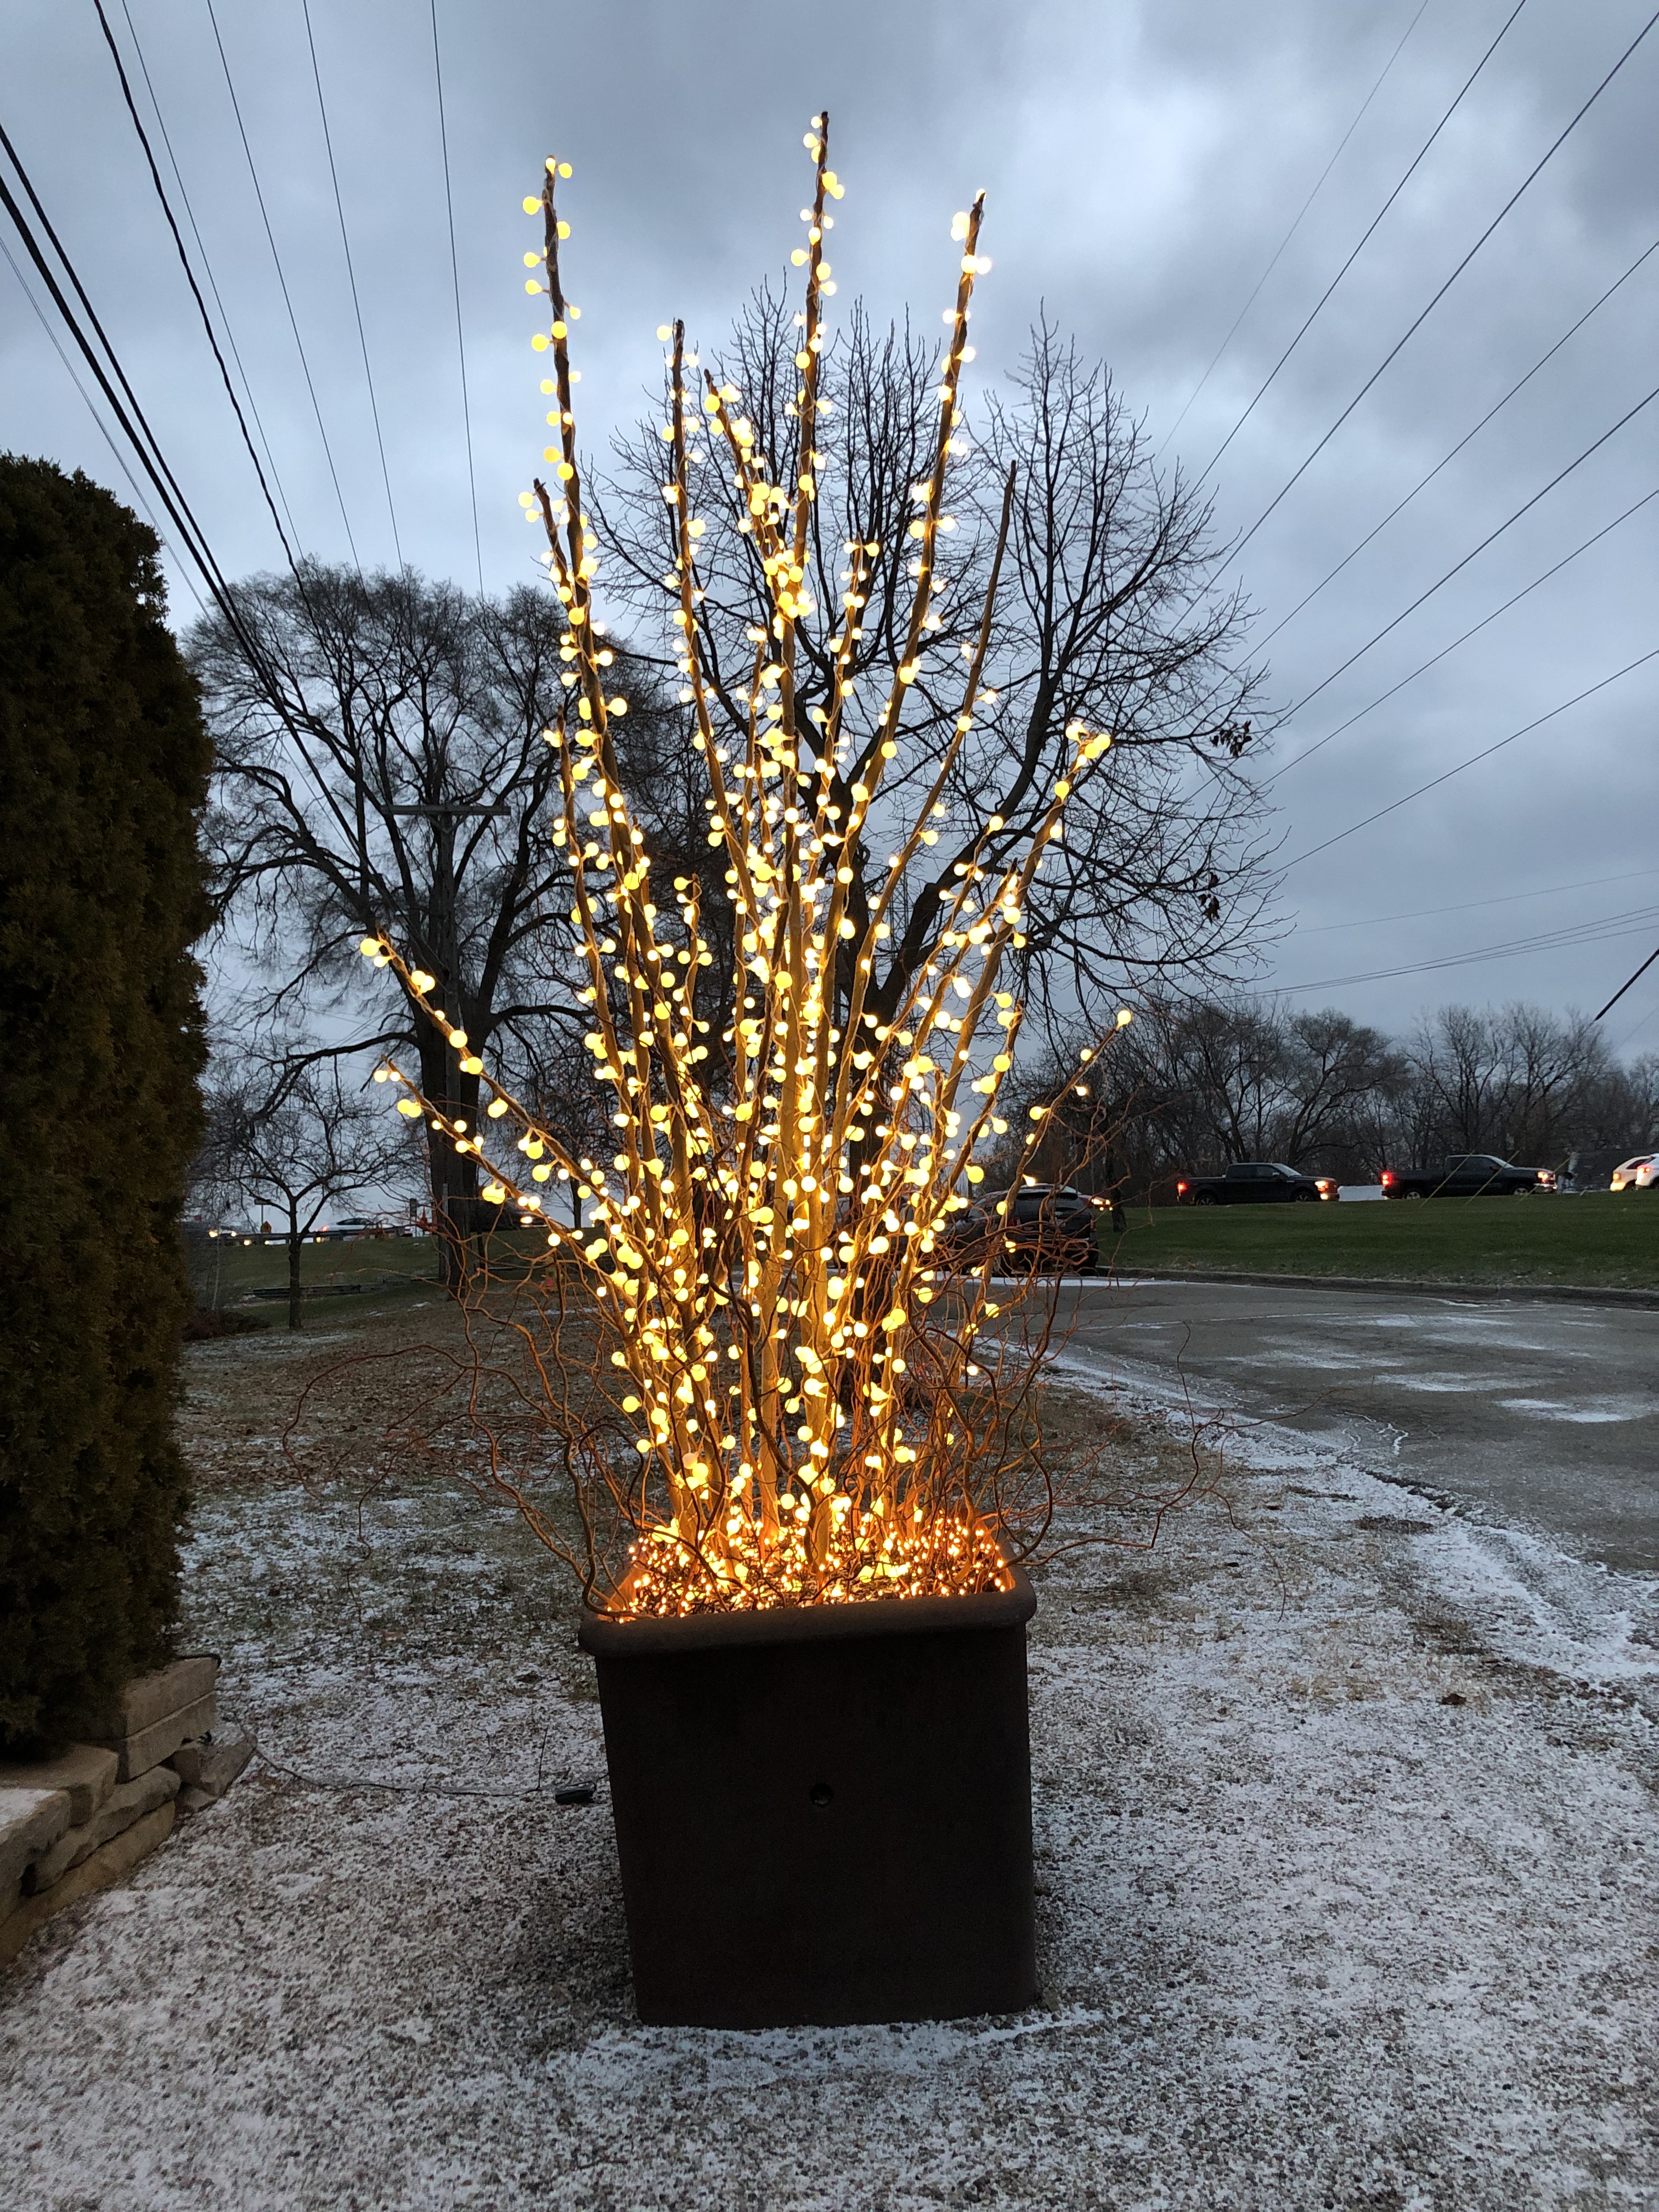
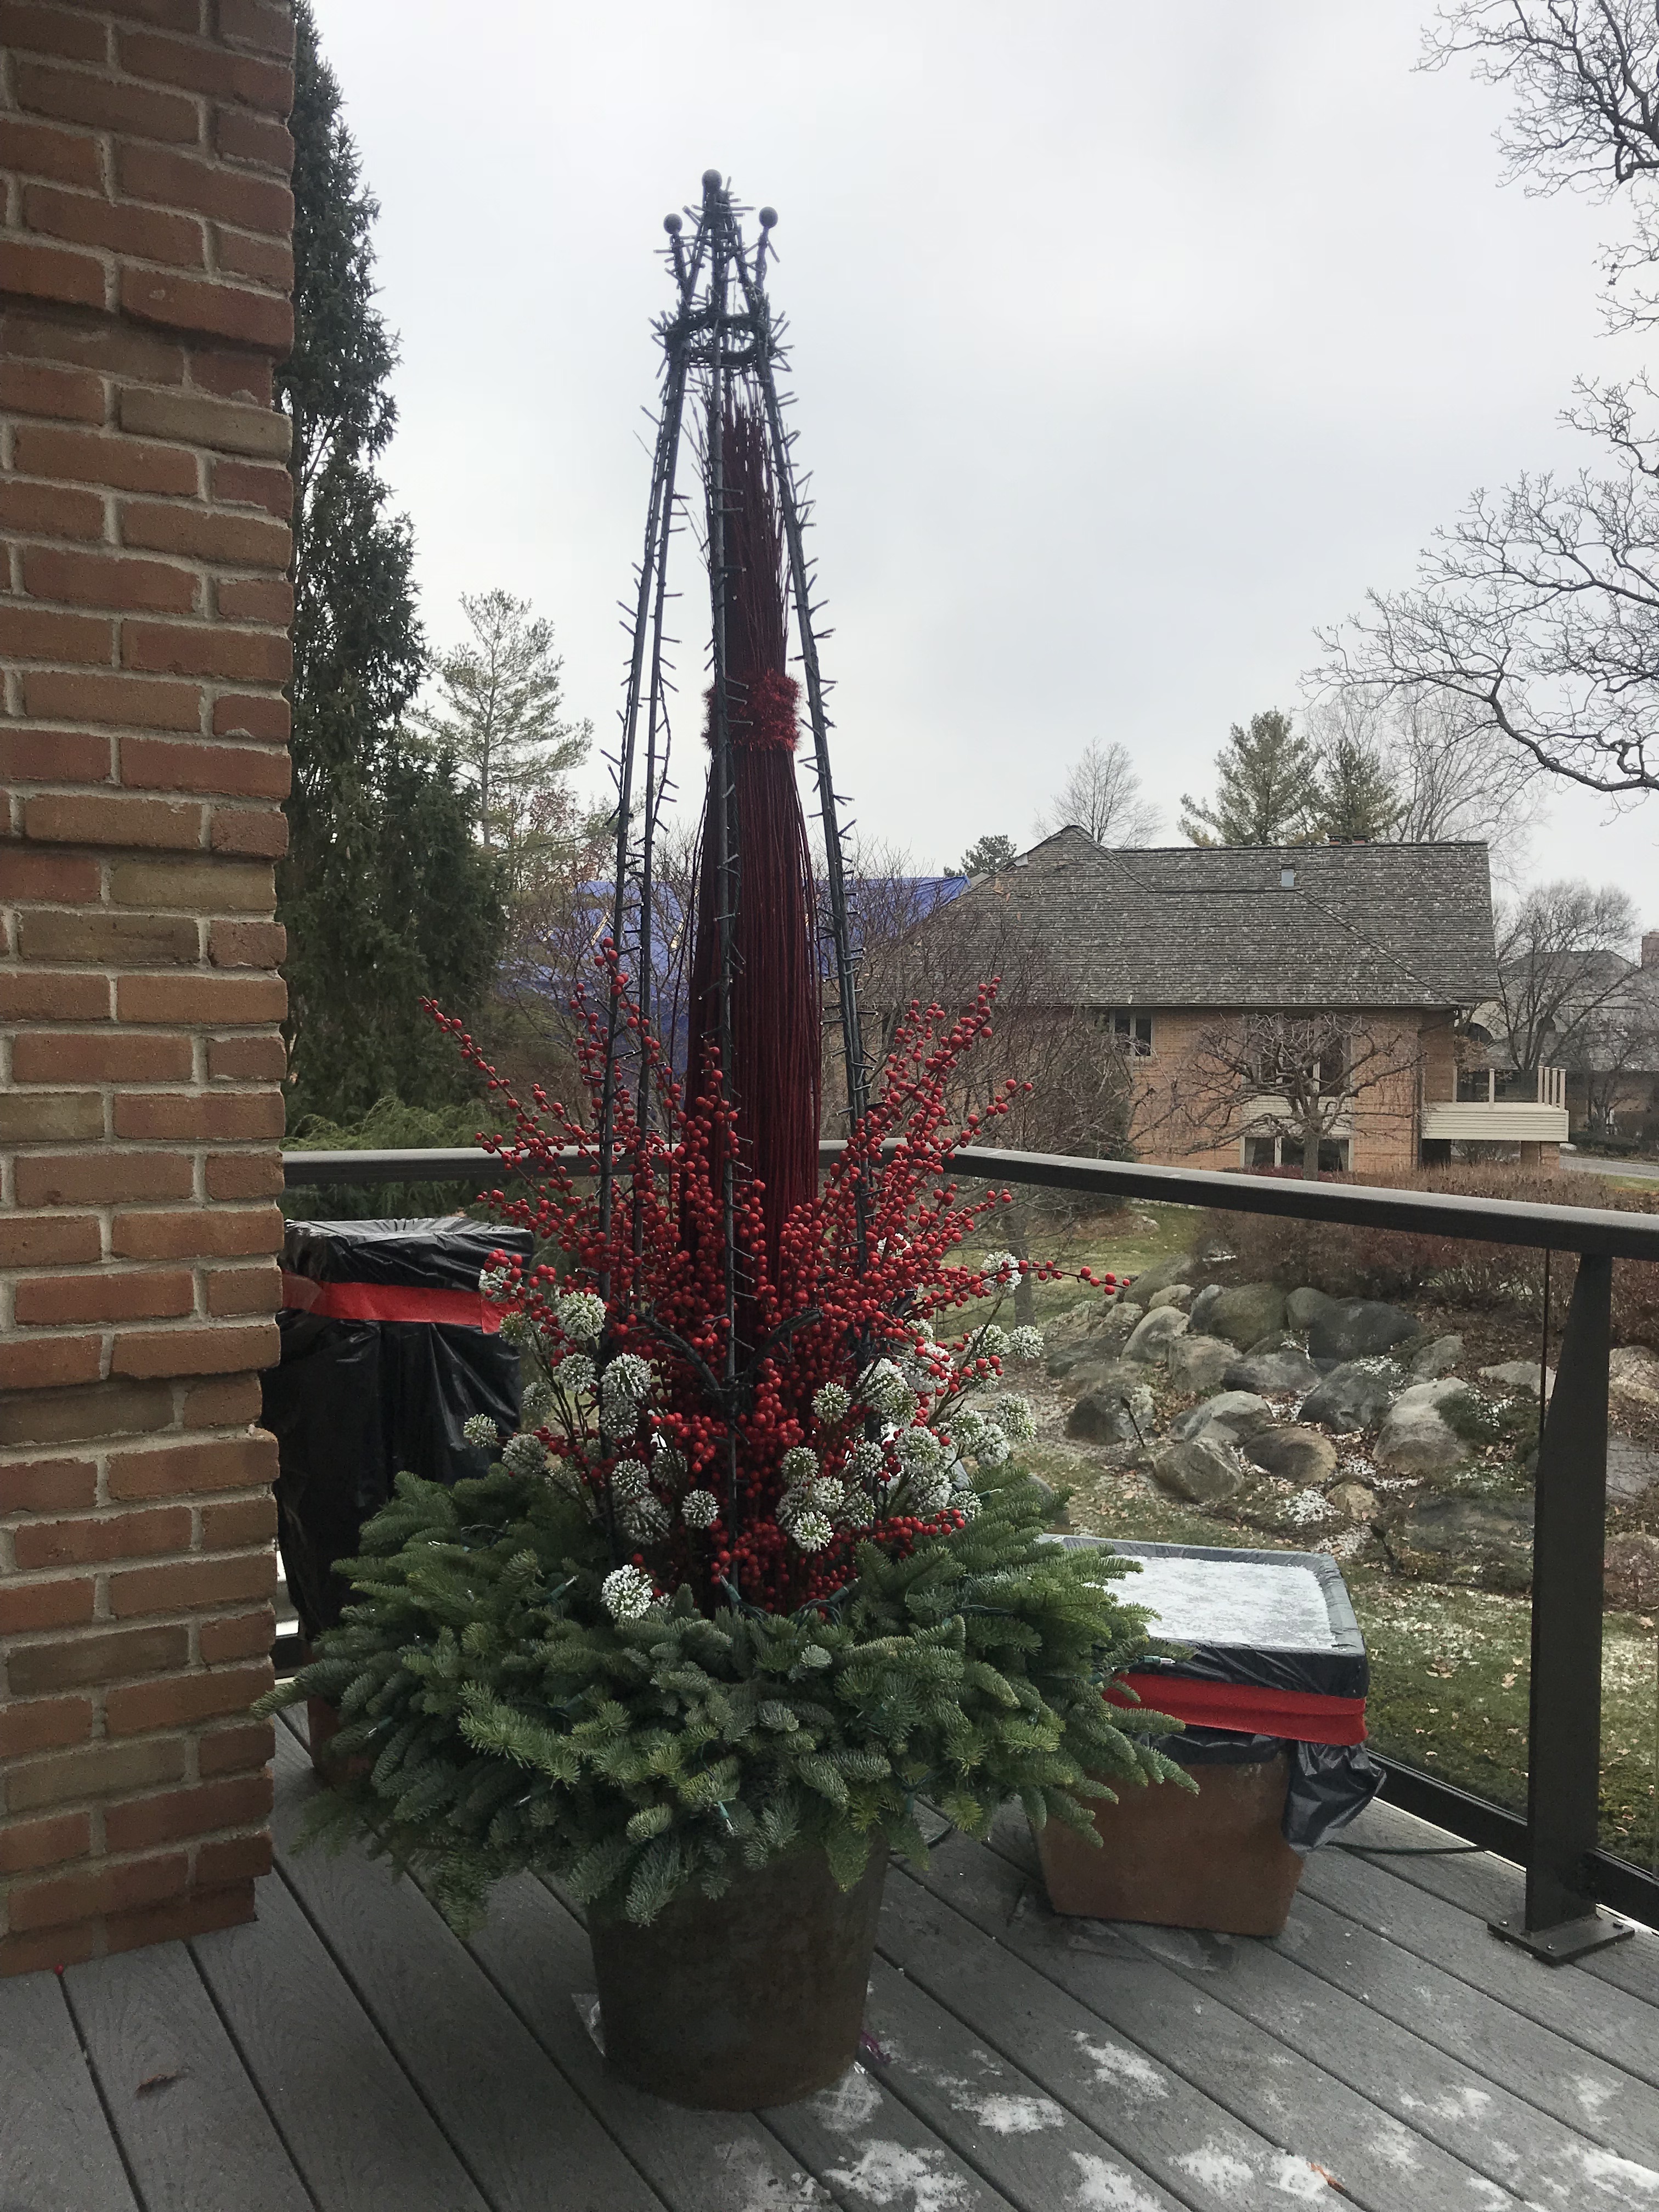
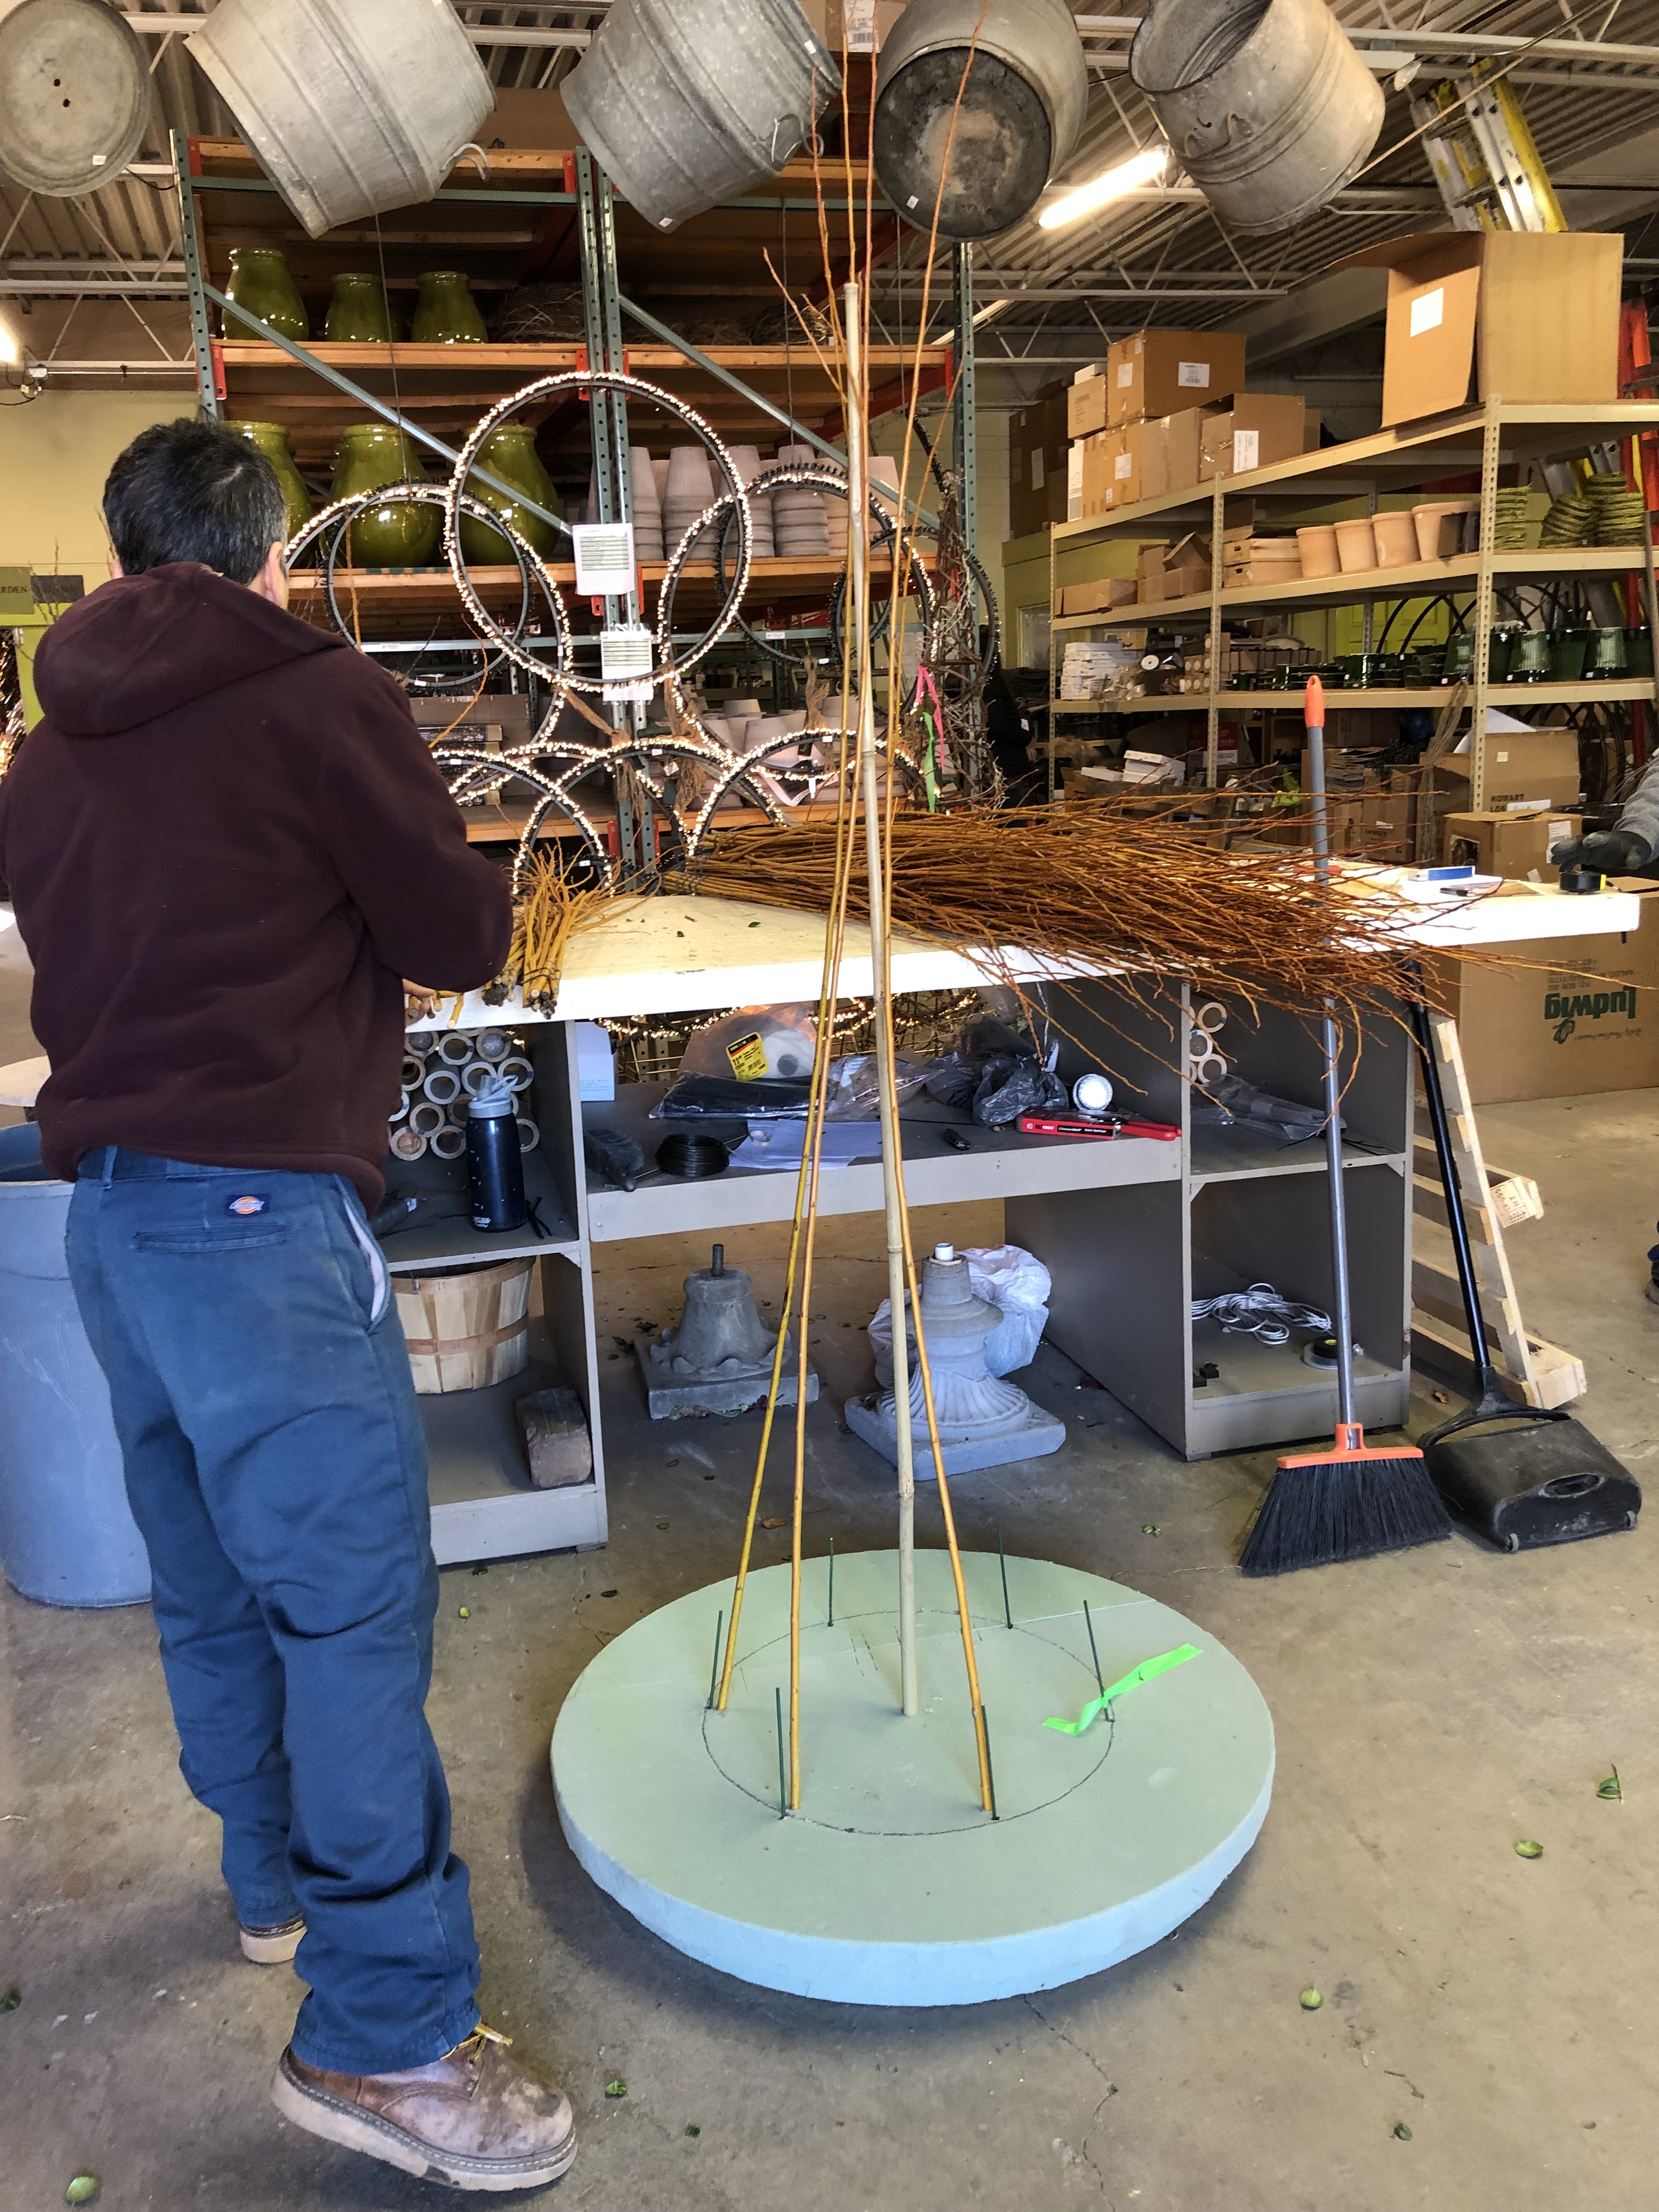
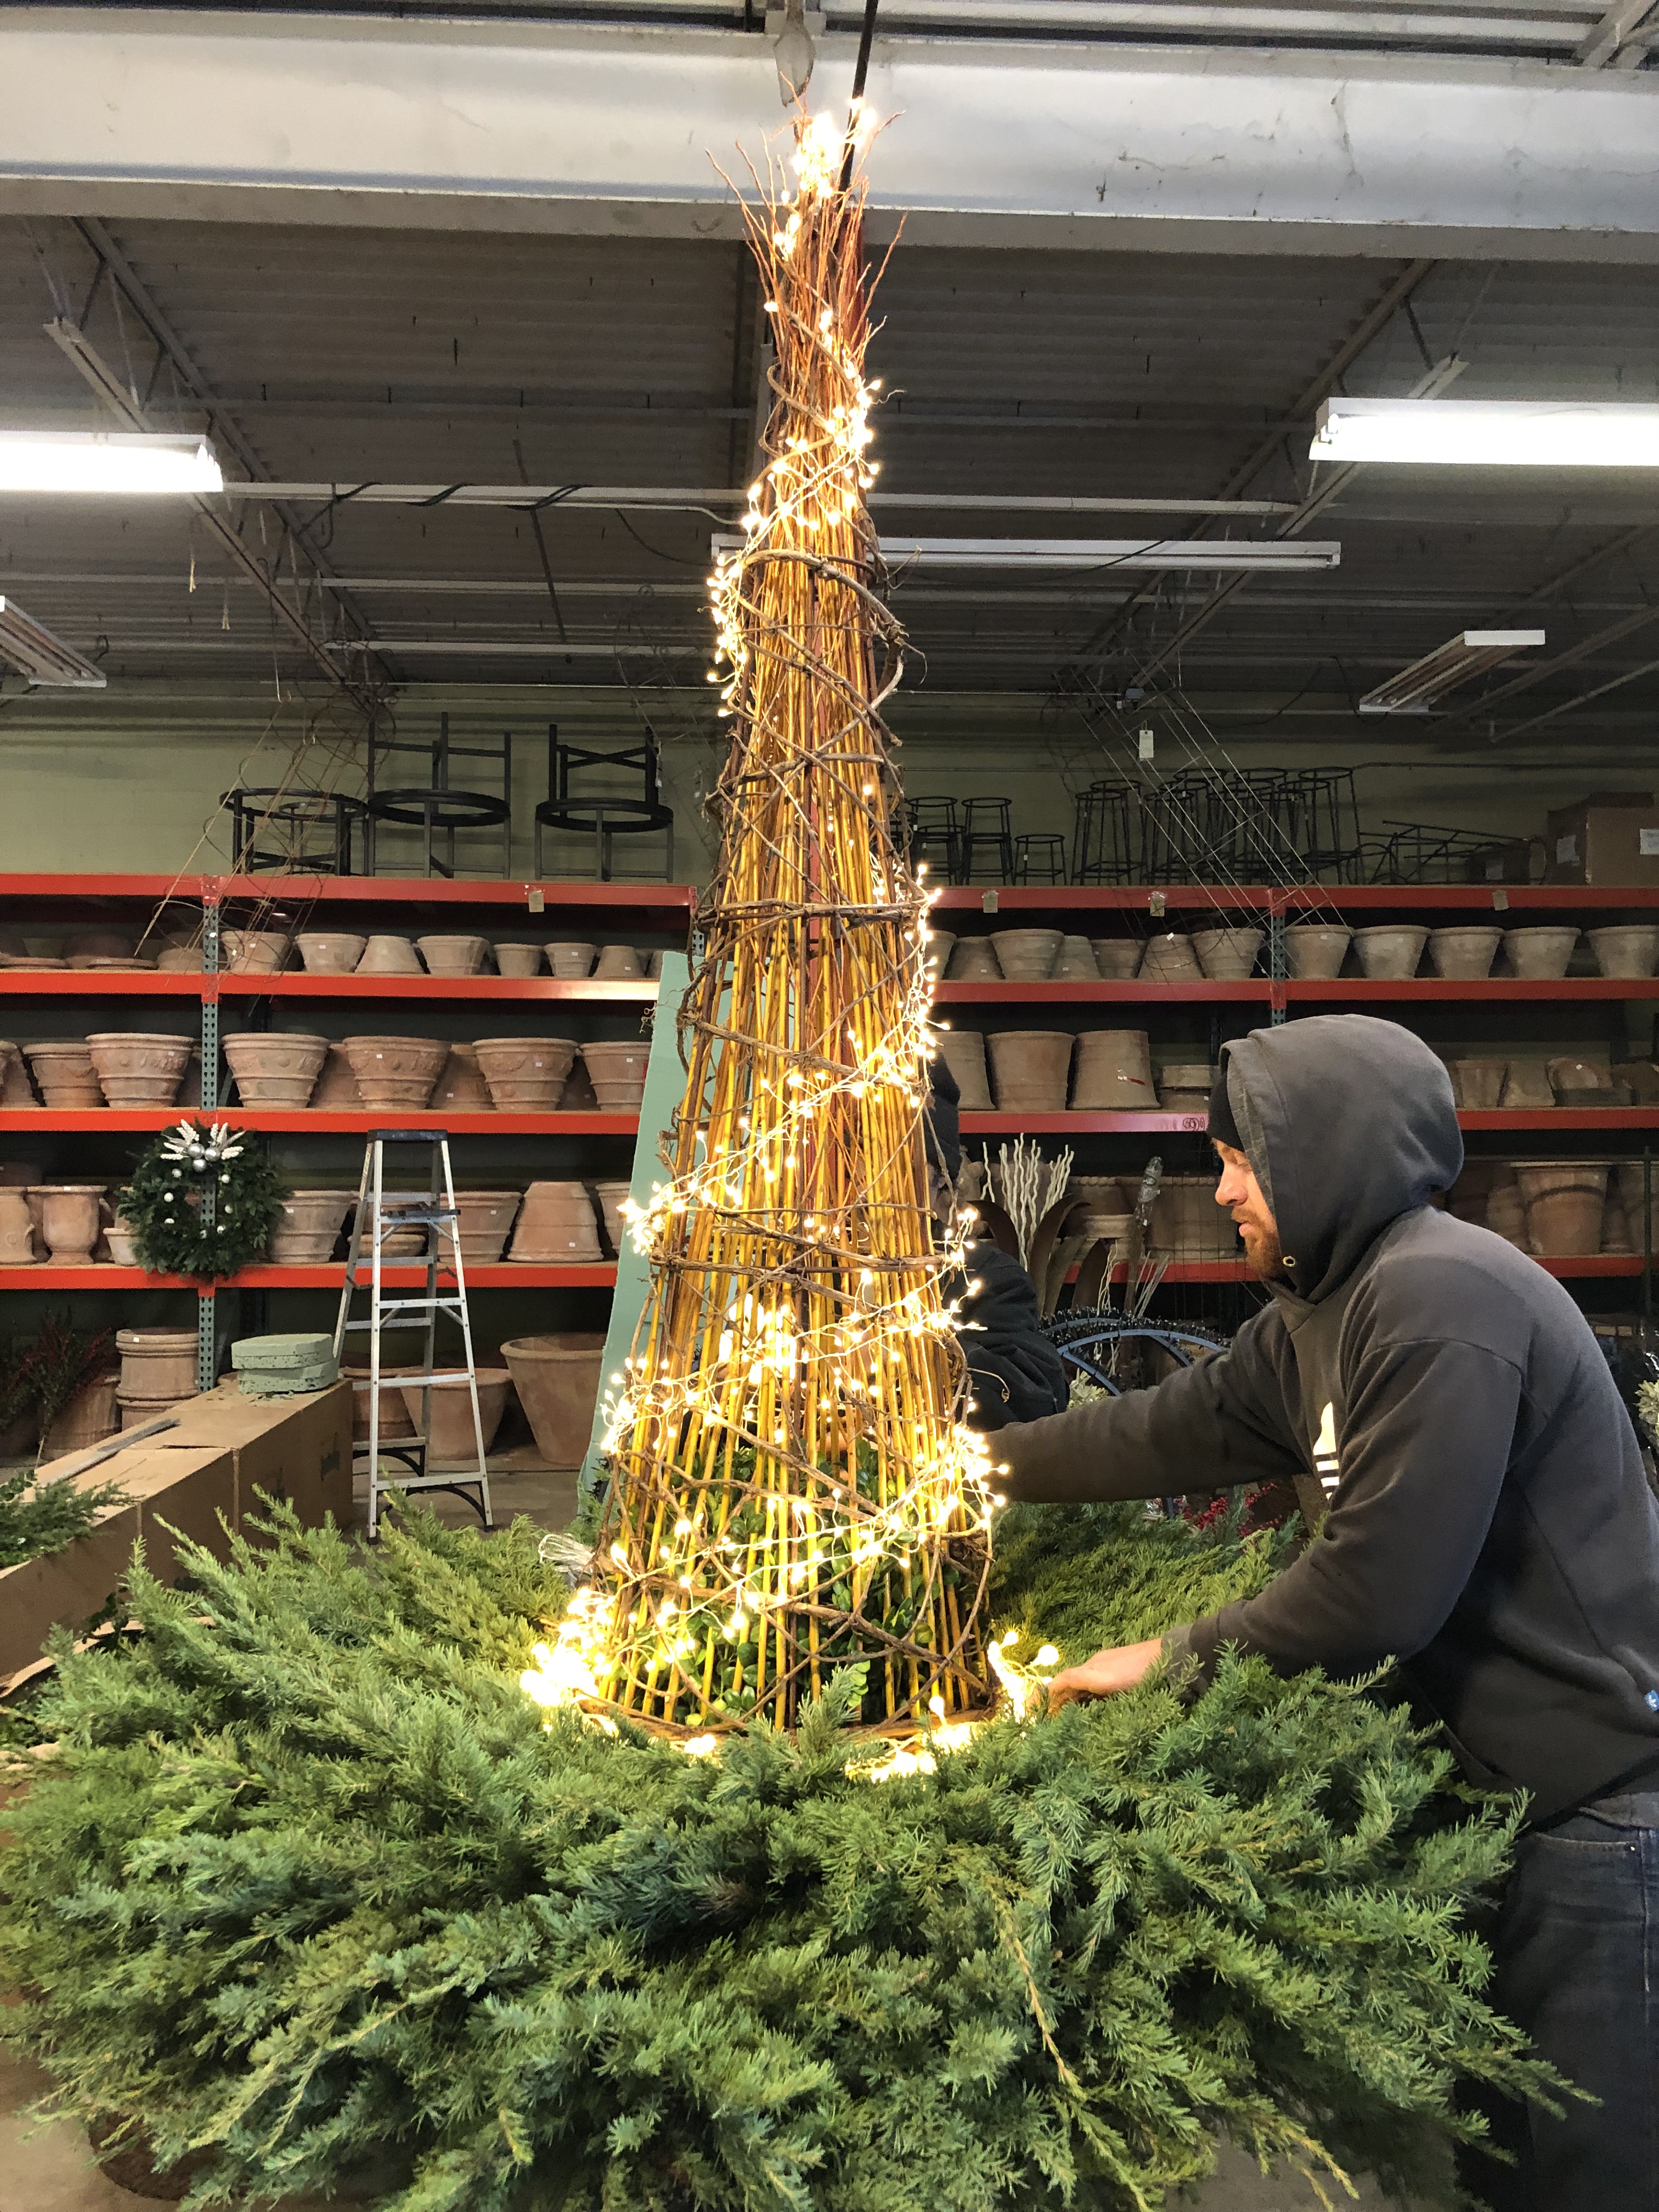
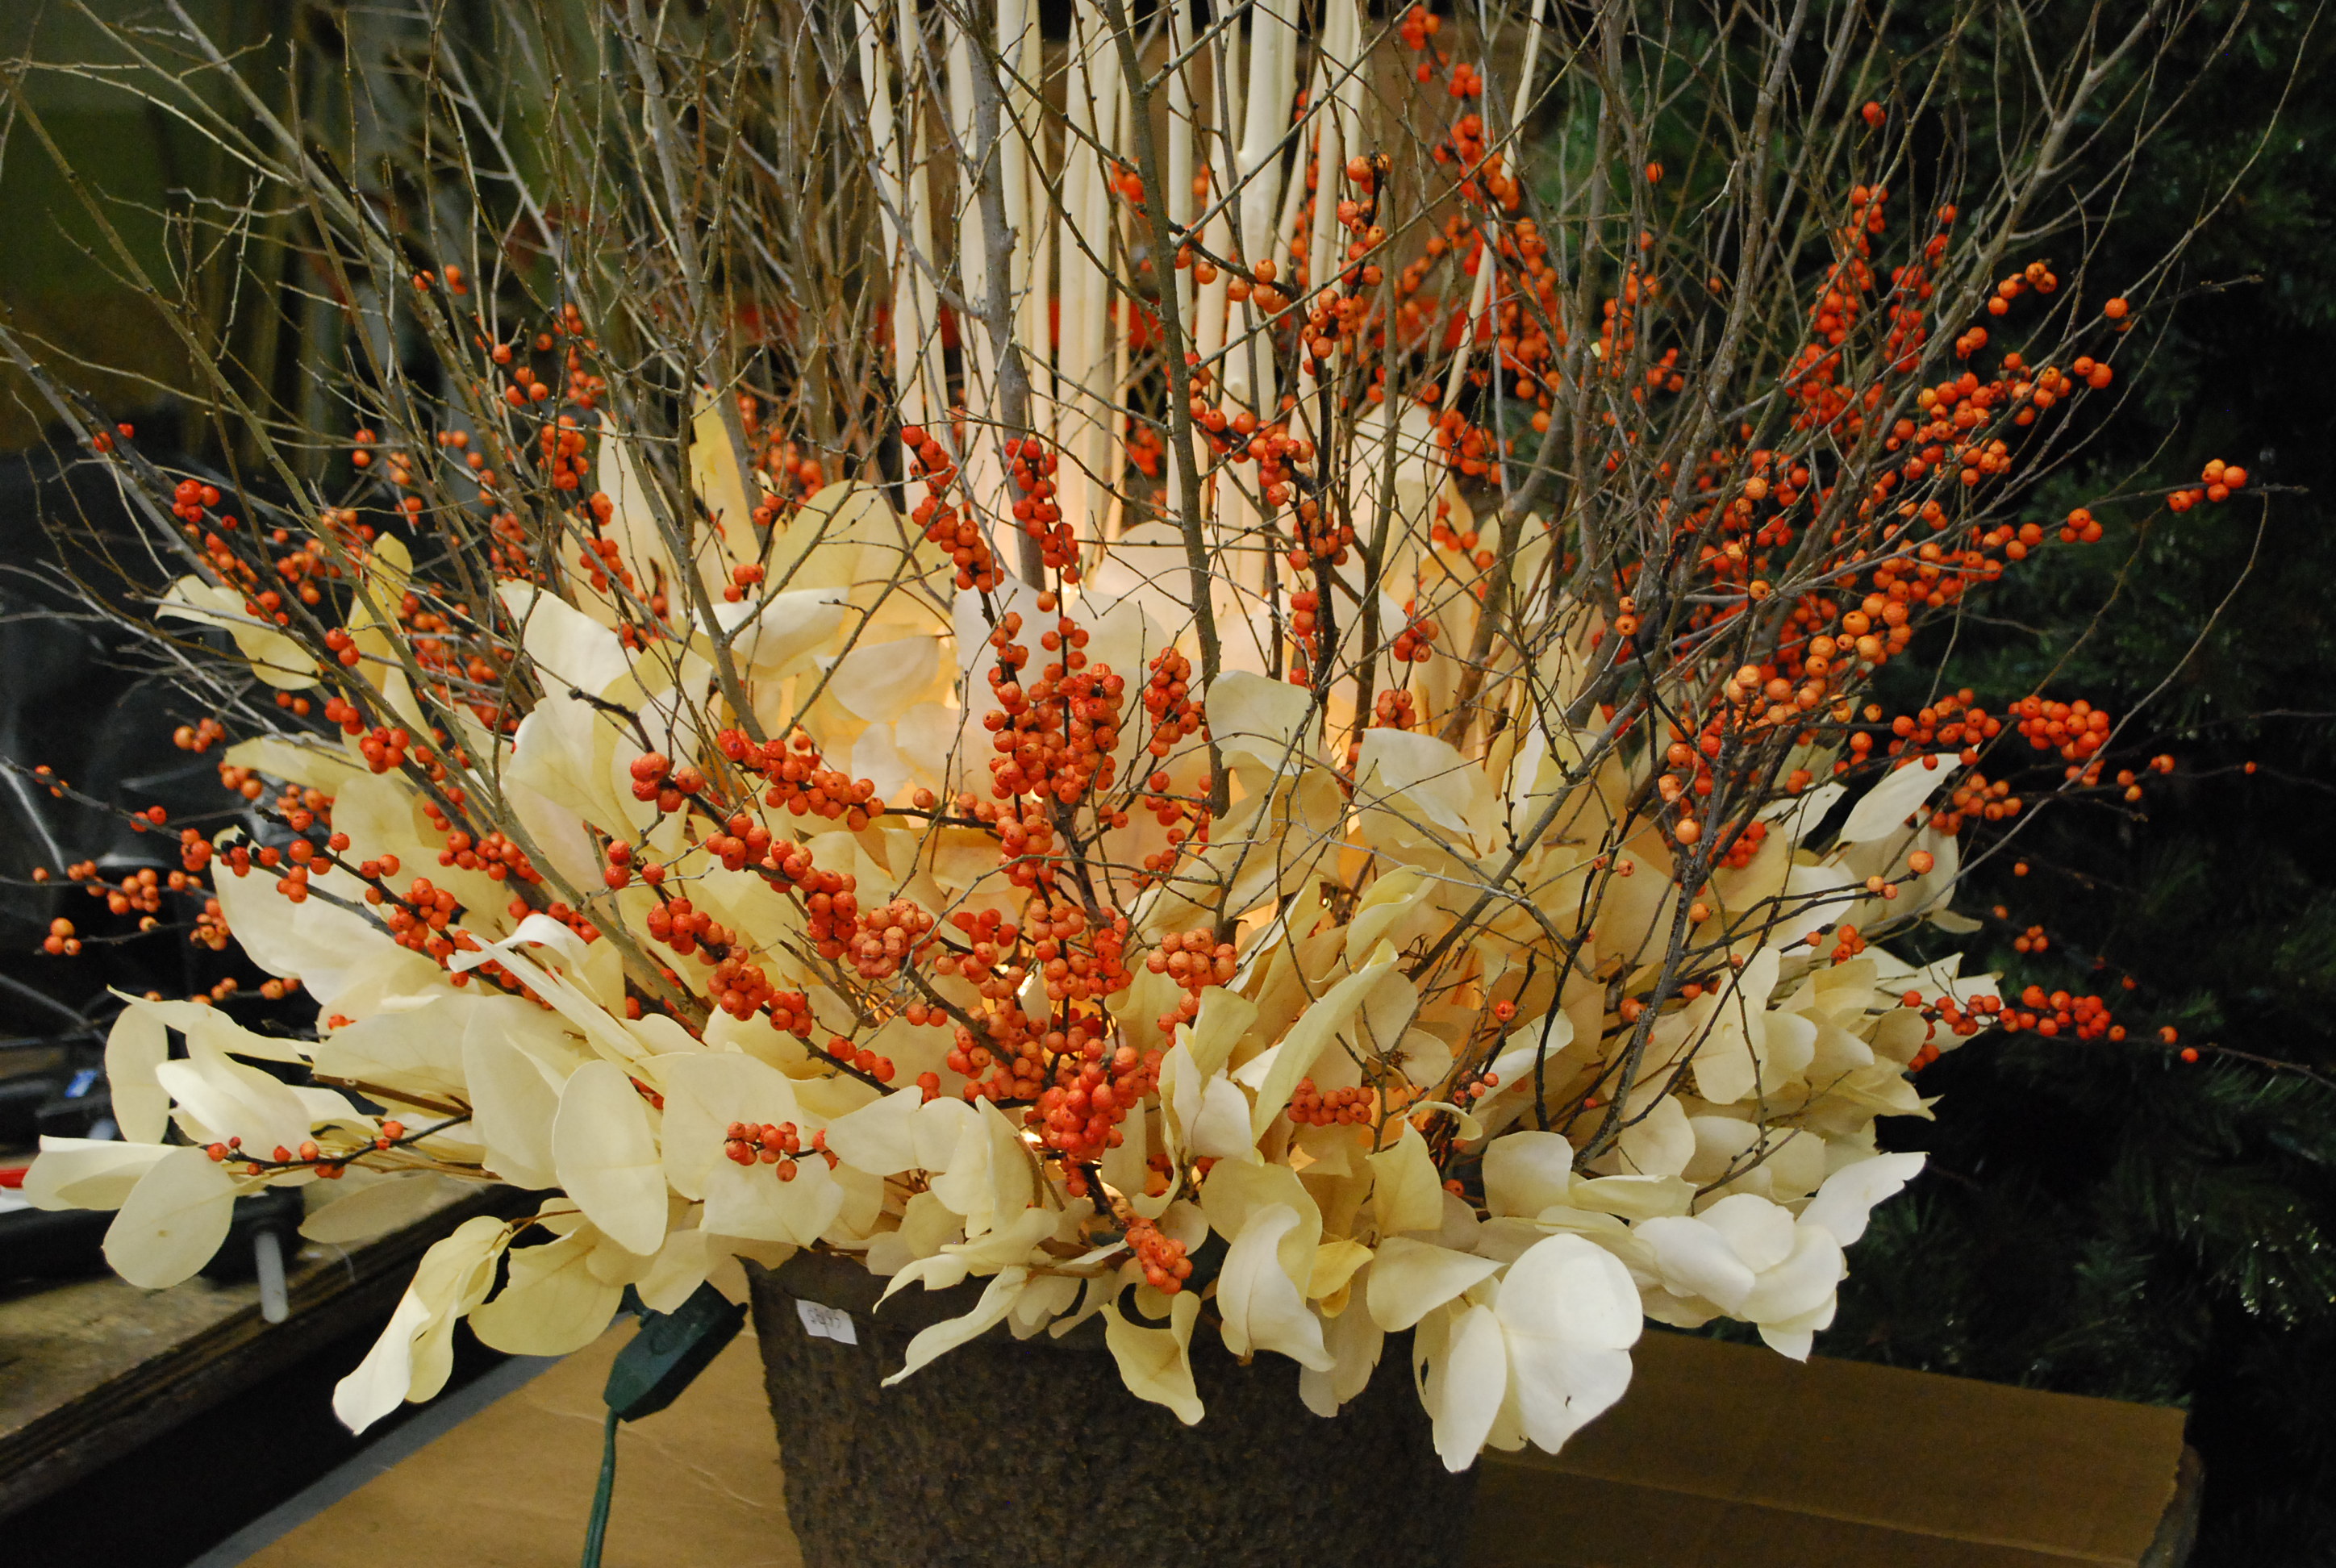
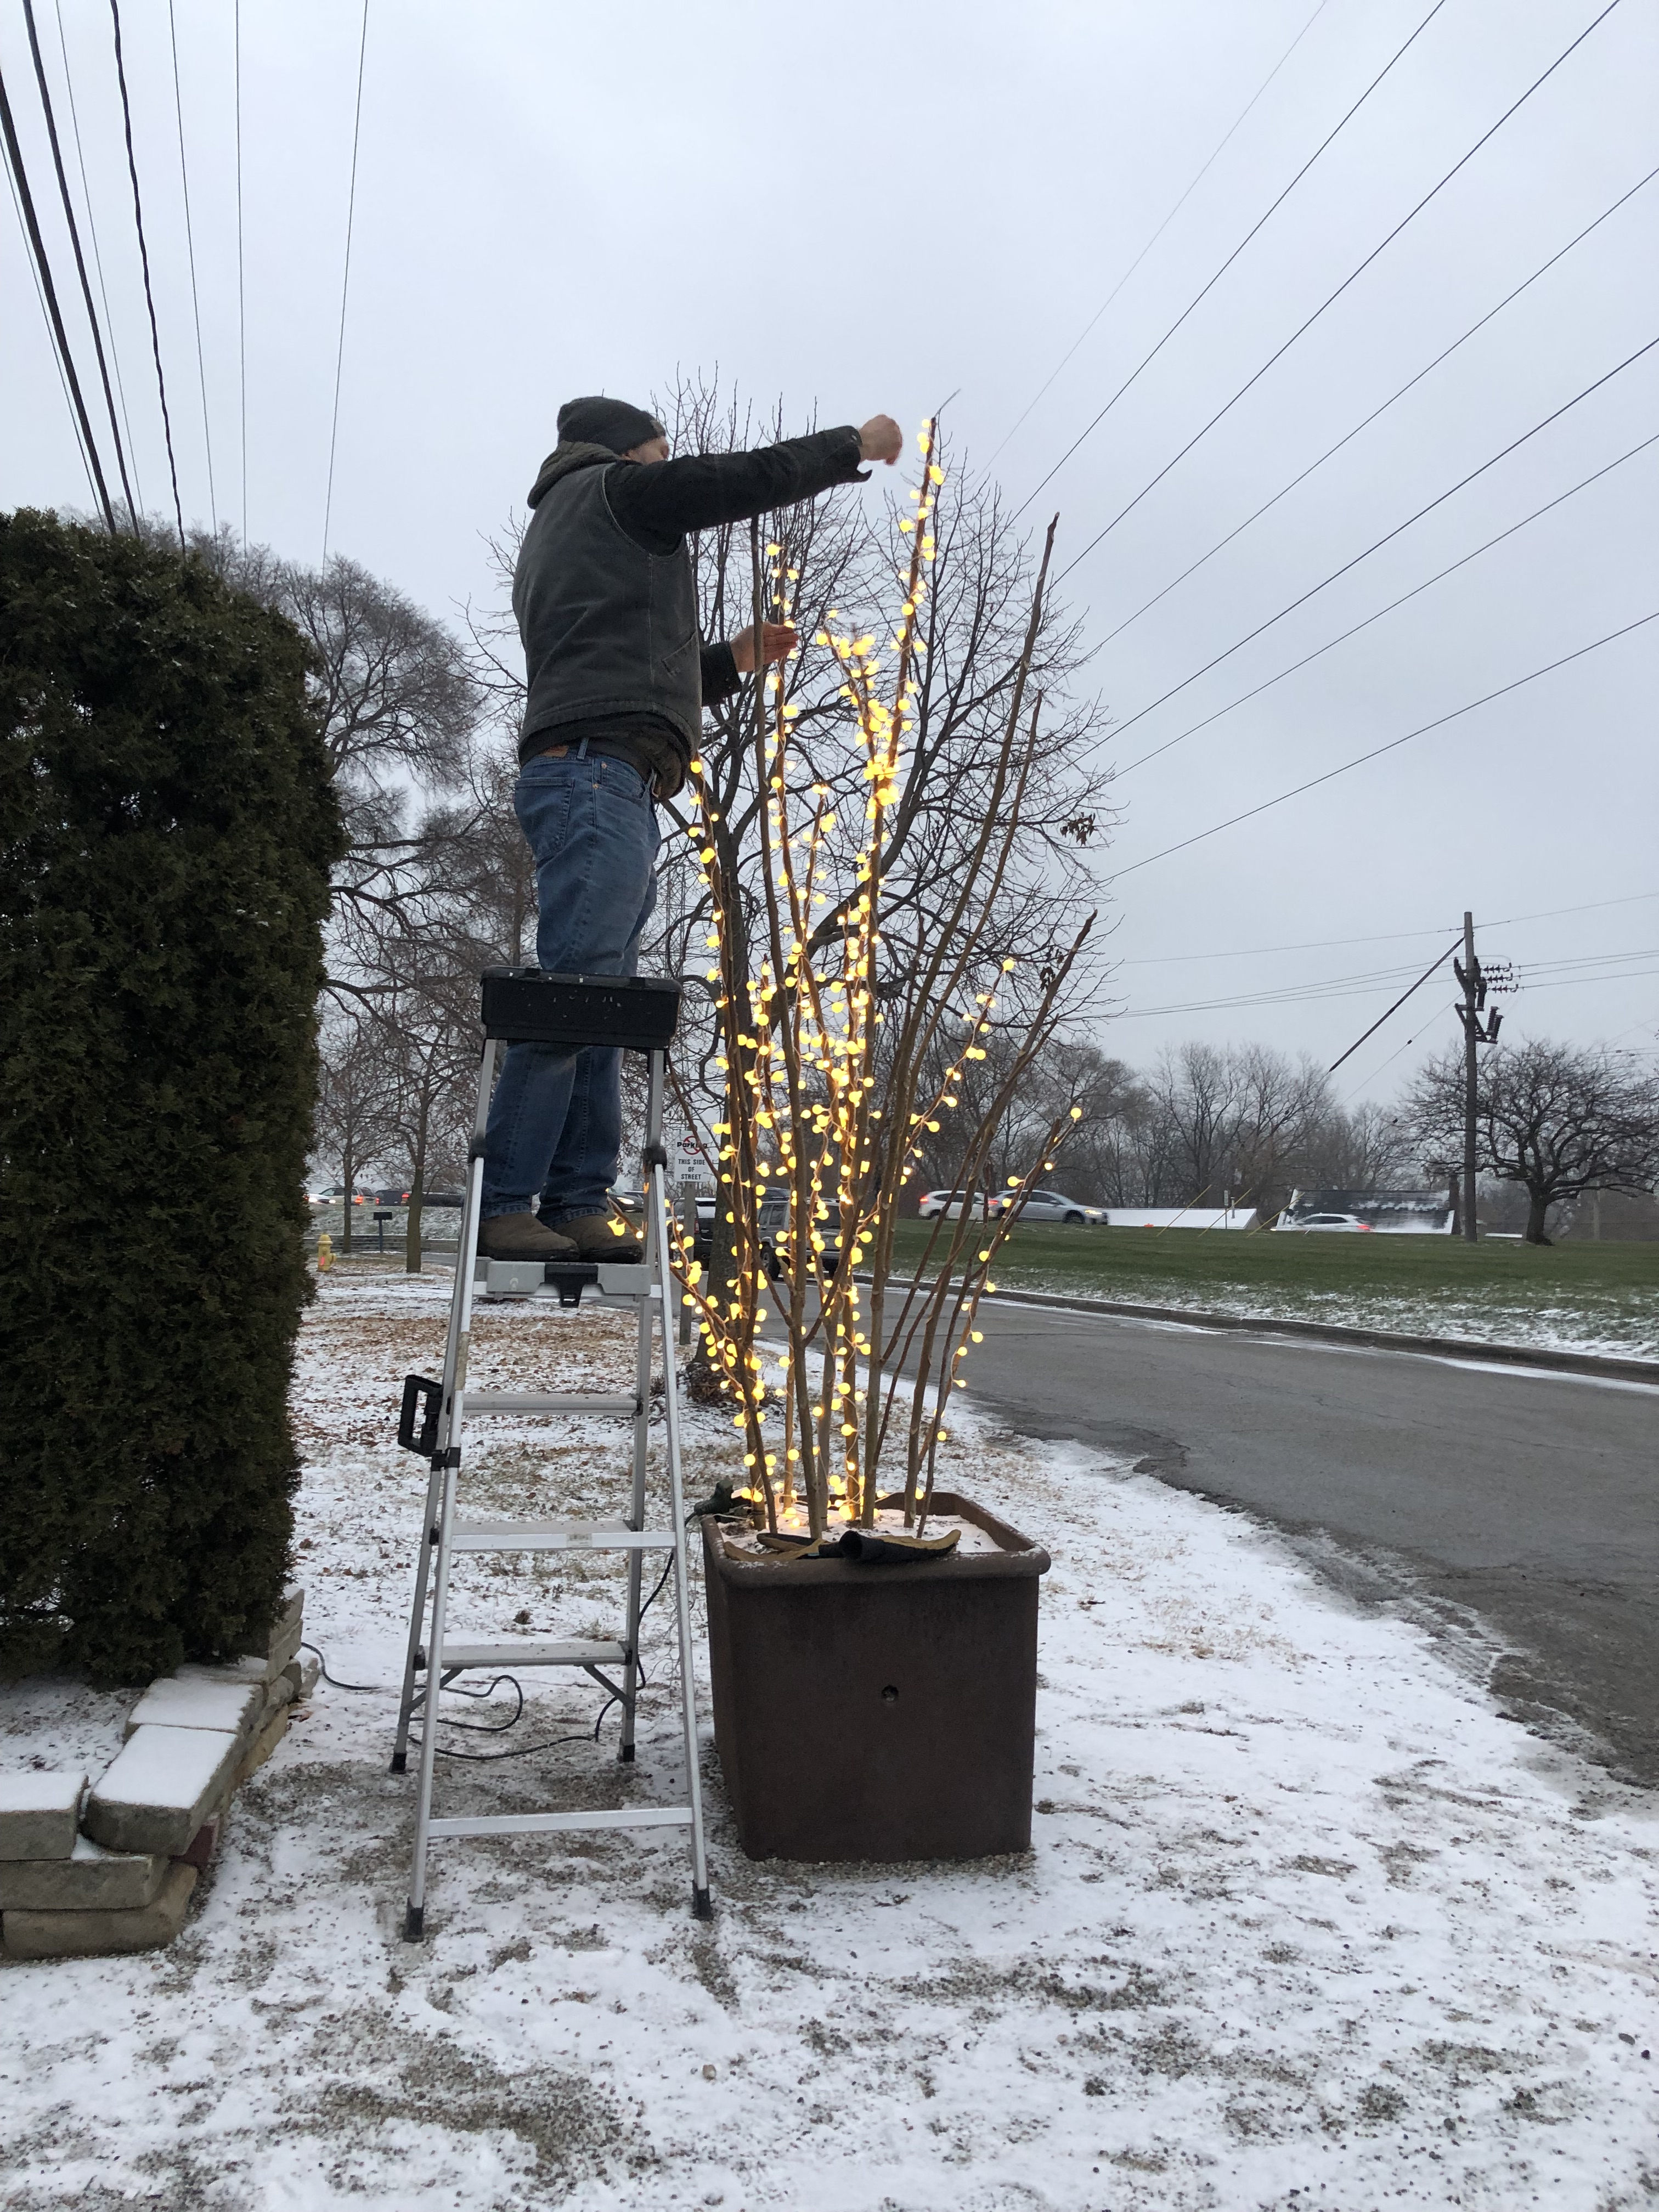
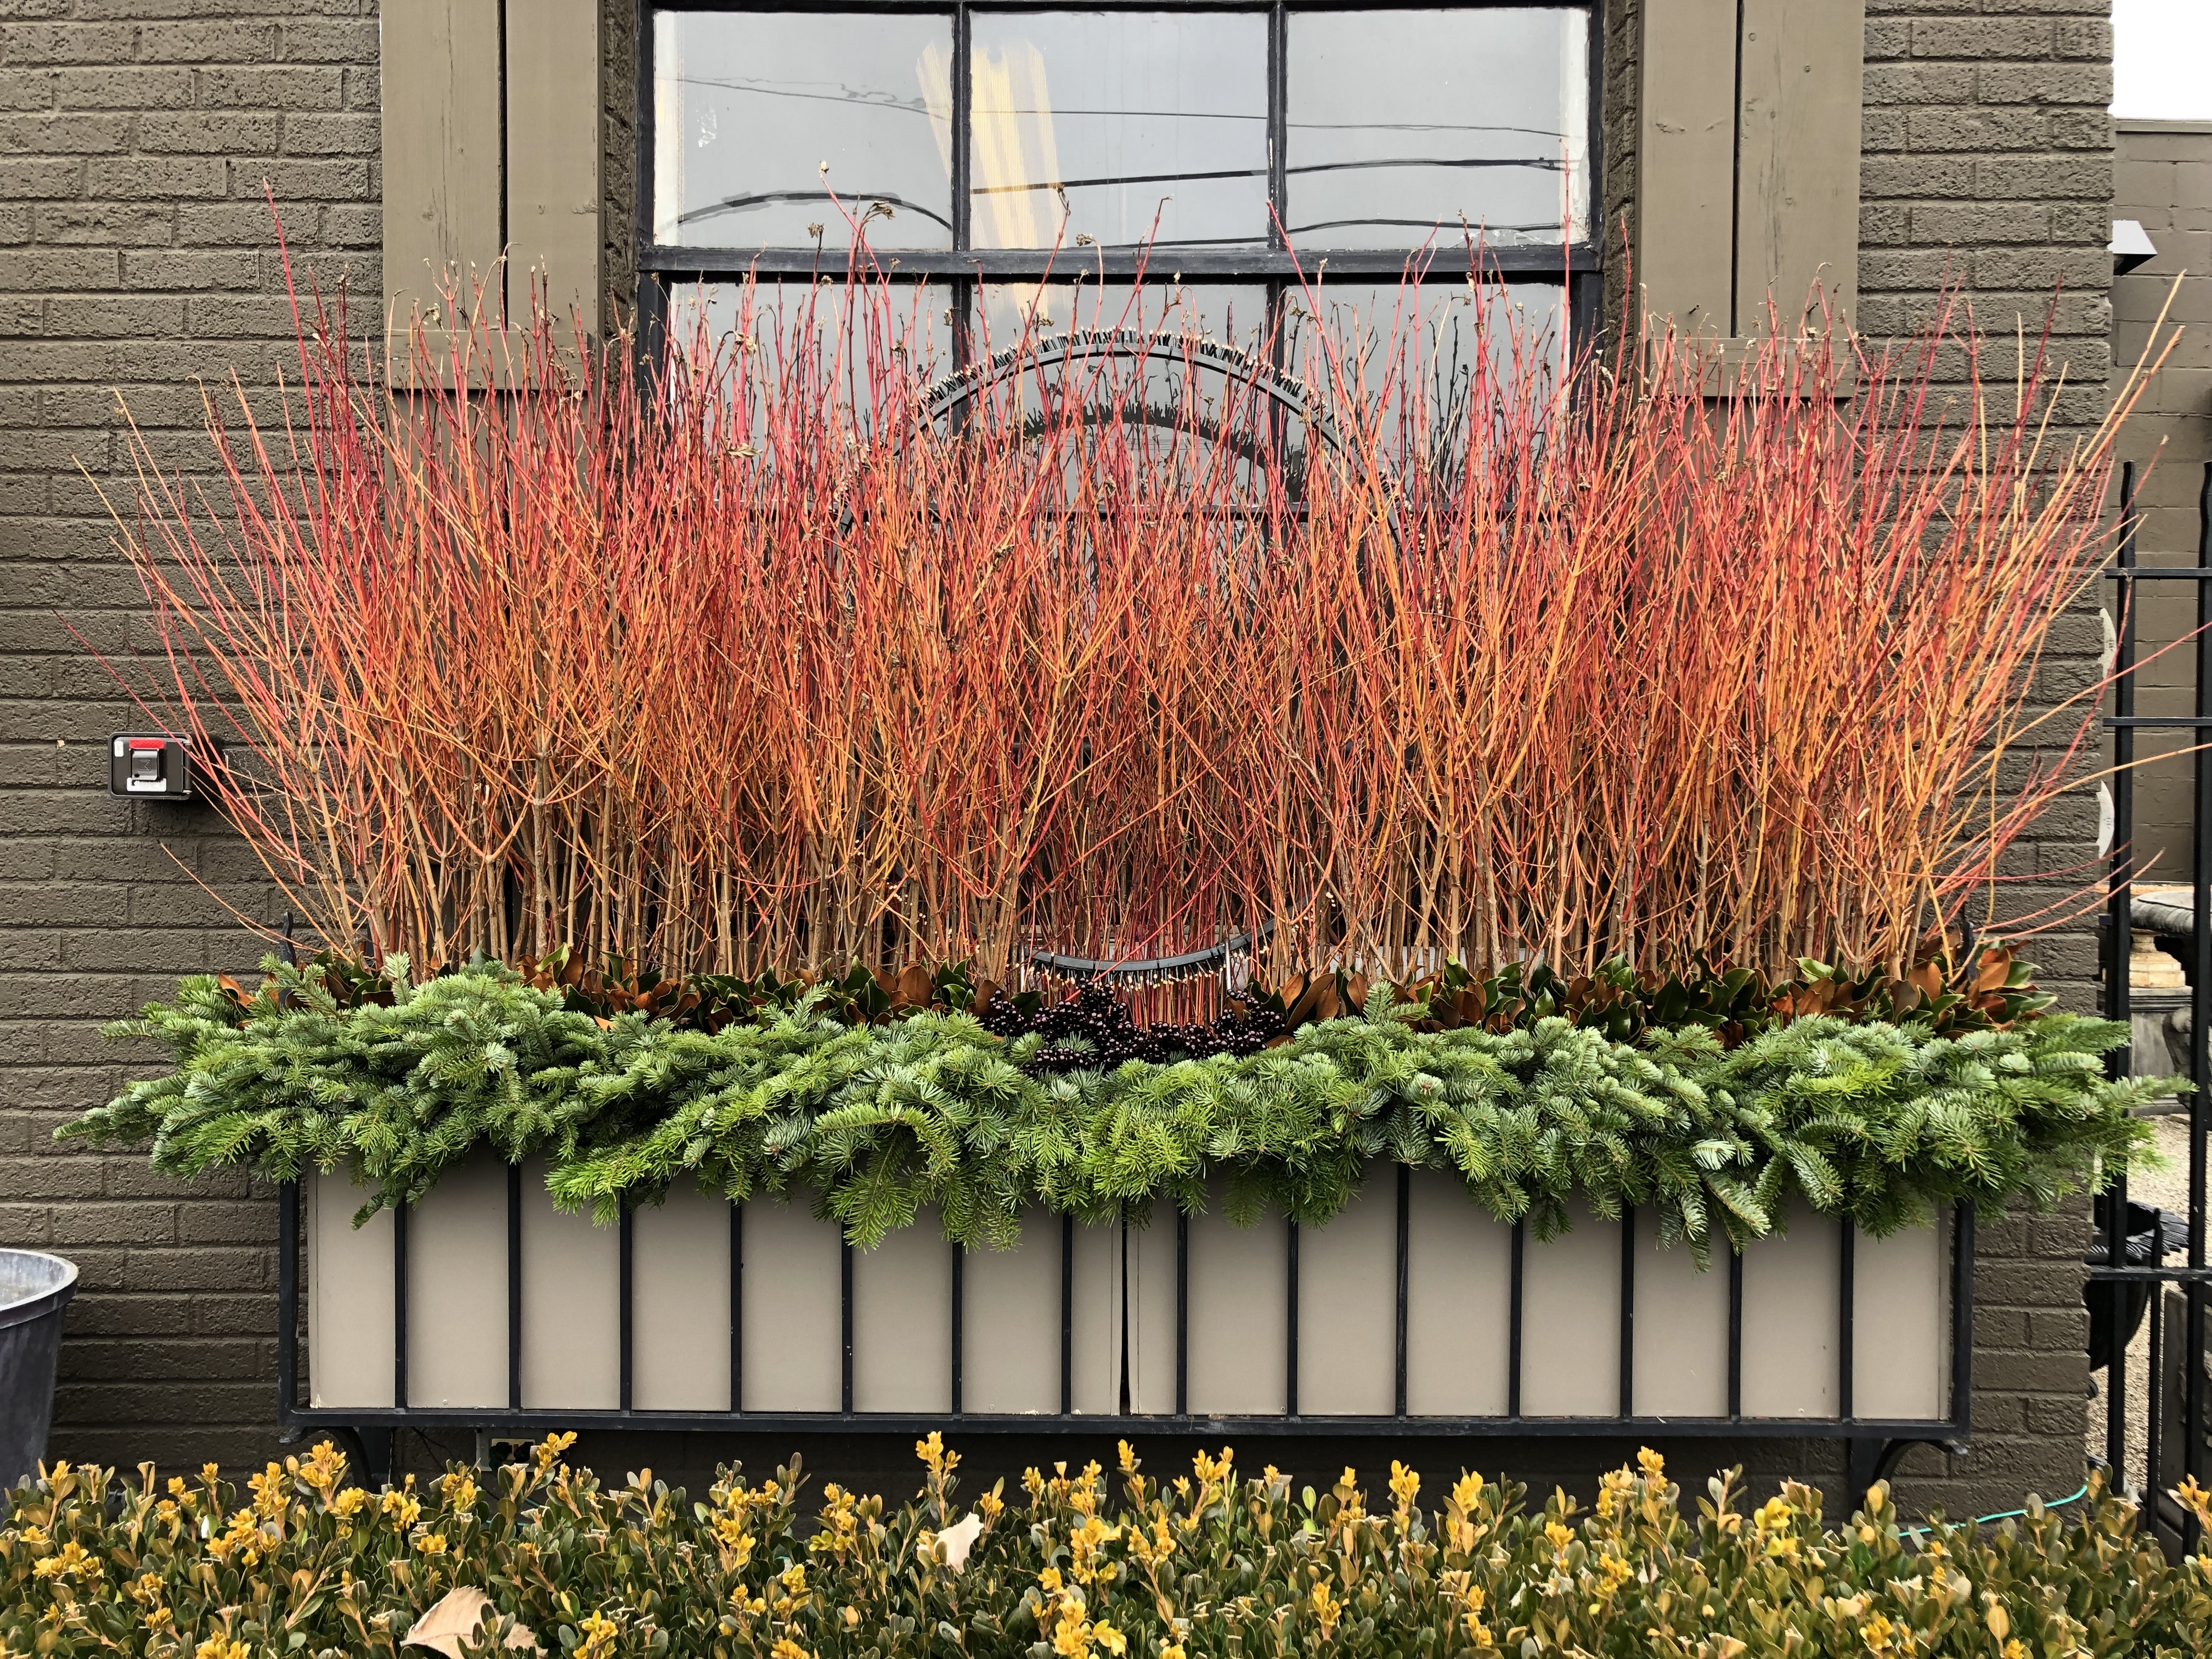
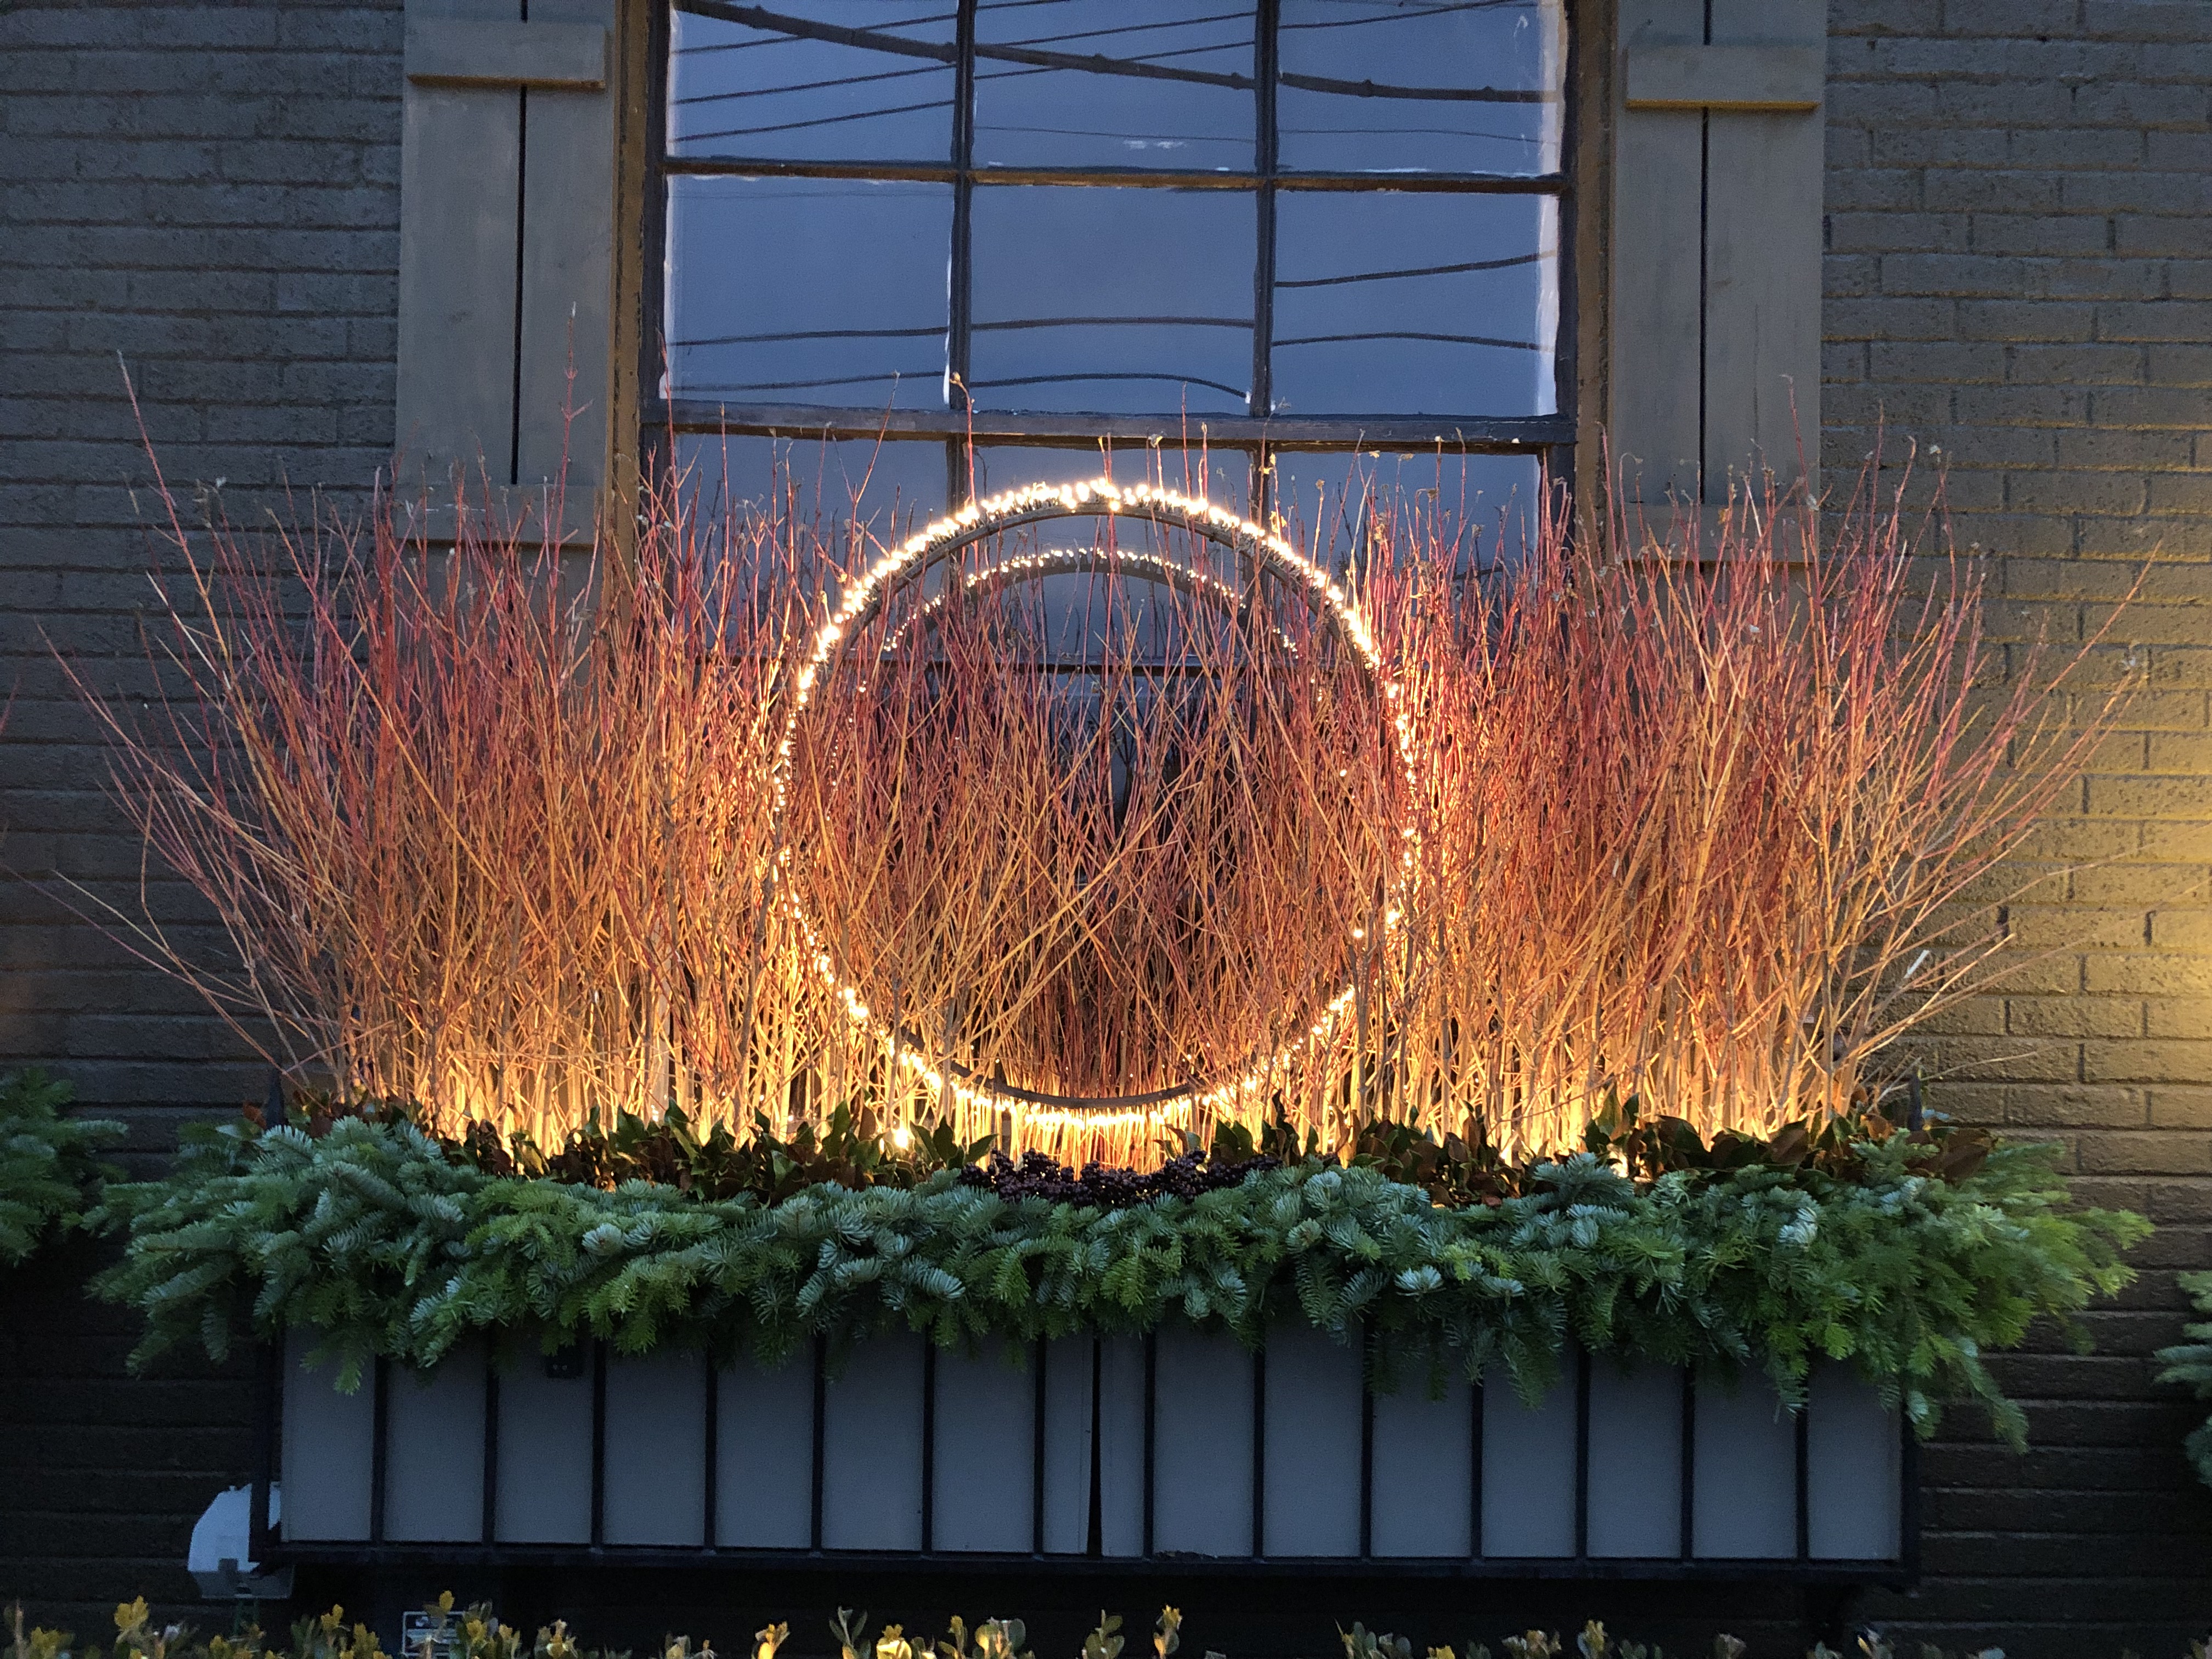
 Every year we fill the window boxes at Detroit Garden Works for the winter season. This year, our winter and seasonal pot obligations ran long. On December 21, my crews had gone home for the holidays, and our storefront boxes were still bare. My crew had a long and arduous season, so I was not about to have them fret over the shop winter window boxes. And our supplies of branches and greens were low. Happily, our supplier emailed Rob that he had a late cutting of a new branch for him – were we interested? It did not take long for him to send 12 bales of Midwinter Fire dogwood stems our way. The form in the above picture has its fair share of holes, as this is its third season. But with a few minor repairs, it was ready. My part in the process of our winter pots is the design. My crew does all of the construction admirably well. But given that there was a time when I designed and fabricated, I was sure I could do that again. The idea was simple. Embed a light ring in a thicket of dogwood branches.
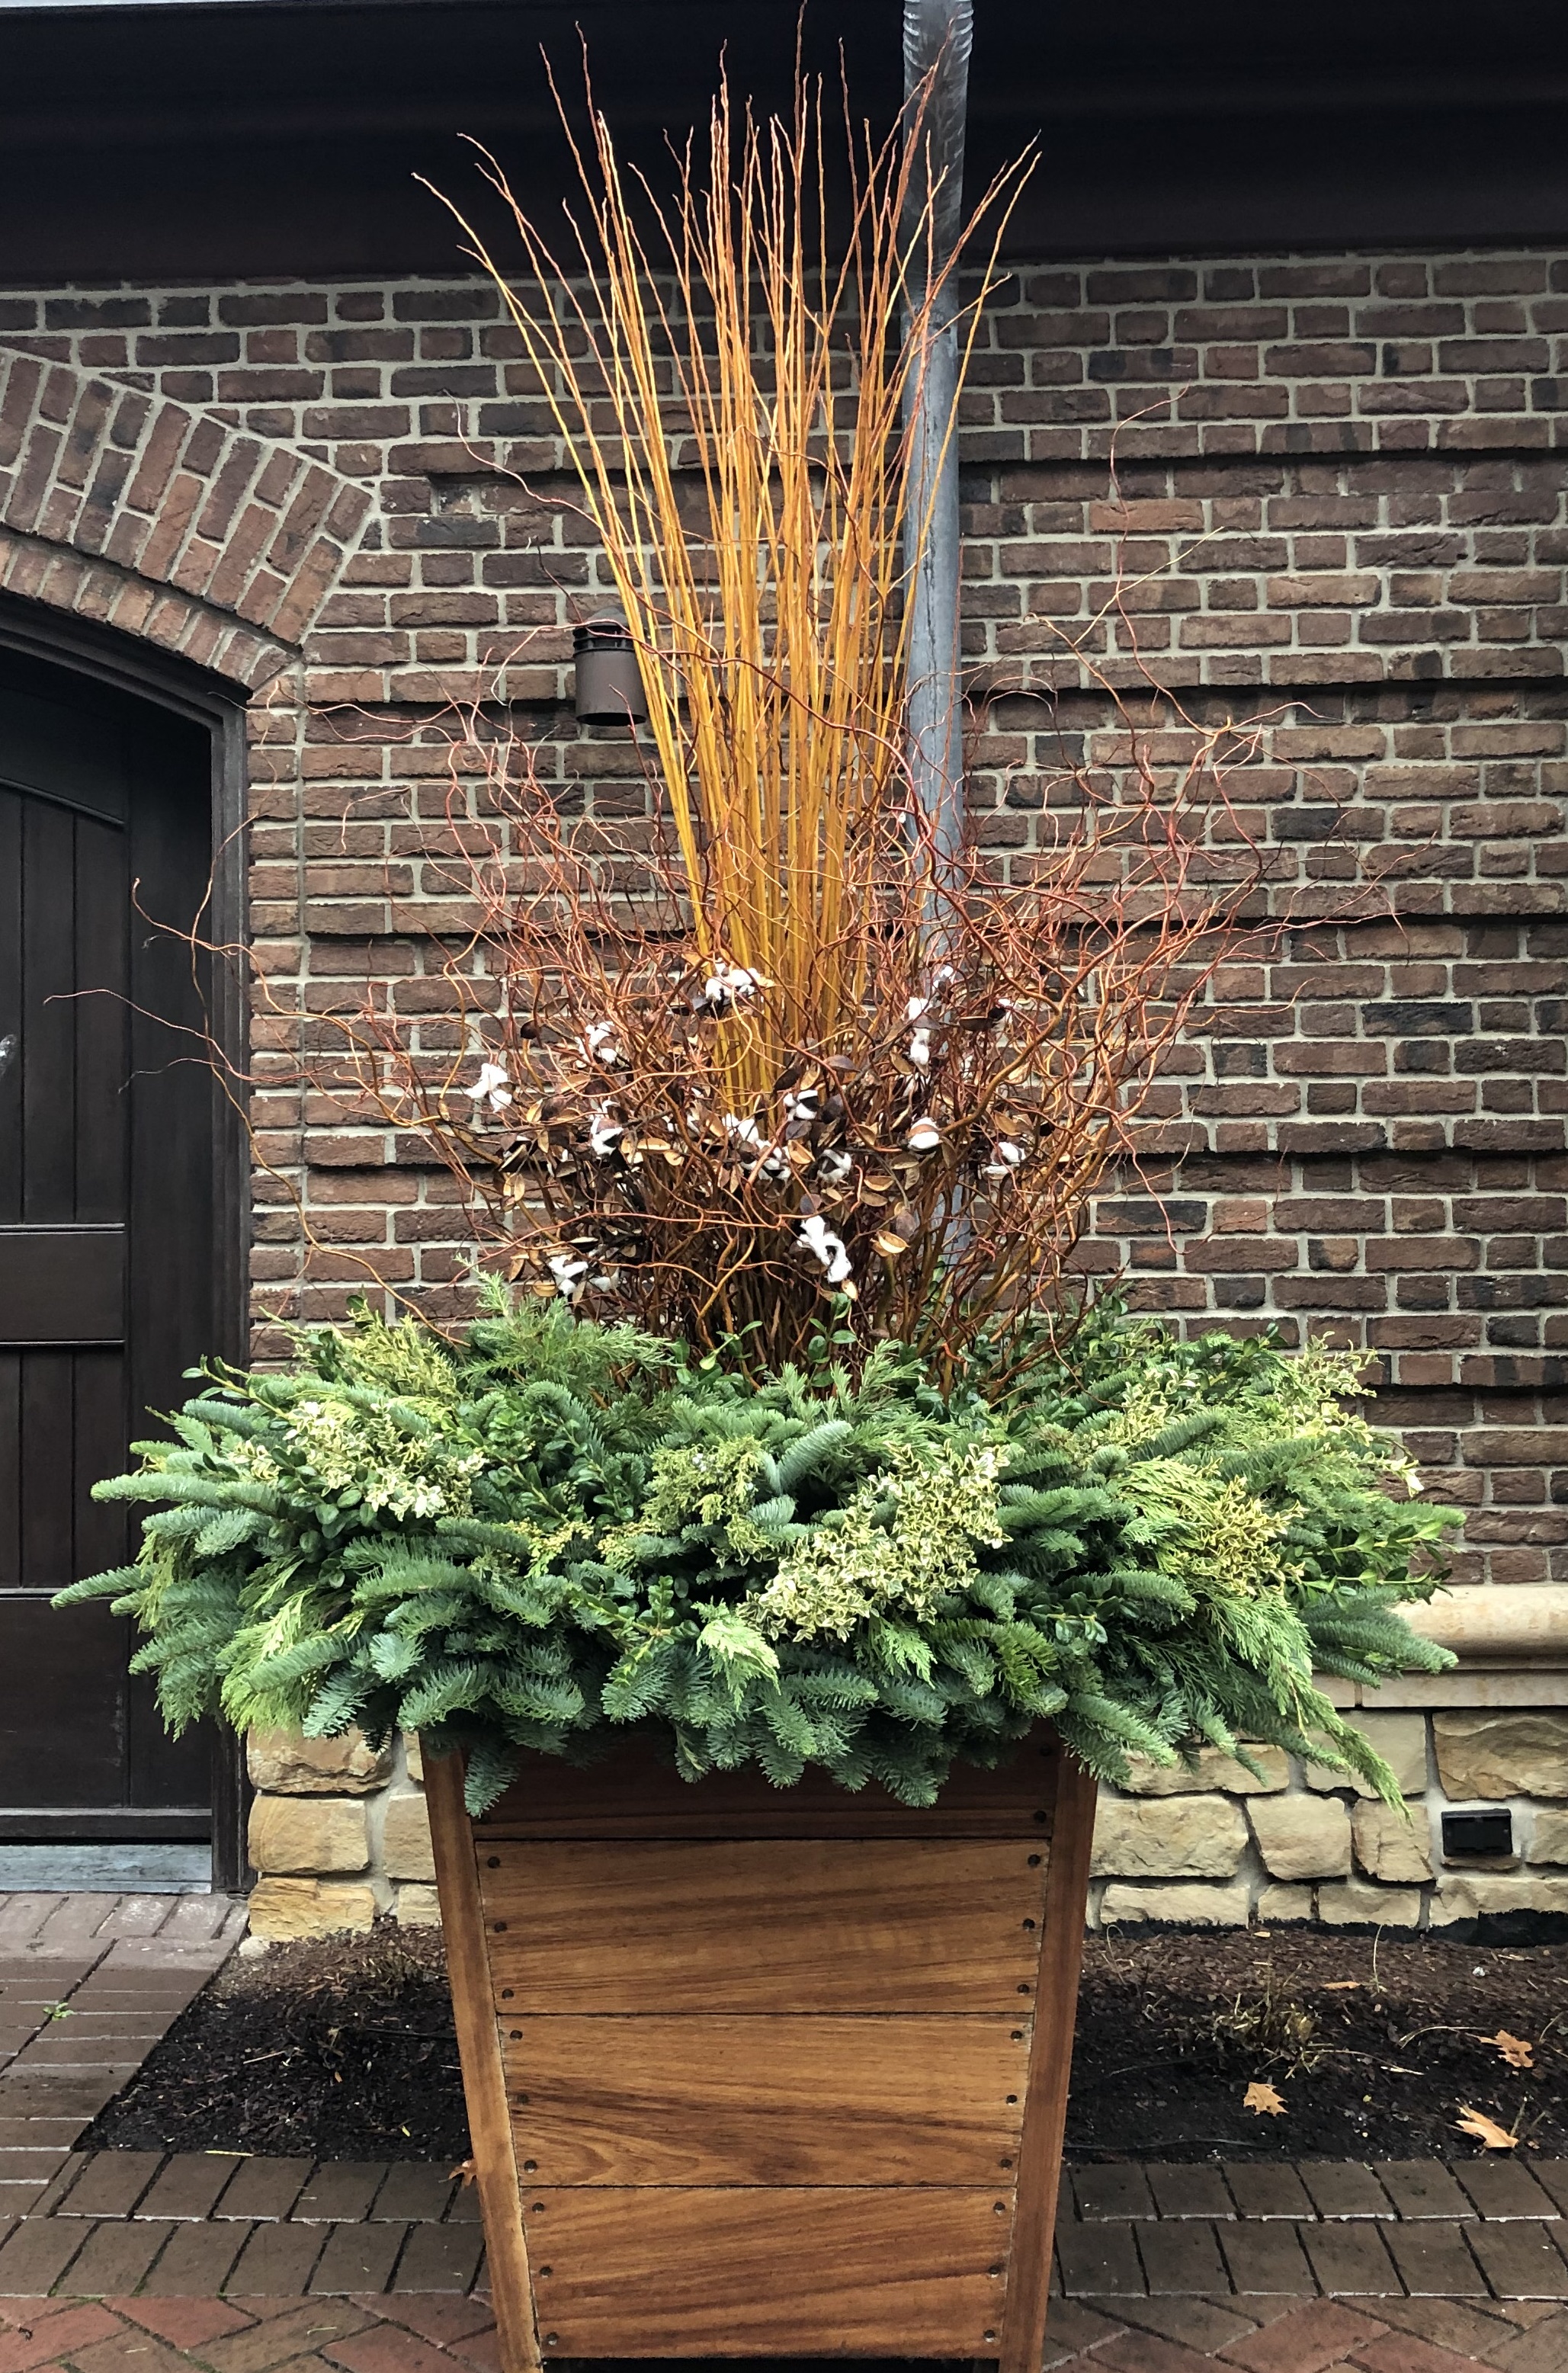
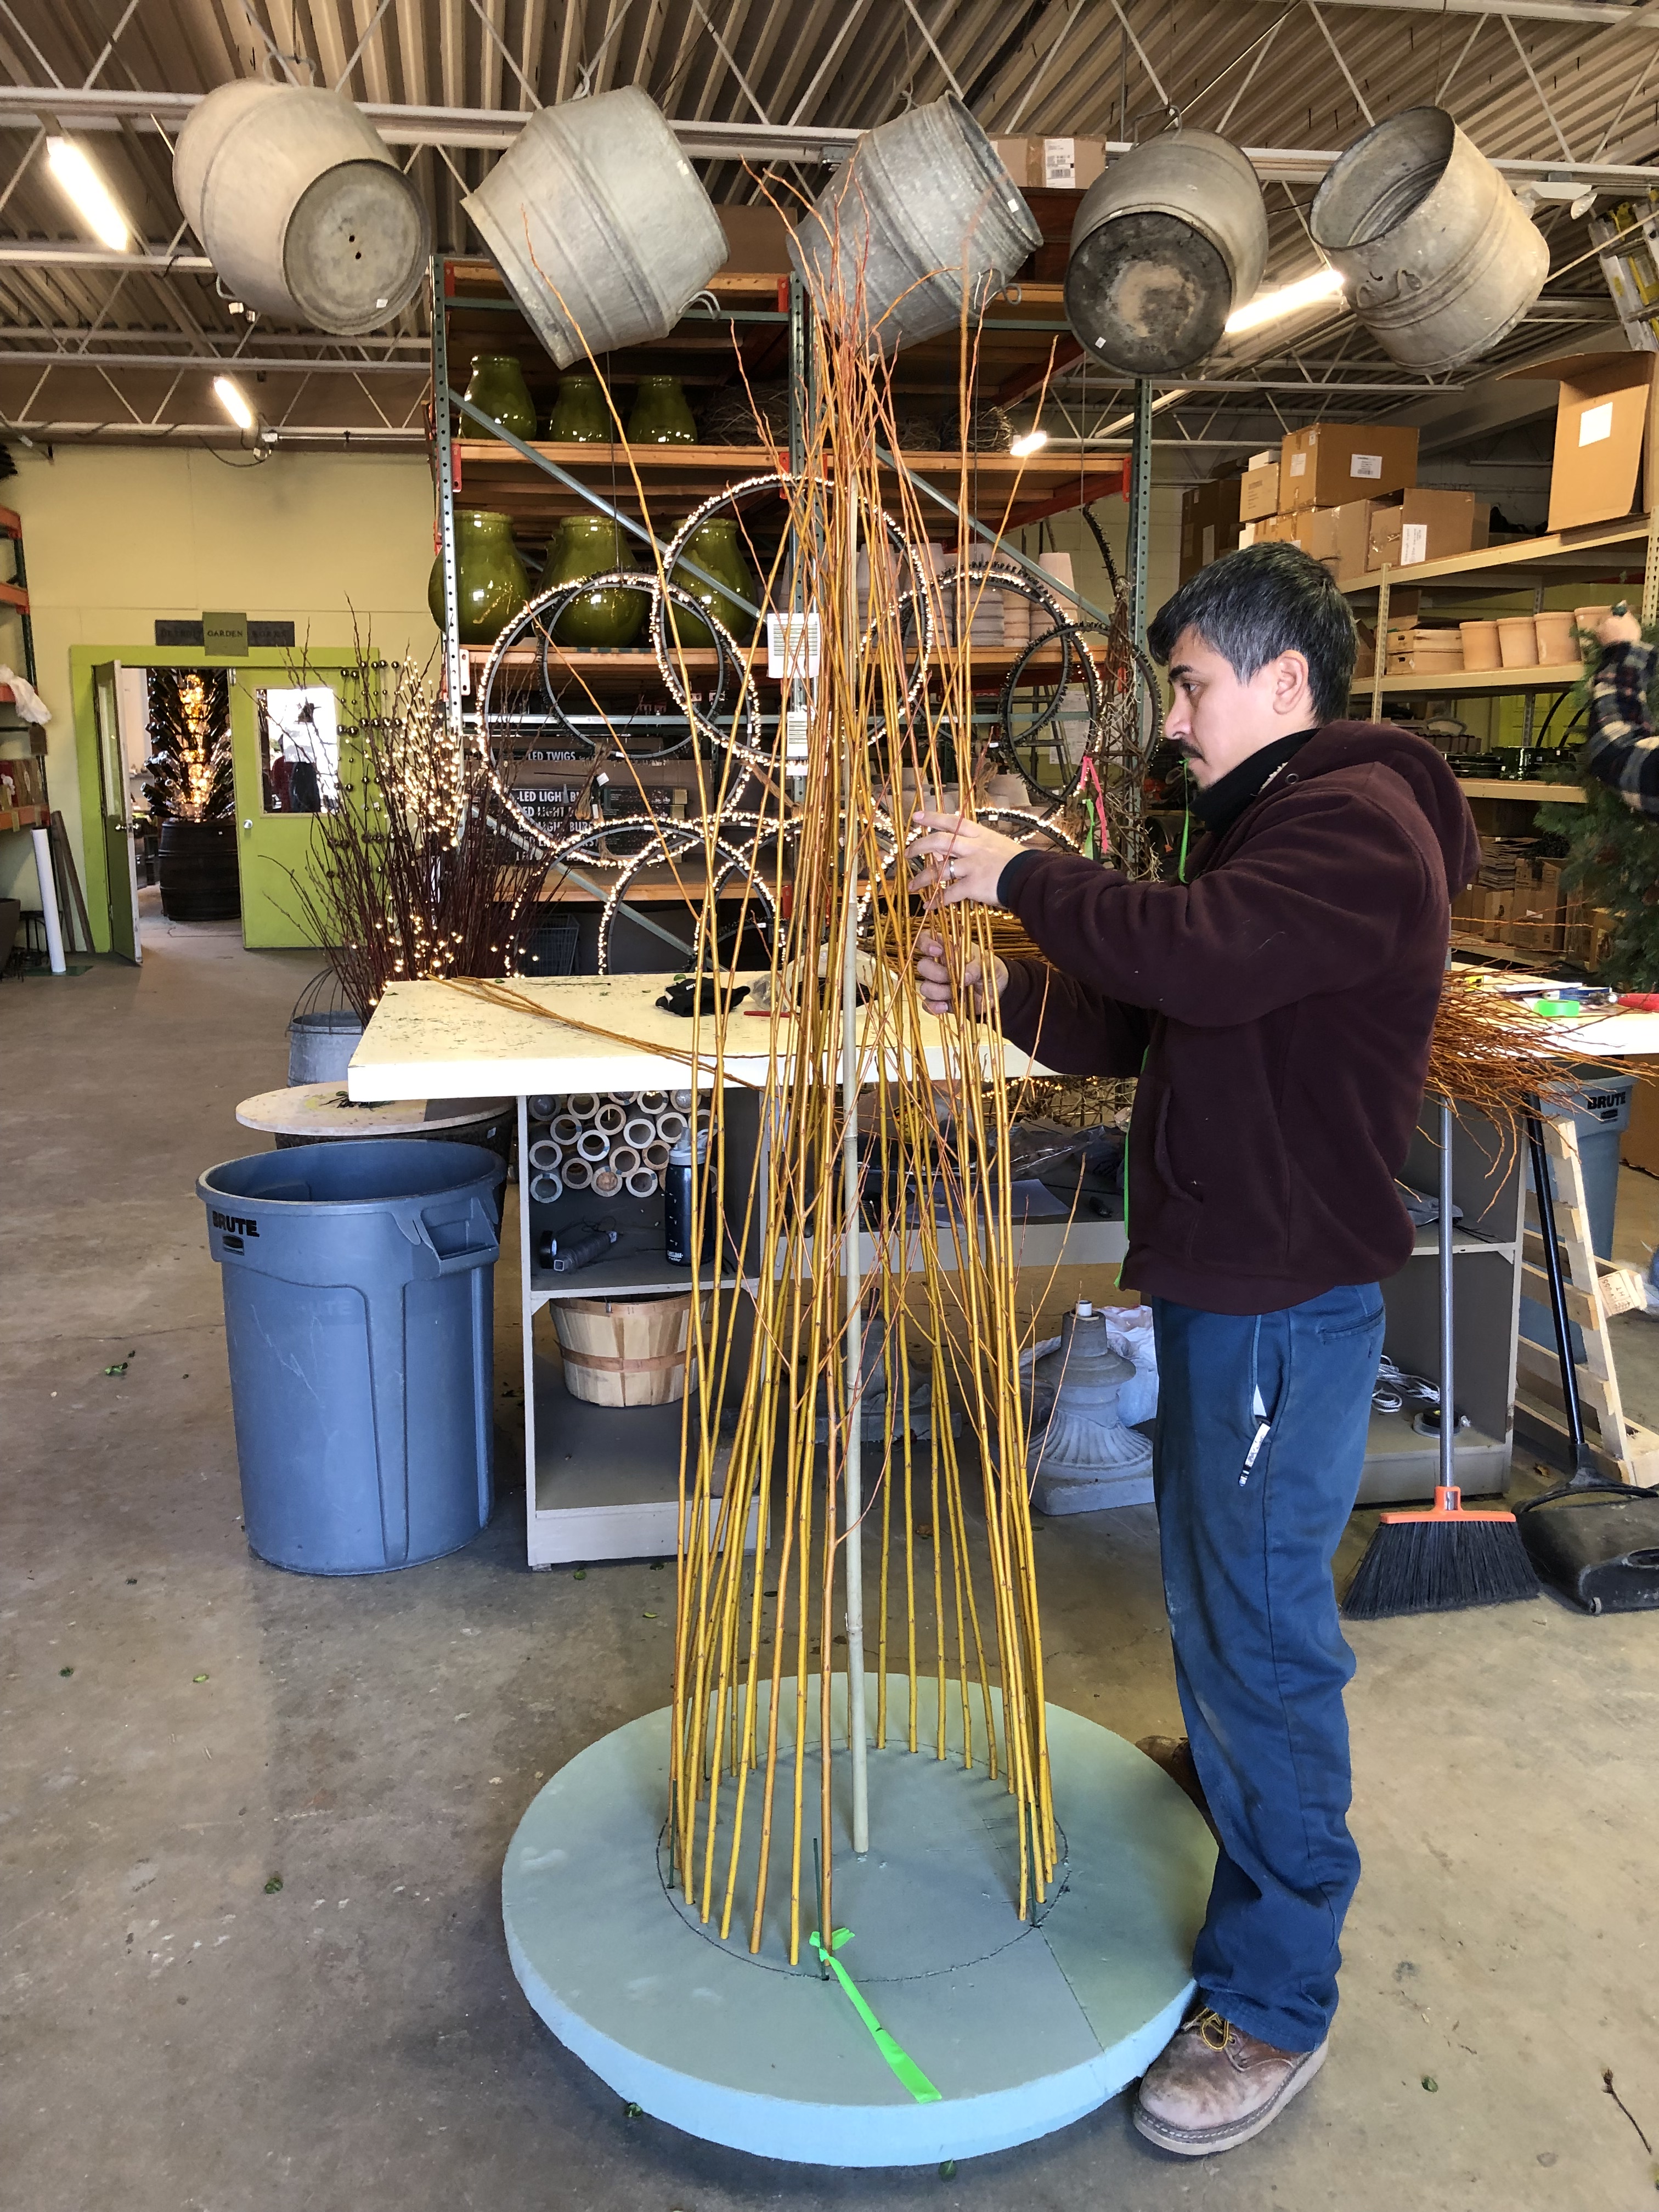
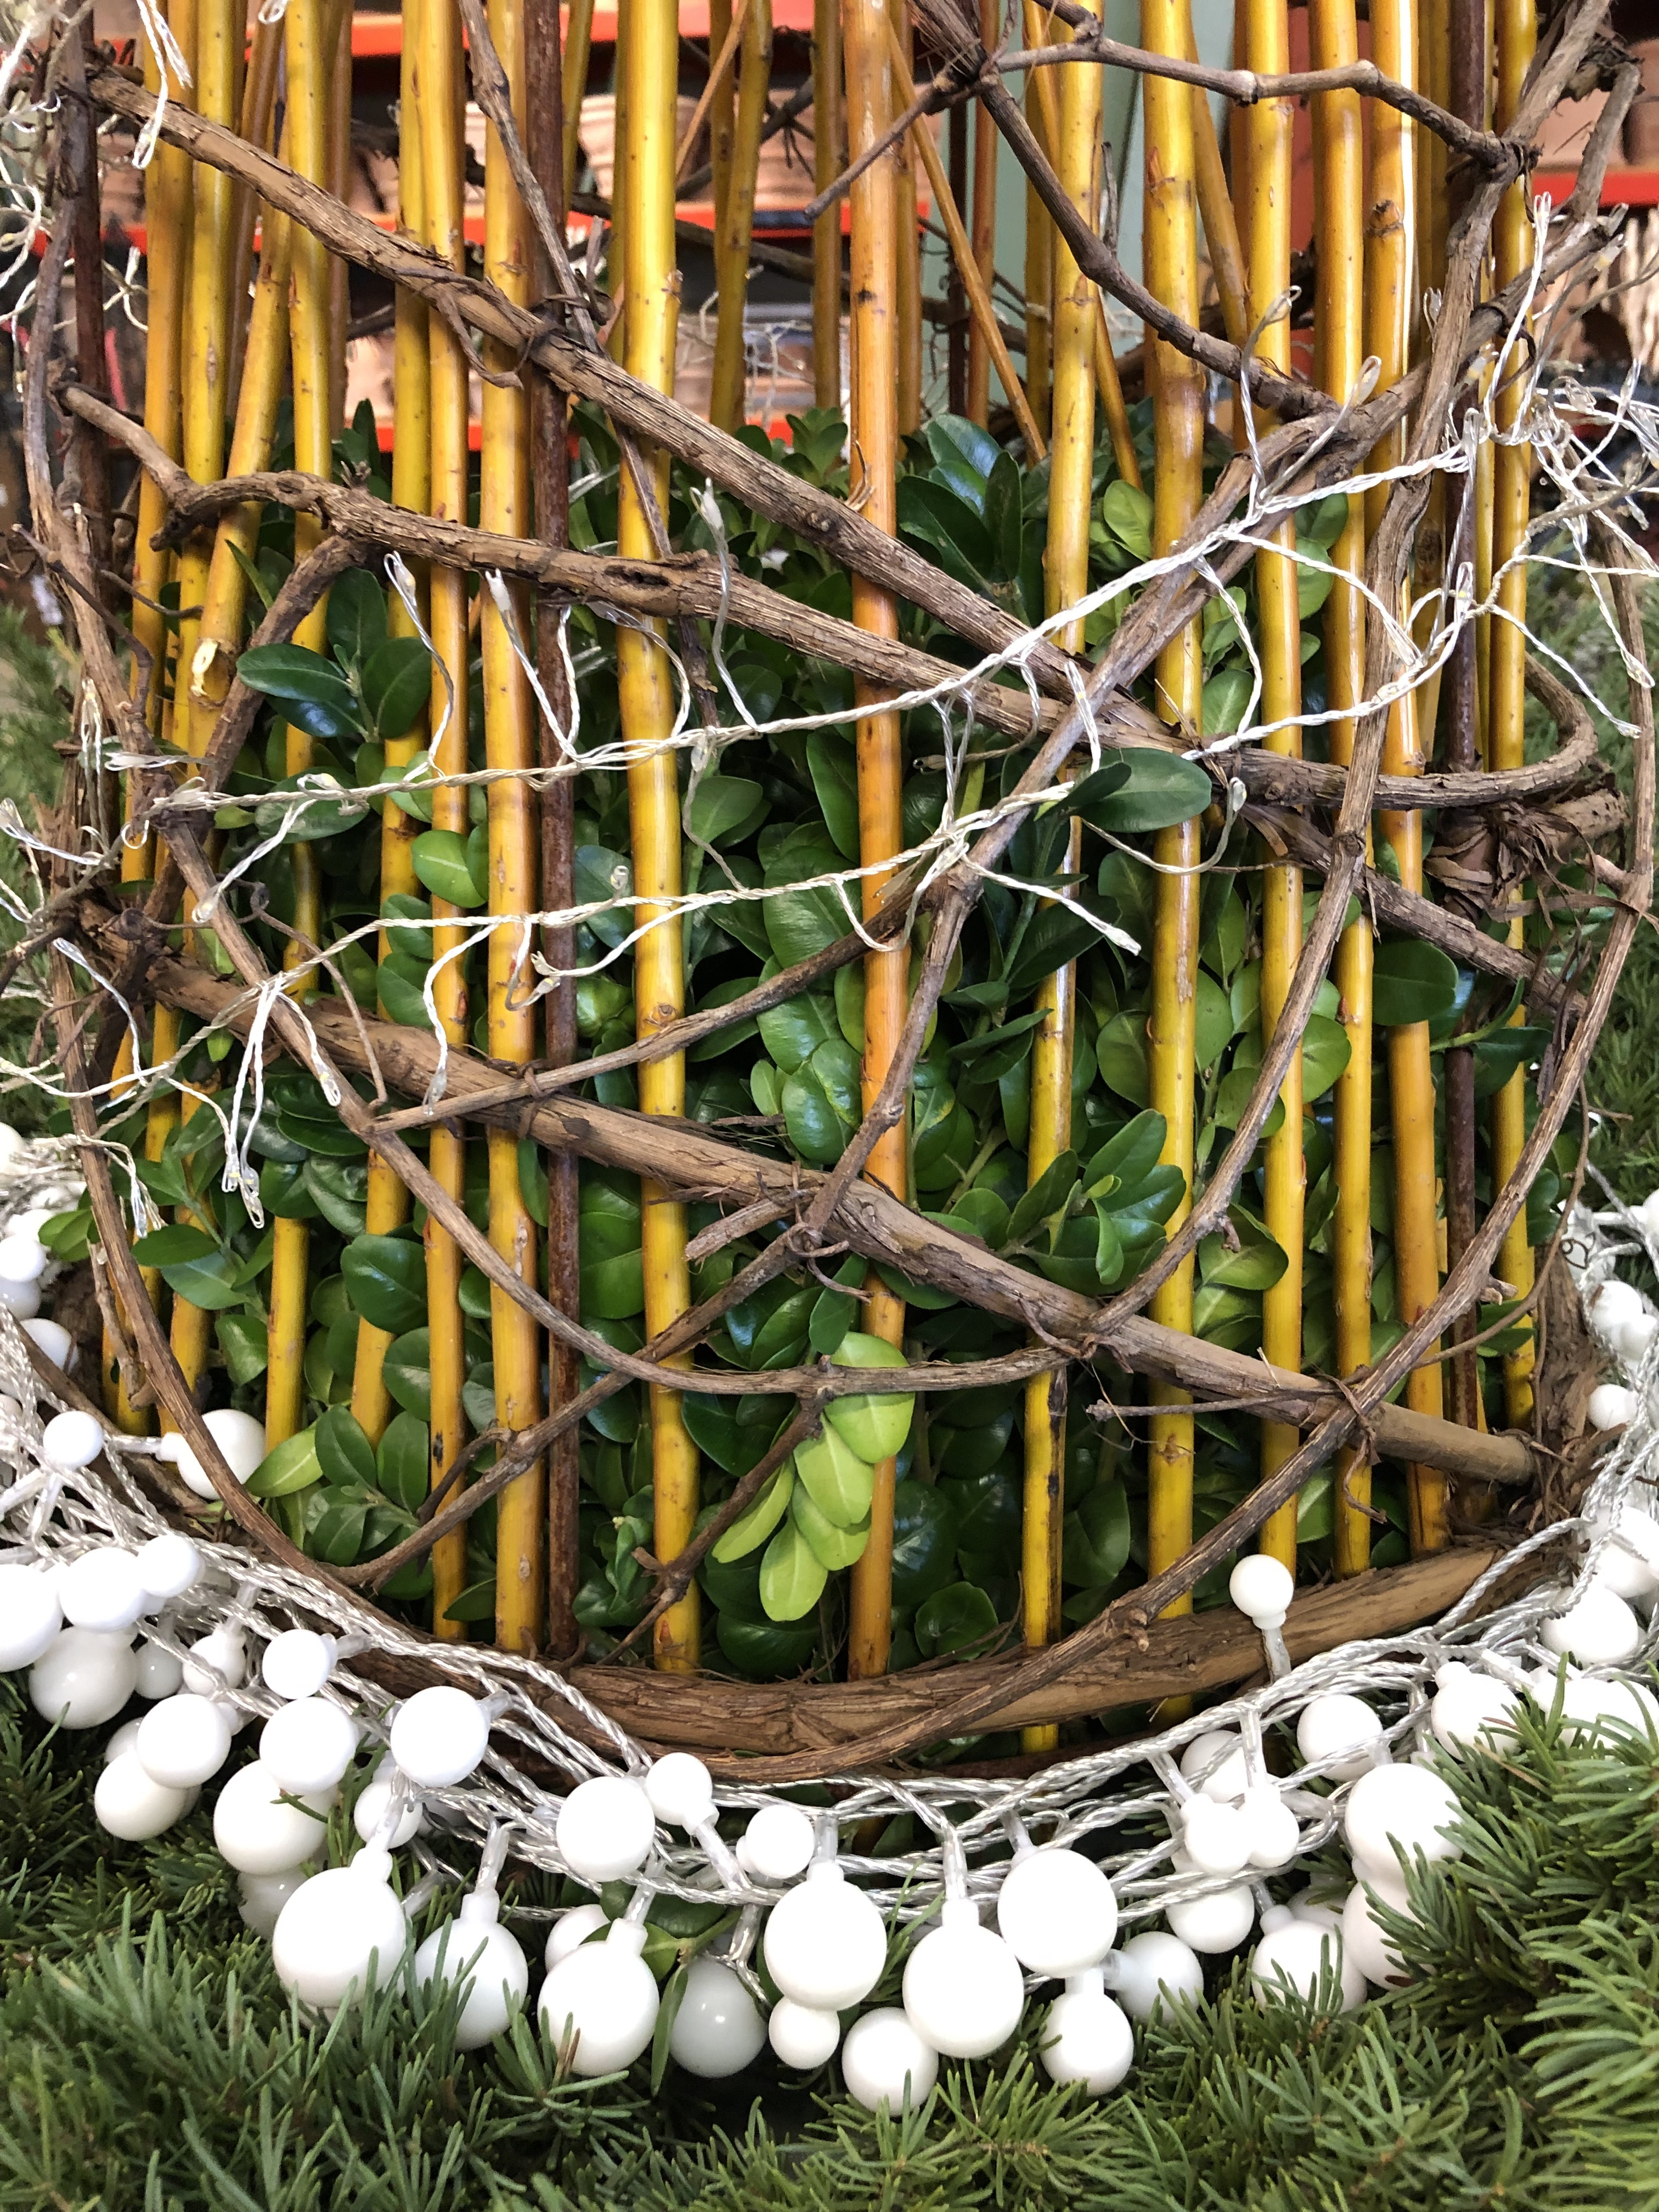
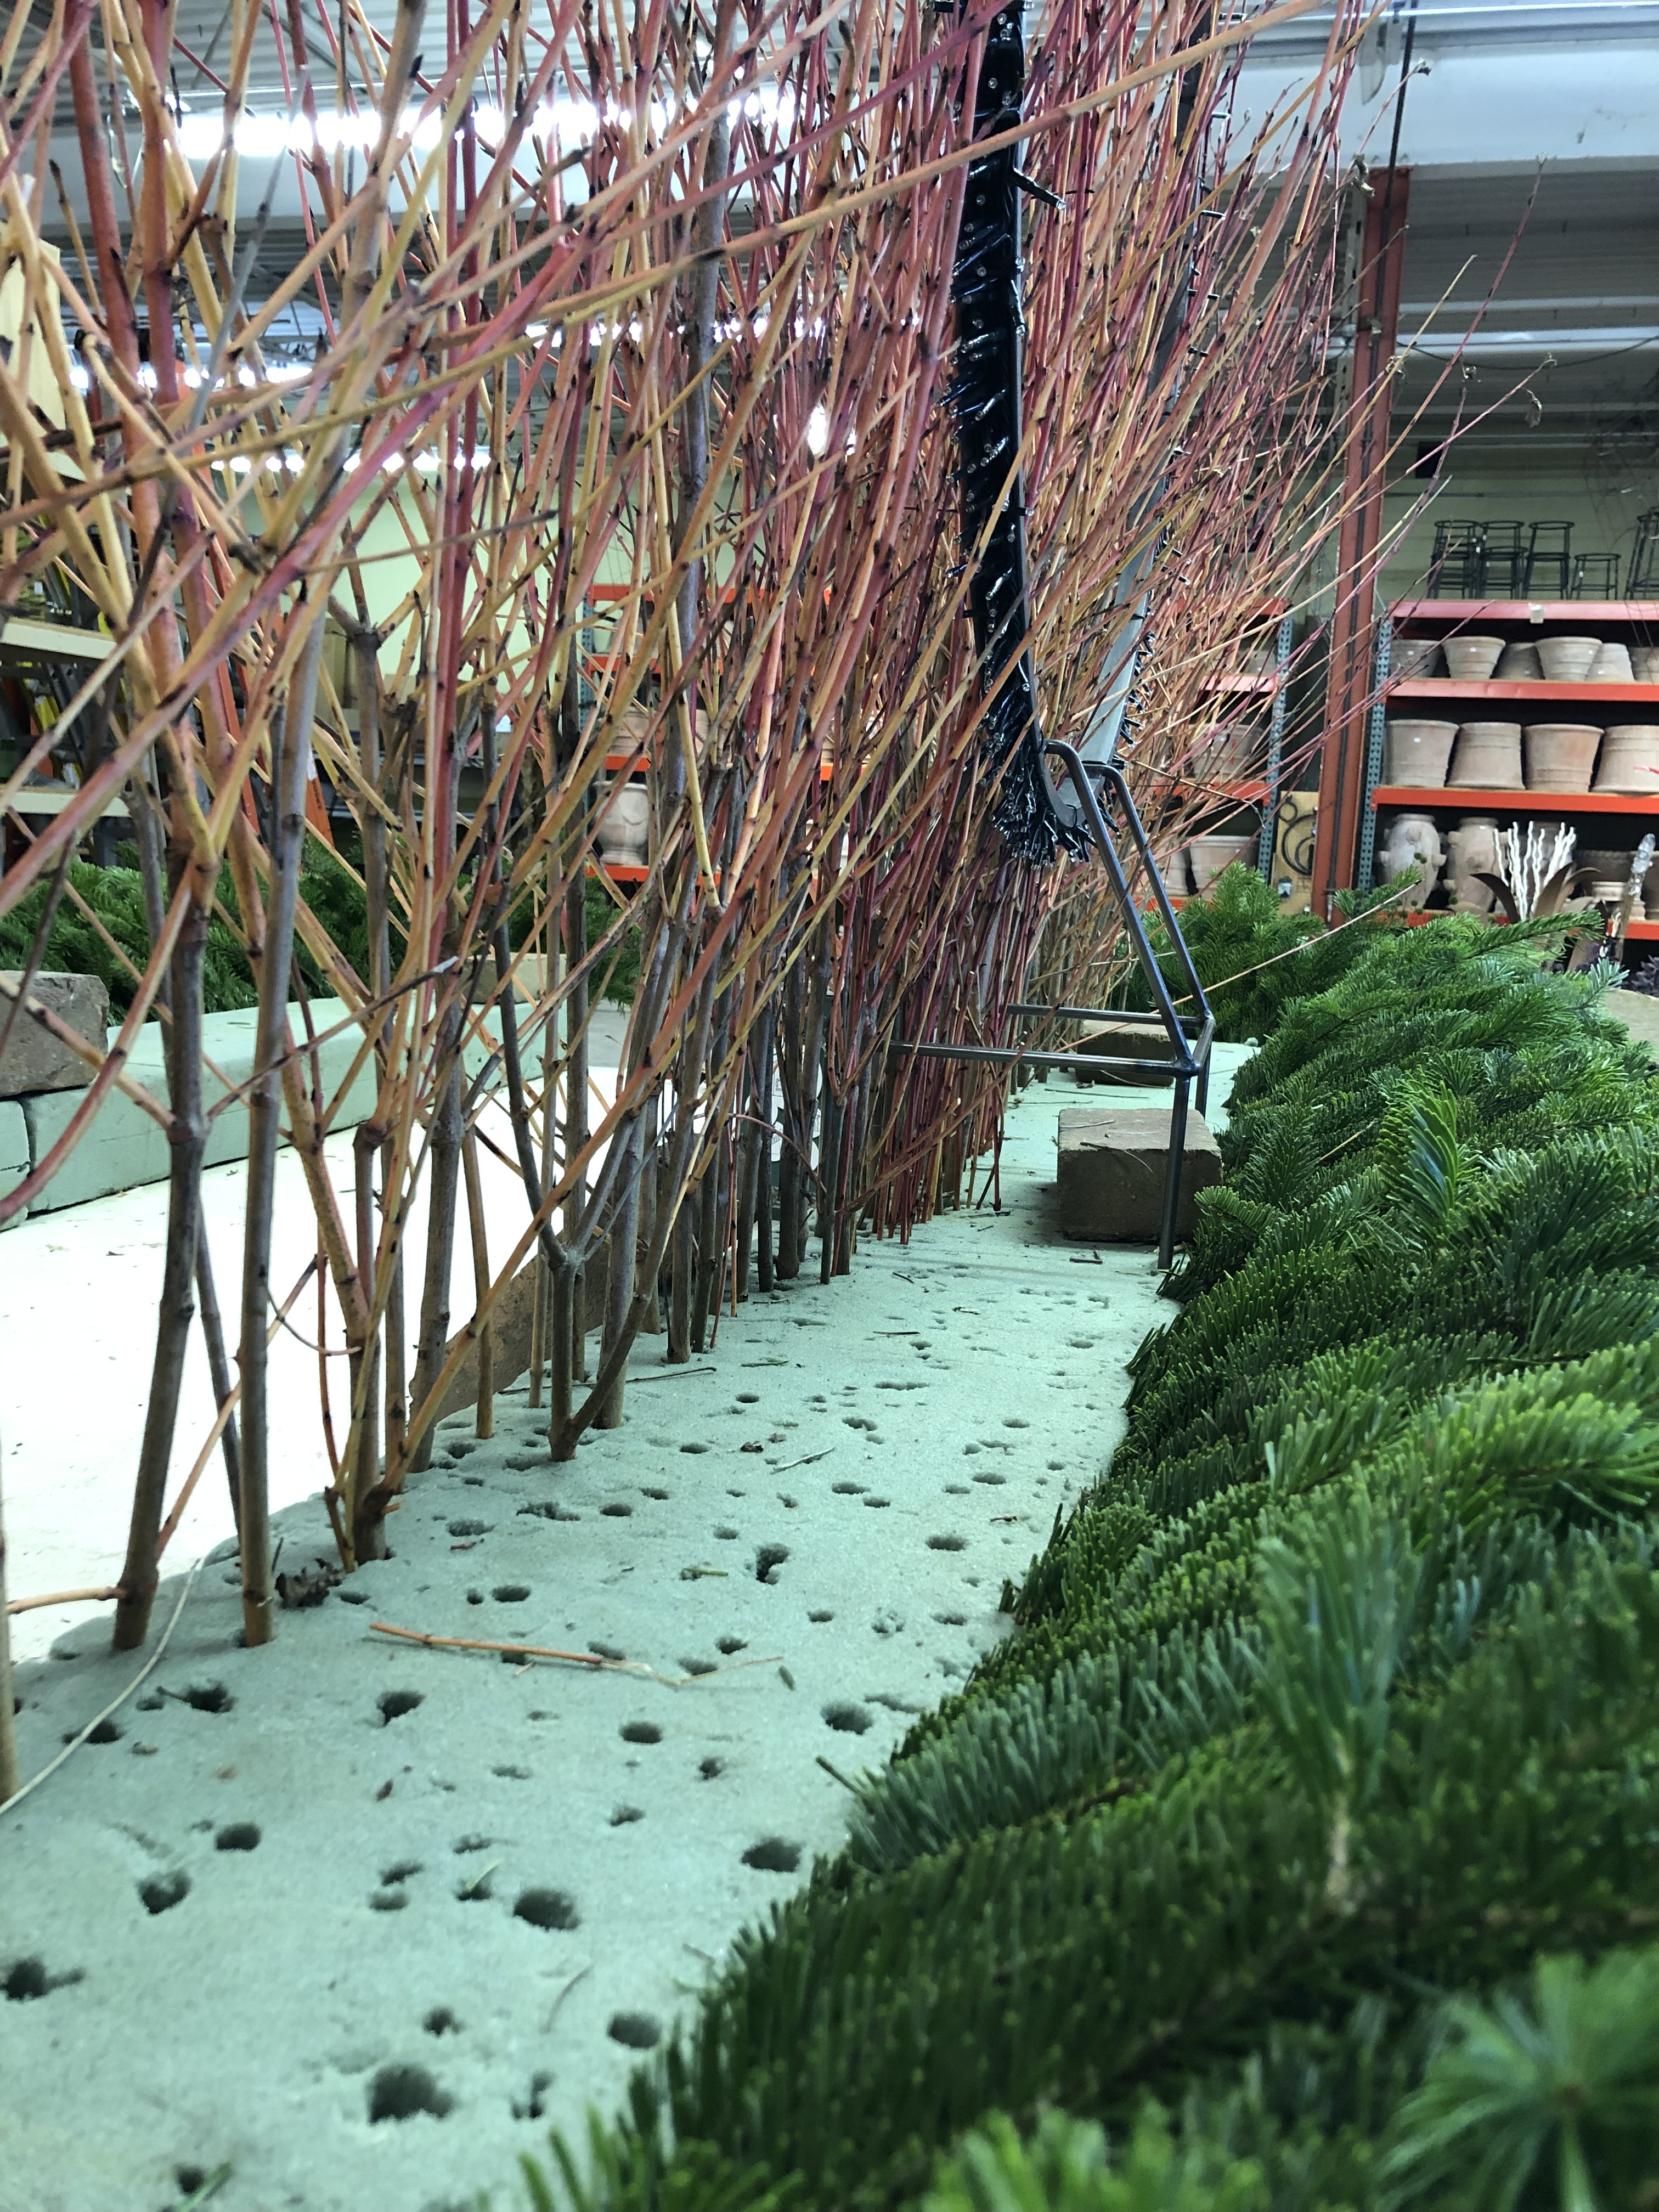
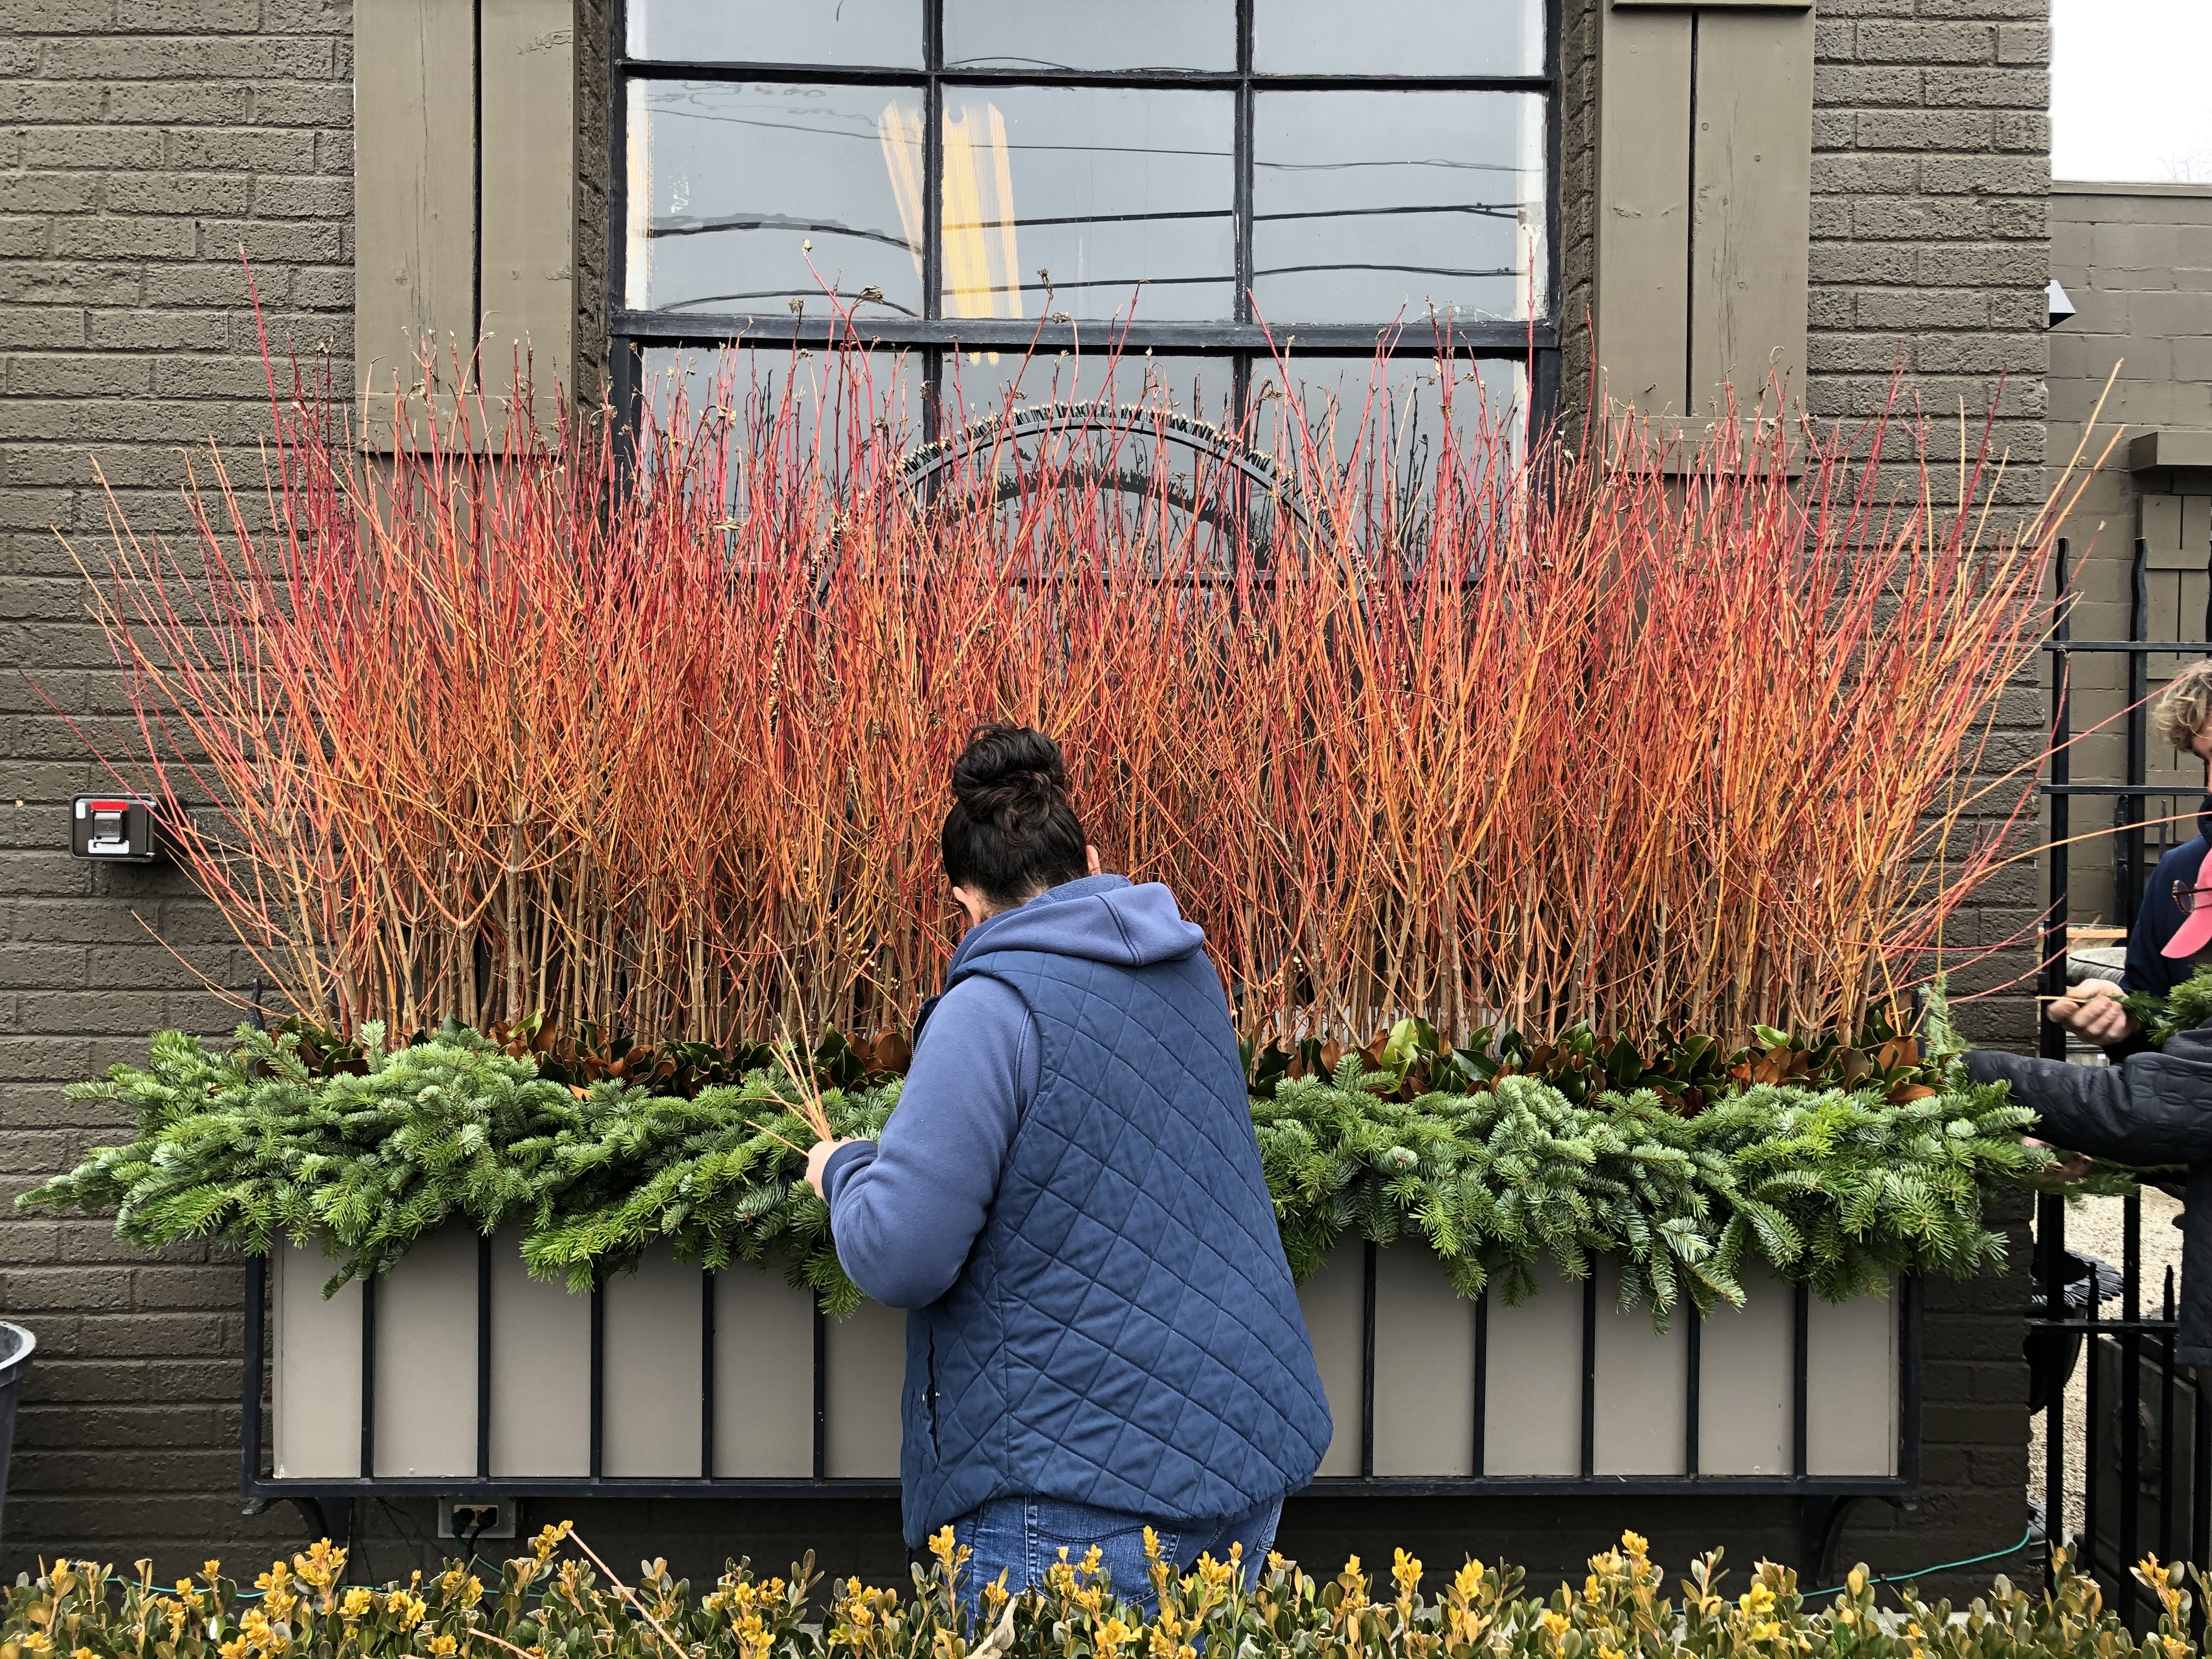
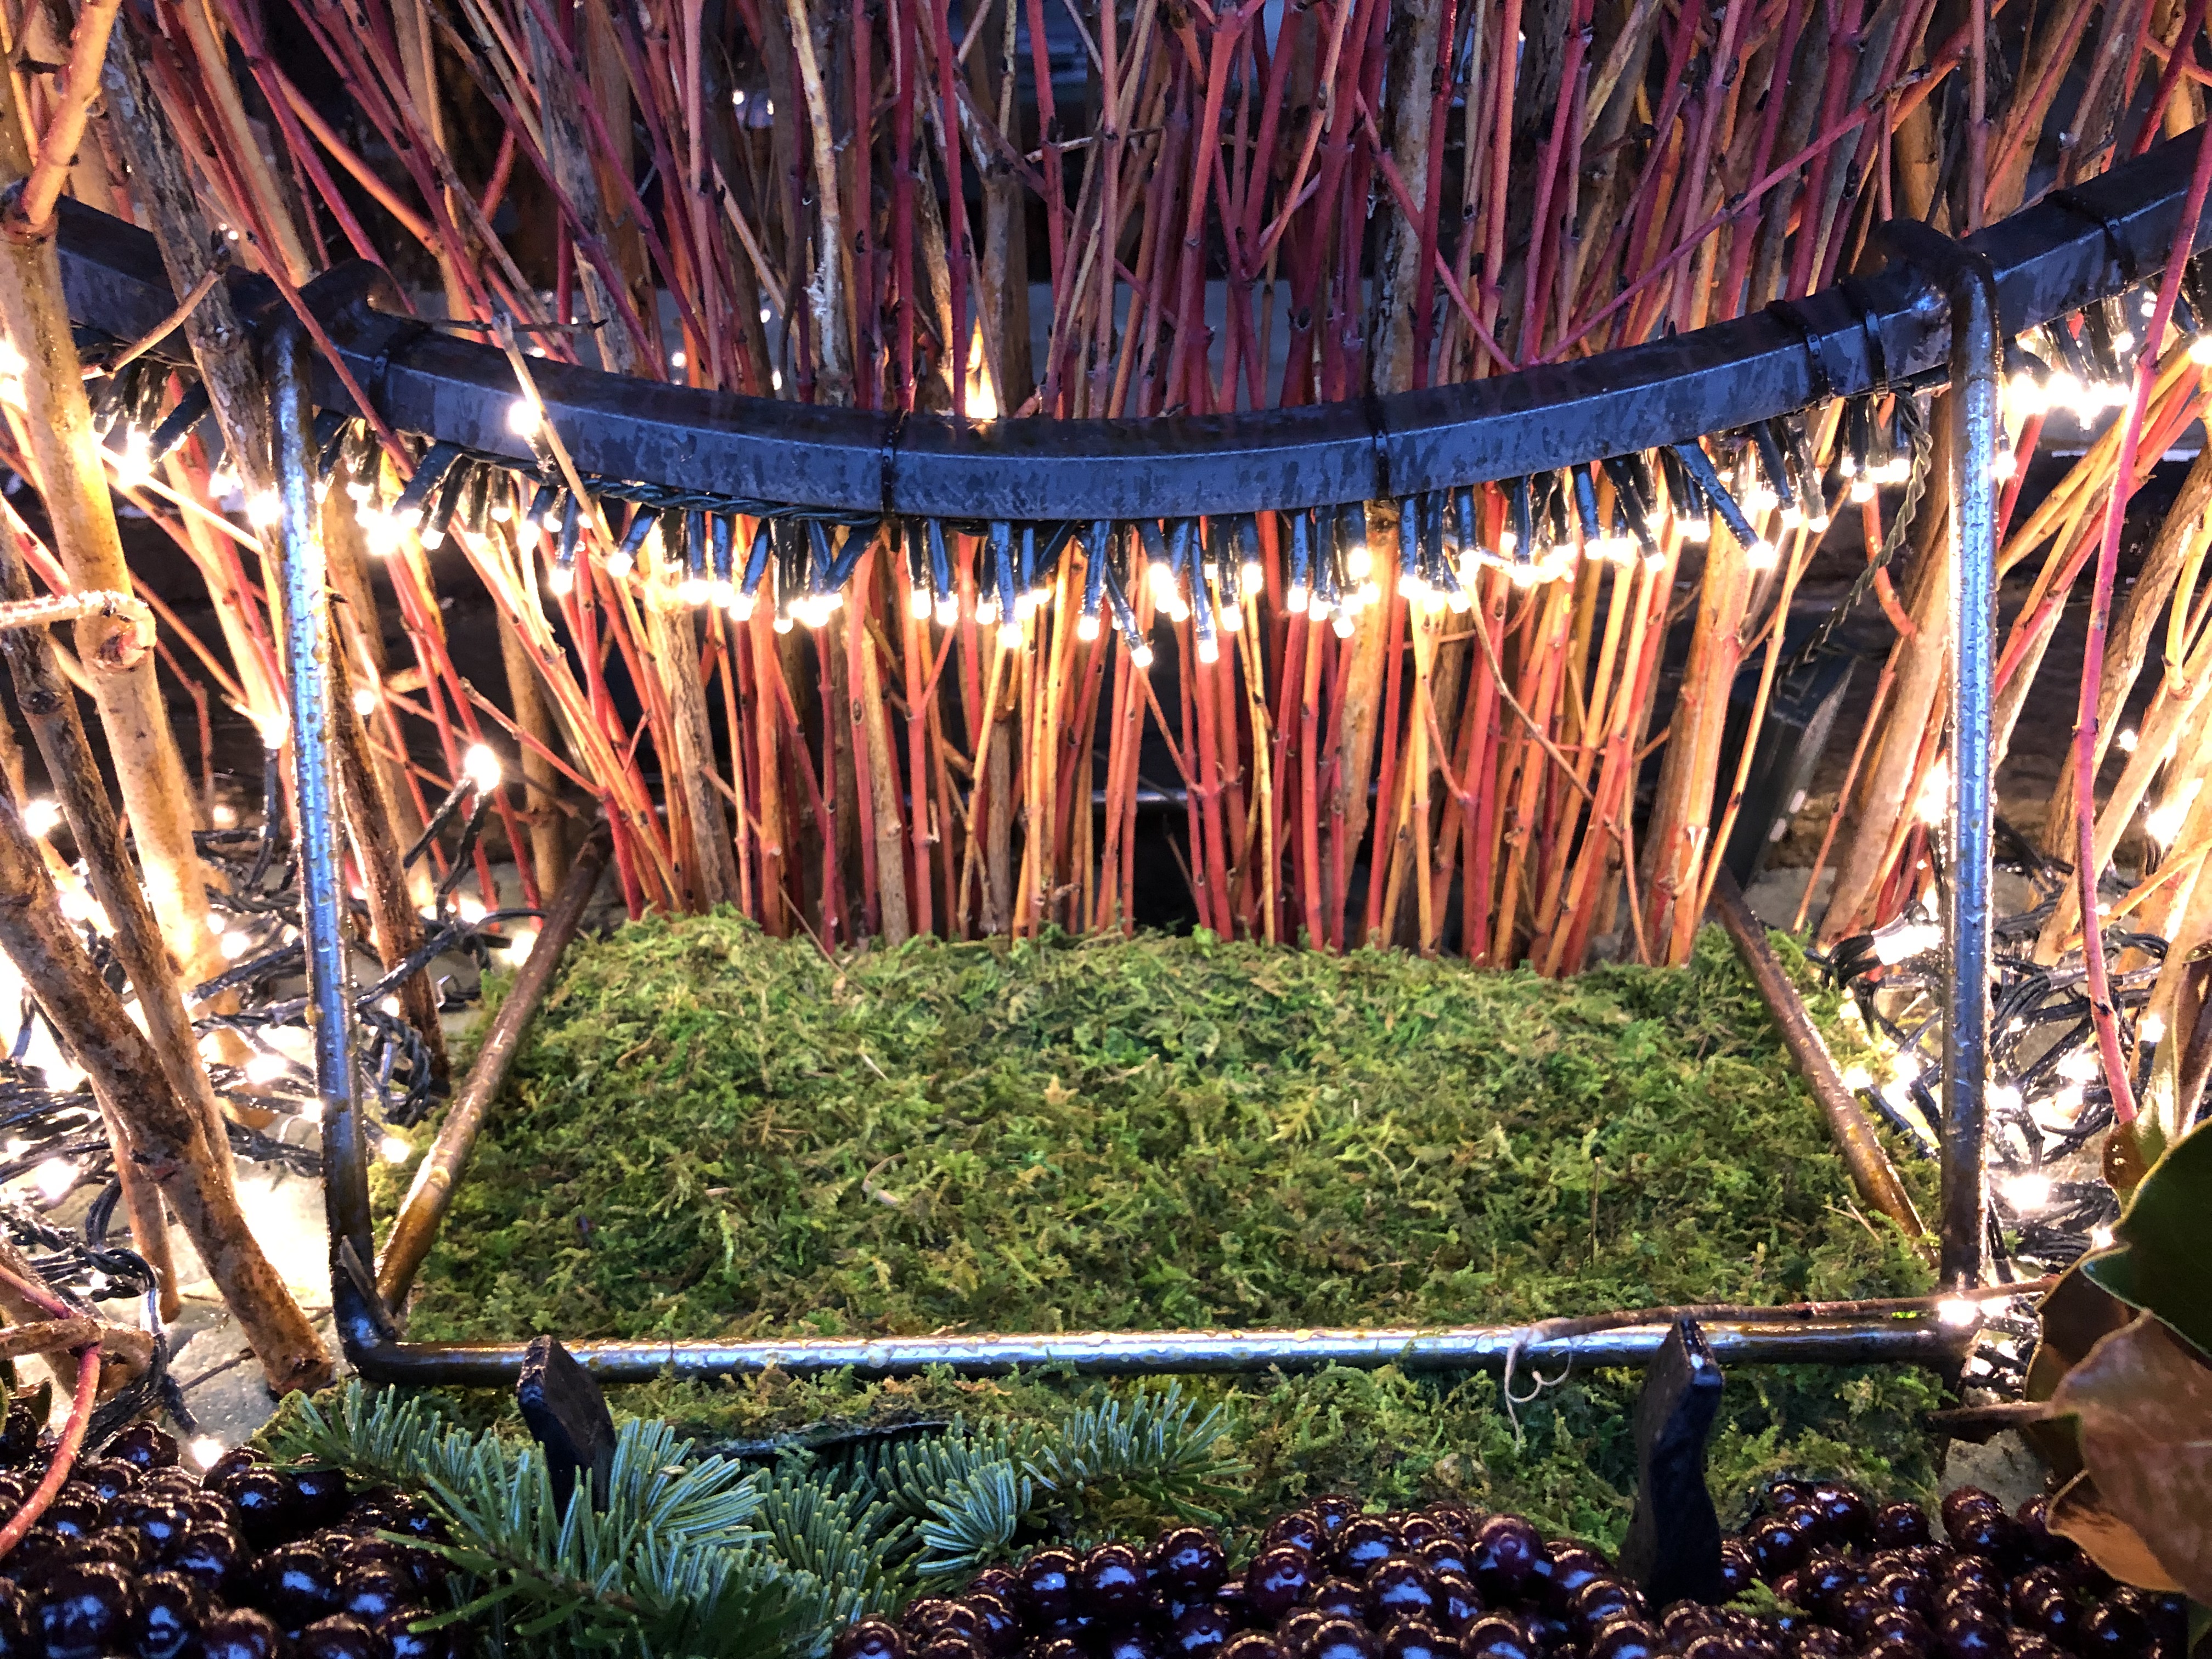
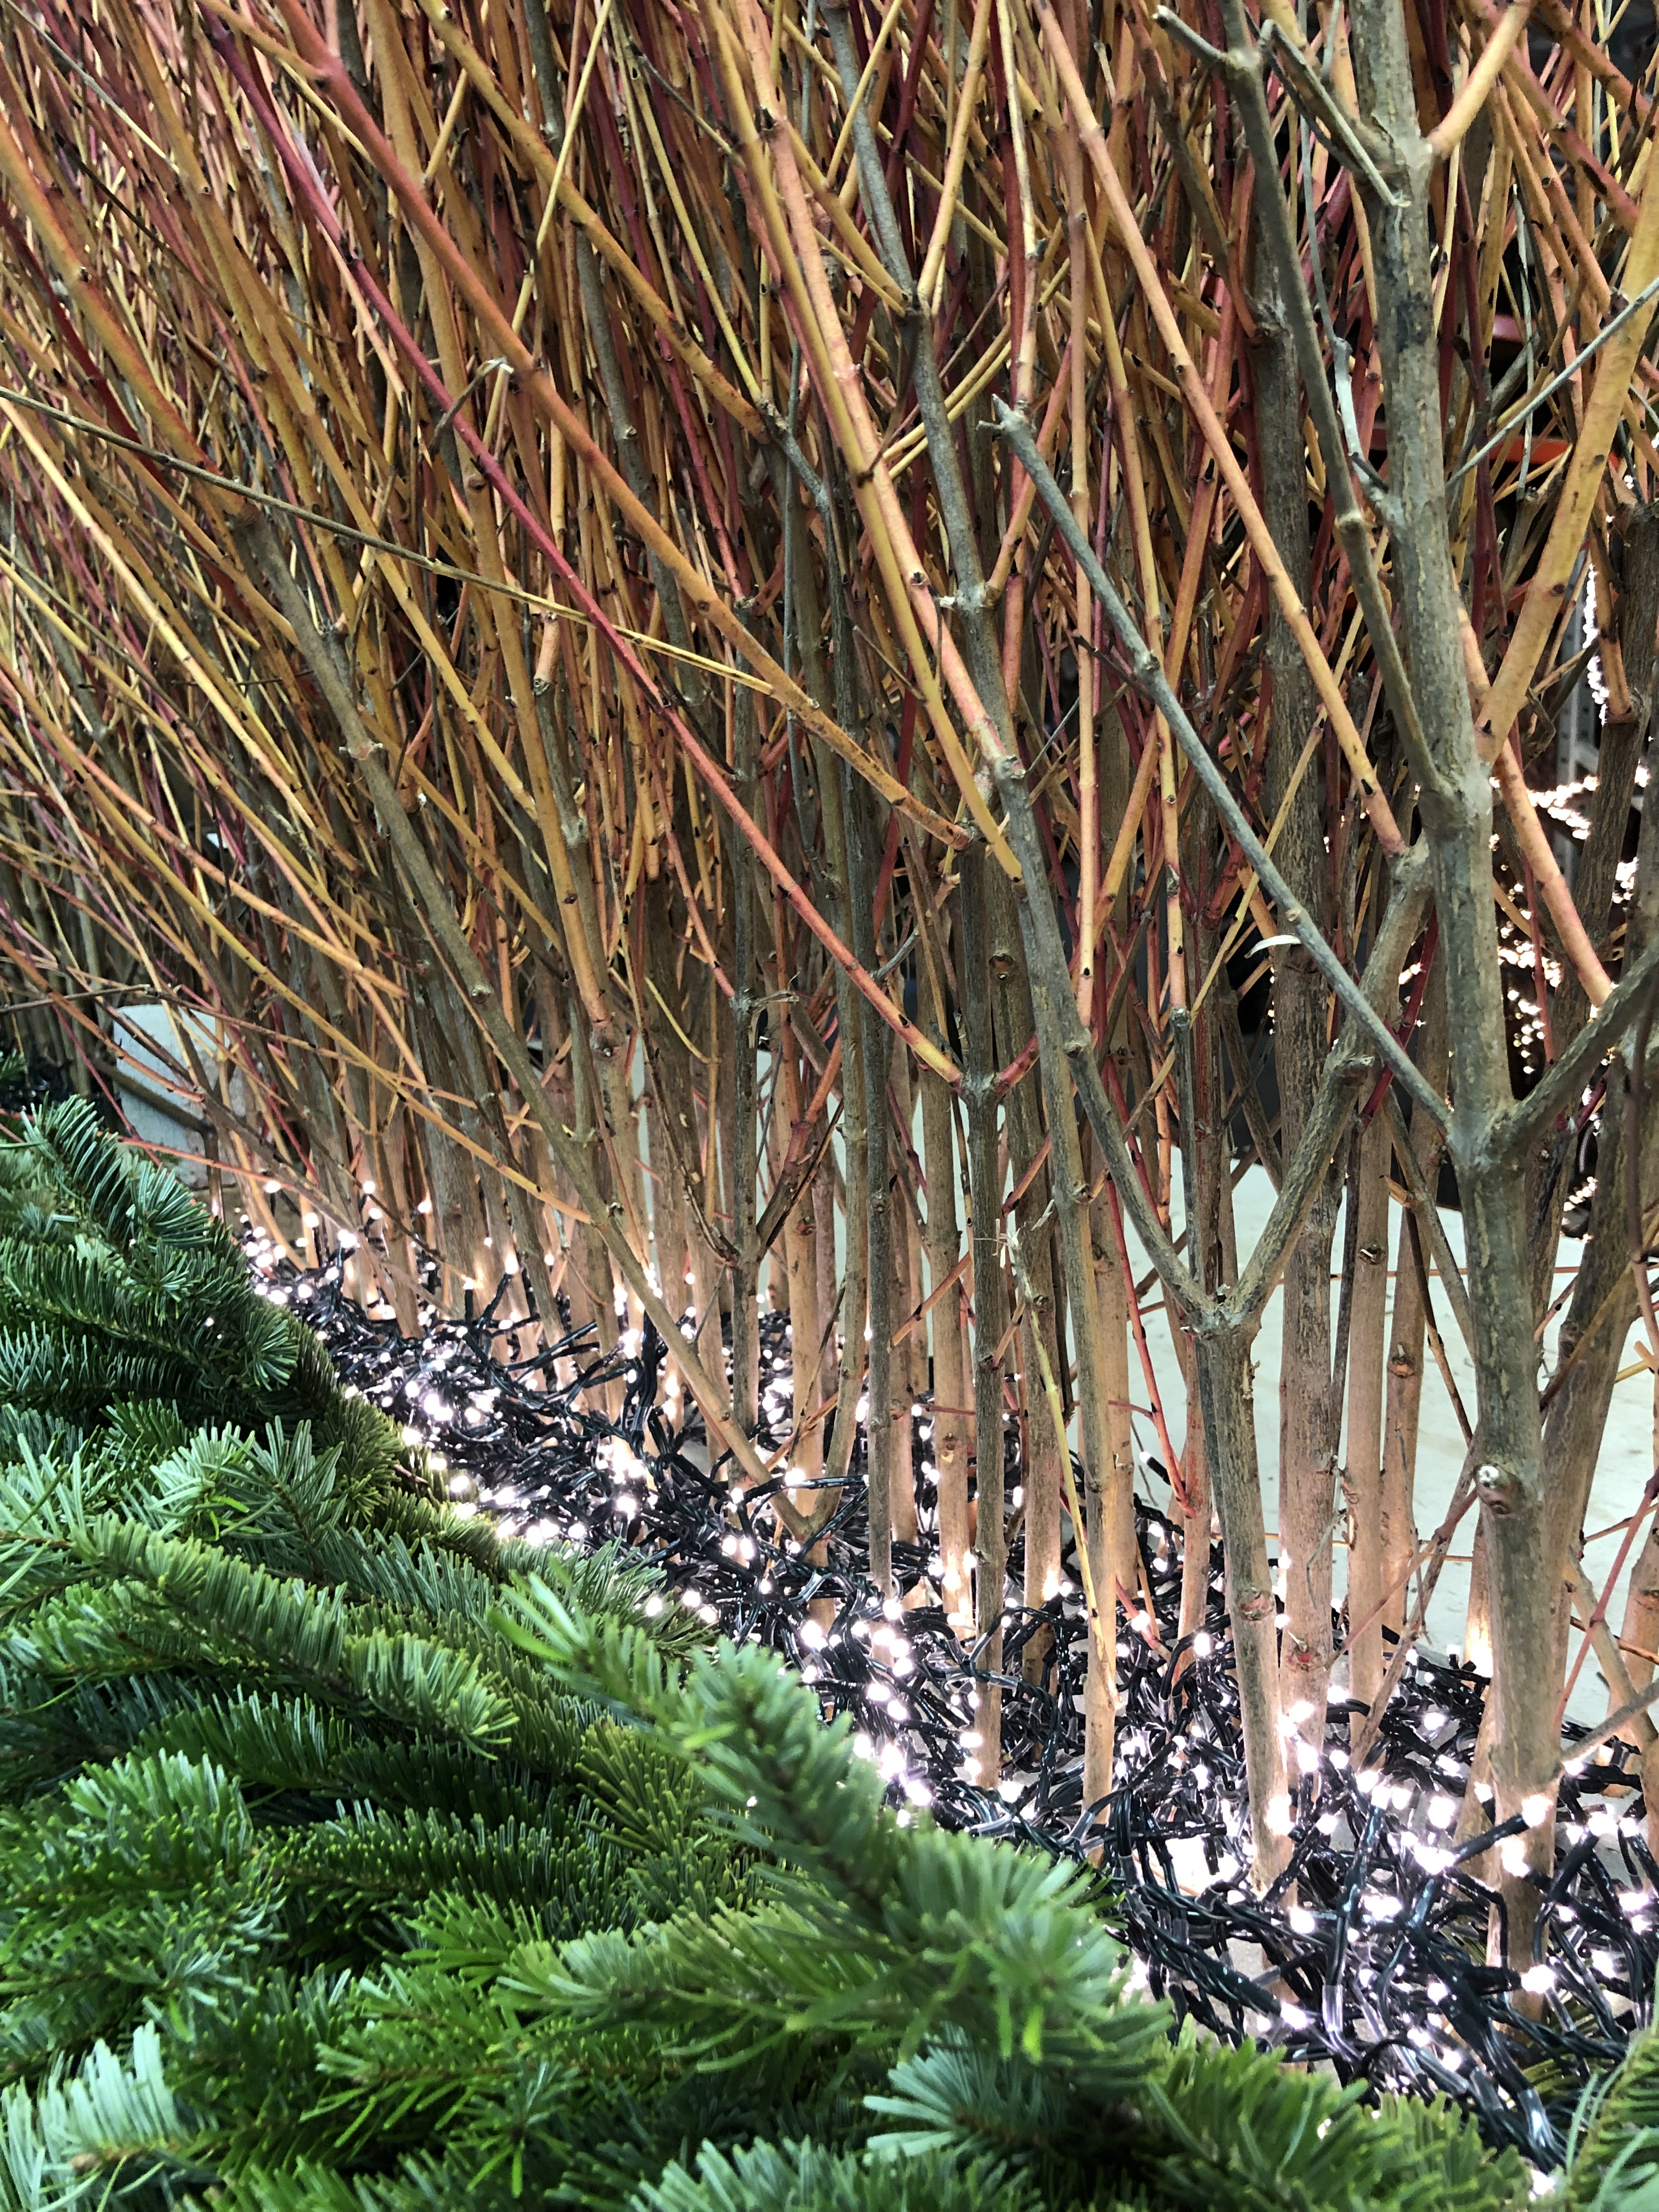 Christmas Eve day, the shop was open, so Karen had time to me a hand sticking the greens on the front face and sides of the forms. Rob and Scott helped trim the bottoms off the thickest branches. I set a row of branches close together across the back of the form, and 2 lengths of a 33 foot long light strand in front of them before starting the next row of branches. 4 rows of branches separated by four rows of lights. The branches are pushed in all the way to the bottom of the form.
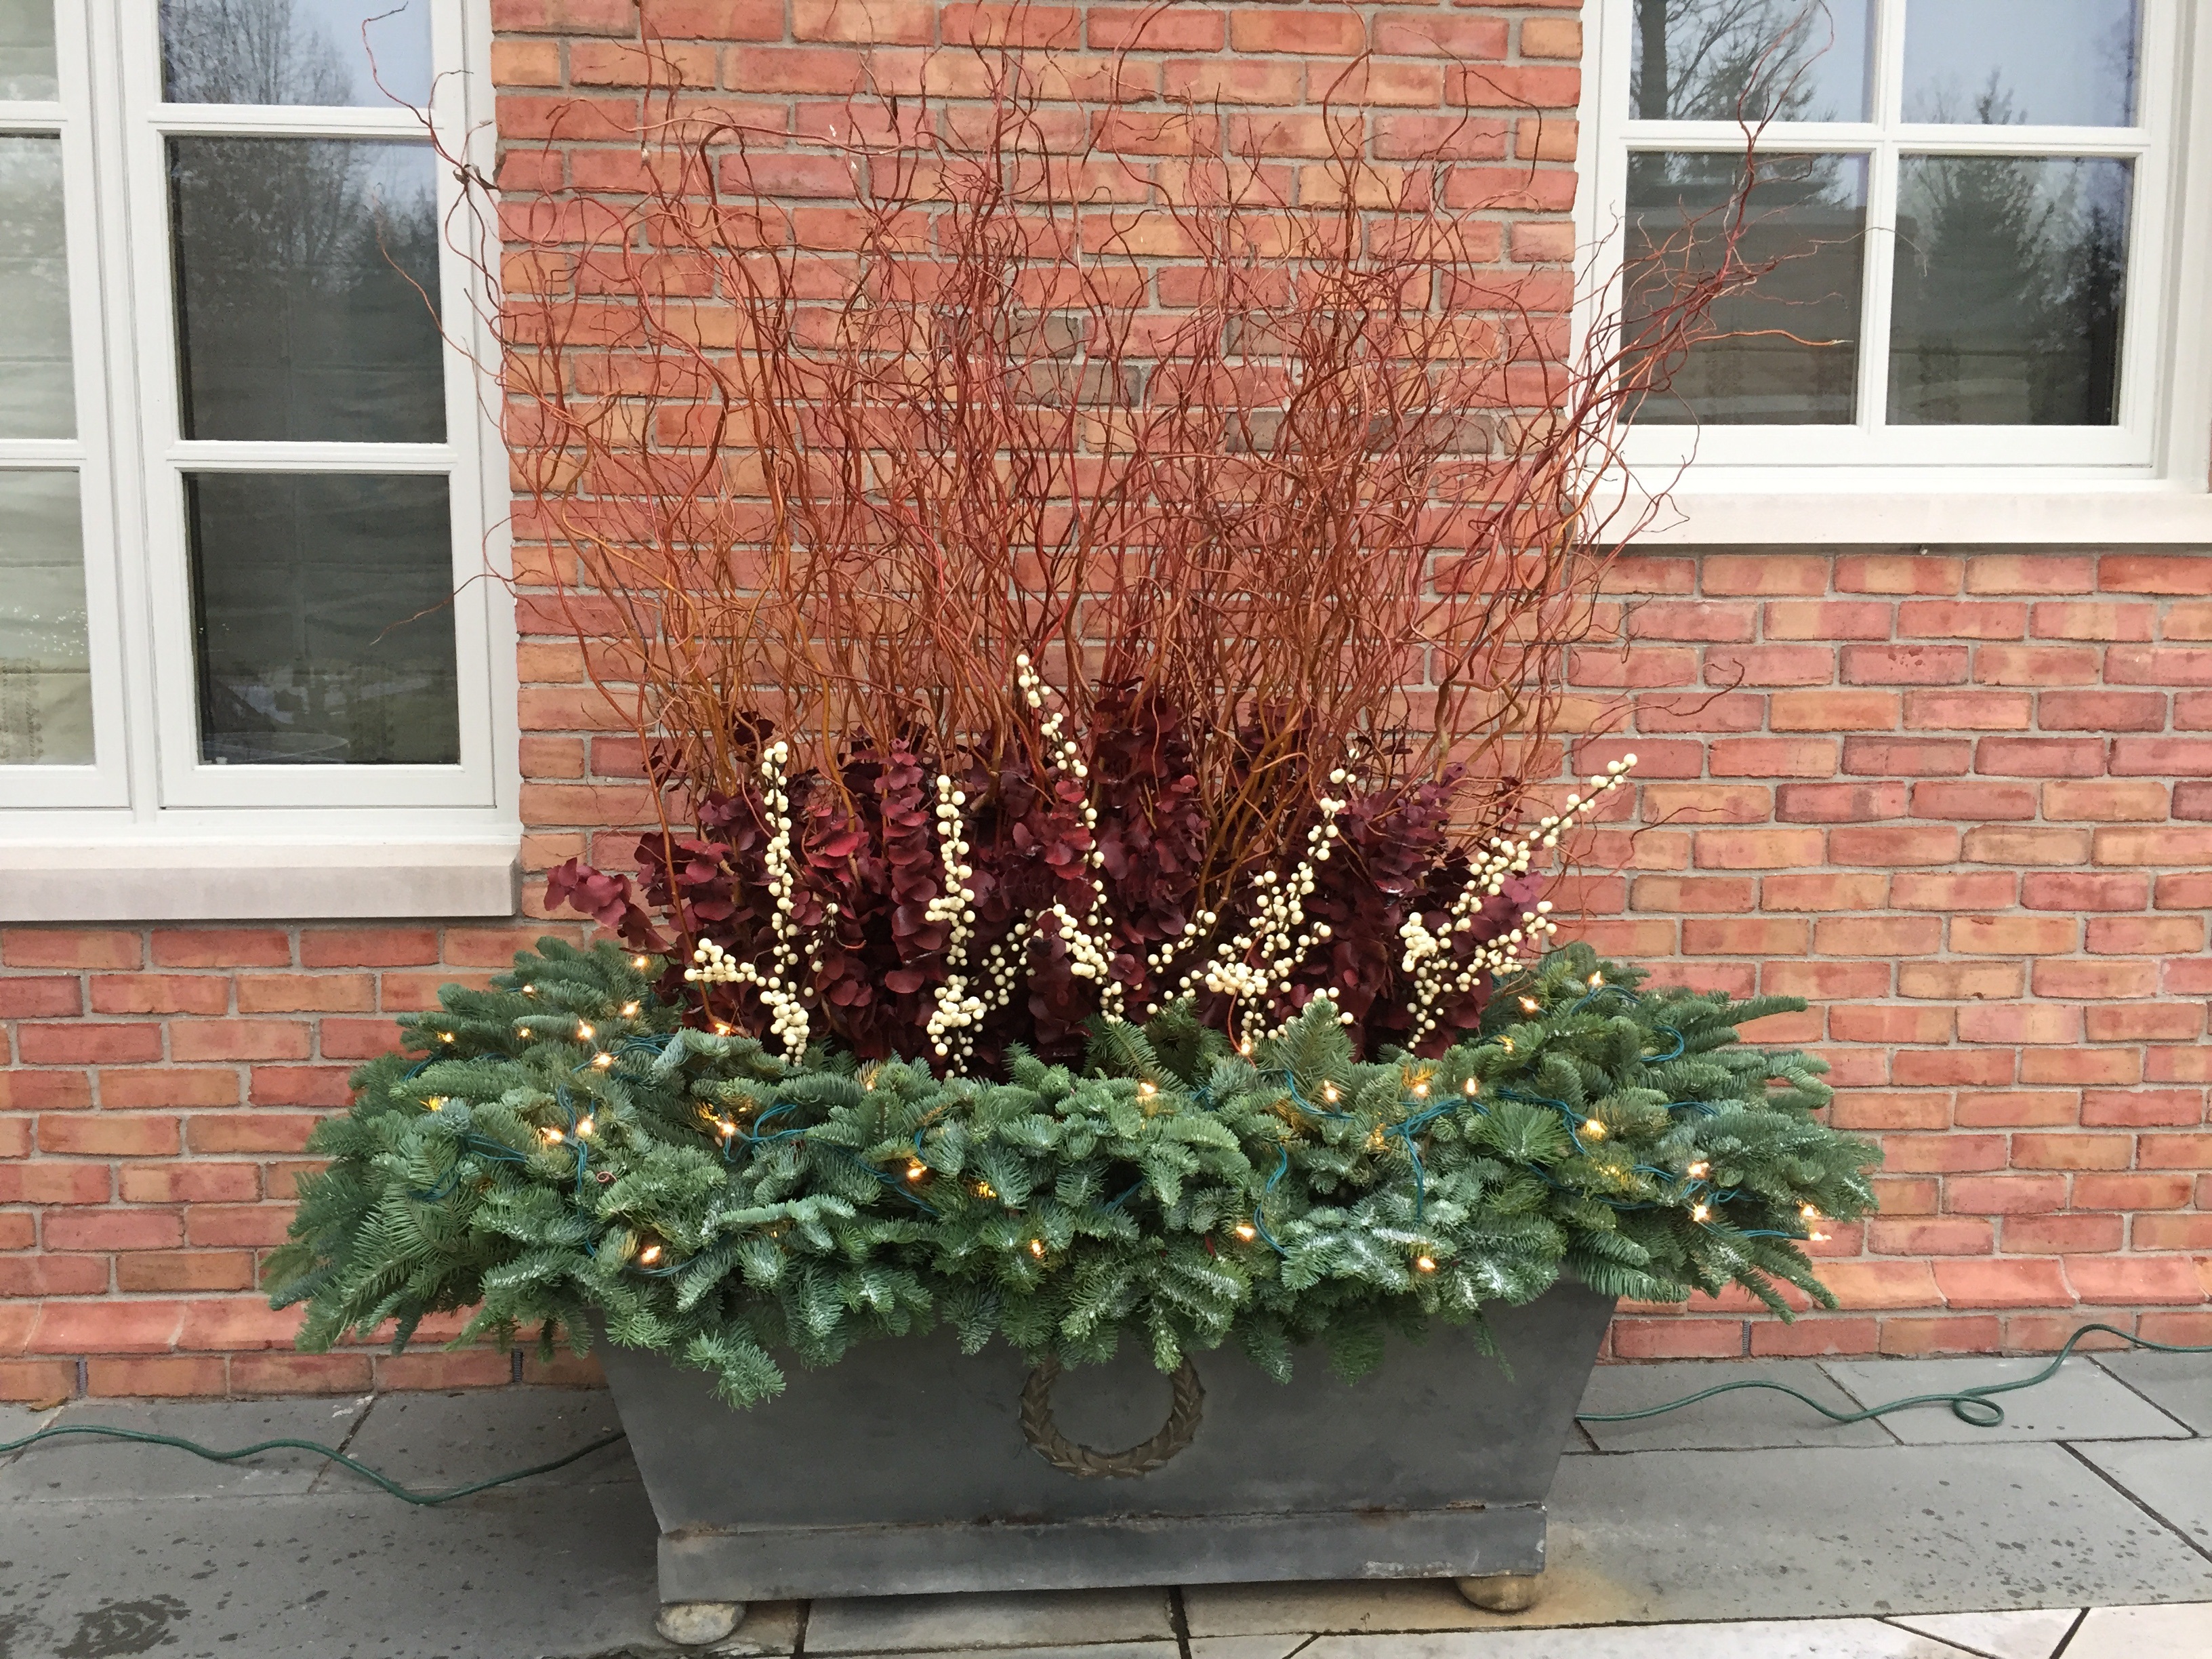
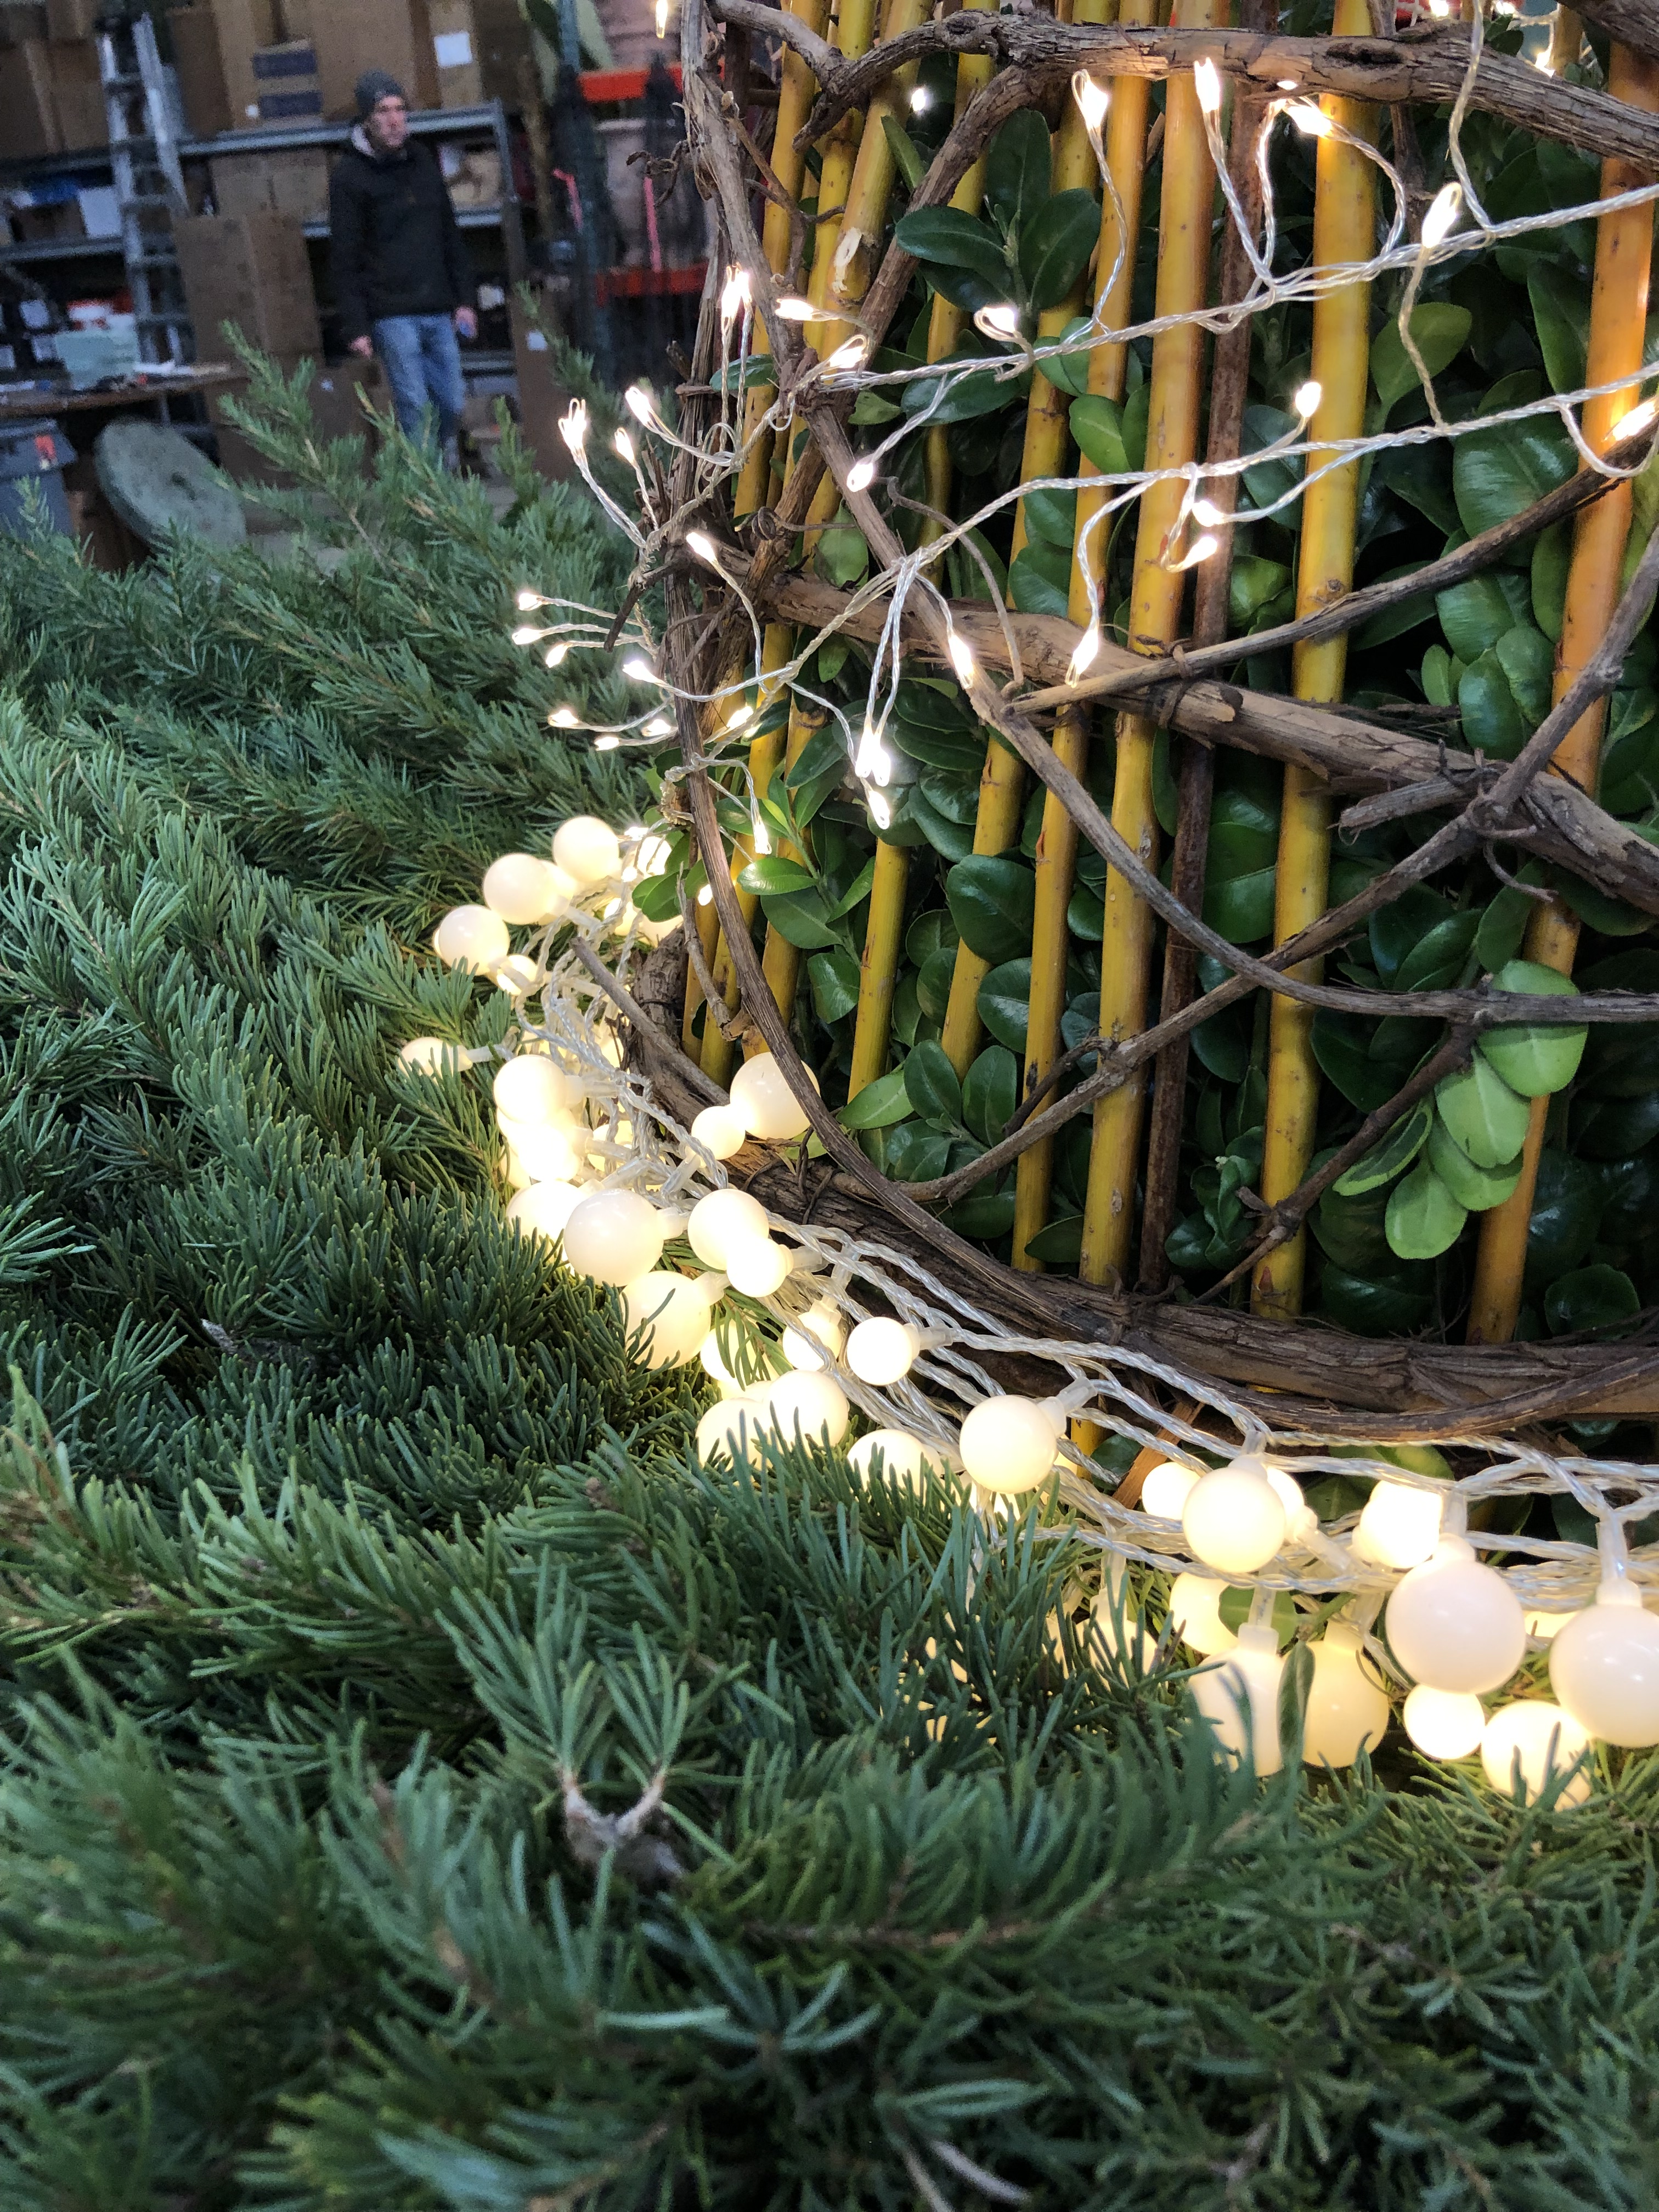
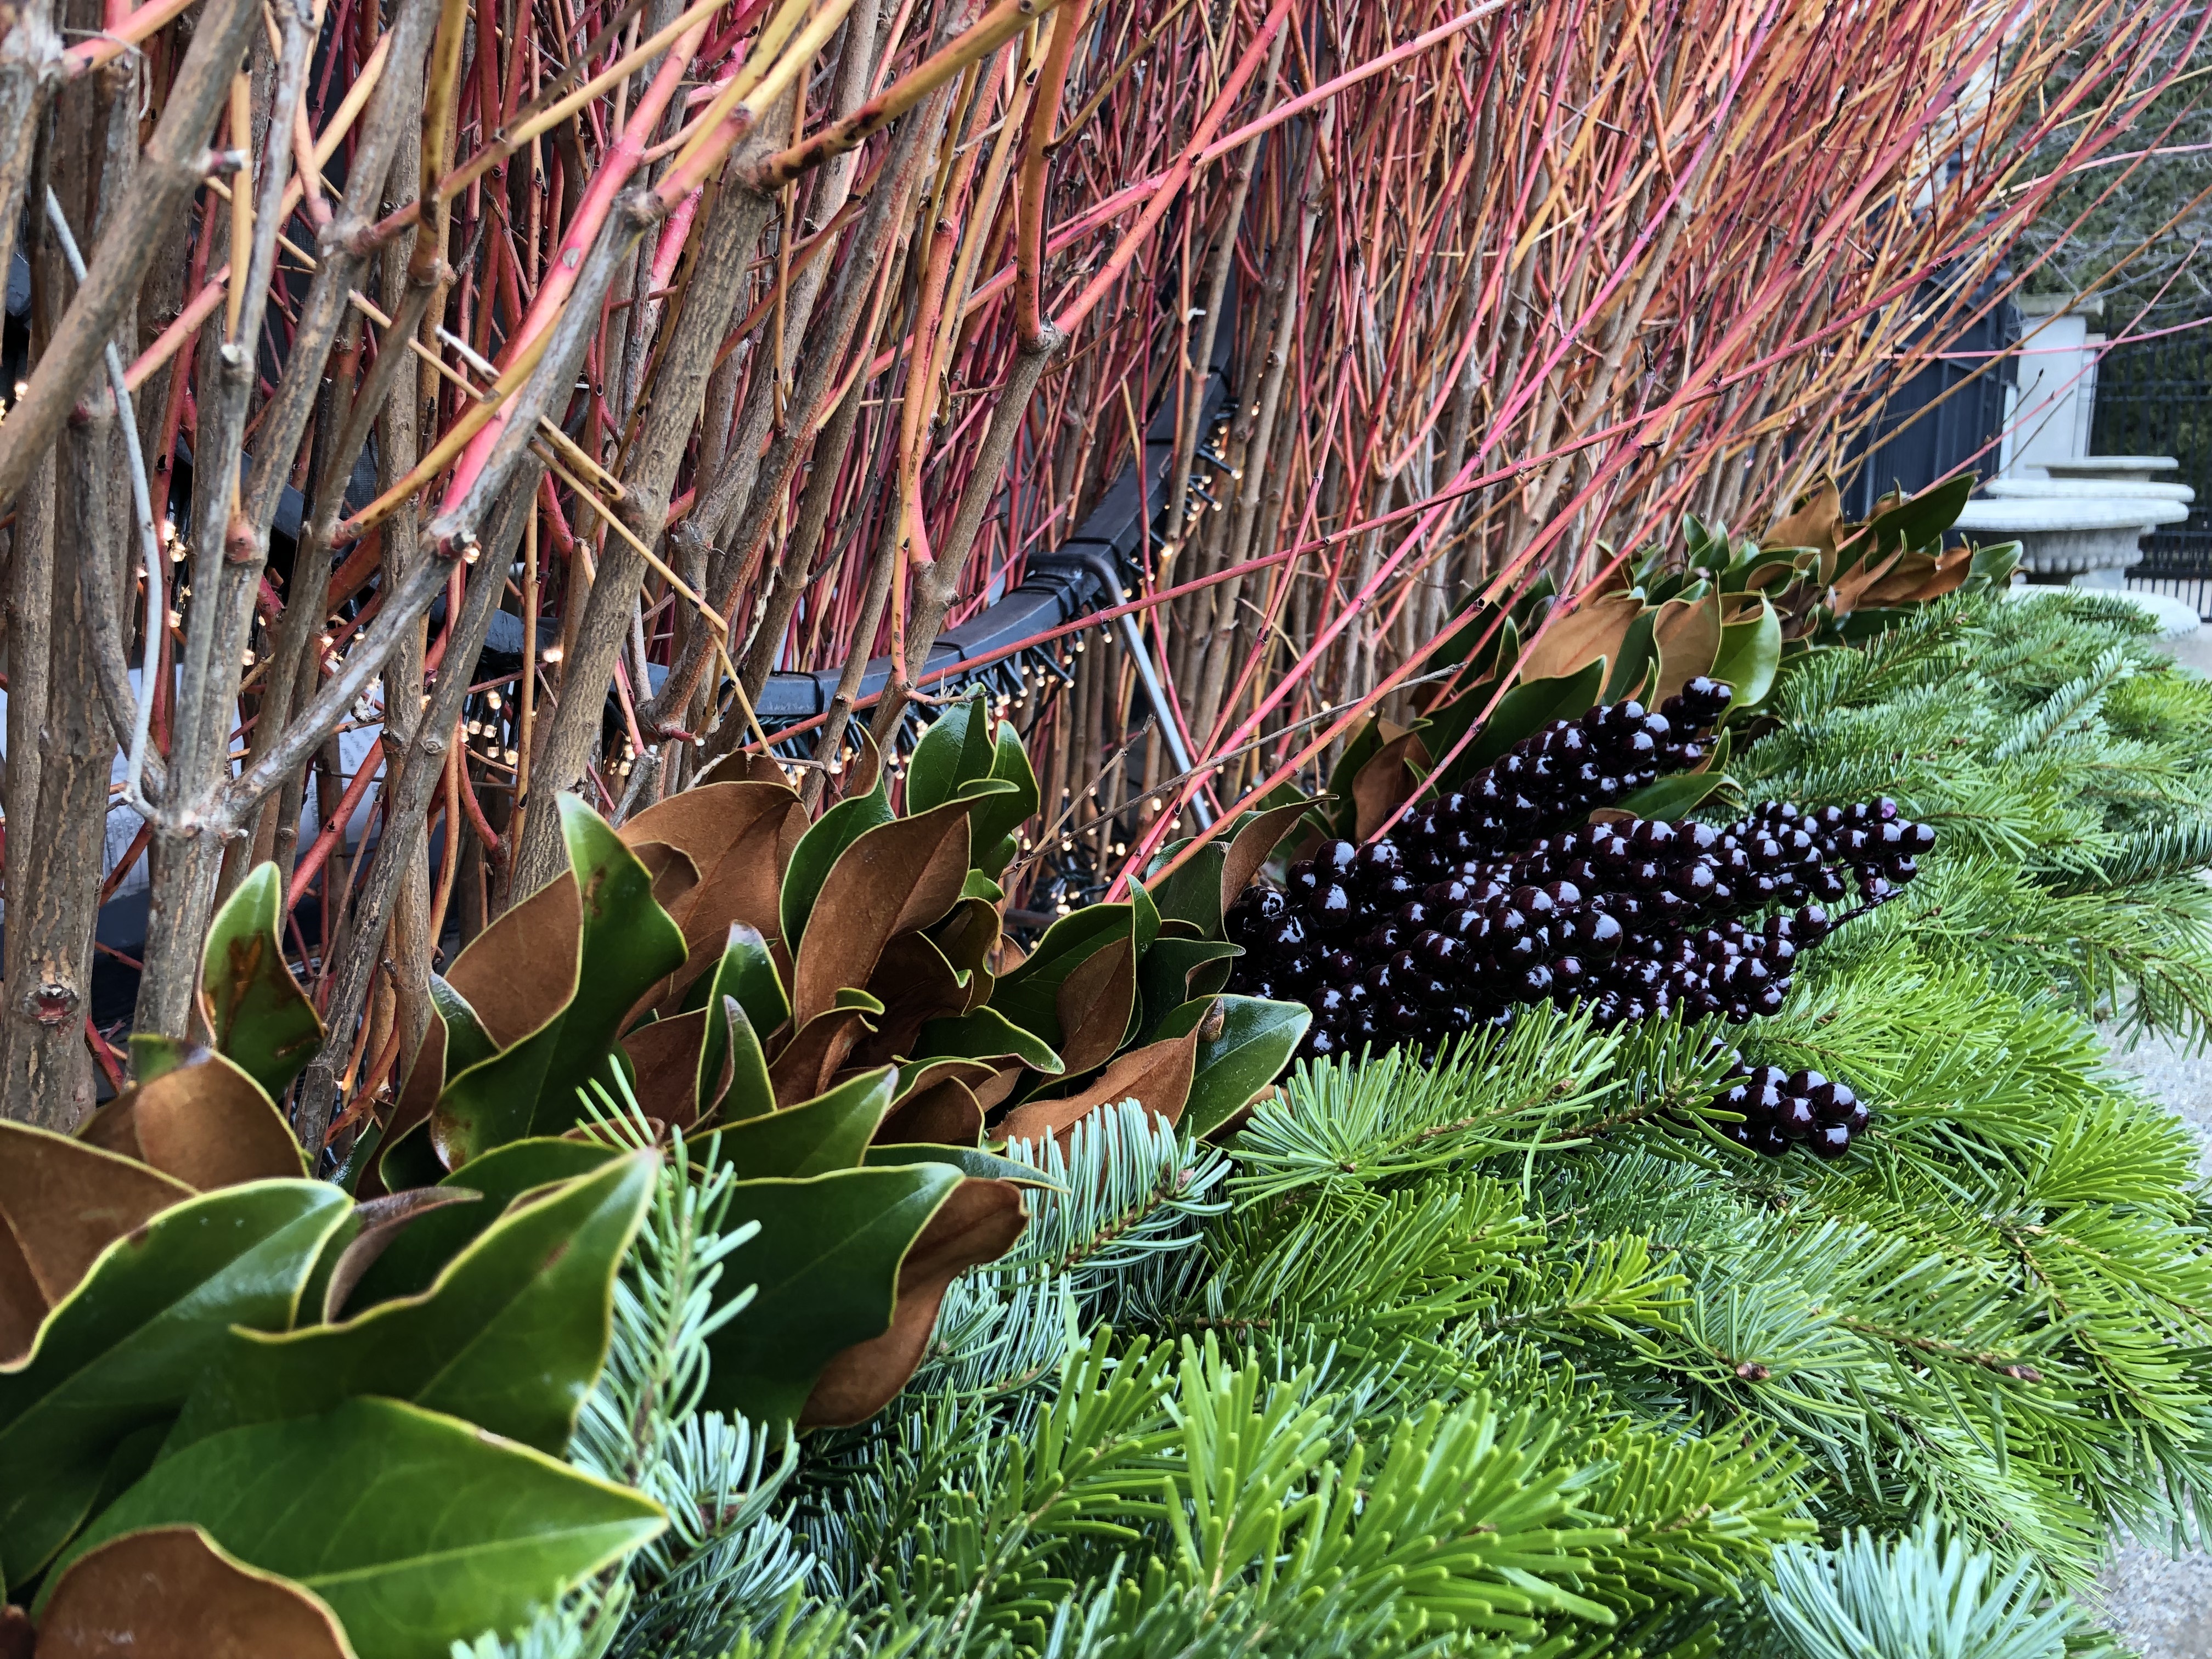
 The work of it was integrating each new branch into the neighboring branches. As they were fresh cut, the stems were pliable. A pair of thick wool gloves made that work easier. There was no need to cover the back of the form, as the window box hugs the window. The bottom layer of foam goes into the box. The soil had already been lowered a corresponding amount. The top layer on the front and sides holds the greens. Short stems of magnolia would separate the greens layer from the twig thicket. The large brown and green leaves not only separate the similar textures of the greens and twigs, they conceal the mechanics of the light source from view.
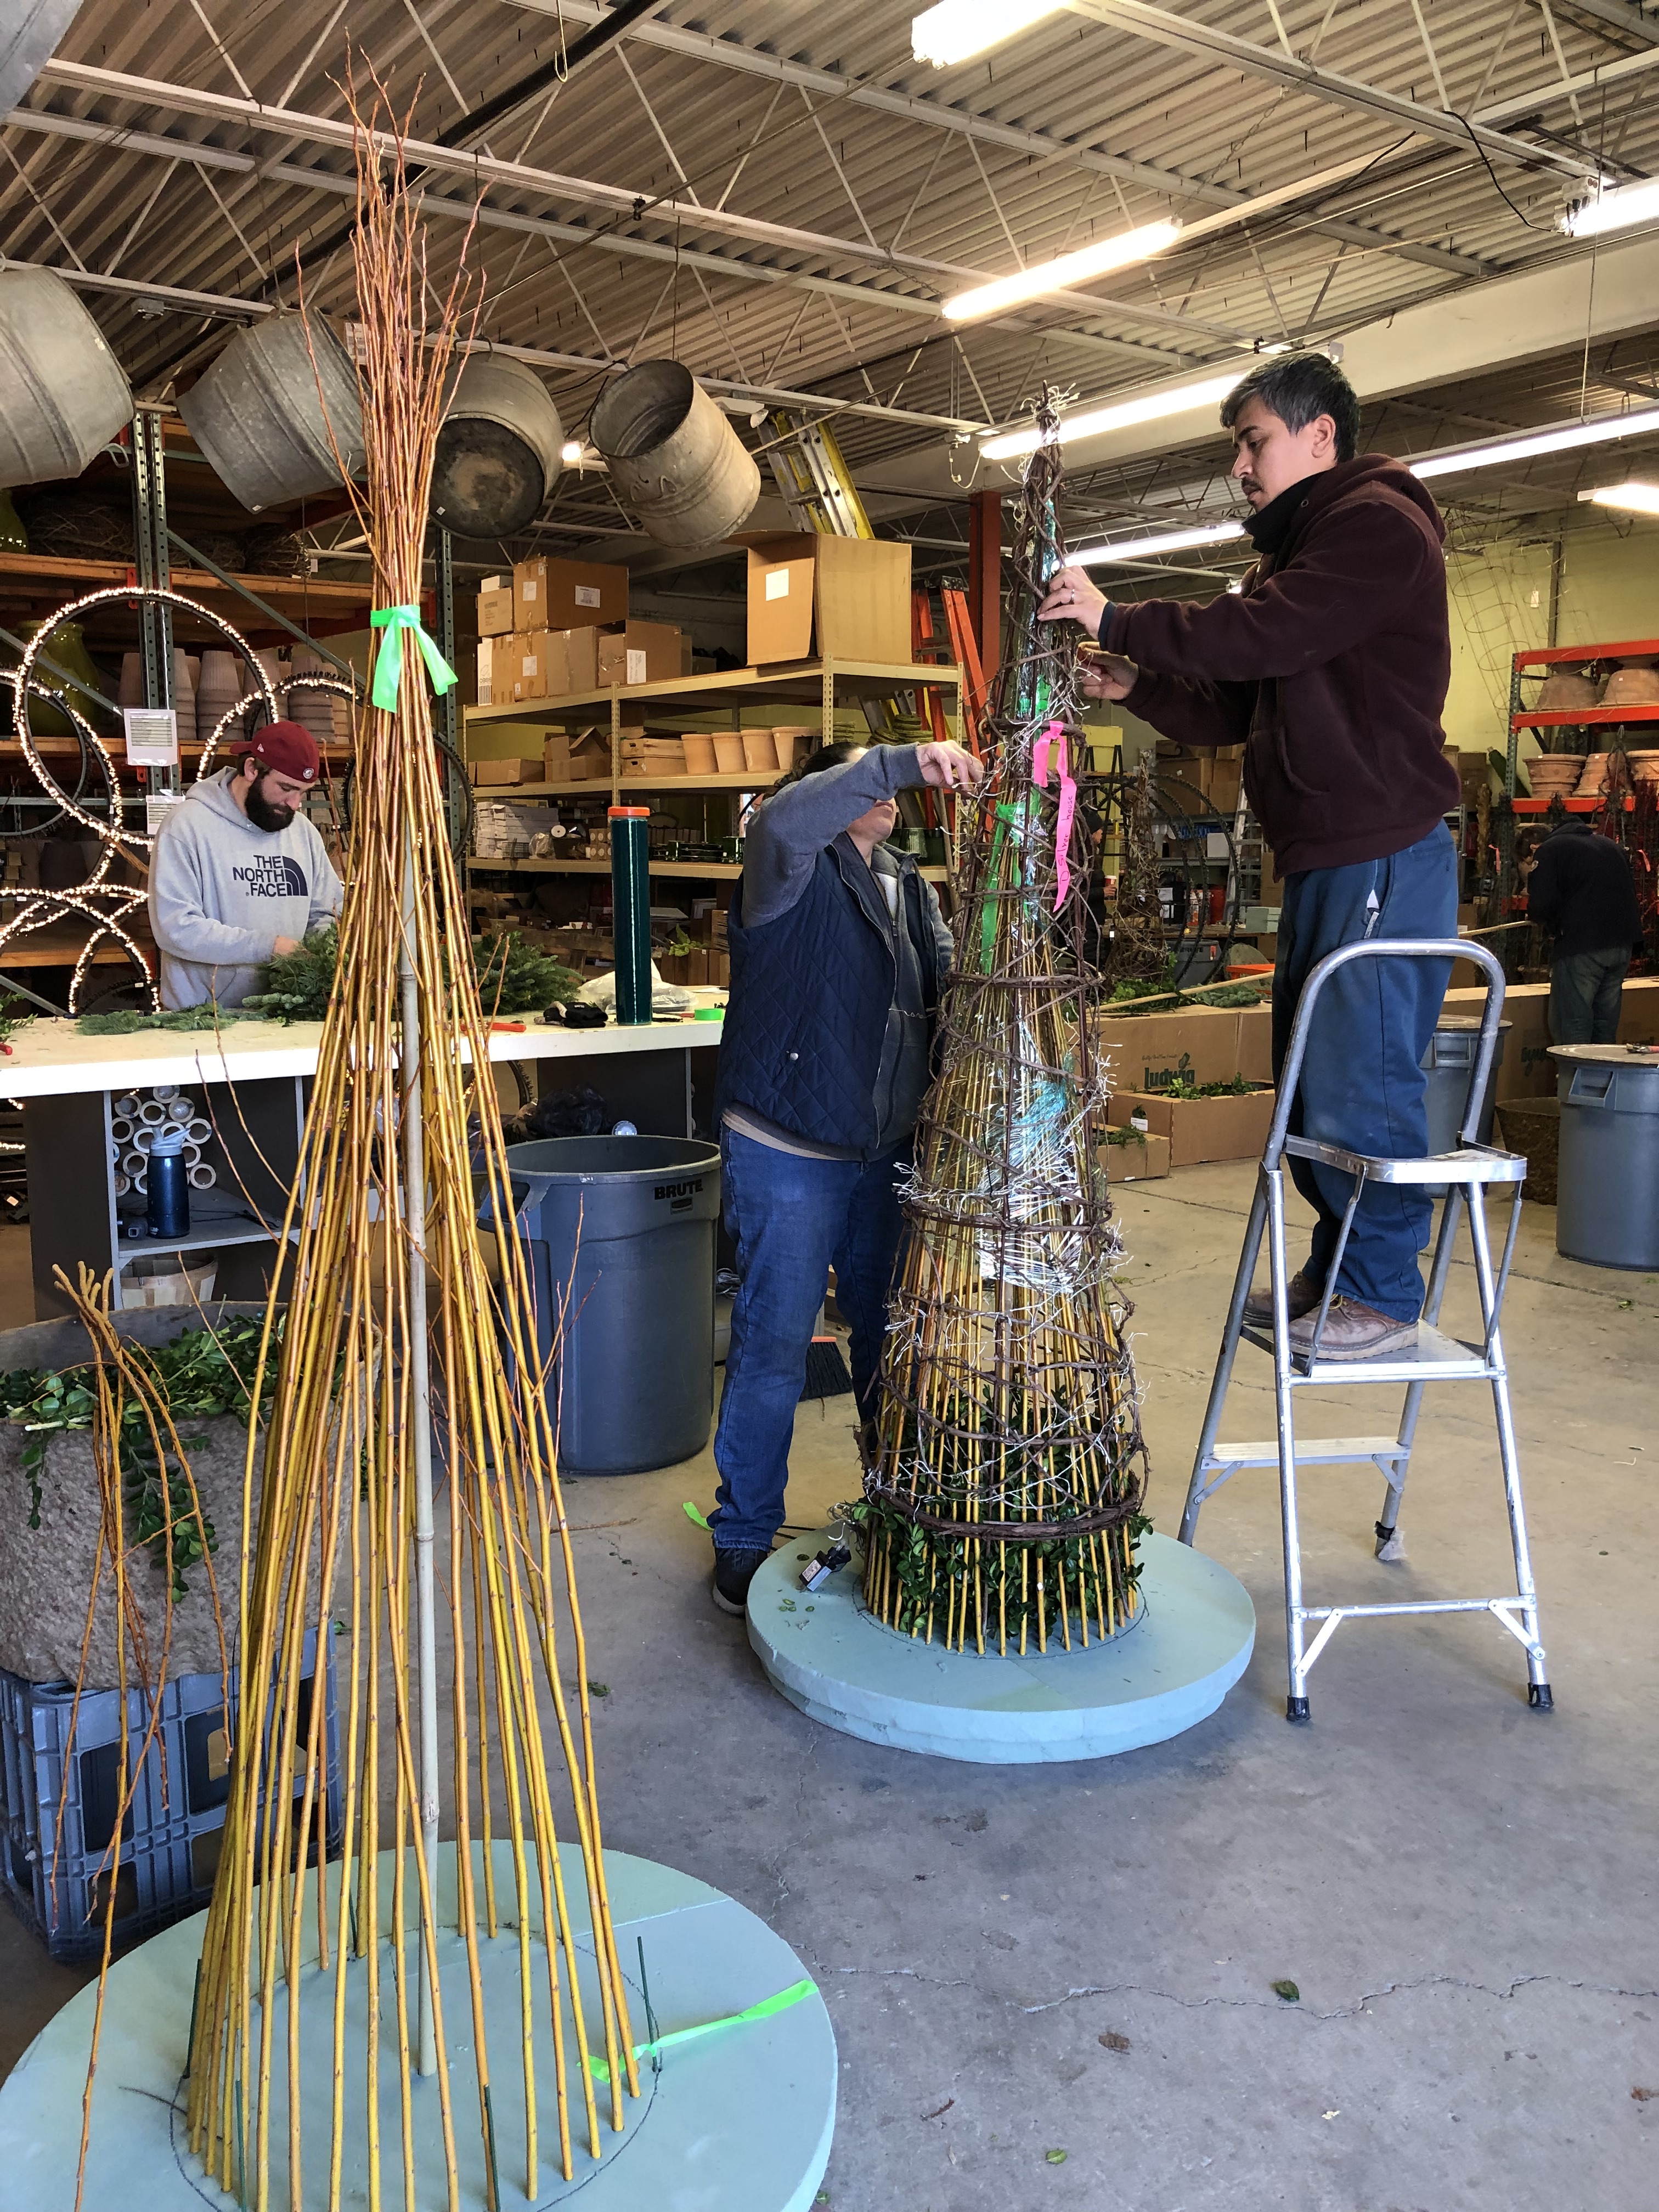
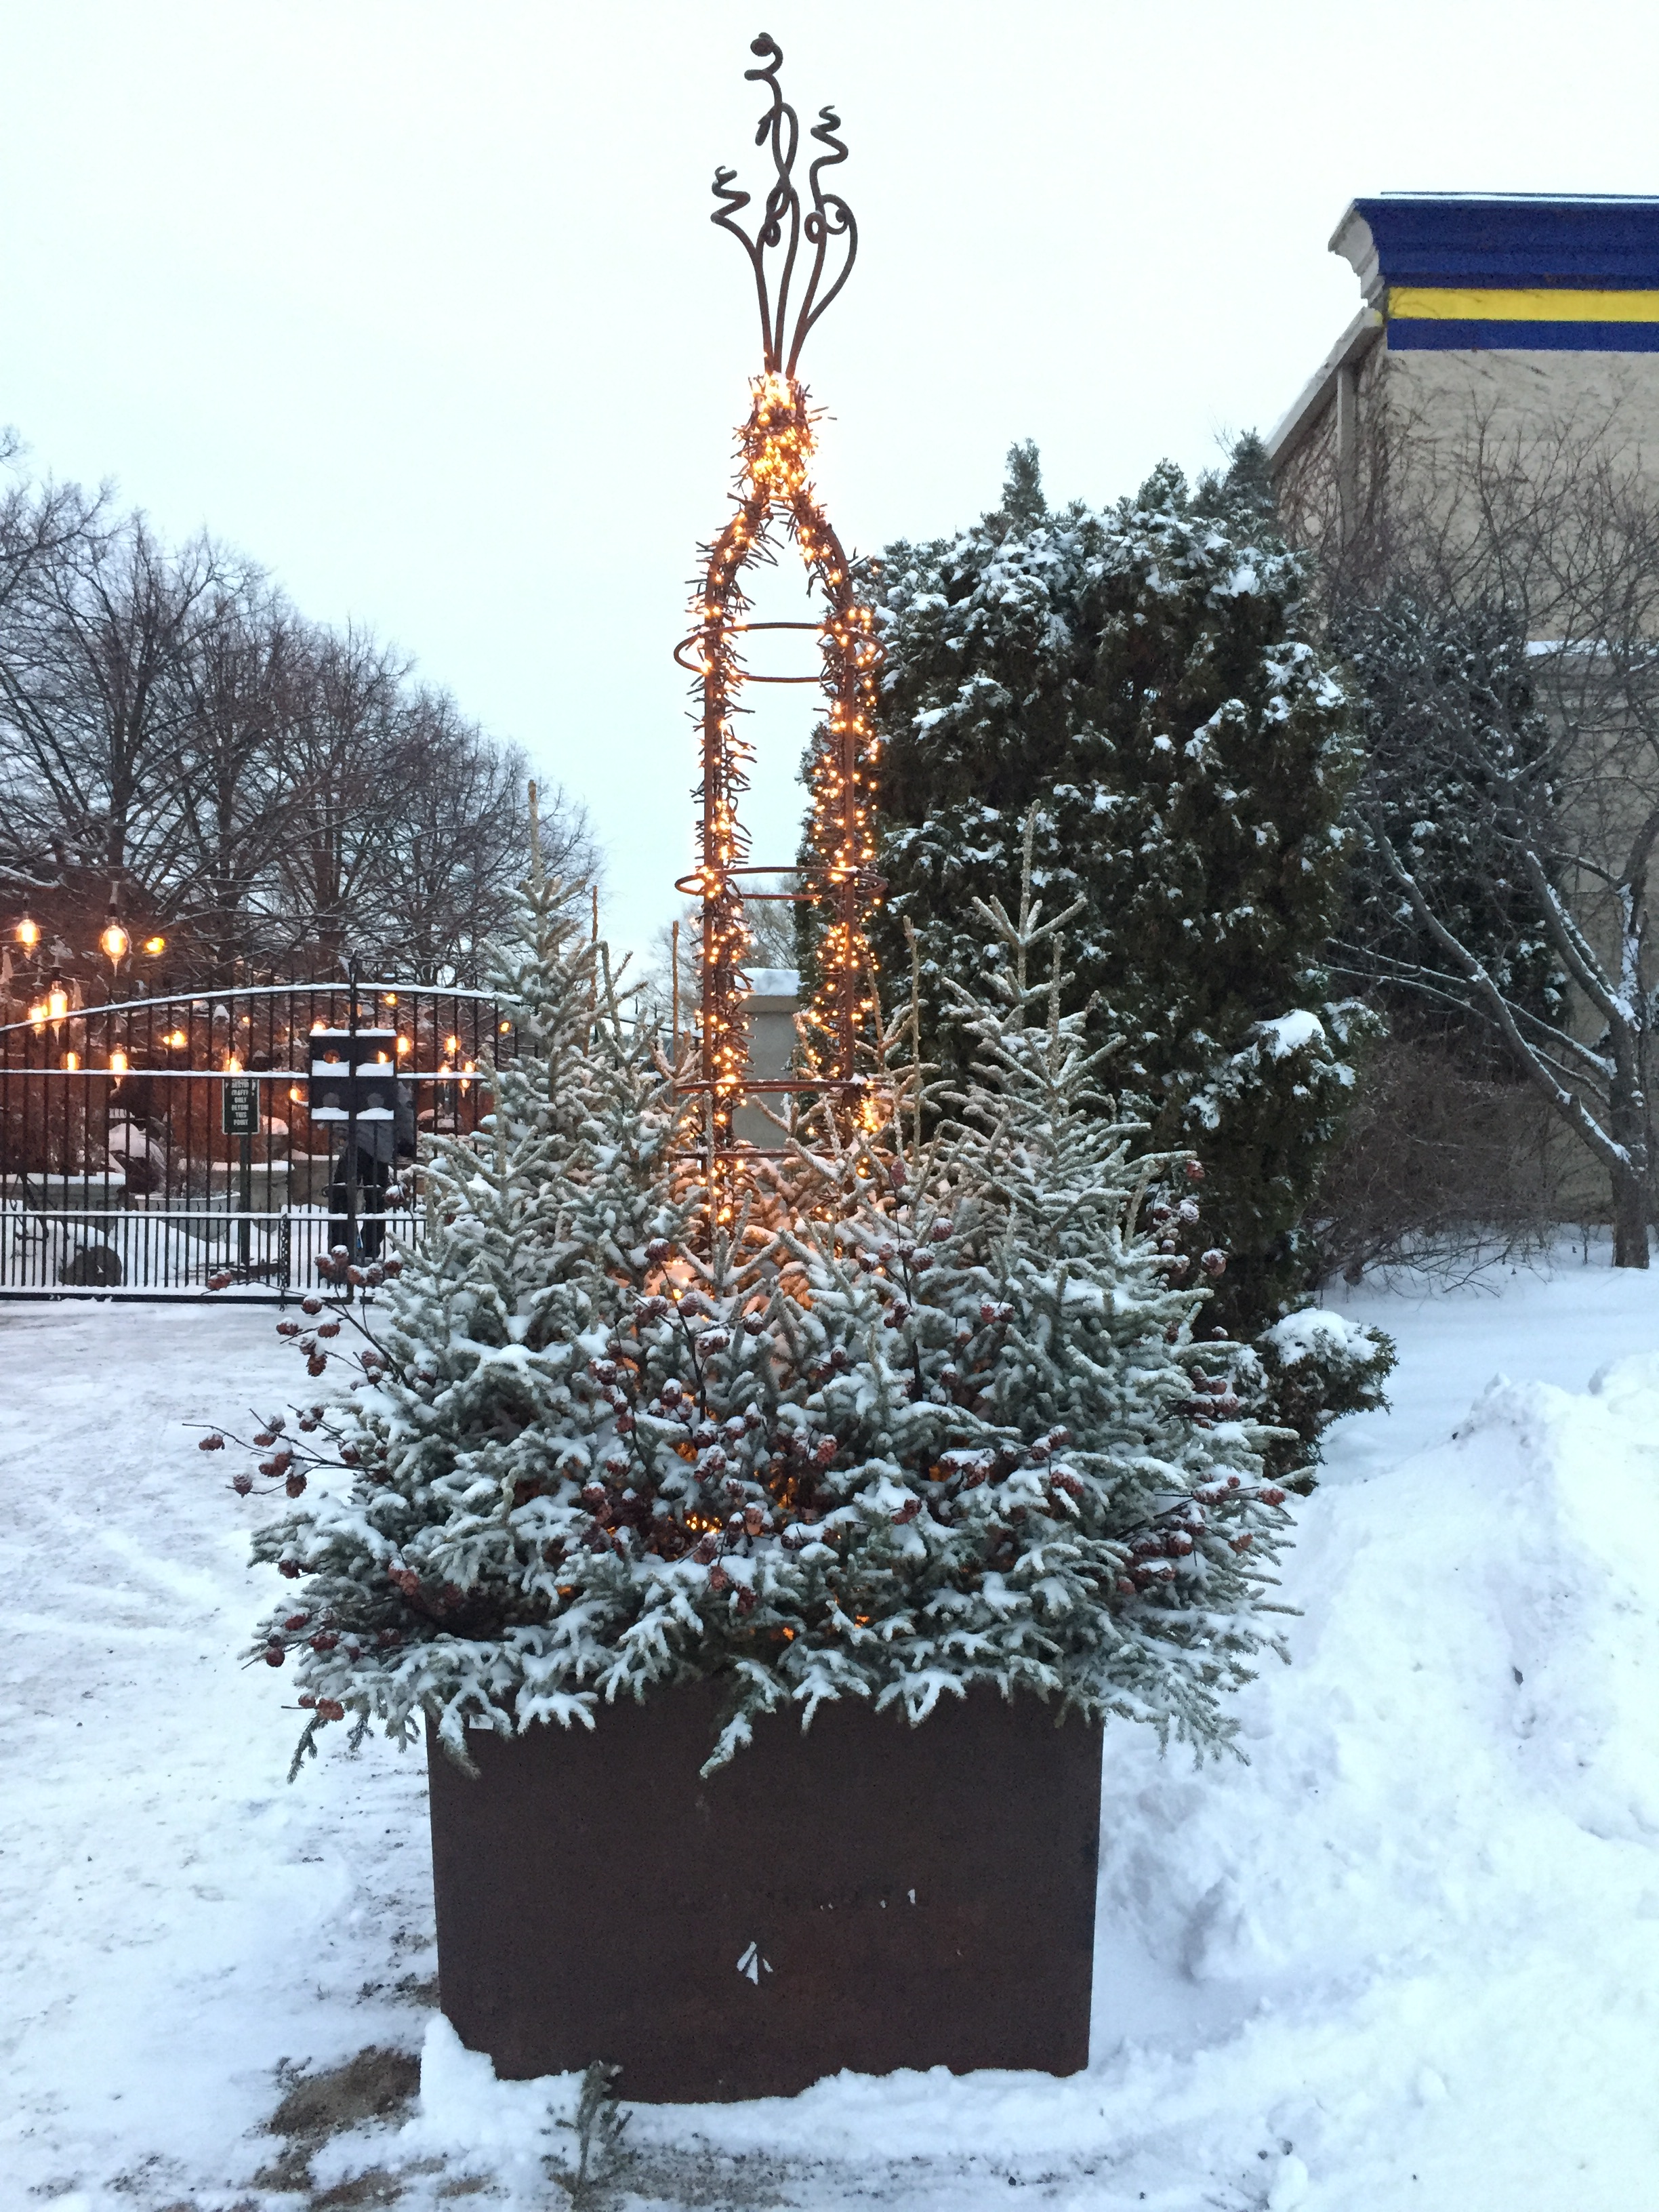
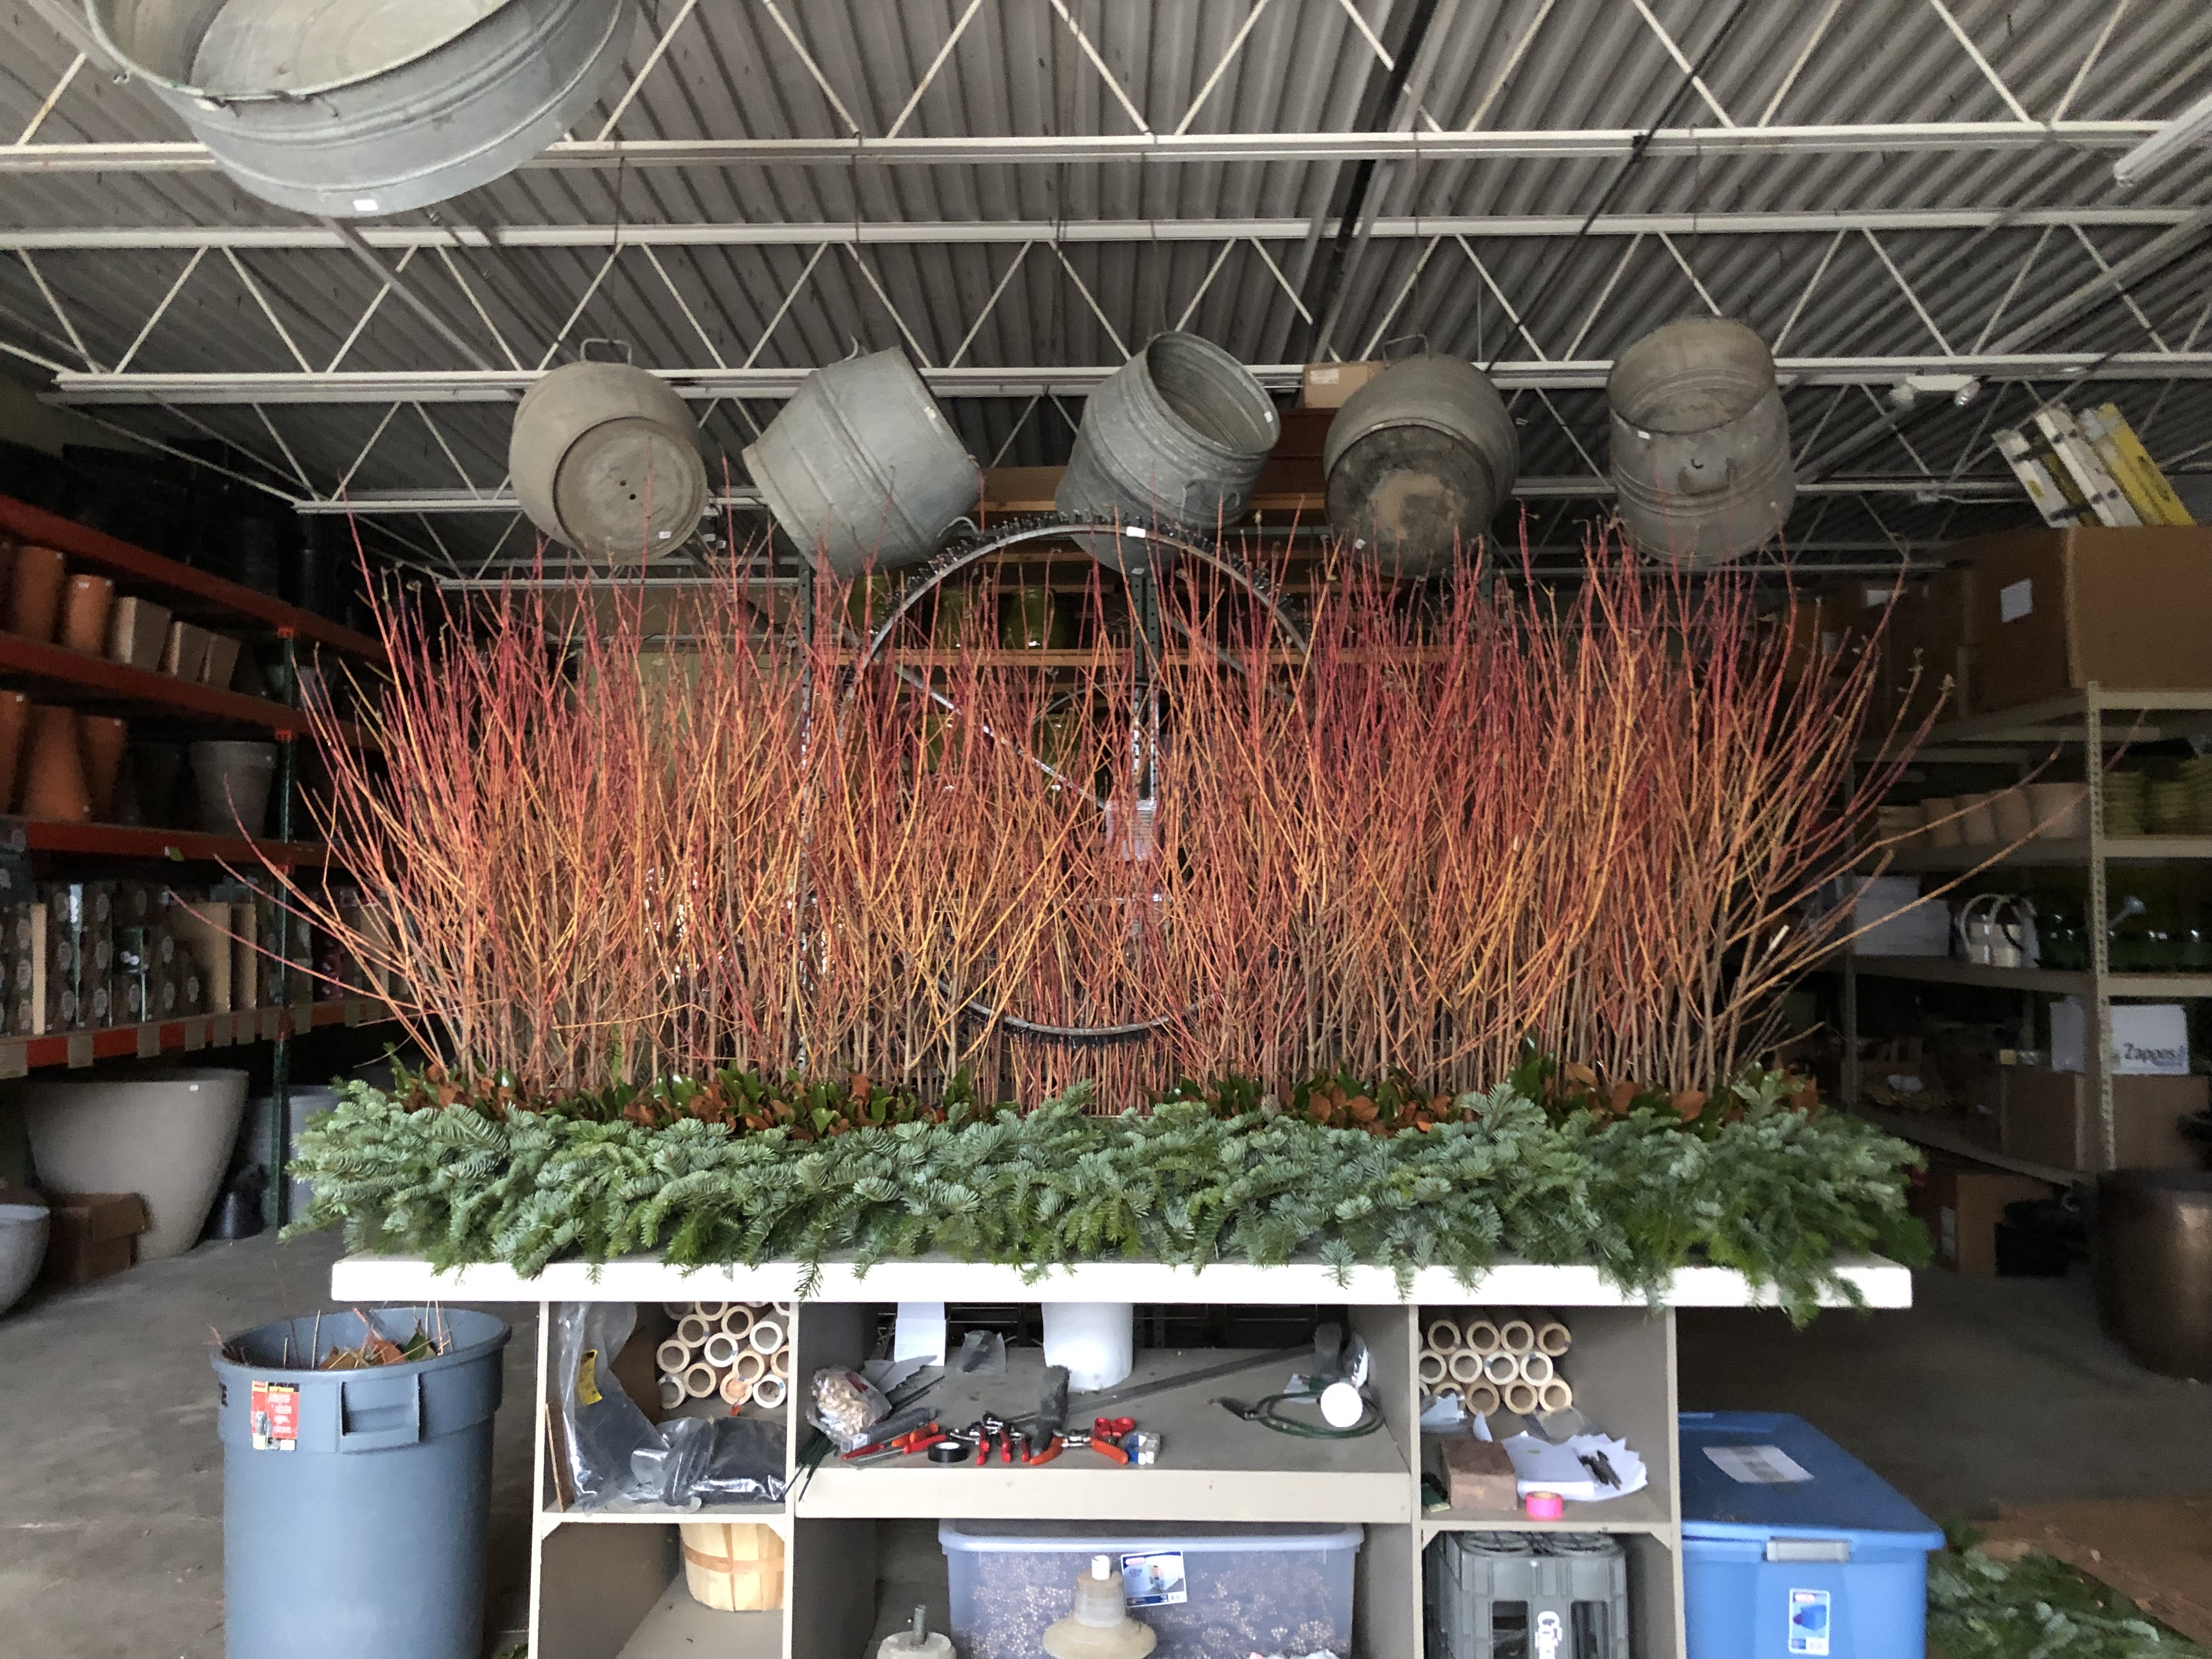 Though my crew would have sailed through this fabrication, it took me two days. No deadline was looming, and I wanted to enjoy the process. No twigs cover the lower portion of the light ring. The ring disappearing into the thicket and re-emerging at the top implies the thicket has depth. I would consider how to finish that spot once the boxes were installed.
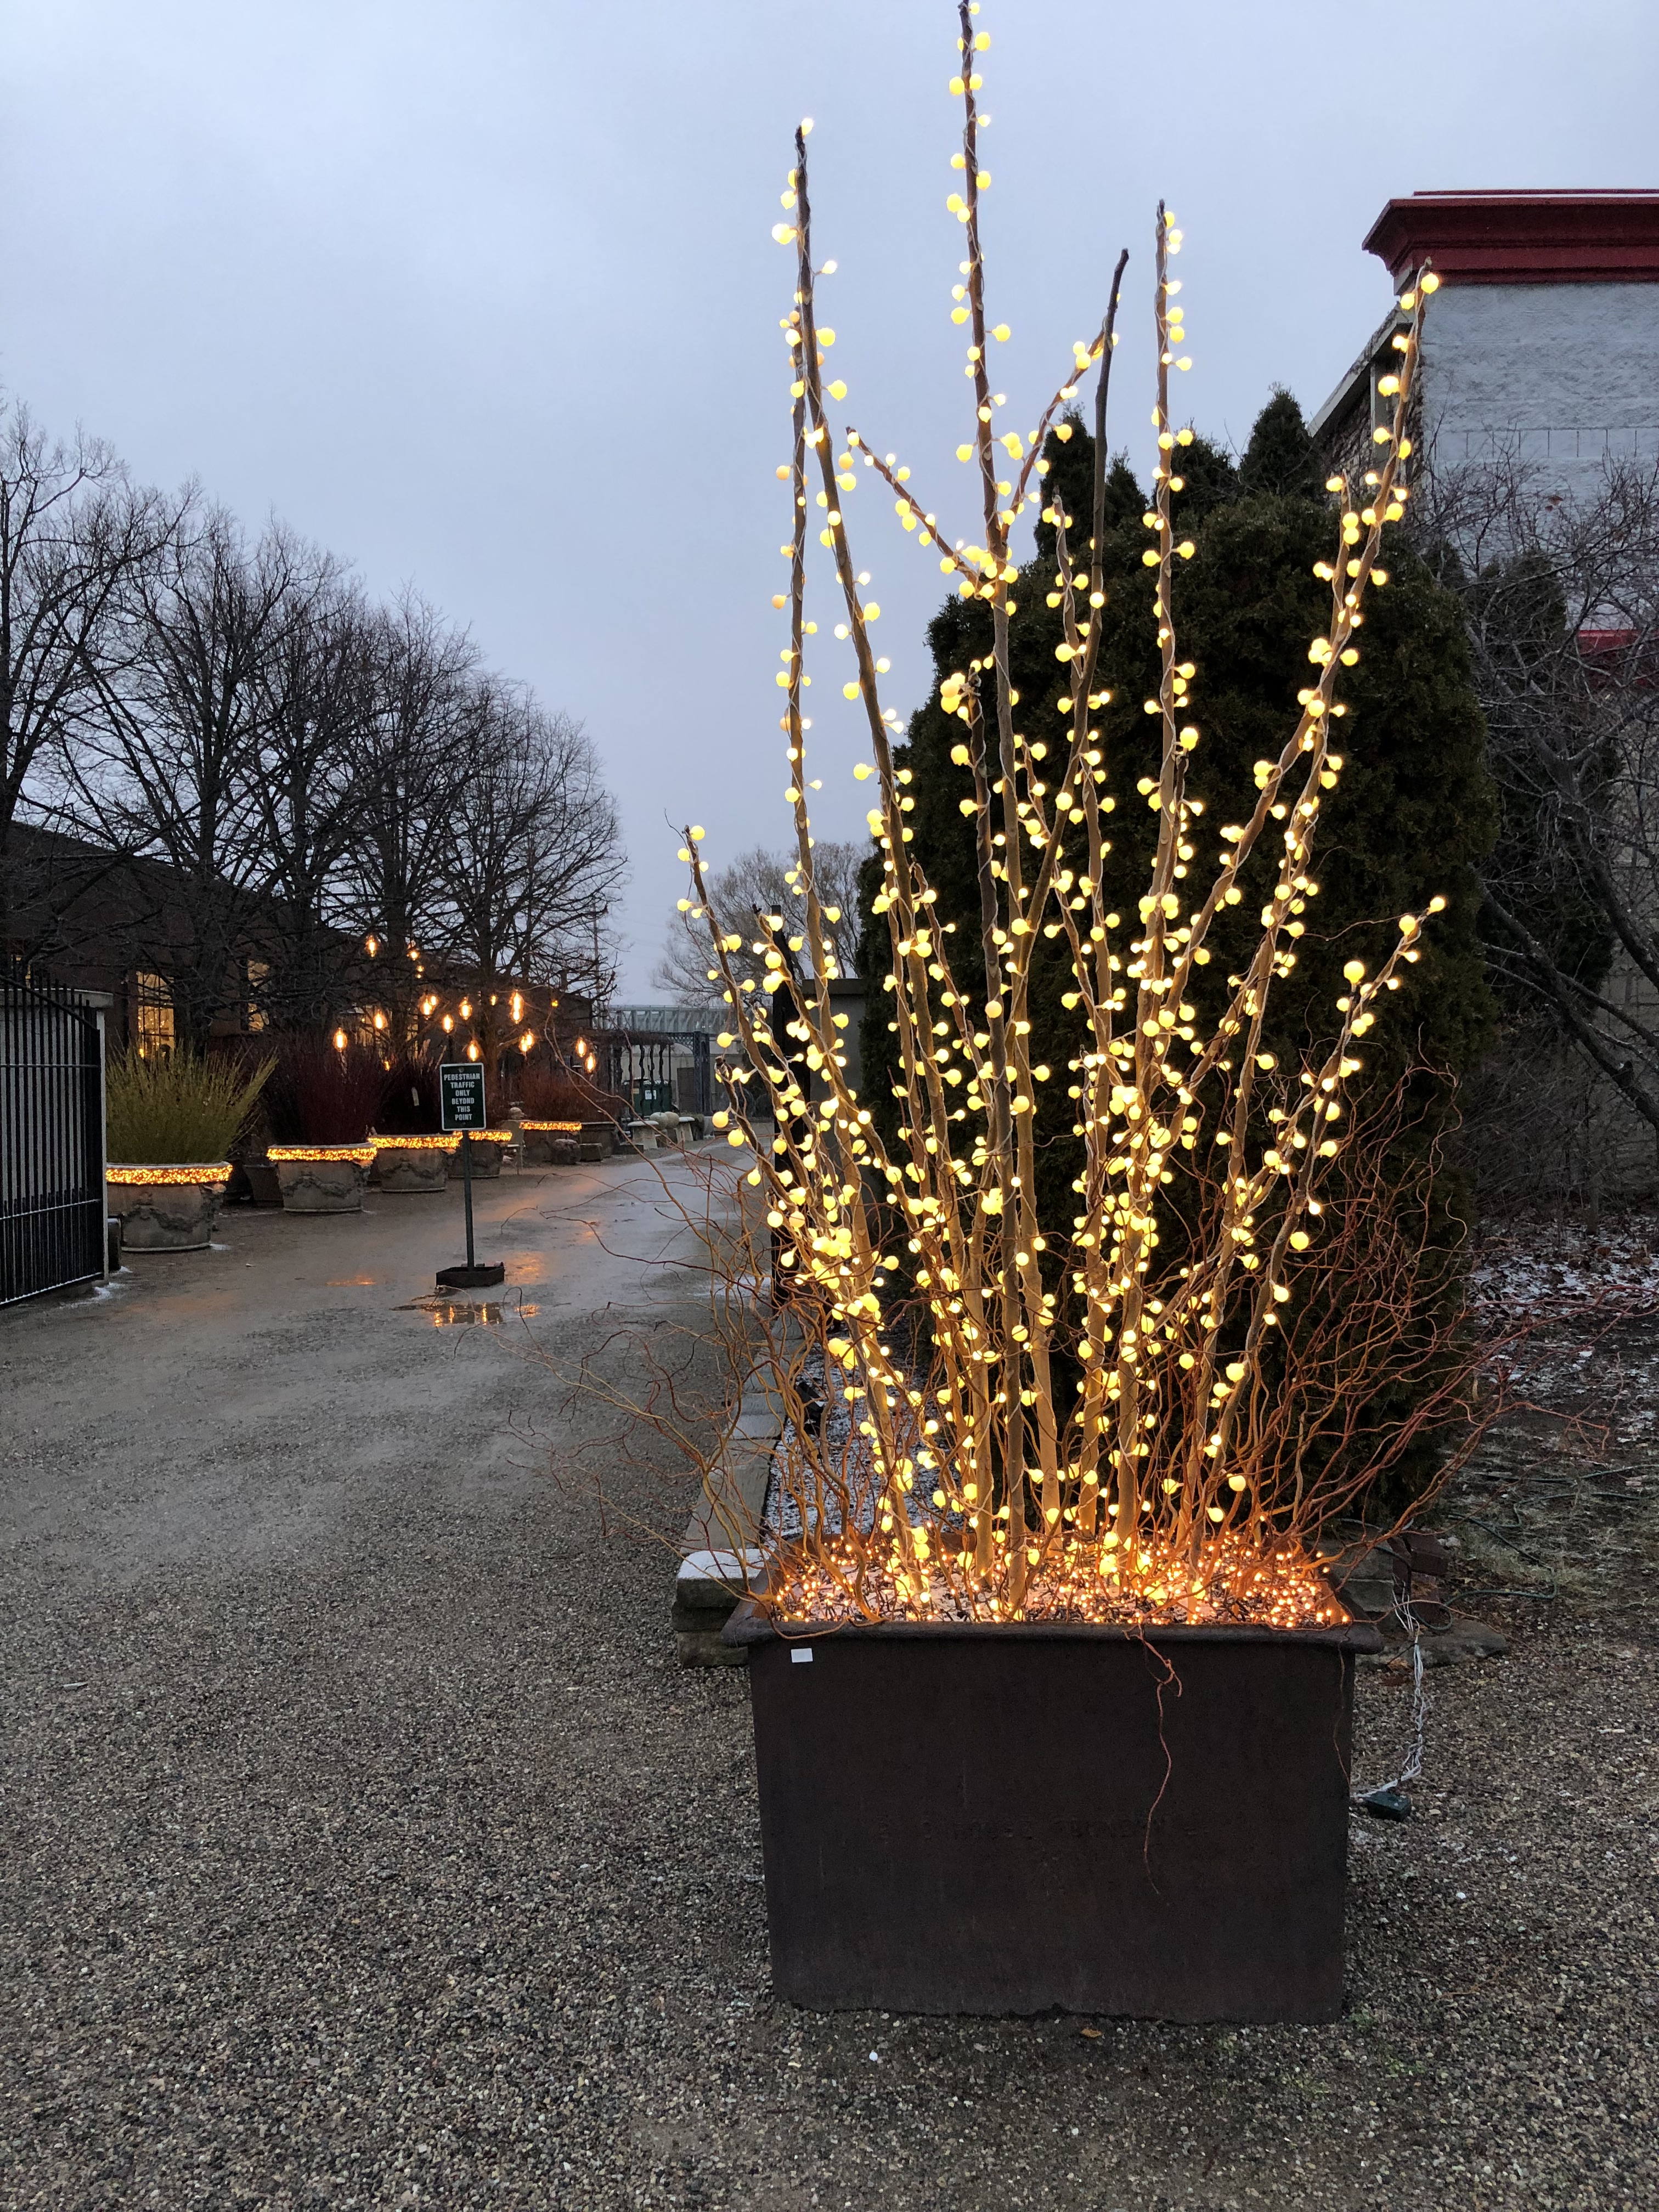
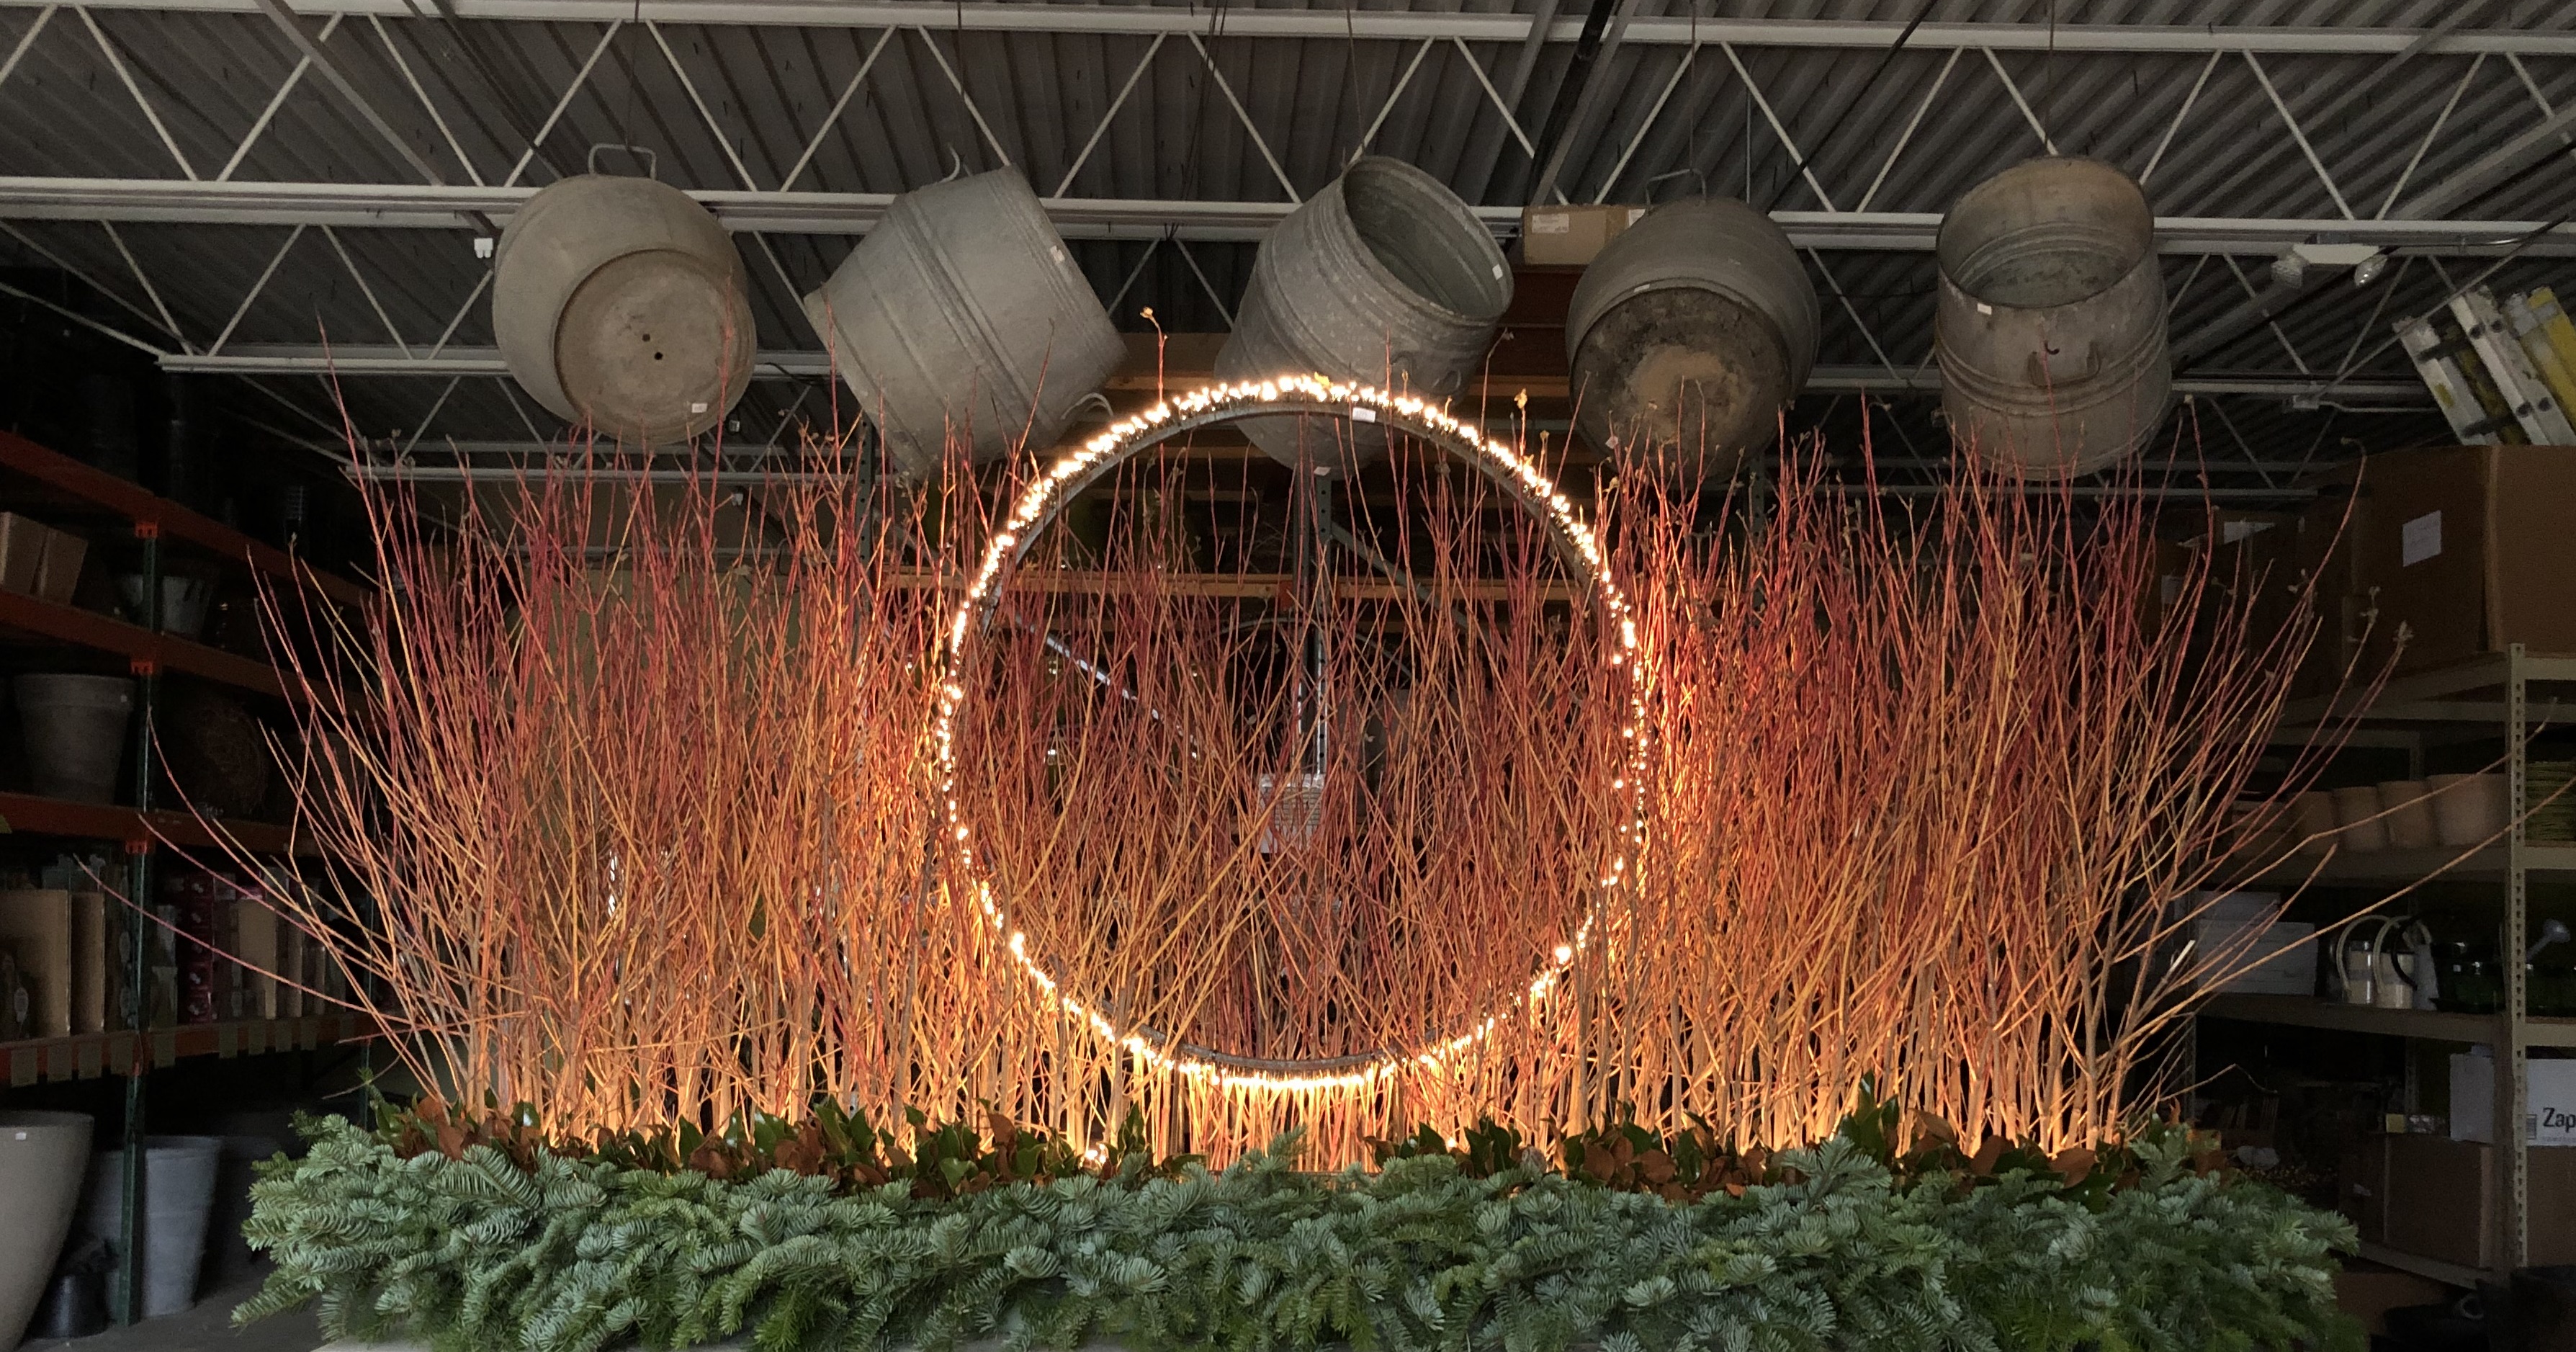 Flipping the switch on the lights once the arrangements were done was great fun. We would indeed have a little midwinter fire.
 Marzela and David came in the Thursday and Friday after Christmas. They fabricated and installed 2 projects we had not finished before the holiday. Karen, Rob and Scott joined in. We sometimes remove the light rings after fabrication, and reinstall them on the job. But in this case, it seemed vastly easier to just leave them in. They took care of all of the finishing work and electrical, once the forms were set.
 Some of the finishing touches will only be seen by those who walk by or come over to take a closer look. We tried to address the near and far, and the day and night. The shop boxes are just the right size for that.
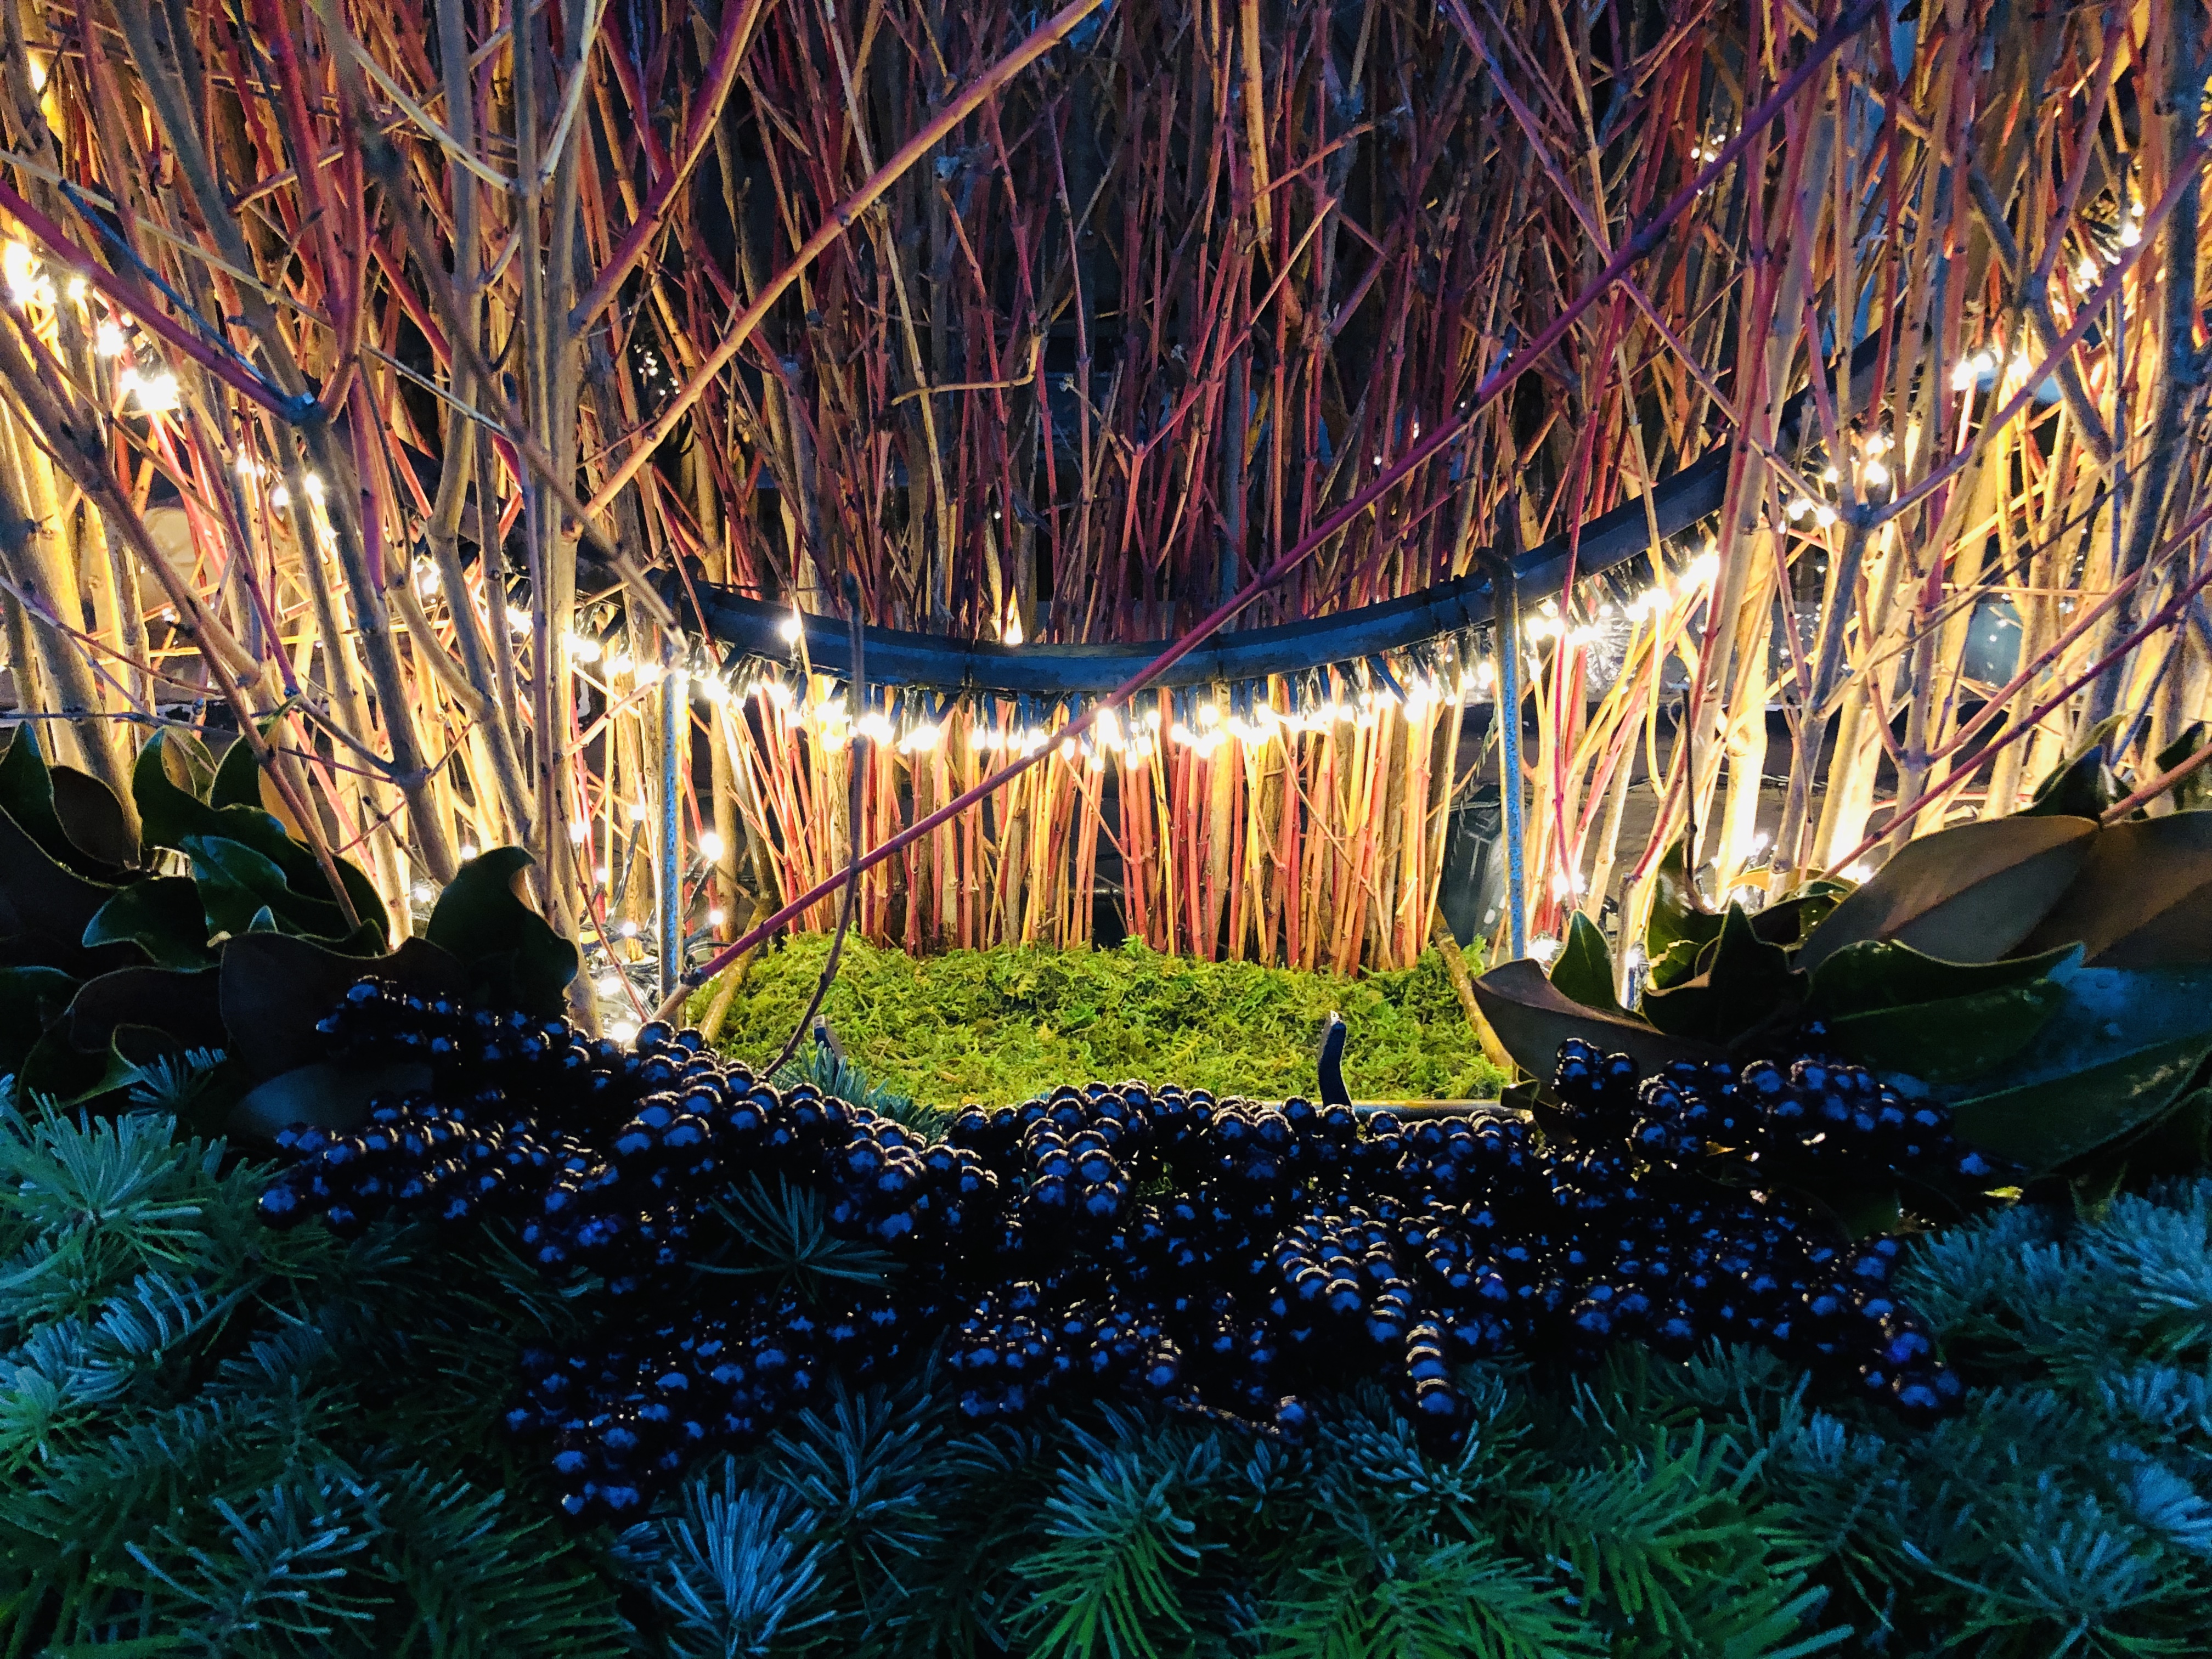
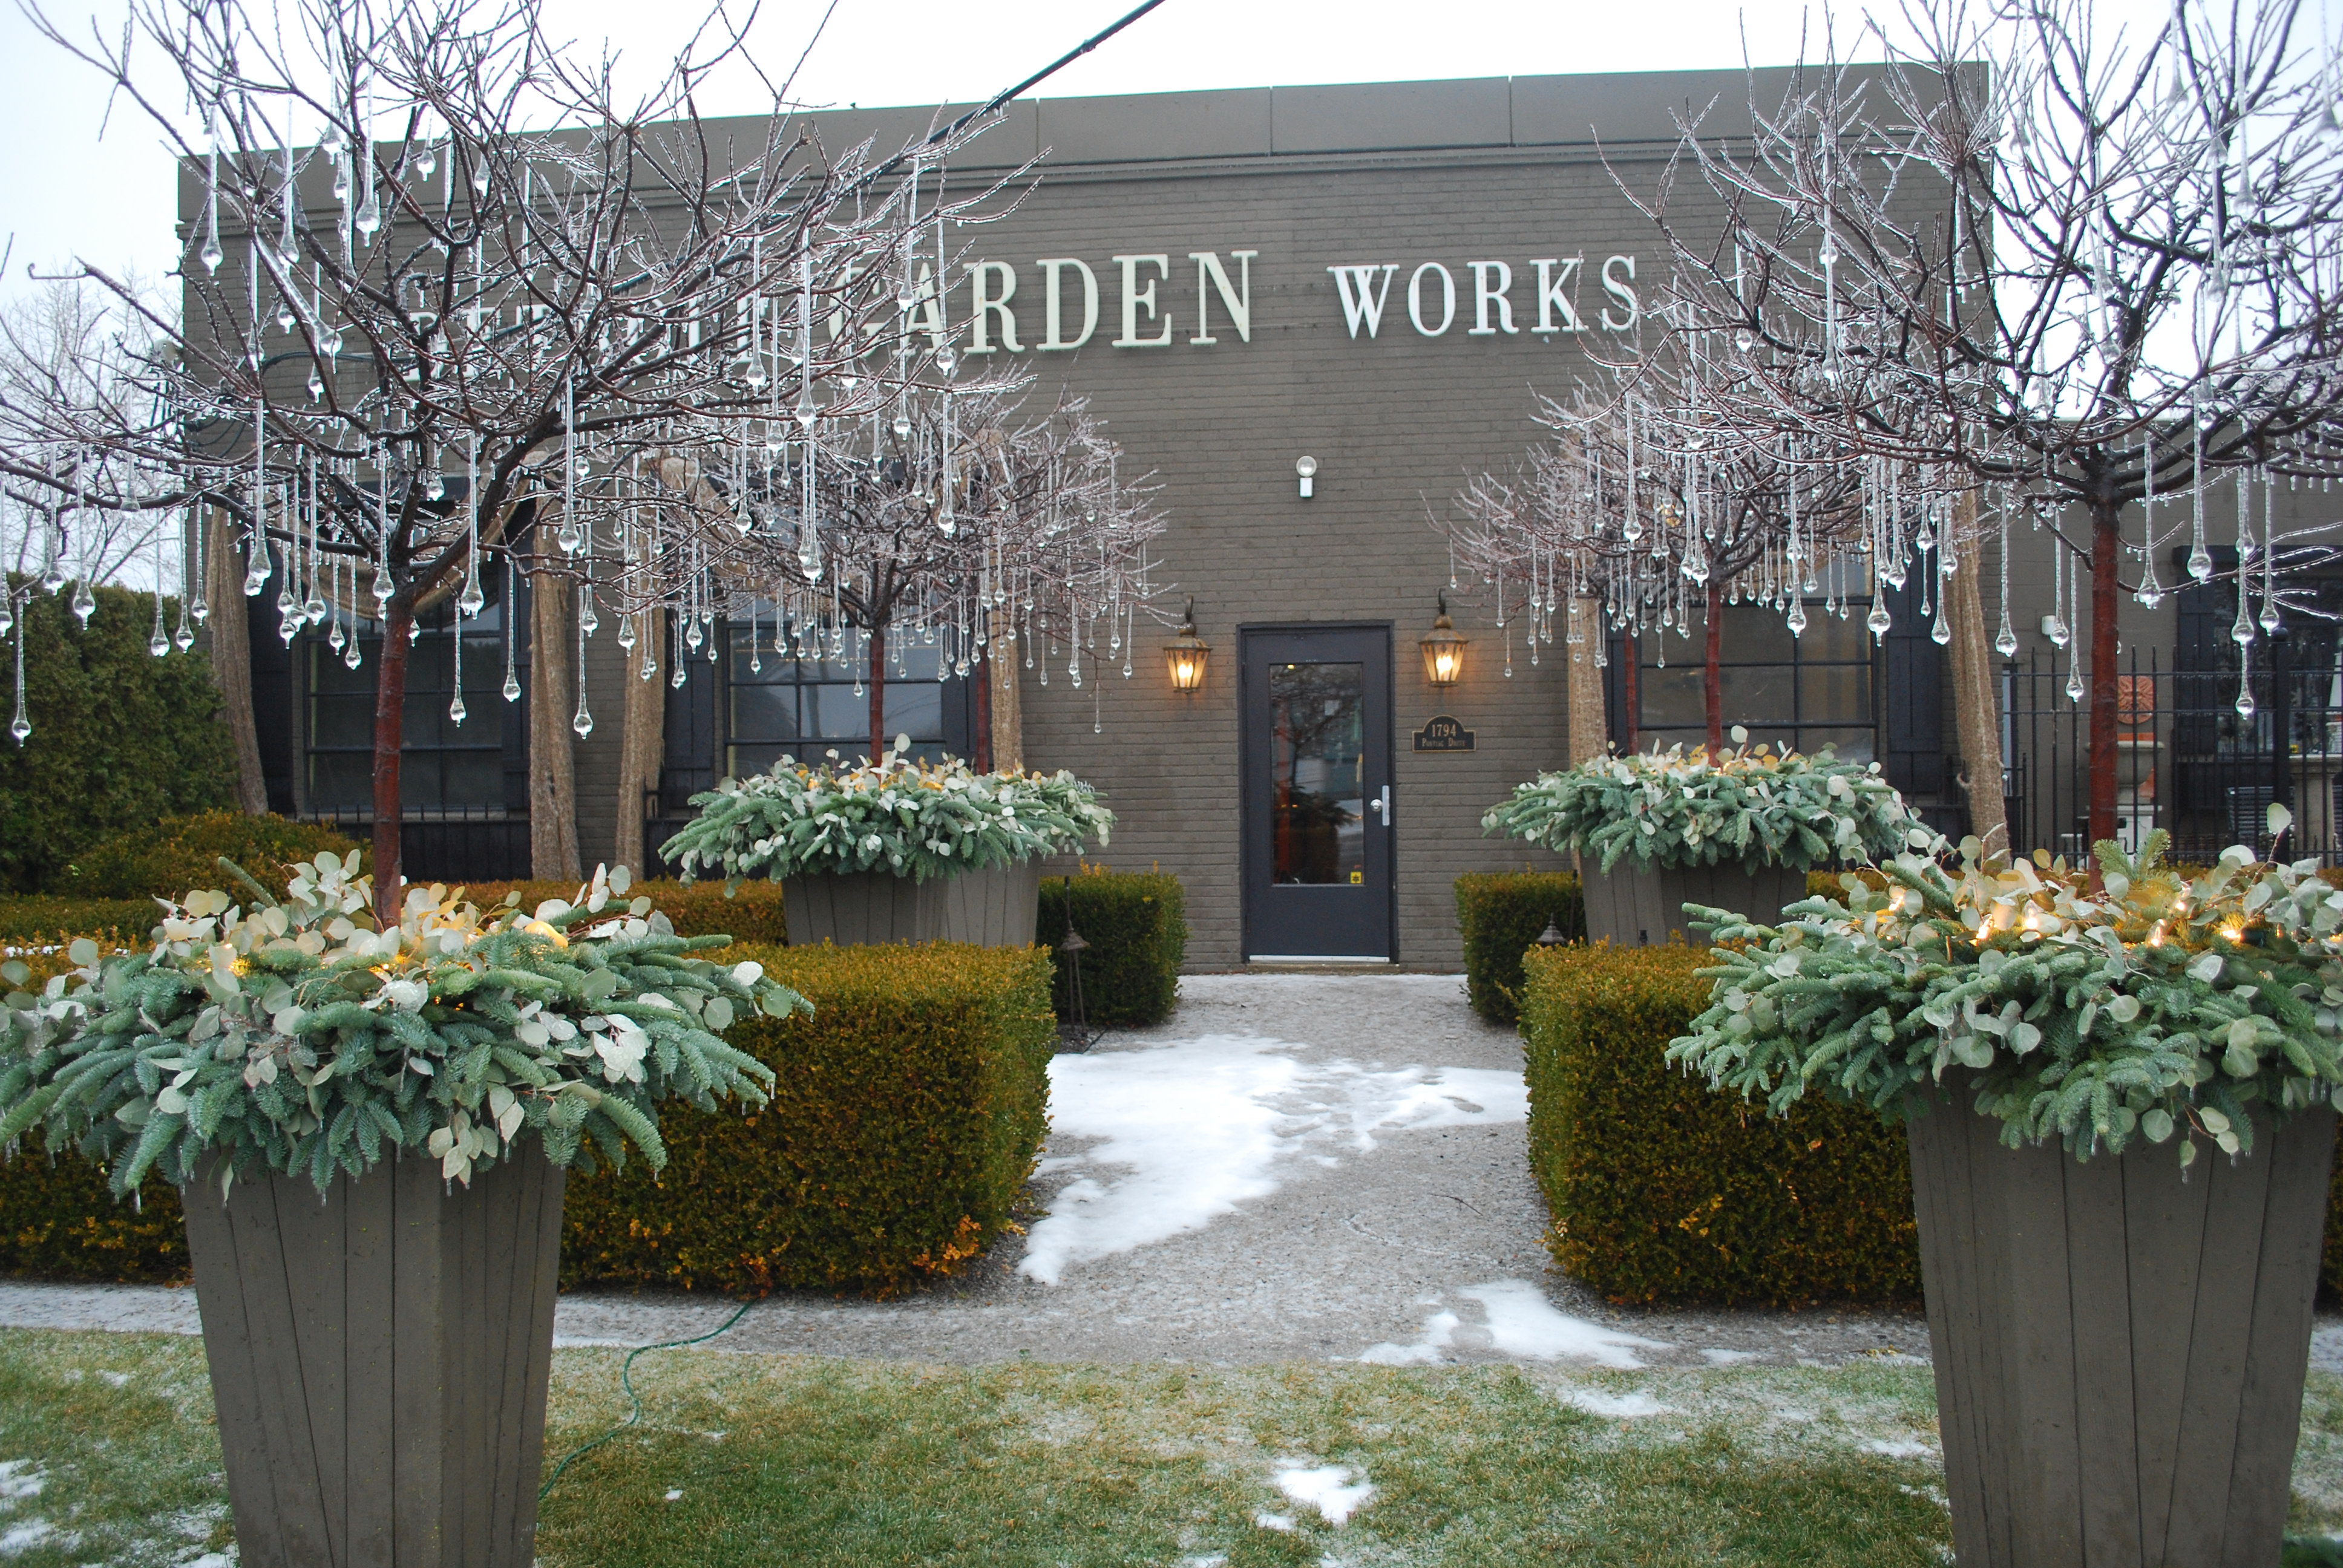
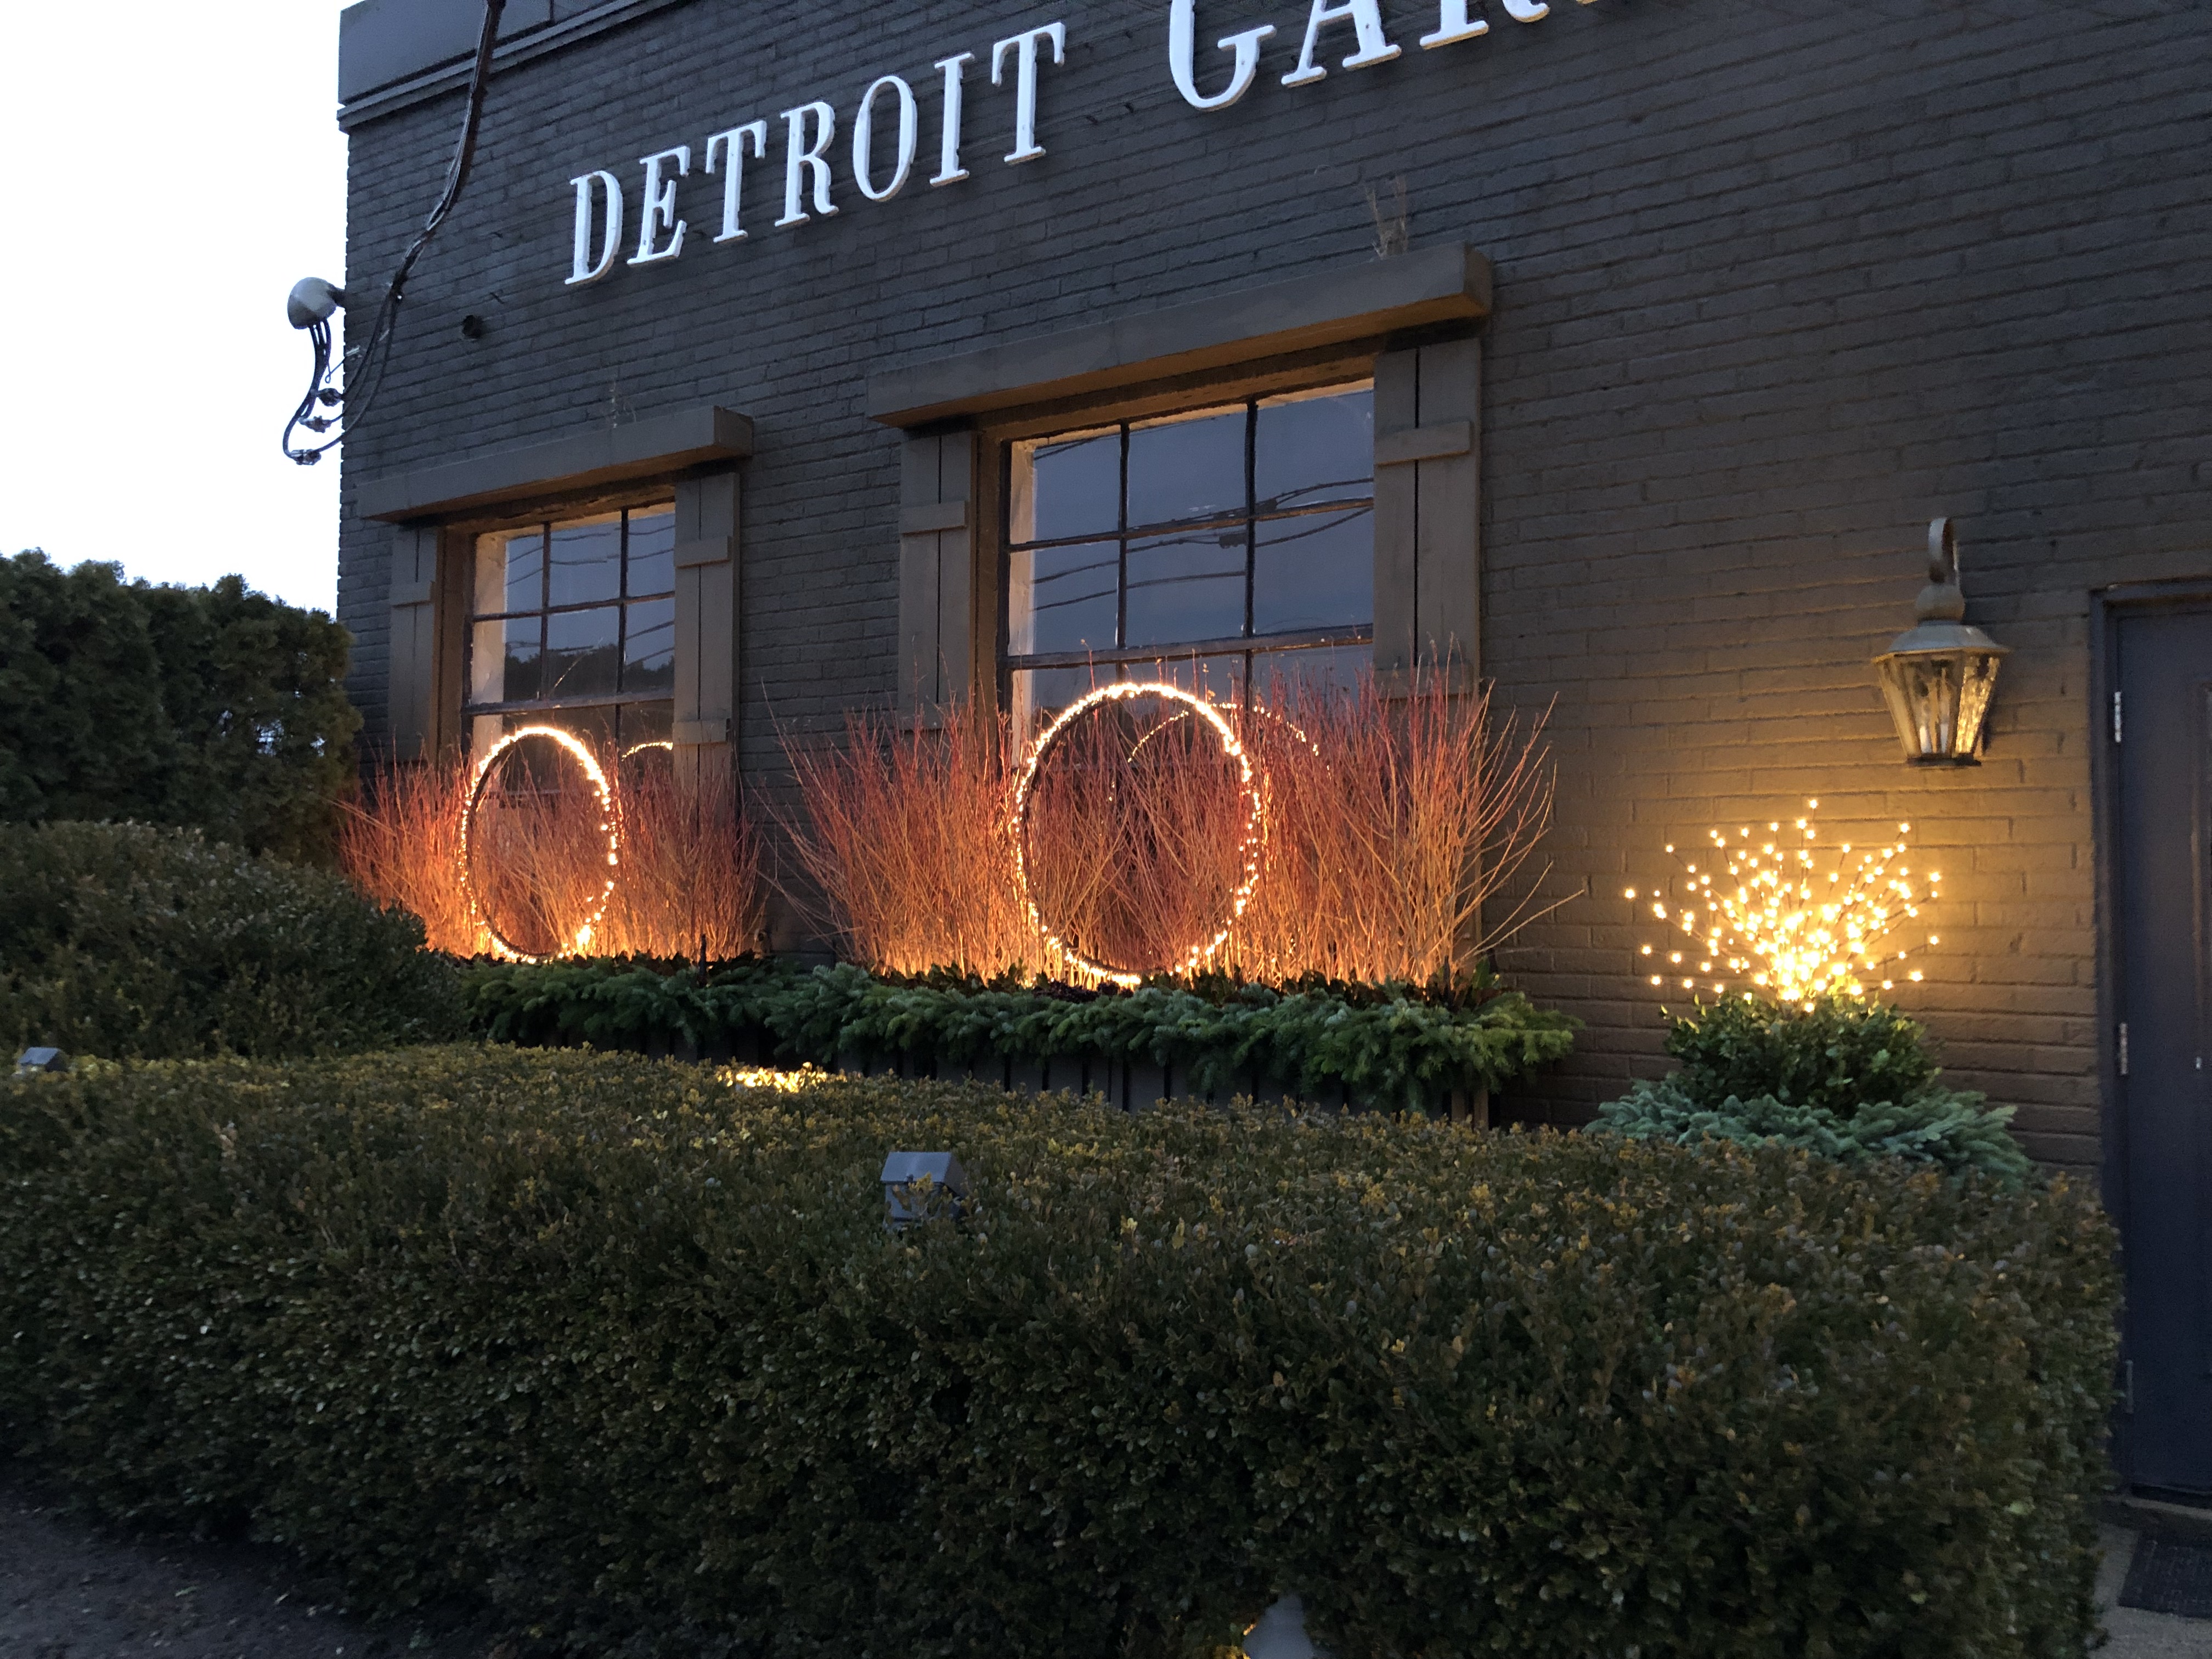 The pots on either side of the door are stuffed with fir and boxwood, and lit with a single 3 foot tall LED light burst from the shop. It came with a pointed metal stake that is easy to push into a form or soil.

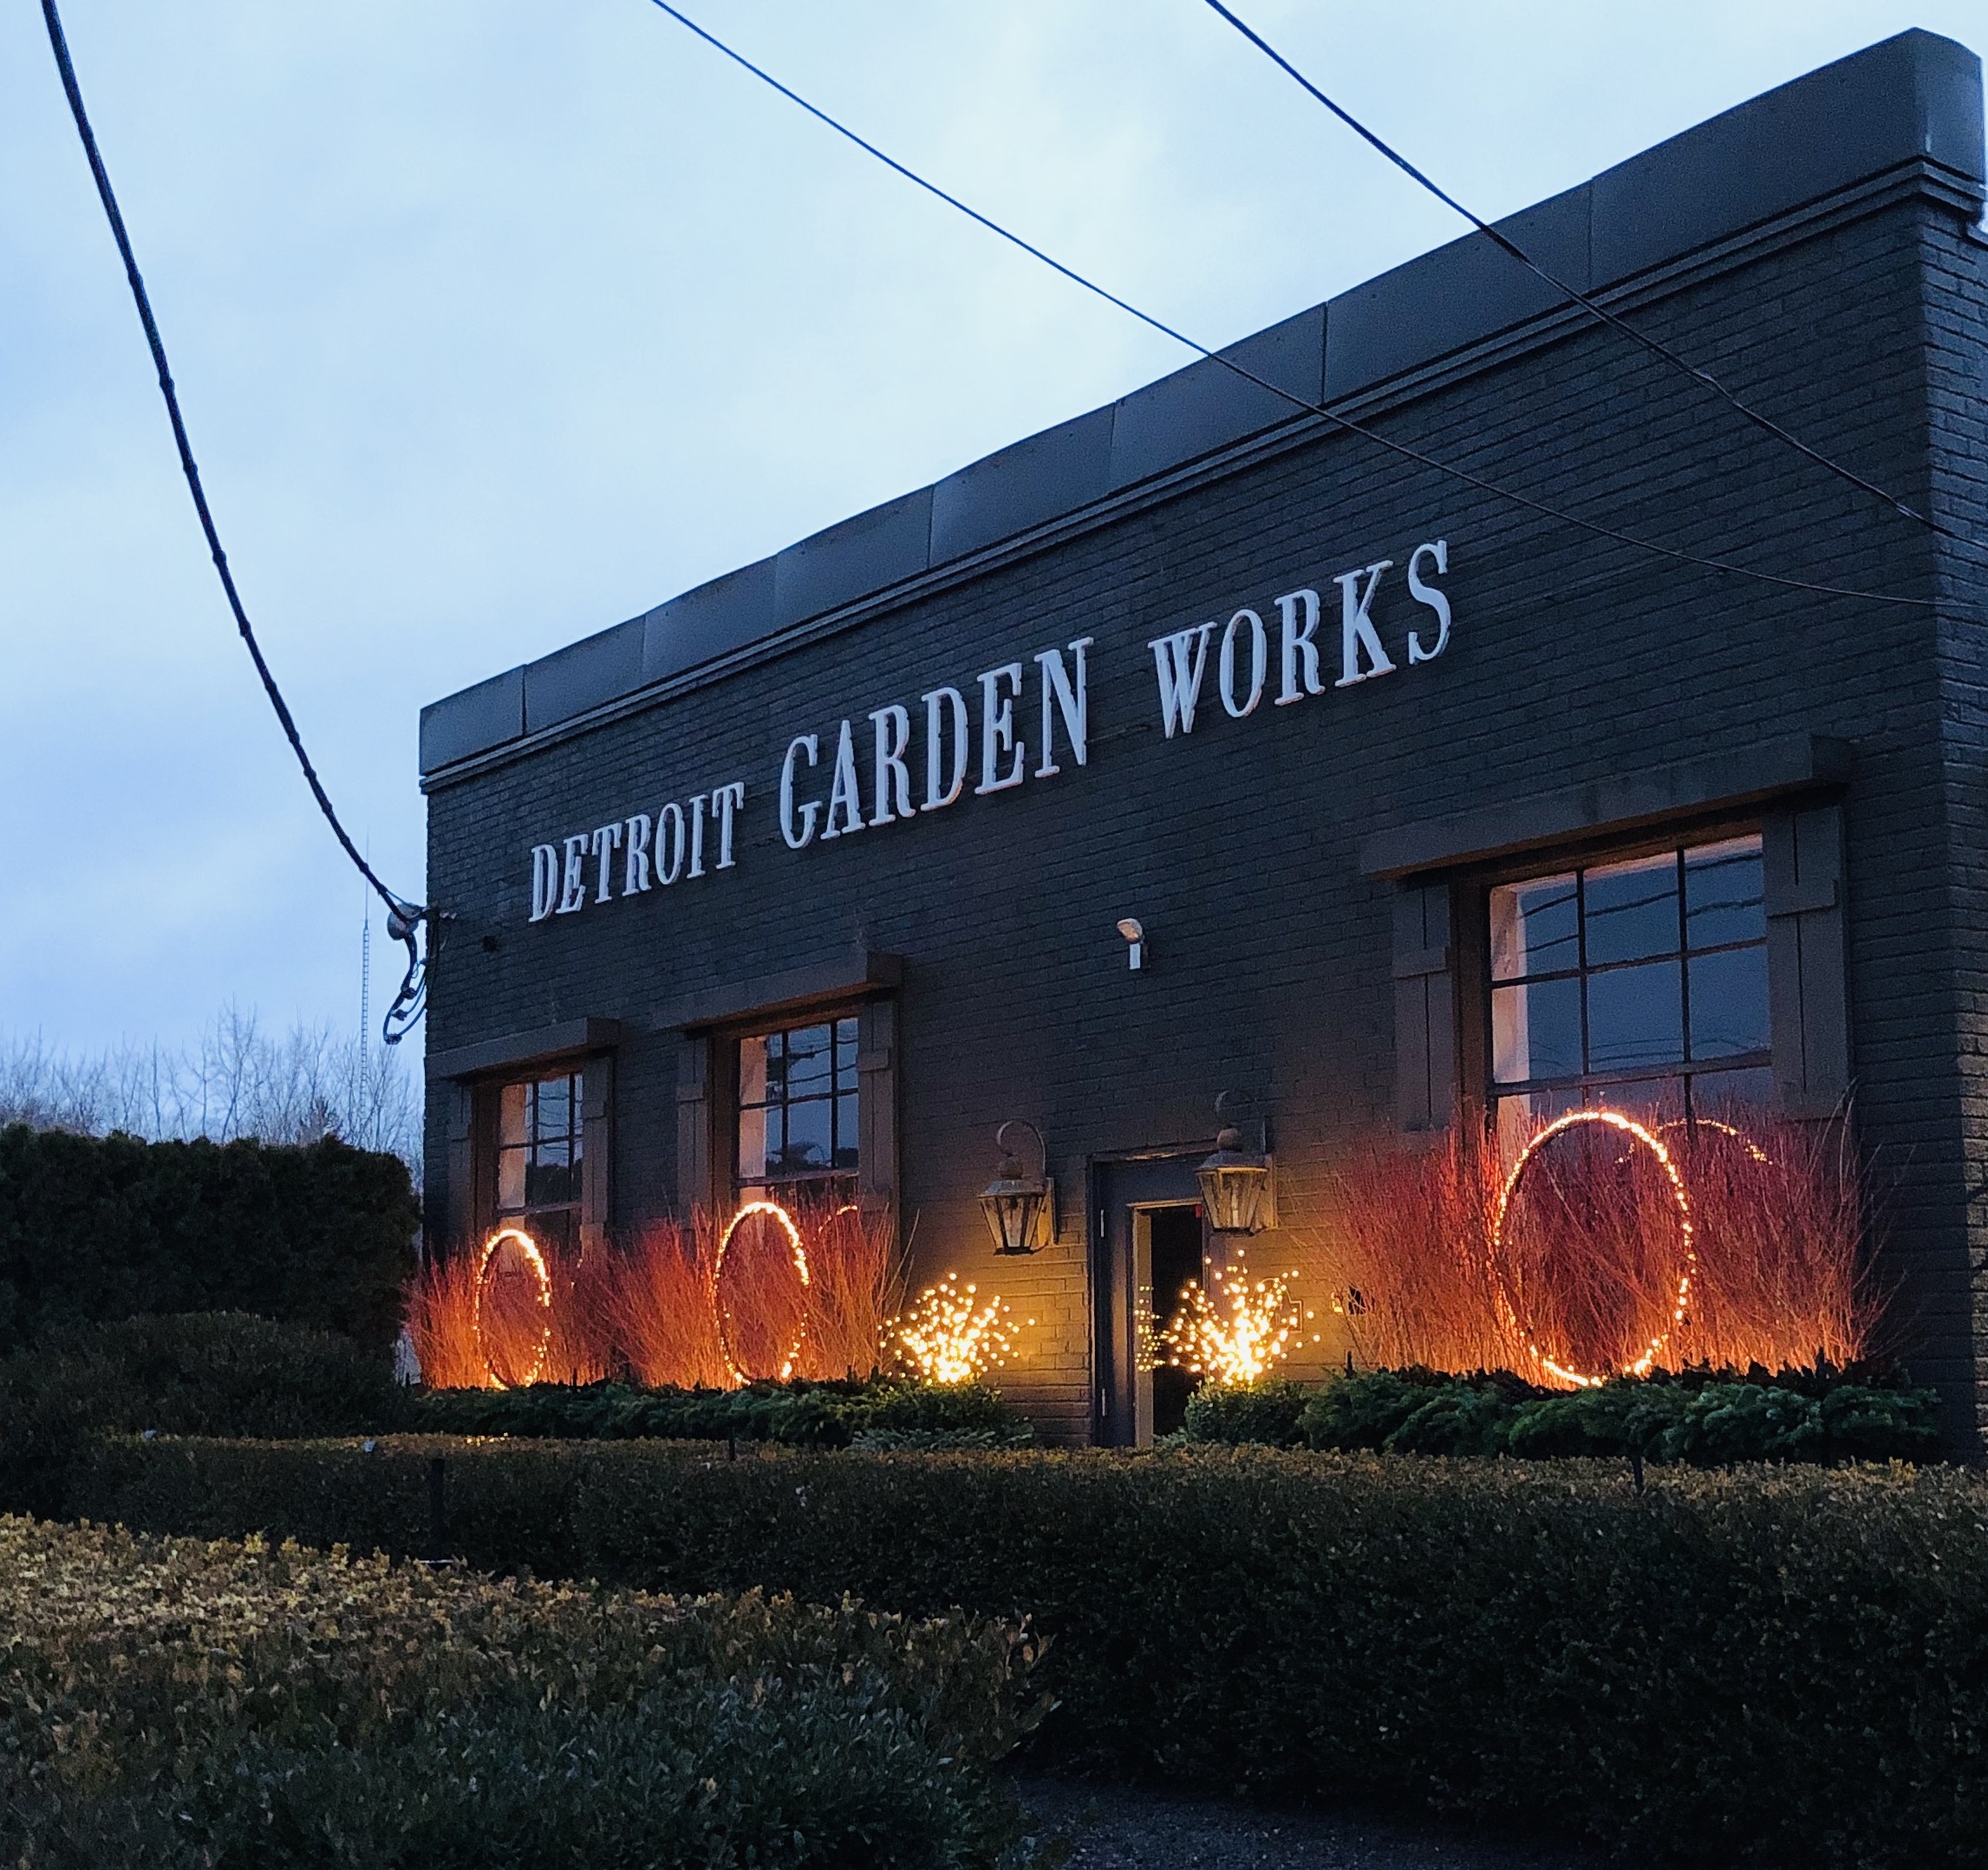
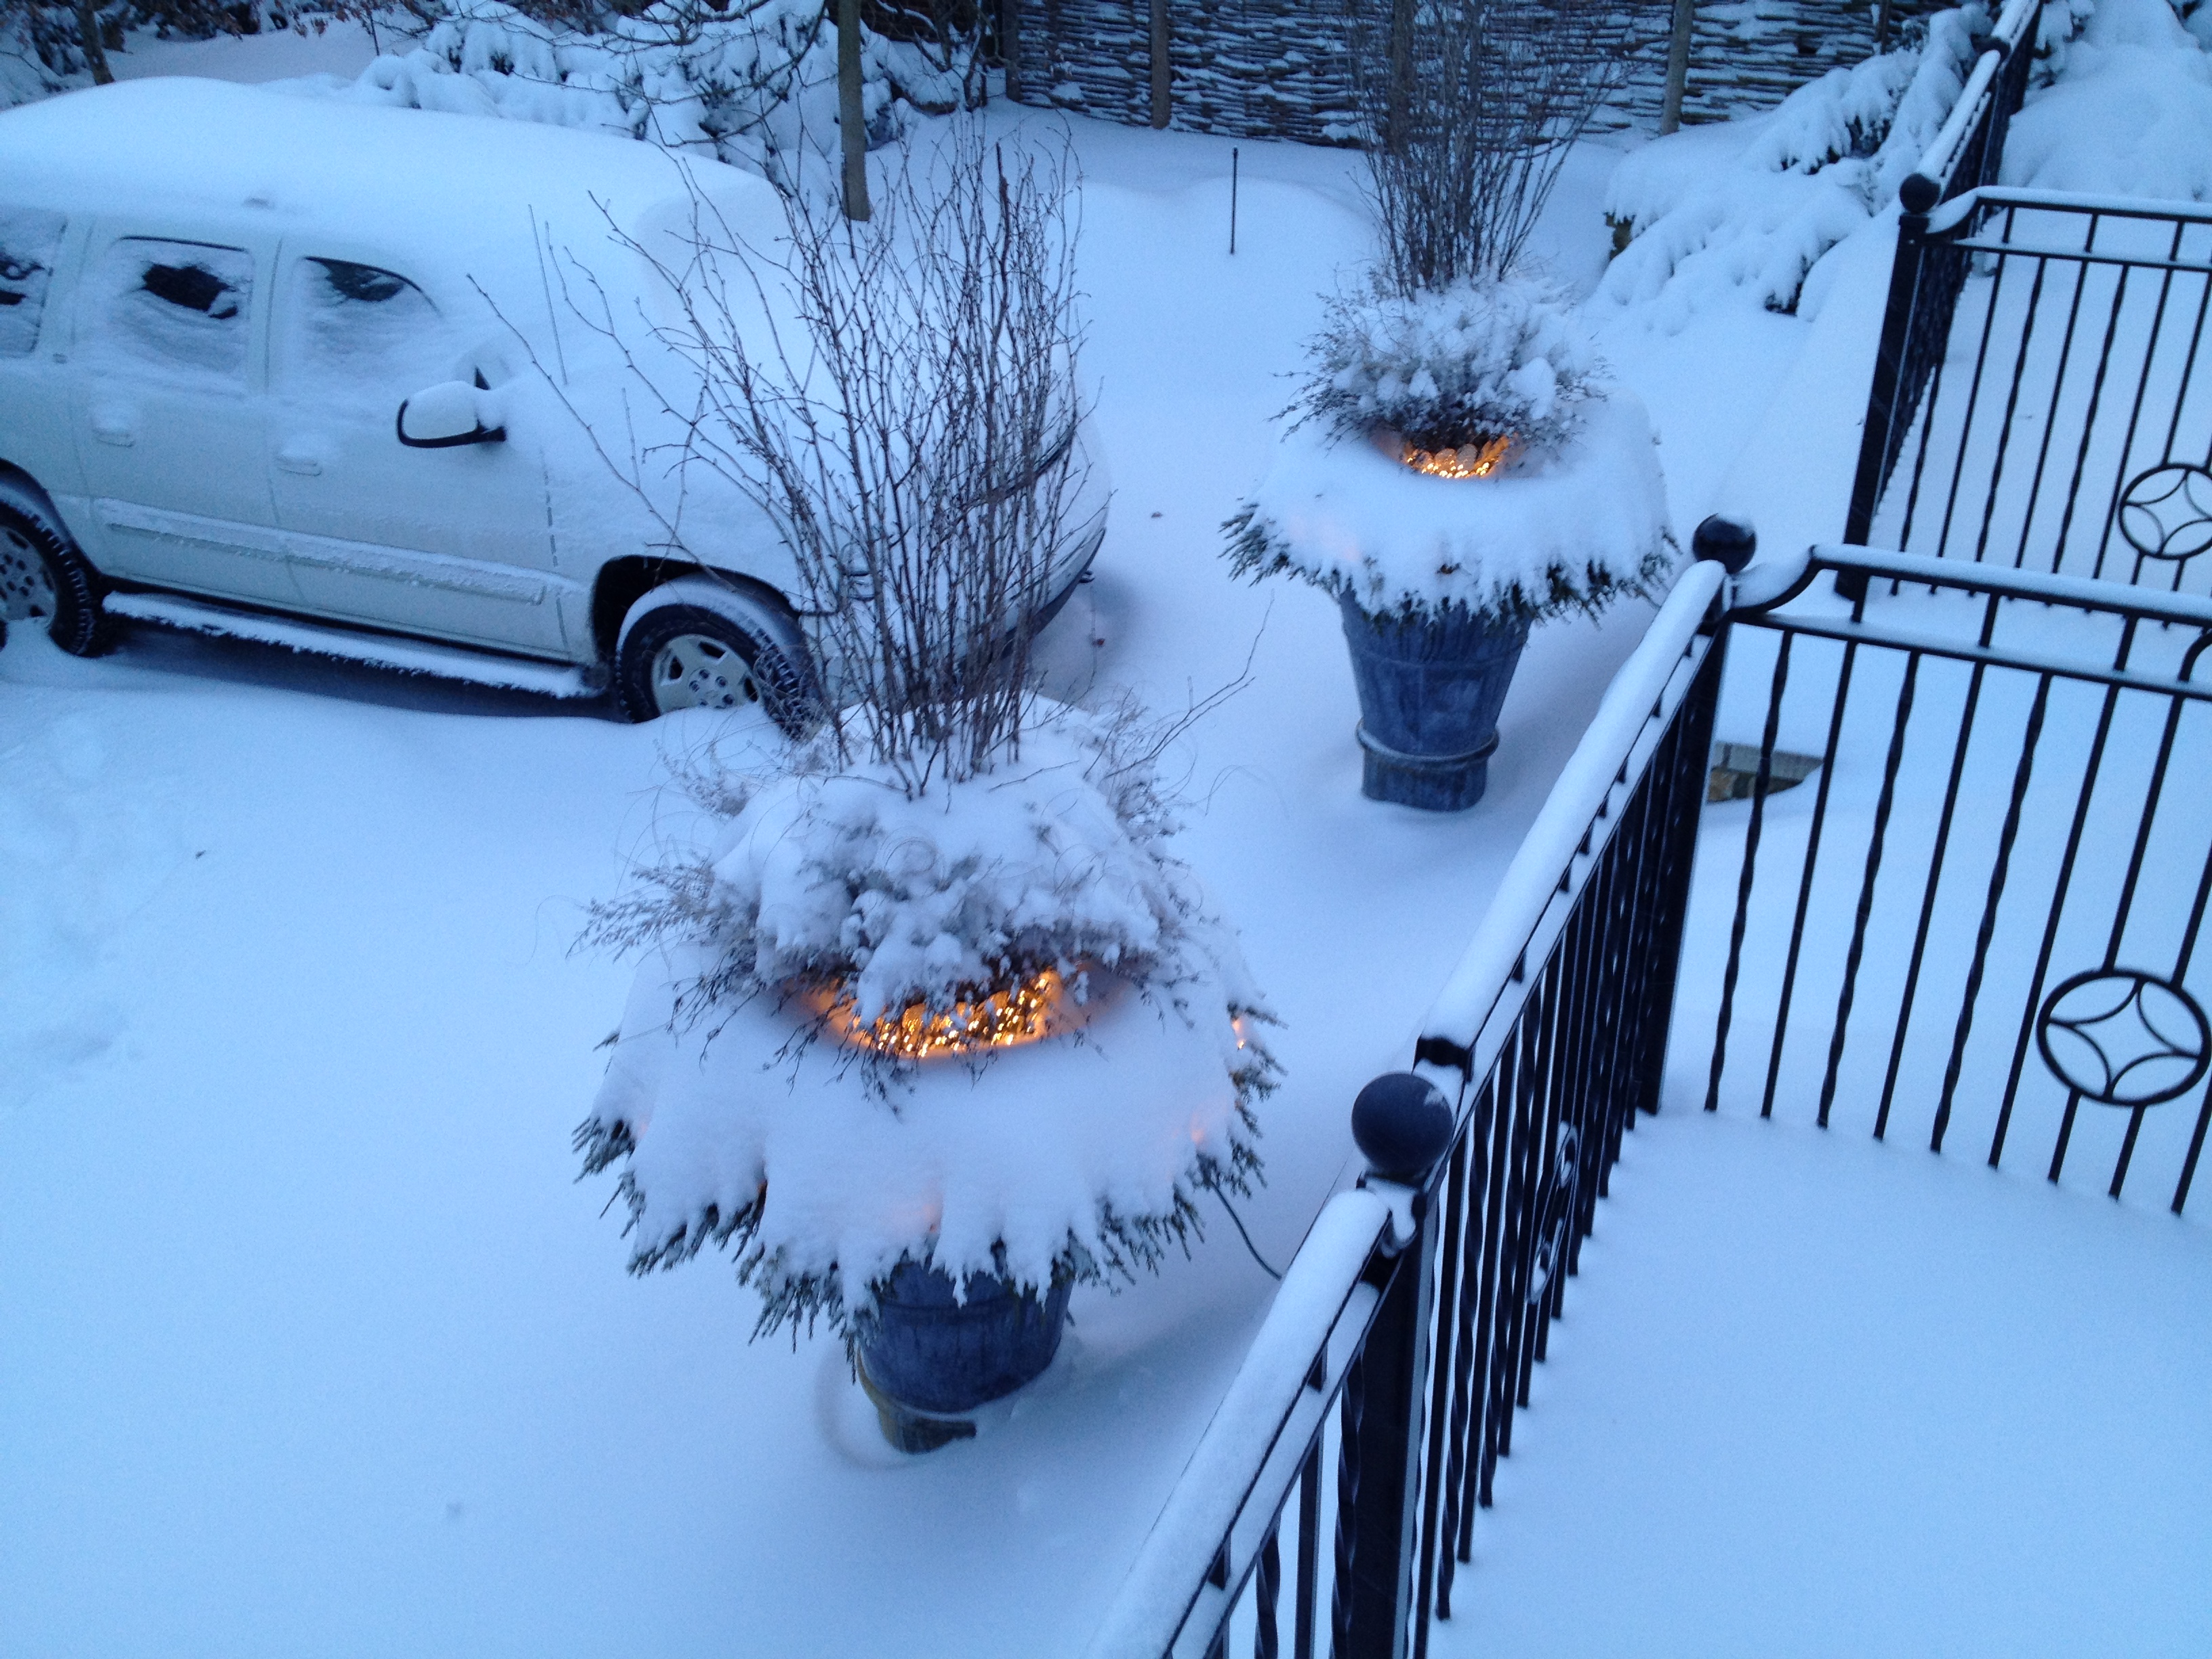
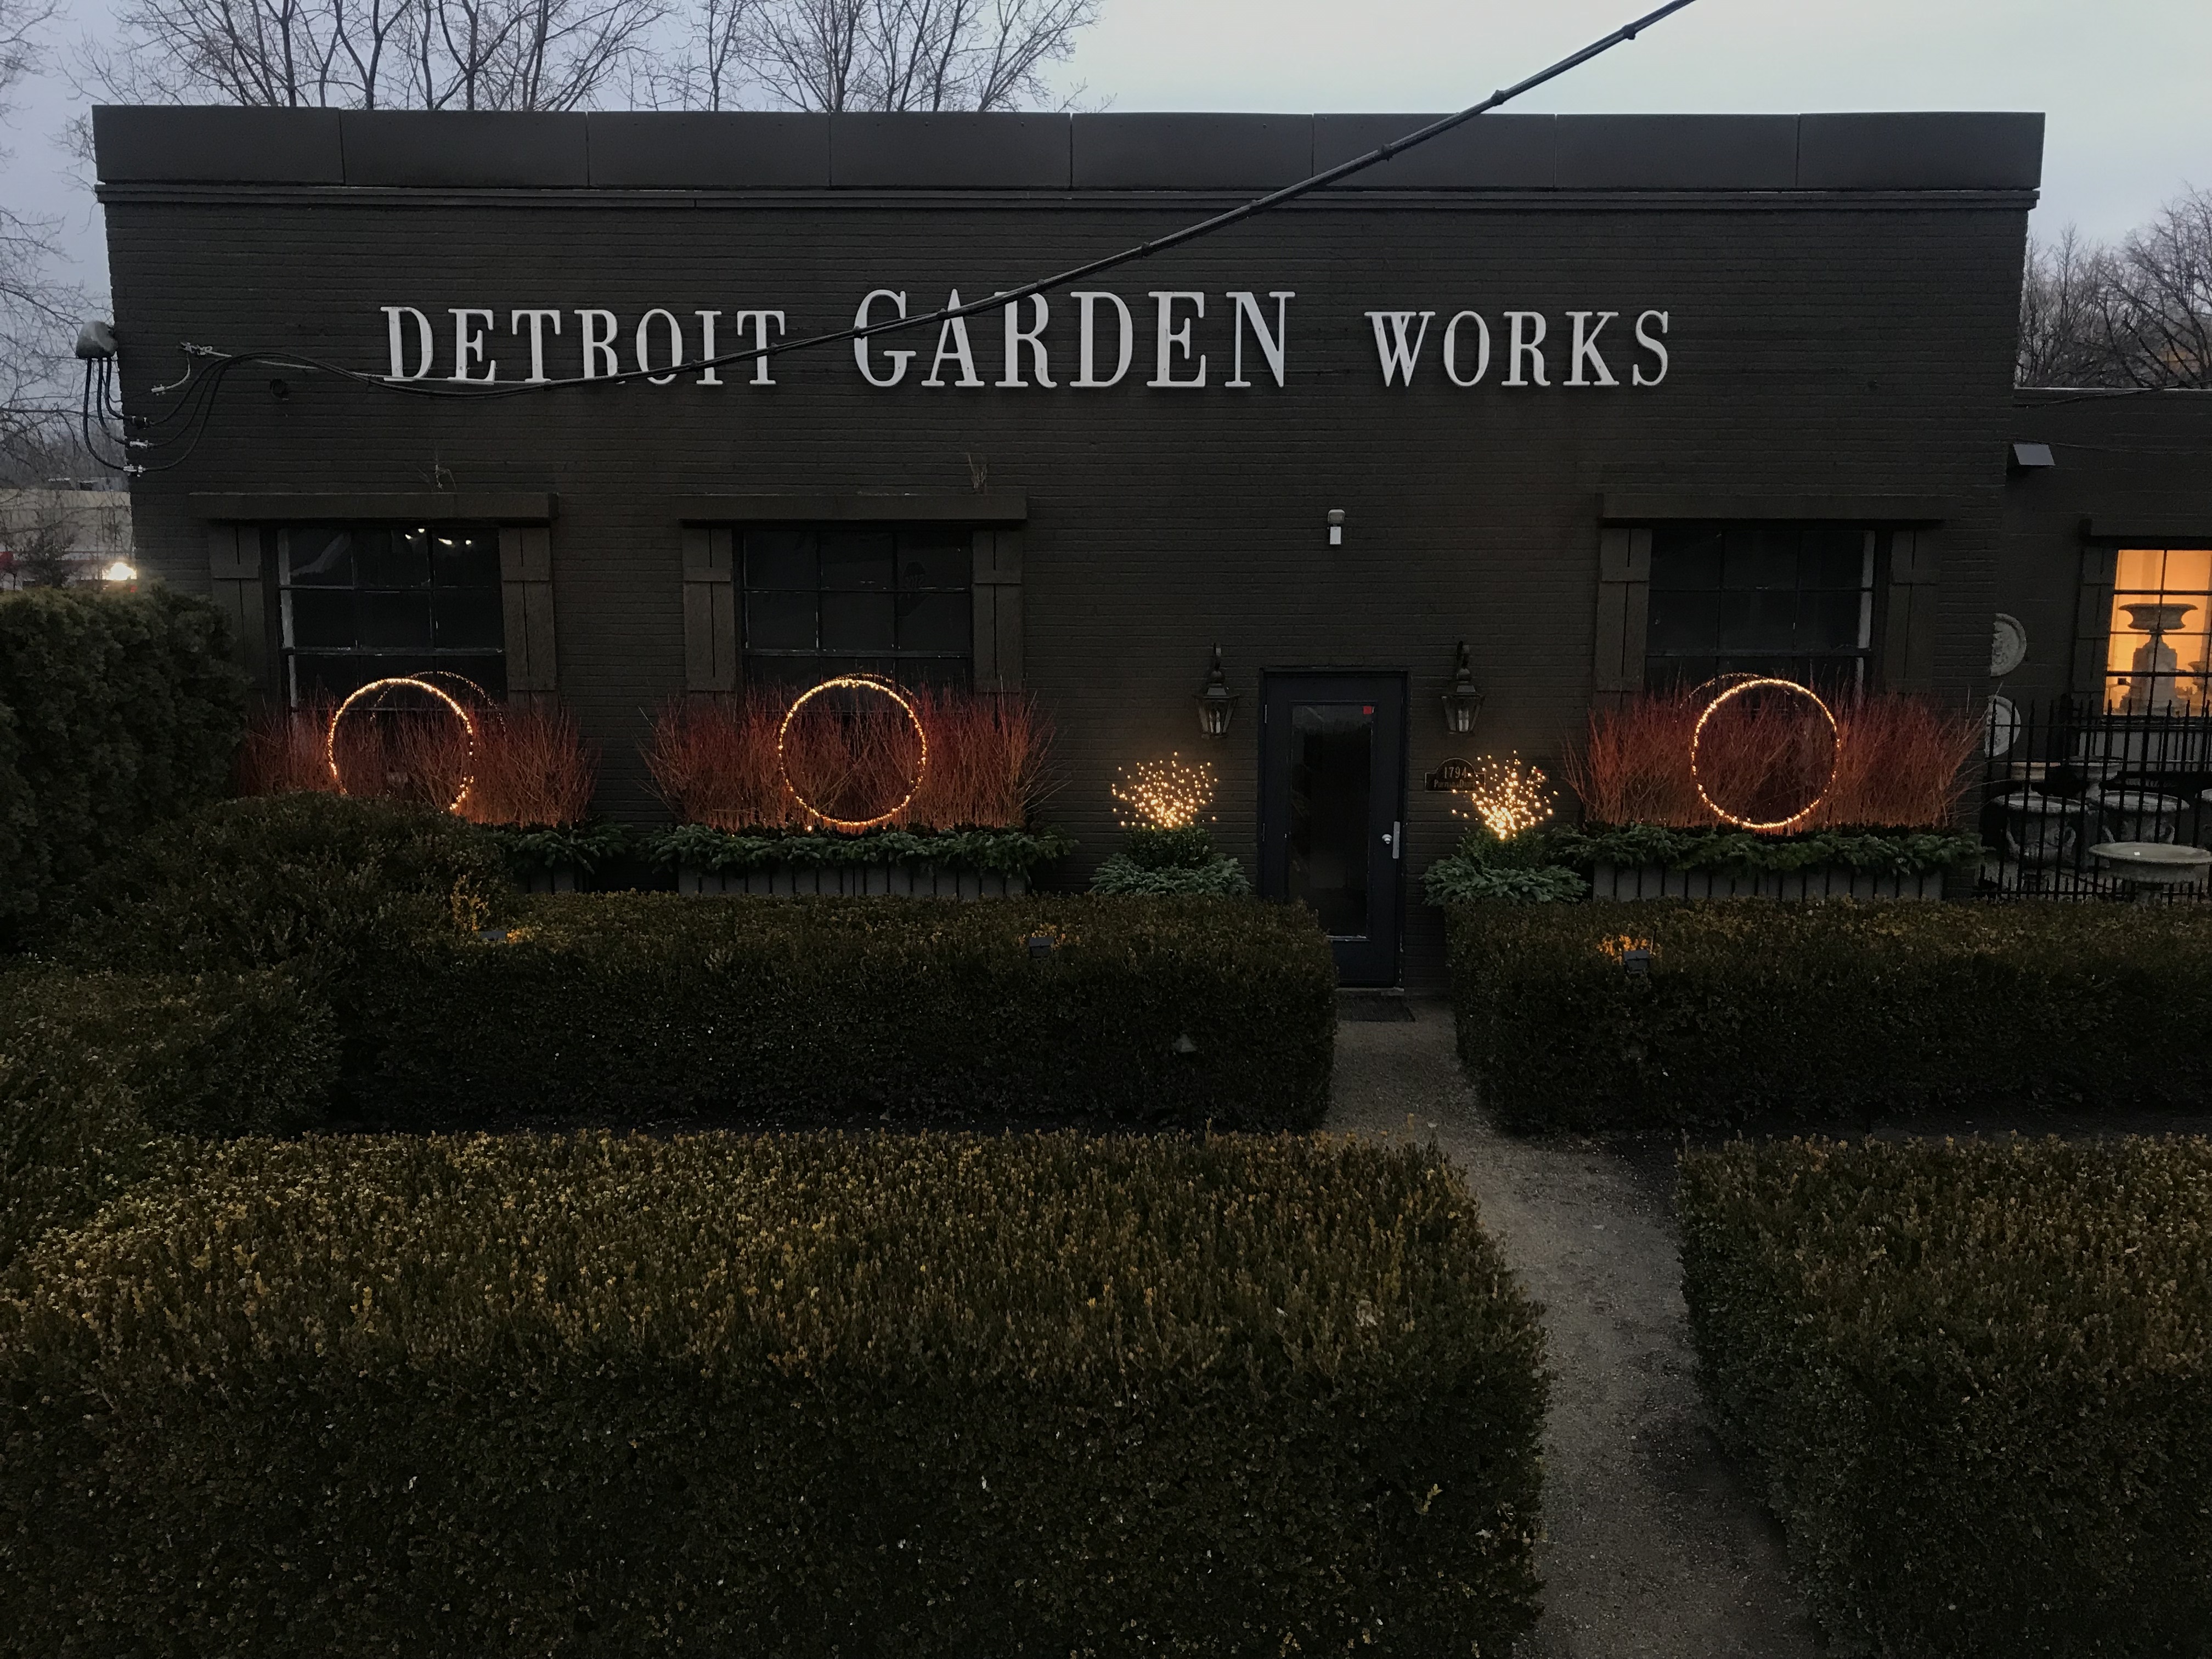 Rob took this picture from the top of a 12 foot ladder, right at dusk. The look of them in the transition between day and night was subtle. The visual changes wrought by the light and weather come courtesy of mother nature.
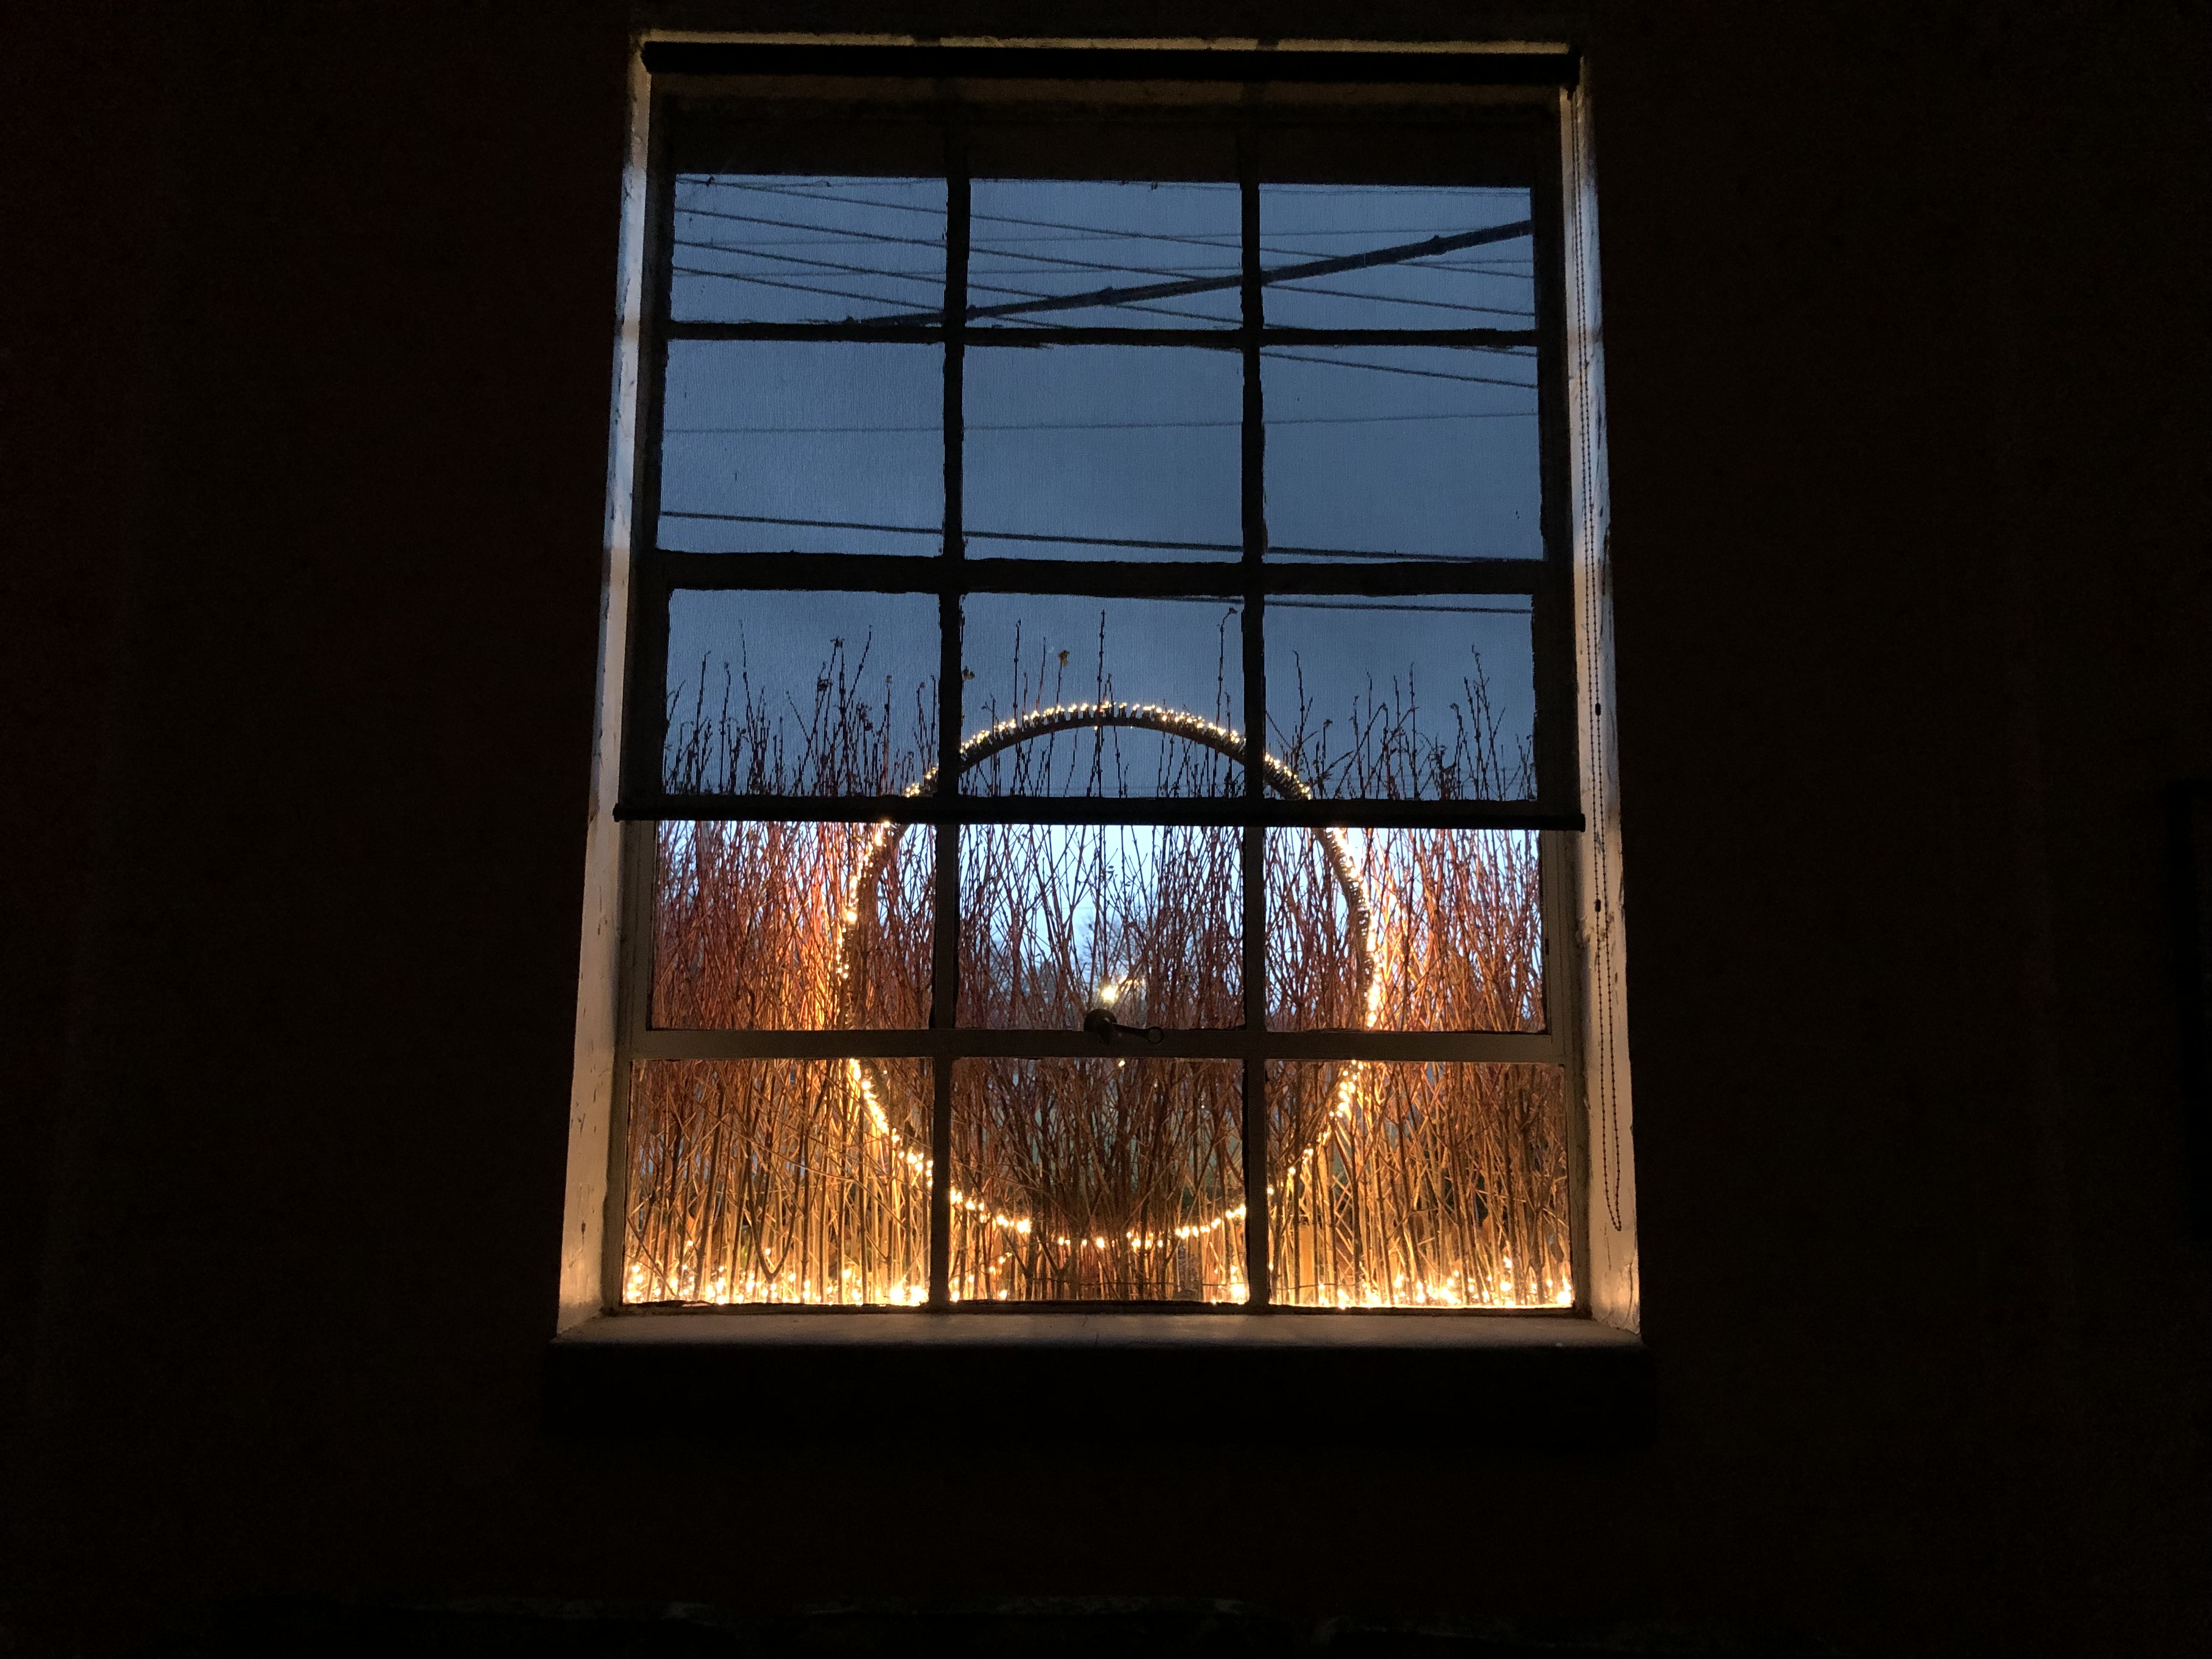 I never thought about how they would look from inside my office, but I am enjoying it.