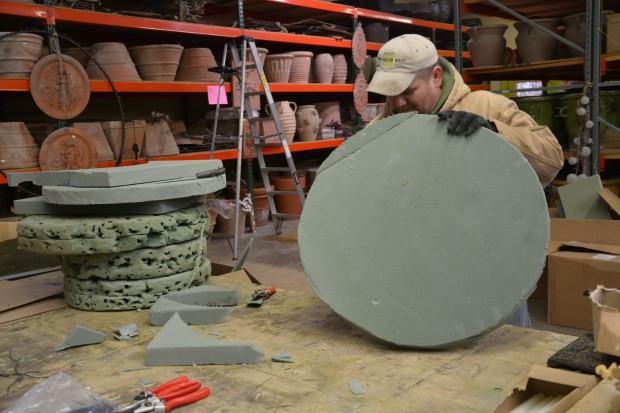
 Our late fall weather took a nose dive a few days ago. Just yesterday, it was 15 degrees when I came into work. Bitter cold like that over a period of time can make any soil left in a container turn rock hard. I have had gardeners in, wondering how they will get their winter containers done. We do not stick any of our greens into the soil in a pot. Evergreen boughs installed in the soil have only one direction possible-that is straight up. We build forms from florist’s foam that fit tight into the pot. The foam will stand above the rim of the pot, enabling the placement of greens to the side, and on an angle. Once a form is built, you can reuse it, or patch it. But another great feature of working in foam is the fact that frozen soil is not a problem.
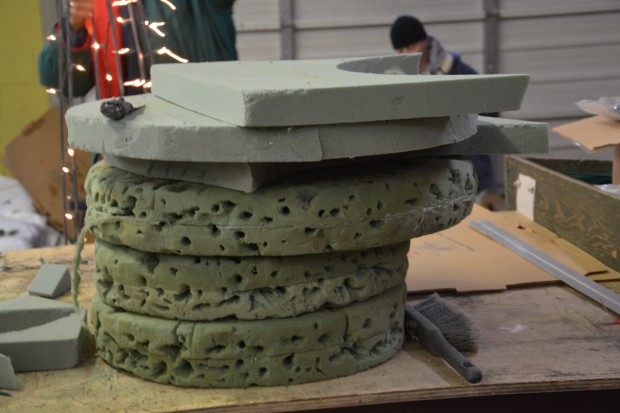 I try to remember to take 4 ” or so of soil out of the pot when doing the fall cleanup. The bottom layer of the foam will sit down into the pot. The top layer gets the evergreen stems. Very large pots may ask for more layers of foam. Given very large pots, or very tall centerpieces, we may wrap the foam with steel wire.
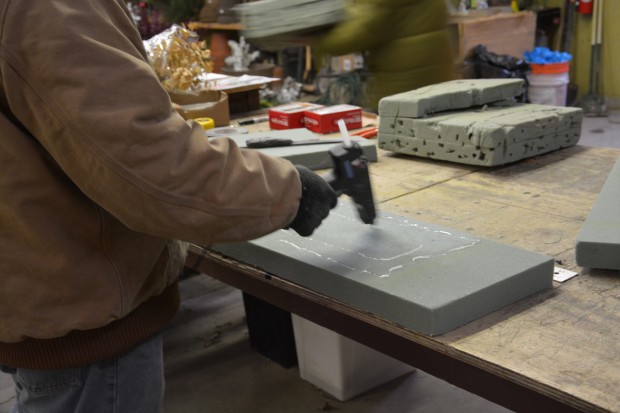
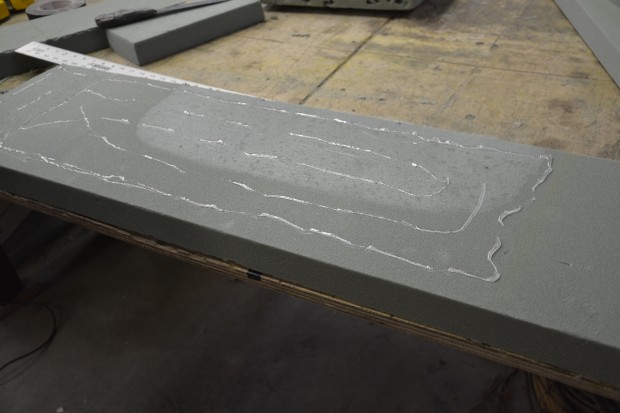
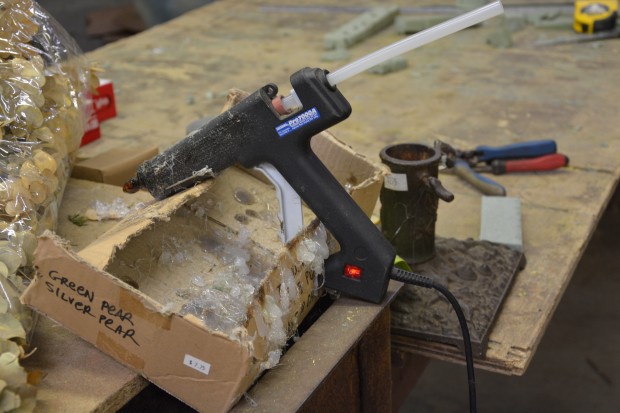
We glue our layers of foam together with hot melt glue. Since the glue cools and sets up fairly quickly, we usually have 2 glue guns going at once. If this sounds like way to much work, we make forms to order all the time.
 There are plenty of variations on this theme. A long window box may ask for 3 forms that can be wedged together upon installation. Odd shaped containers may ask for foam bricks that can be glued up, rather than sheets. Some forms are thicker at the back than the front, if the materials at the back will be heavier in the back. This material enables the actual sticking of the greens to be done indoors. I would dread having to insert branches into half frozen soil when the temperature is much below freezing. This would make the job miserable.
 Gardeners are routinely victimized by the weather, but in this particular instance, there is no need. Being comfortable means the ability to concentrate on the task at hand, rather than the wind chill. Should you want to move a branch over or up an inch, that adjustment is easy. You can control the angle and direction of the placement with ease. If you make a move you don’t like, you can try a different move.
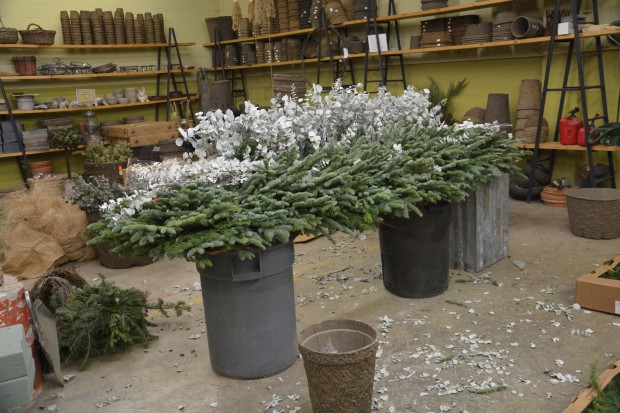 Much better this mess on the garage floor, than on the front porch. This is easy to sweep up.
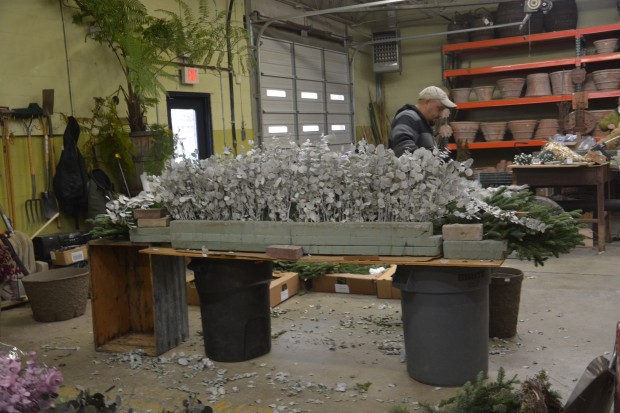 This is the third year for this form. We actually don’t make so many holes in the foam. We sharpen the woody stems of the greens with pruners. This makes for a tight fit. We look at the green topside of a branch to decide on the placement of the next. We do not place the woody stems close together. This helps to conserve material without sacrificing a lush look.
 Transporting an arrangement this large takes some doing. And the heaviest stems or centerpieces are put in once the foam is in place. Once you get the hang of sticking the foam, there will be no stopping you.
If you haven’t done your winter containers yet, don’t despair. A little simple technology can help make it happen. I did post lots of pictures of winter pots on the Detroit Garden Works facebook page today, should you be interested.
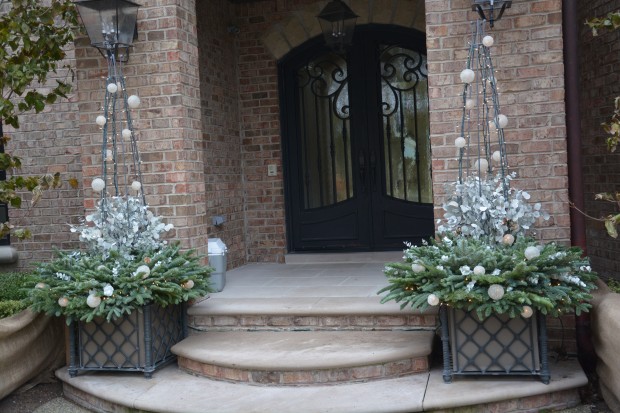
I fight frozen soil every year and I dread it. But I love the idea of using foam. It gives you so many more options for designing a winter pot, as your many creative arrangements confirm.
Where do you get such huge pieces? I have been looking. And is it dry floral foam?
Thanks.
Dear Amy, dry floral foam yes. Craft stores sell dry floral foam-try googling it. We order in 24 by 36 inch sheets by the case, as a single piece is so much easier and faster to deal with. Thanks, Deborah
Your information came just in time….I was wondering what to do…Thank-you
once again – your approach to the work allows you to roll the way you want to with excellent results!
buck
Once again thanks for the great info, I have a window box that is very heavy when it is full of soil. Add snow on top of this and it looks like its going to rip itself from the wall. I’m going to take the whole thing down and try the florists foam. Thanks so much for the step by step instructions!!
Utterly brilliant, as usual. 🙂
Dear Christina, you are a good friend-I knew you would be from the first moment I met you. Best to you, Deborah
These photos leave me “gobsmacked,” as my English husband says.
There is such joy in your planting designs. And just when I think I’m too bone-weary to mount a new decorating effort (since it’s so much easier to drag out last year’s stuff and ideas), you post photos of the most clever and animated designs. This post has really set my mind to whirling, so it’s off the craft store tomorrow for a basket of foam.
Thanks for sharing!
Deborah,
I enjoy reading about your ideas. I live in the south and we don’t have the frozen soil that you would in Detroit, but I have another problem. I have a beautiful 10 year old concrete fountain that has begun to leak. You can see a few hairline cracks. Is there any product that would prevent the leaking? Thanks for your help.
Cheryl
Cheryl, I am out of my depth here. You need a fountain/pool/irrigation/masonry person to help you with this. Good luck, Deborah
Wow!! I’m very grateful for that look underneath those amazing displays. My neighbours are going to be disappointed at not getting to peer out at the crazy woman across the street with the boiling water and her son’s power tools.
lol Gwen! Never thought of using a drill but its not a bad idea!
Dear Deborah ,
Admire the work of your studio. With the holidays you are beautiful.
Thank-you
Thank you for sharing your know-how. As I read your post, I thought, ‘how come I didn’t think of that’. It’s brilliant! More importantly perhaps, I do very much like the wide planter in a green/silver with a touch of gold planter scheme. Understated and elegant. It’s too bad I finished my own planters last week. For next Spring, I will call DGW to have you do it!!!
Green foam has done wonders for some of my clients for adding depth and dimensions to their urns and other arrangements.
Wow! That explains a LOT! Thank you for so very generously sharing your expertise. I would have thought it would be oasis instead of the dry foam. Don’t the greens need water? I use oasis for my indoor arrangements, but I thought it would blow away outside. I will try this and the bamboo stake as my site is so windy. Wish me luck!
Thank you, thank you, thank you!!!!! I had no idea that foam was the magic trick. Thsi post is definitely a keeper. The weather is supposed to be back up to 40 this weekend so I’m stocking up on foam and greens this Friday for my poor empty pots.
Thanks as always for the clear writing and wonderful photos. And also for mentioning that you have a Facebook page . . . somehow I’d missed that and another place to look at your work is always welcome since you’re too far for me to travel to visit.
Little bit confused — is dry floral foam the same as Oasis? It doesn’t look as though you’re using styrofoam…but I’m excited to try this in my own garden and want to avoid an early blunder (not to be confused with a likely later one).
The containers are absolutely gorgeous!
Dee Dee, dry floral foam was developed to held dry stems for interior arrangements. Oasis is for fresh cut flowers, and is wet when it is used. Dry floral foam is not styrofoam. You might find it at a craft store that sells artificial or dry flowers. best, Deborah
How do you make tour outdoor arangements last through freezing weather? Do you keep the foam wet thru winter?
we use dry foam,Polly. best Deborah
I realize this post is old, so hopefully someone sees this comment…how long can I expect the cut branches and cut stems to last before browning? How can I extend the life of them? Do they need to be watered or misted? I’m in zone 6B. Thank you so much! I’m determined to try a winter window box for the first time this year and I LOVE yours. It’s, by far, the prettiest one I’ve seen and I plan to try and replicate it as best I can. Thank you for the idea 🙂