Cinderella

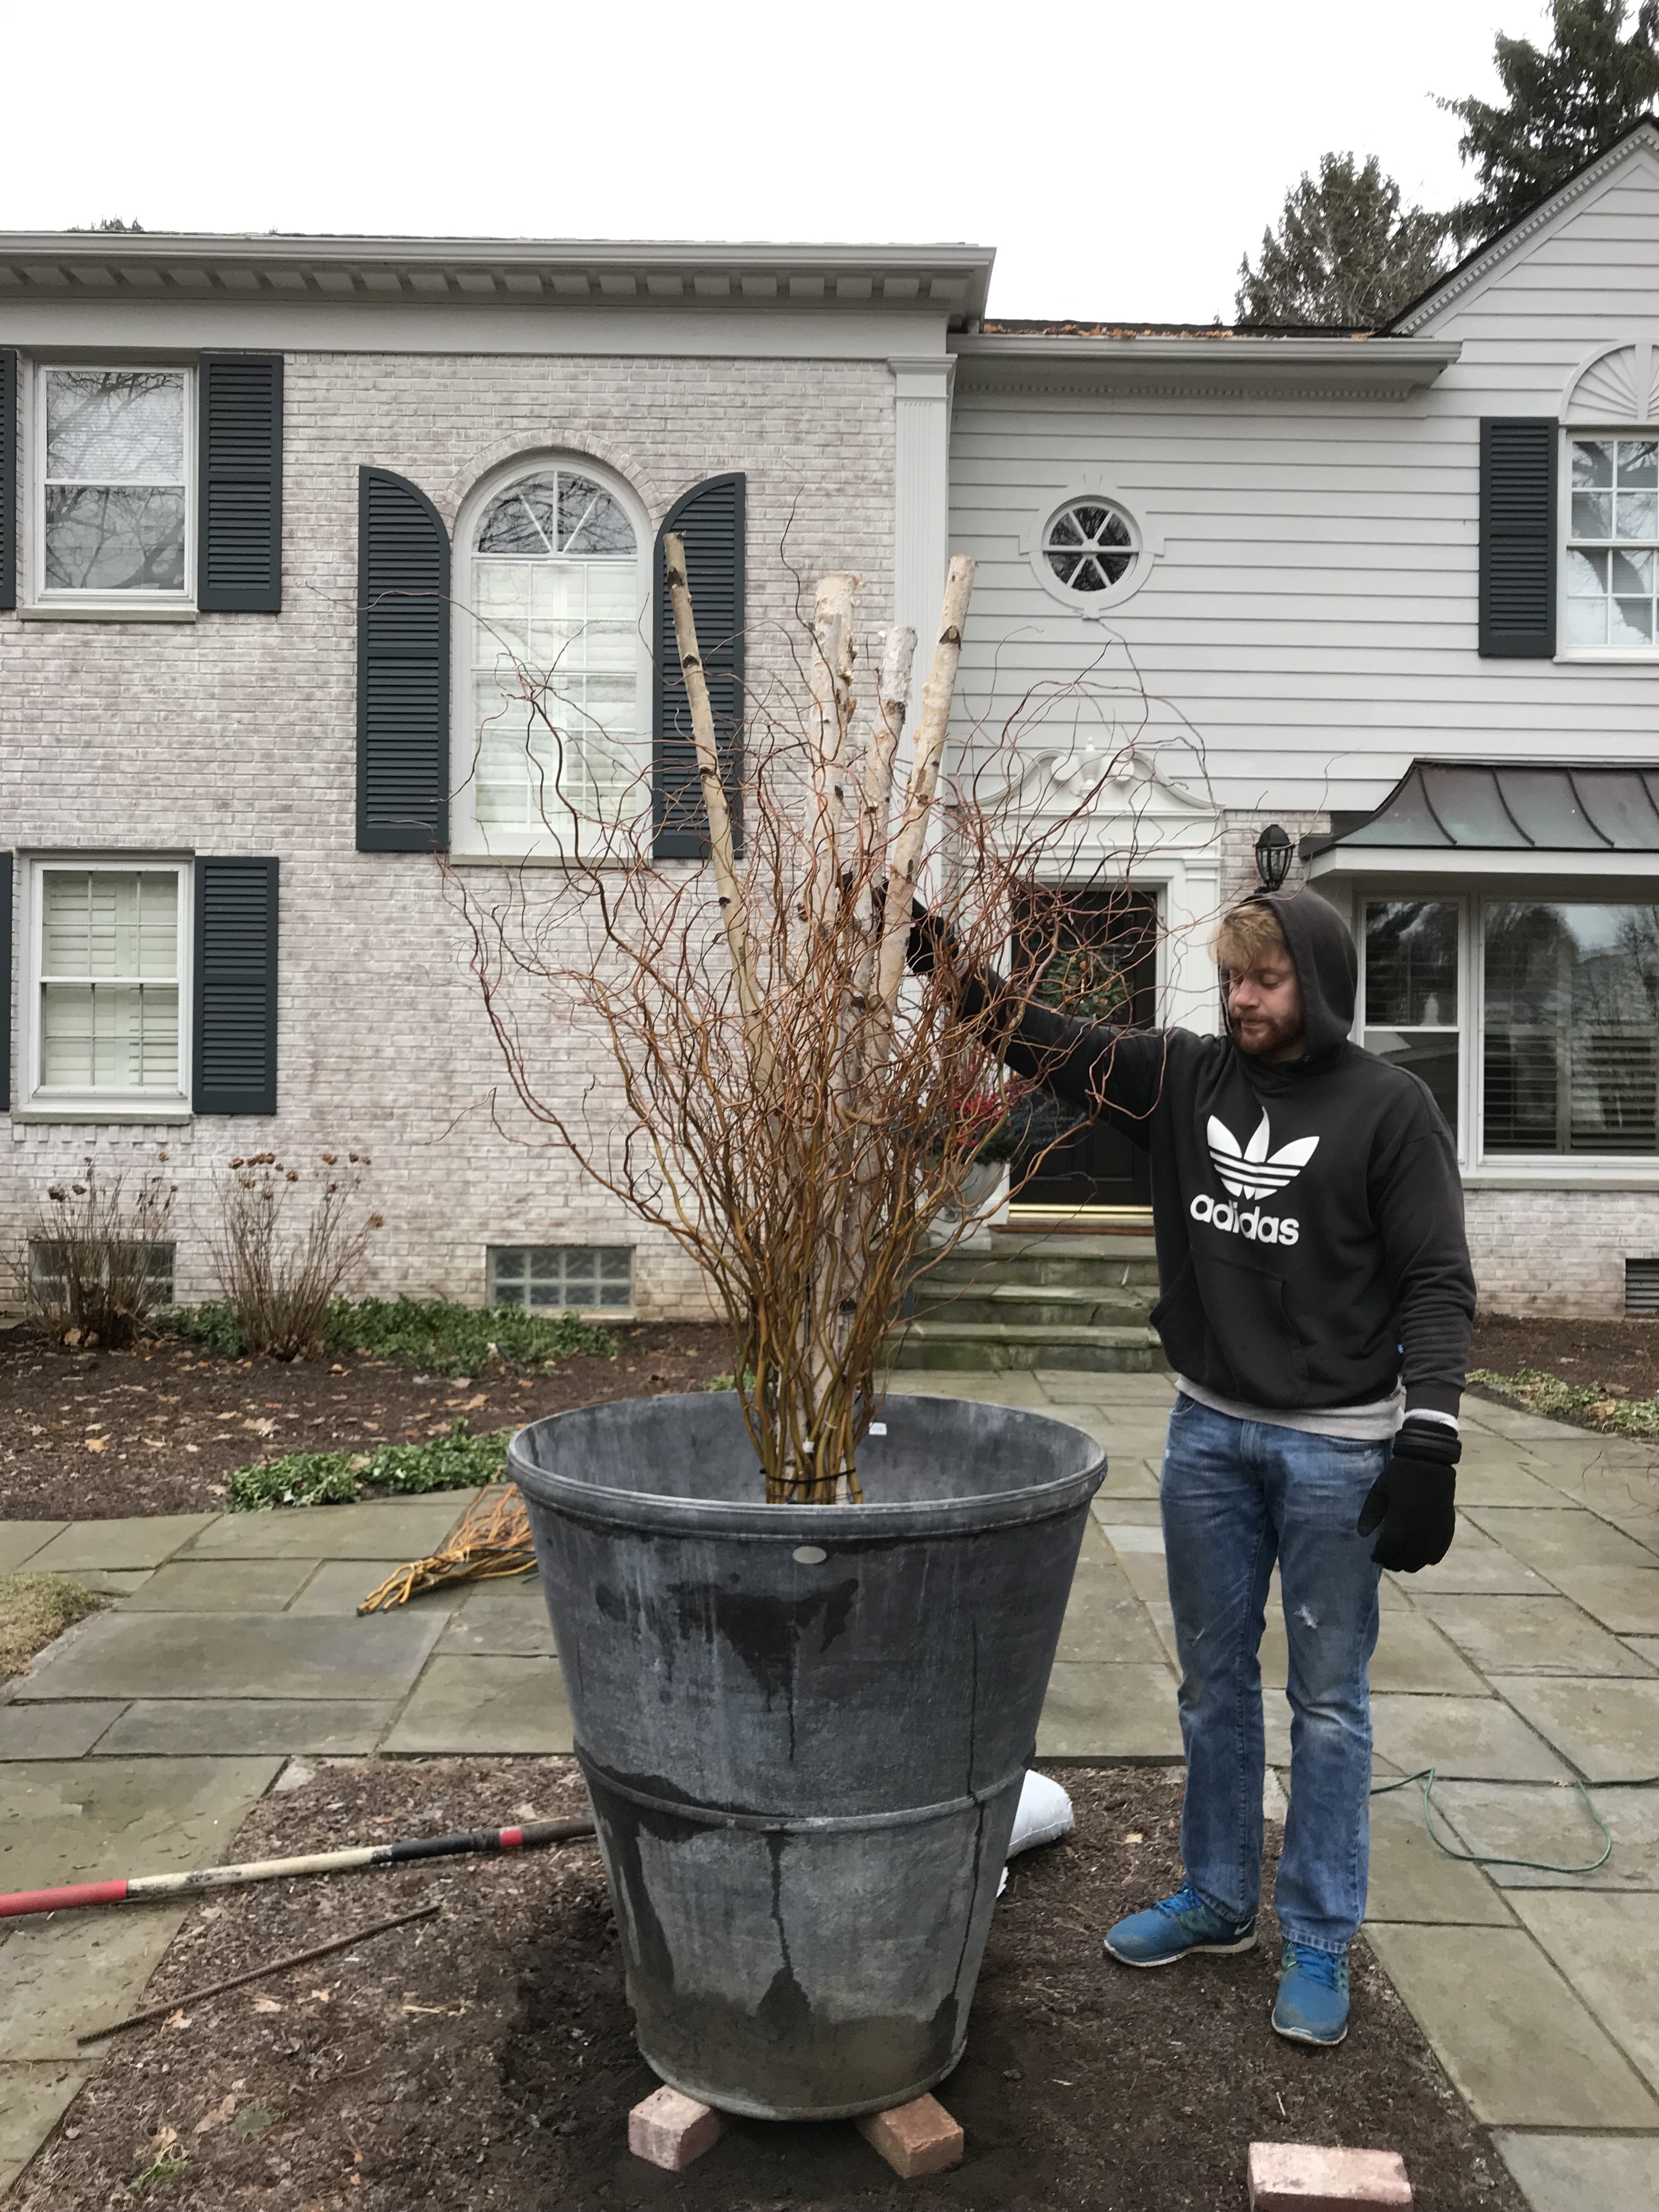
A client asked of we would be able to light a pair of London Plane trees that we planted on either side of her driveway near the road – for the winter season. Of course I said yes. But I should back up. To say that we planted them warrants further explanation. I asked Ralph Plummer, owner of GP Enterprises, to locate, secure and plant a pair of London Planes of substantial size at the street entry of a landscape I designed and installed.

He obliged with a pair of eight inch caliper Planes that topped out at nearly 30 feet tall. I like big elements in the foreground of a landscape composition. That size is a request to focus and a visual invitation. These giant trees frame the view ahead. I had been absorbed with the installation inside the gates. My client made a request to me for a pair of big framing trees outside those gates. I can assure you flat out that my best projects as a designer have a committed and passionate client as a partner.

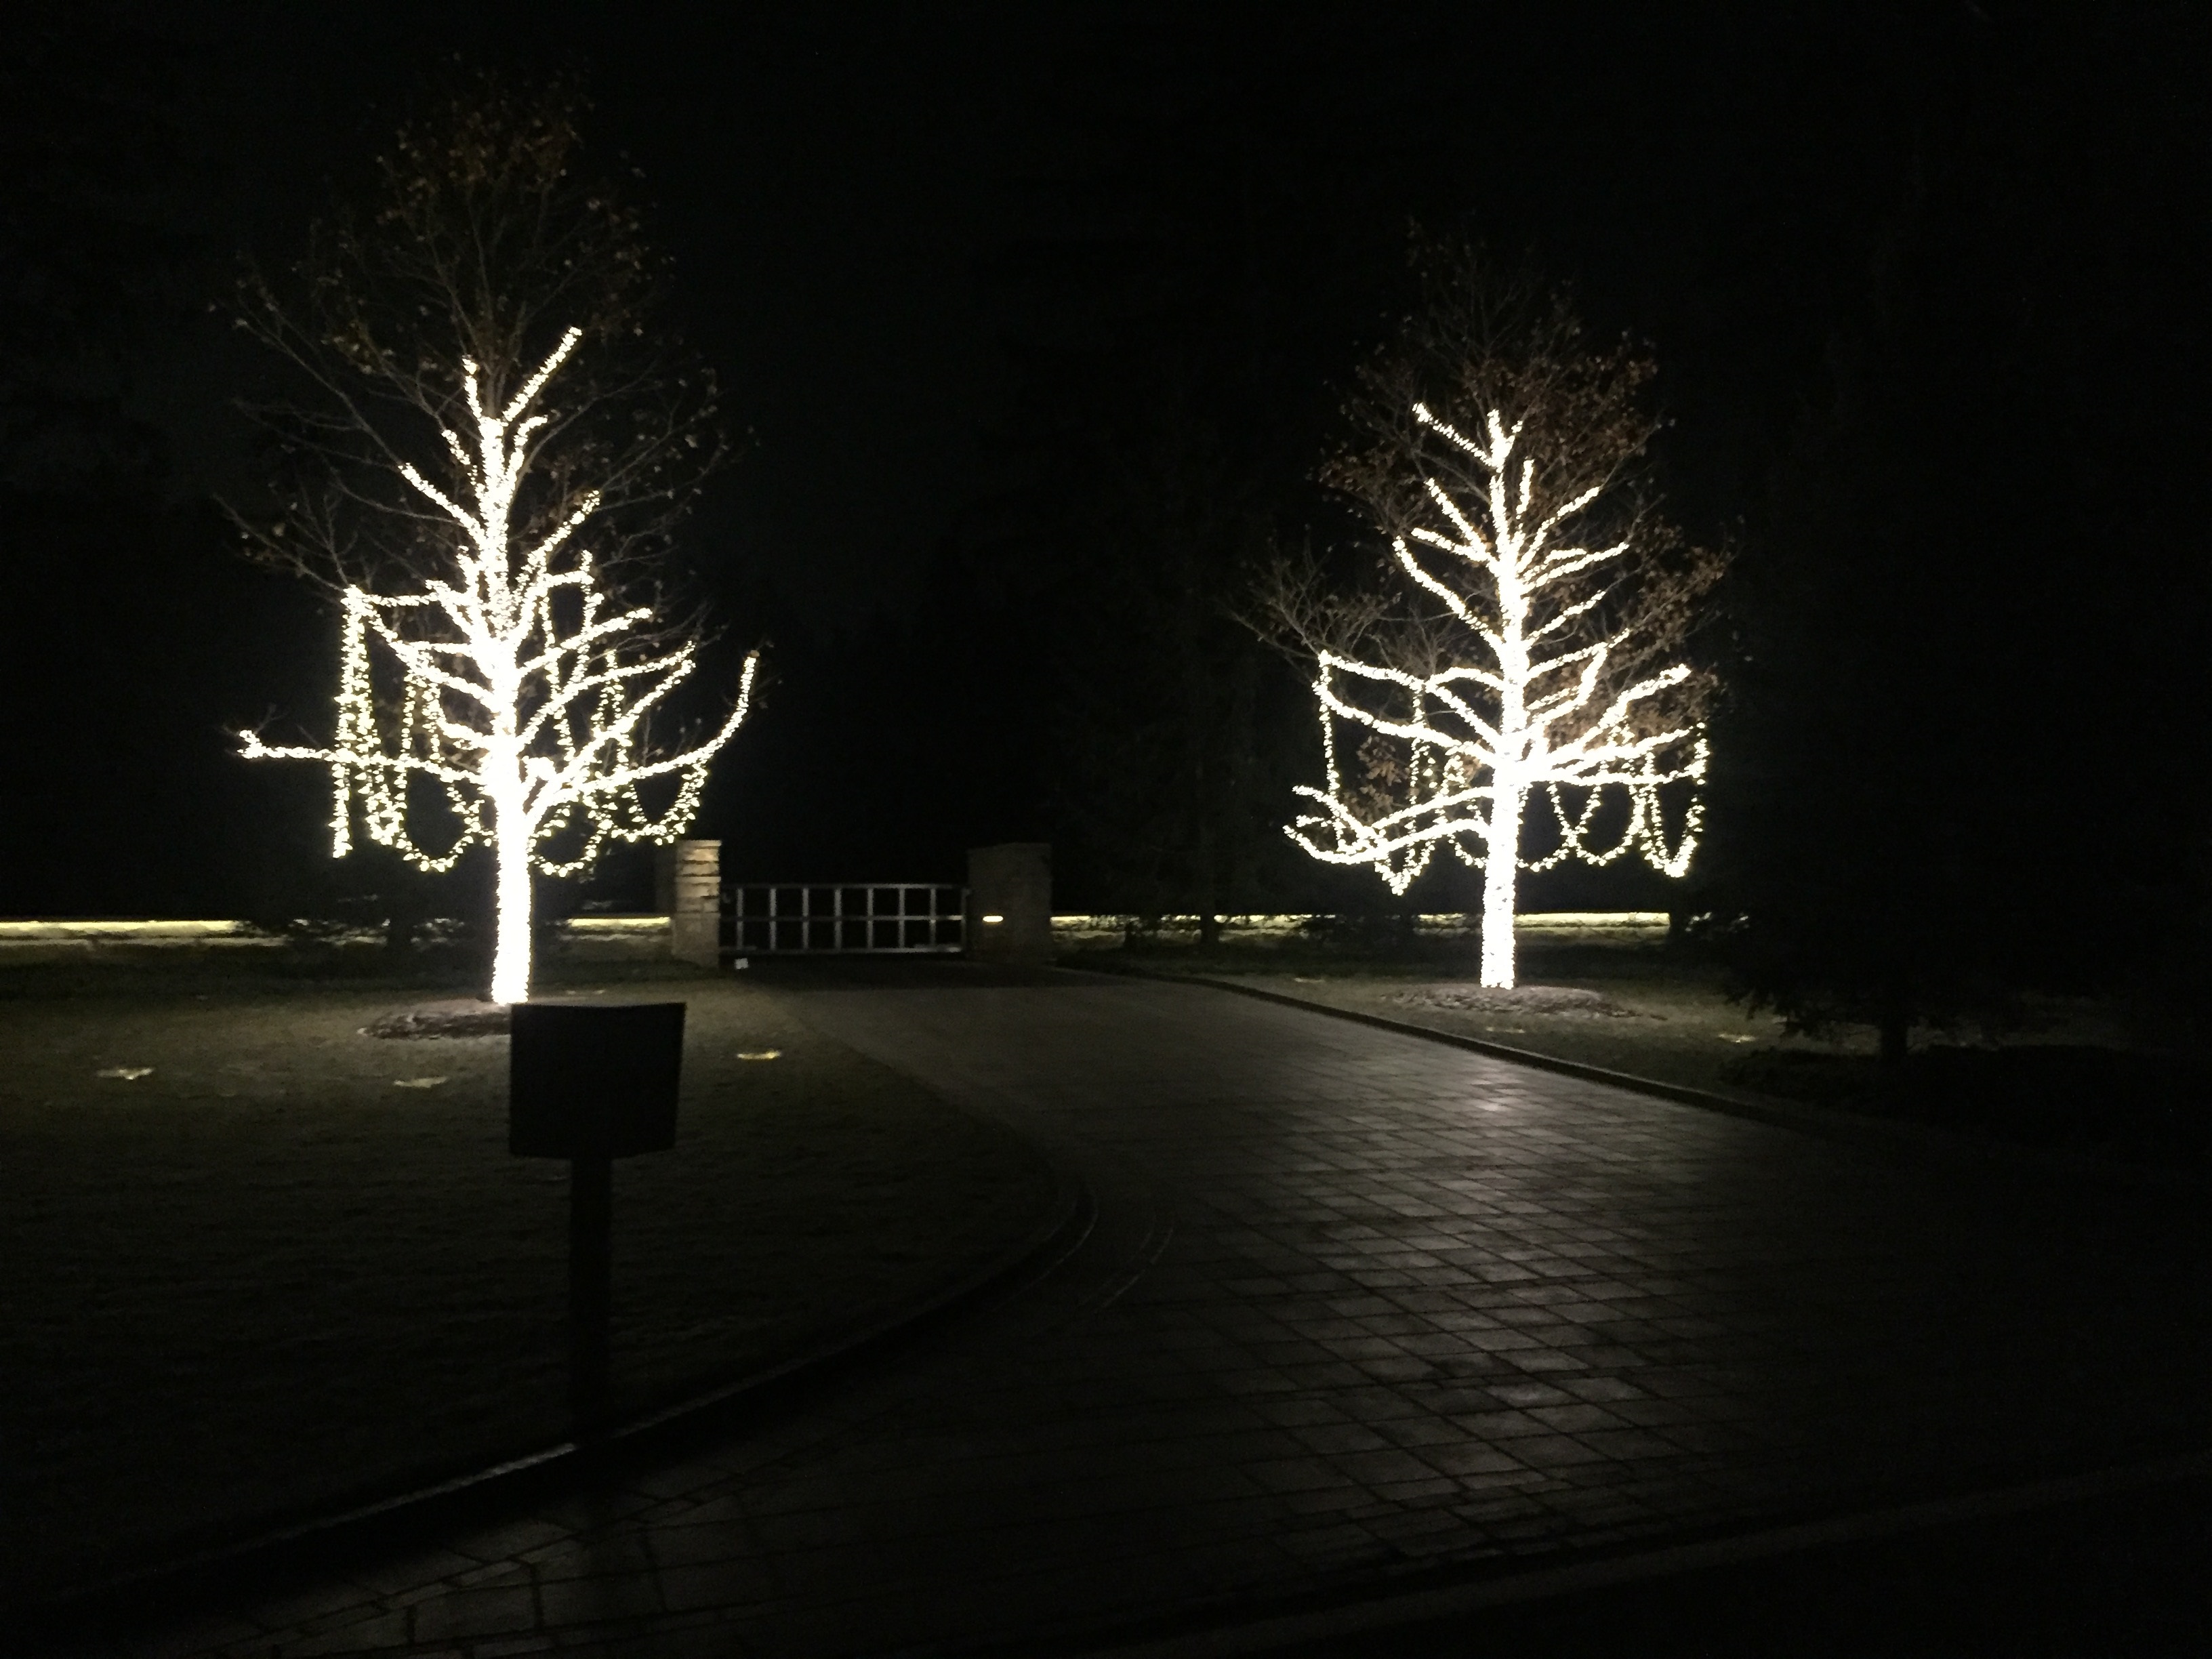
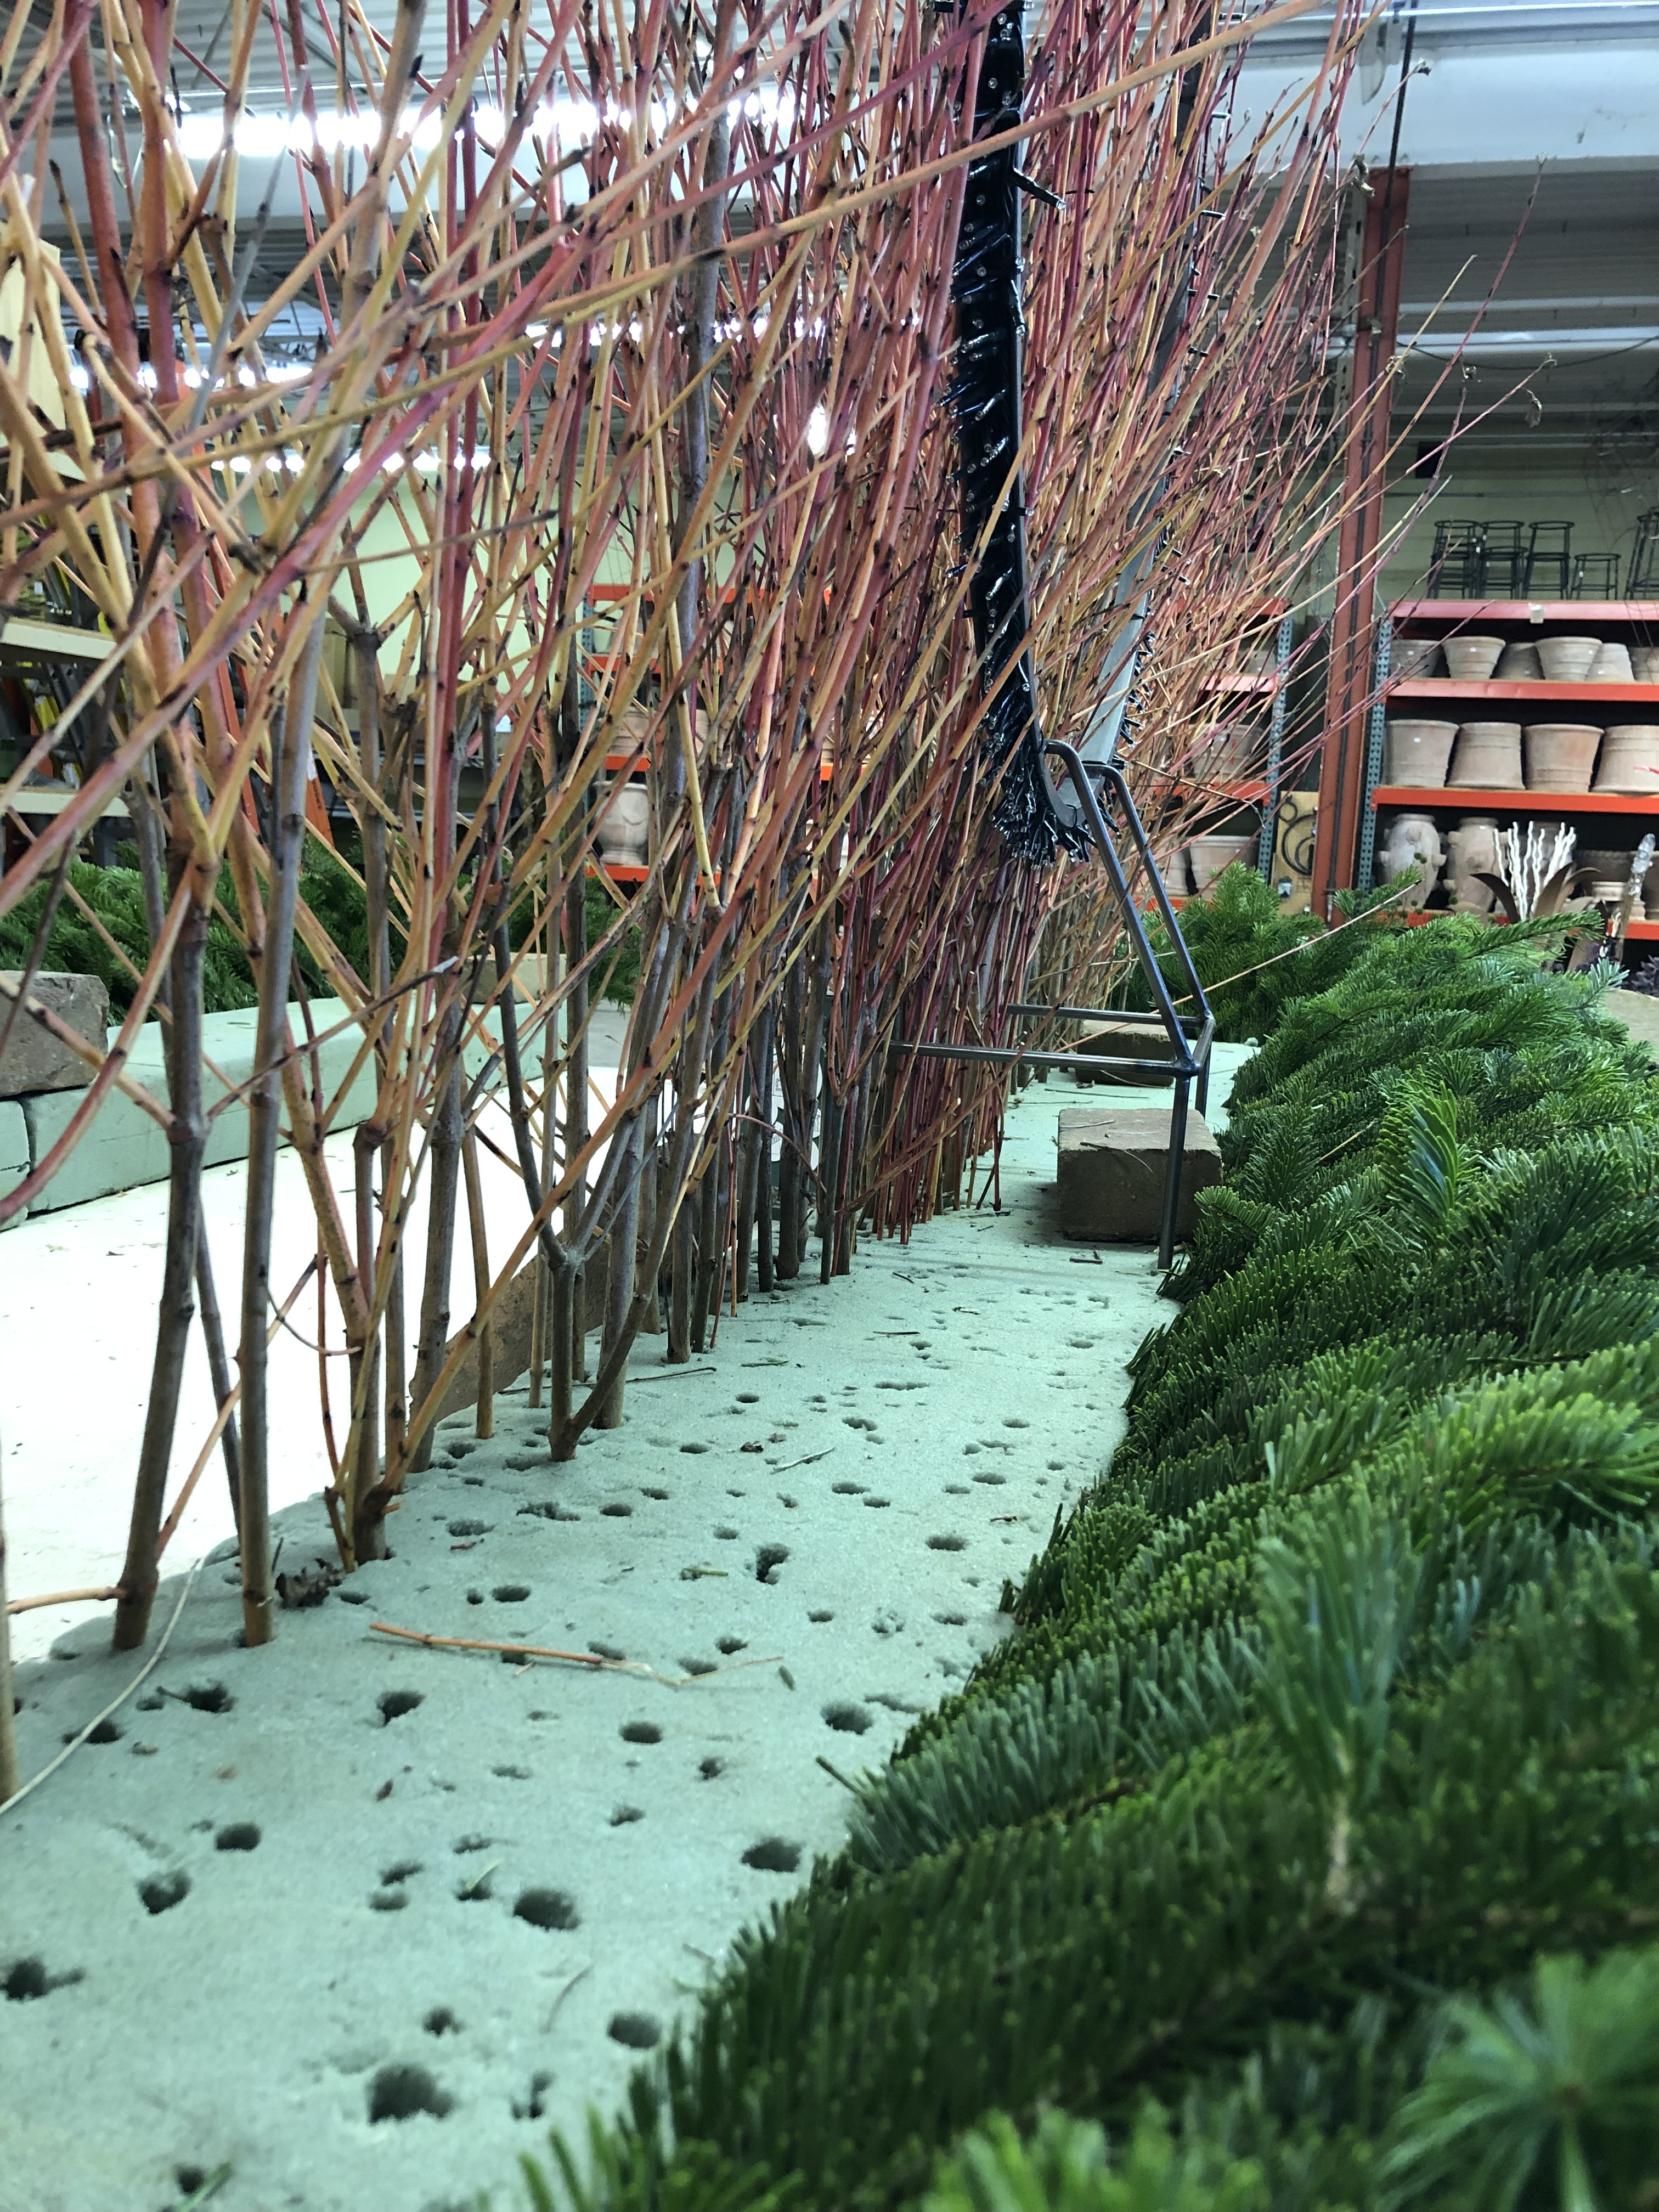
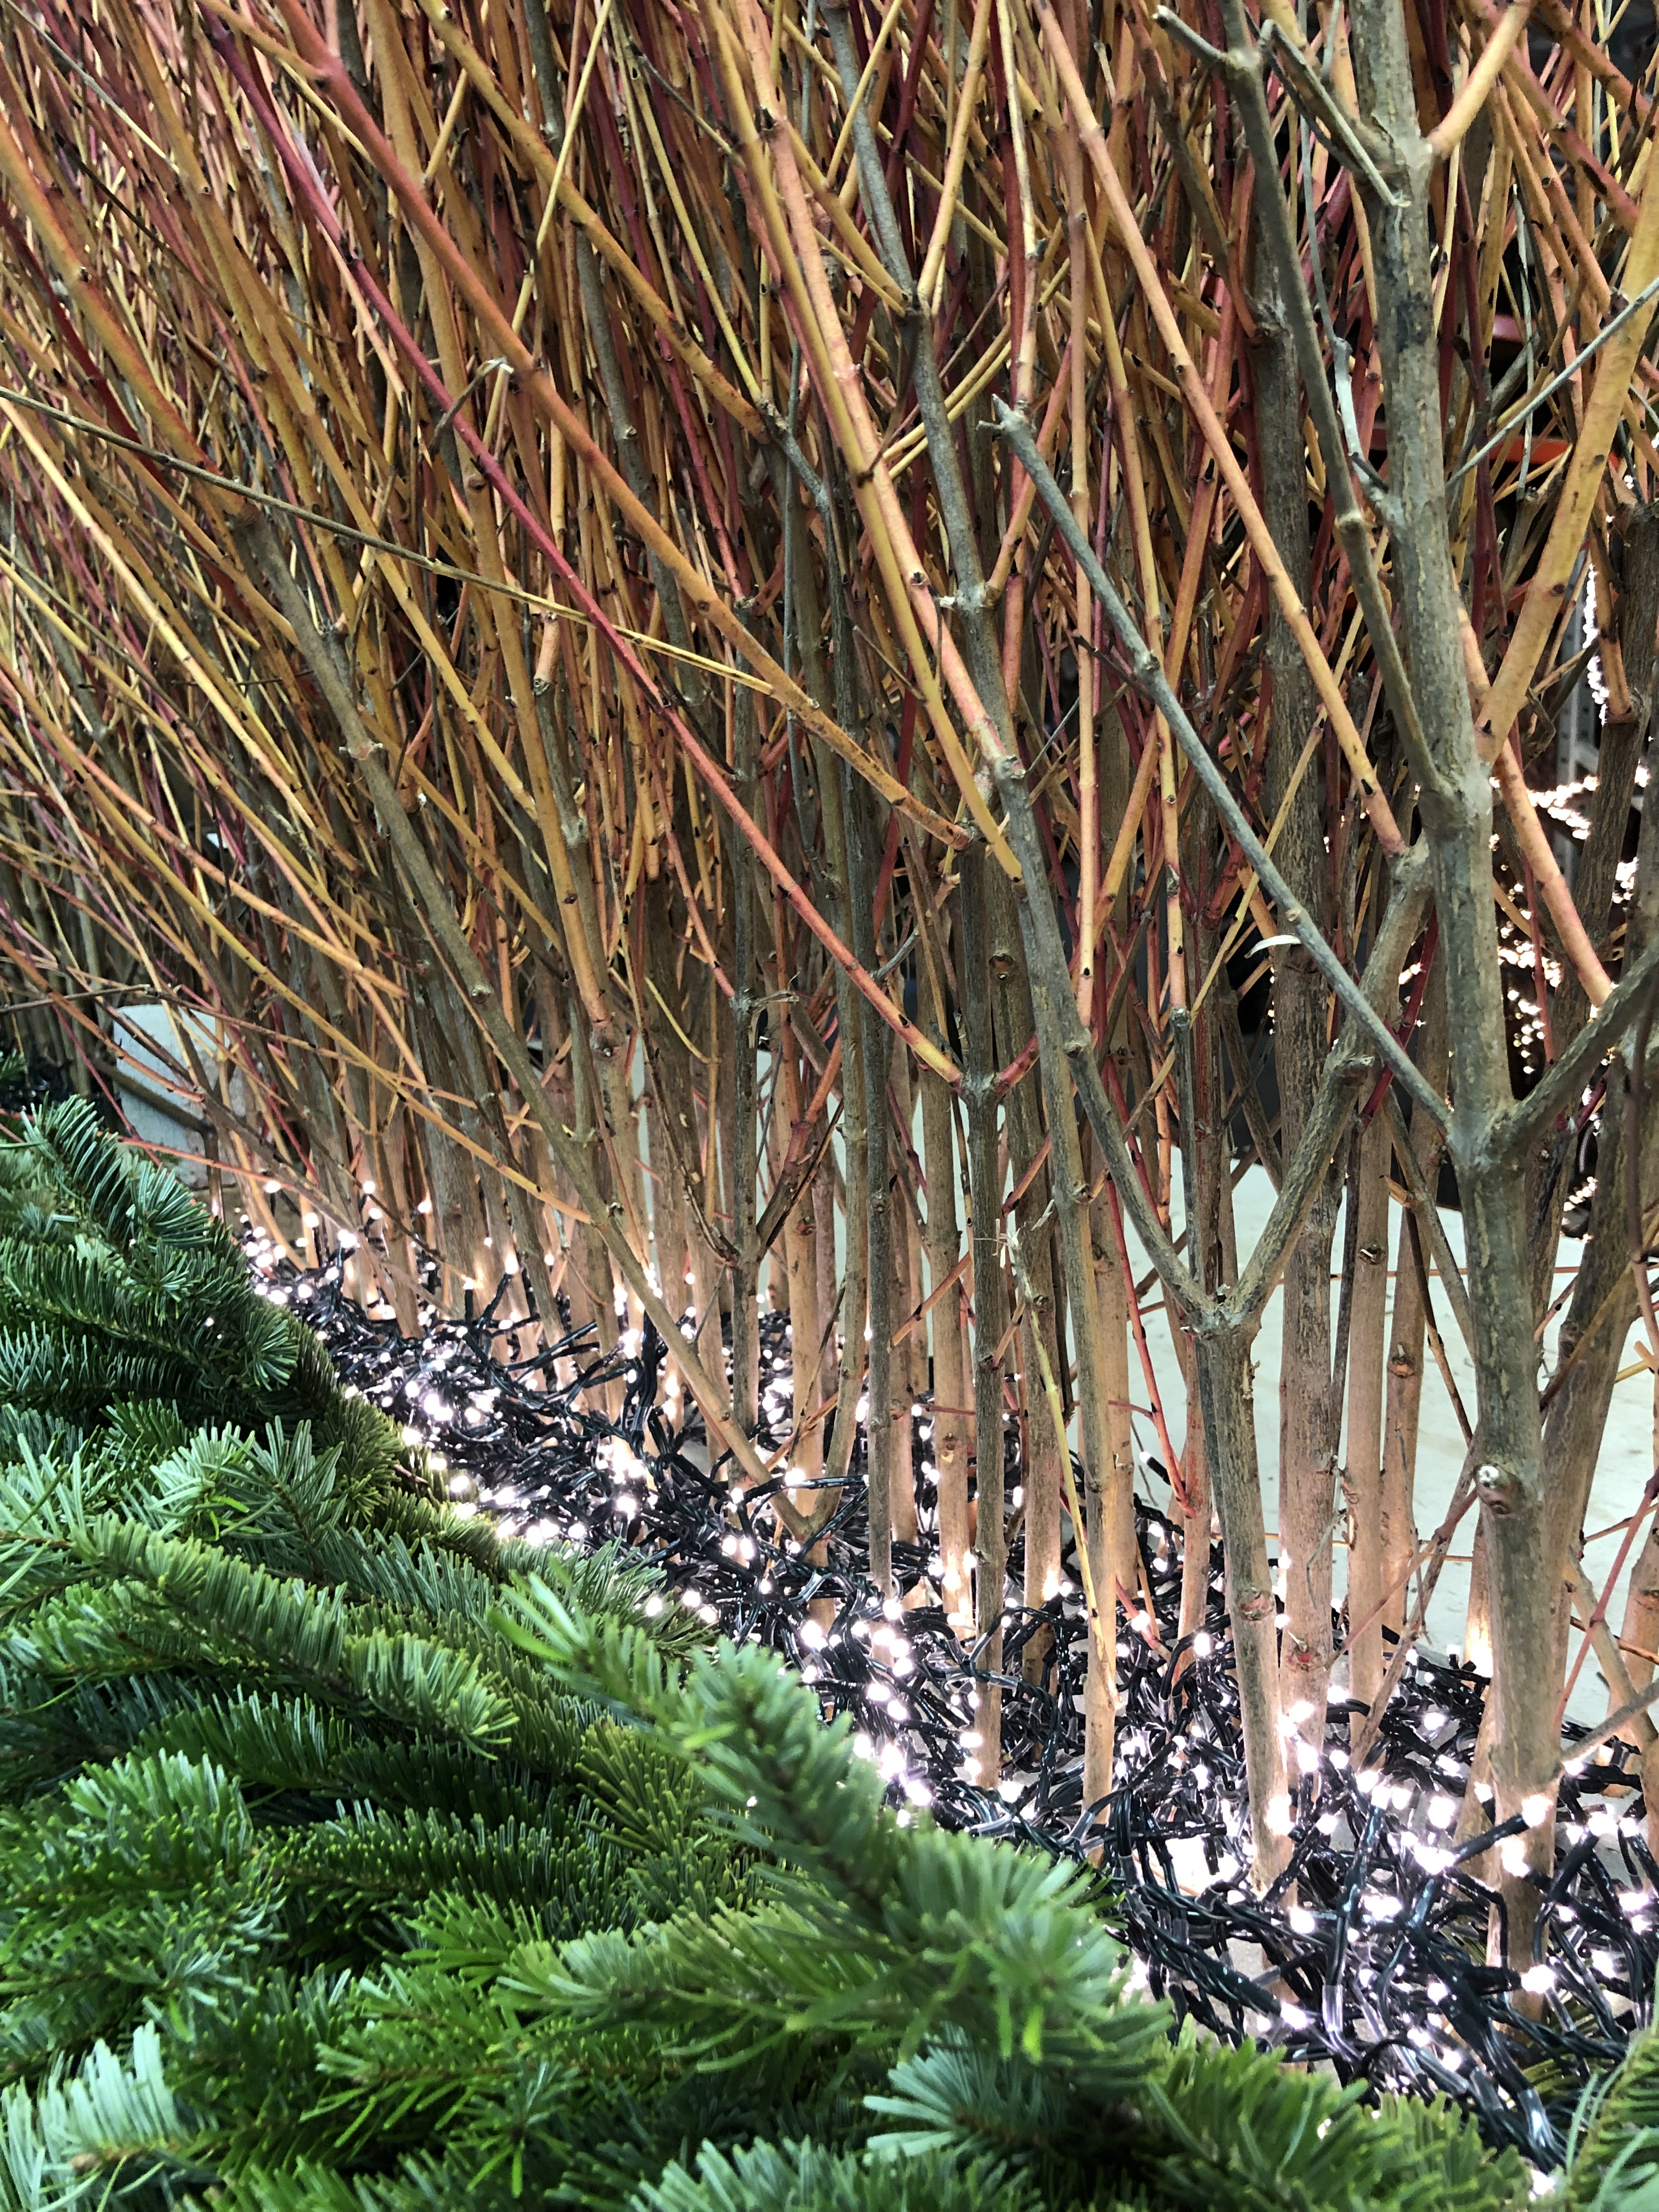
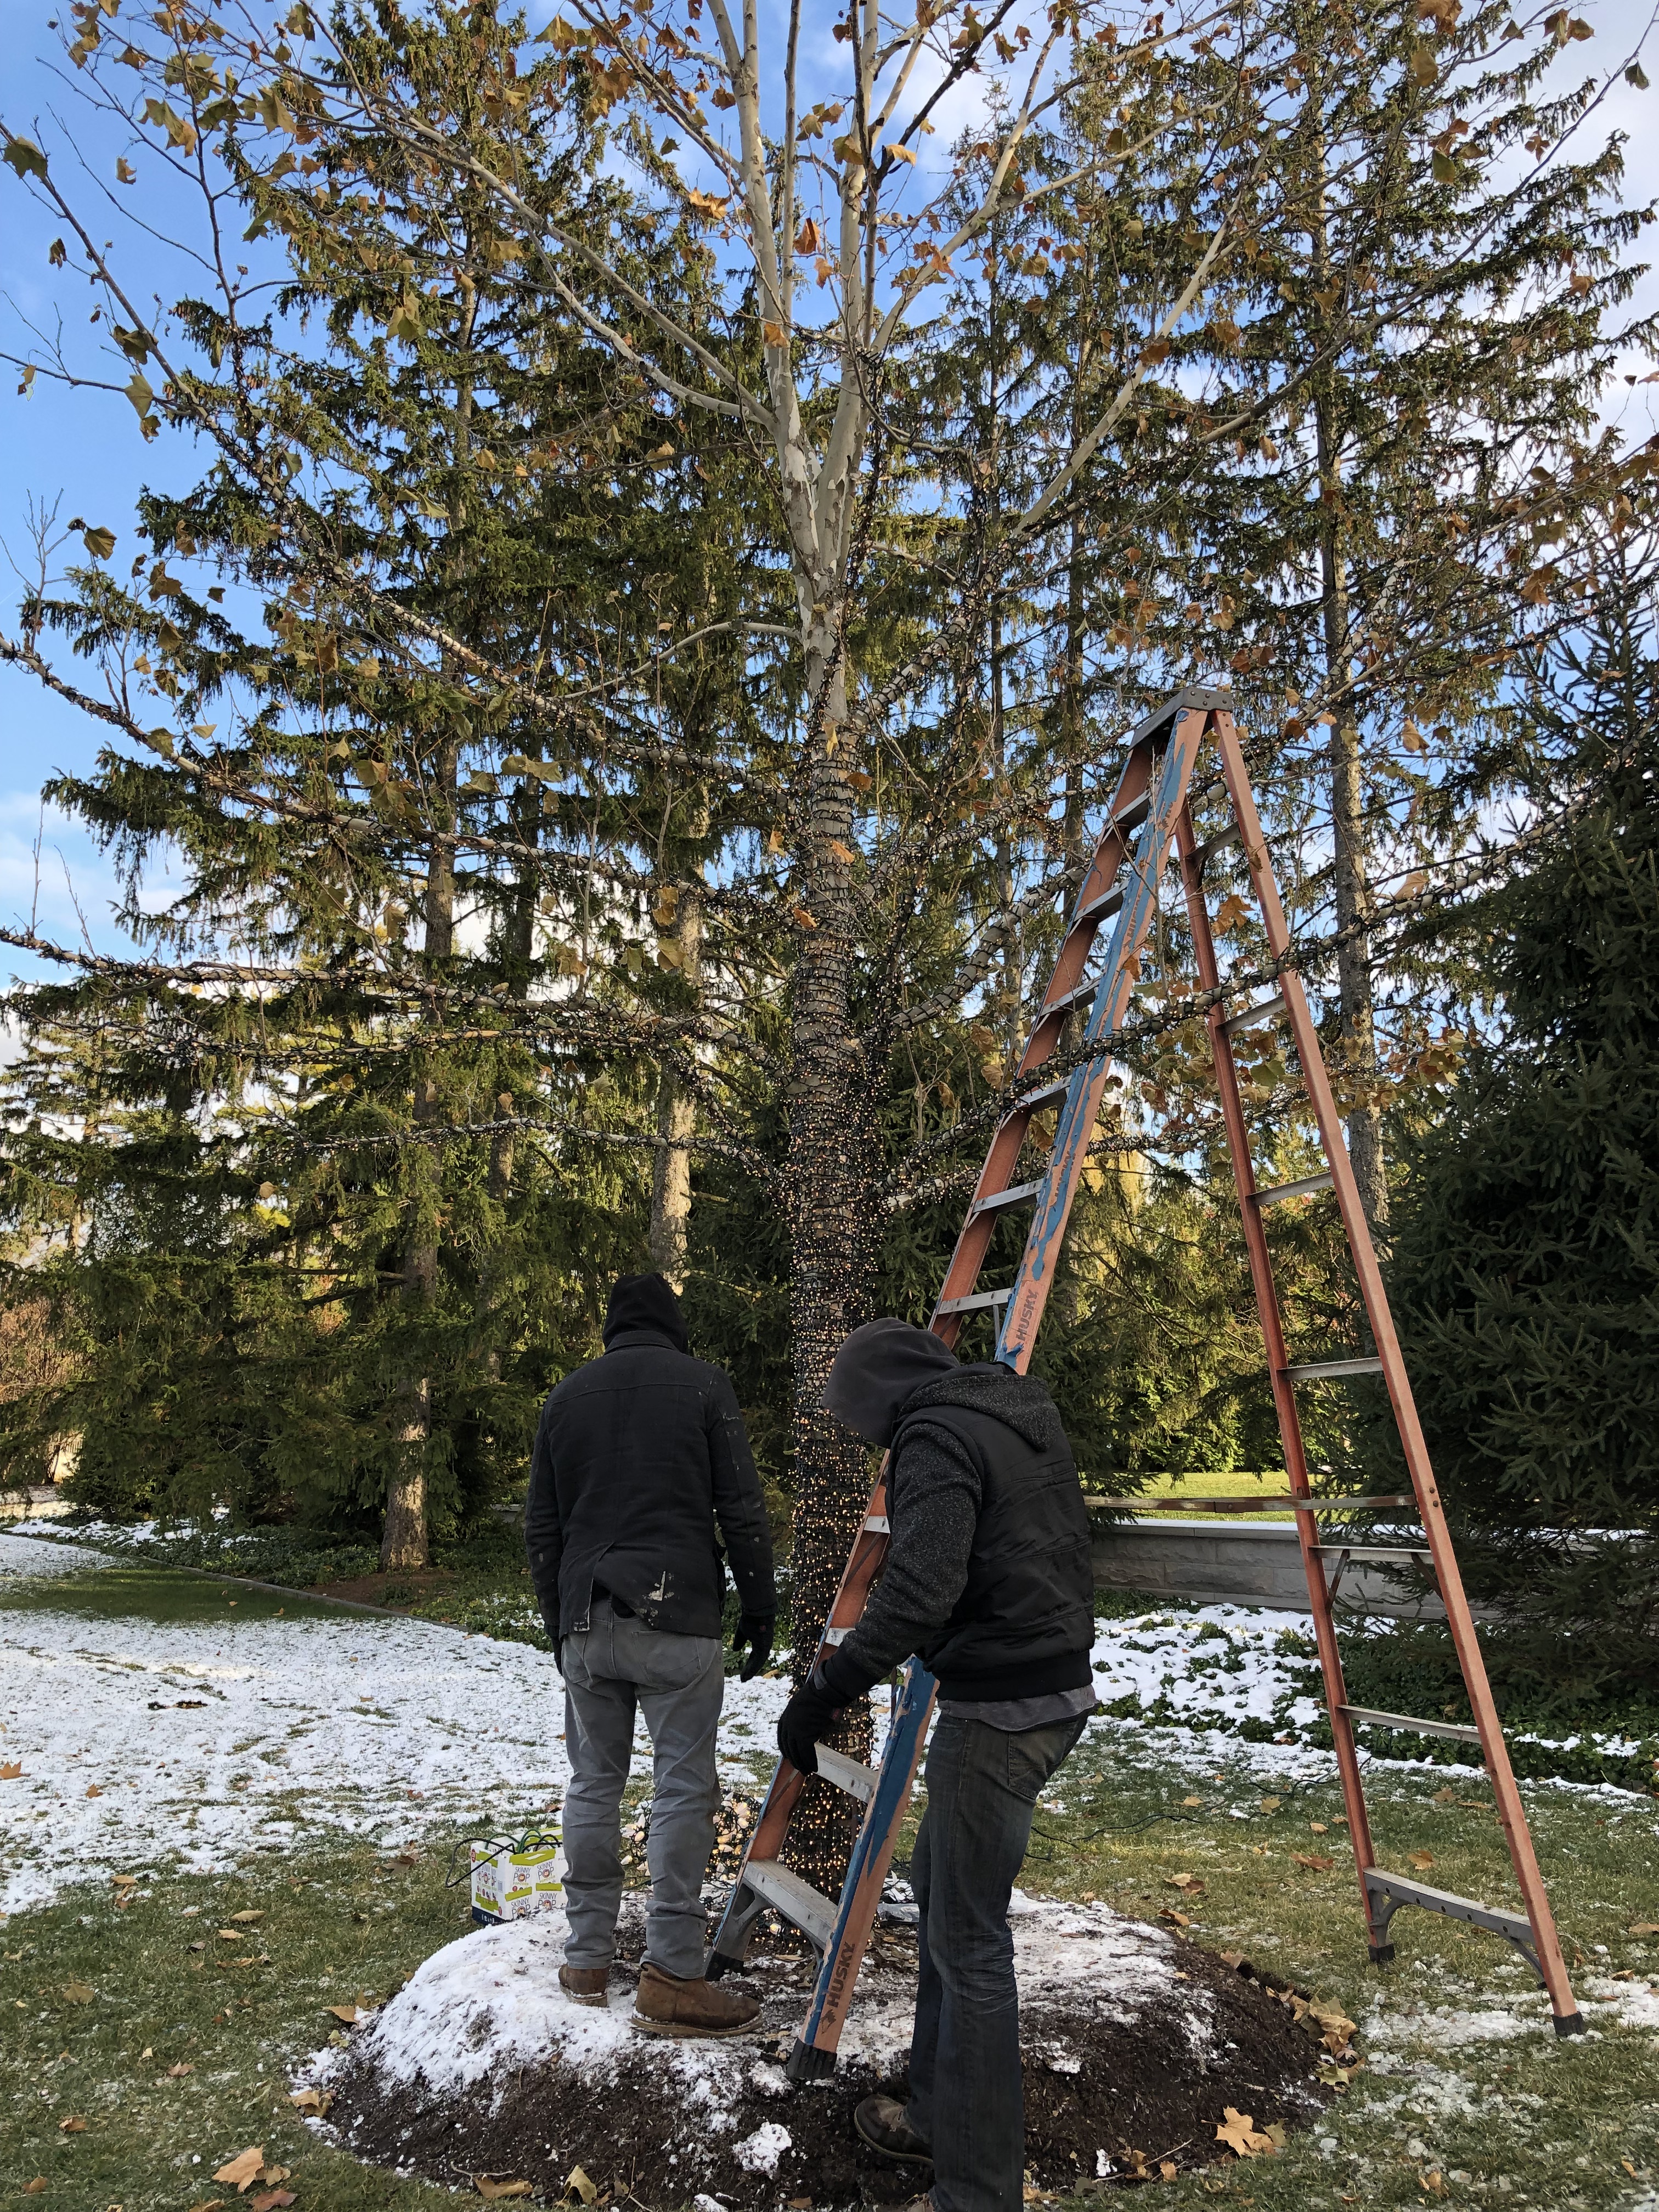
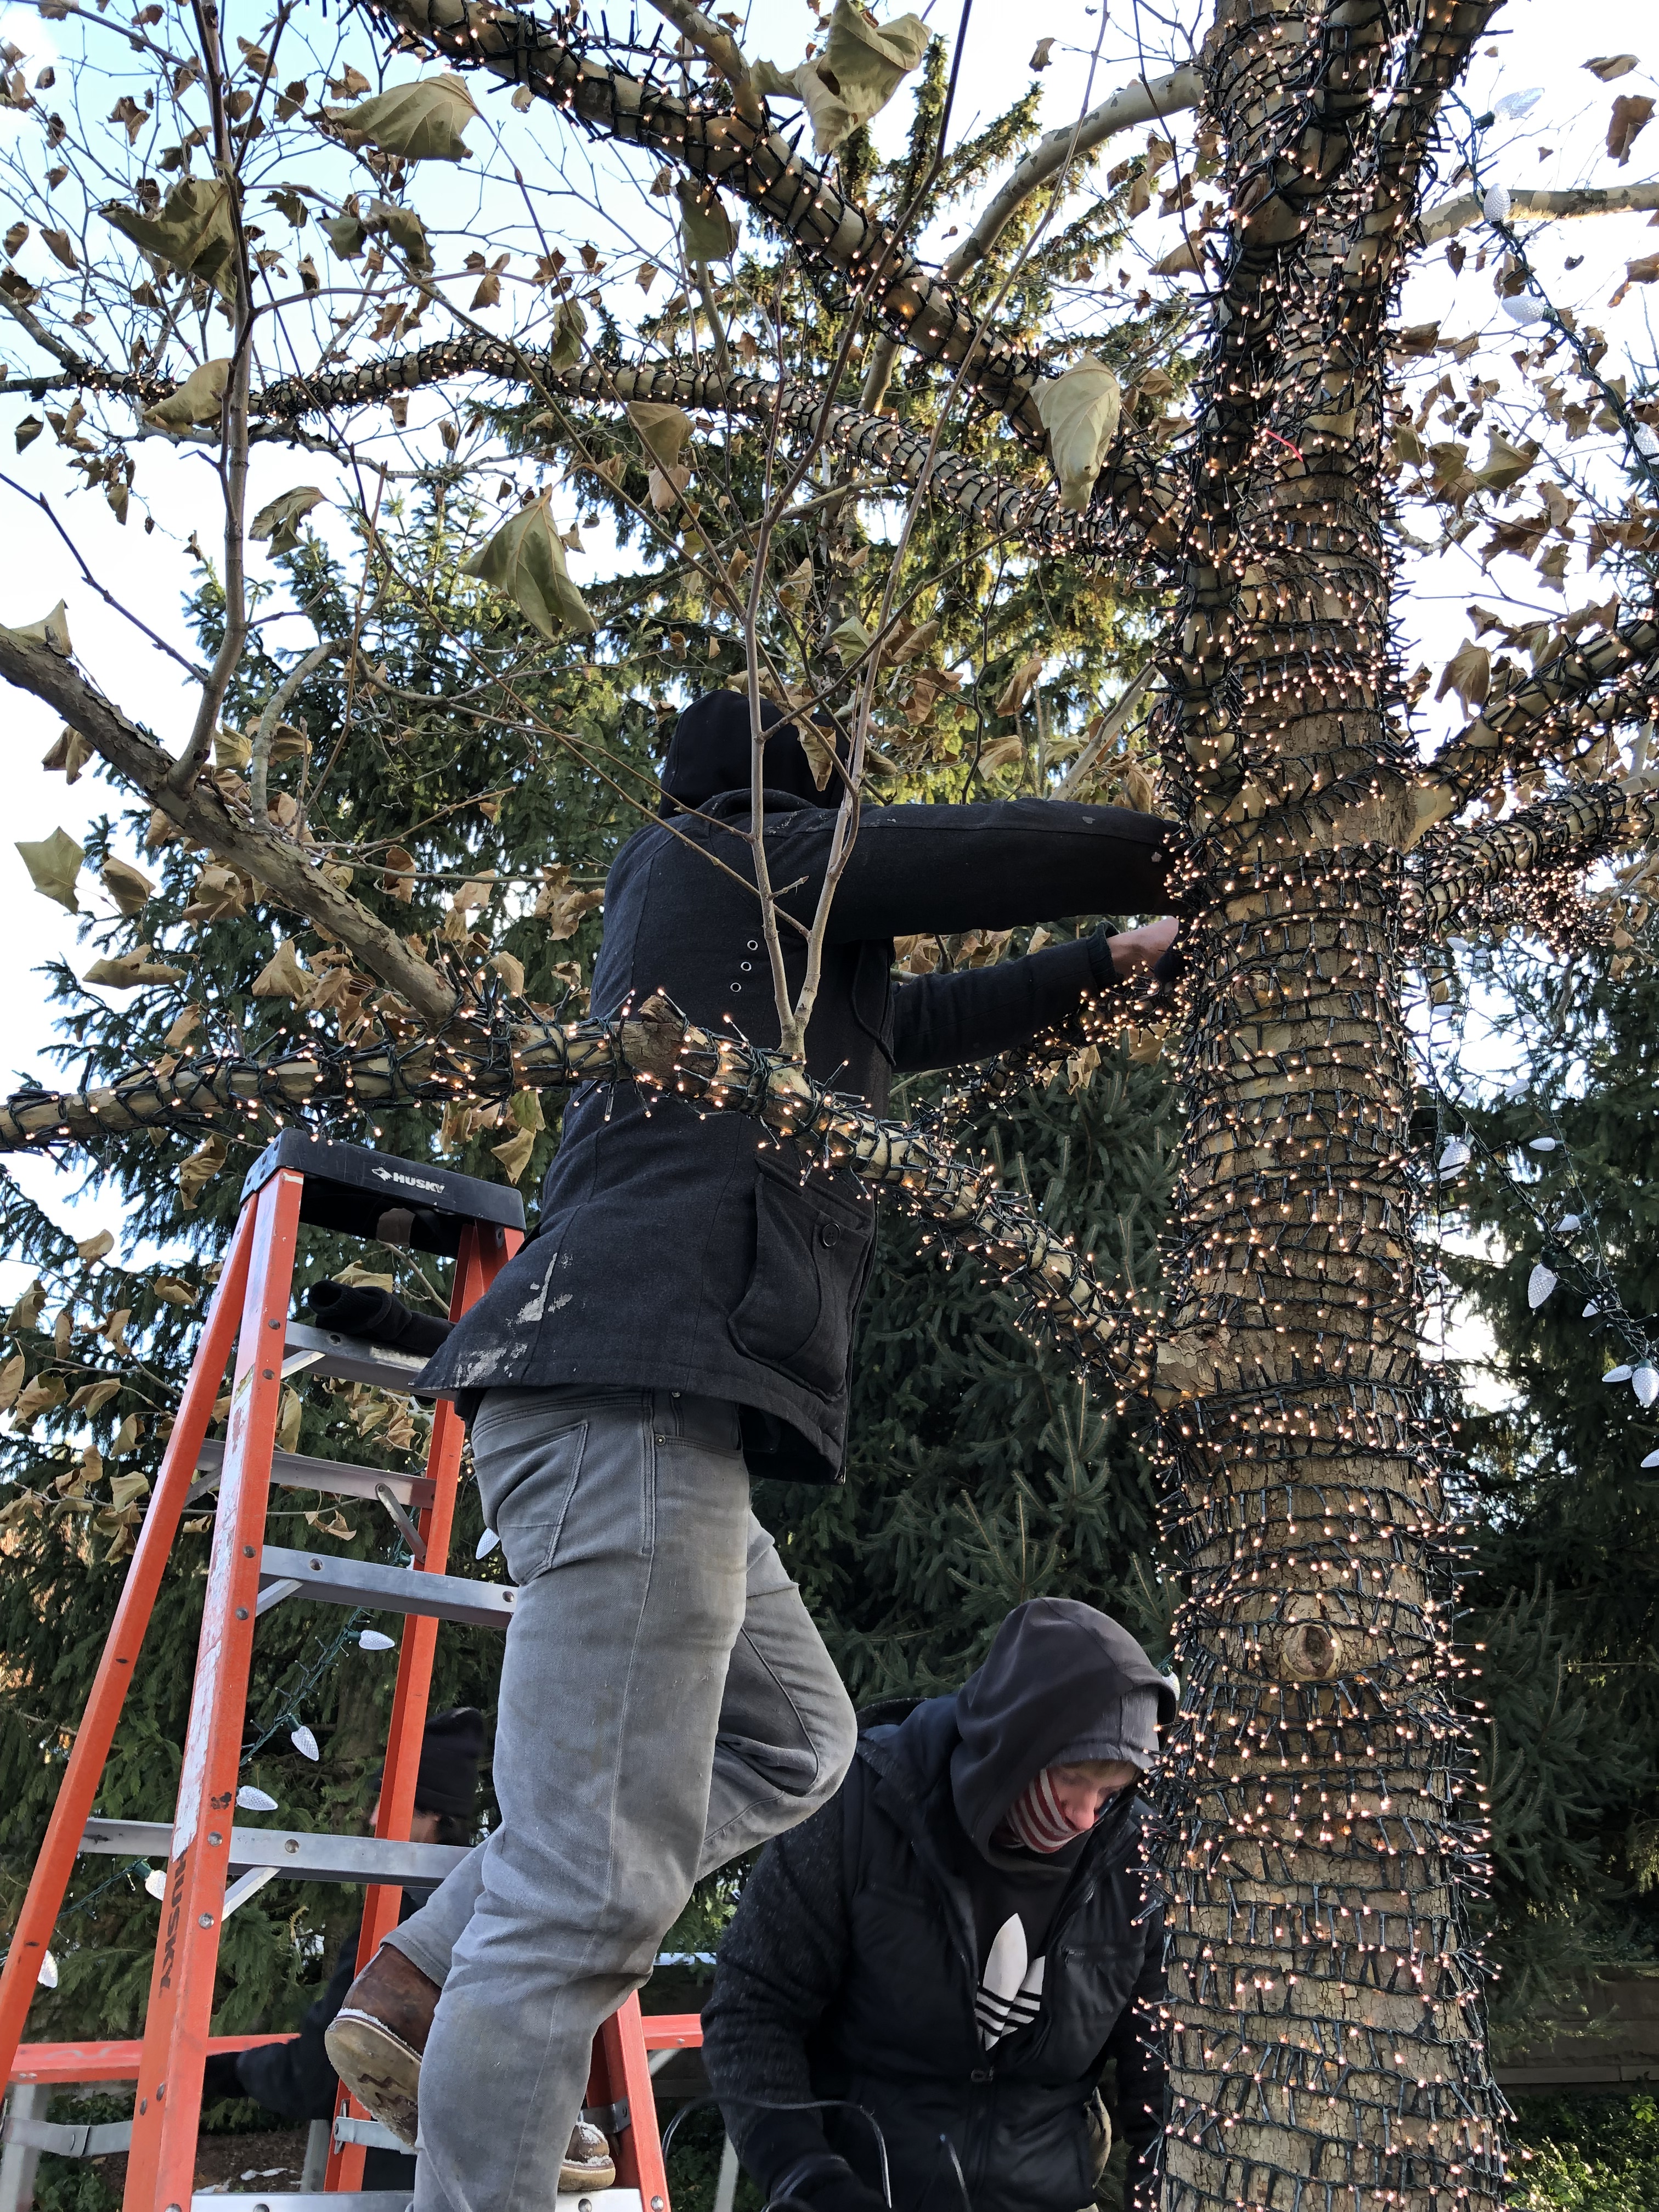
So back to the lighting of these trees. Of course Rob backed us up at Detroit Garden Works with LED compact string lighting strands that were 110 feet in length, and featured 2000 lights each. We wound the trunks and major branches horizontally with these strands – lots of them. This day in November was 20 degrees. The weather was an enormous challenge to the work, but that is not news where gardening is concerned.

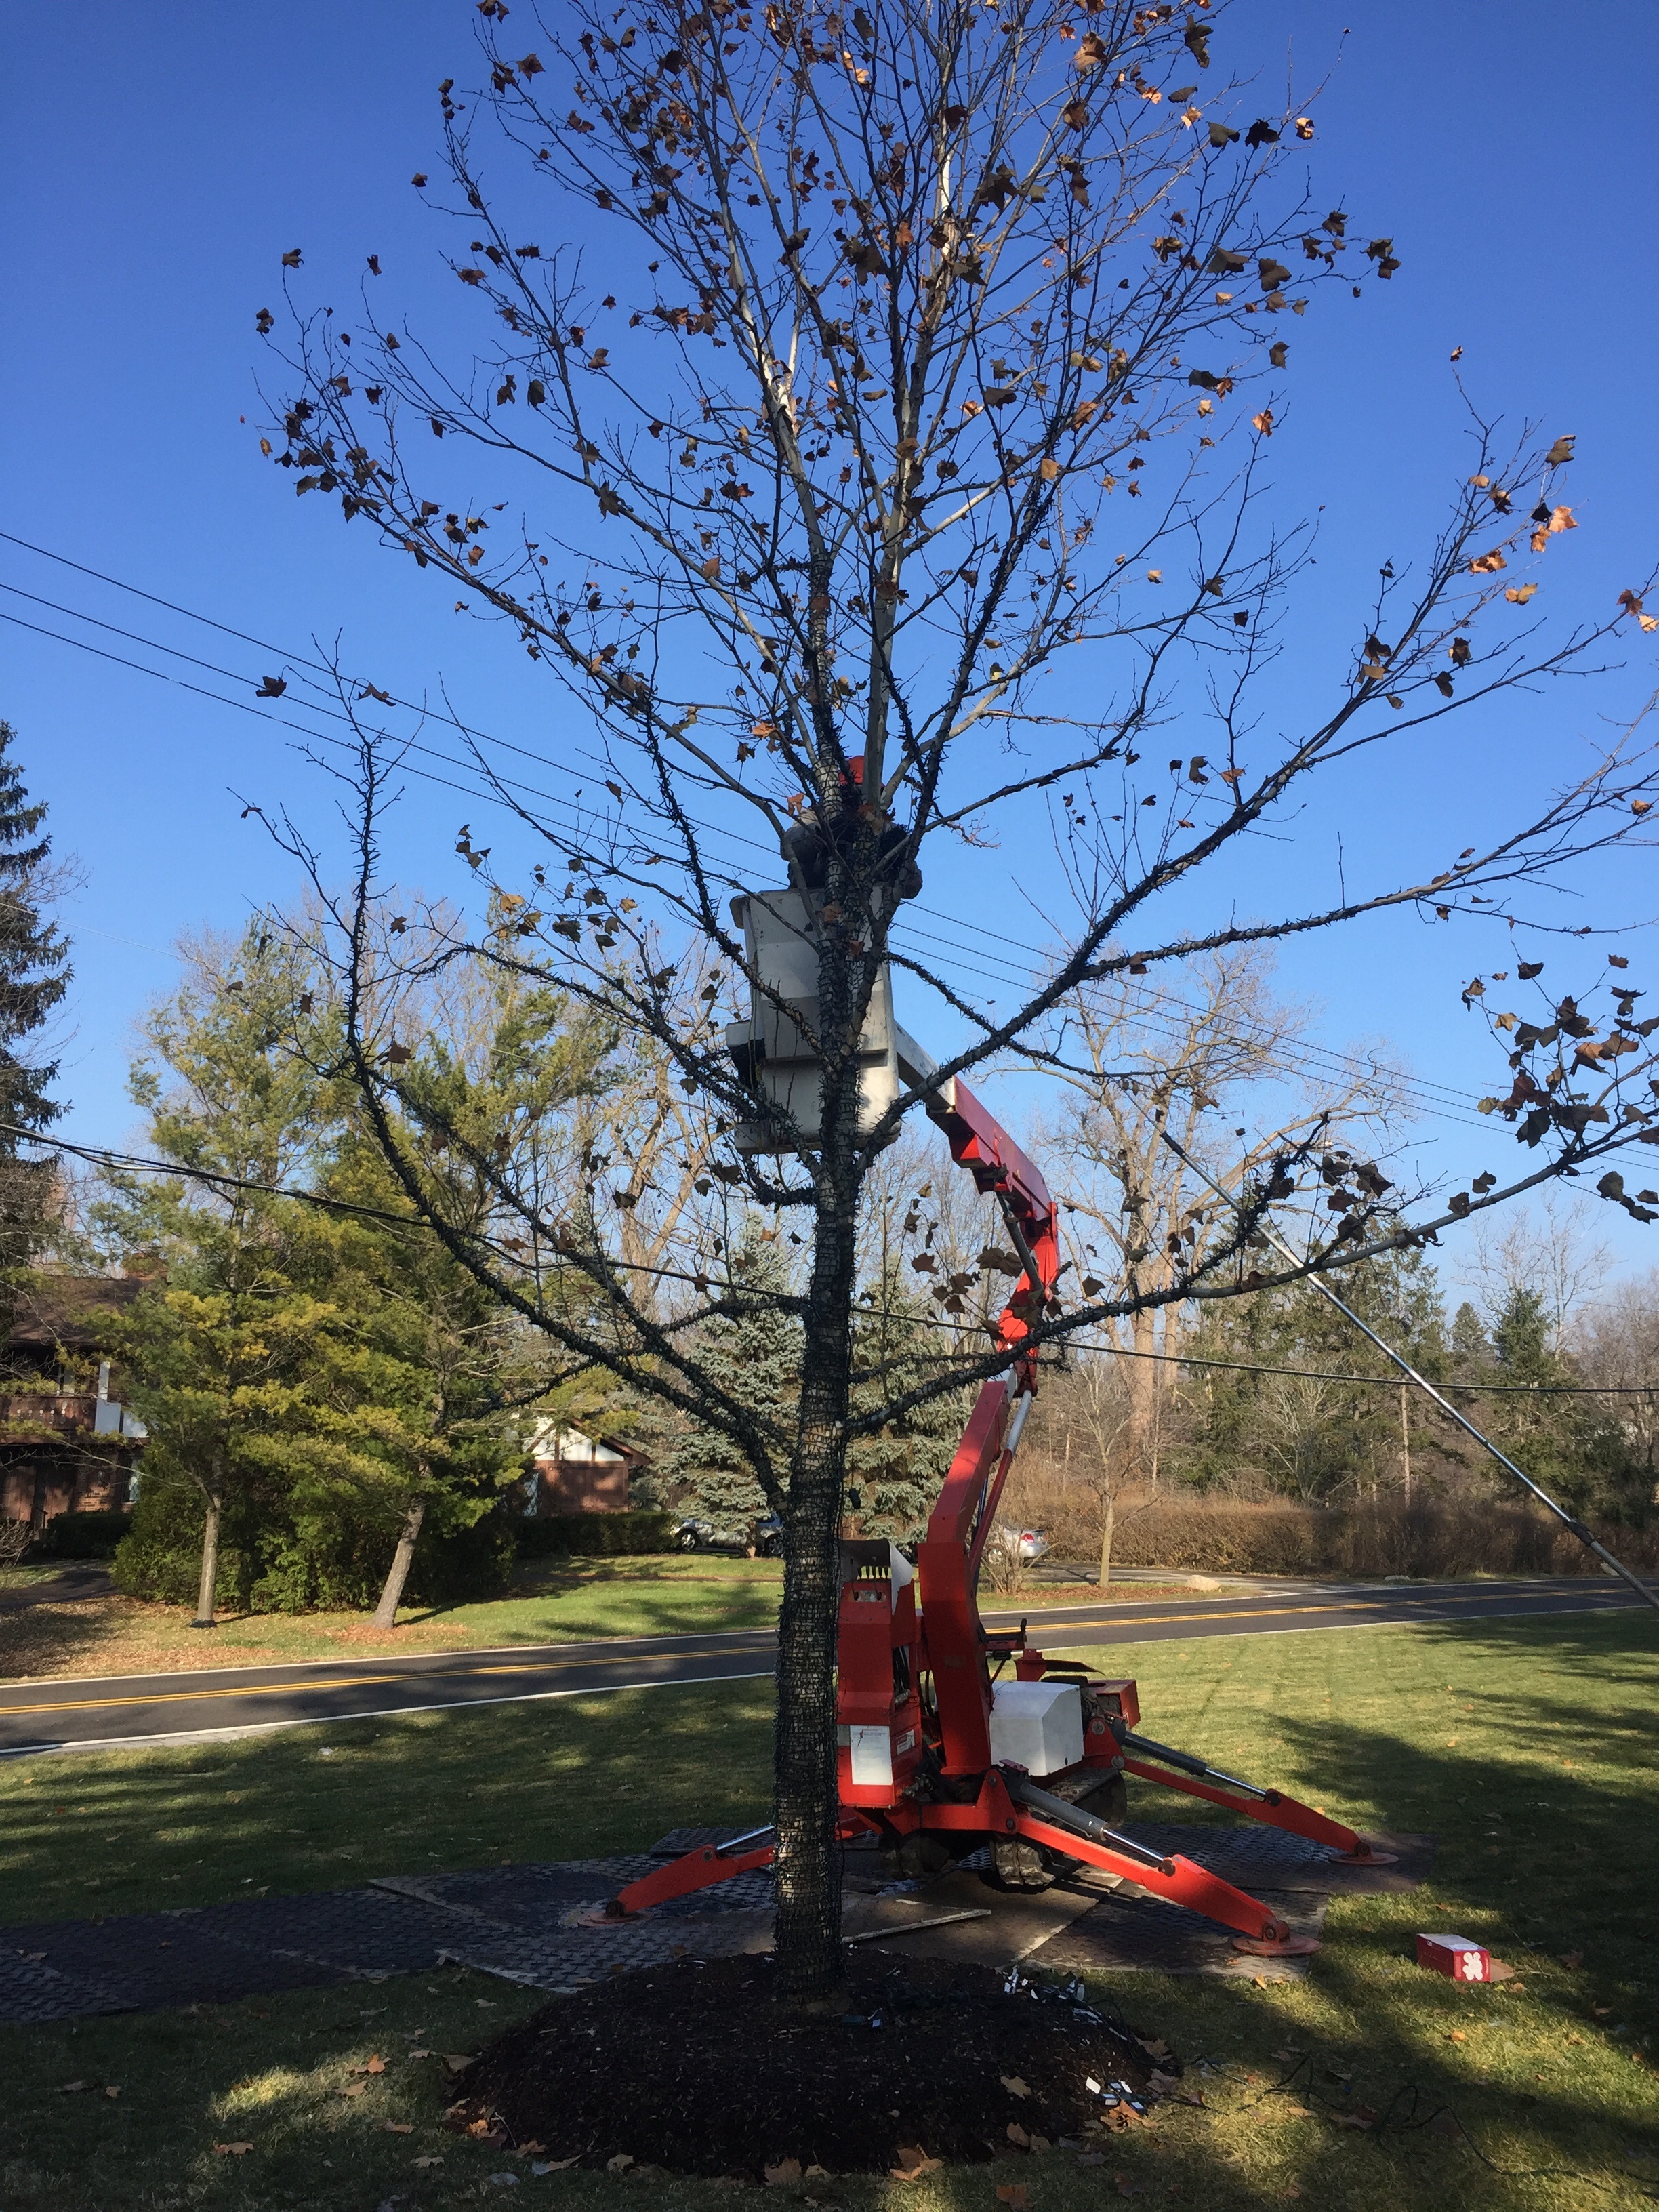
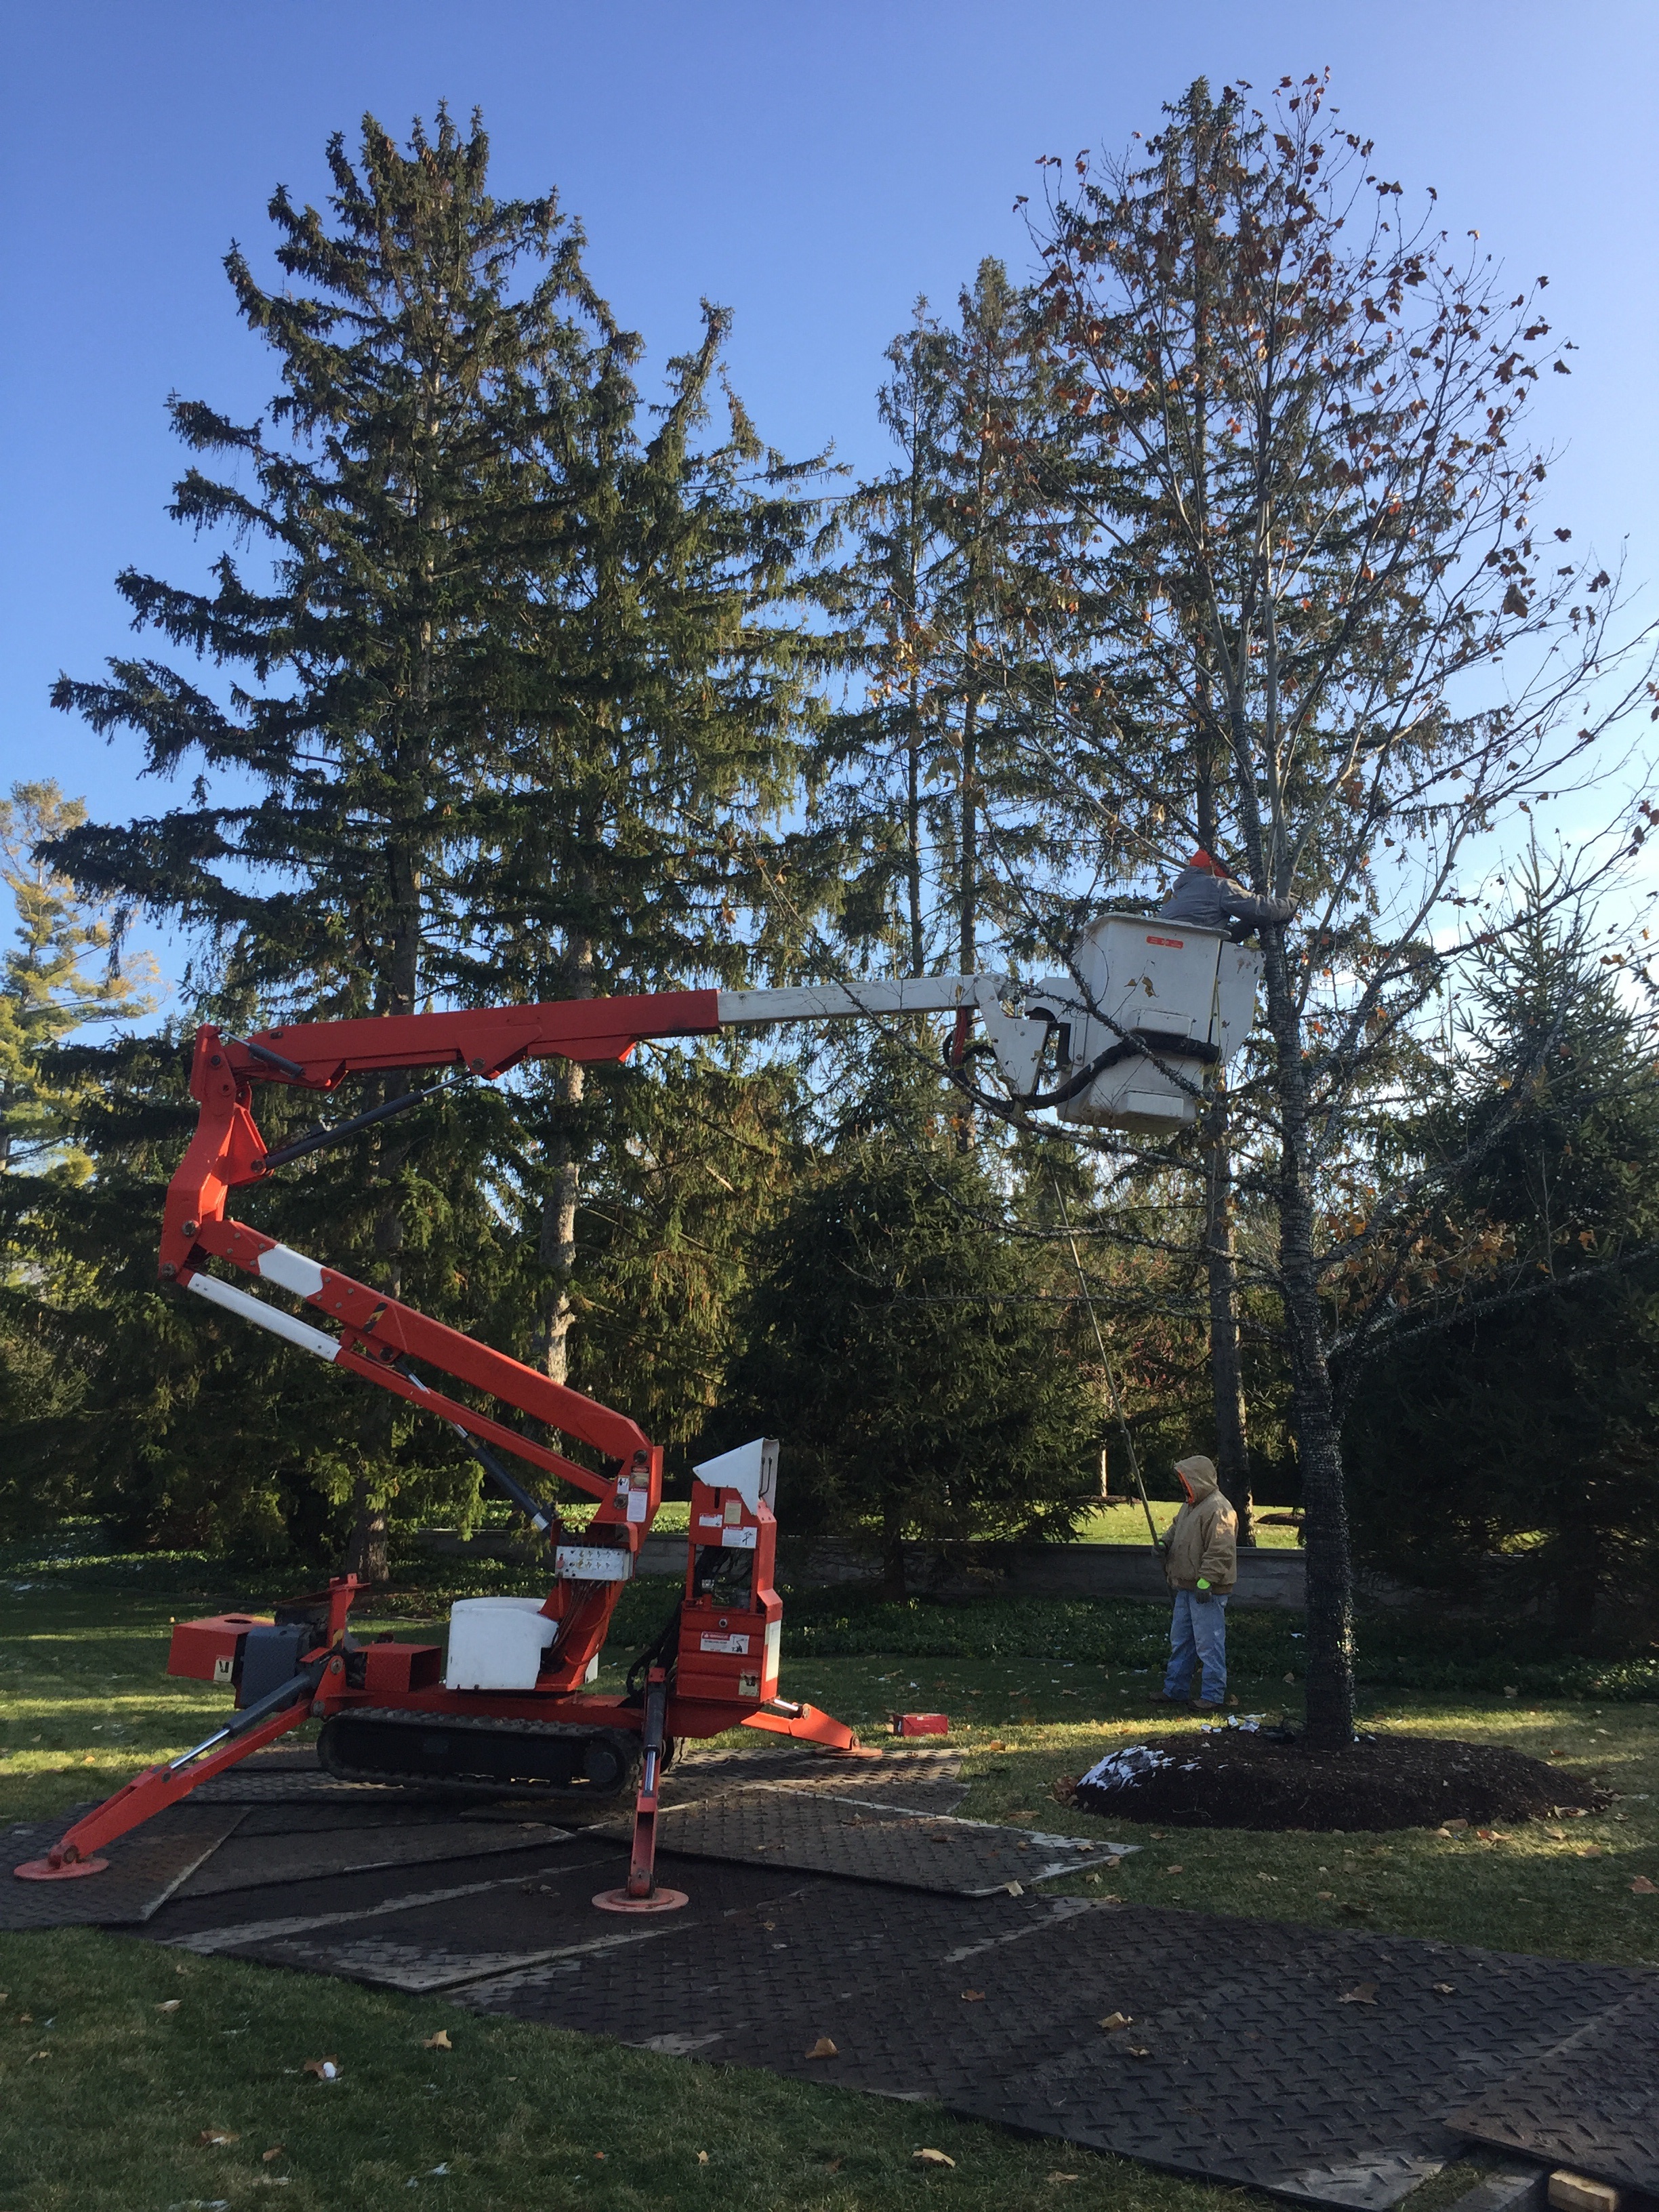
Our lighting via ladders took us up close to 20 feet. My client called to ask when were we coming back to do the rest? I should have known that the limit of our reach on our ladders was a self imposed limit. If the sky was the limit, I was going to need some help. Mike Shecter sent two of his people over with a lift. That machine enabled them to wrap both of the trees much closer to the top.

There are a few landscape companies in my area that offer holiday lighting, but that is a very specialized niche. The purchase and maintenance on a piece of equipment like this has to be very expensive. Not to mention the workman’s compensation policy on people who are working this high off the ground. I was happy to get some help with this project, and even happier that I do not own this machine.

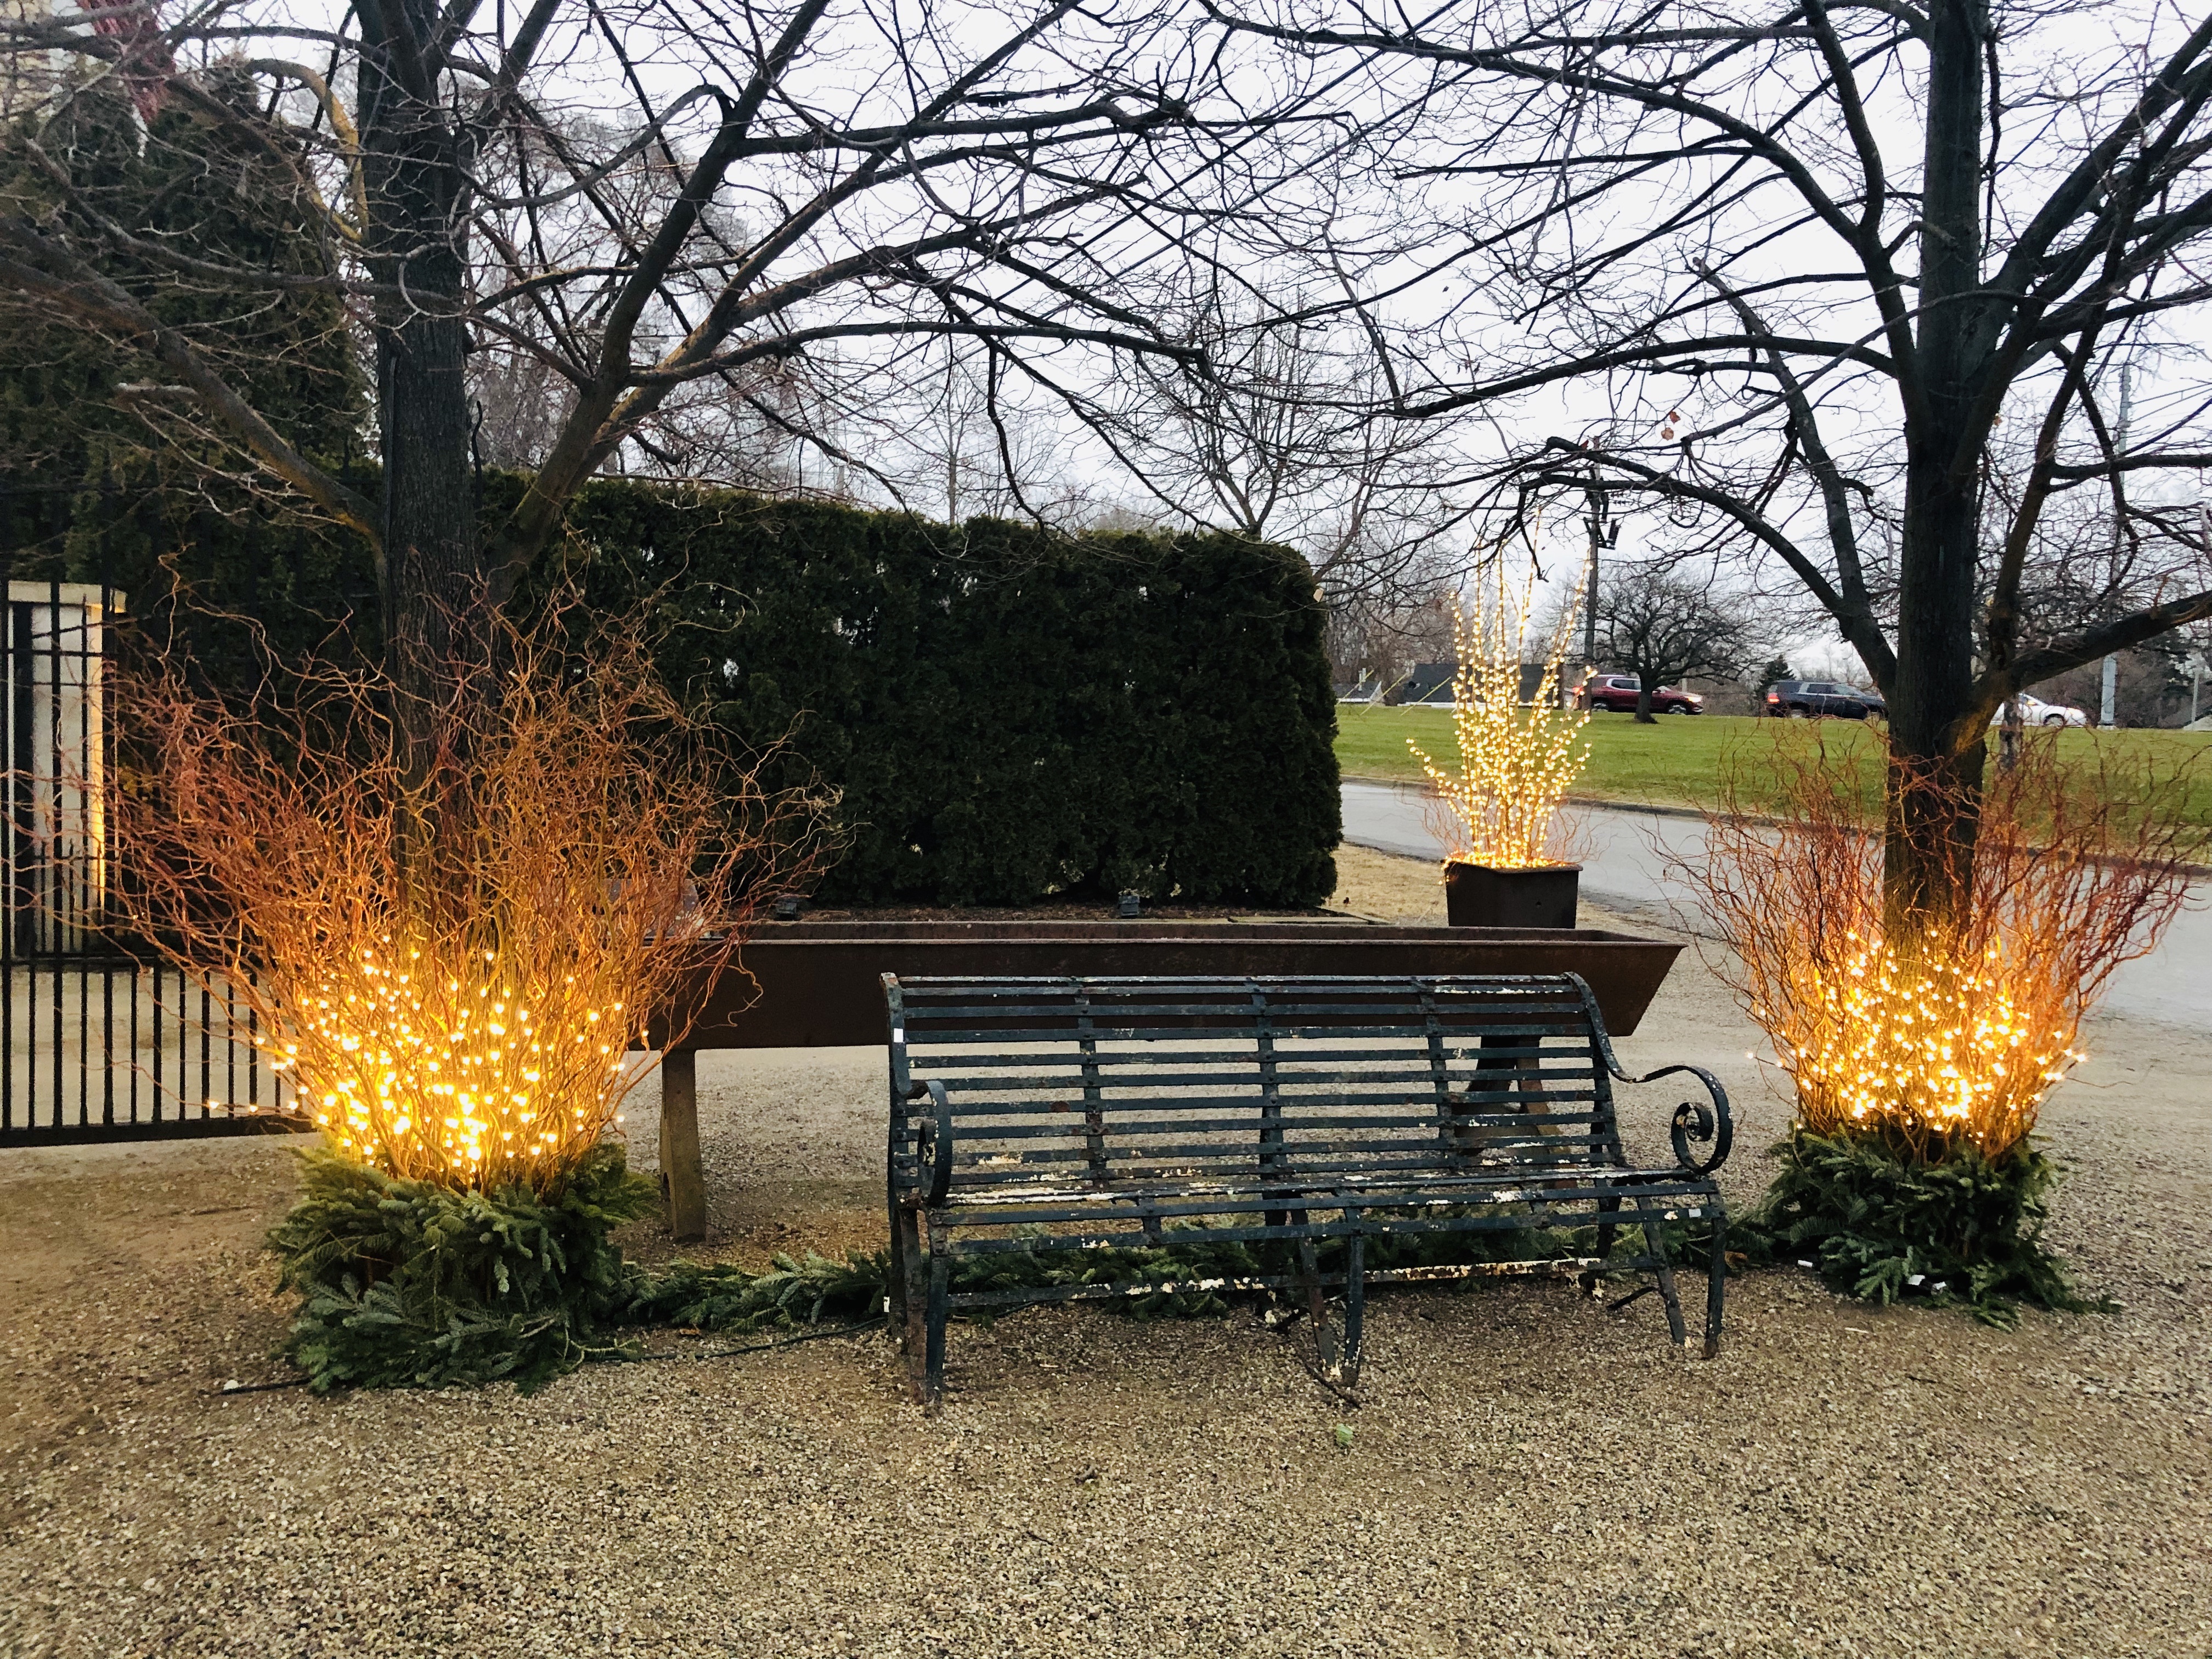
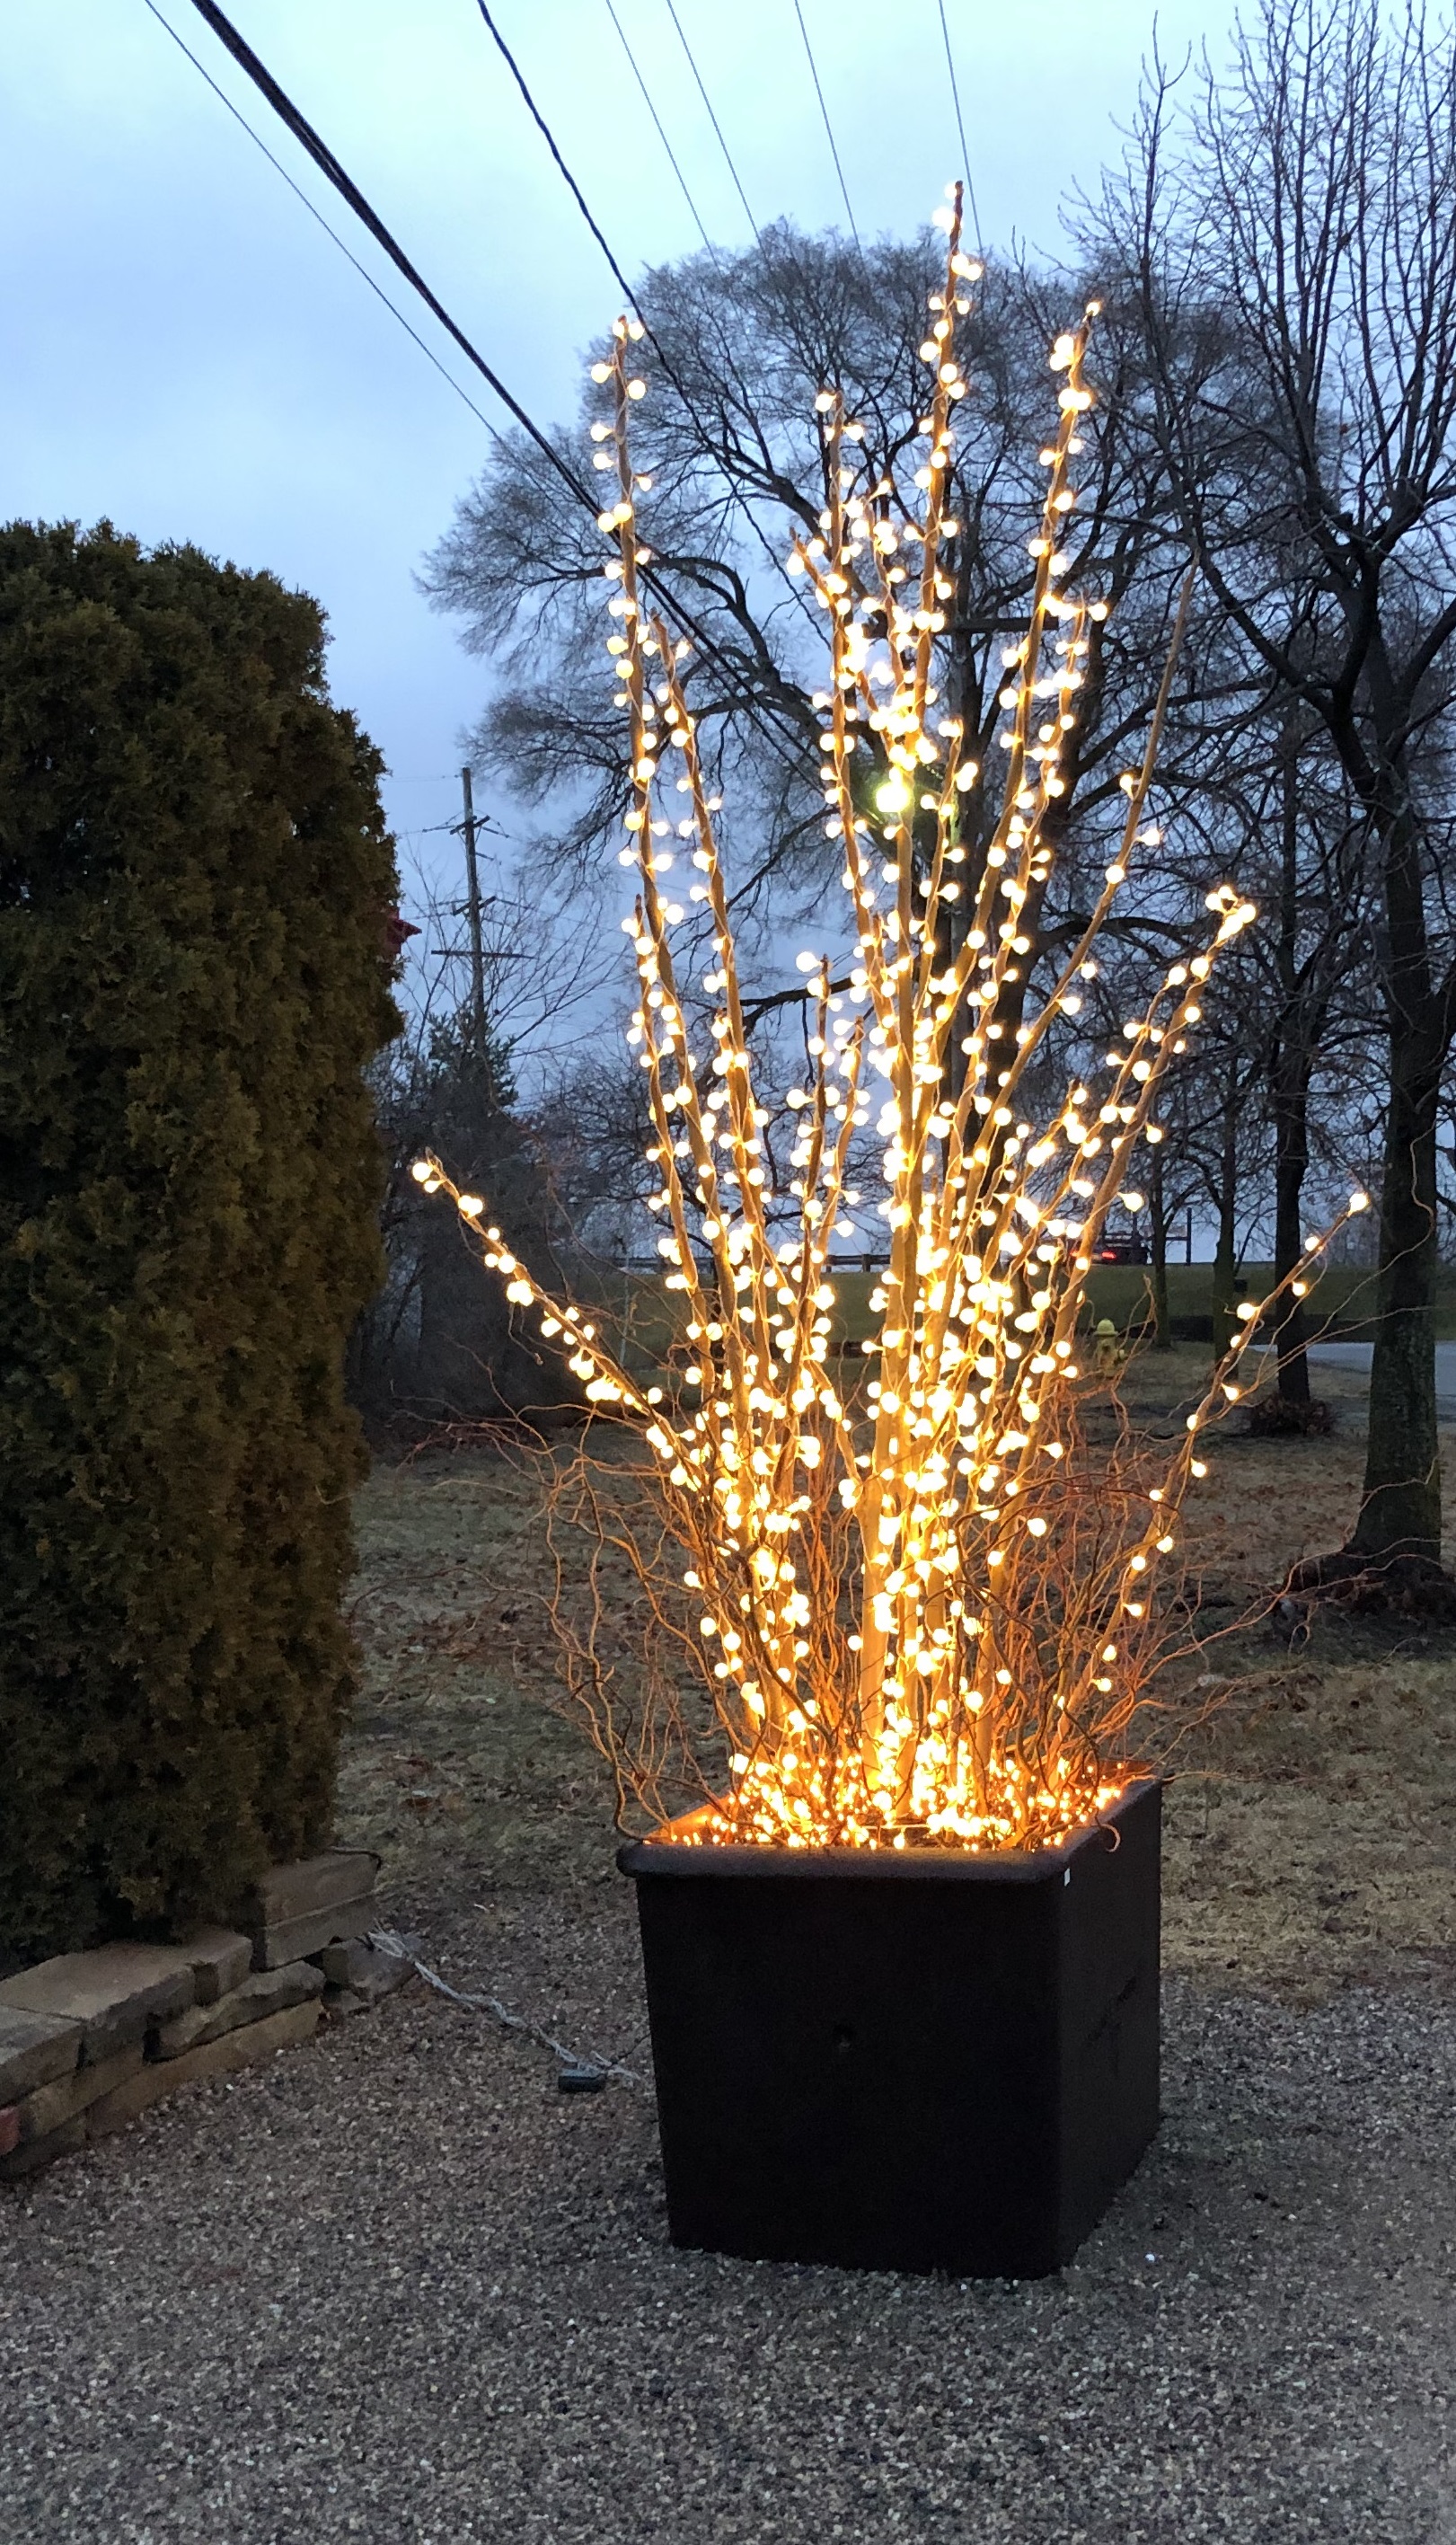
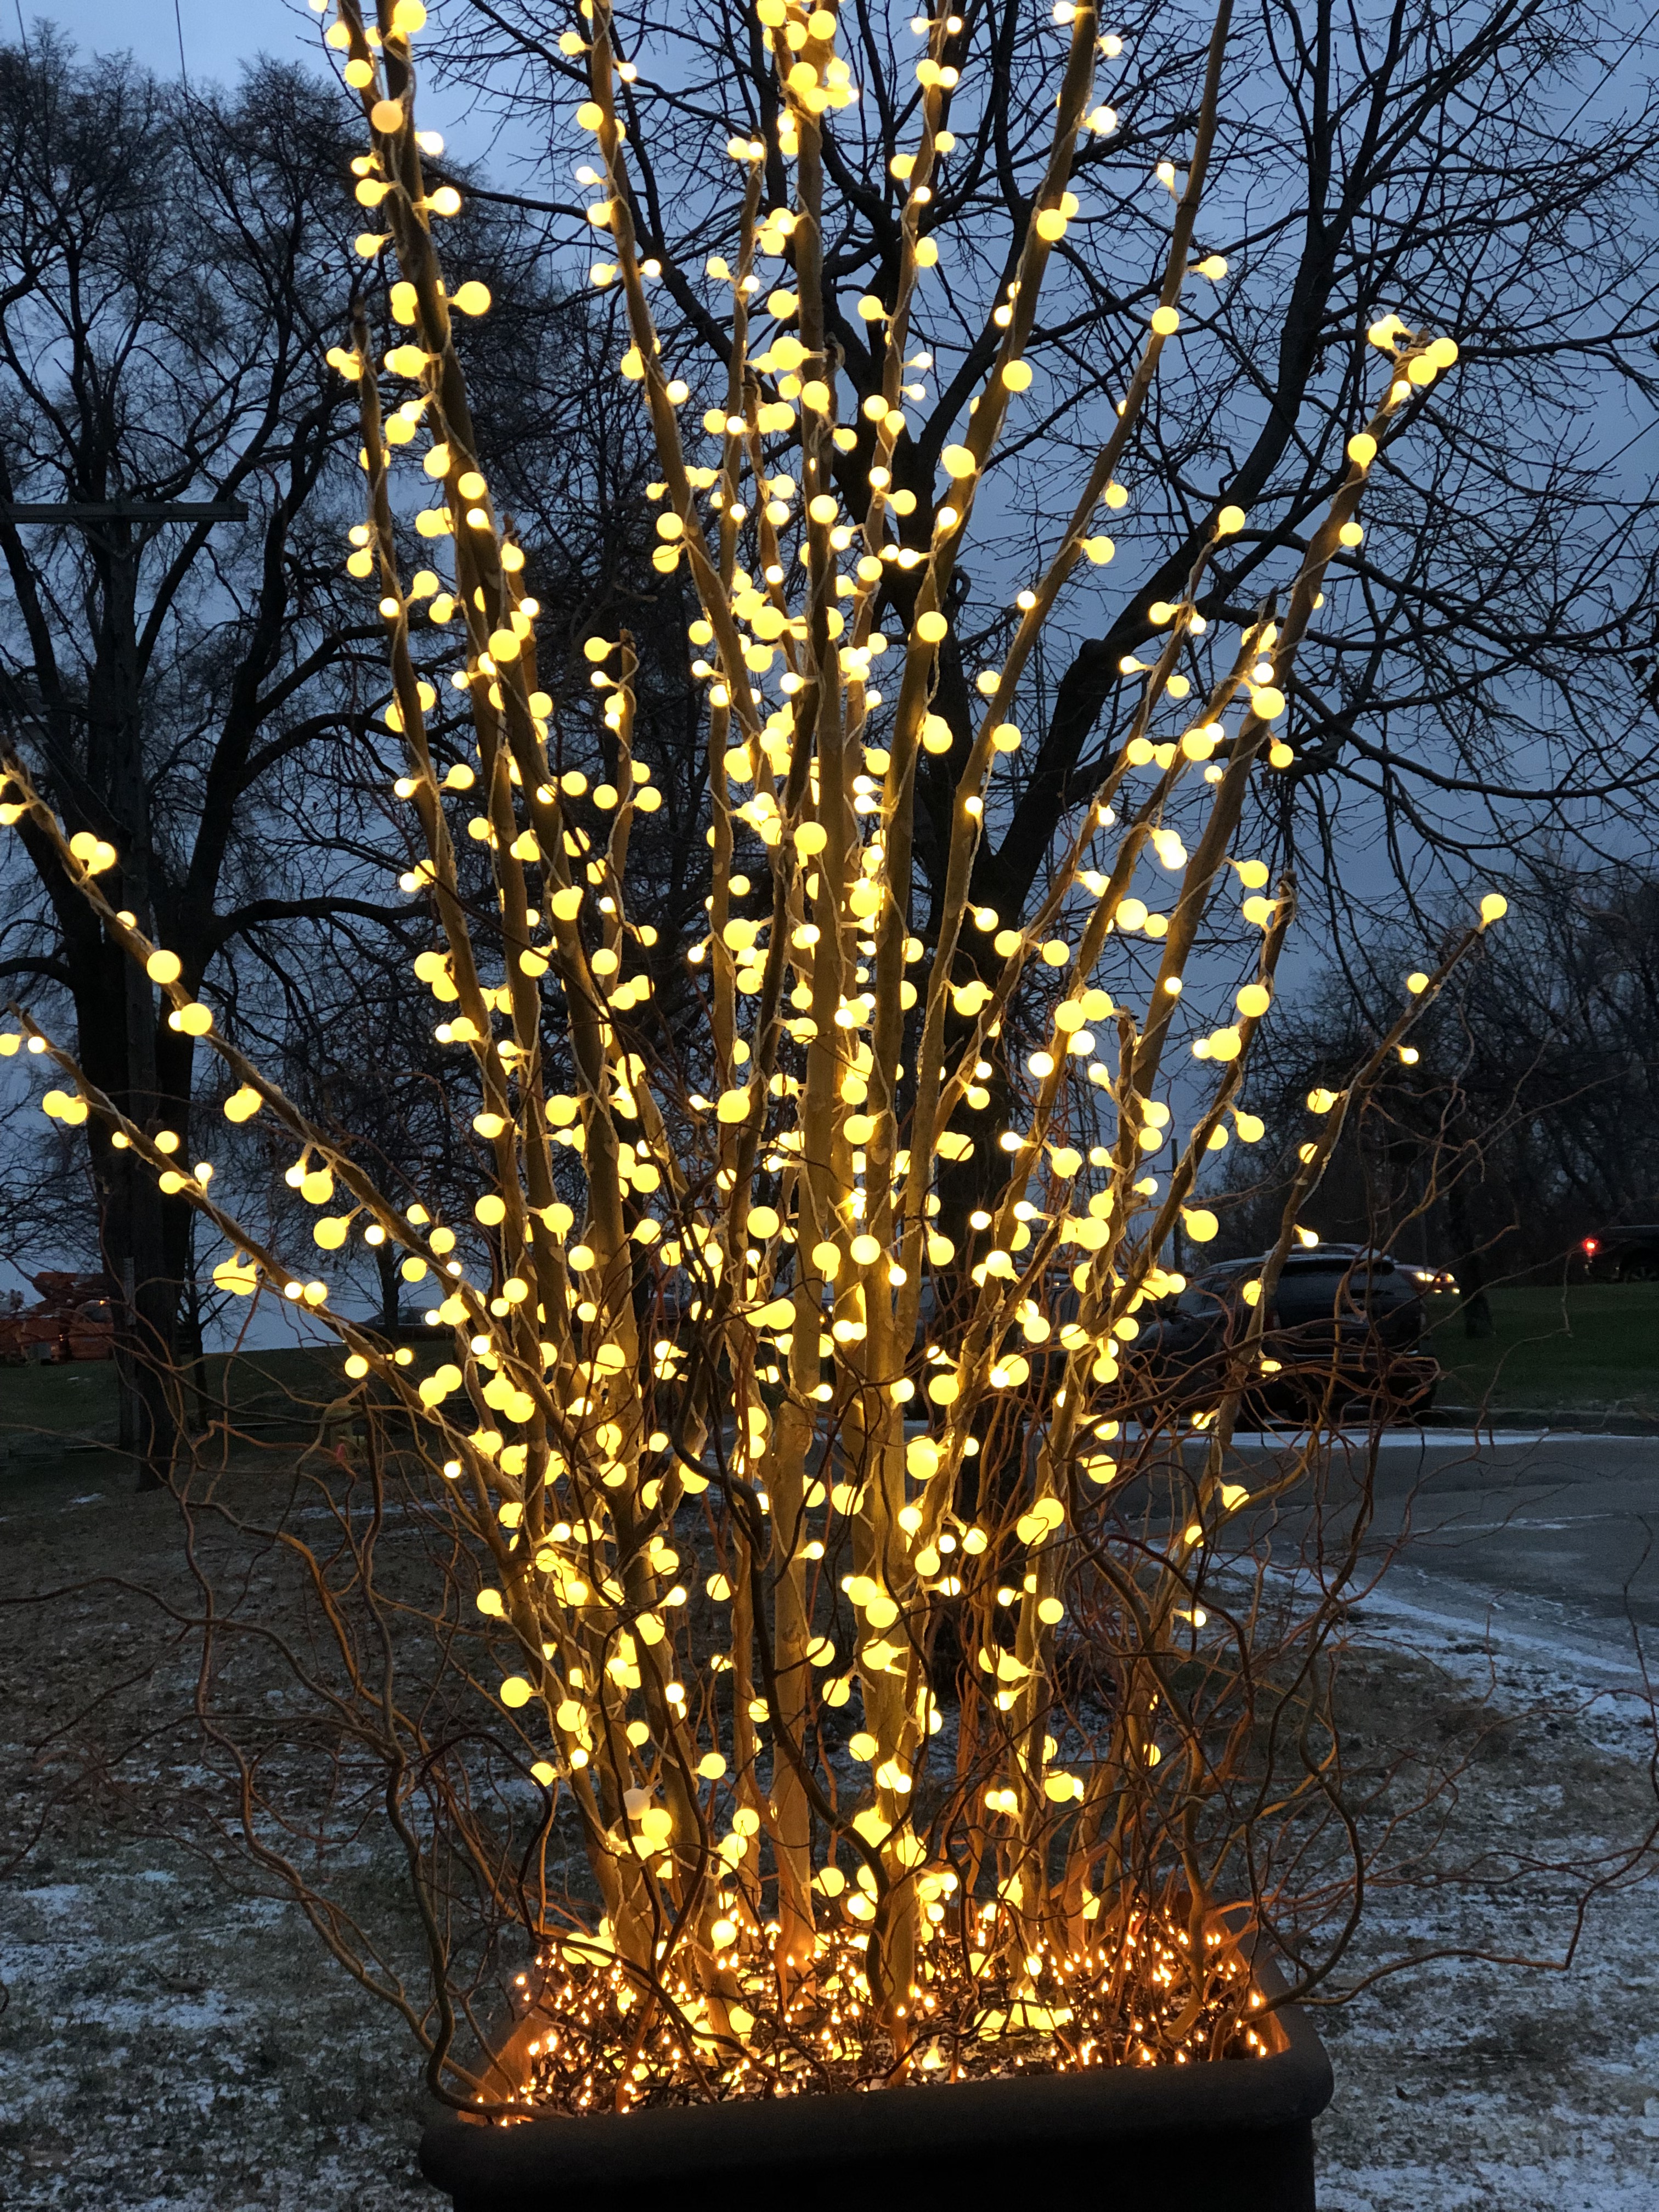
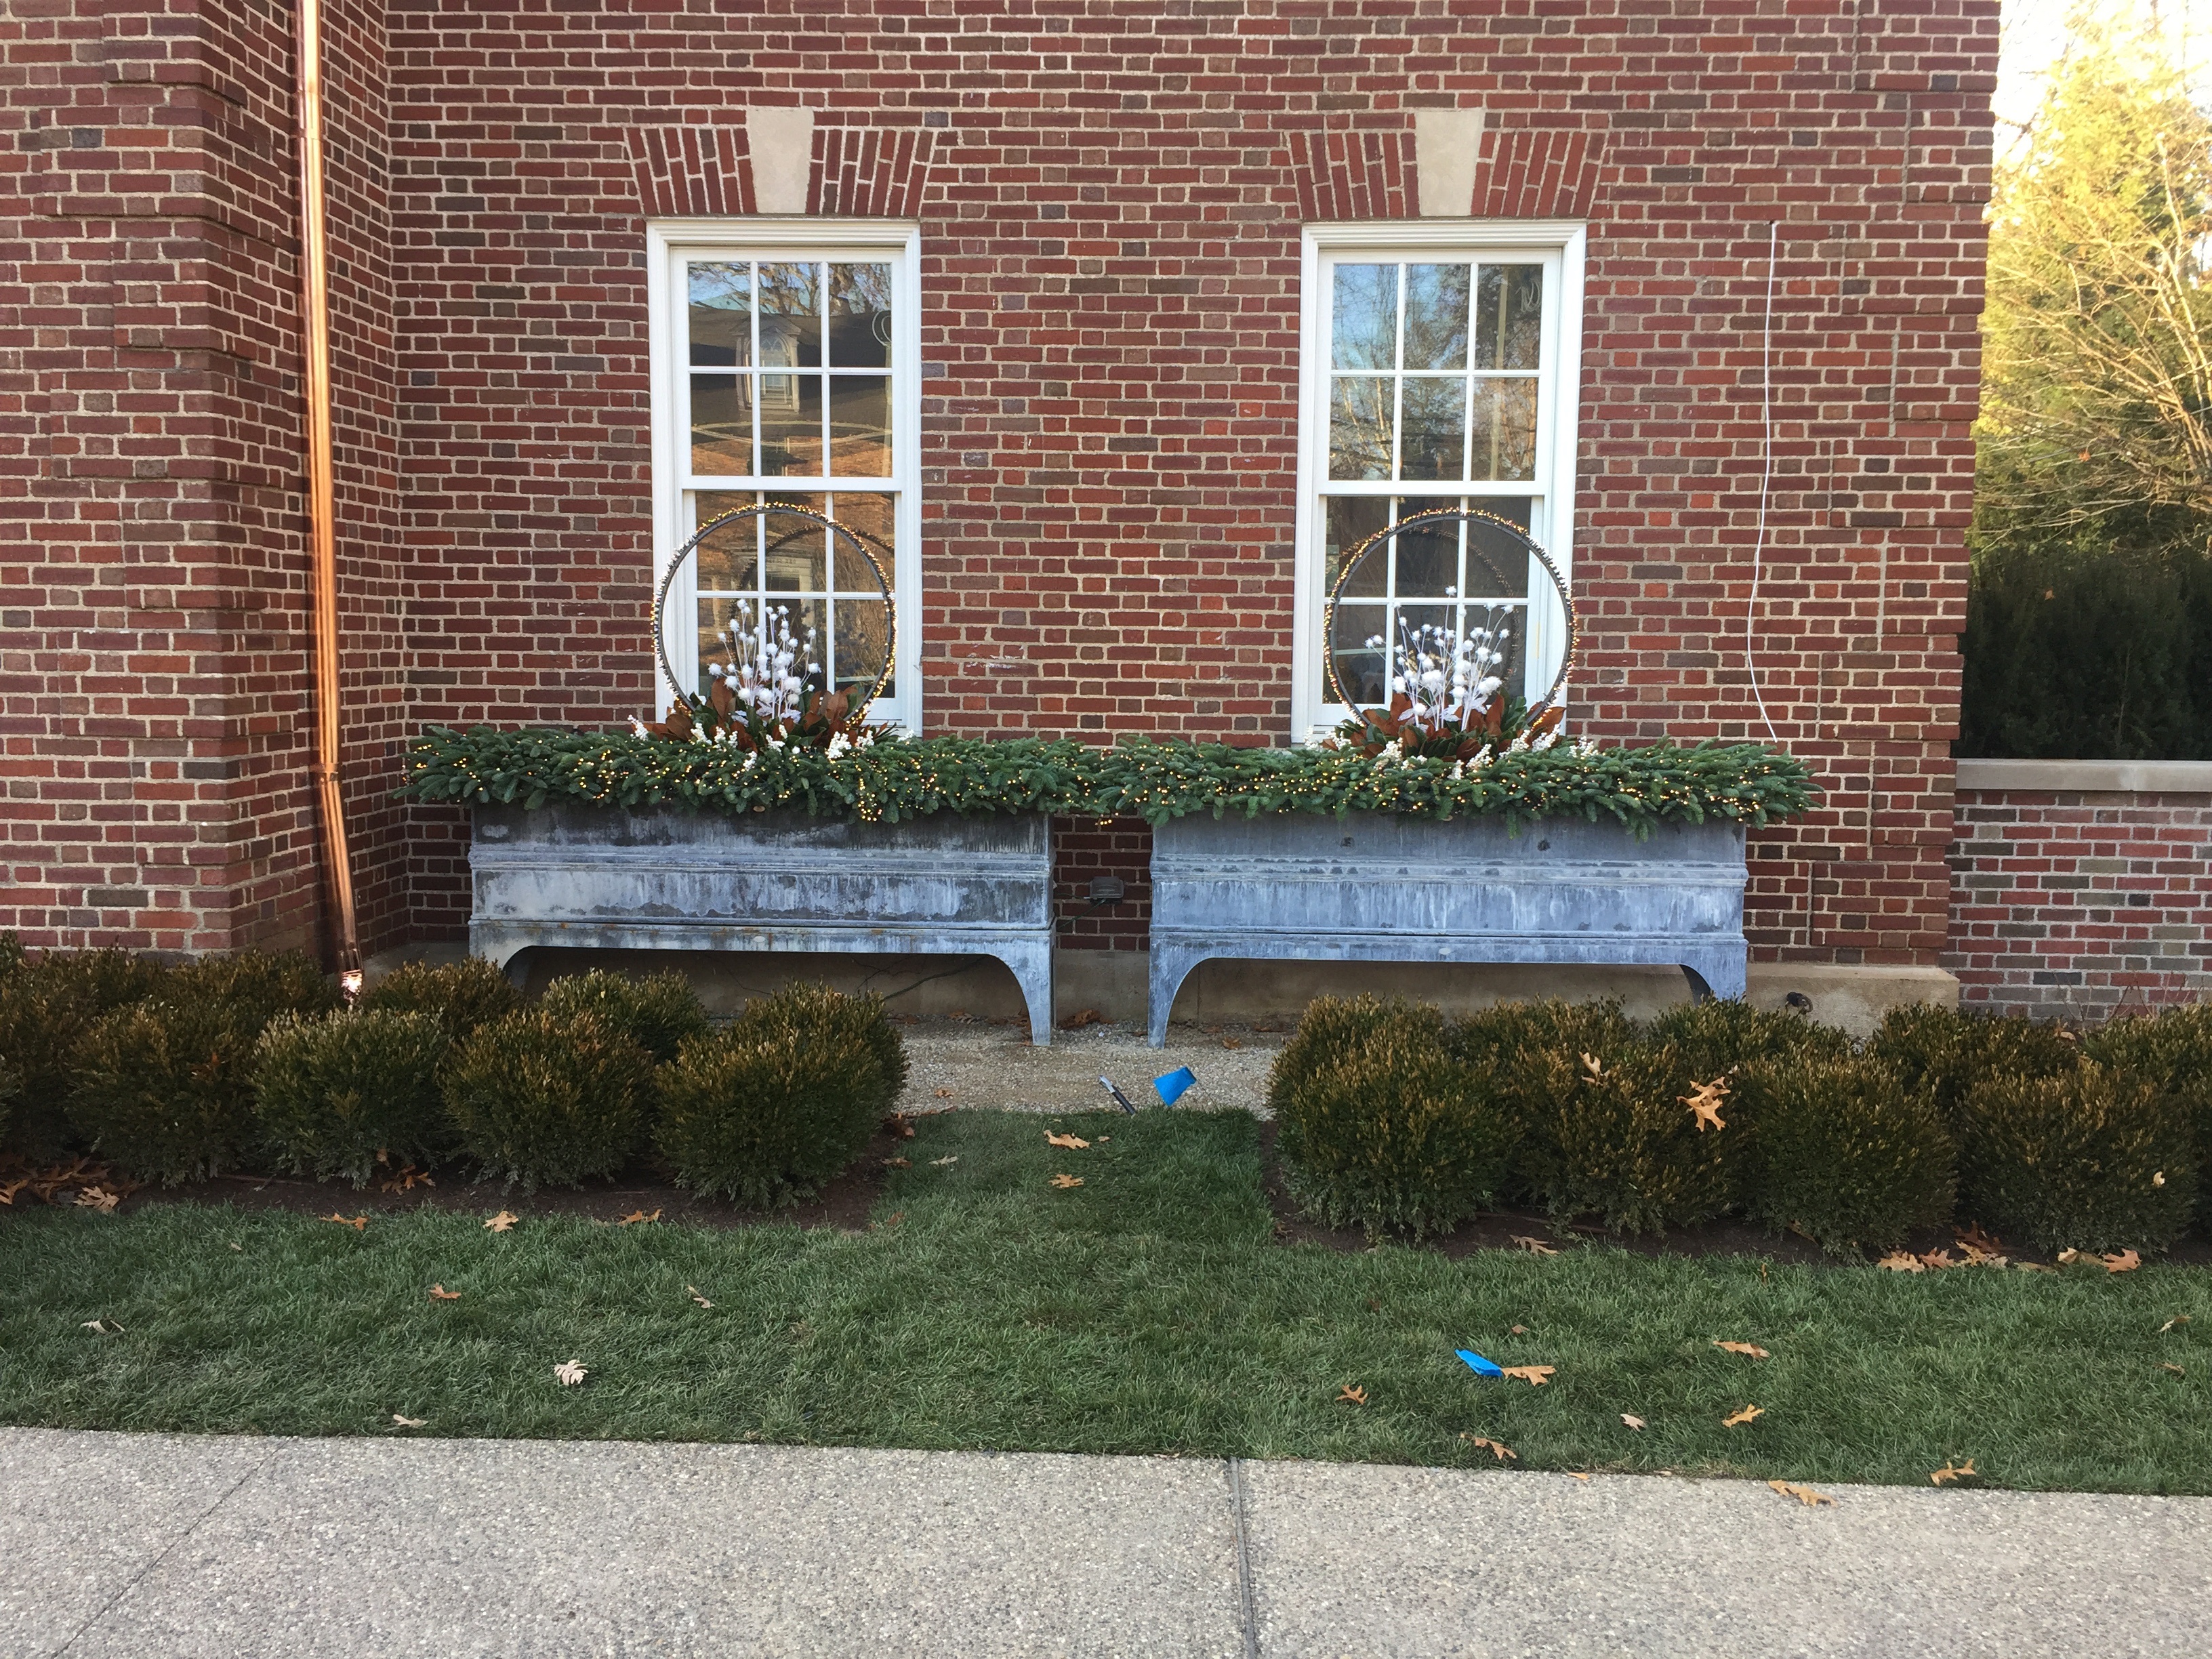
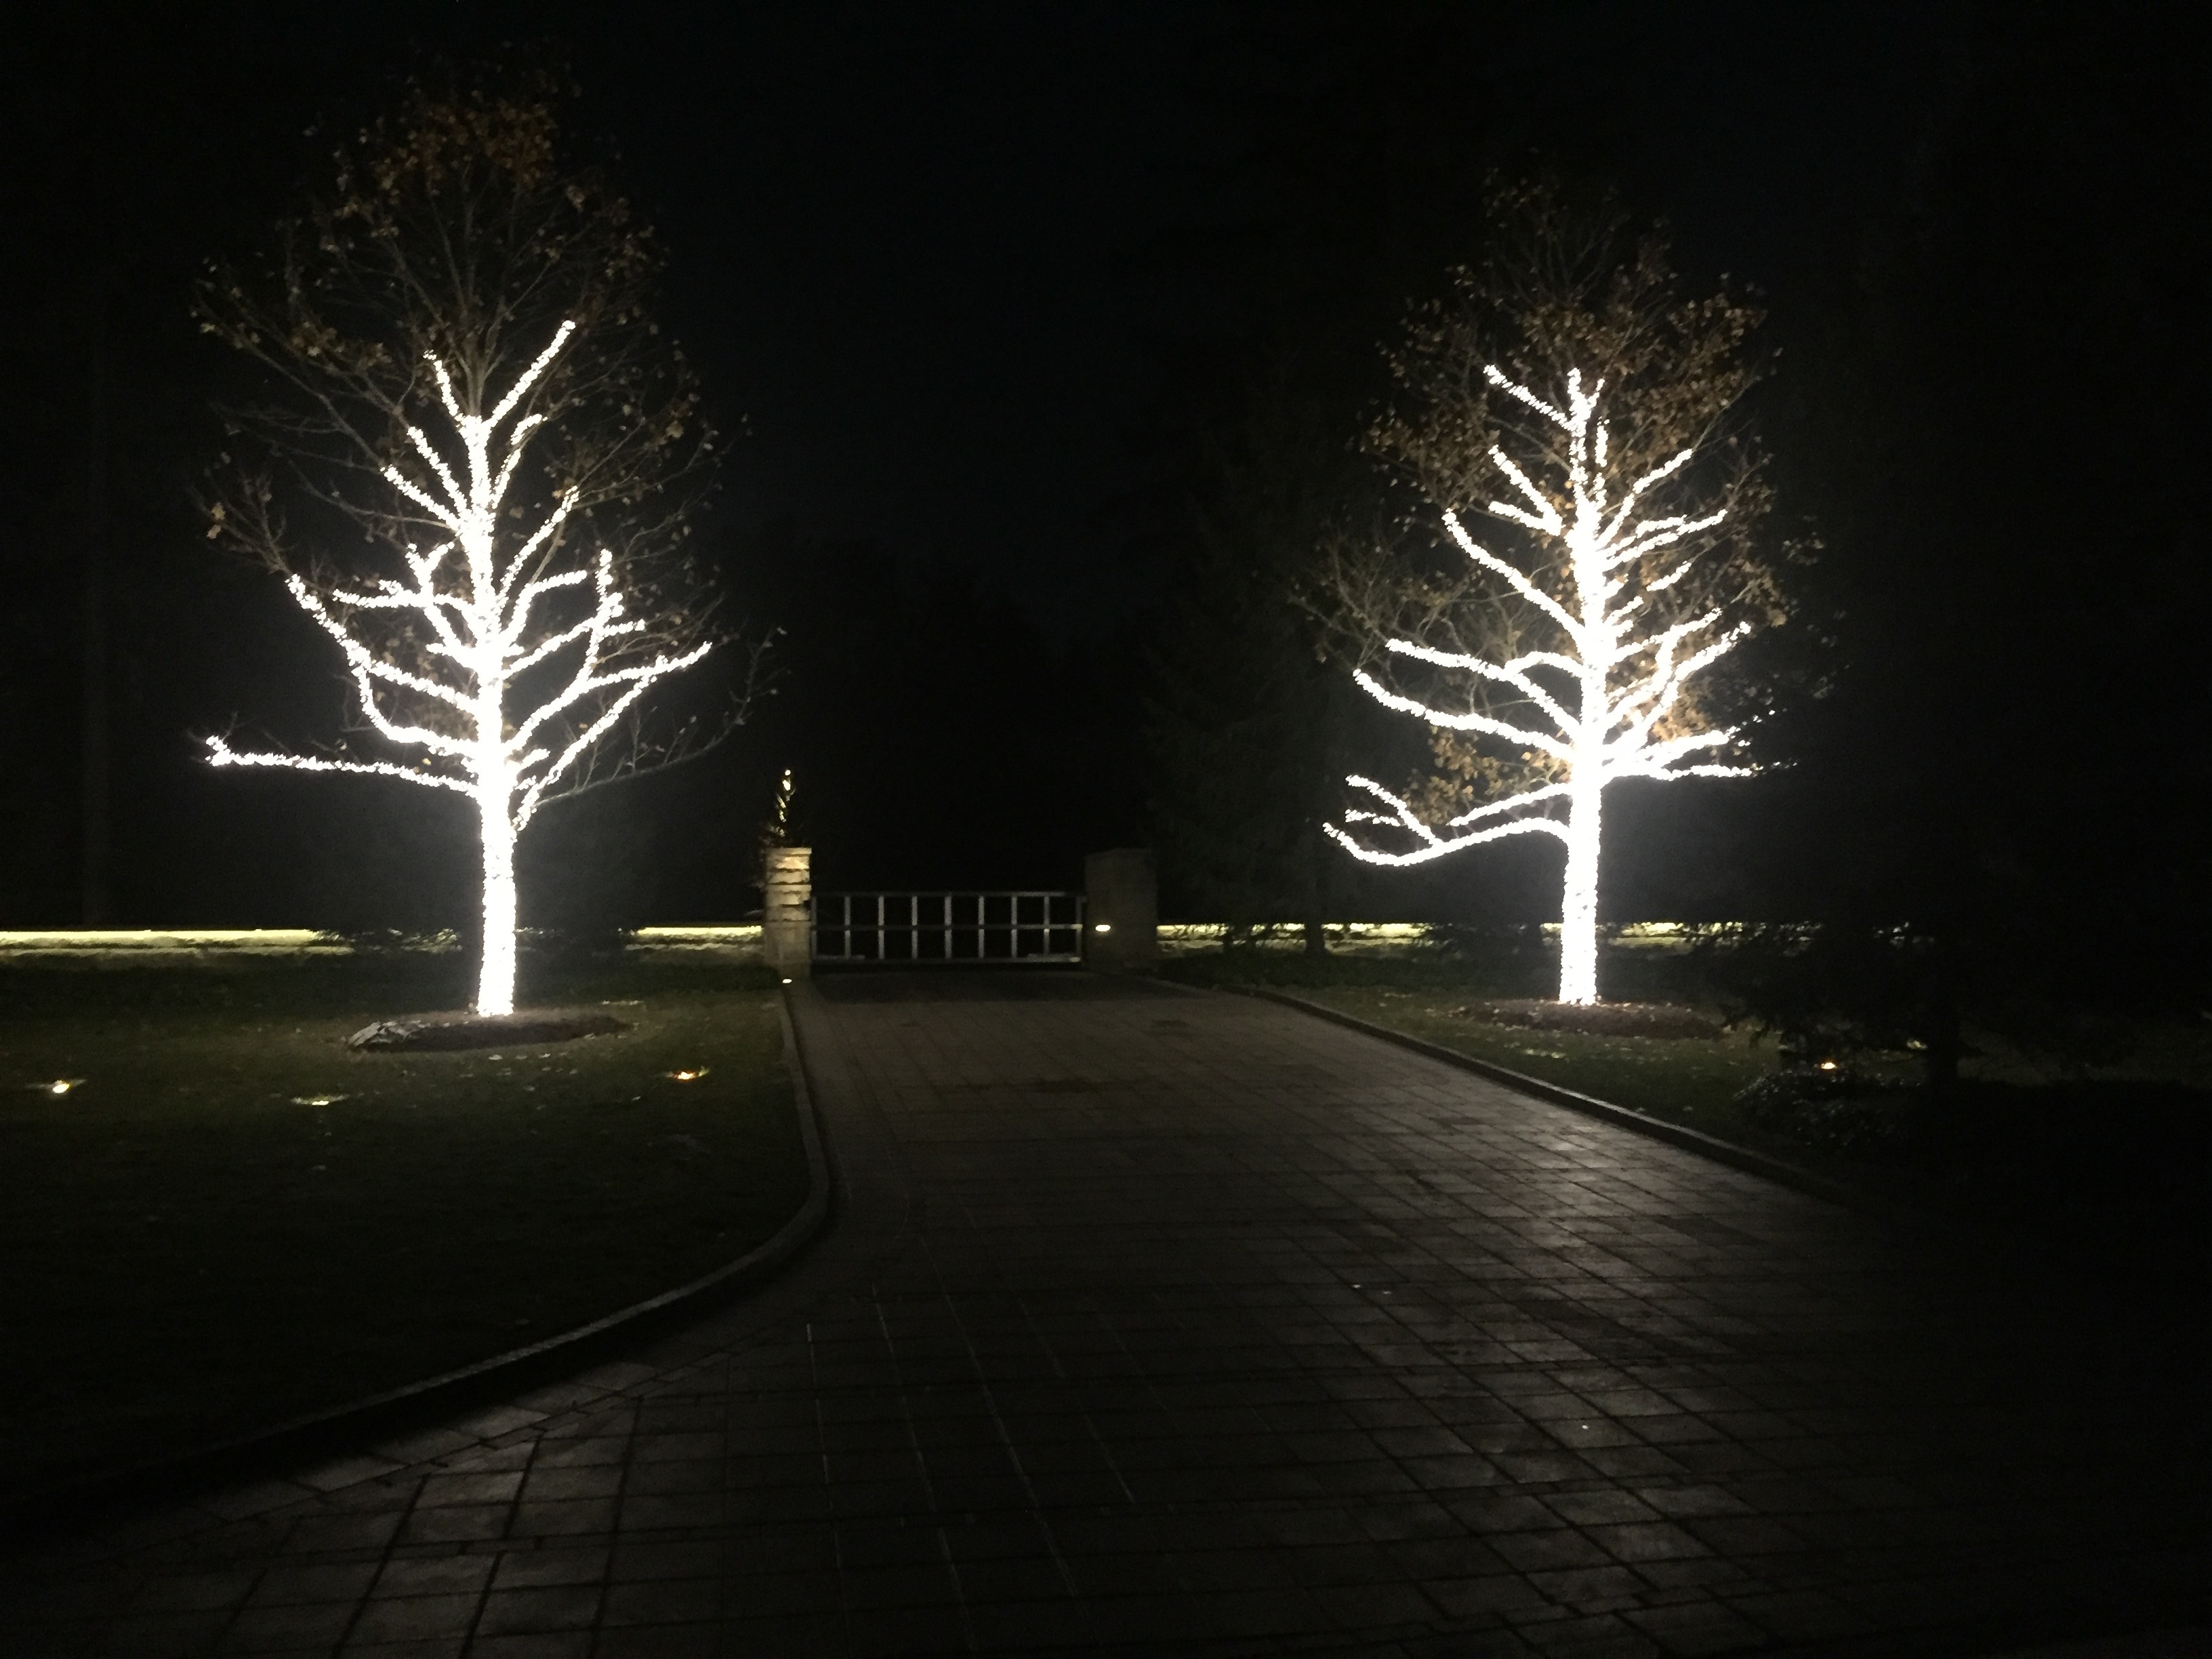
Trees densely wound round with lights is not especially unusual. Many commercial businesses feature very elaborate lighting schemes for the holiday season.  I understand why. The light is dazzling, and uplifting. As in festival of lights. As much as I loved this look, something was missing.

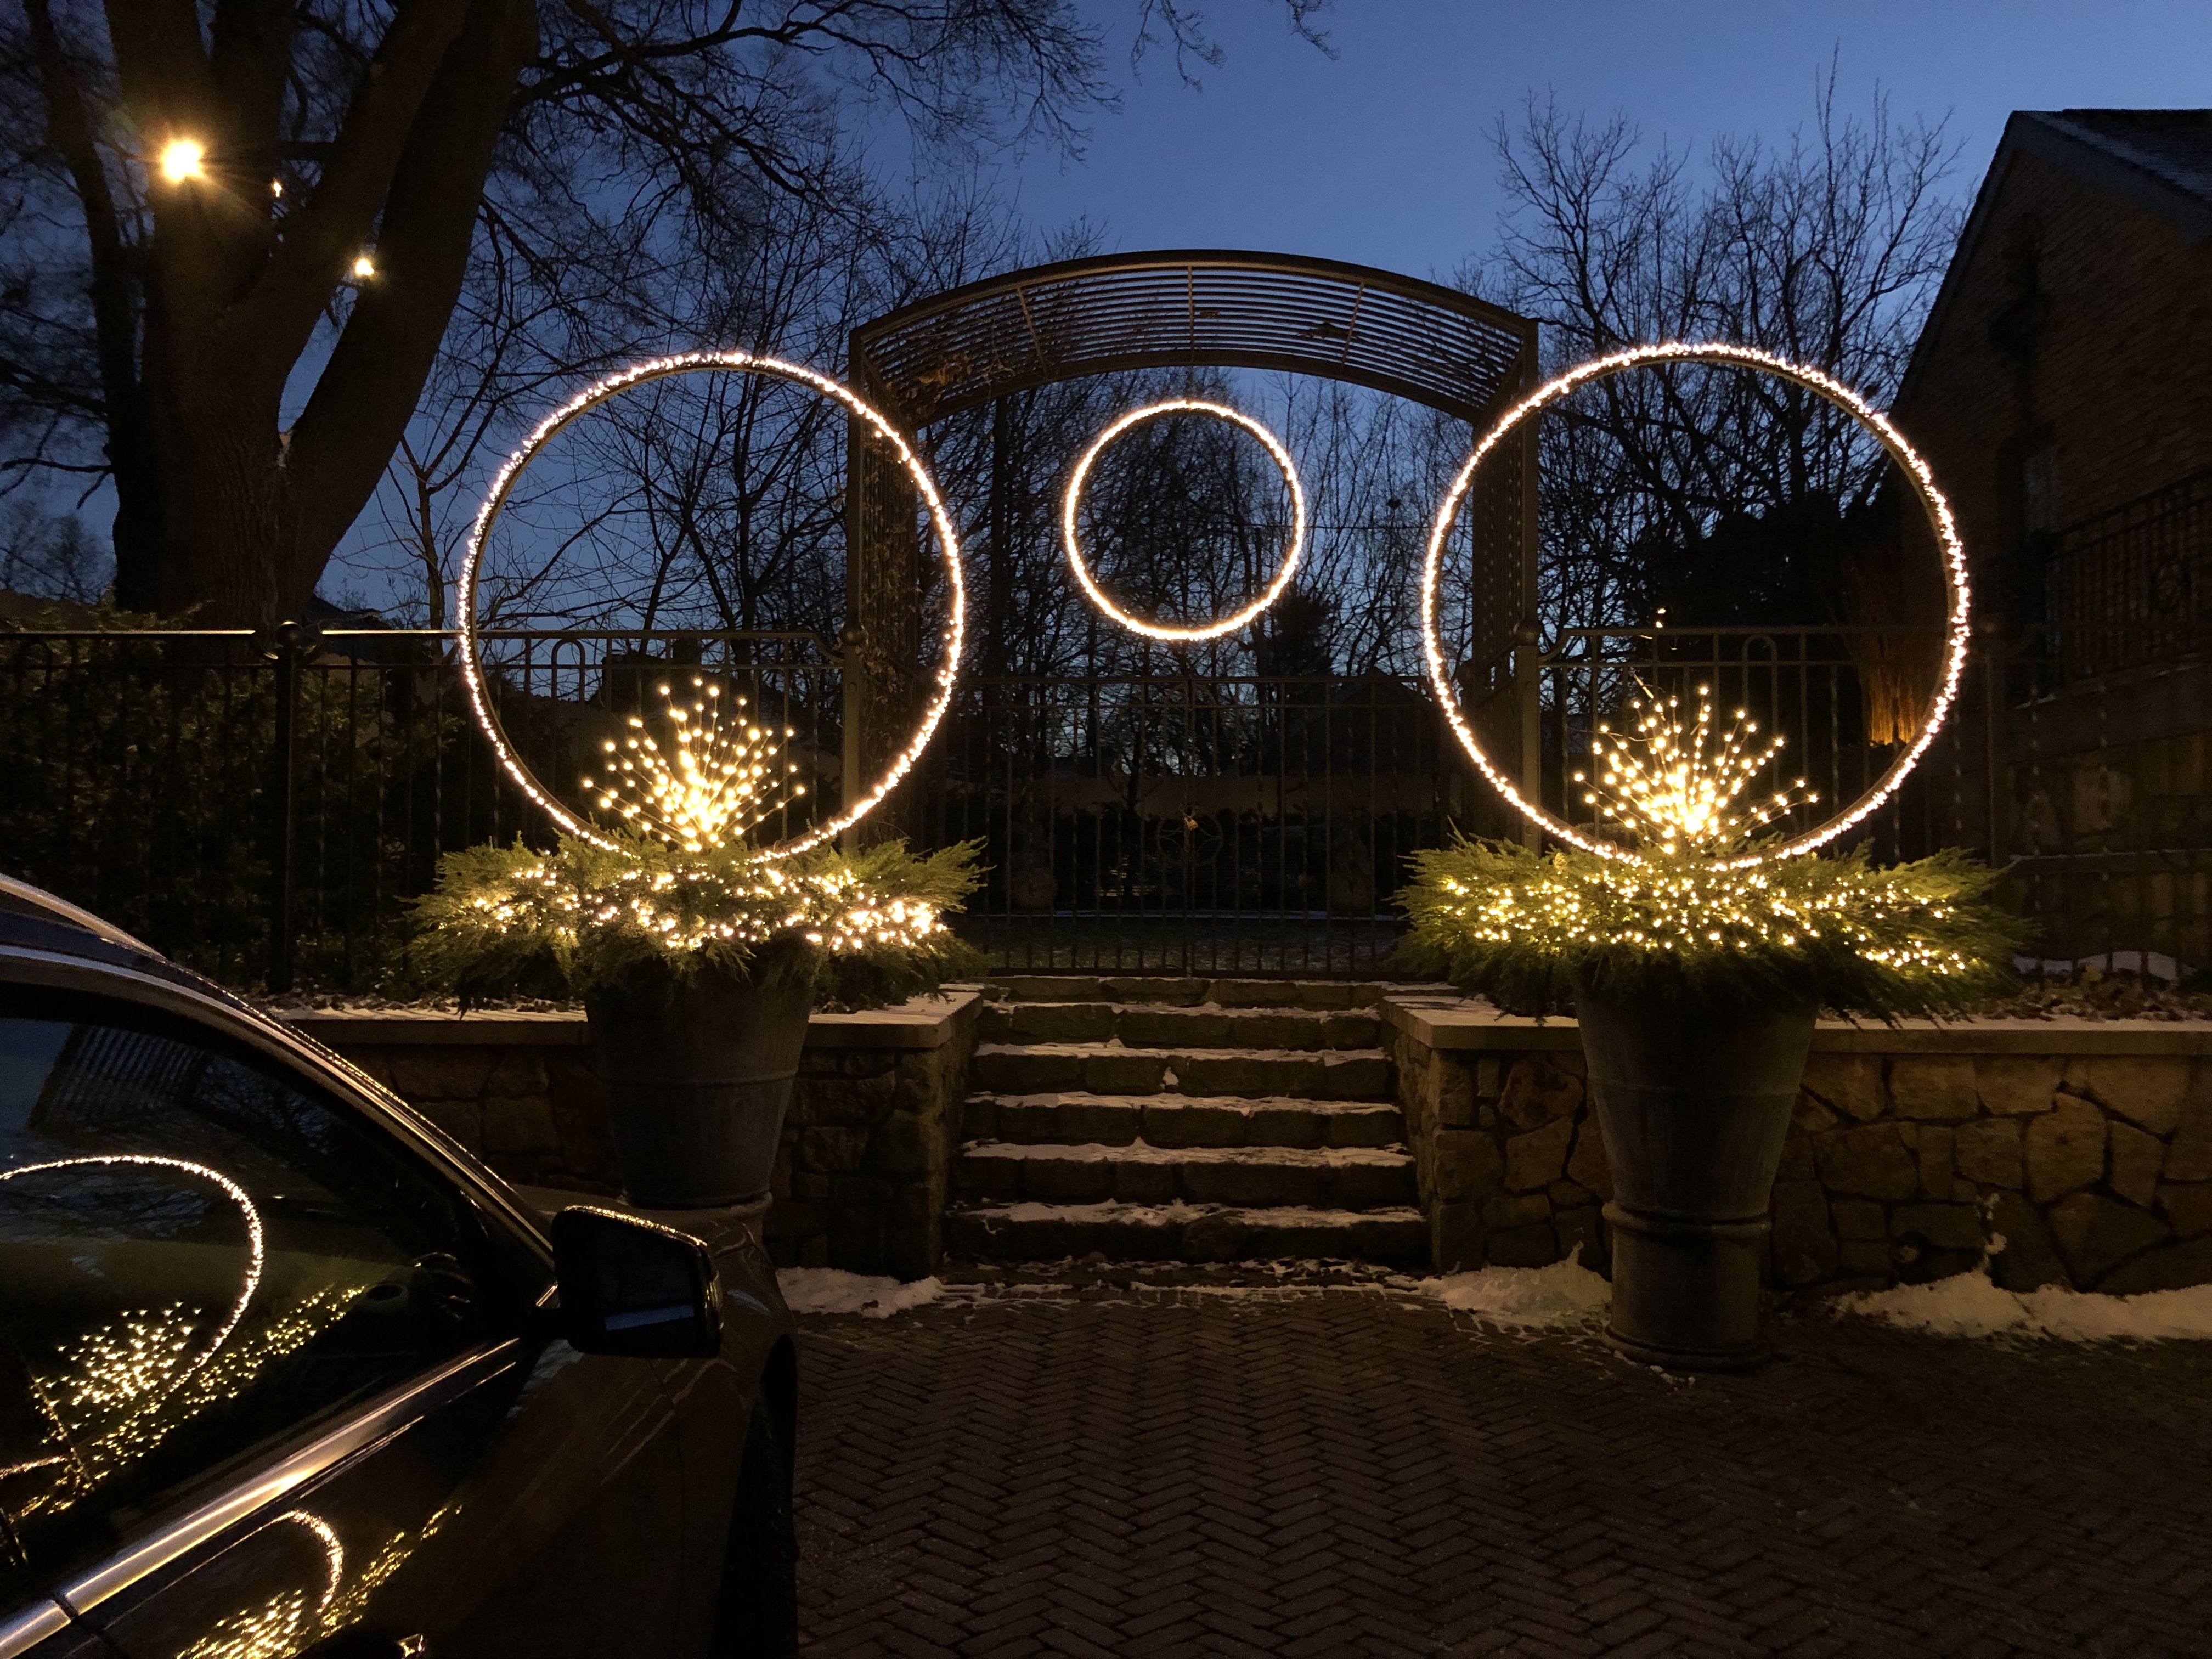
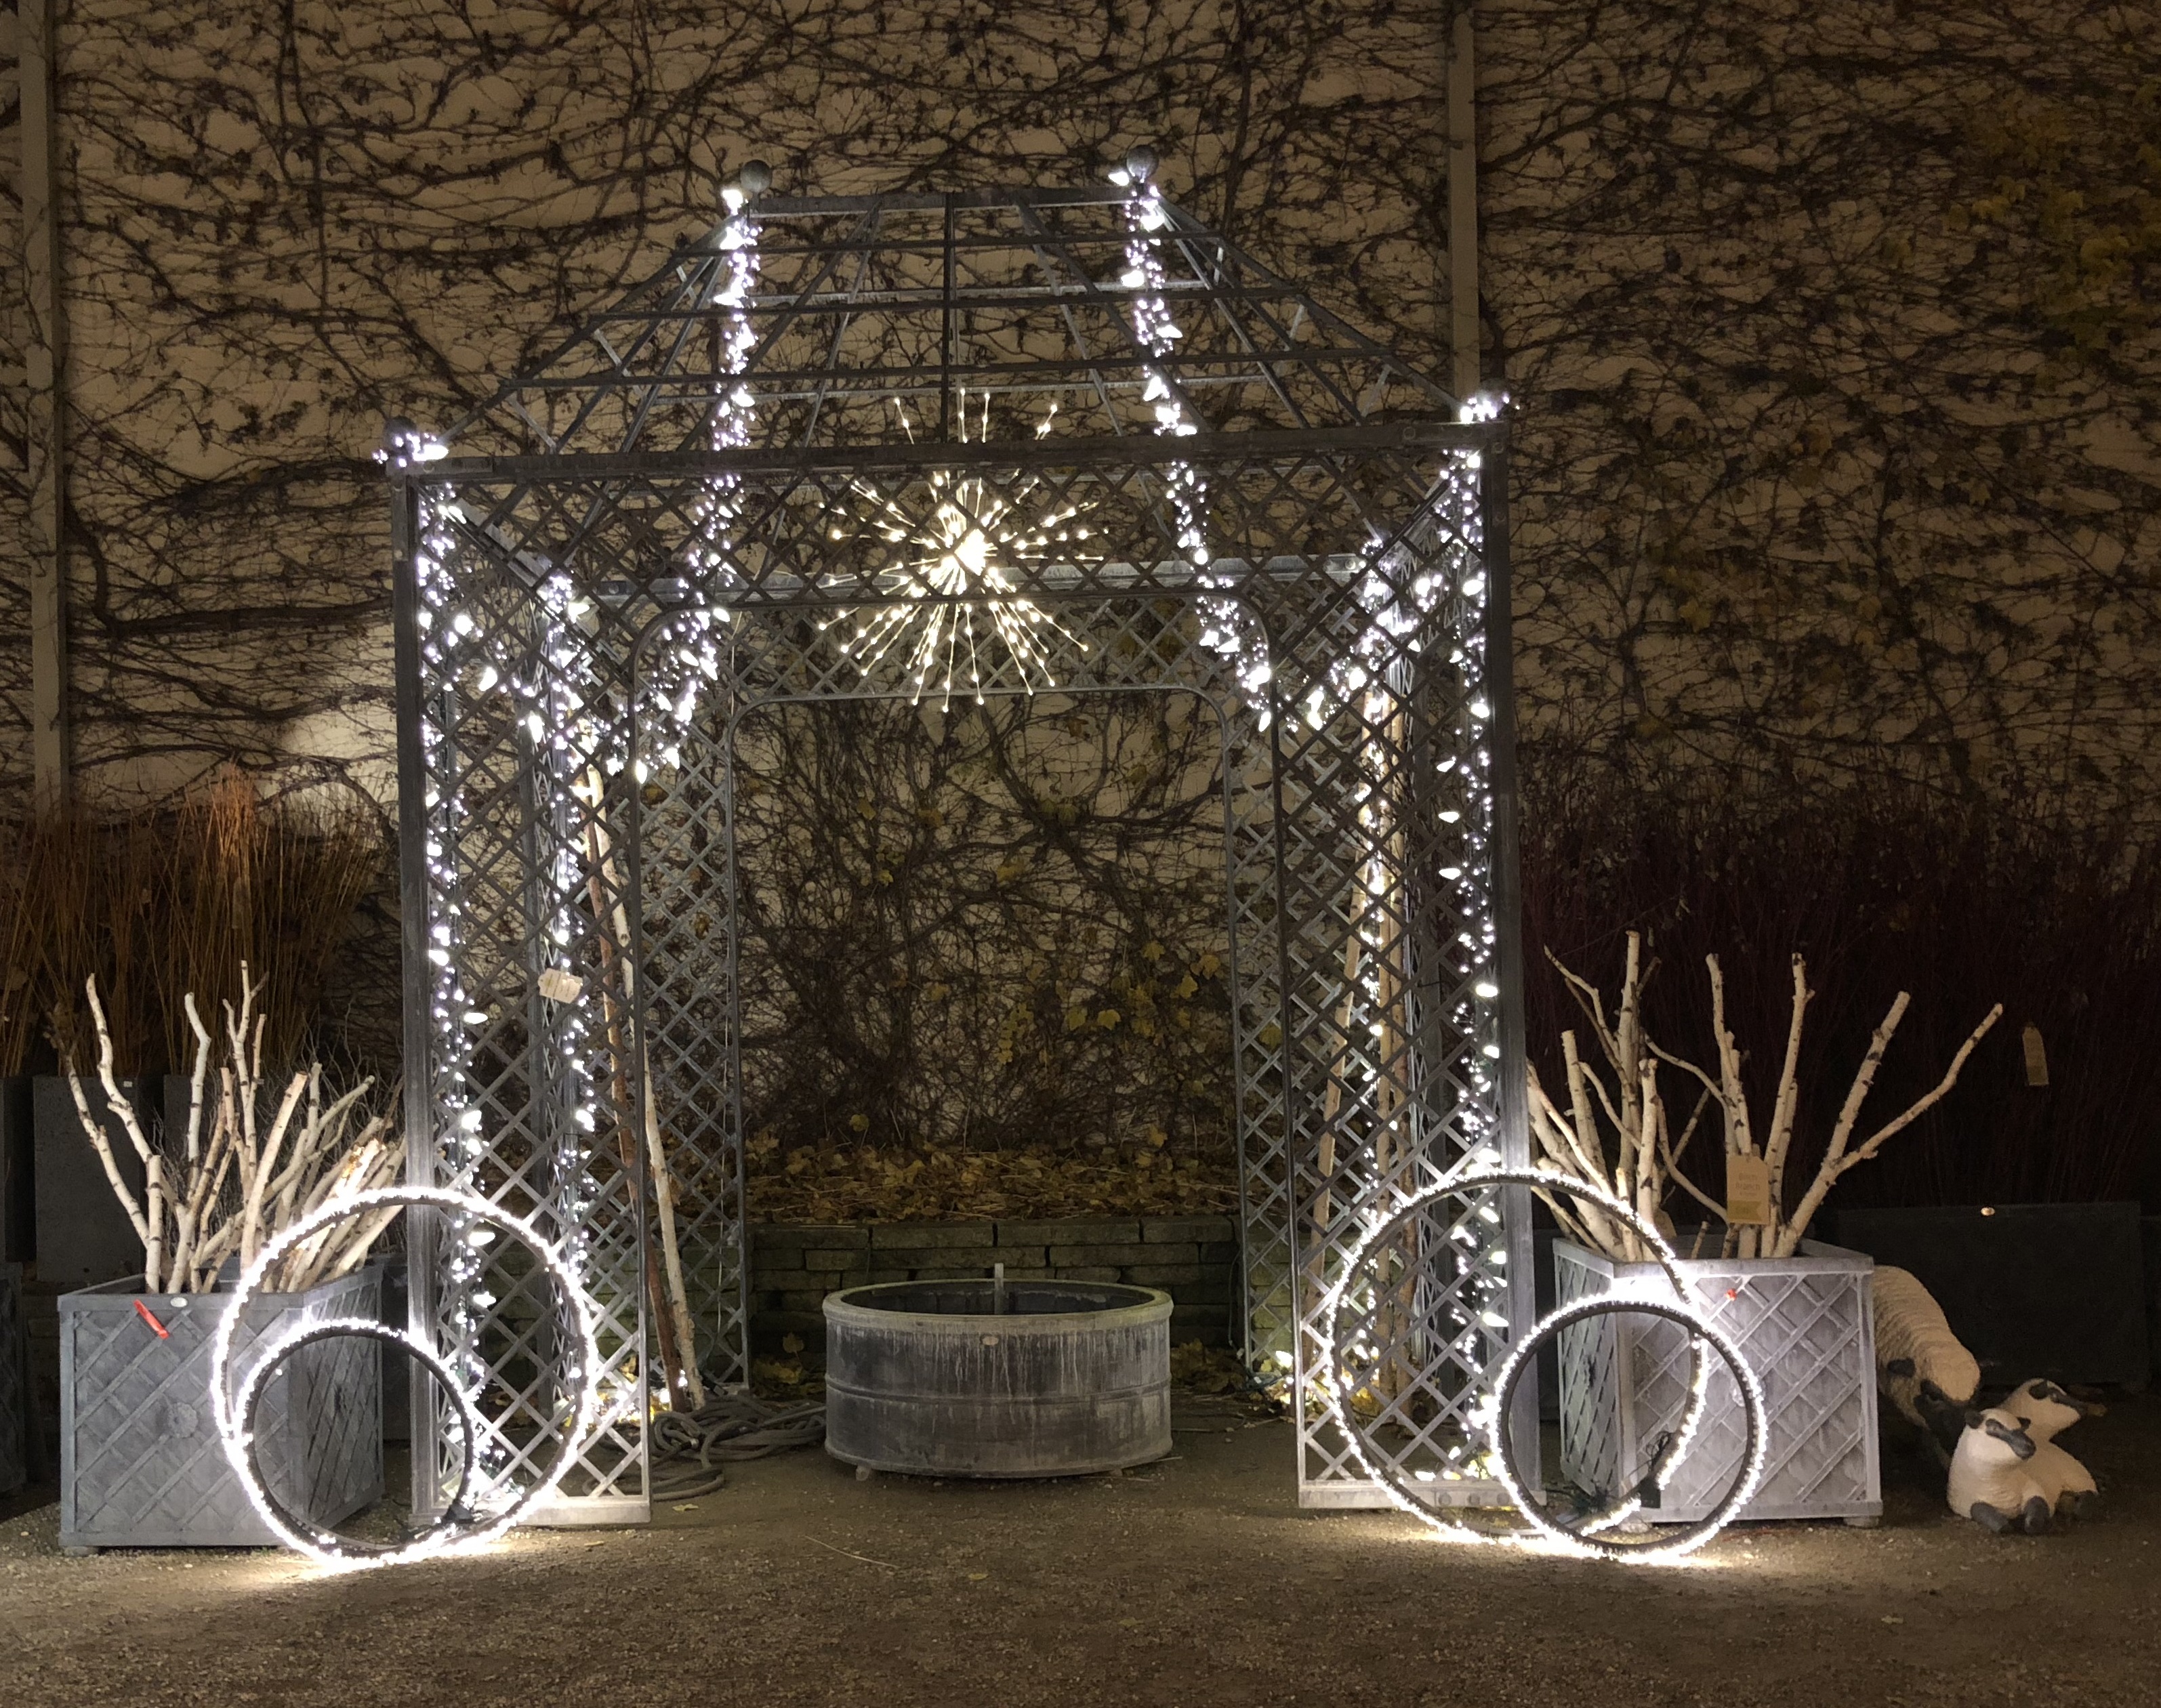
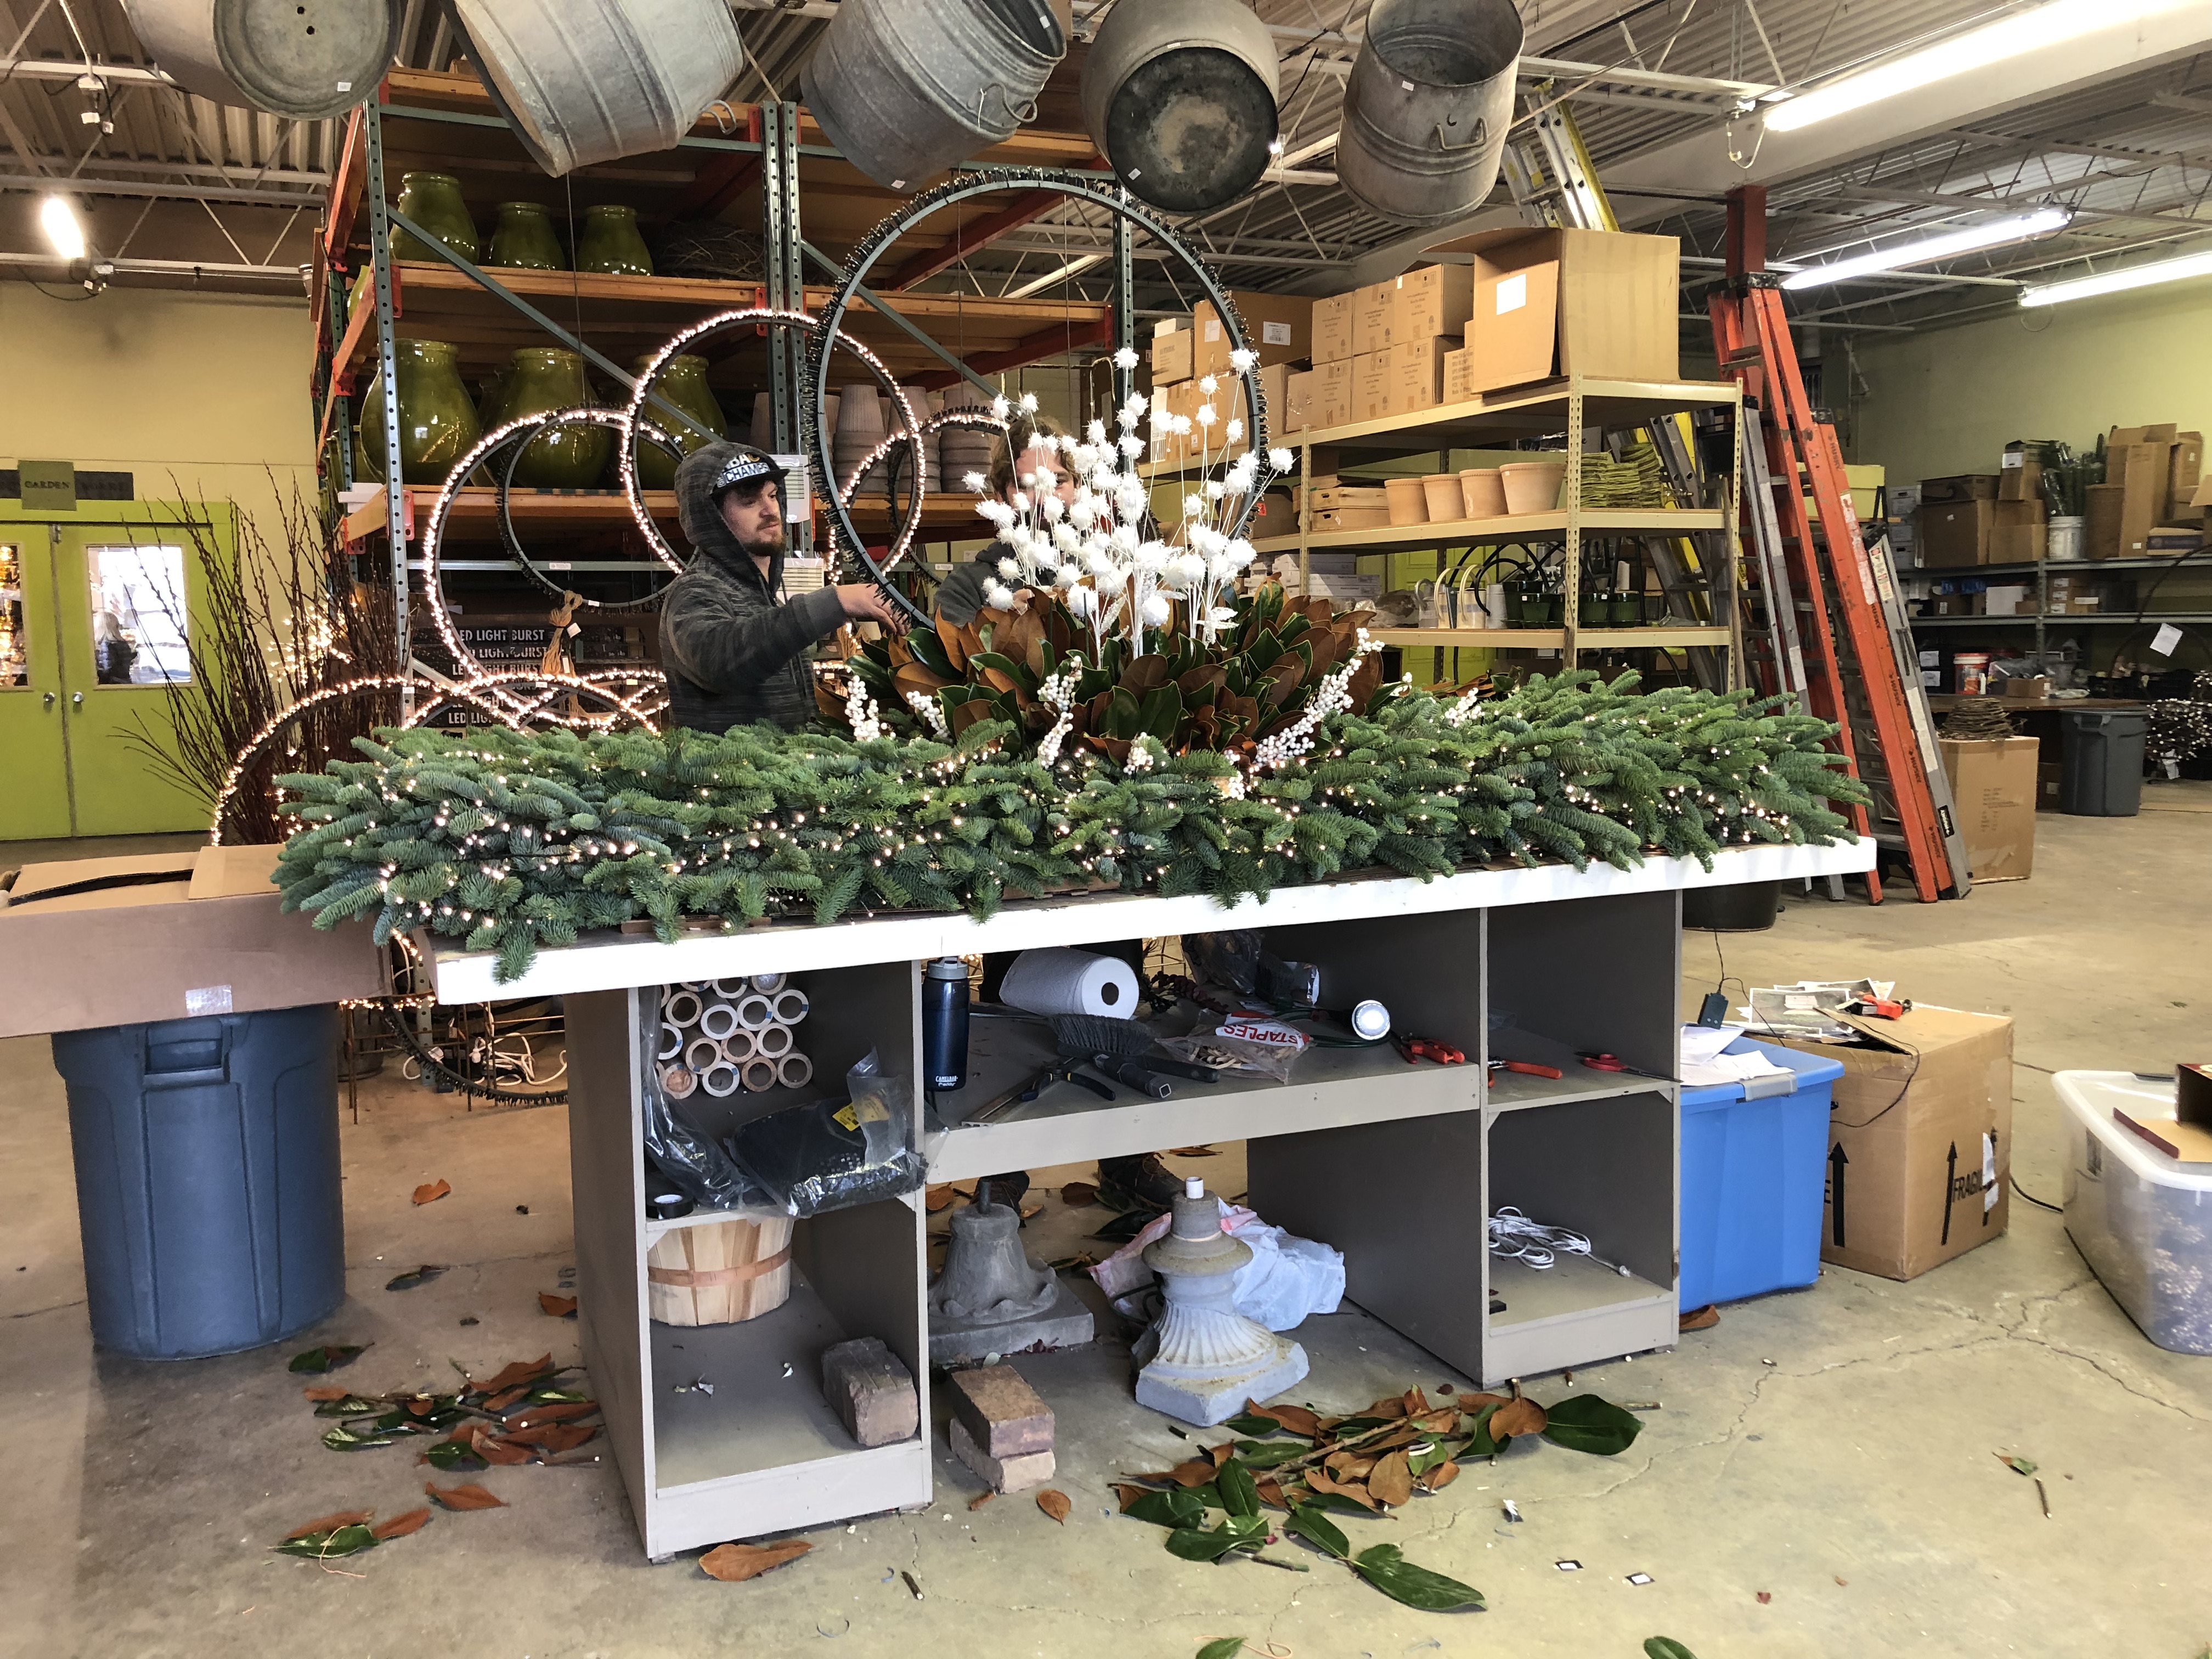
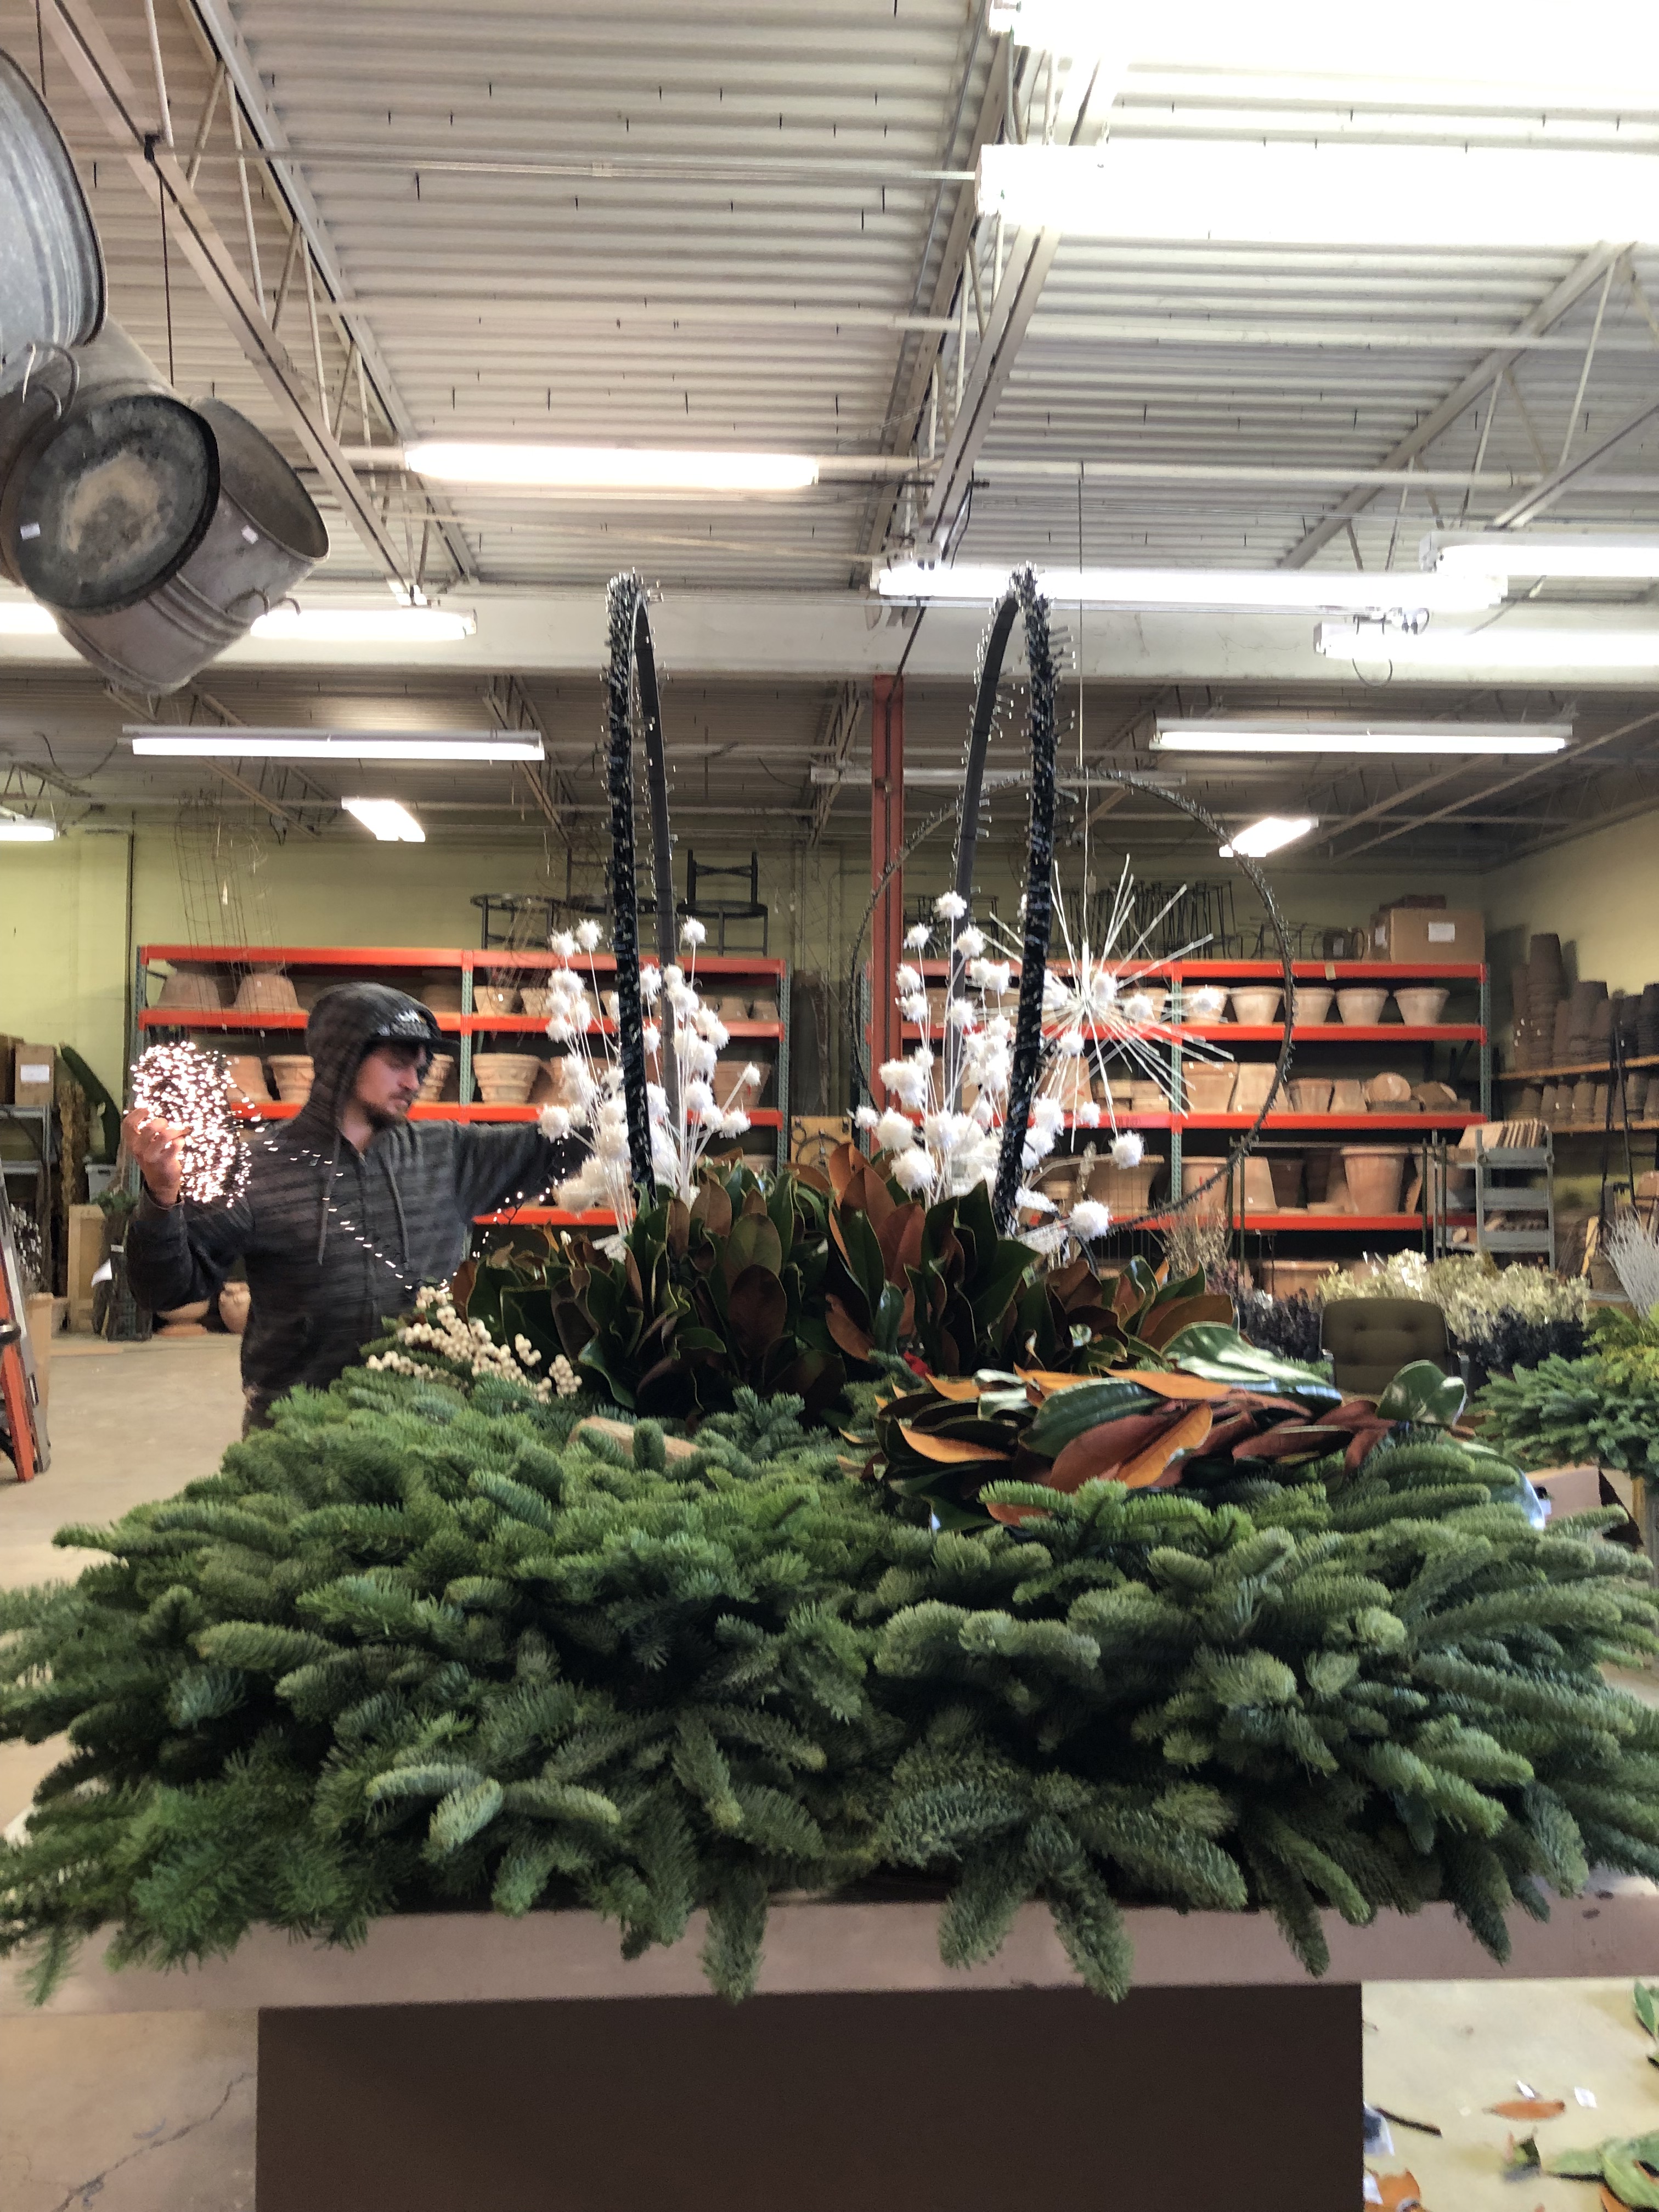
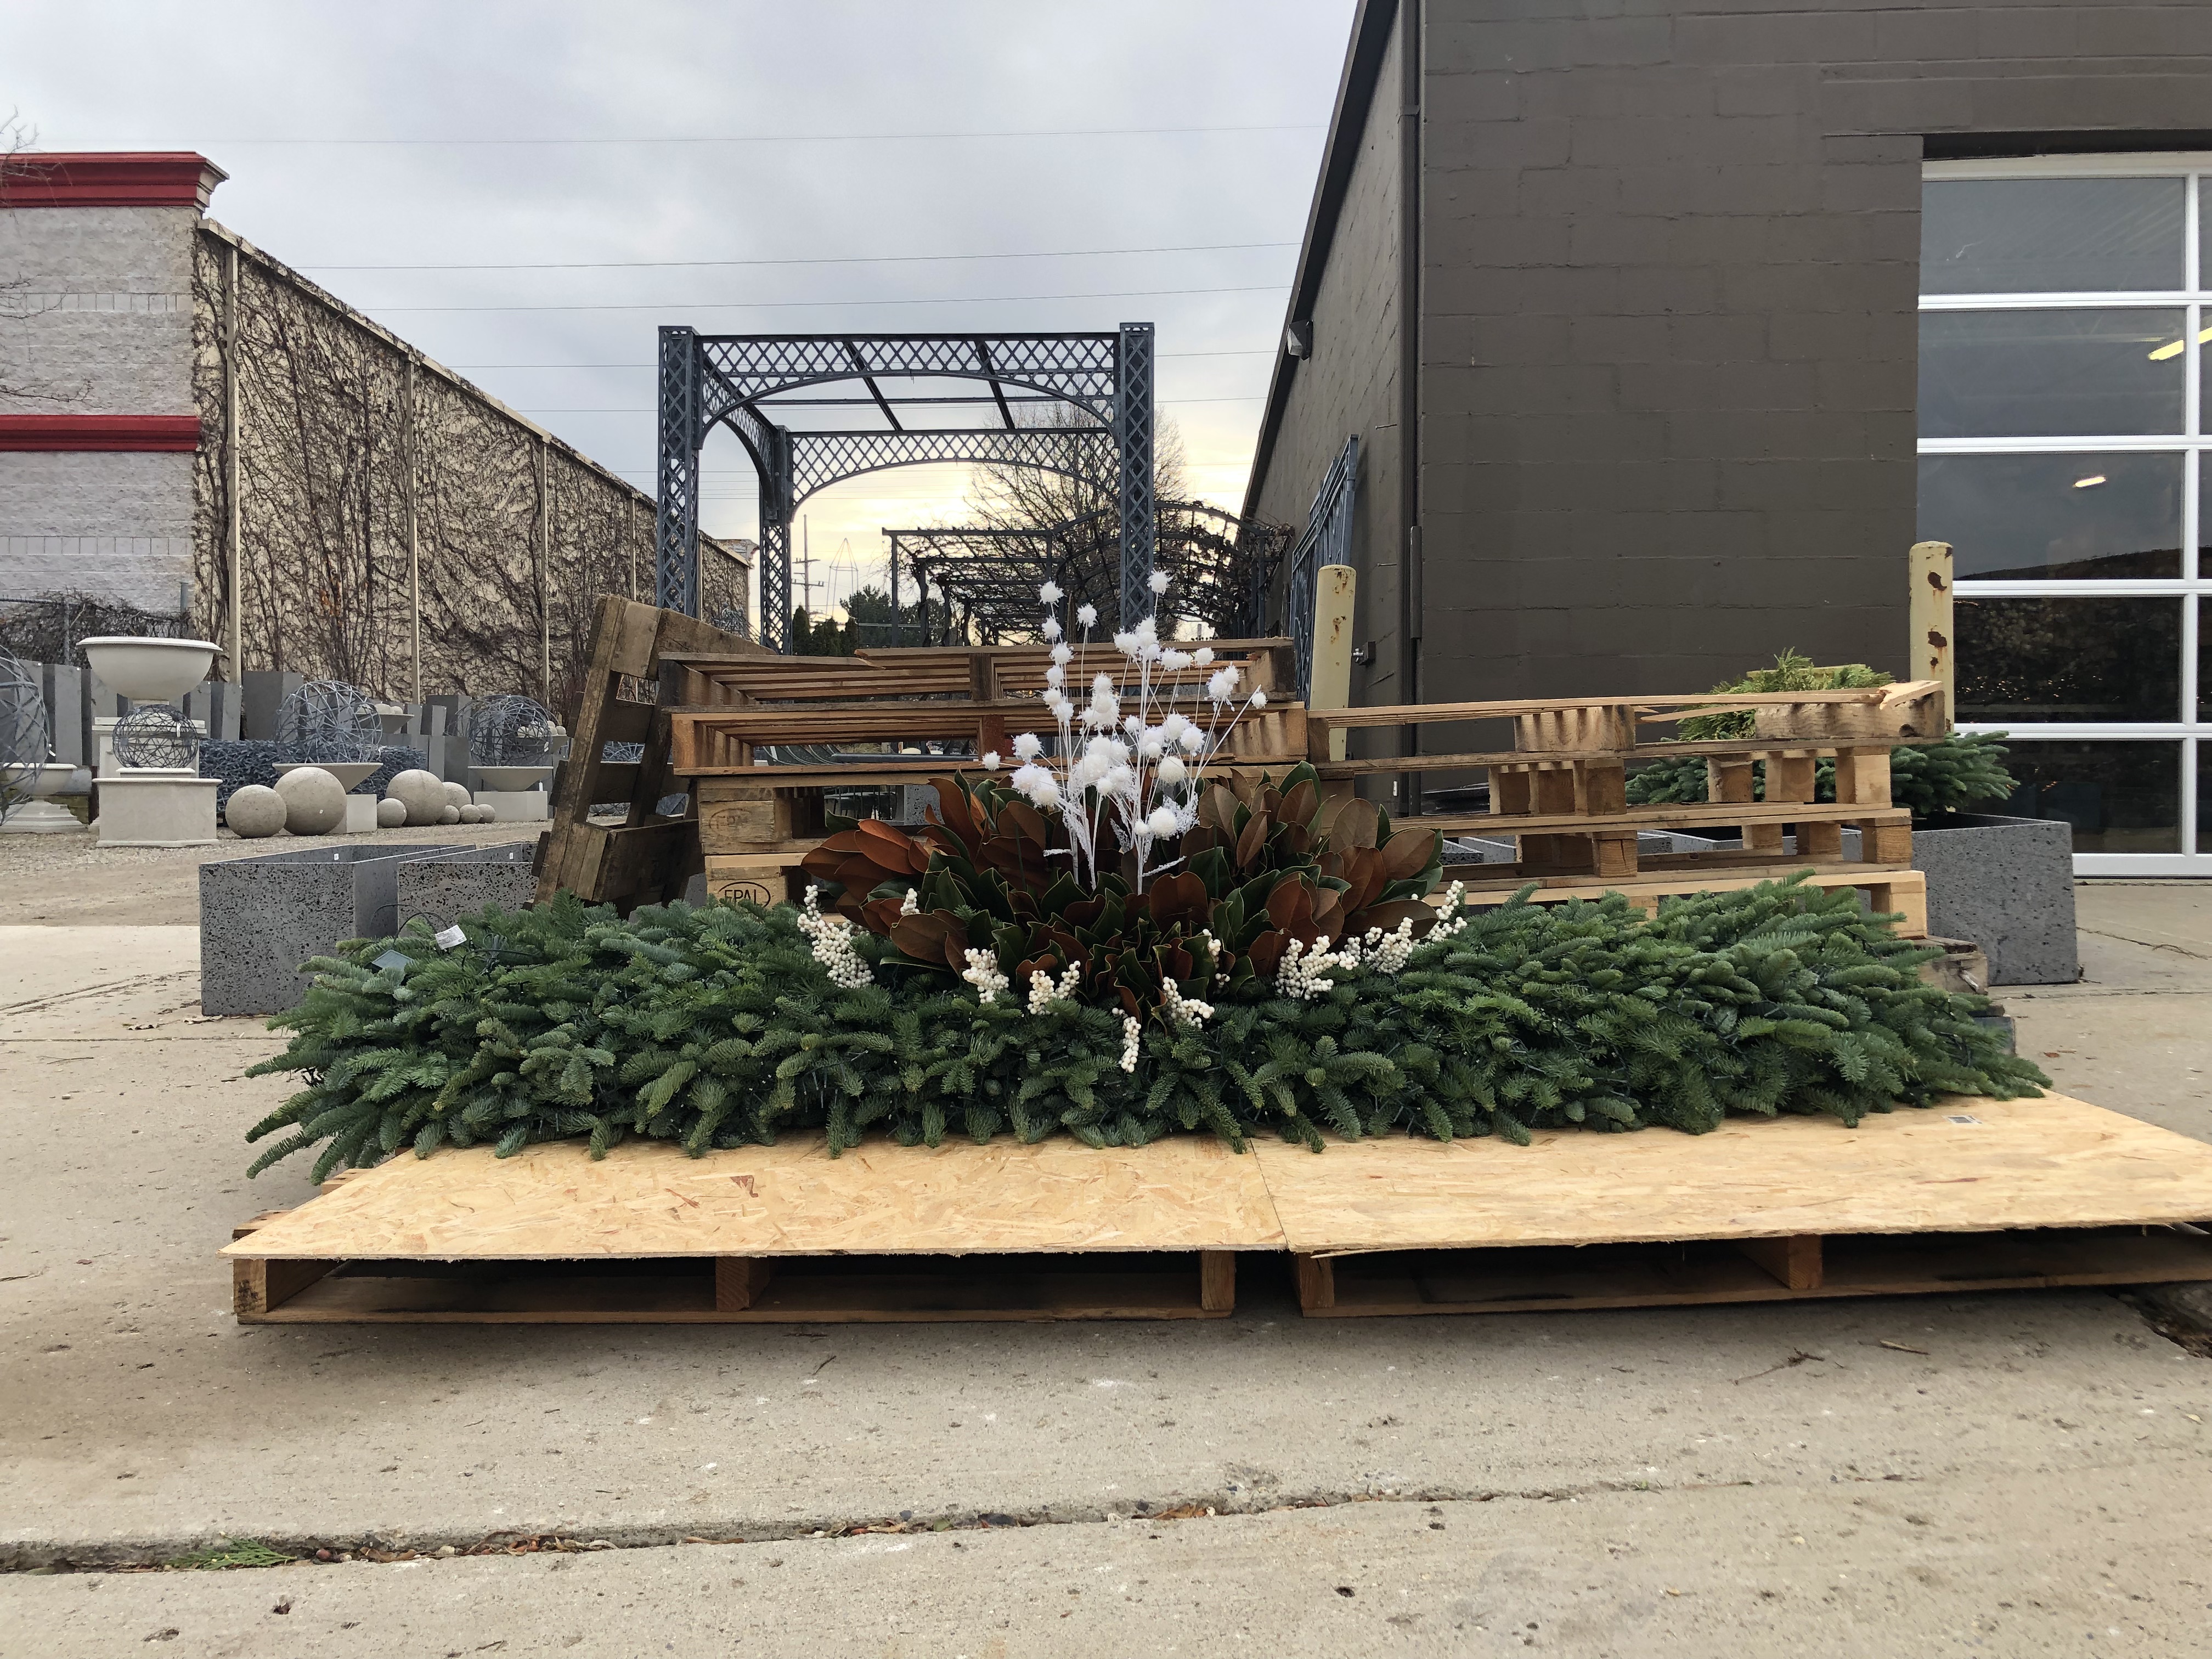
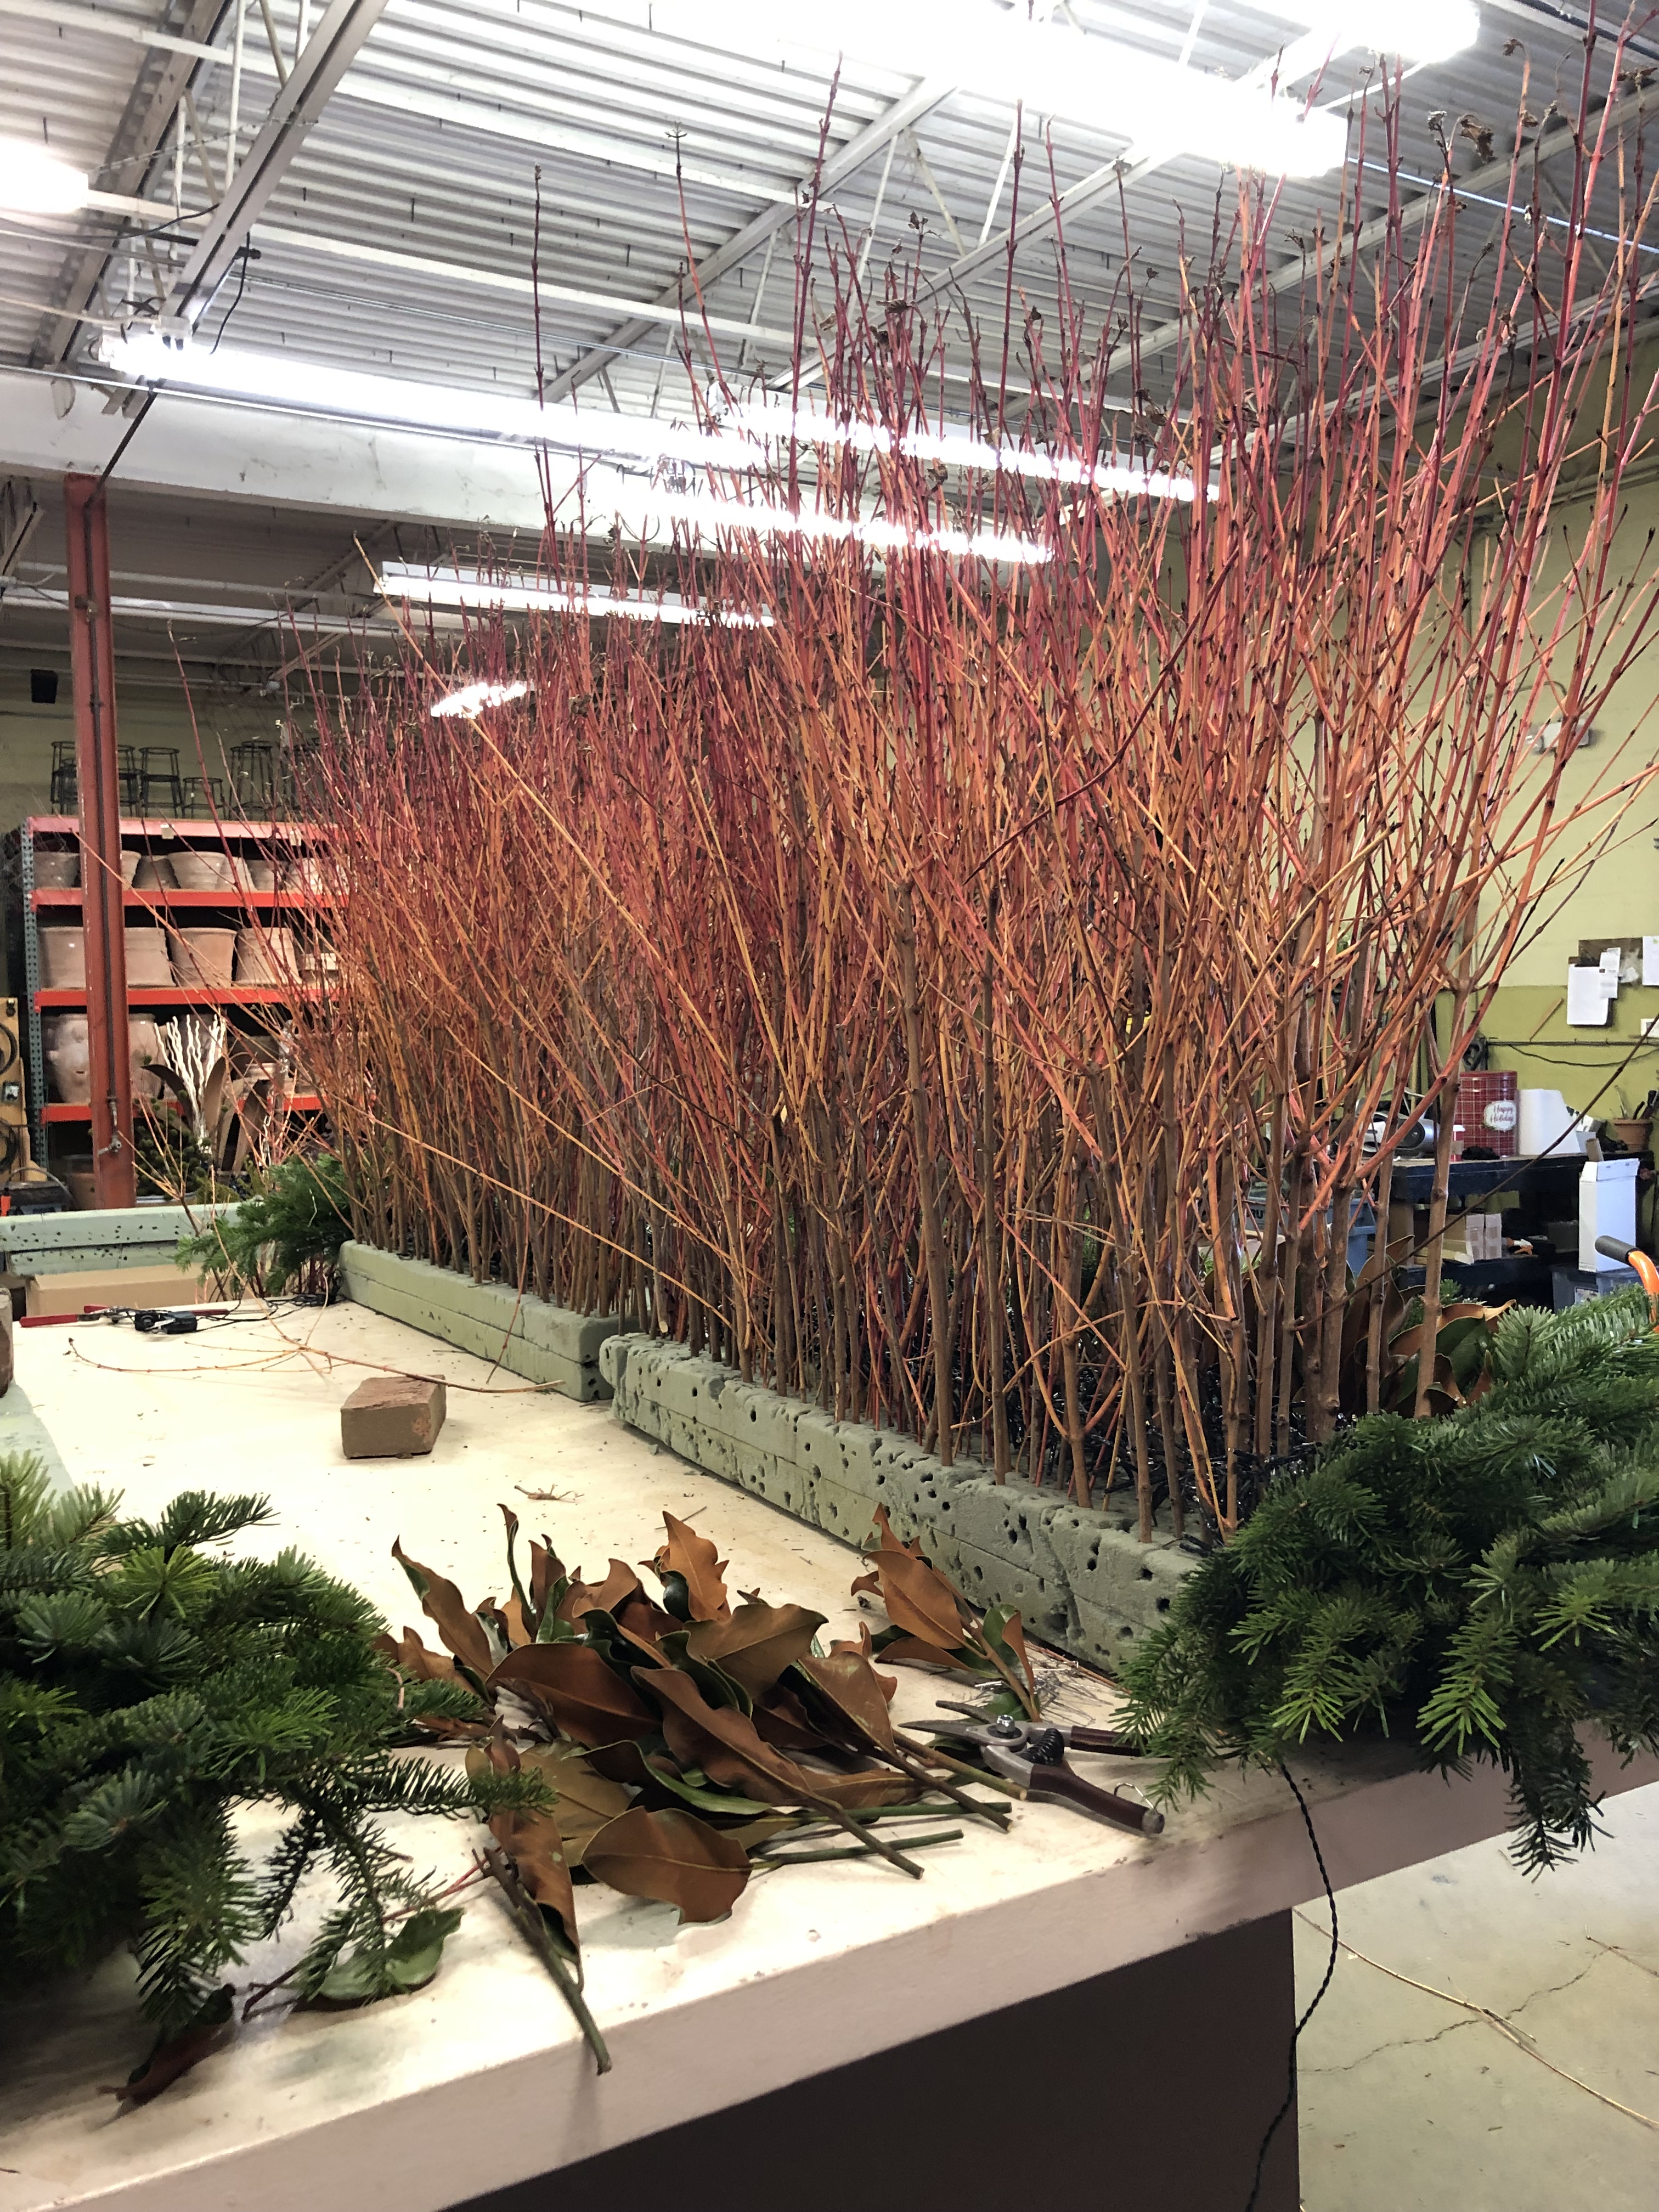
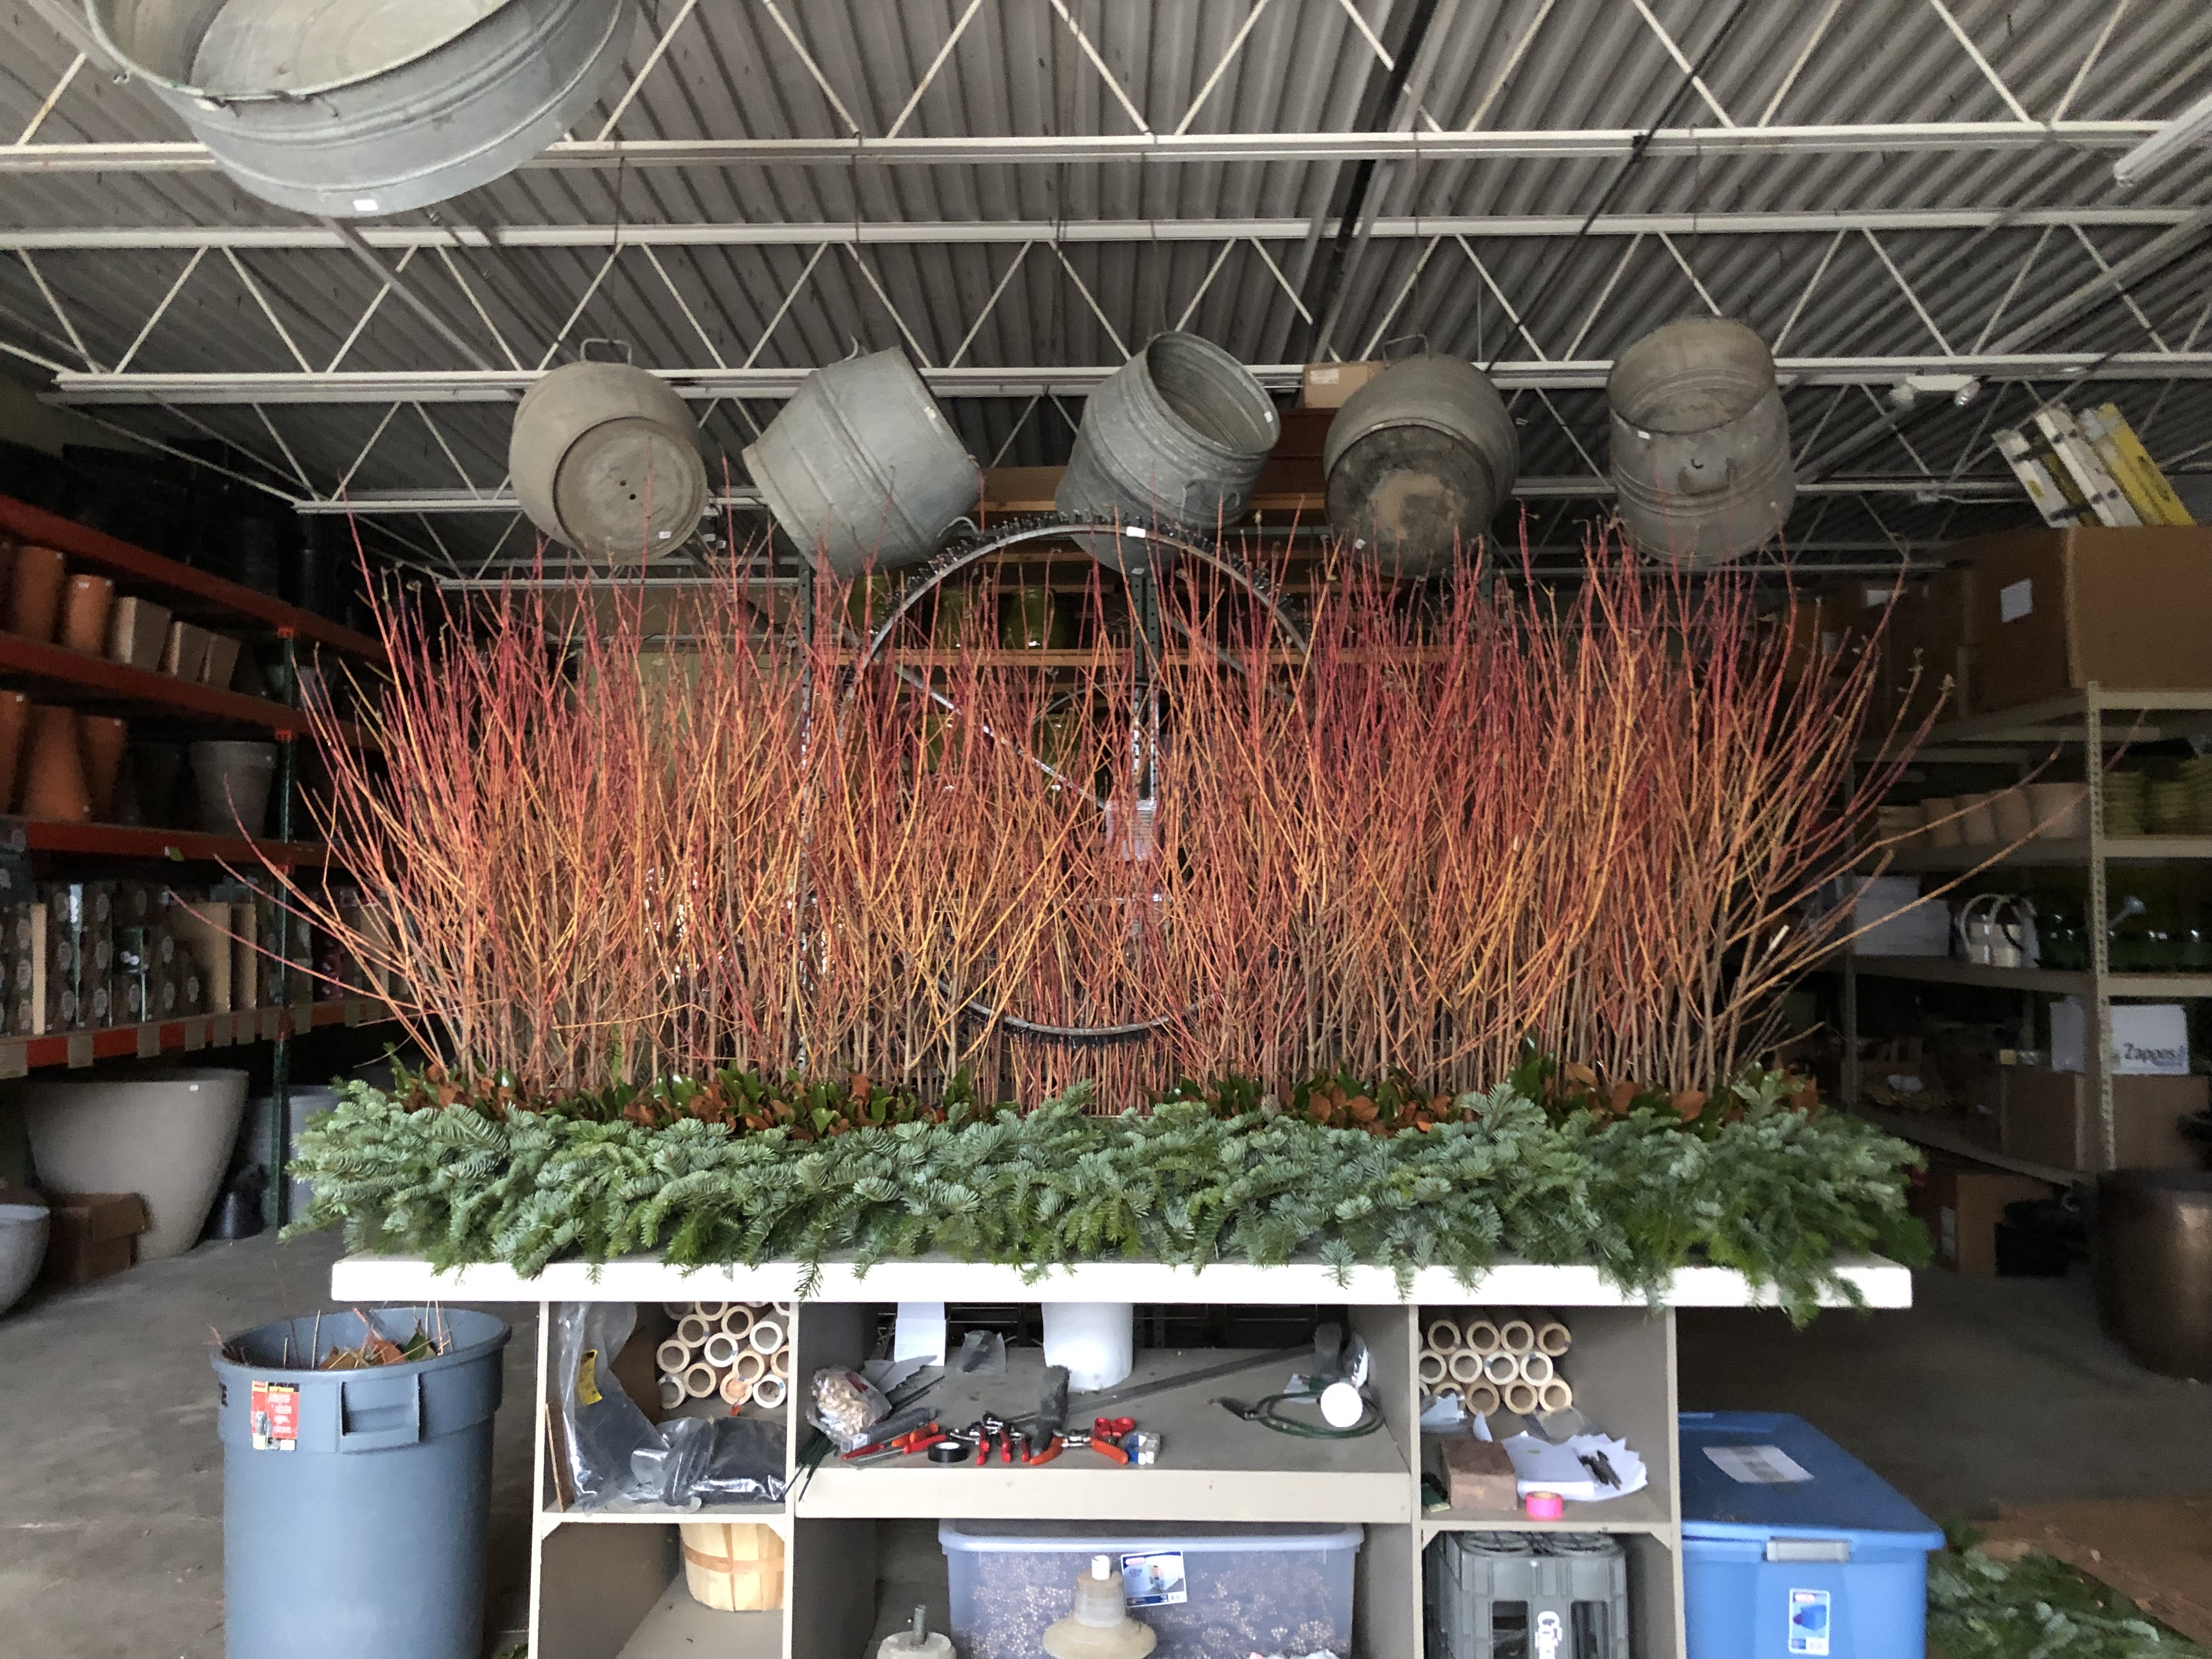
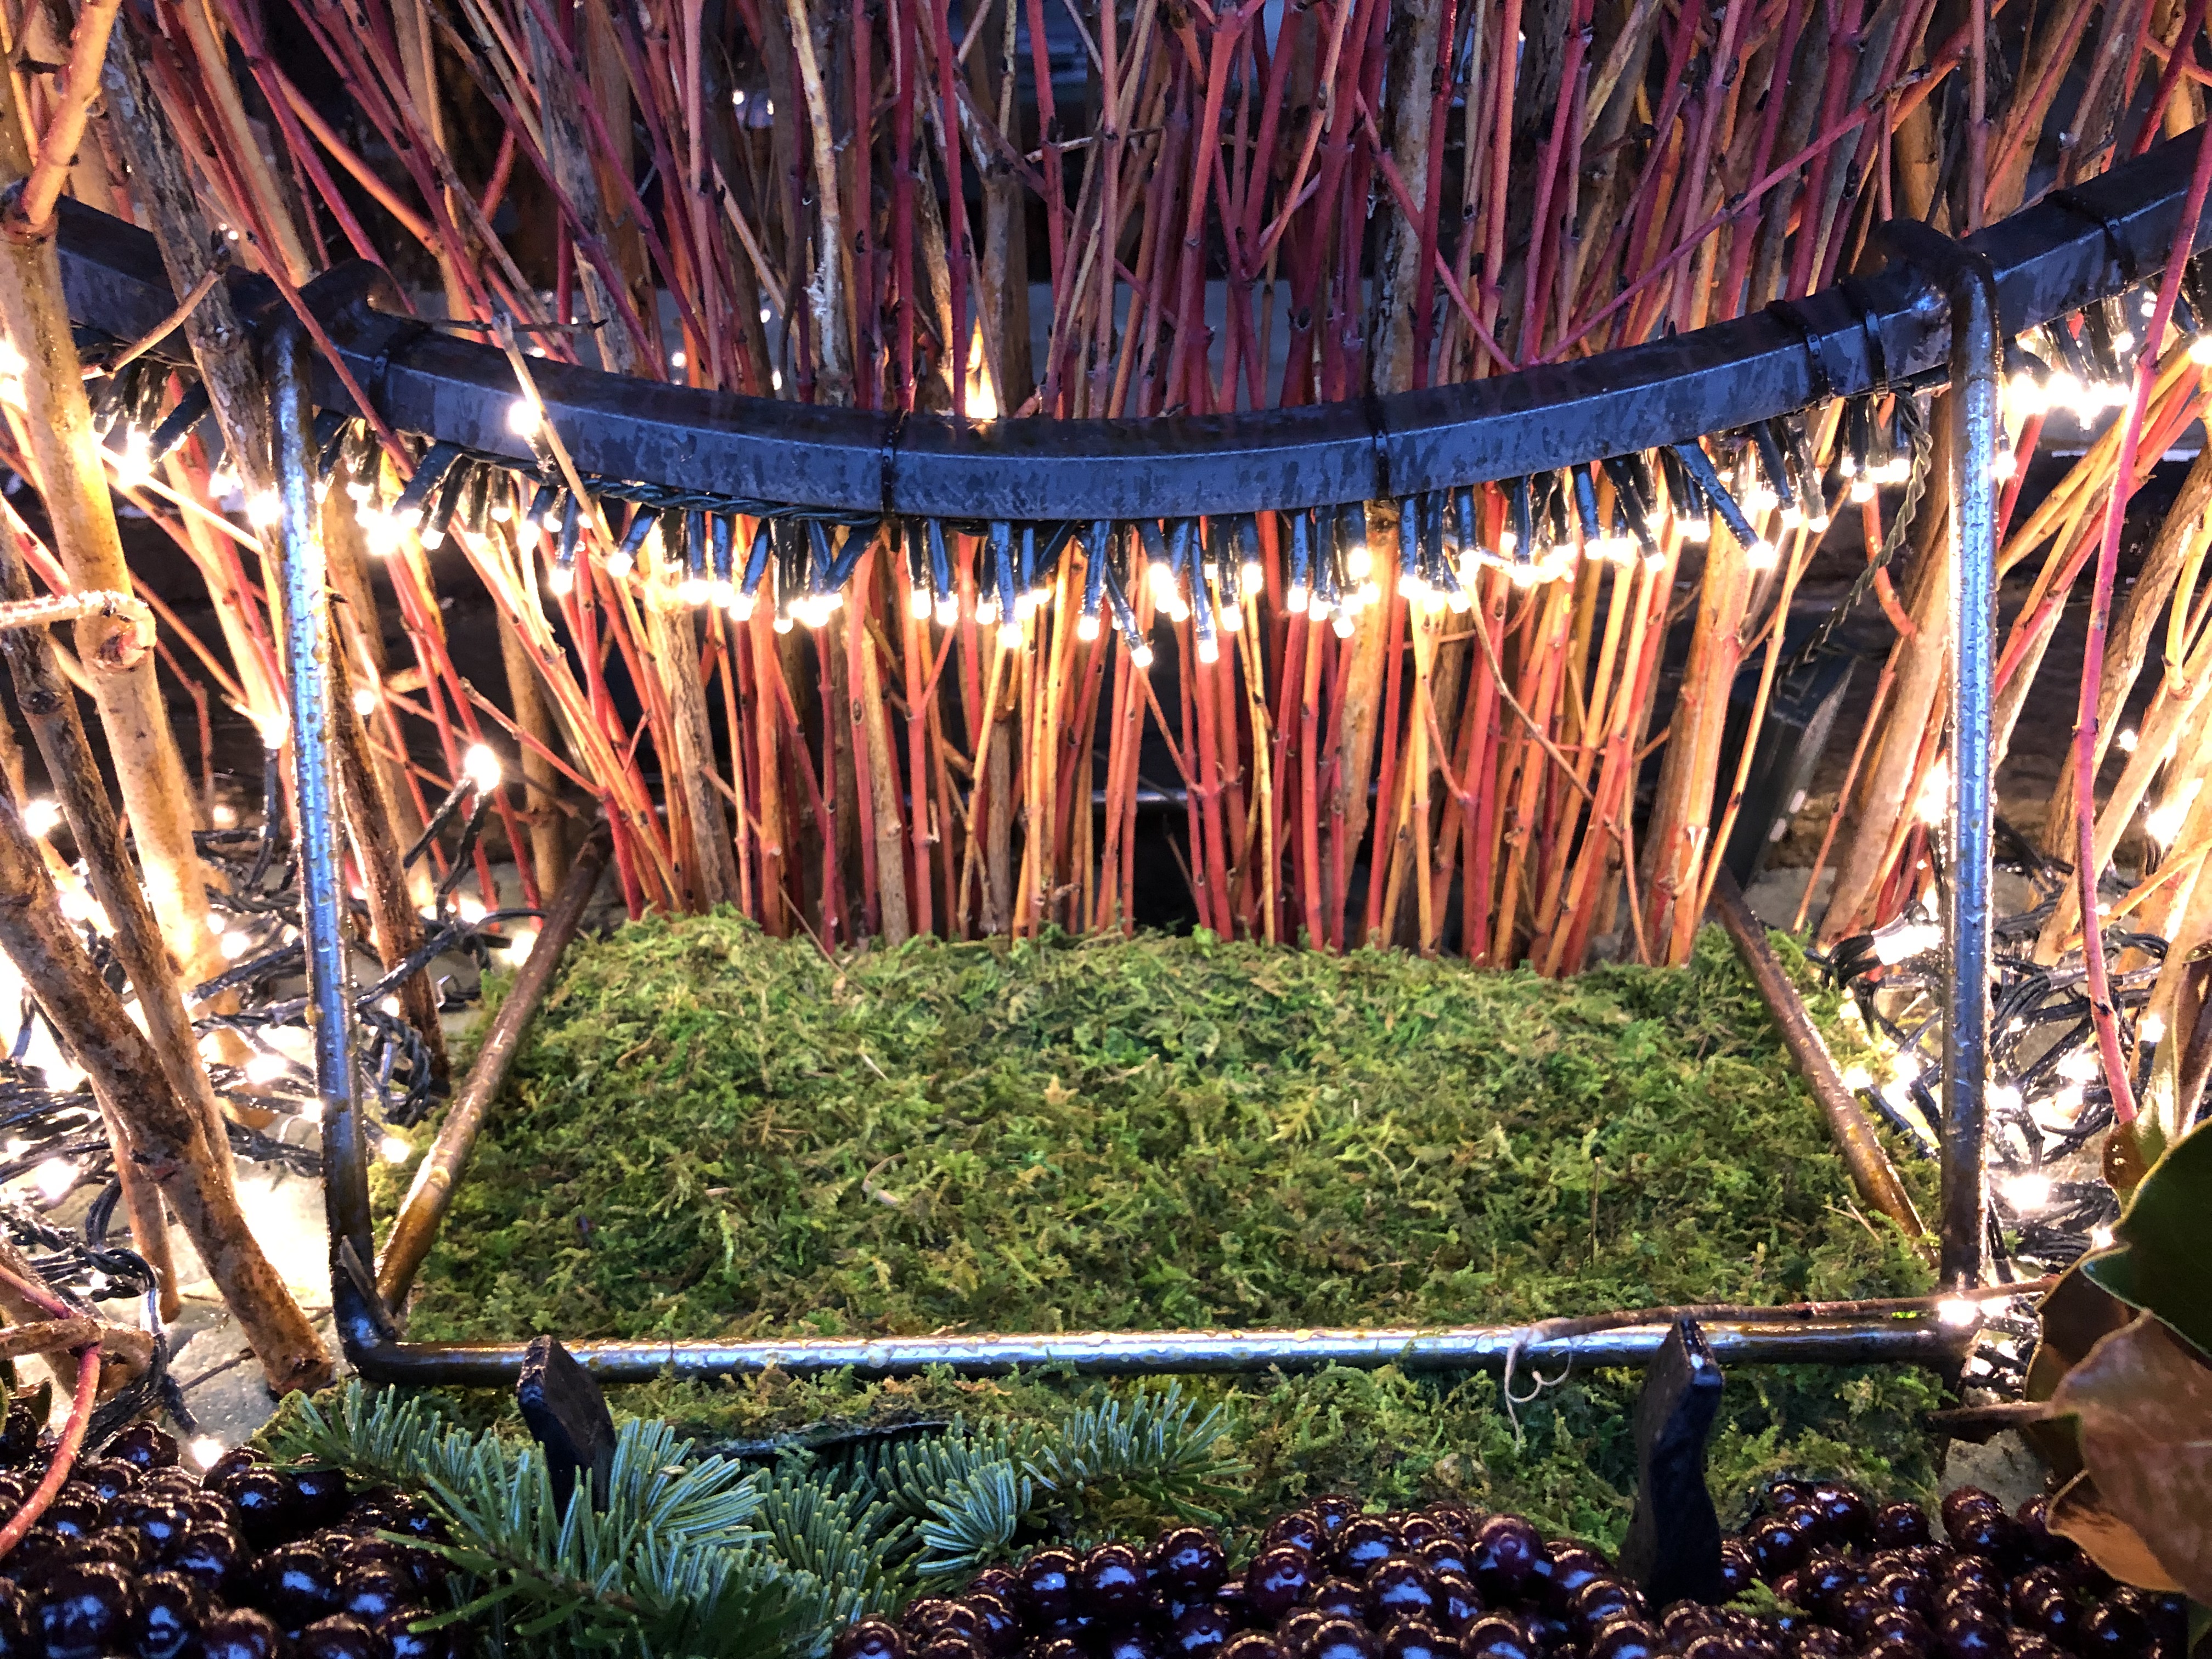
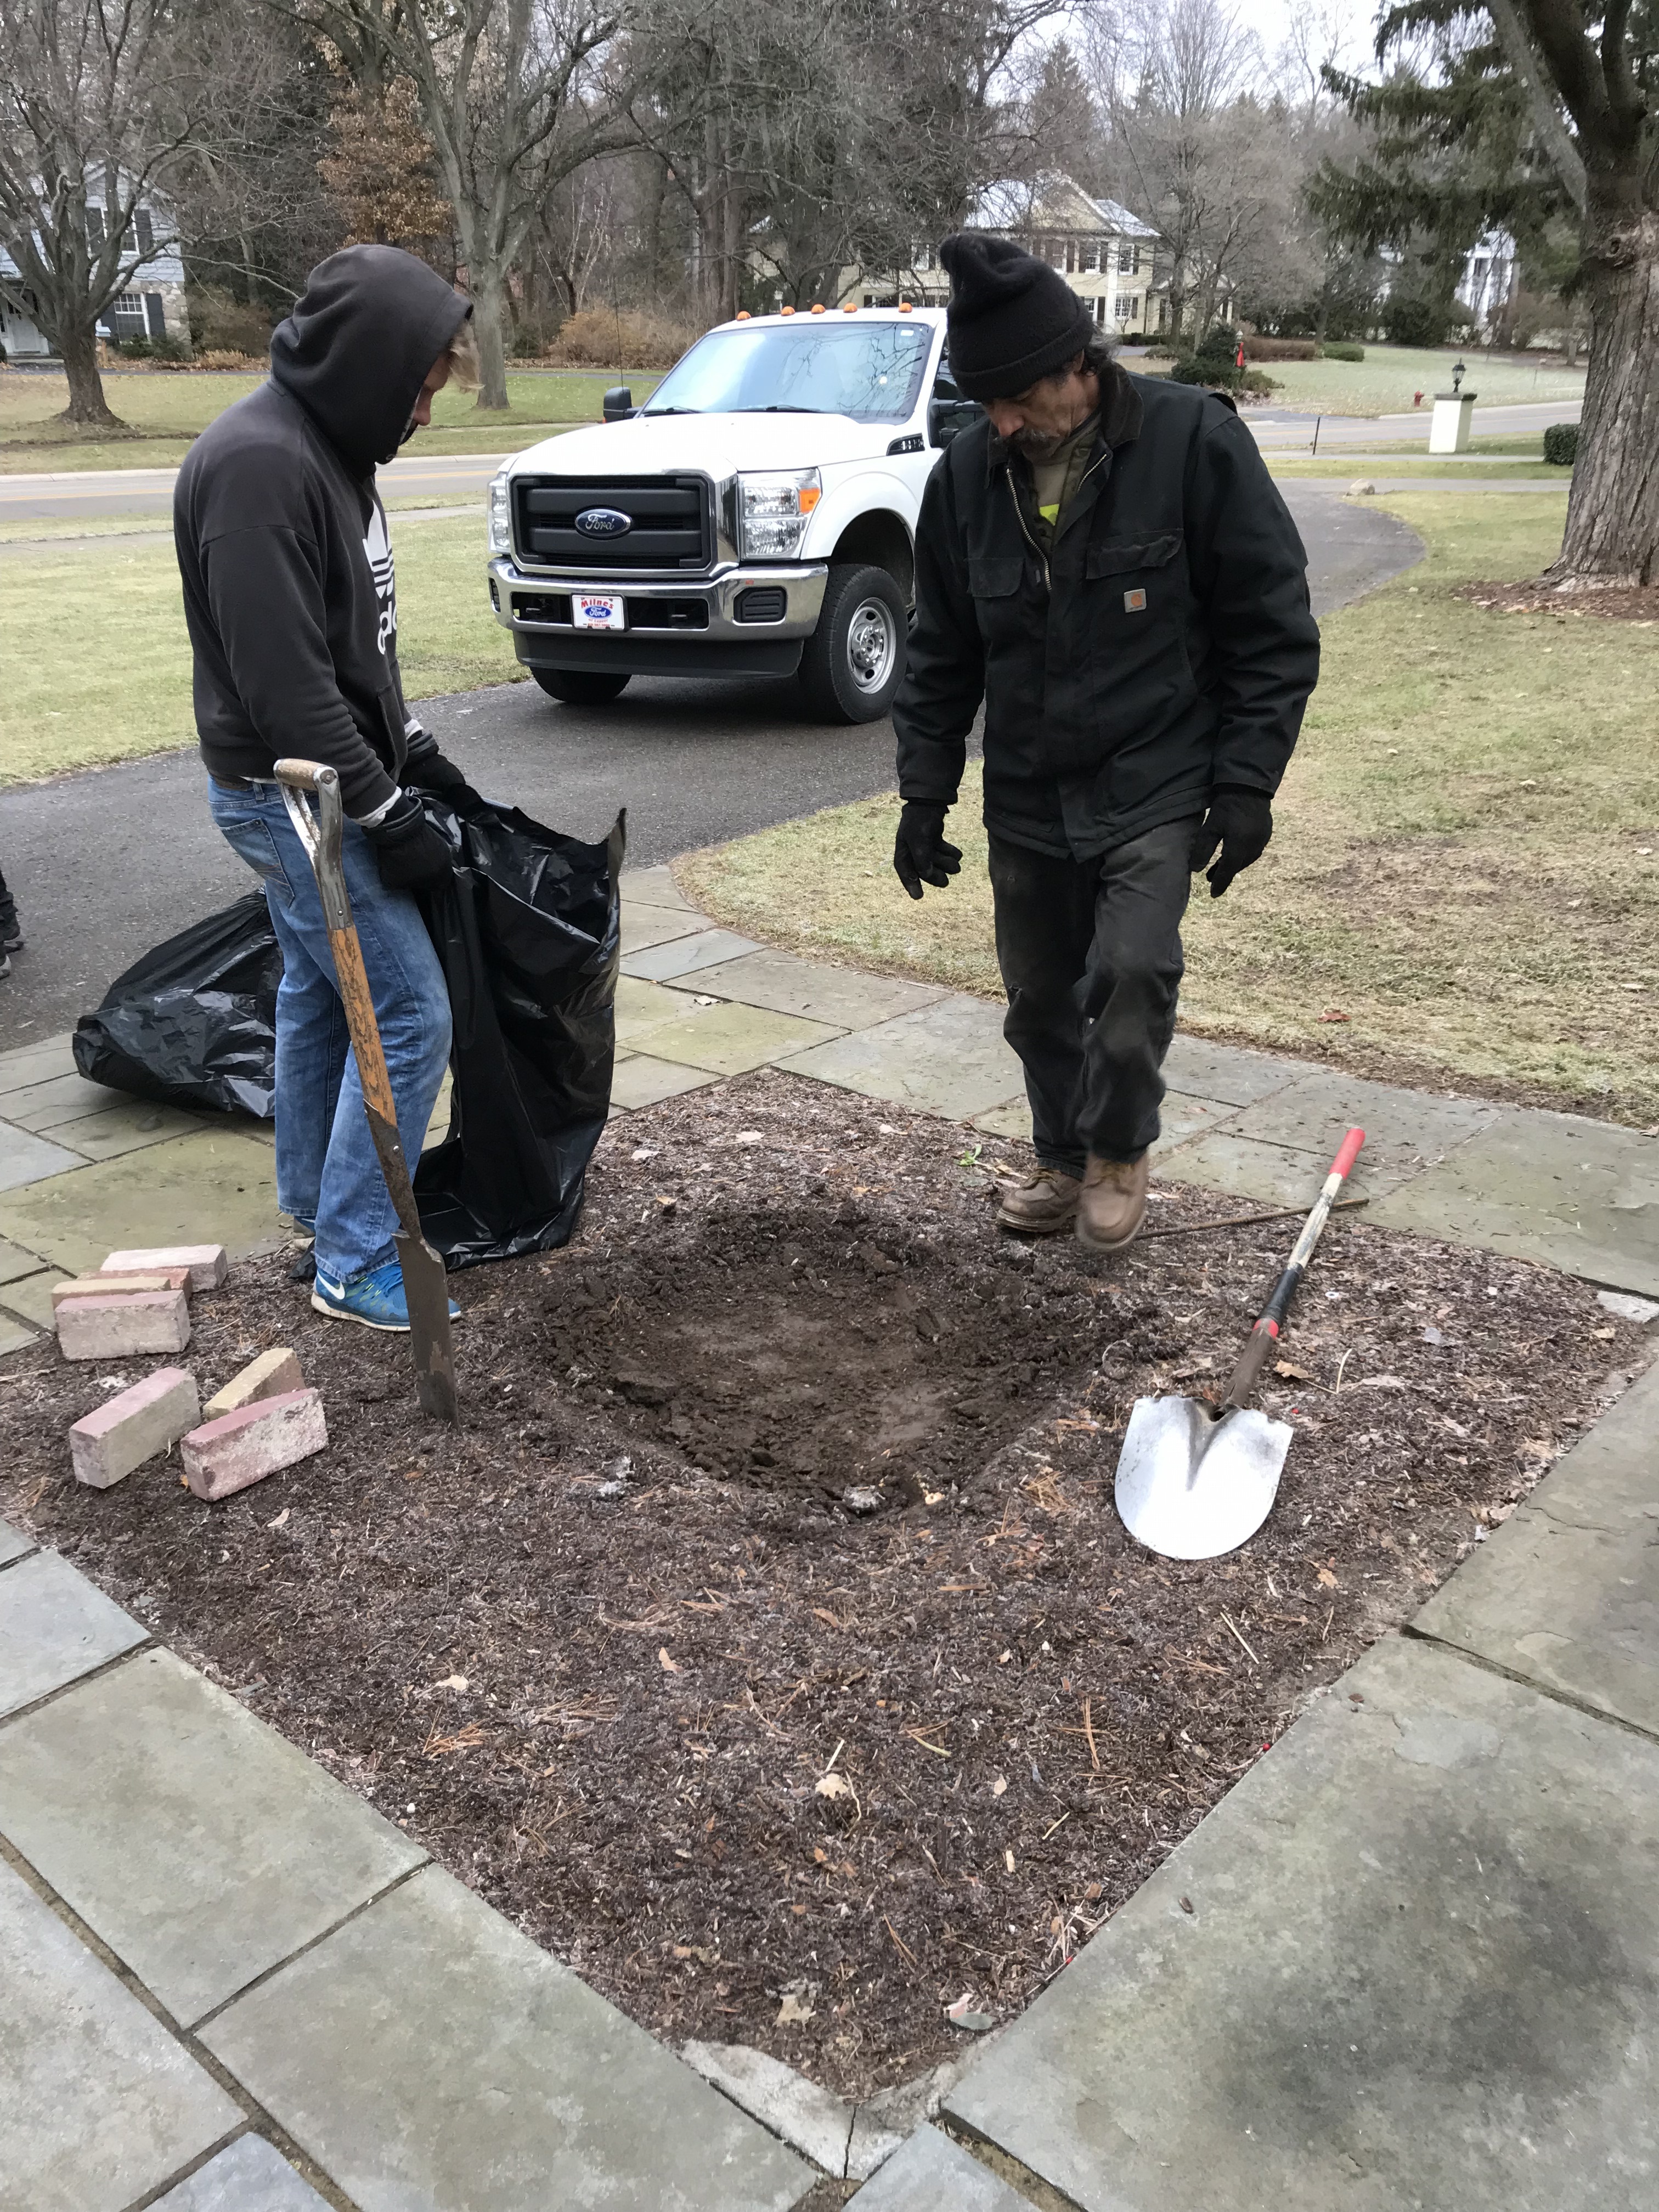
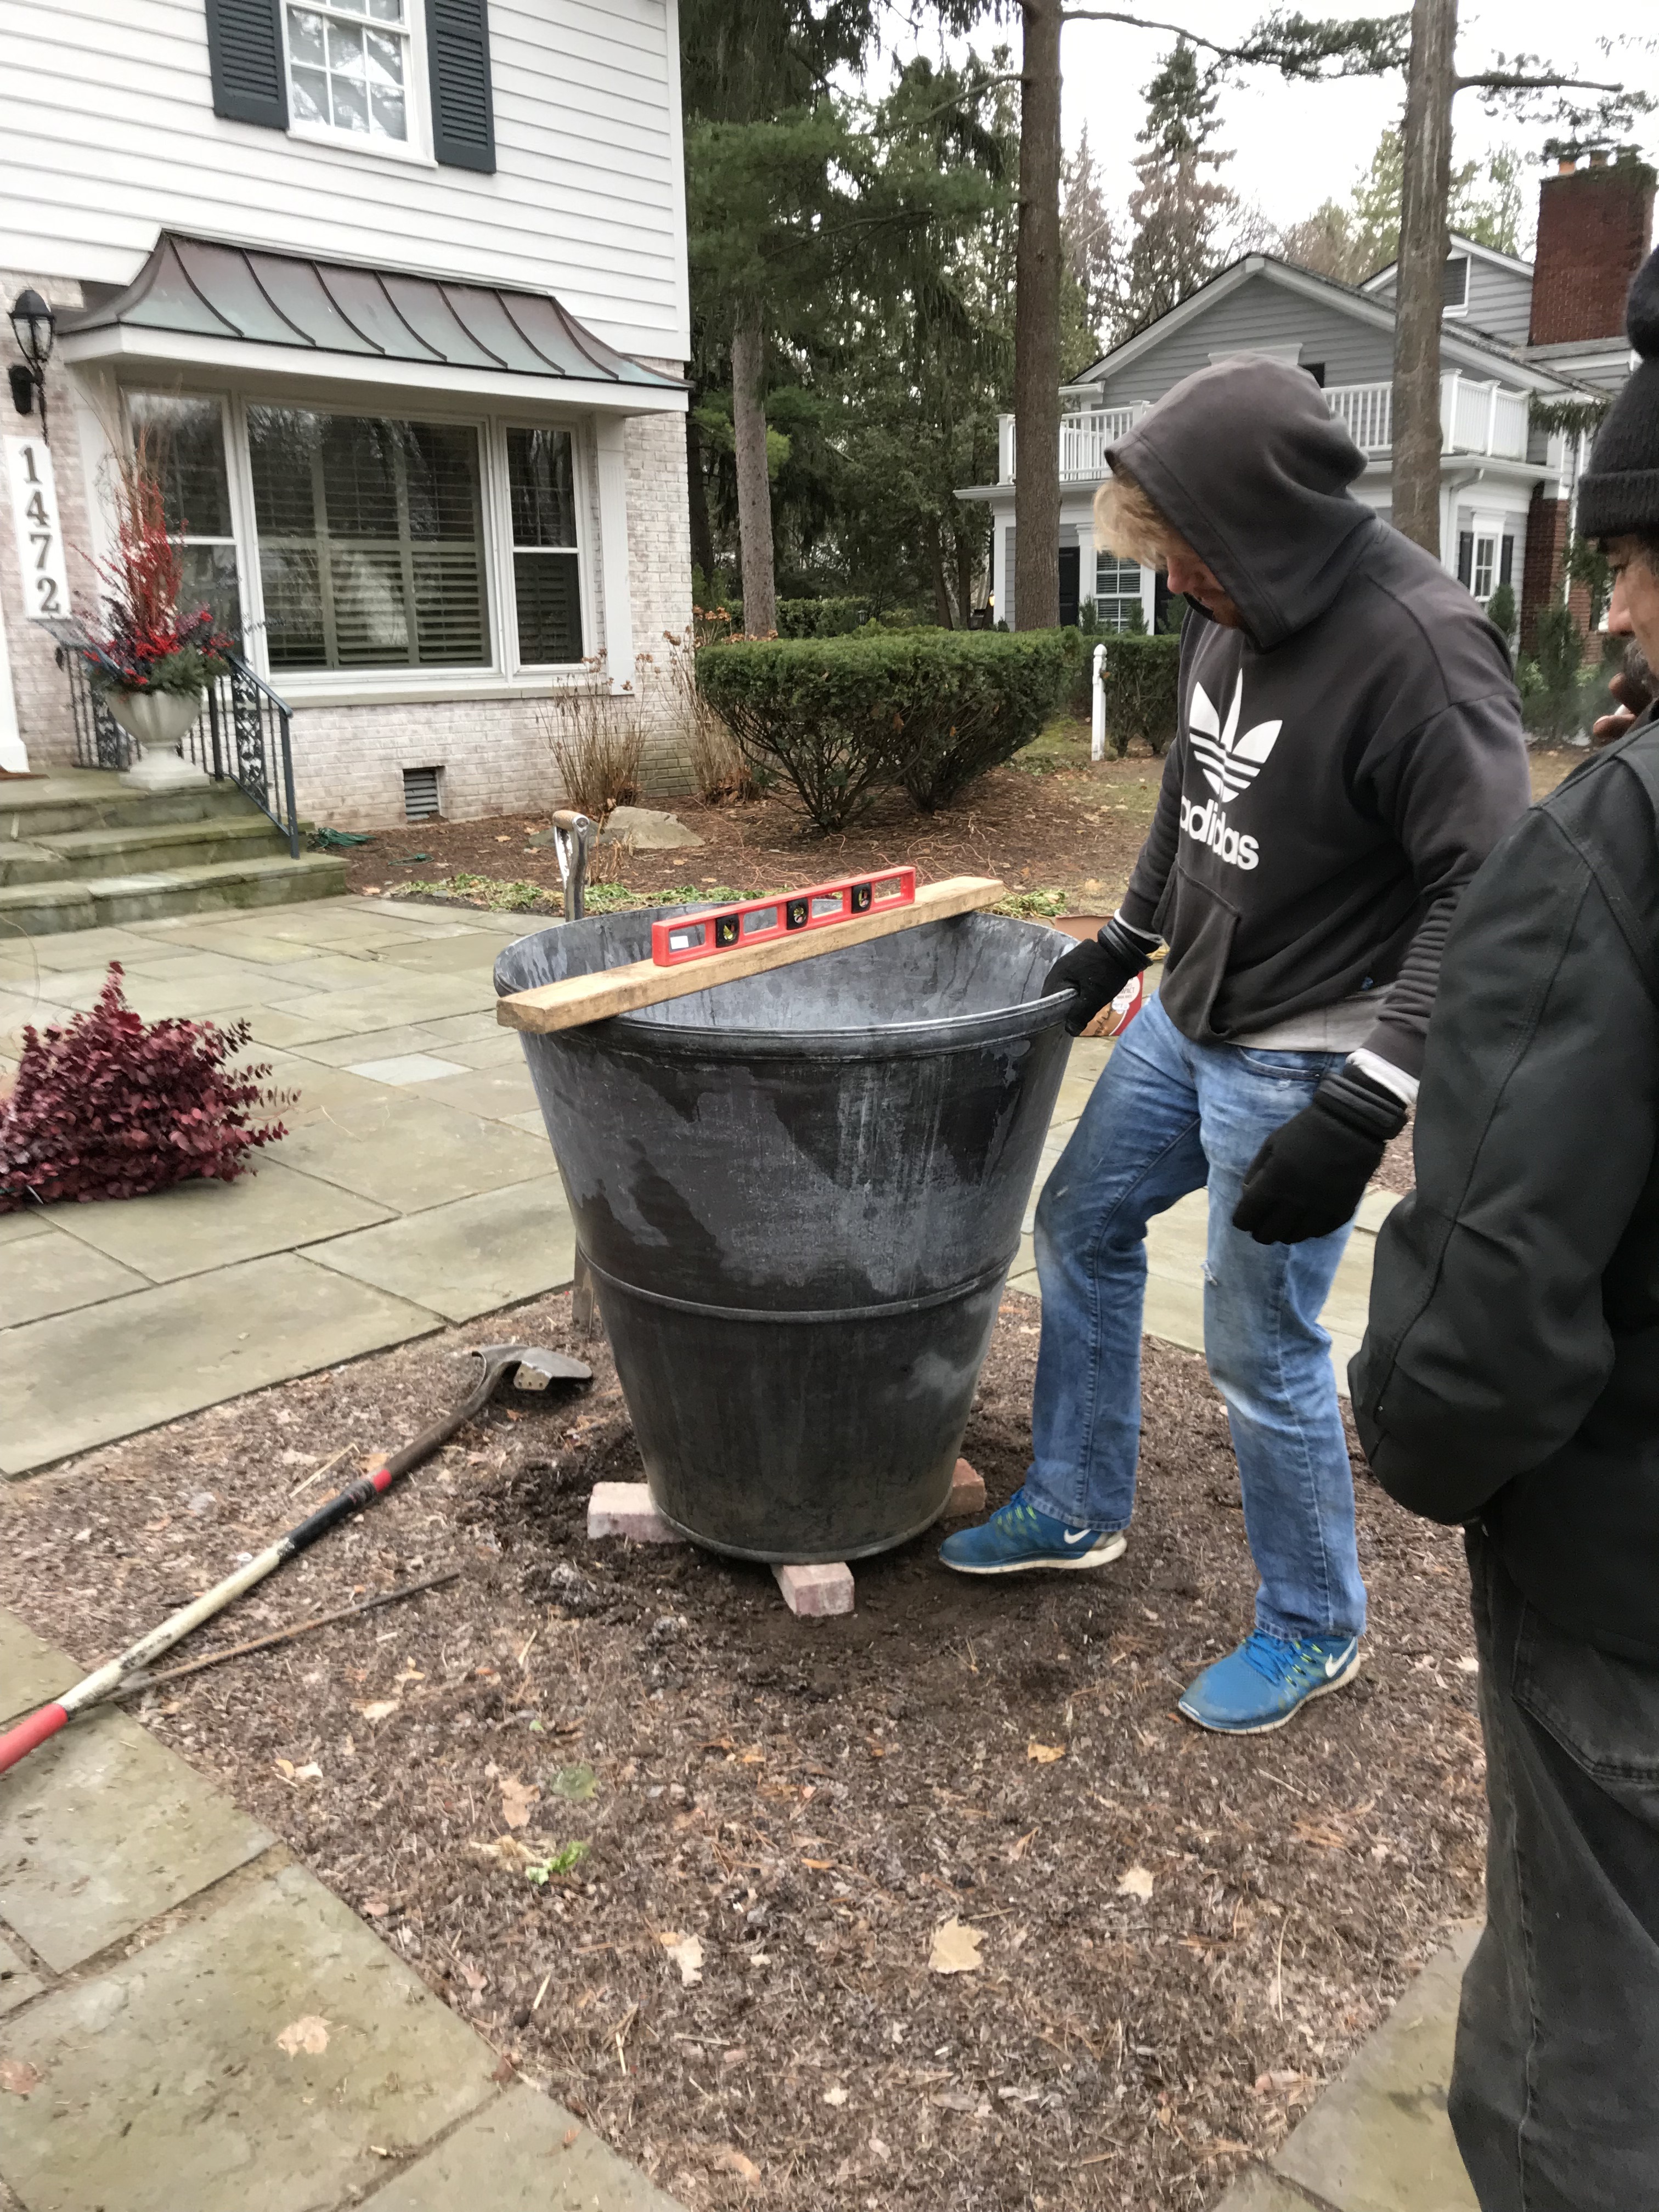
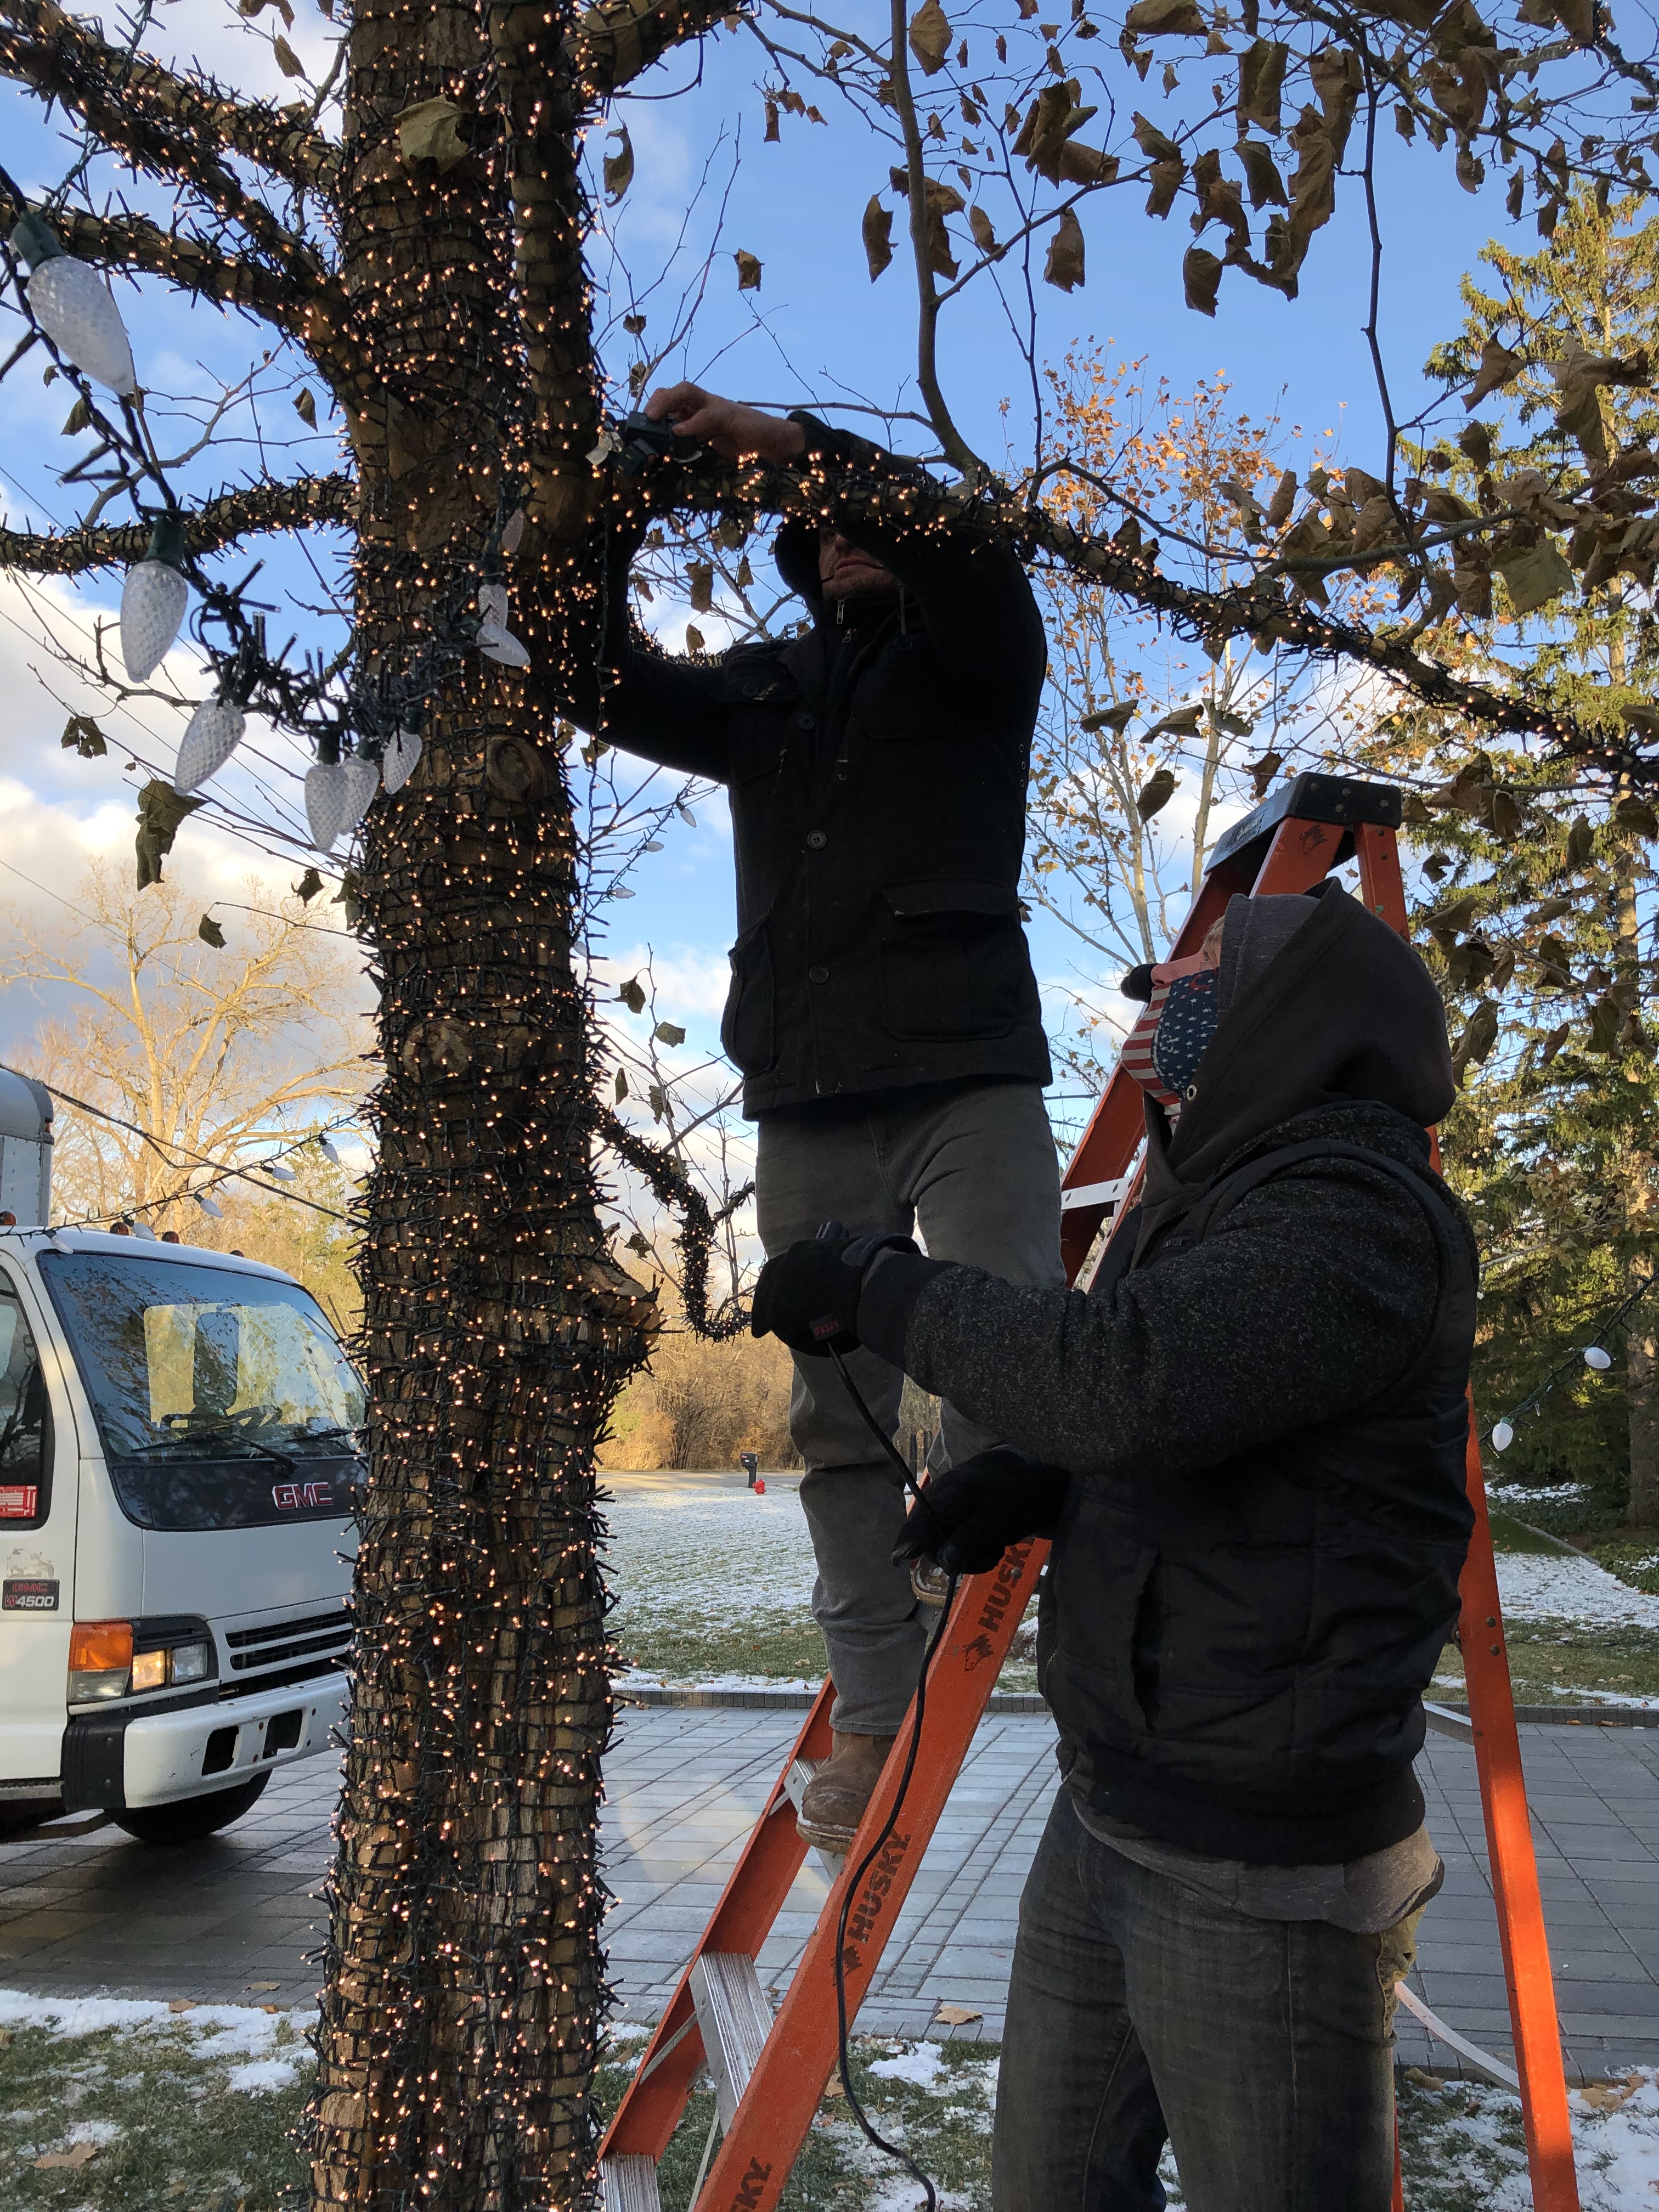
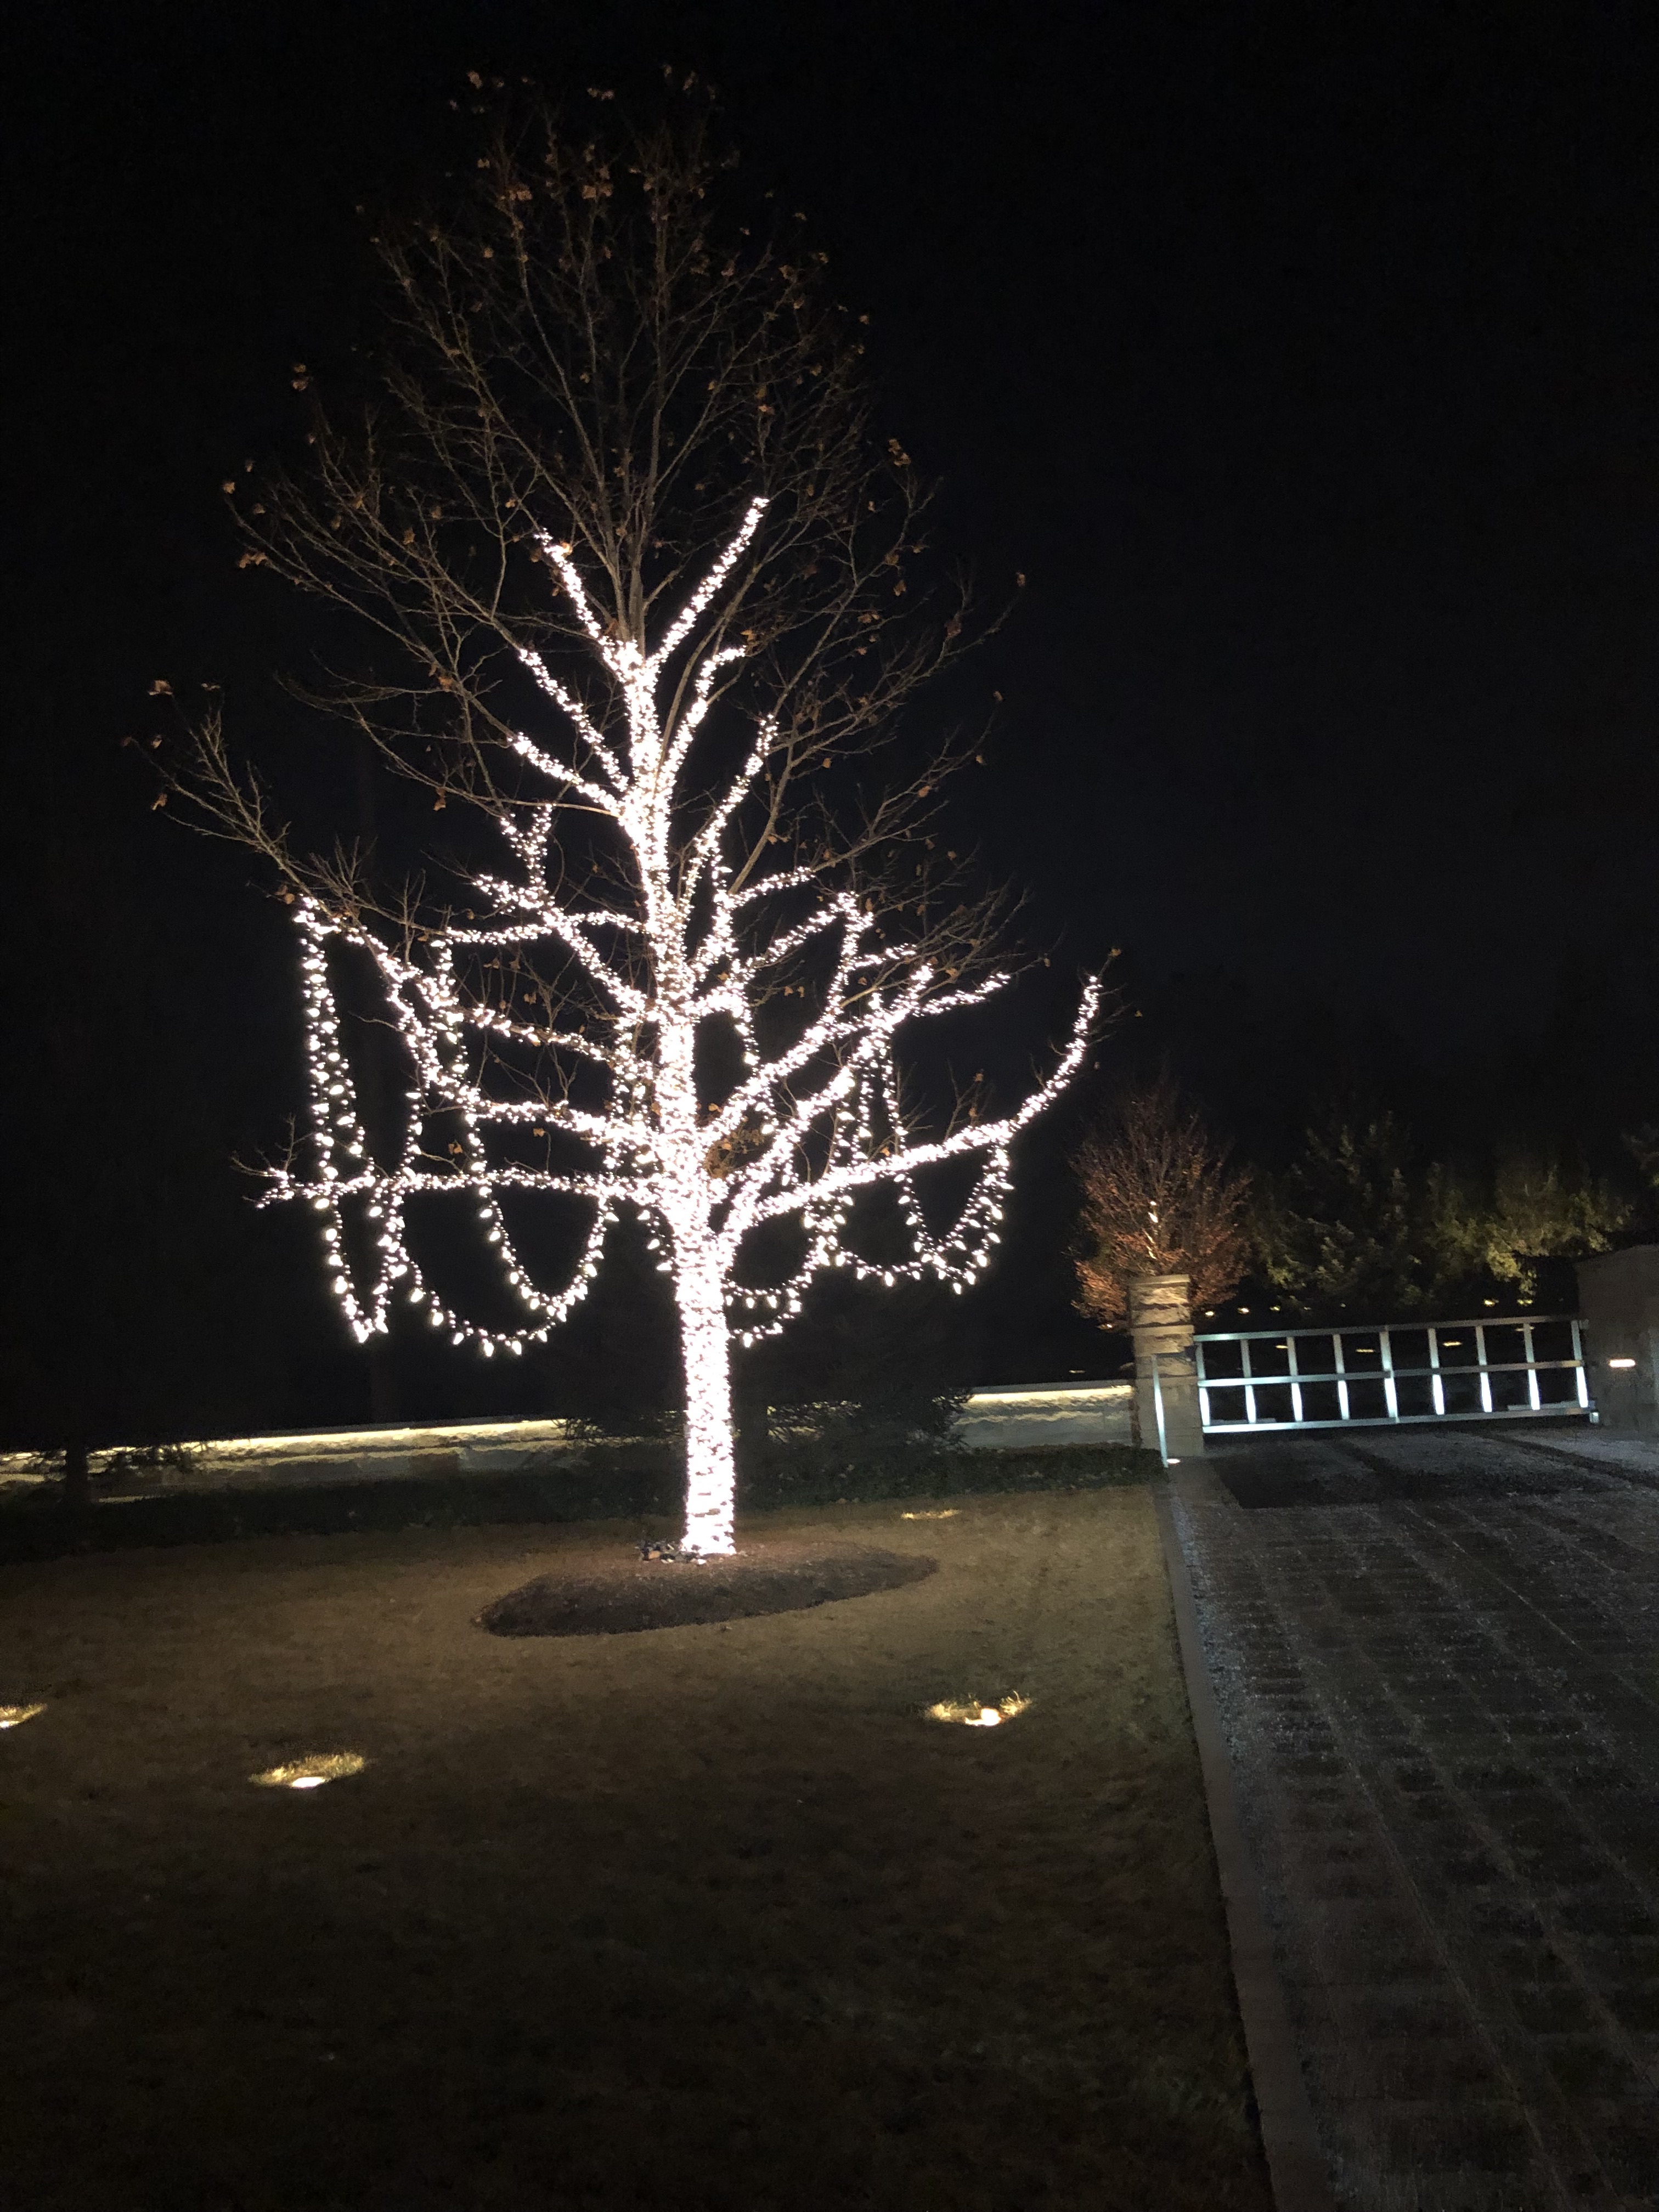
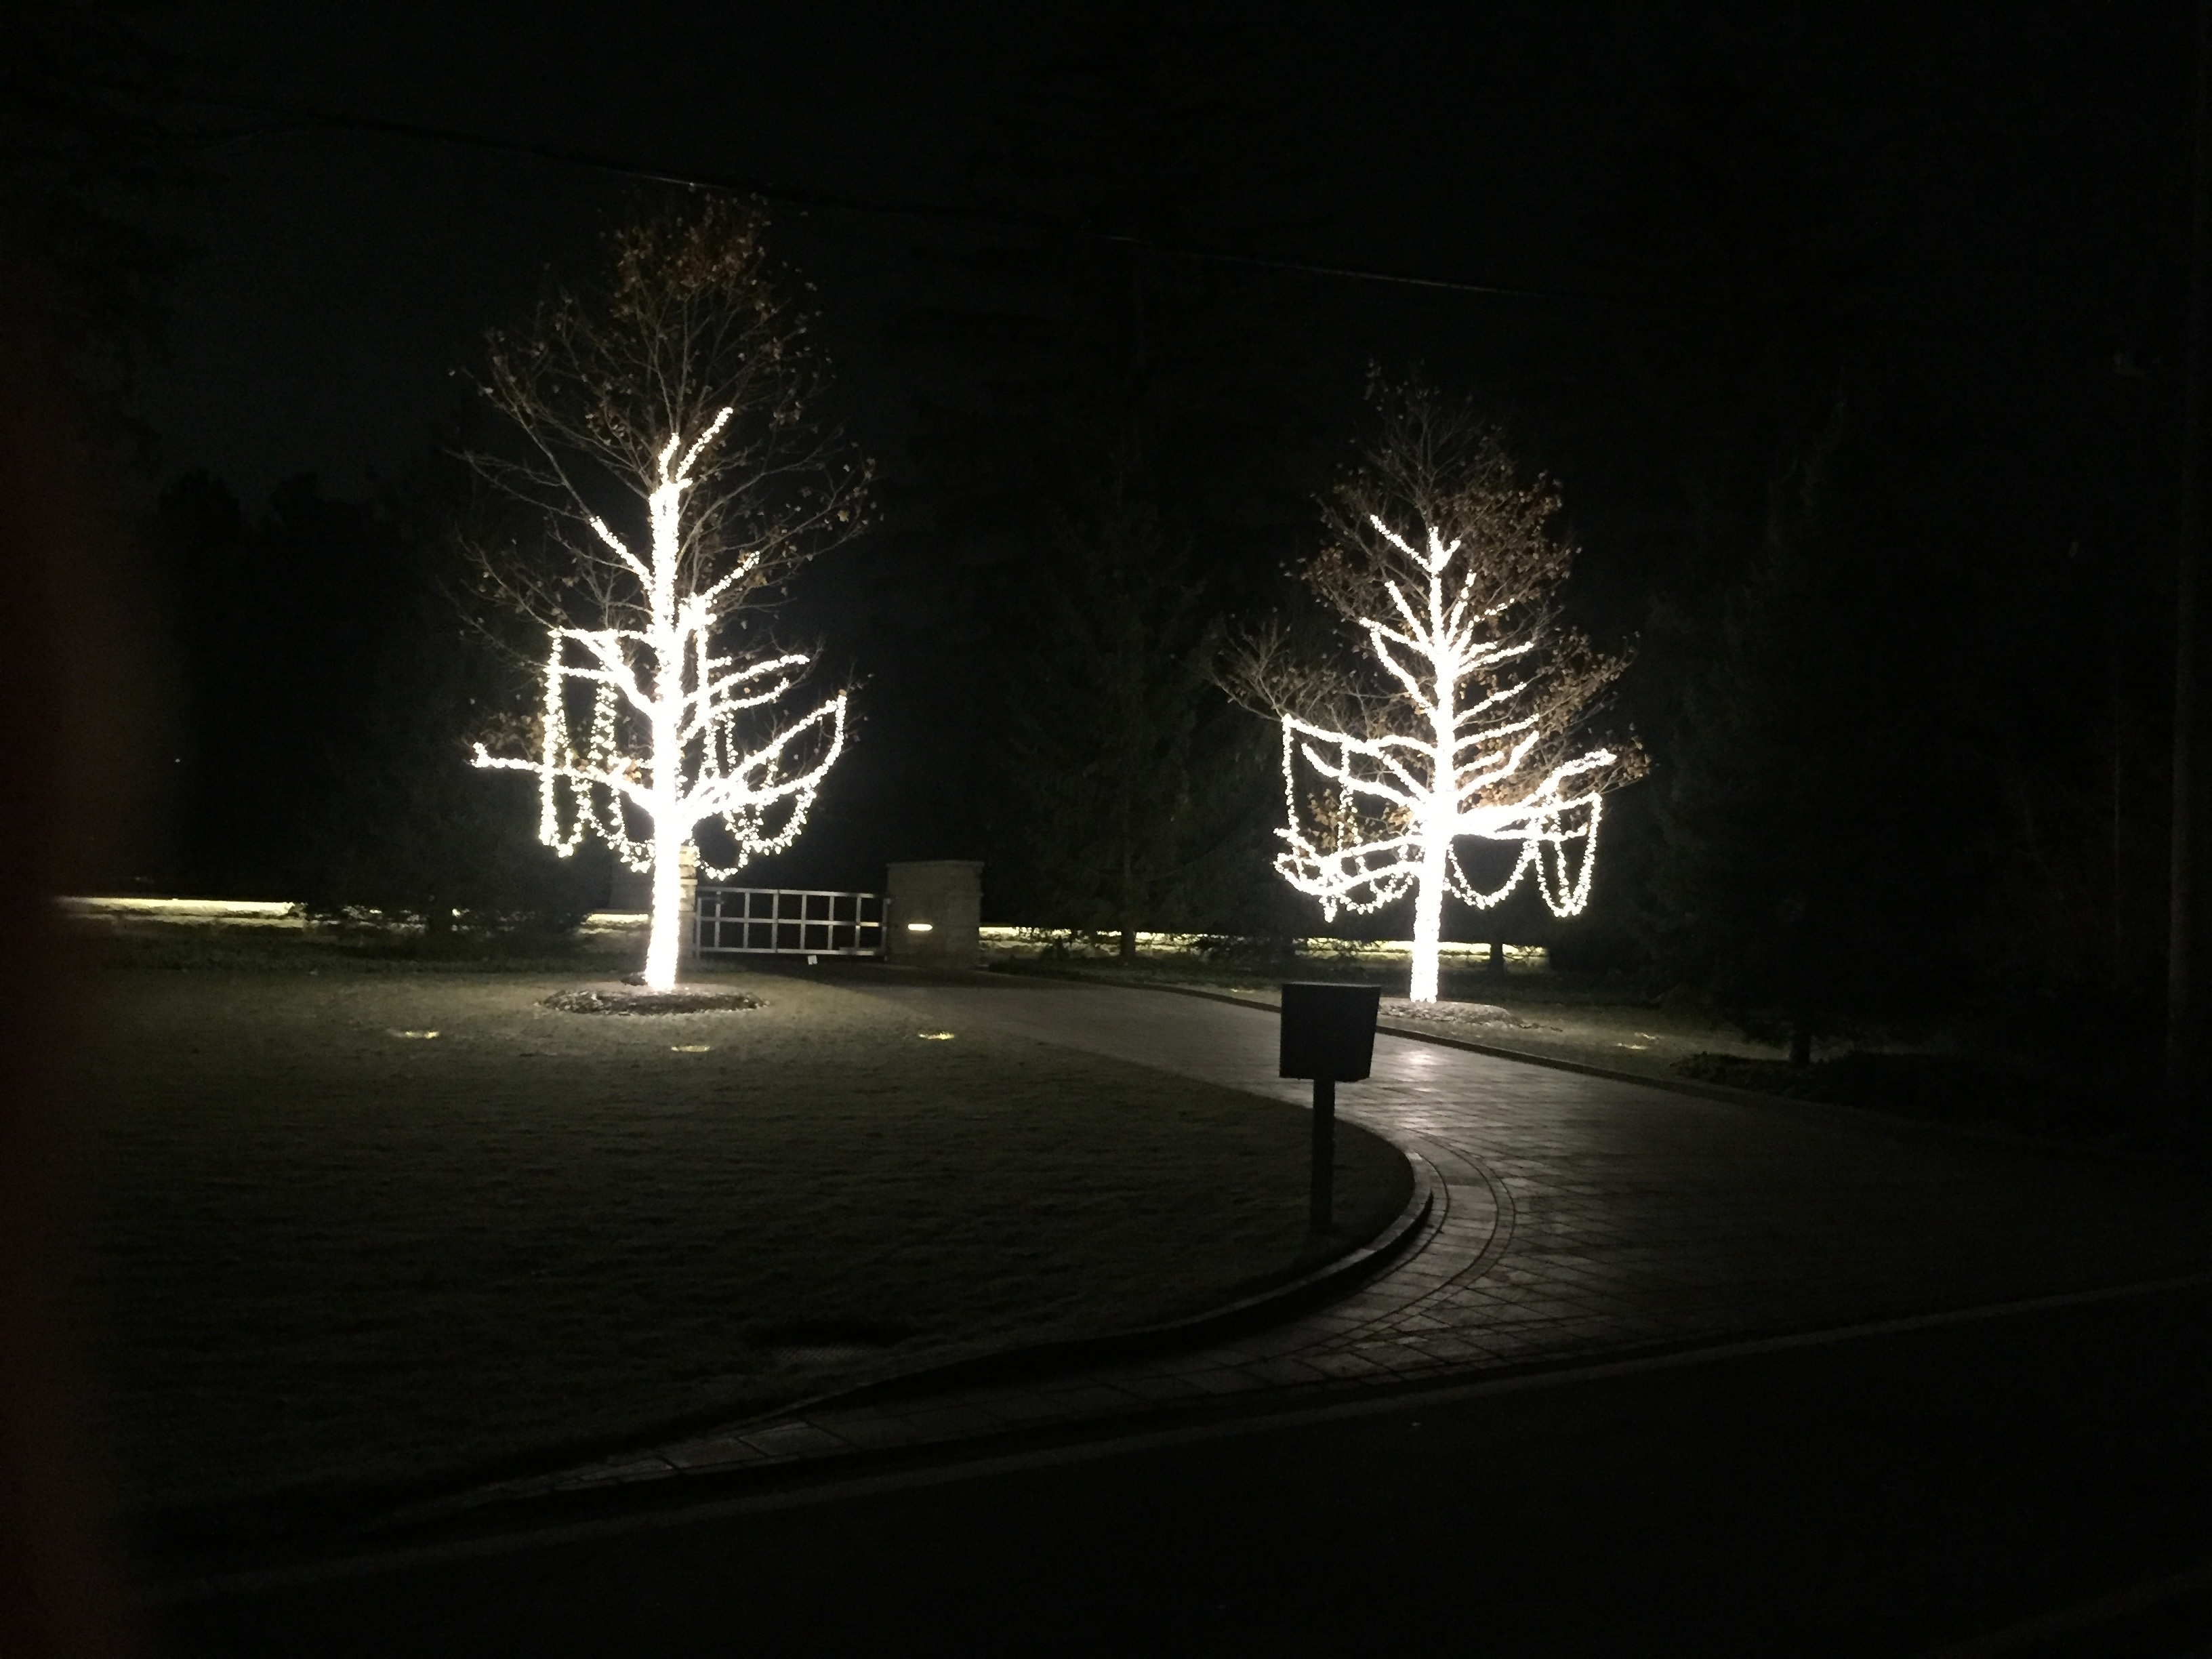
We put together a pair of light garlands in our shop, featuring 100 feet of LED compact lighted zip tied to a corresponding length of LED strands with the larger C-7 size bulbs. As there was no way to draw or describe the installation of the garland, I was part of the install crew. We laid the garland on the ground, and dragged and pulled it until it described a large circle on the ground all around each tree. A ladder, a 6′ 2″ tall person, a 10 foot bamboo stake with a hook at the top, and 4 support people were all we had in the way of equipment.

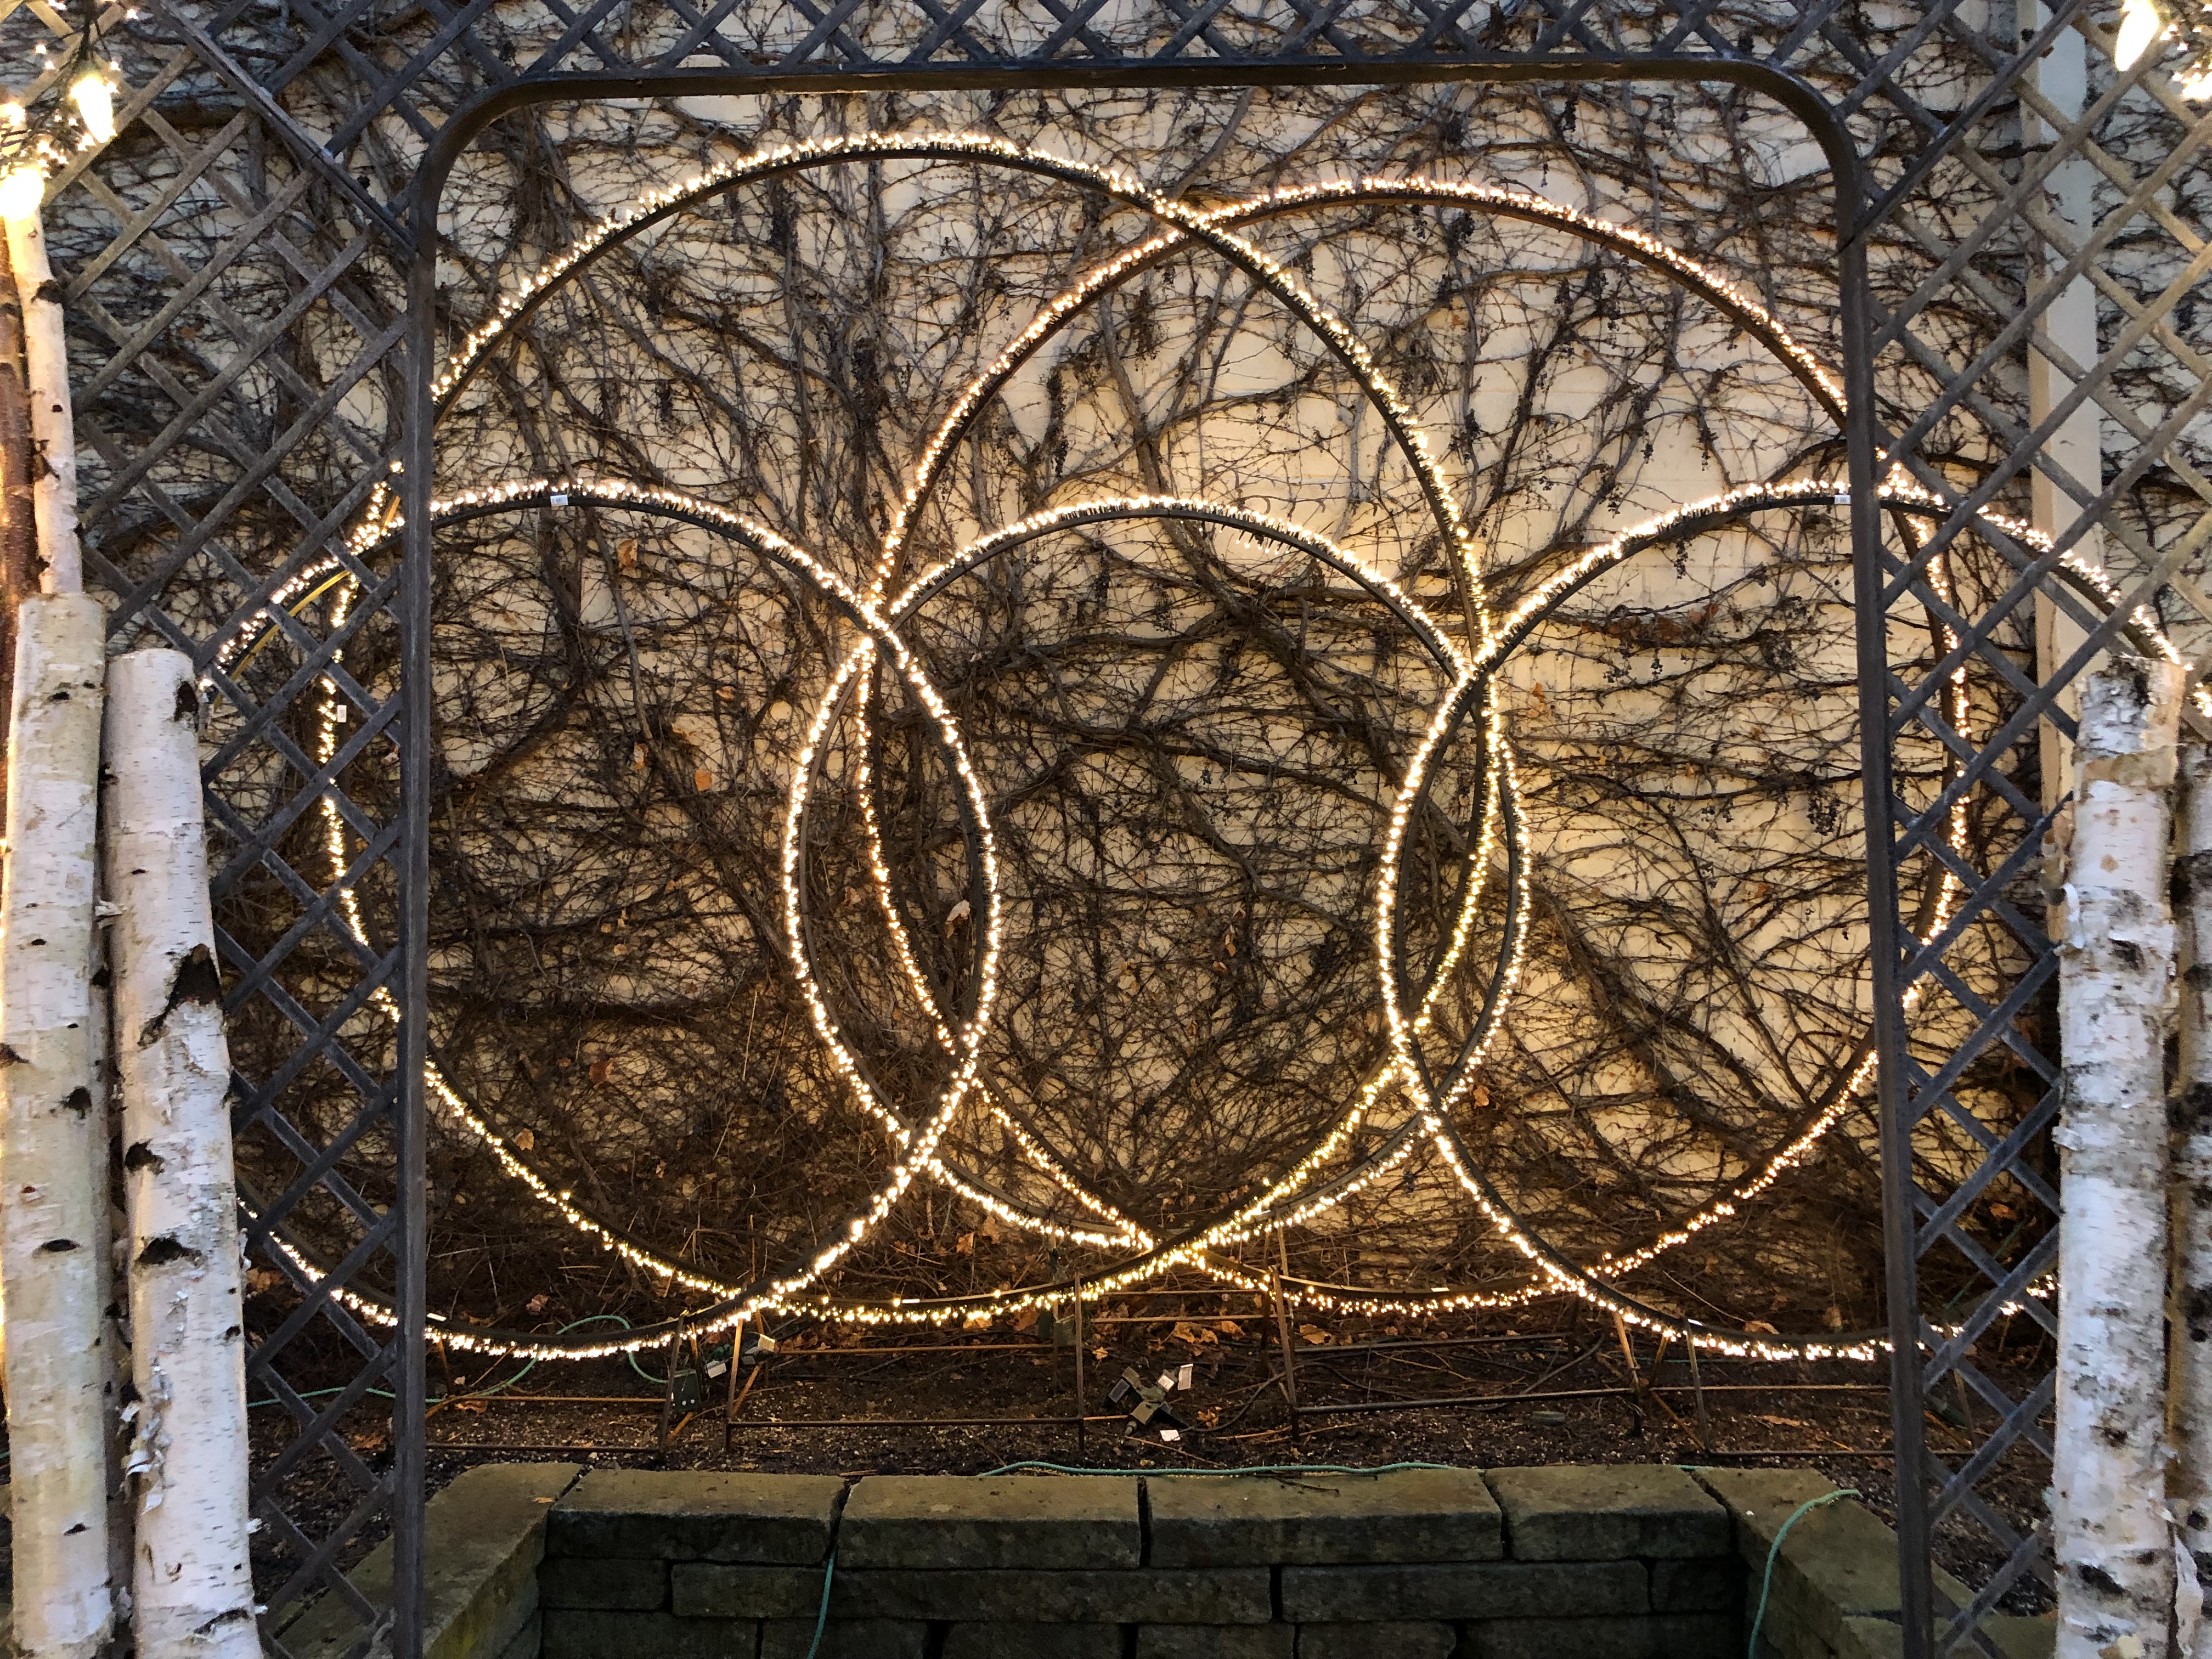
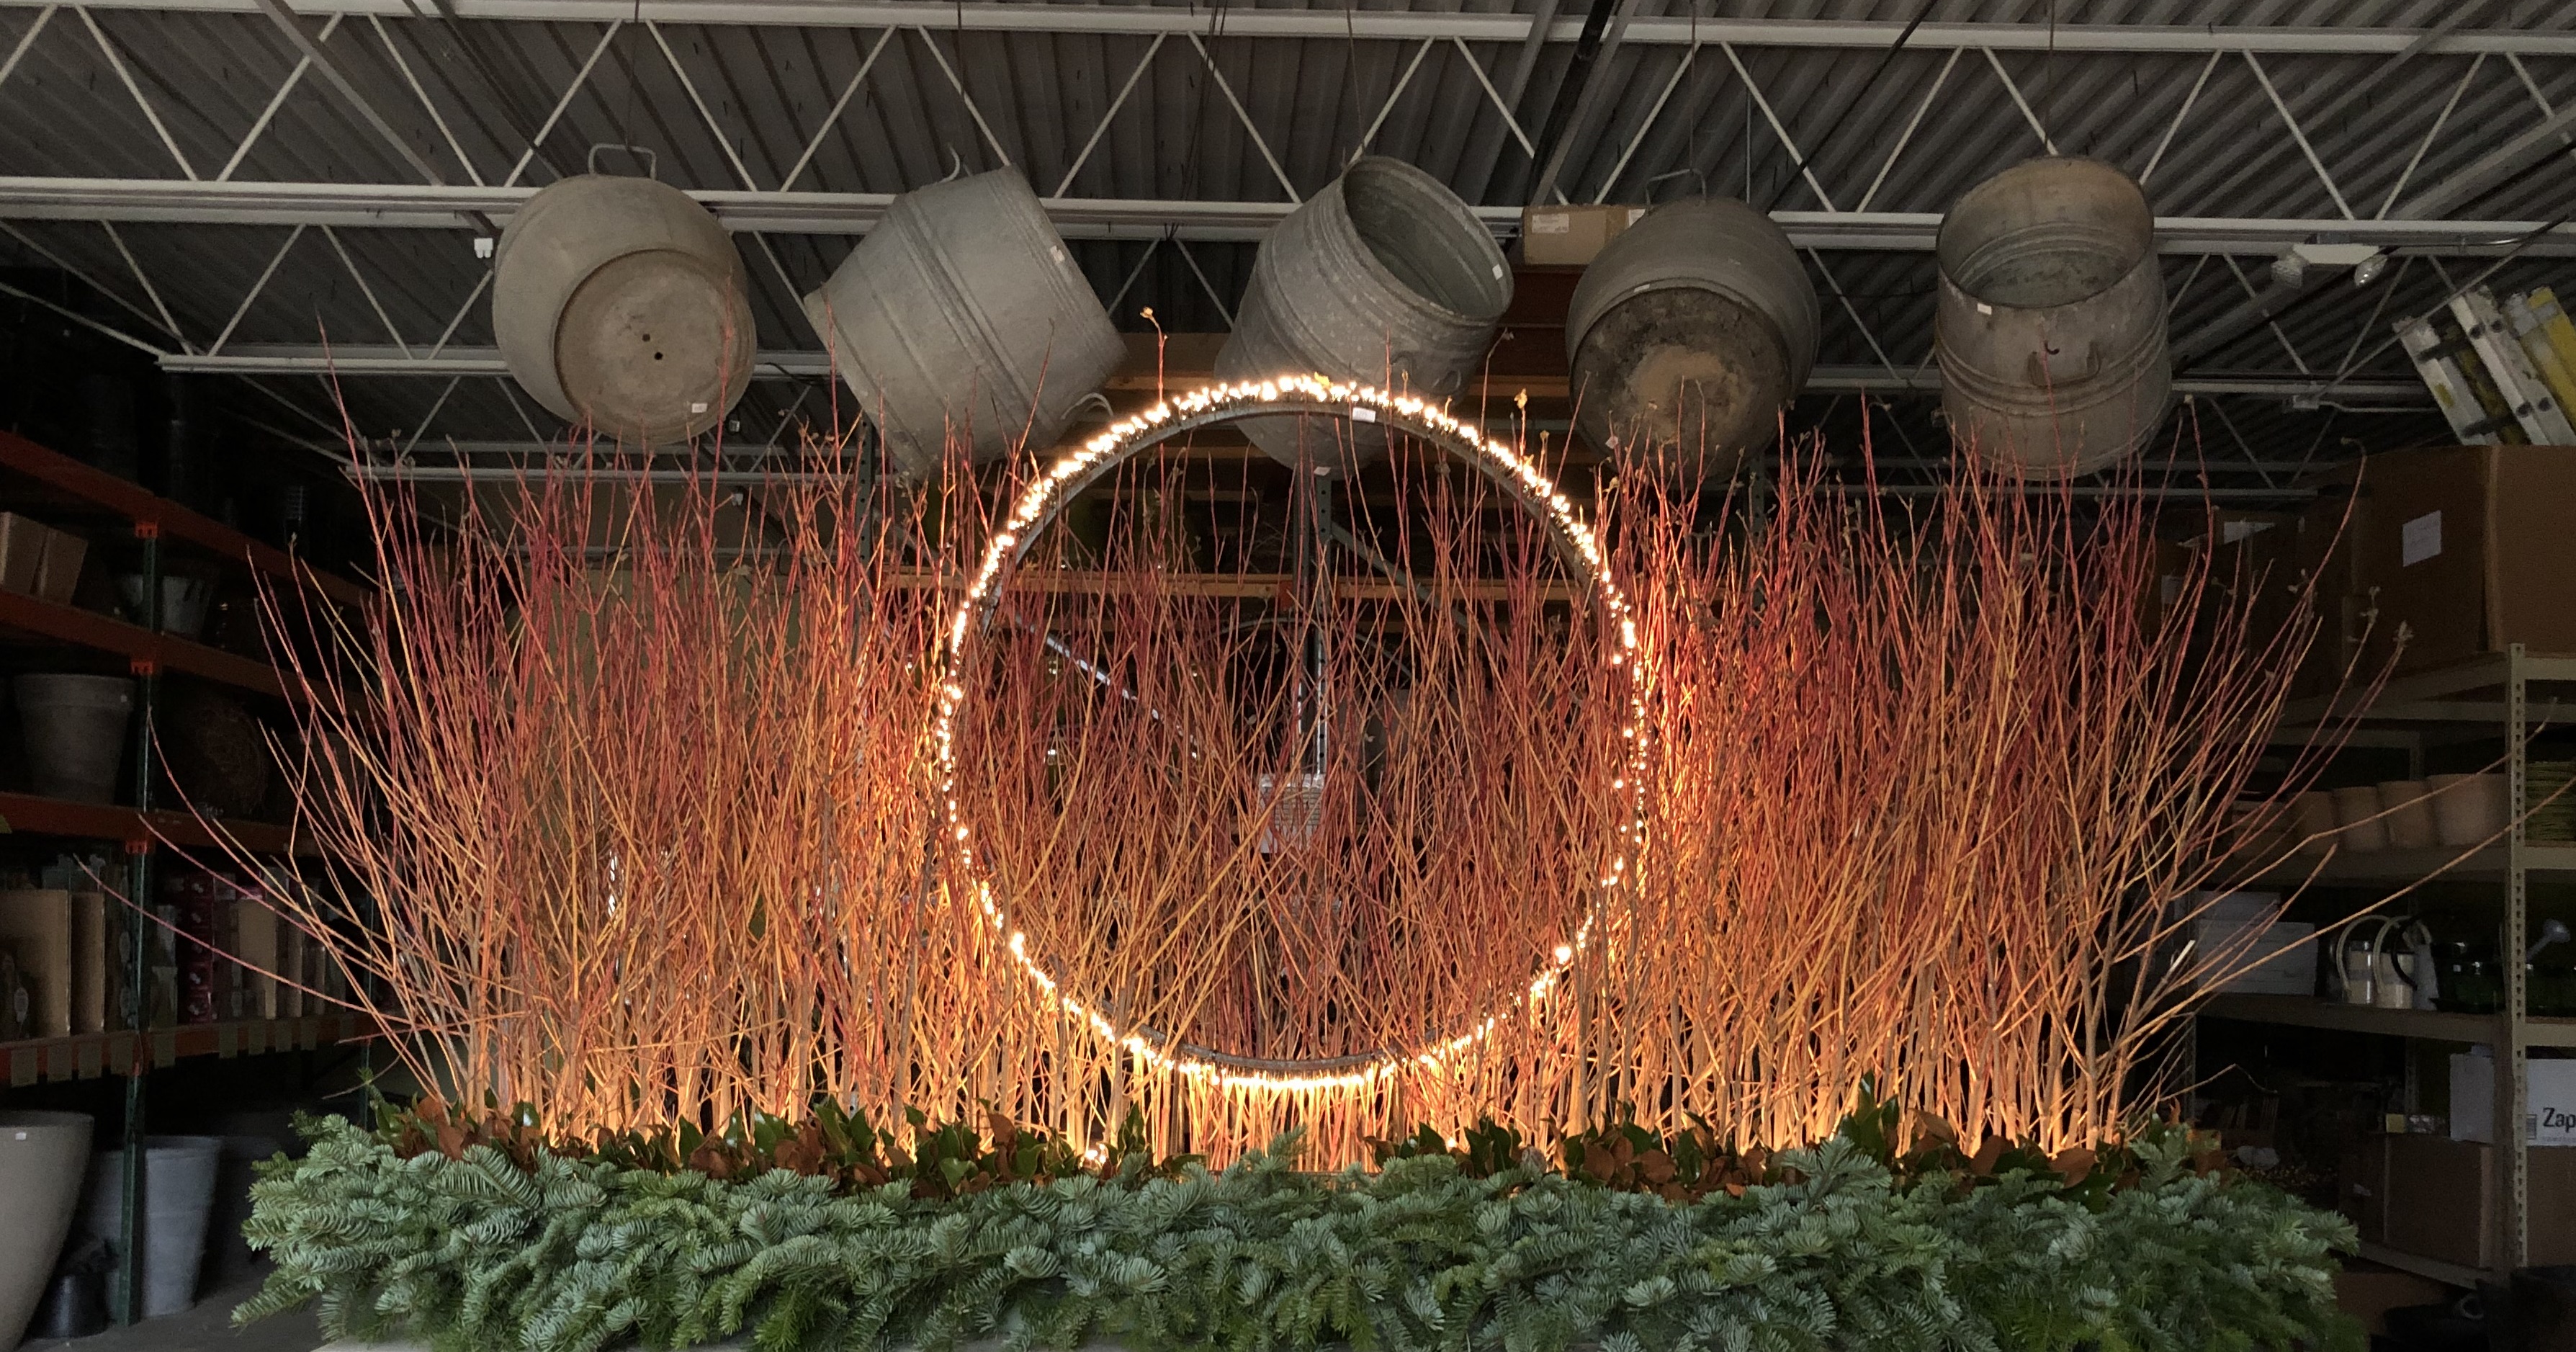
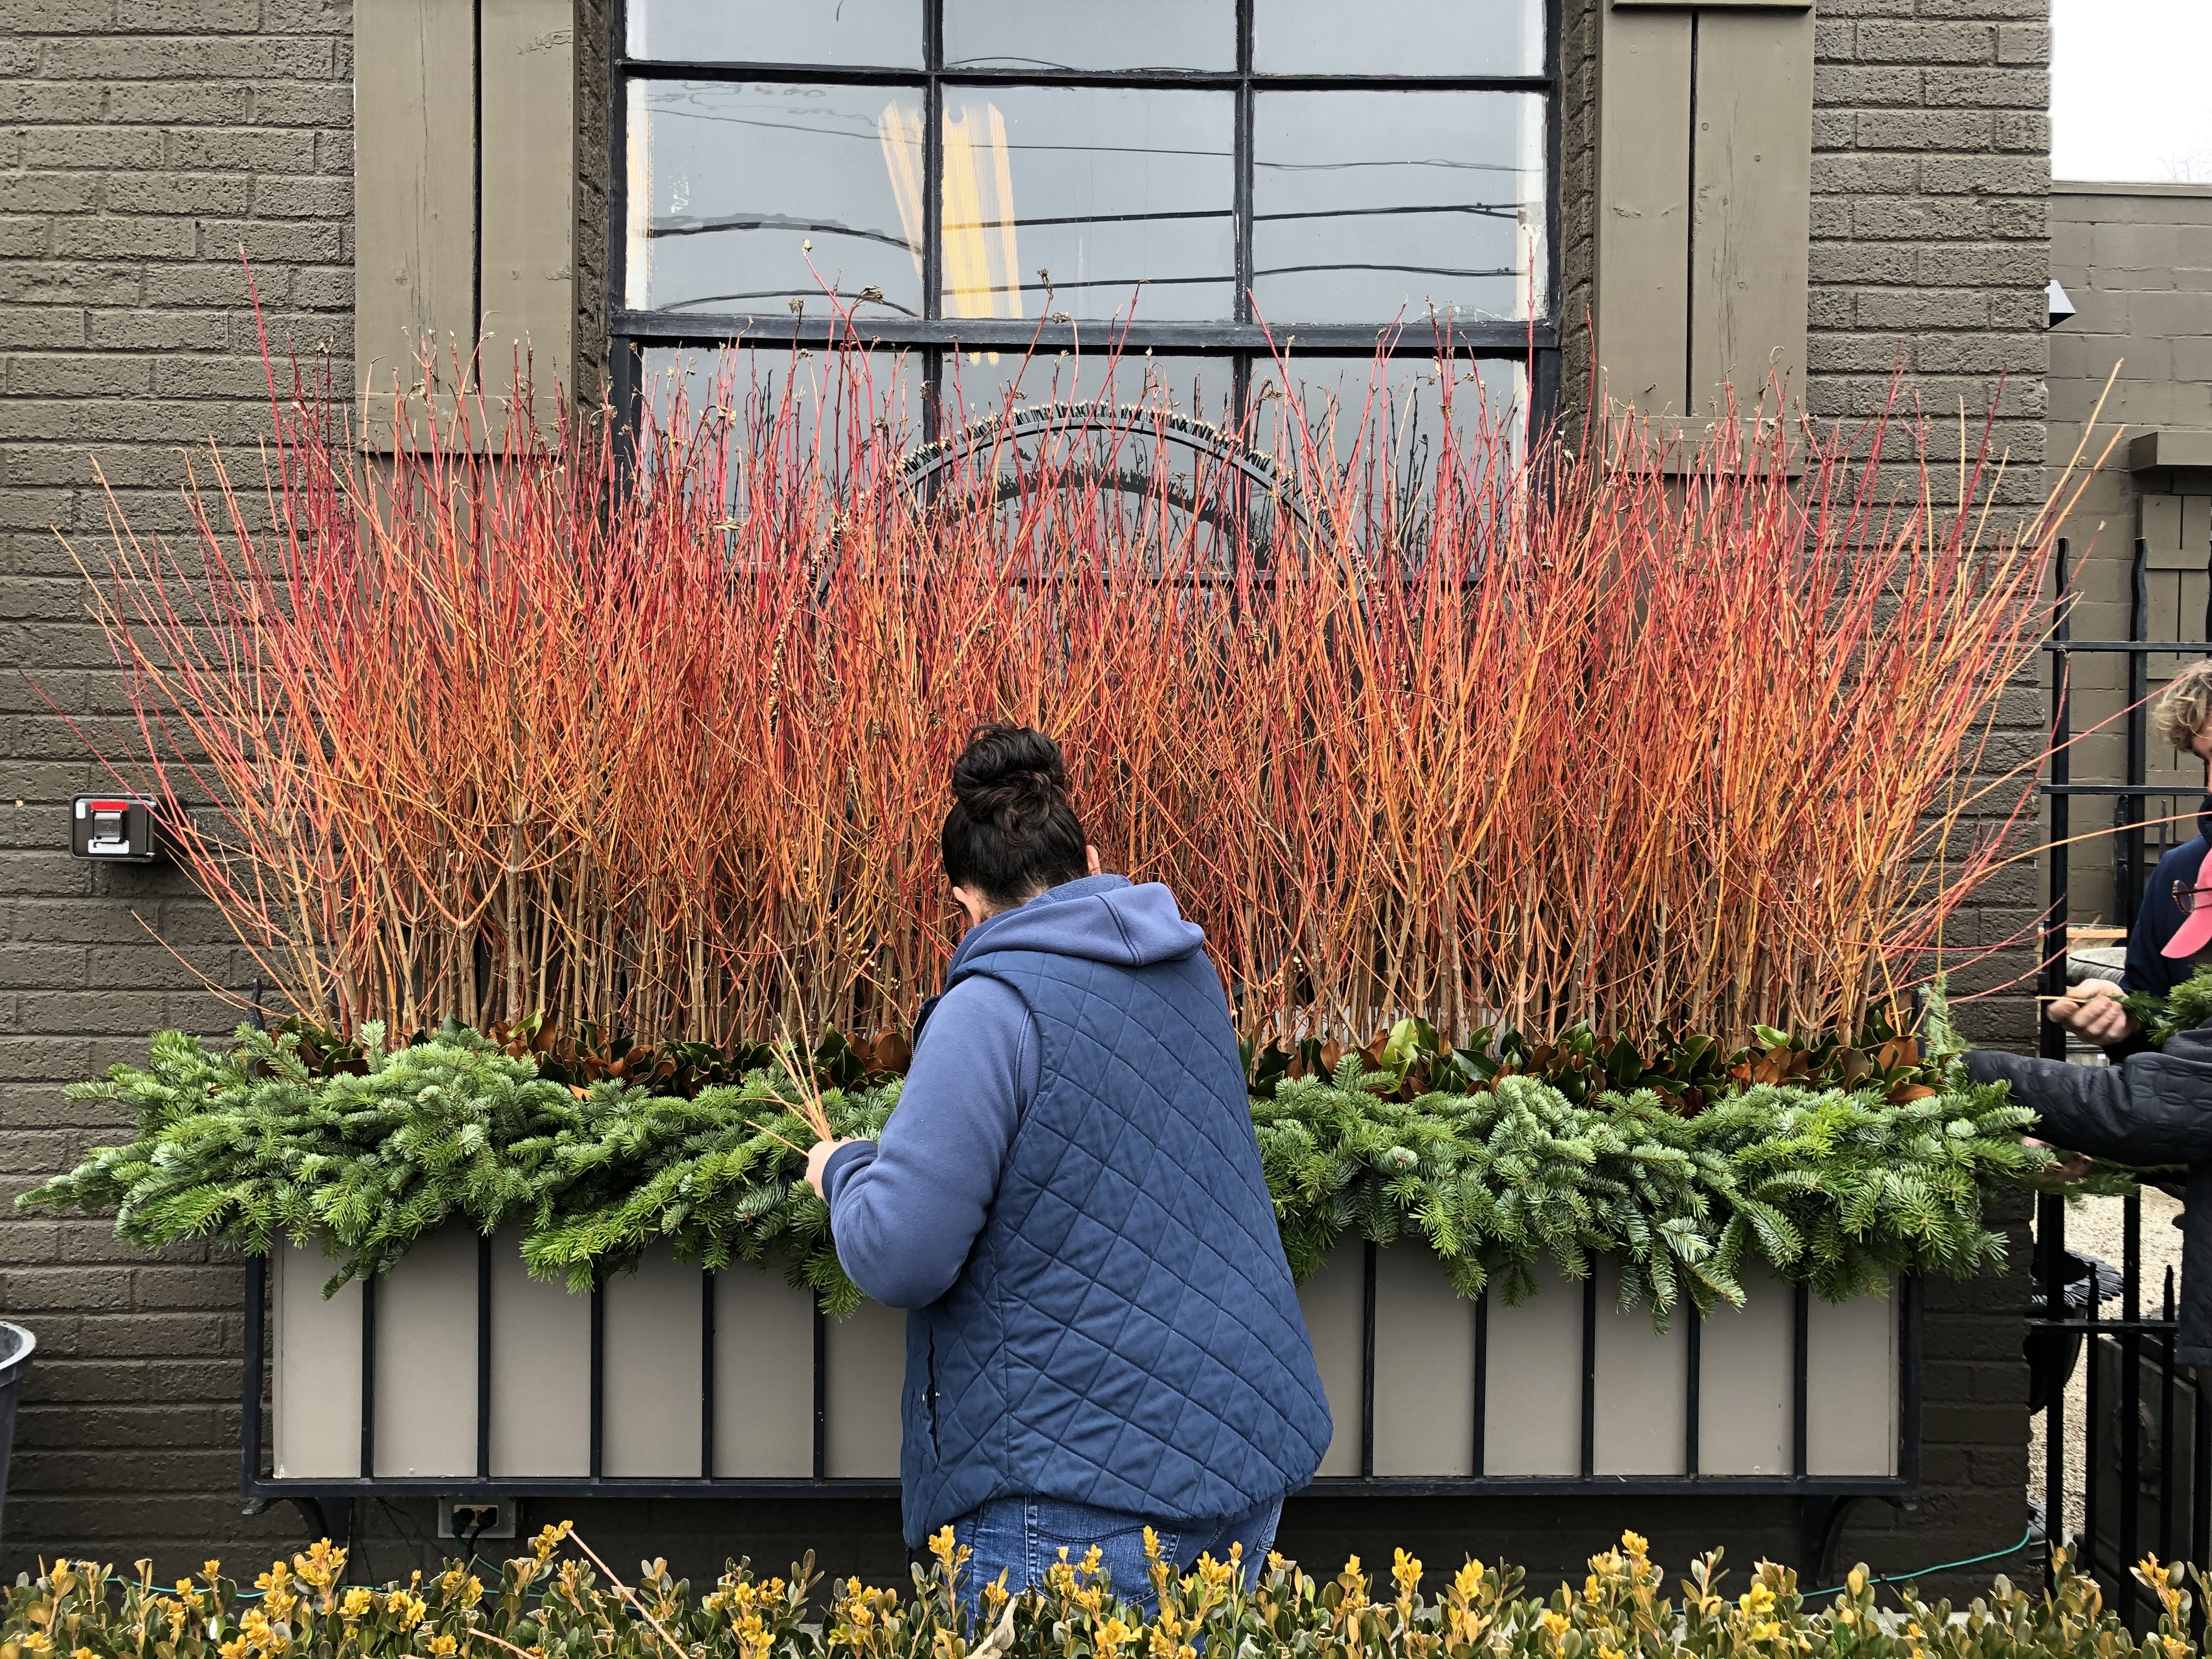
The lowest point of each loop/swoop is just about 6′ 2″ above the ground. It was easy to have Colin stand underneath the loops so we knew how low to make them. As bright as they are at night, these lights are a little tough to see during the day. The tops of the loops were secured to lighted branches via a zip tie. Having learned this the hard way, I would recommend tagging the ends of each strand of lights with its own zip tie. The technology of these lights is amazing, but they are by no means perfect or foolproof.  If you have a strand go out that cannot be fixed with a new transformer, you want to know the location of the end of that faulty strand. Trying to find it on a cold winter’s day is exasperating, especially considering that this work is next to impossible to do with gloves on.

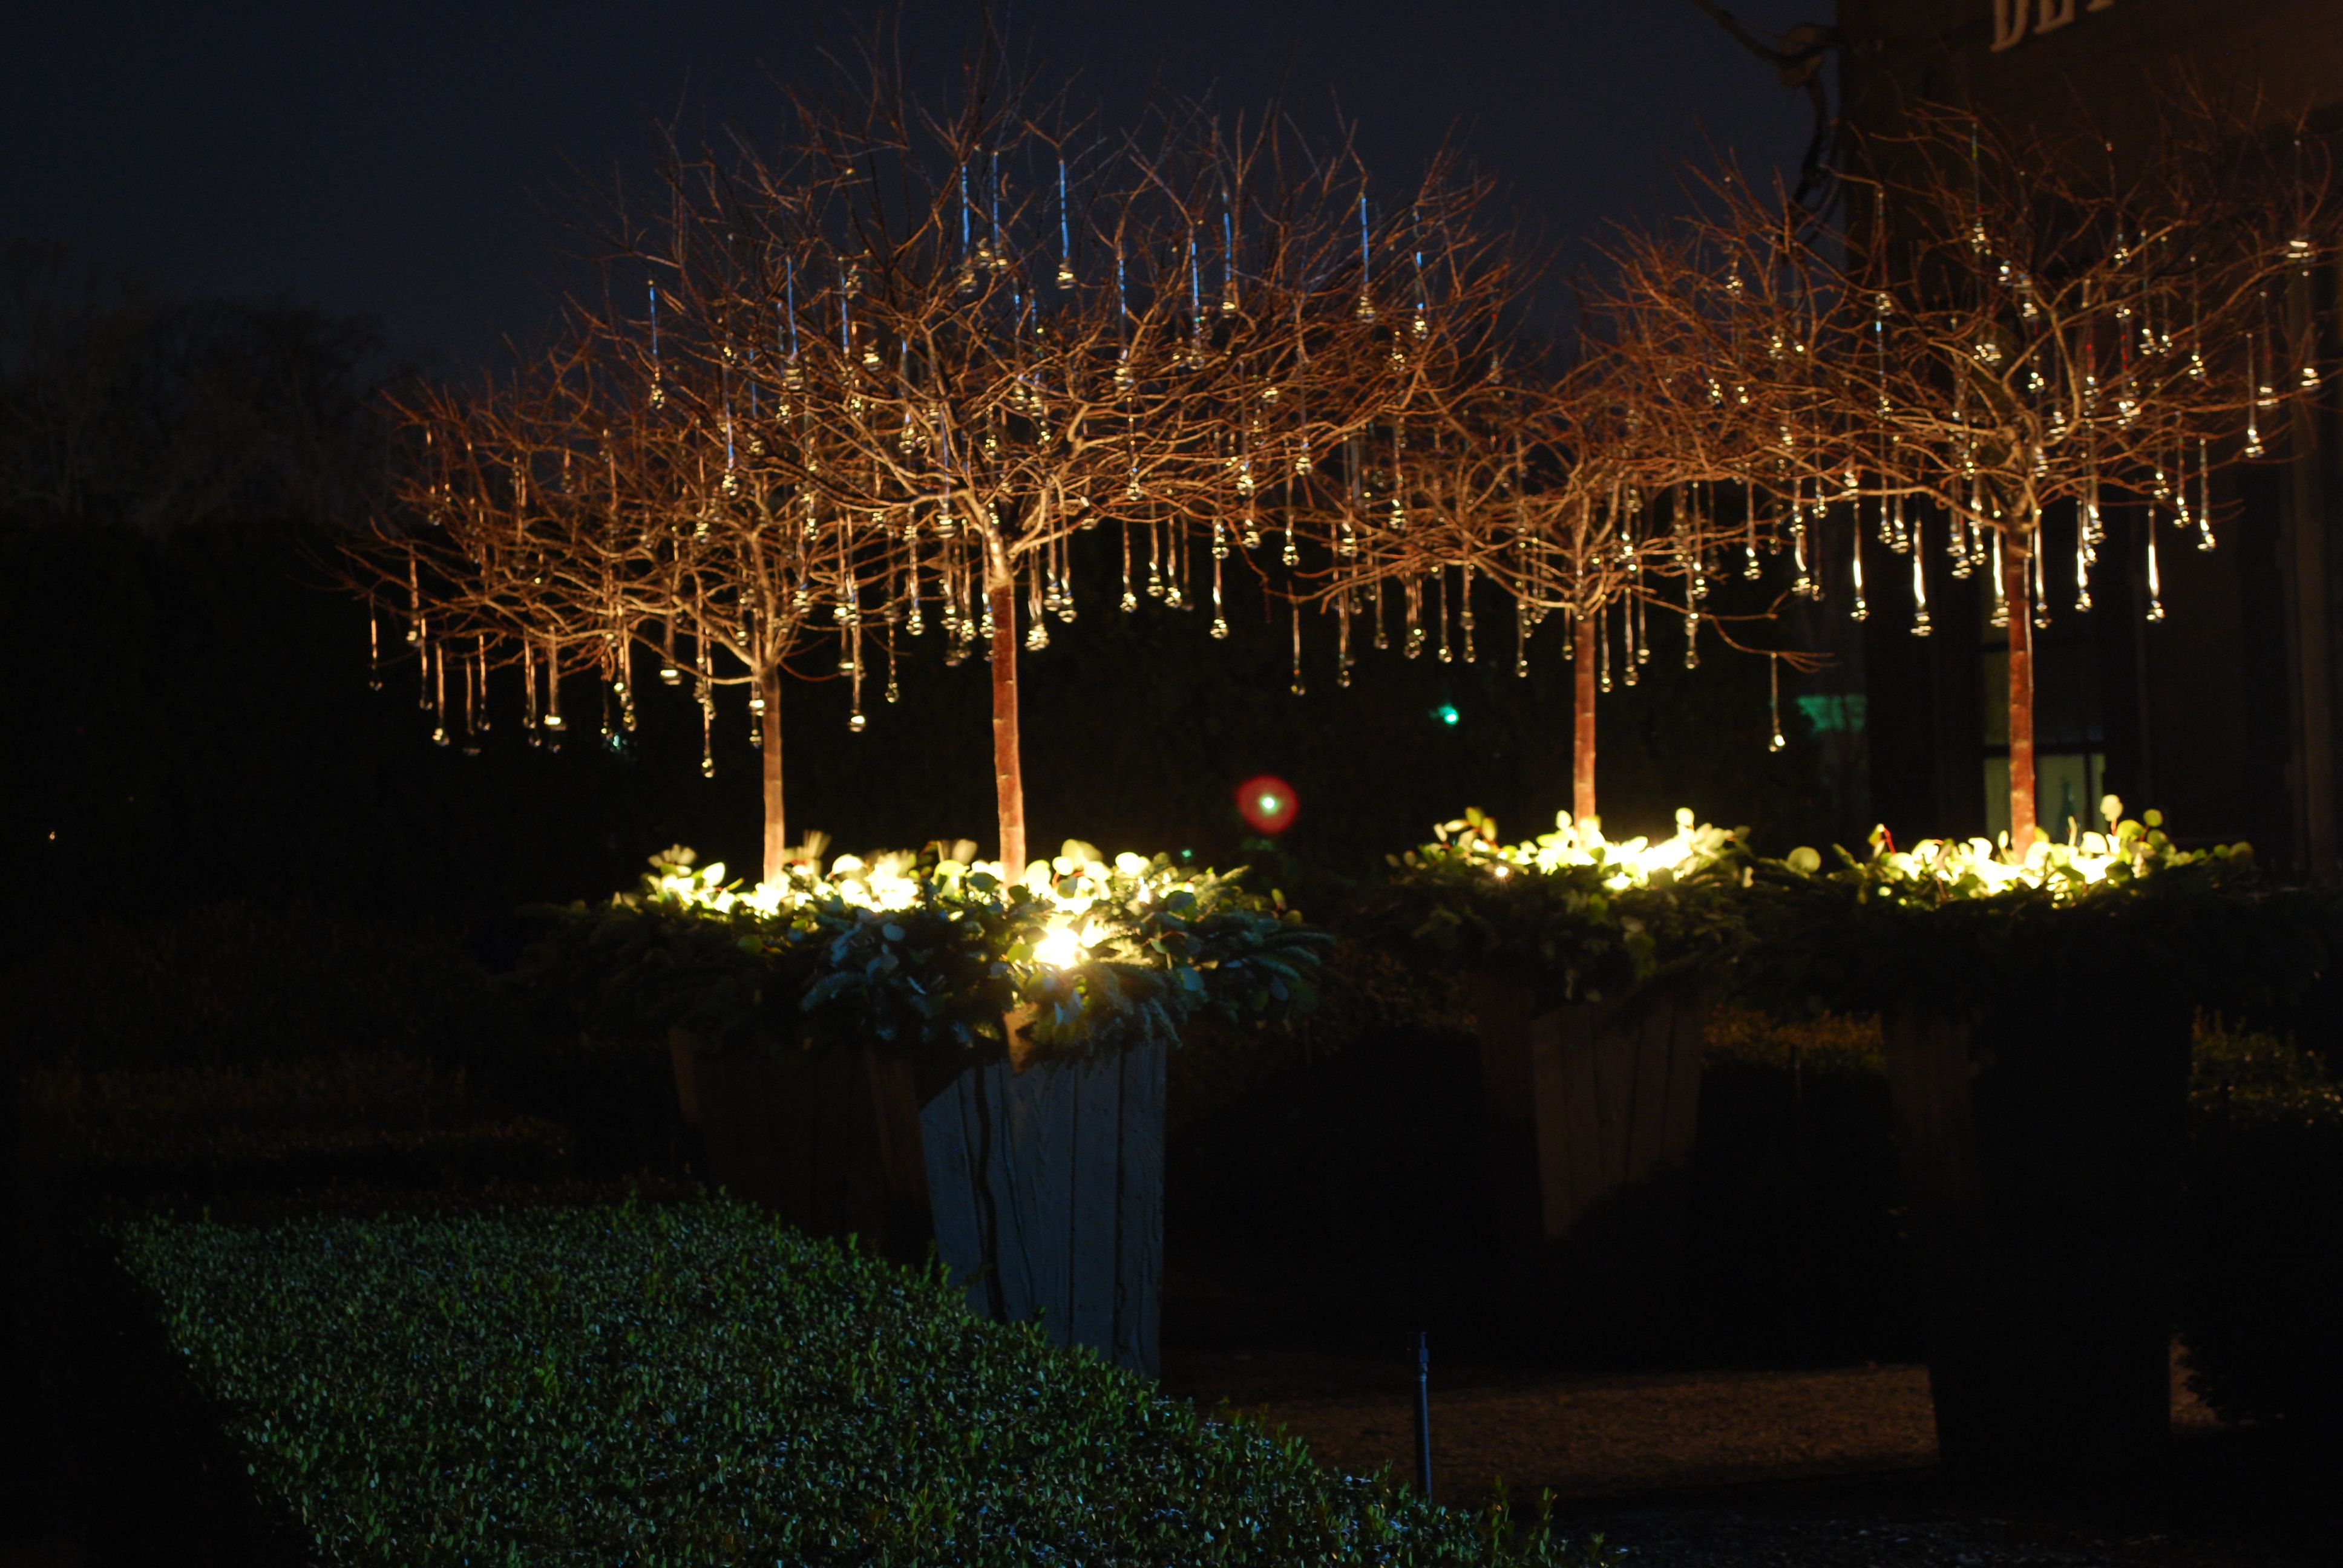
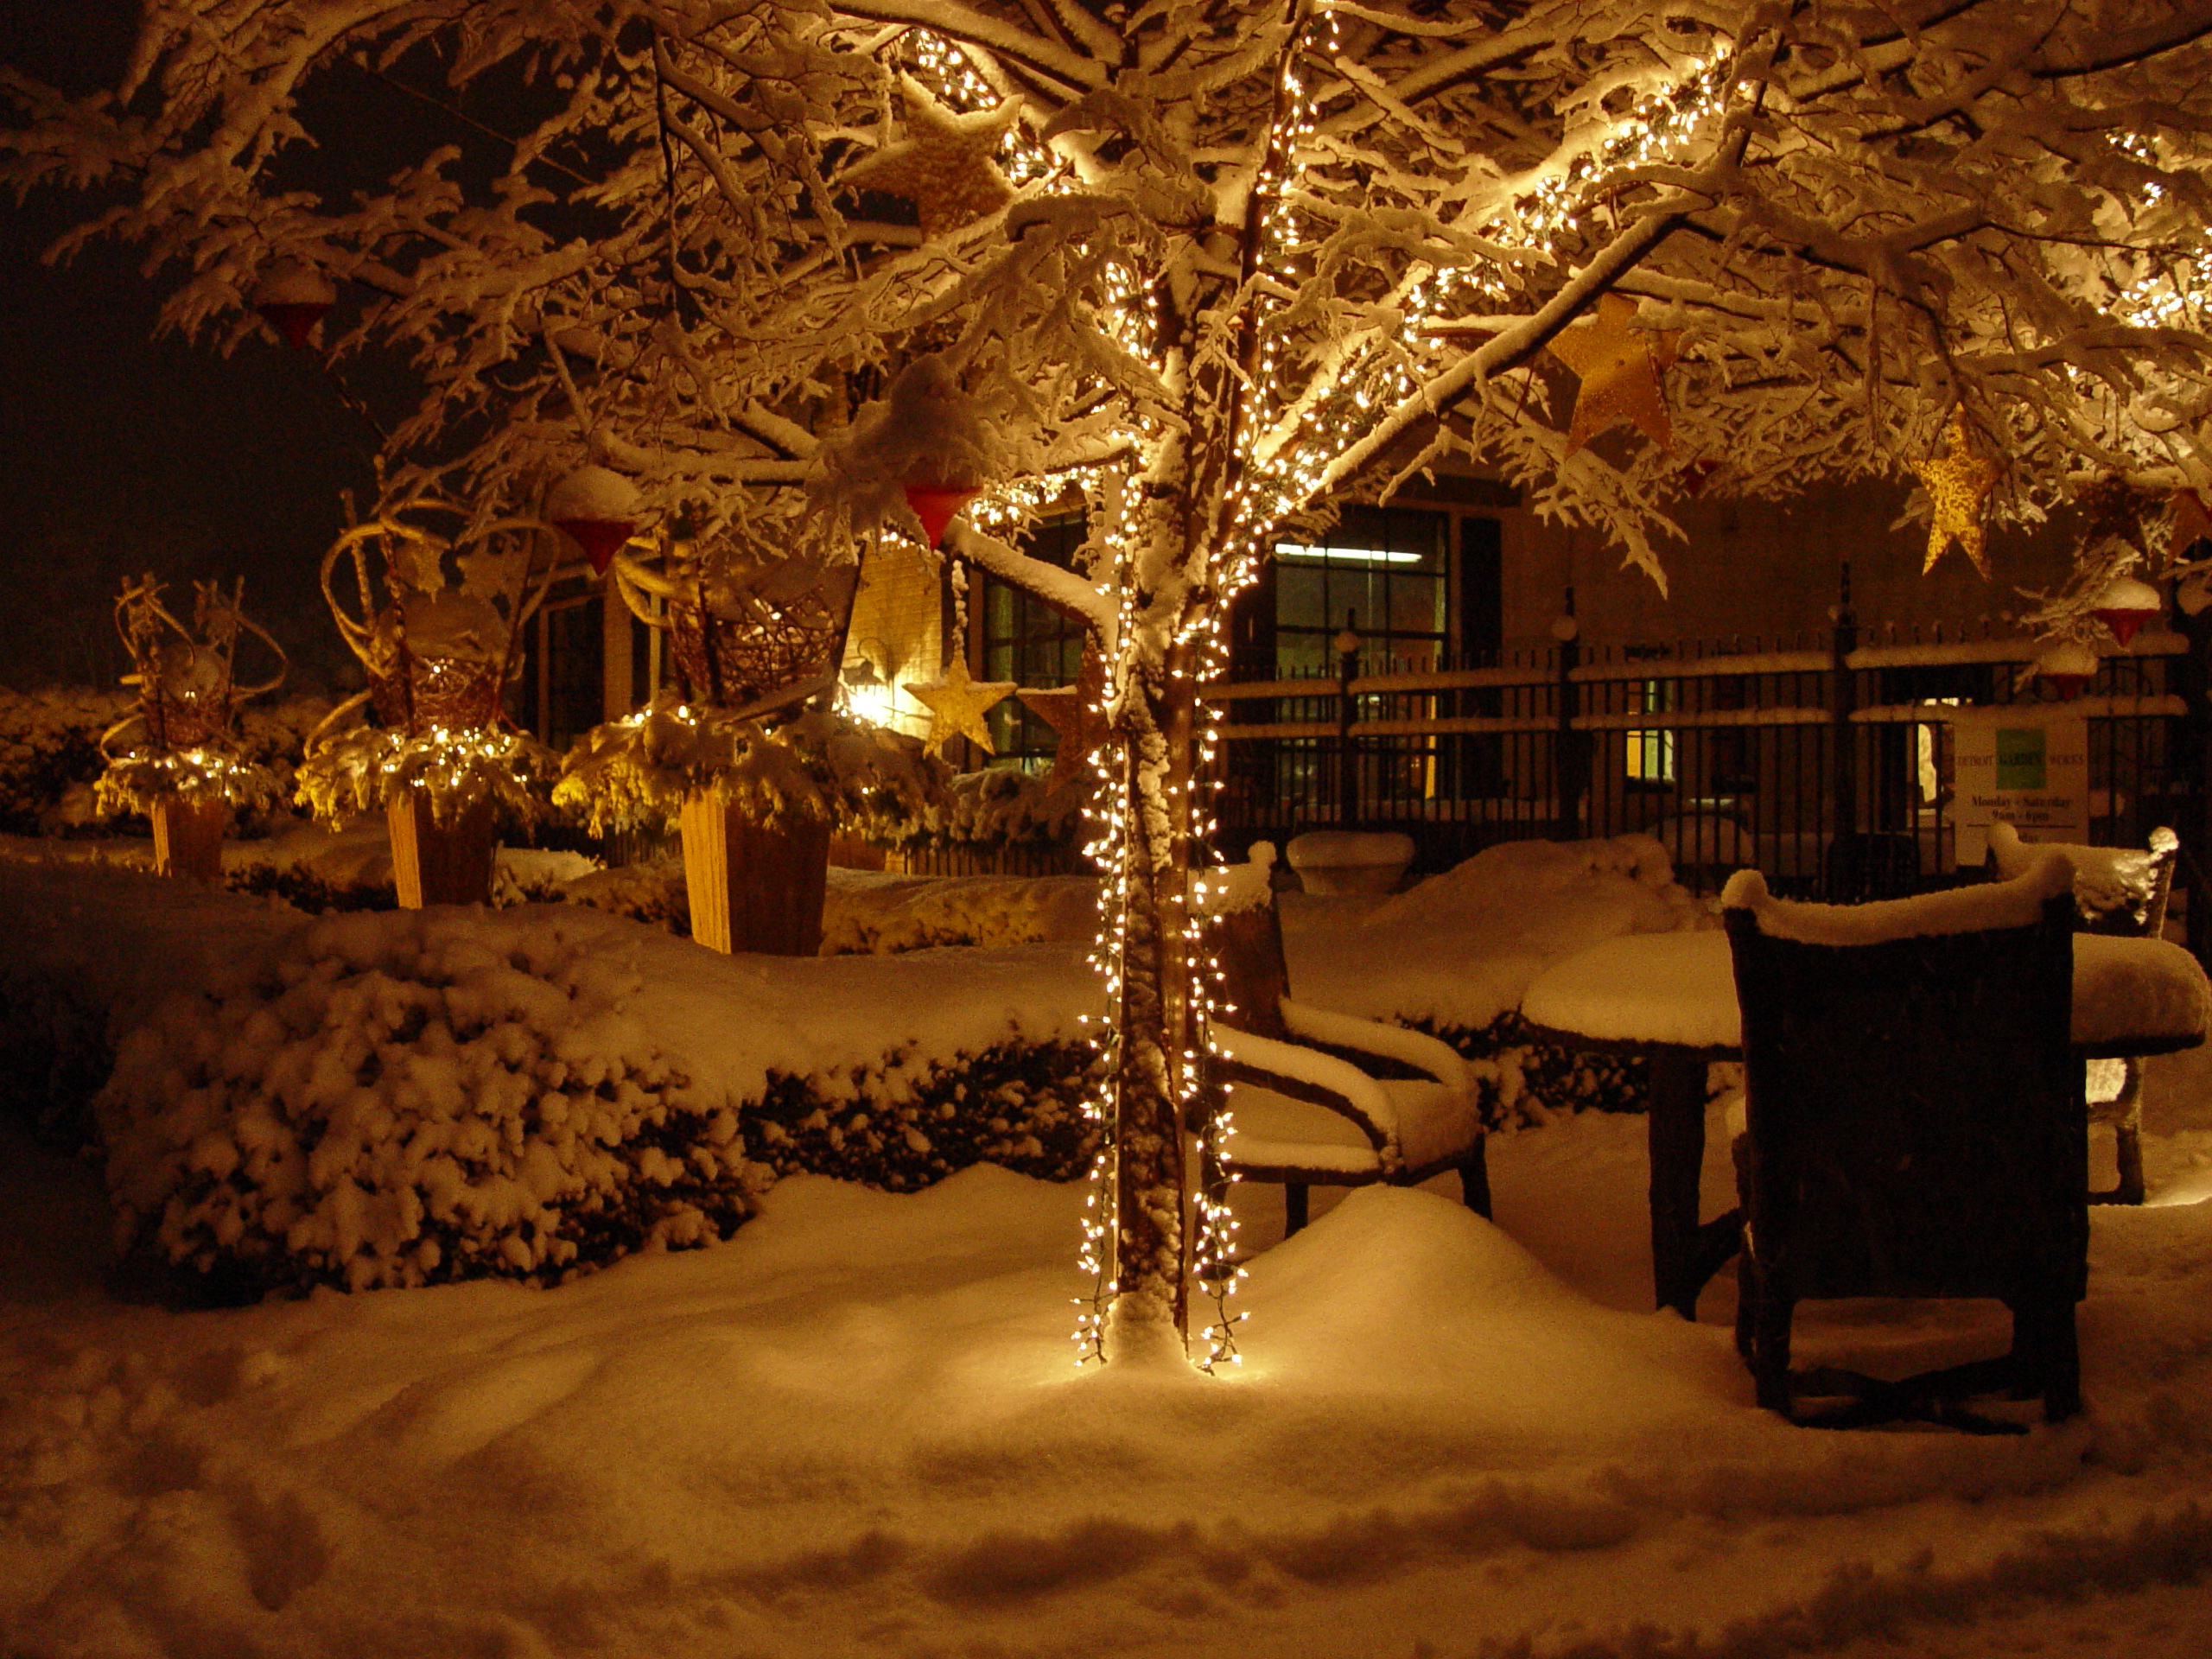
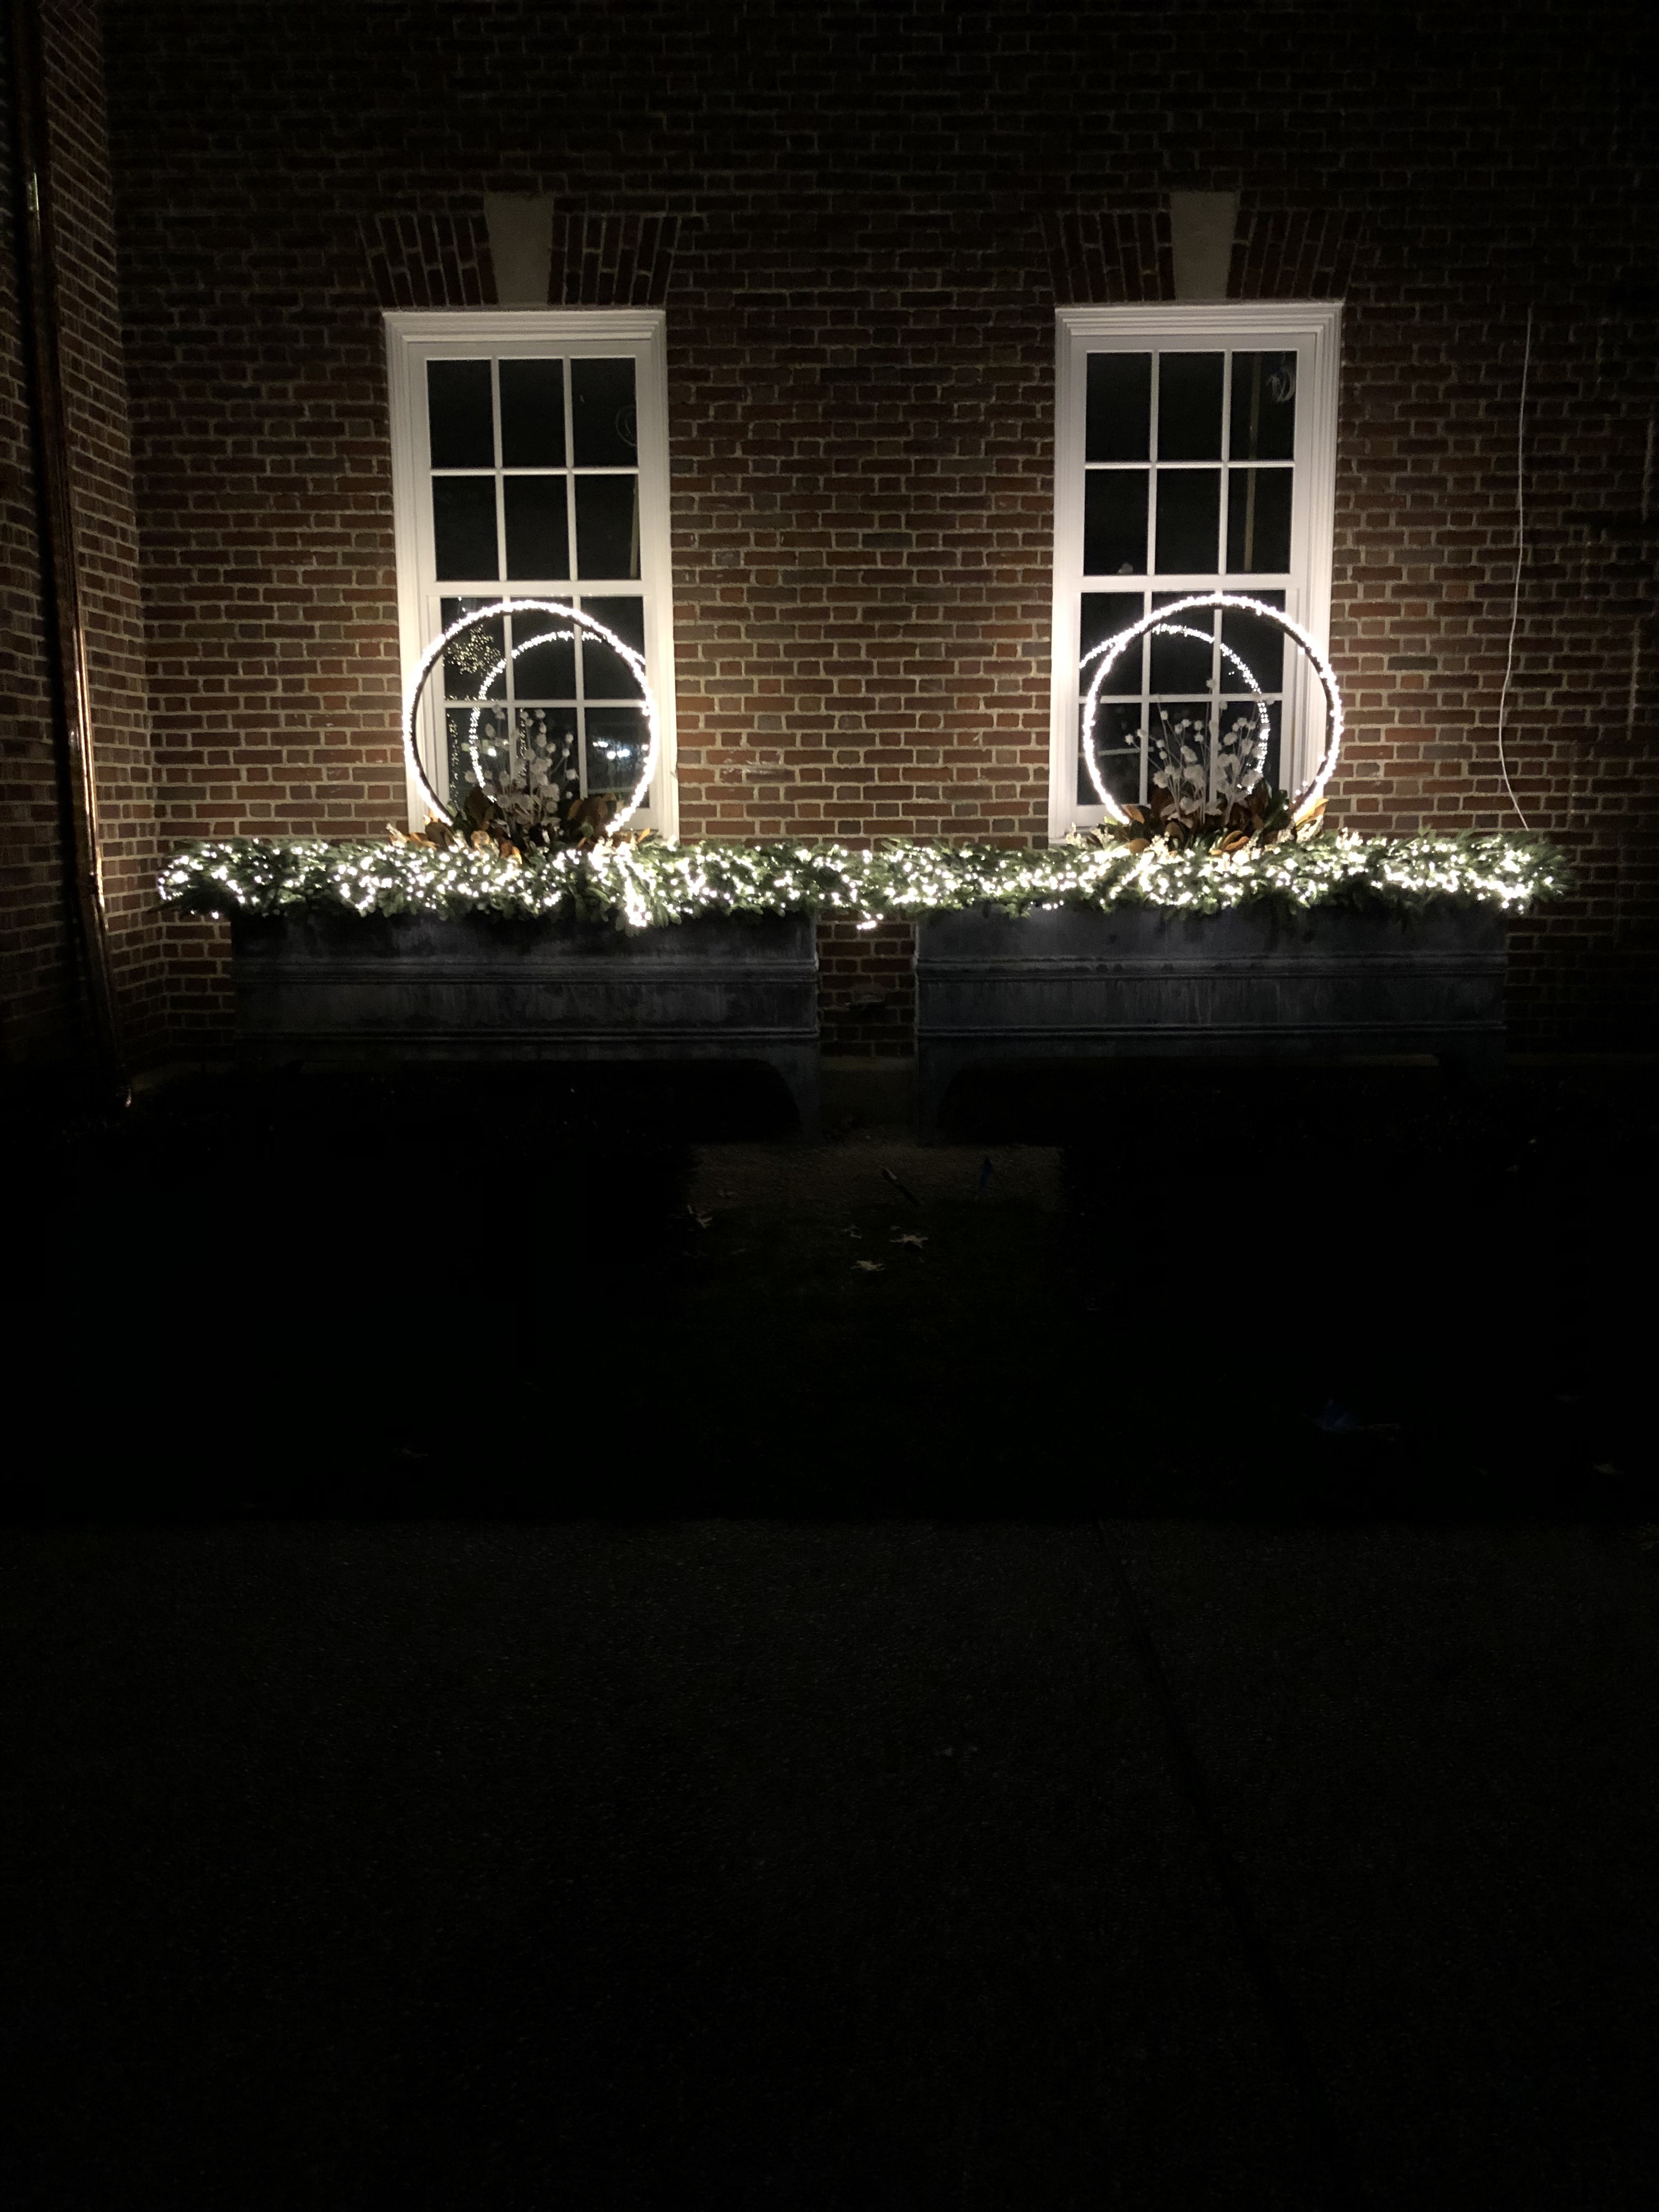
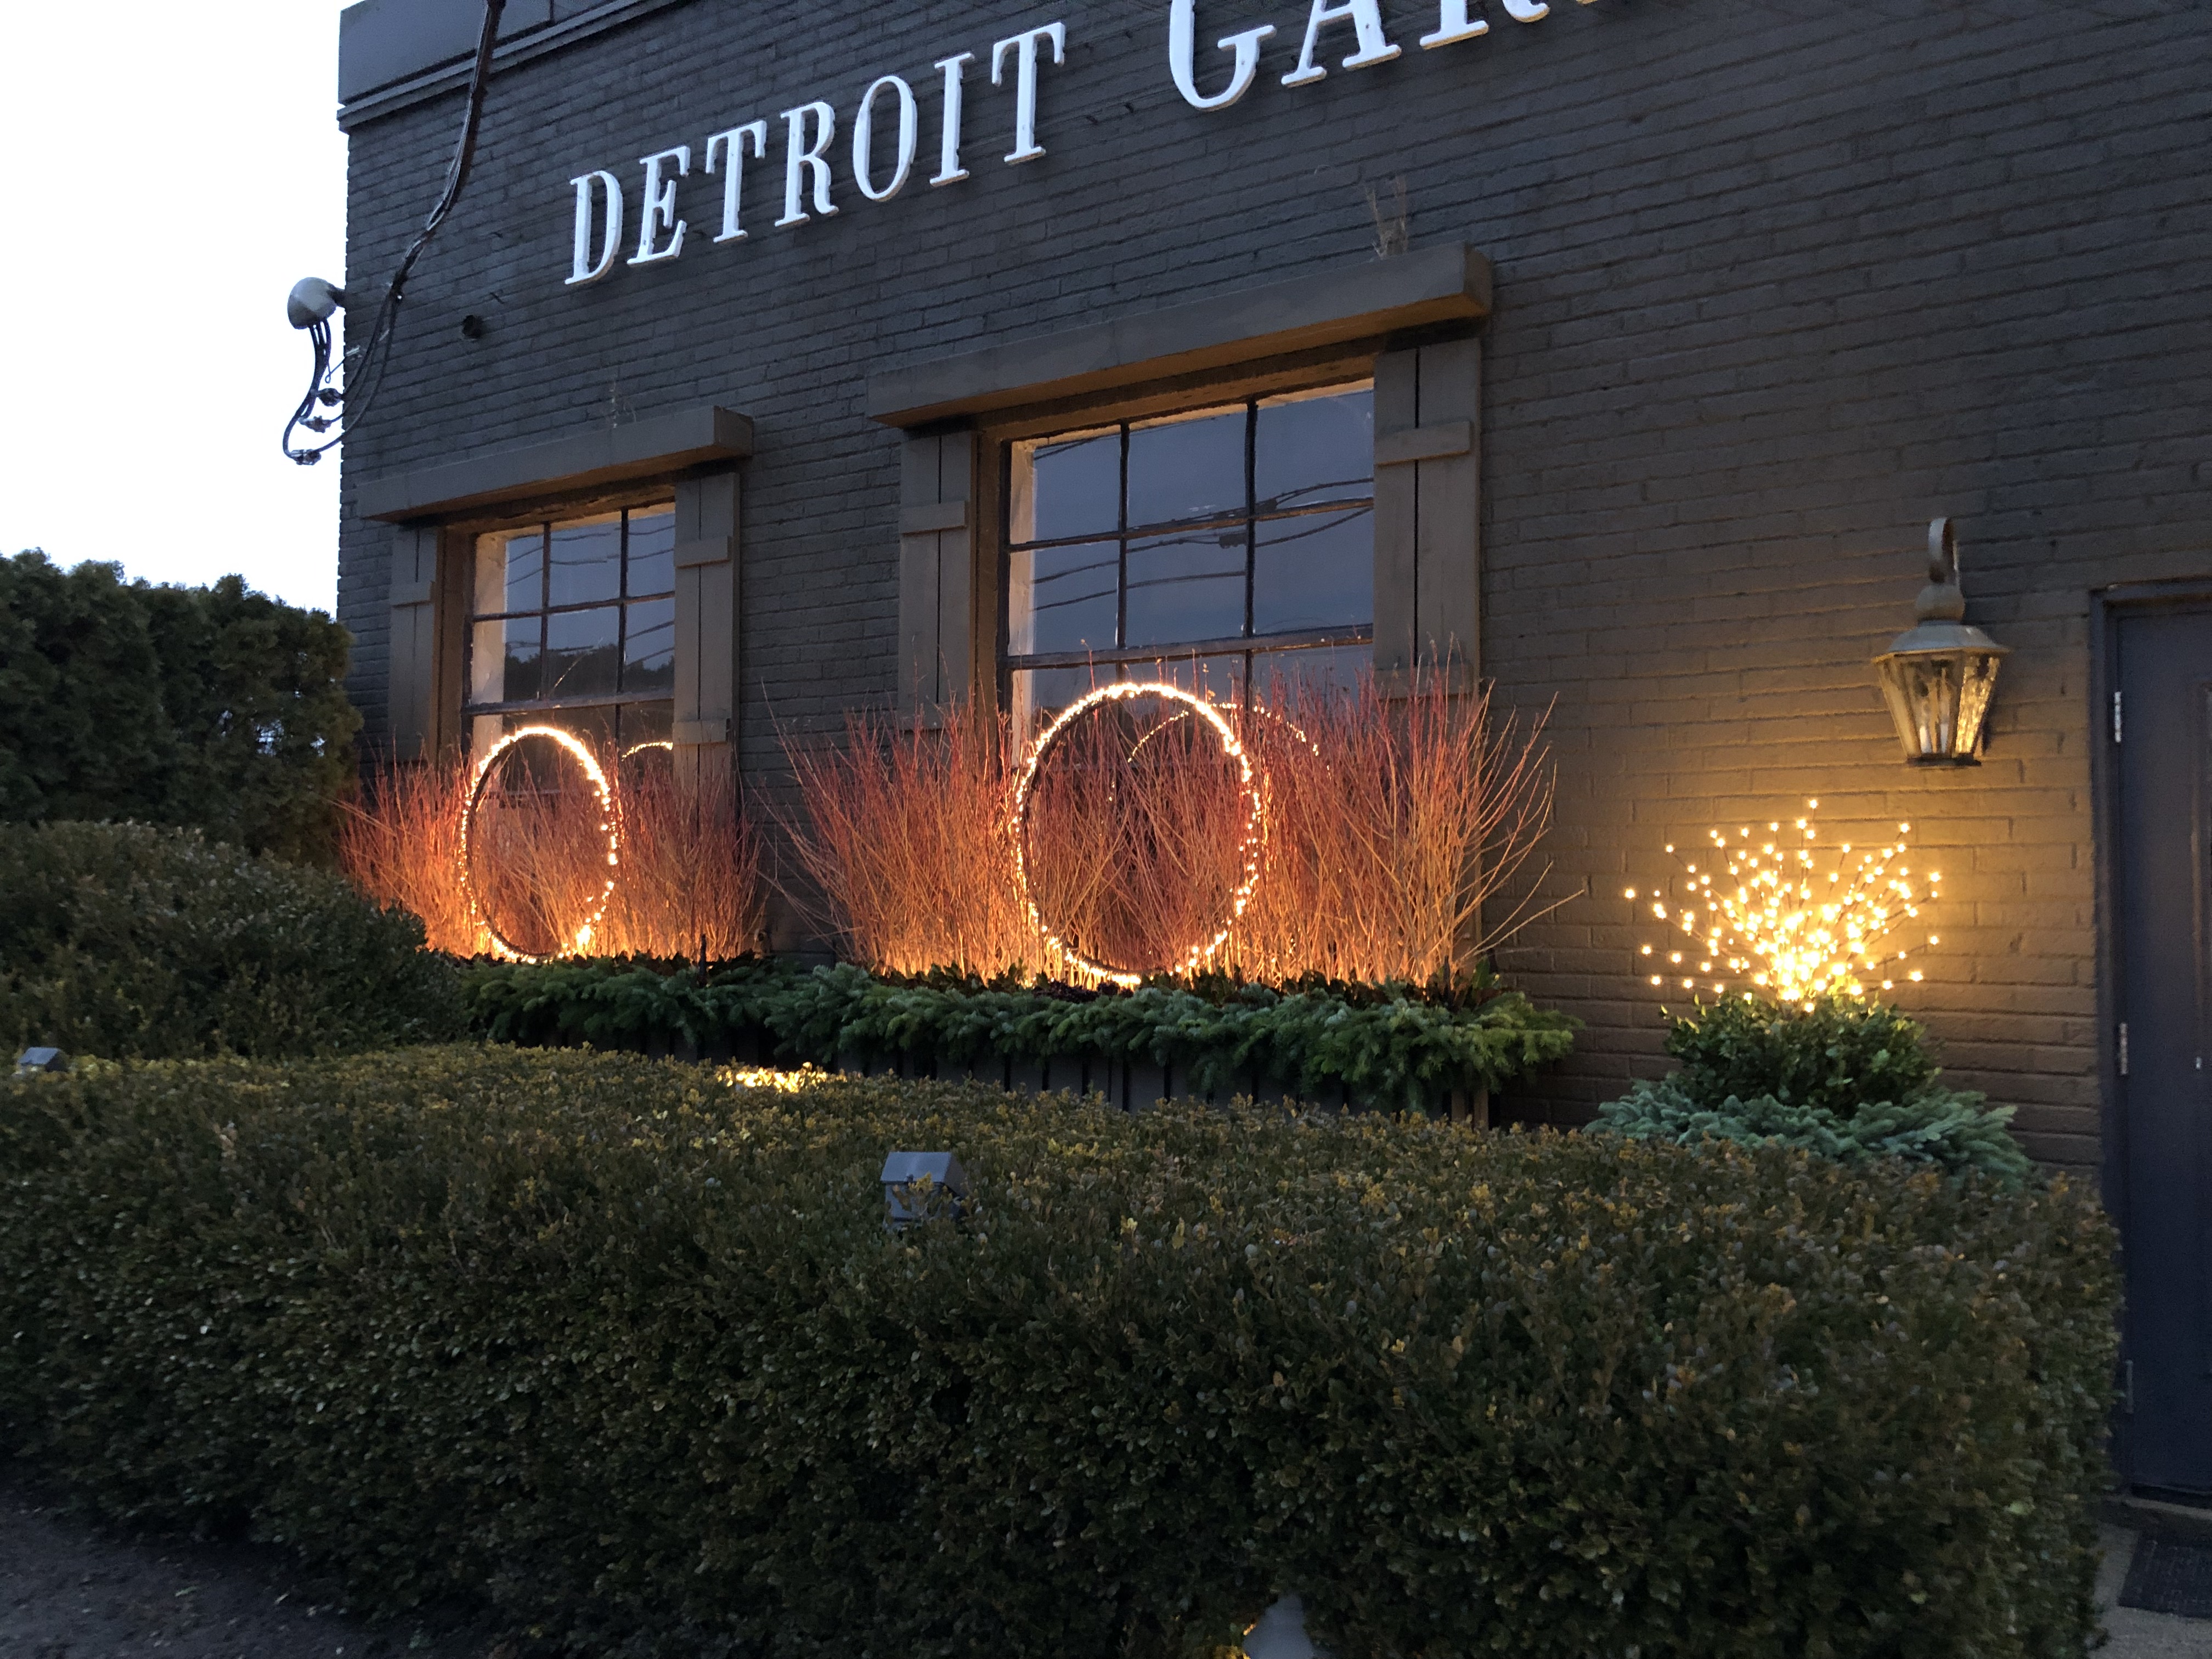
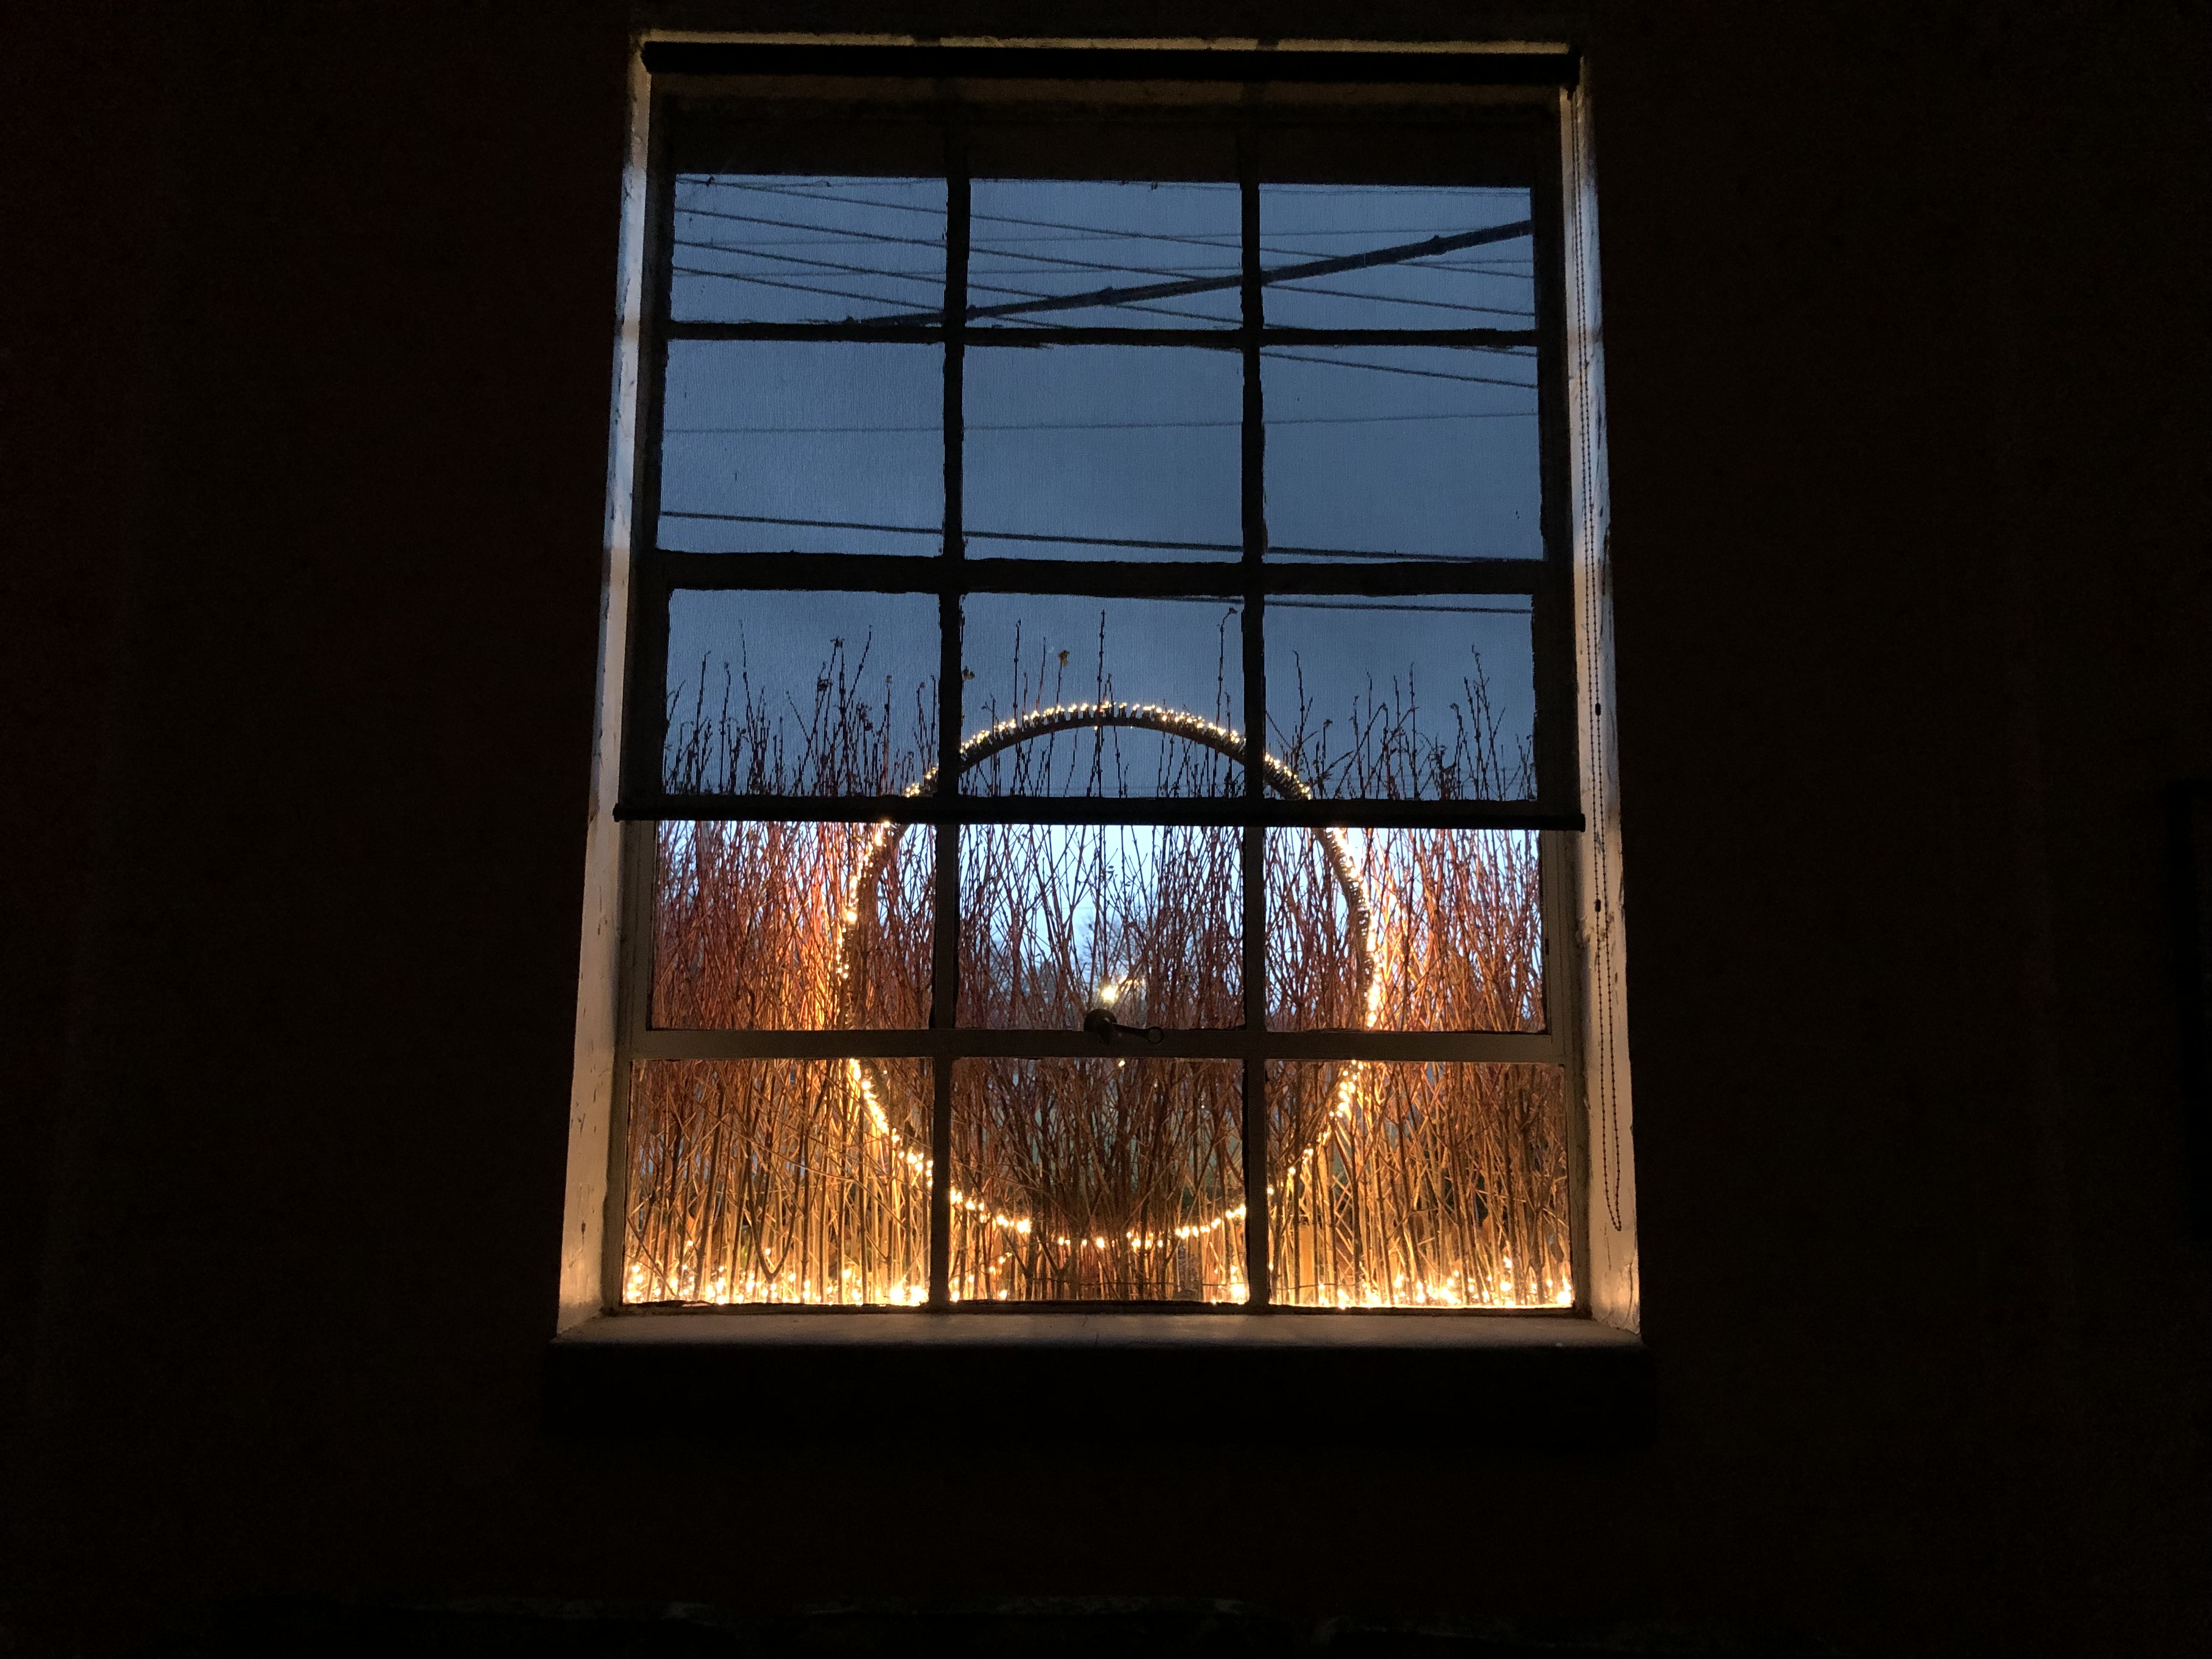
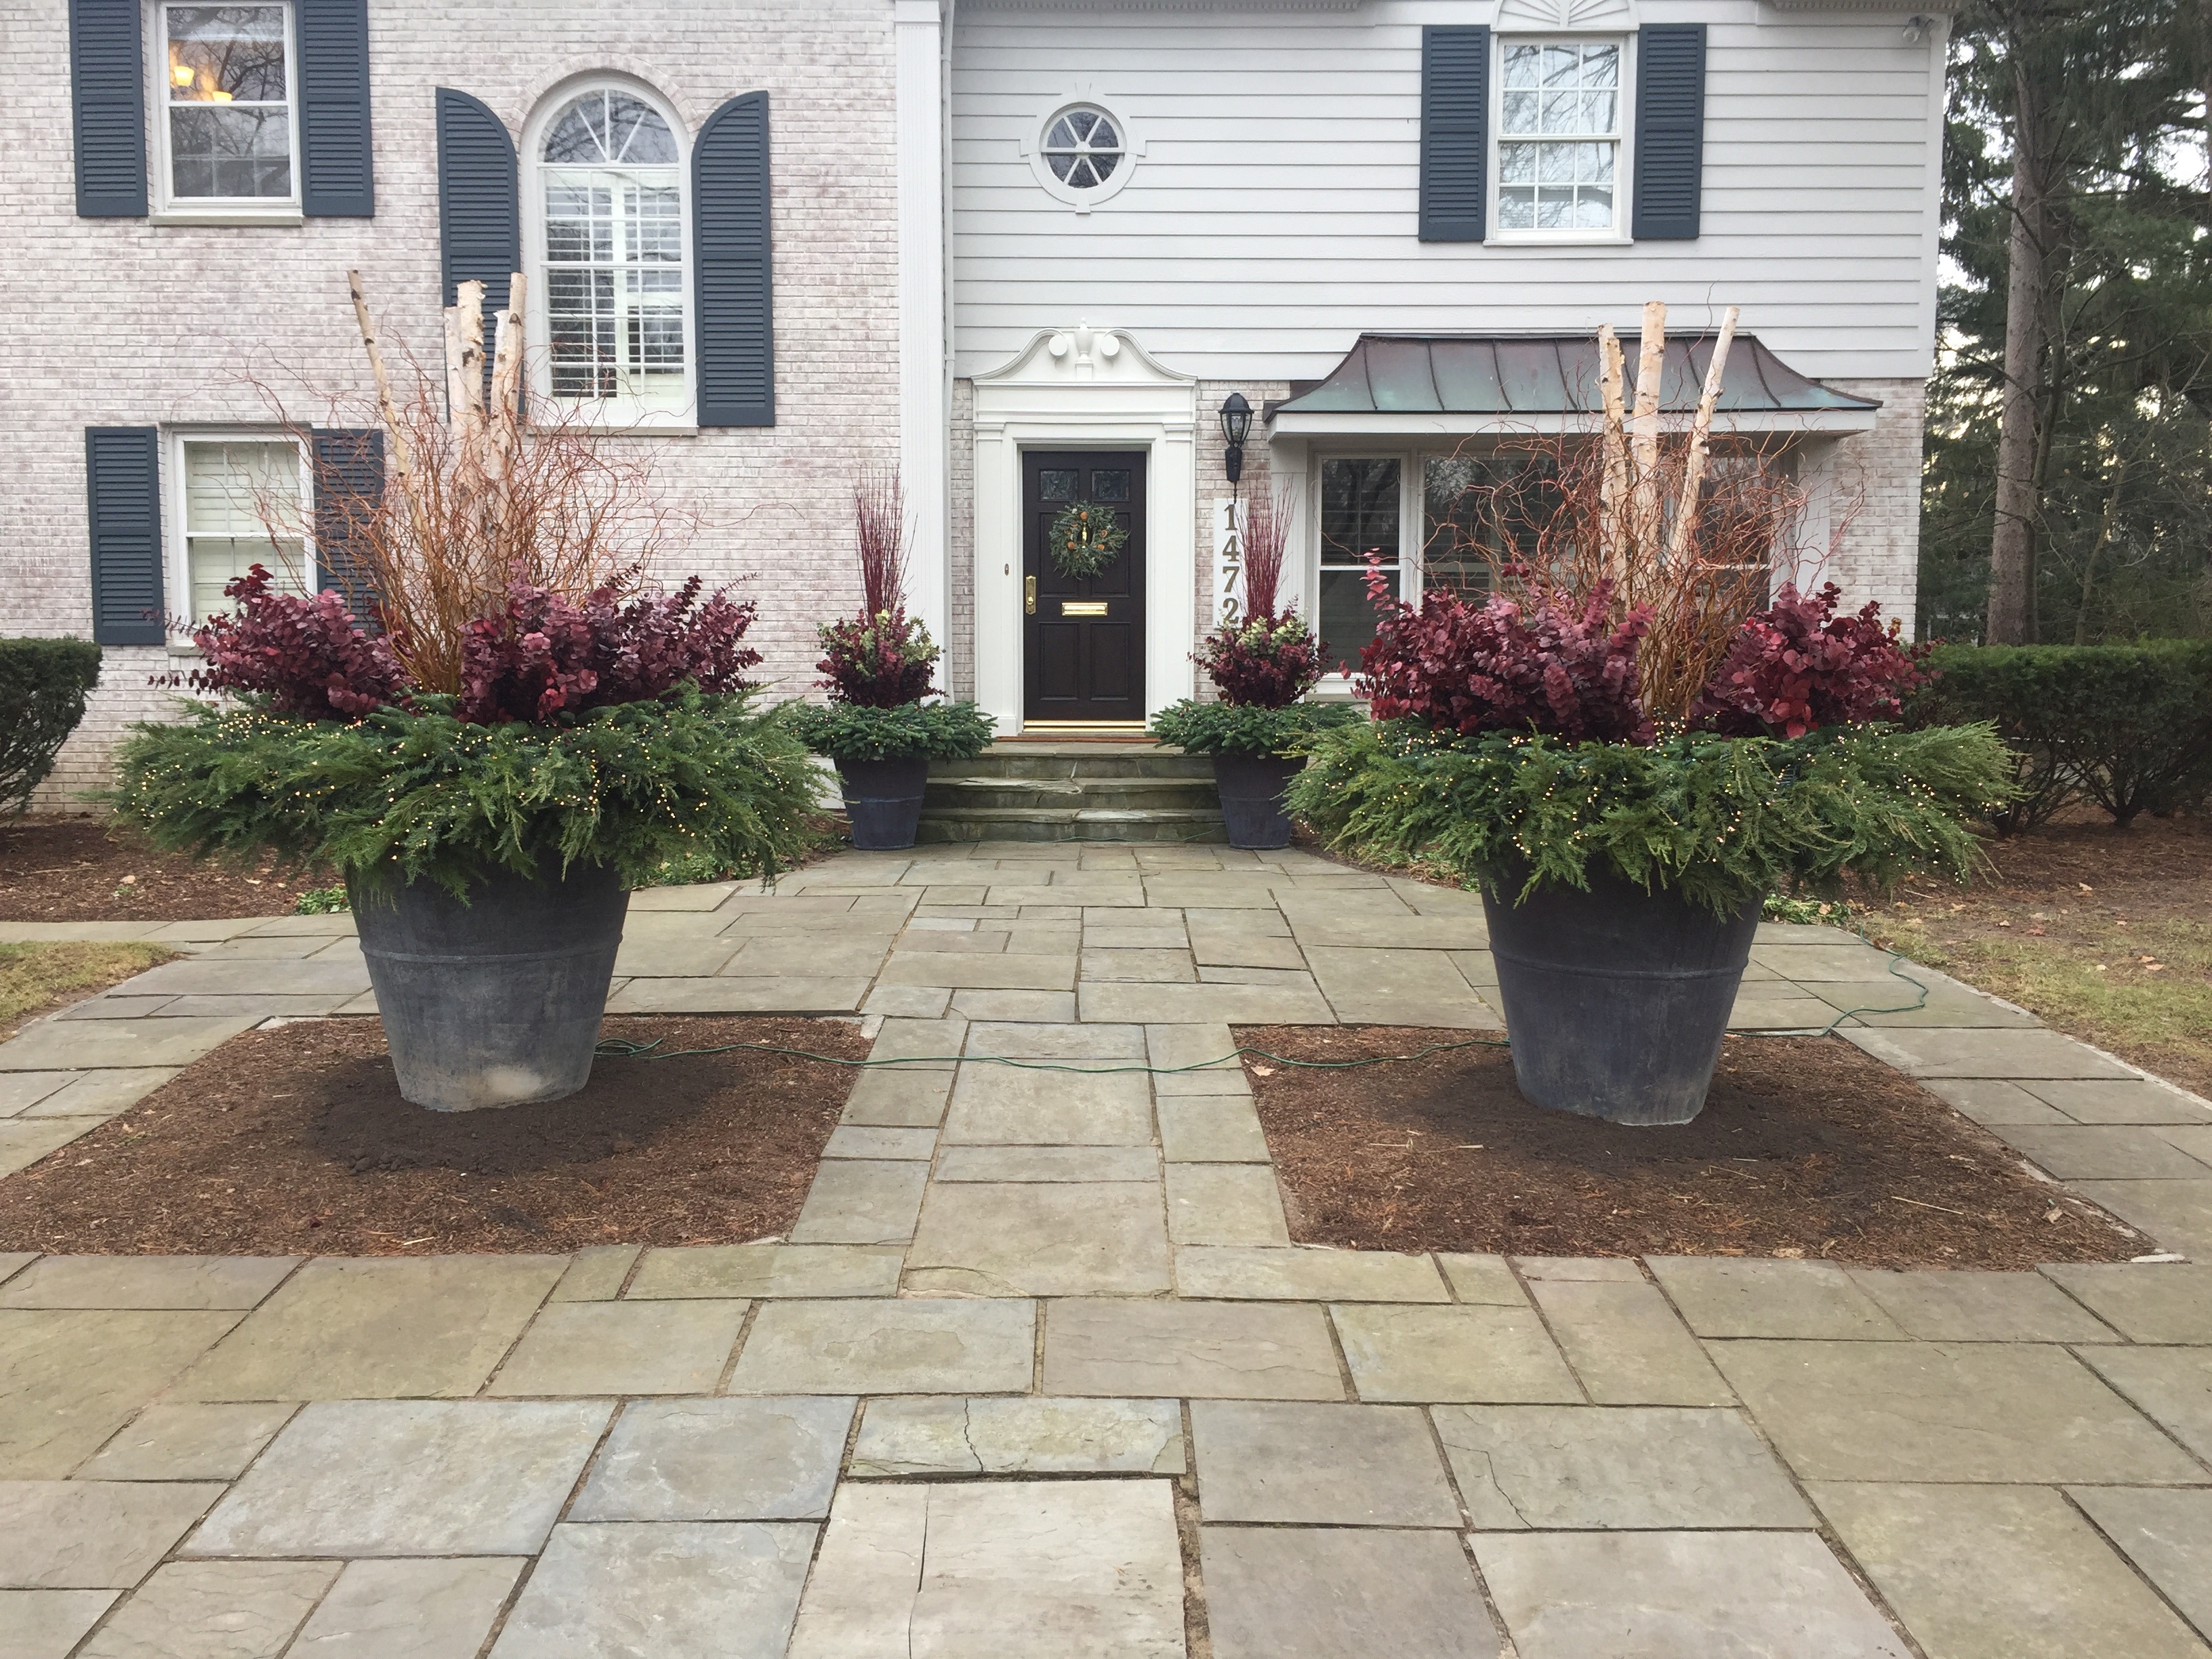
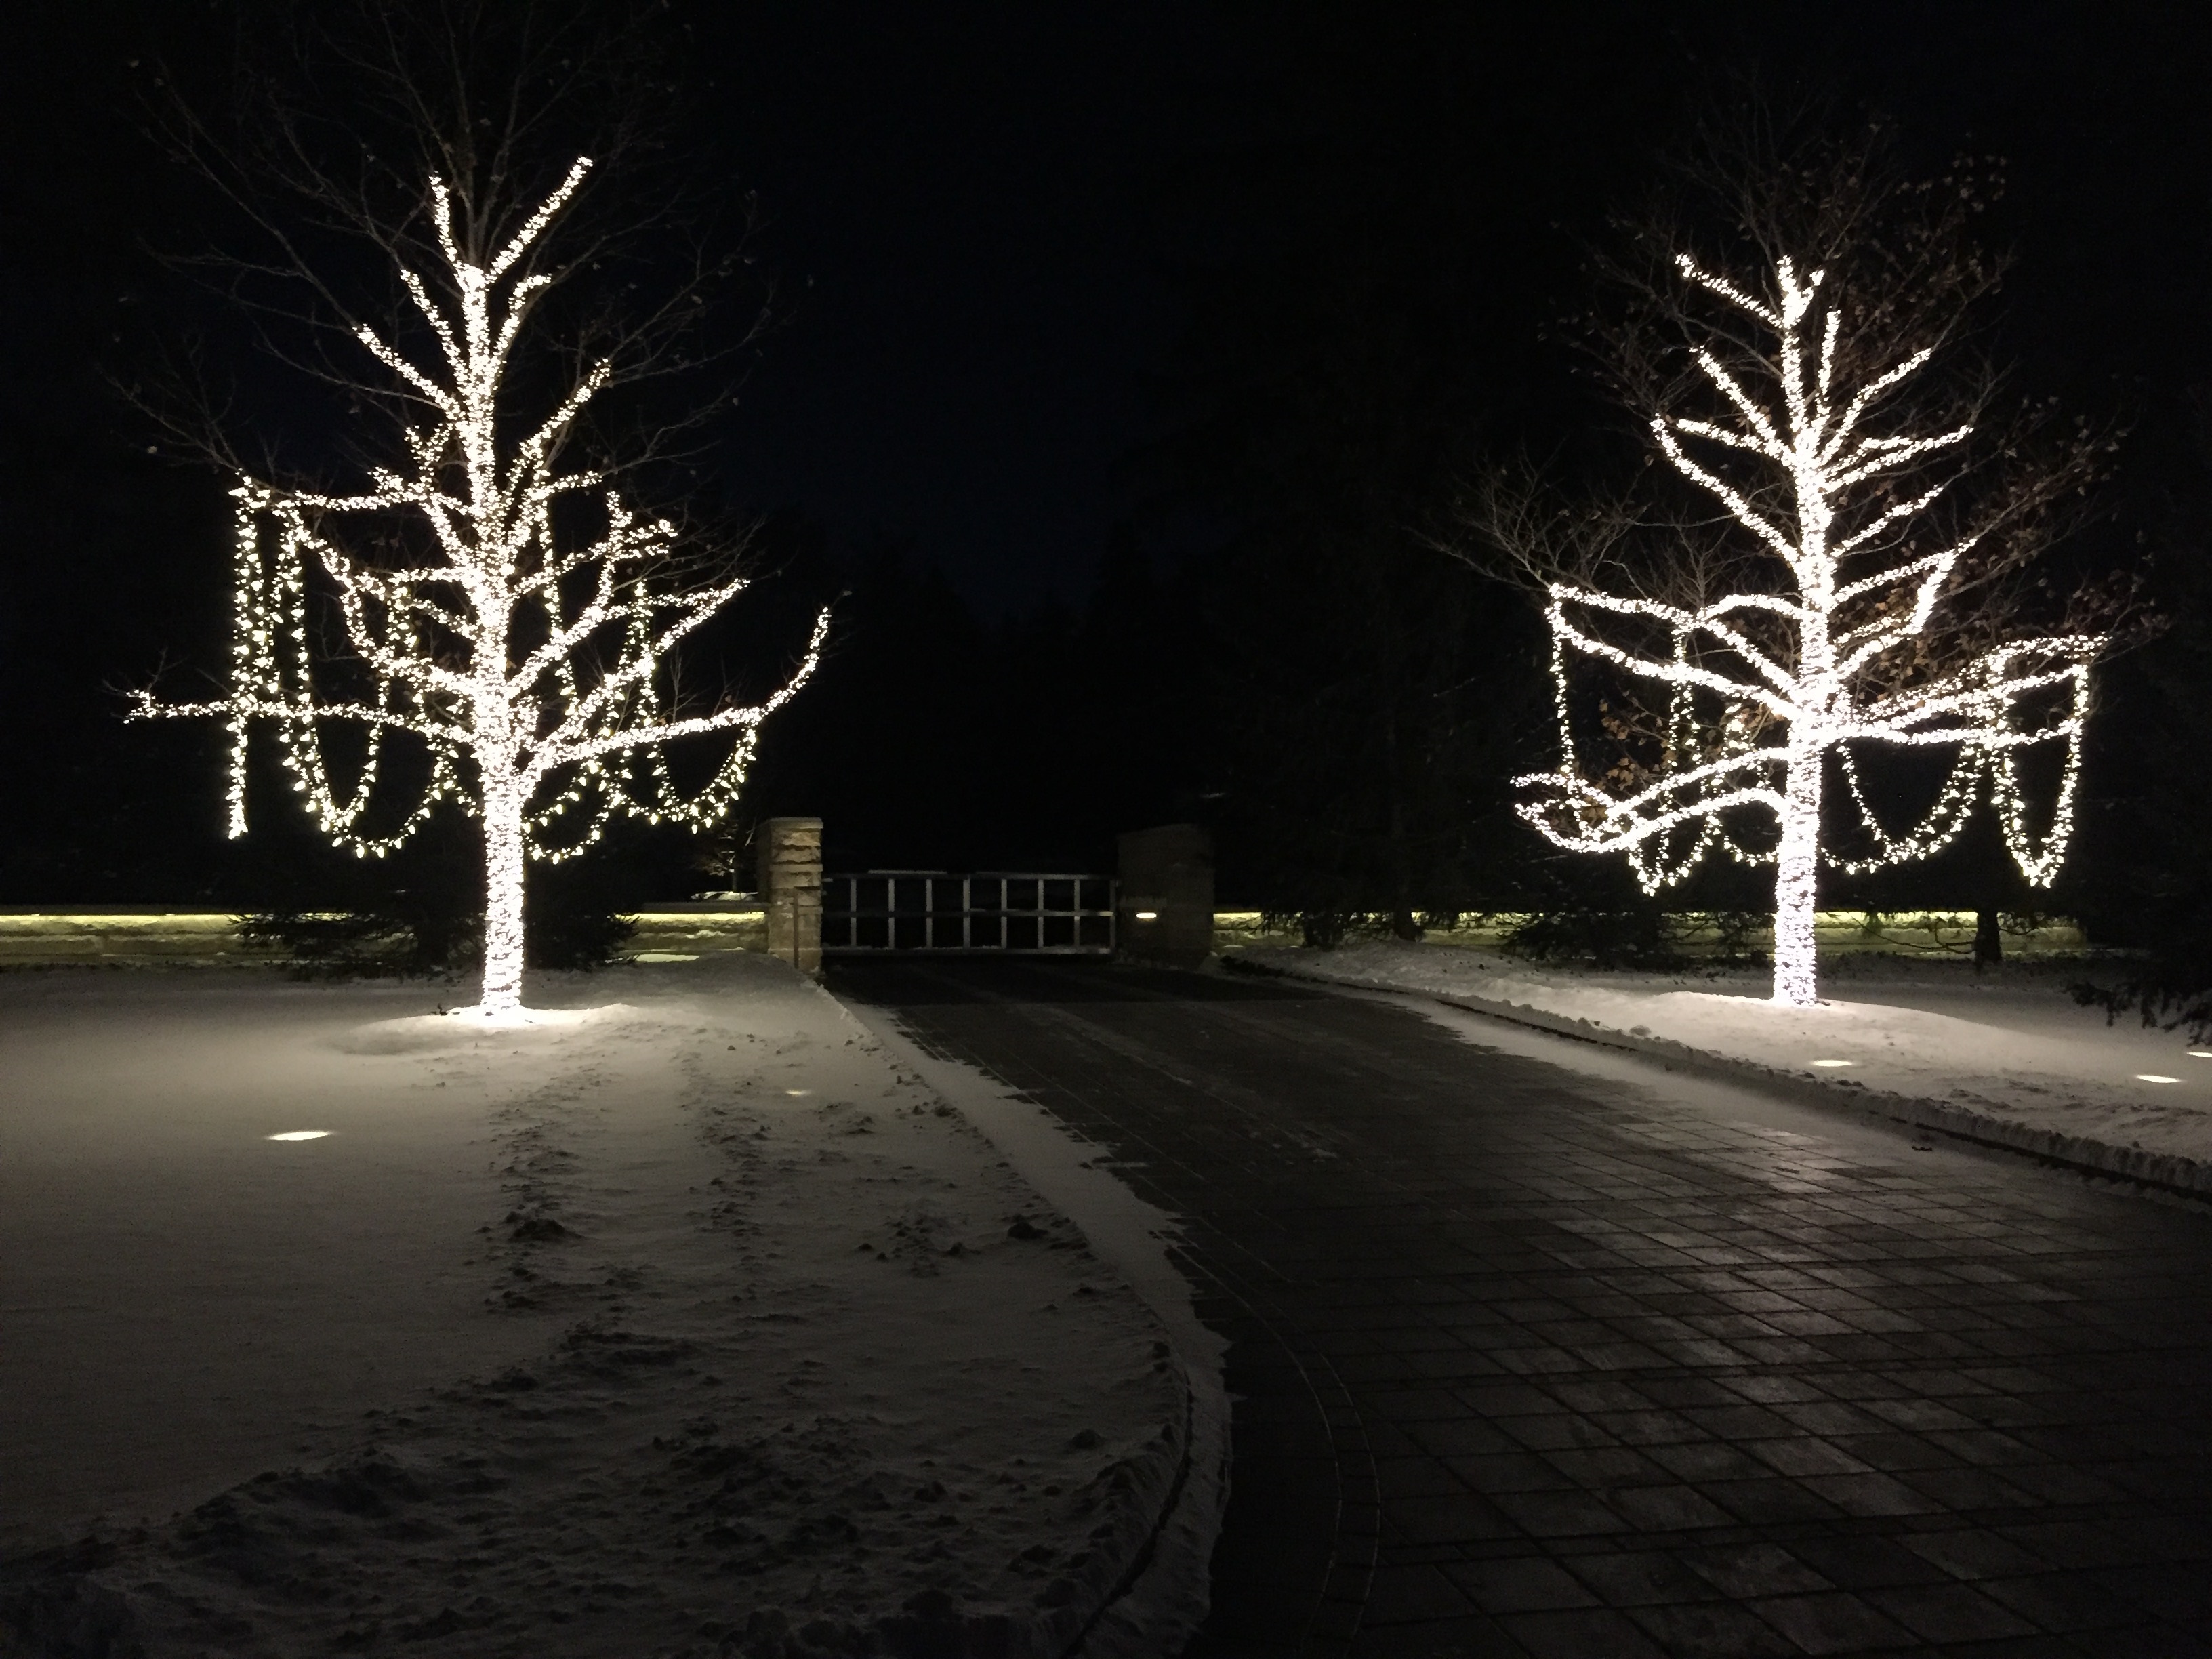
The gardens added a whole other dimension to the lighting scheme. What was impressive in its scope was now a jewel in the landscape. They have that aura of romance.

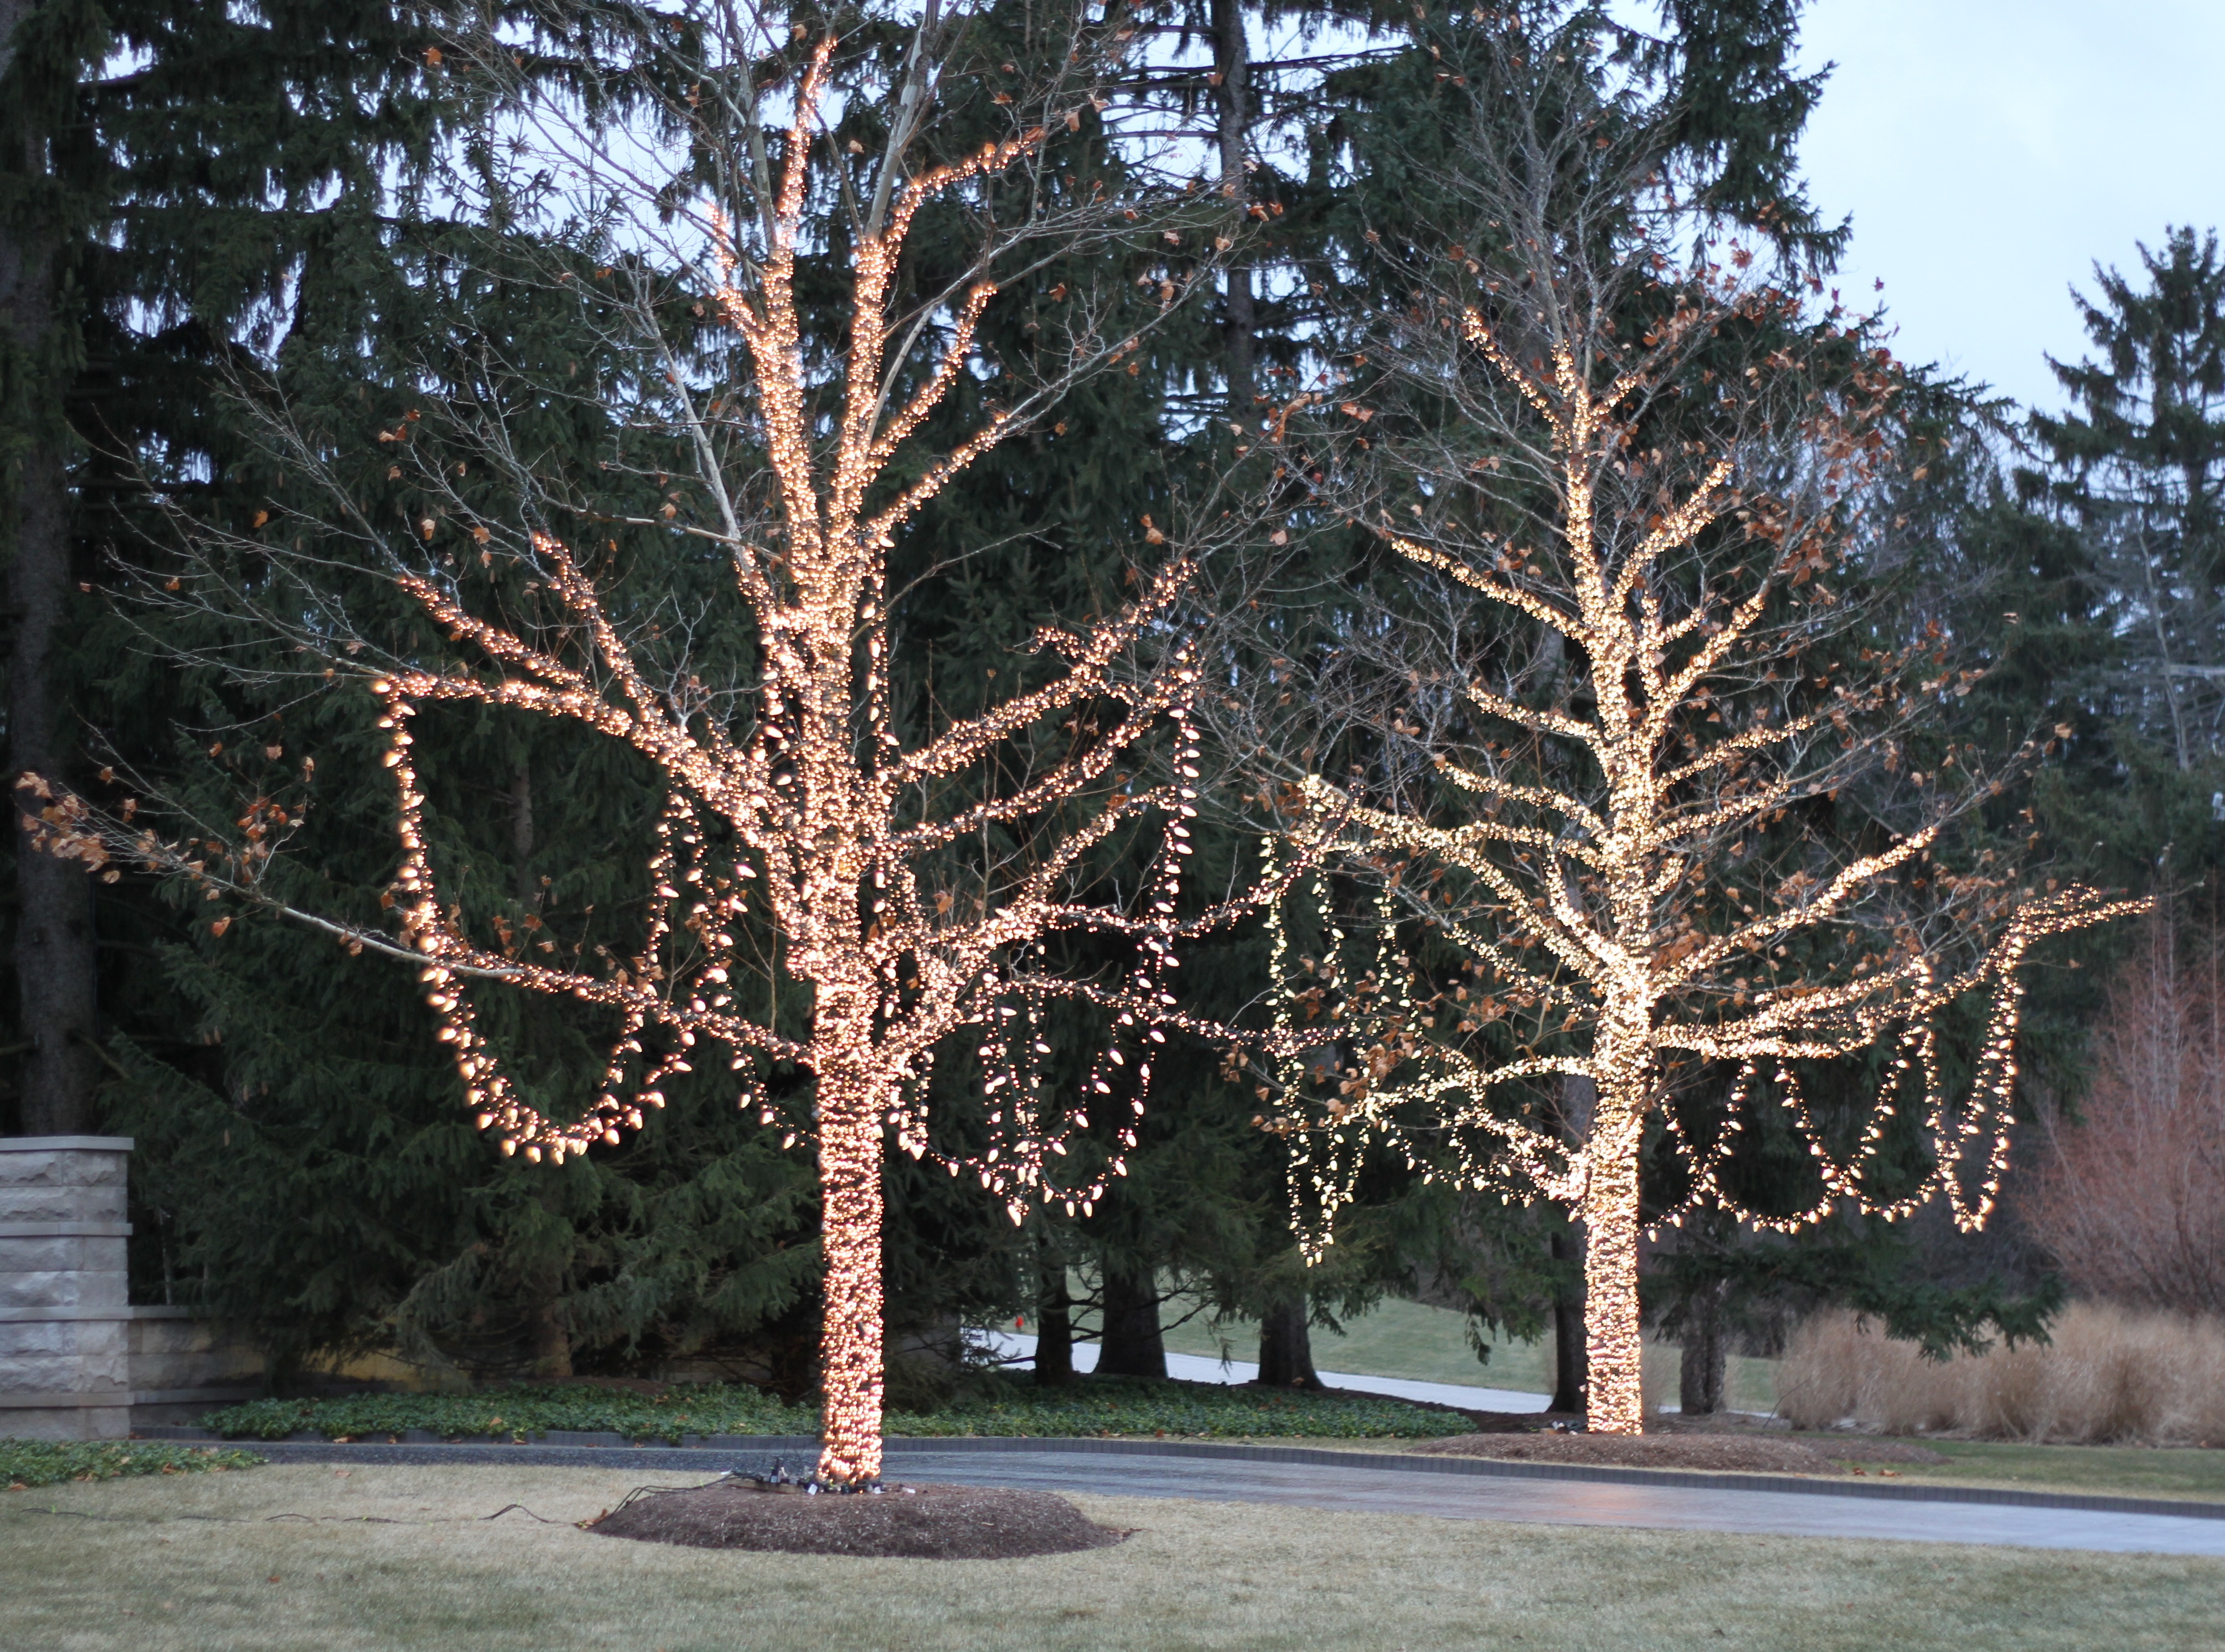
I posted this picture that David took the other morning at 8am on instagram. Landscape designer Susan Cohan commented: “Cinderellas!” What a wonderful way to describe them! Though London Planes are stately trees with gorgeous exfoliating bark and luxuriously large leaves, dressed in lights and wreathed in garlands, they are the stuff of fairy tales. Wrought from a very static and hard material, the effect is graceful and dressy.

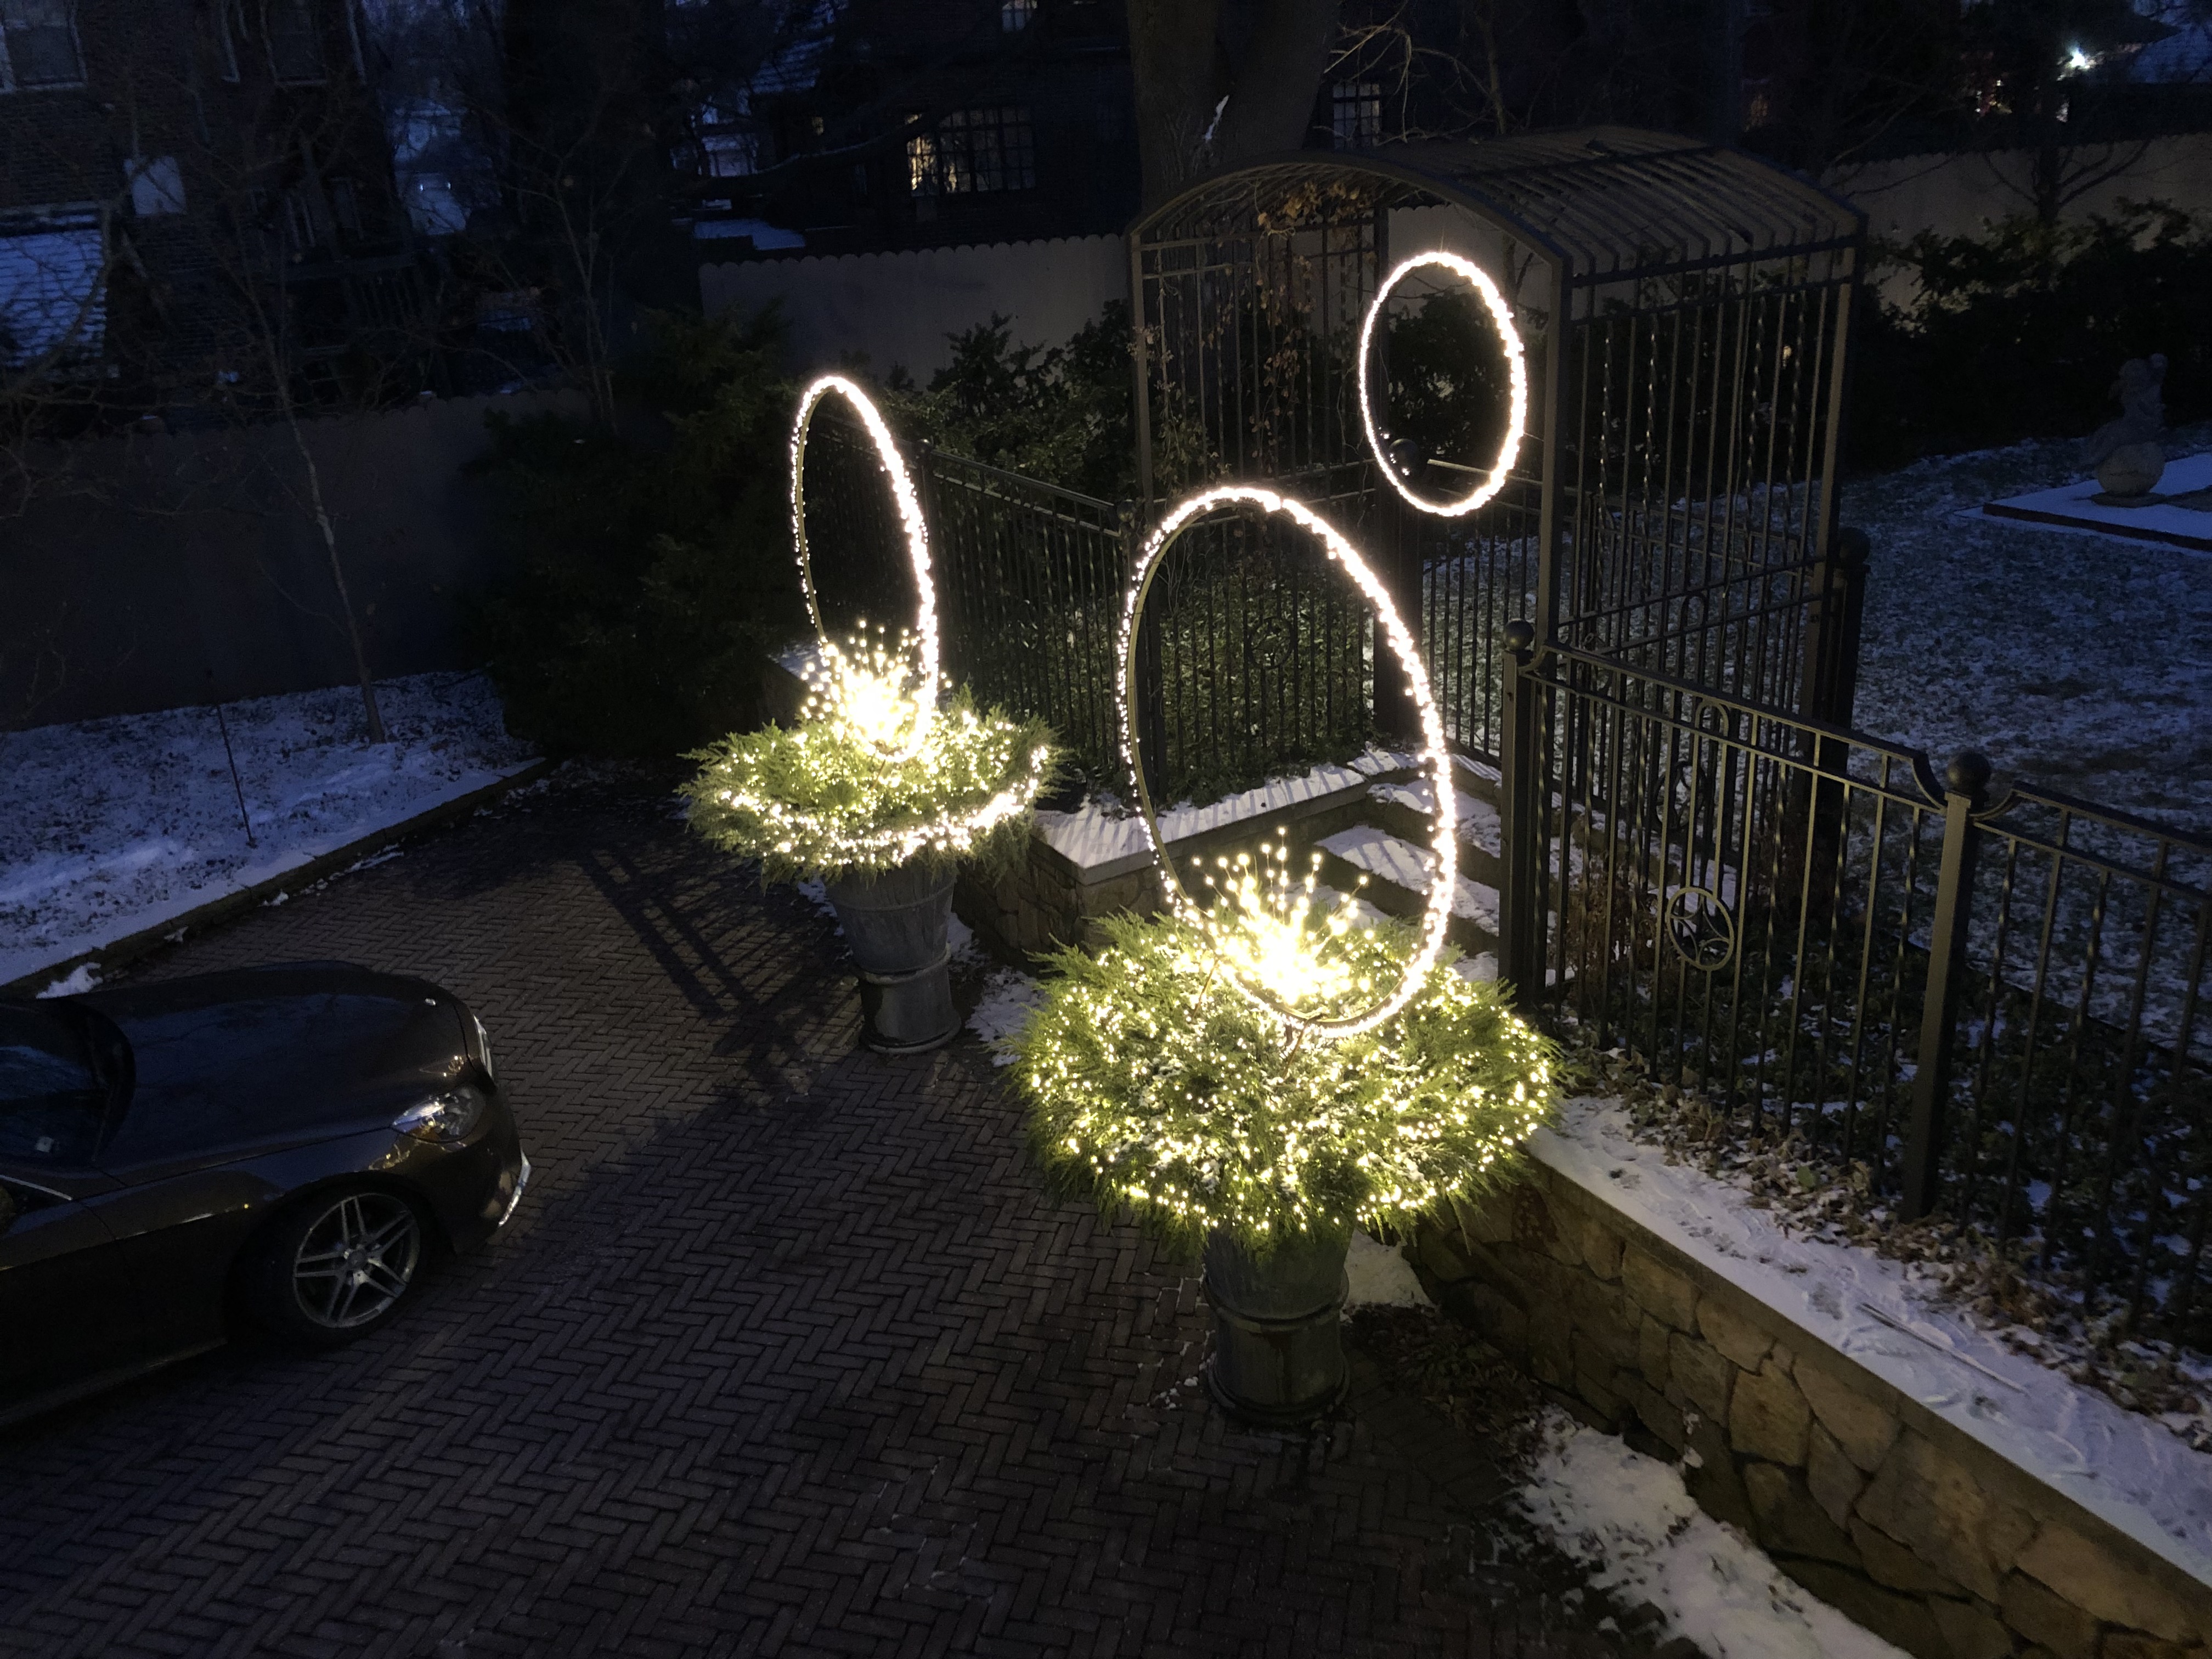
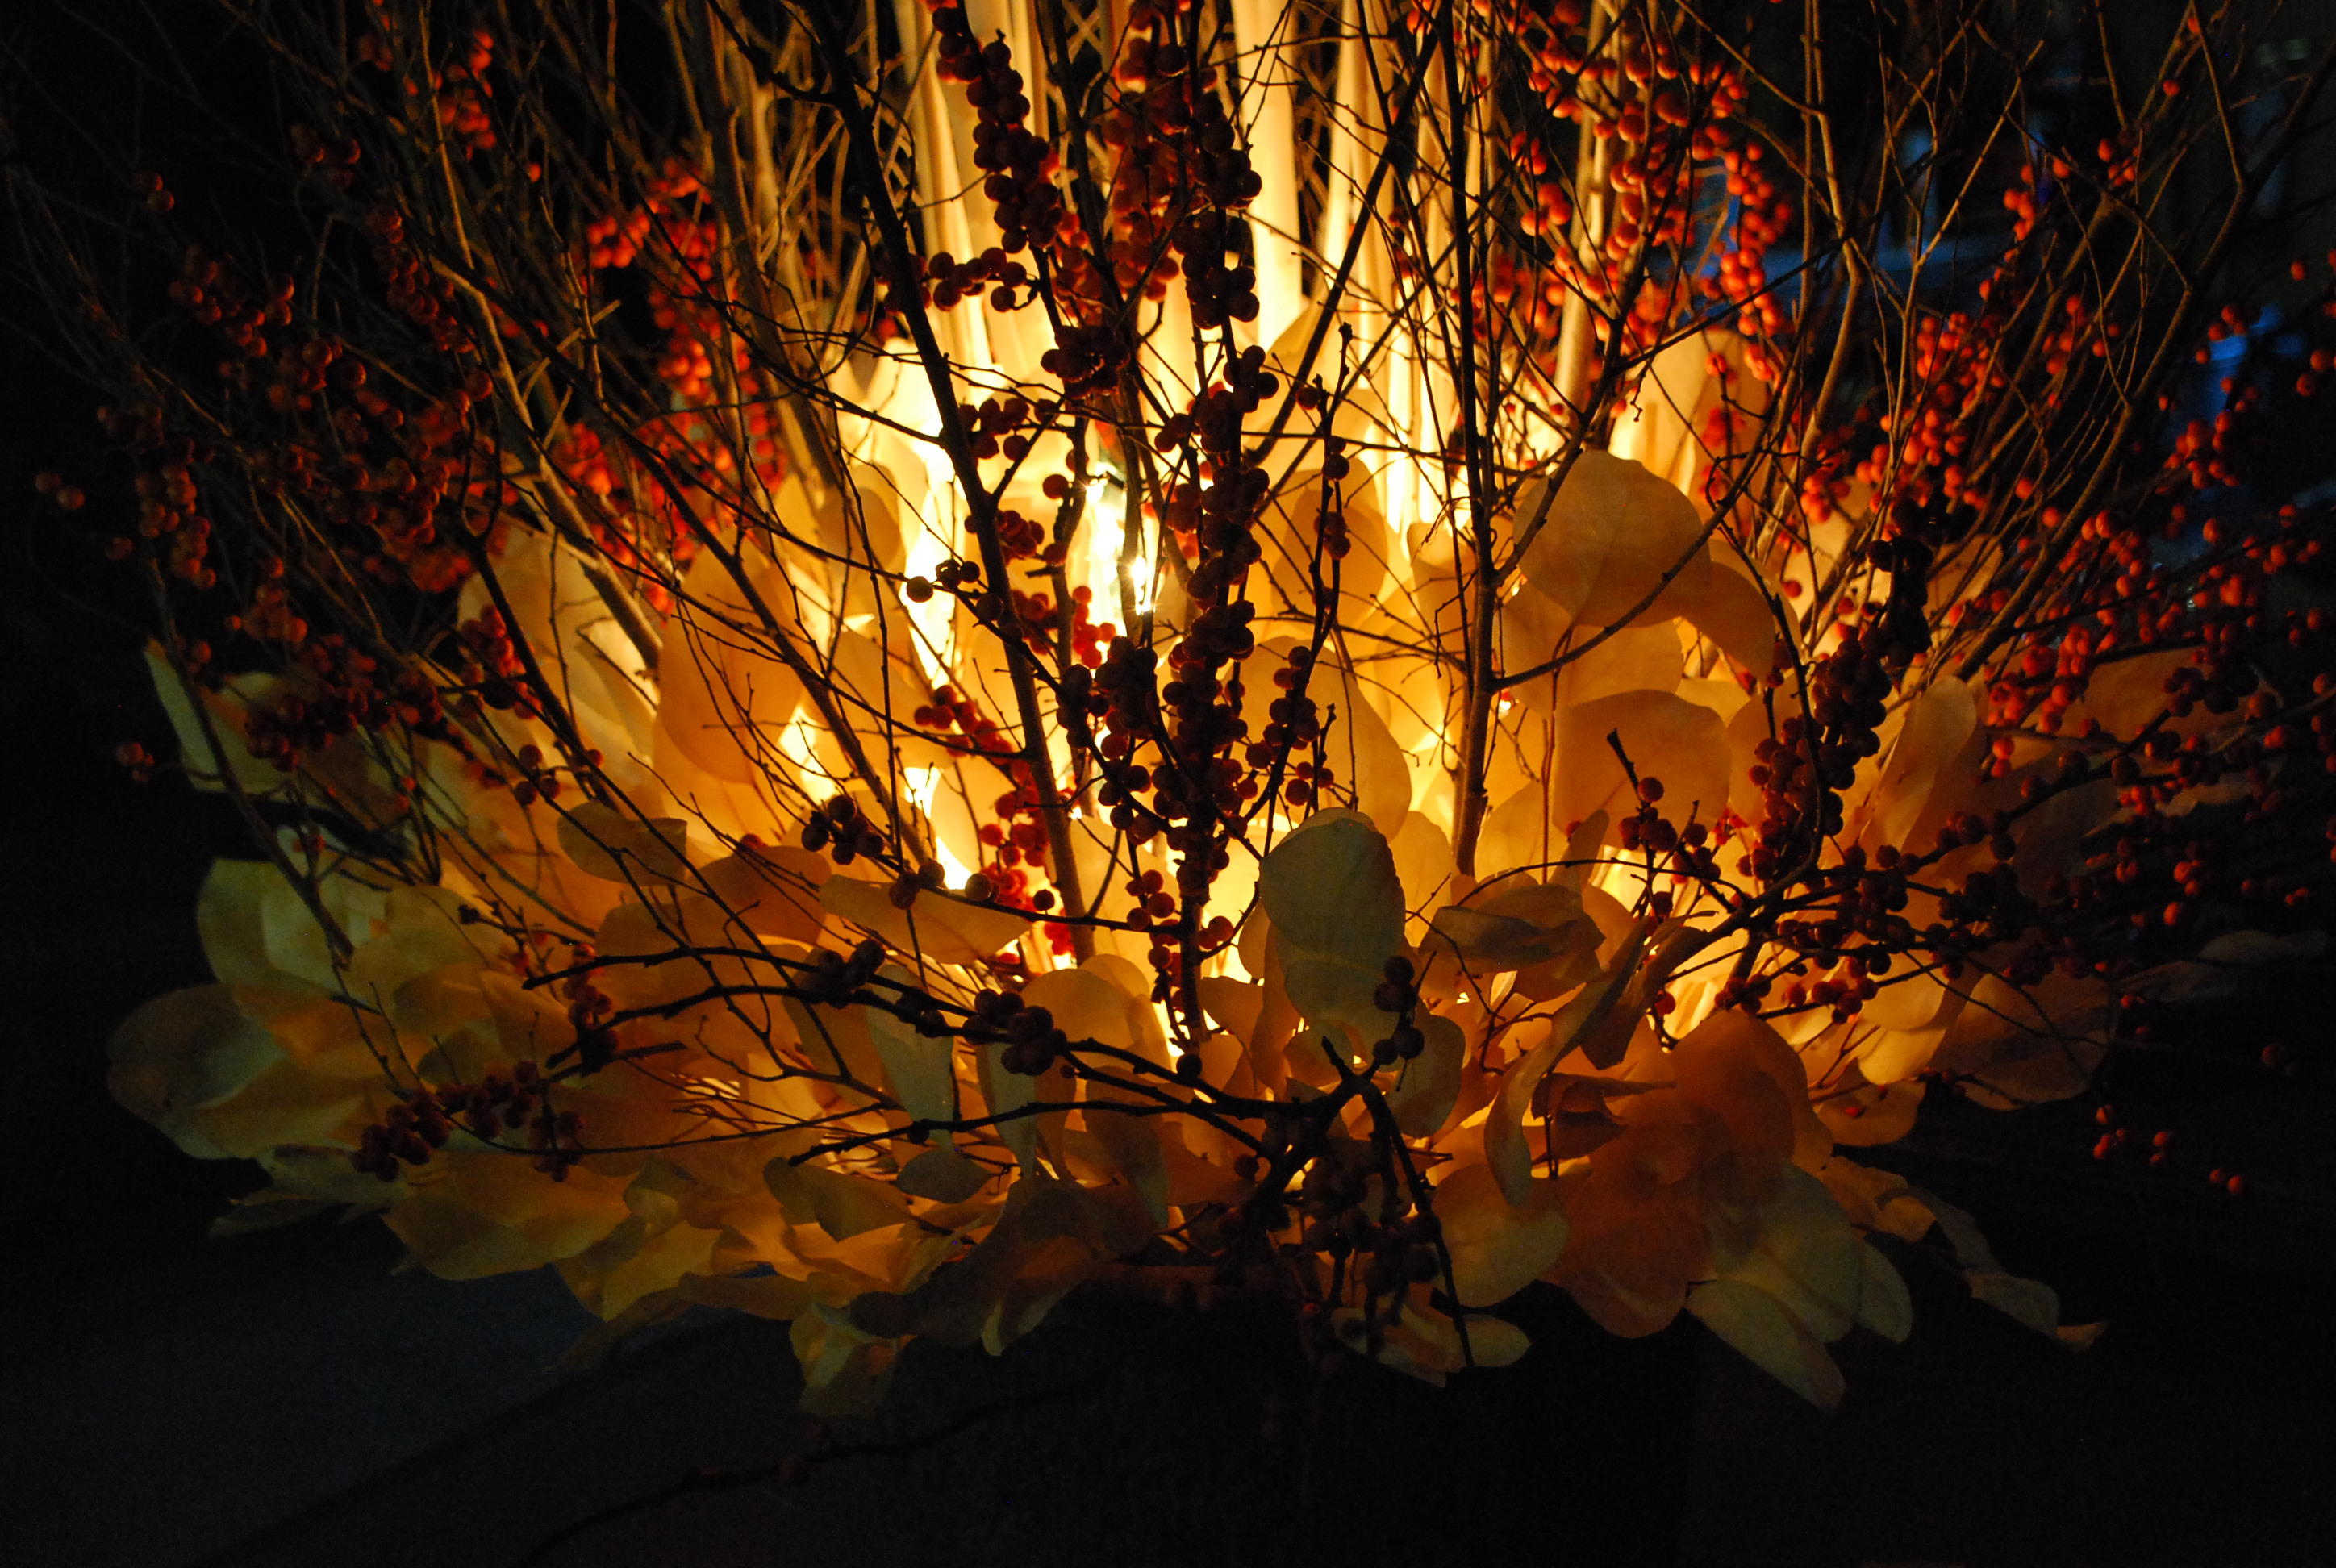
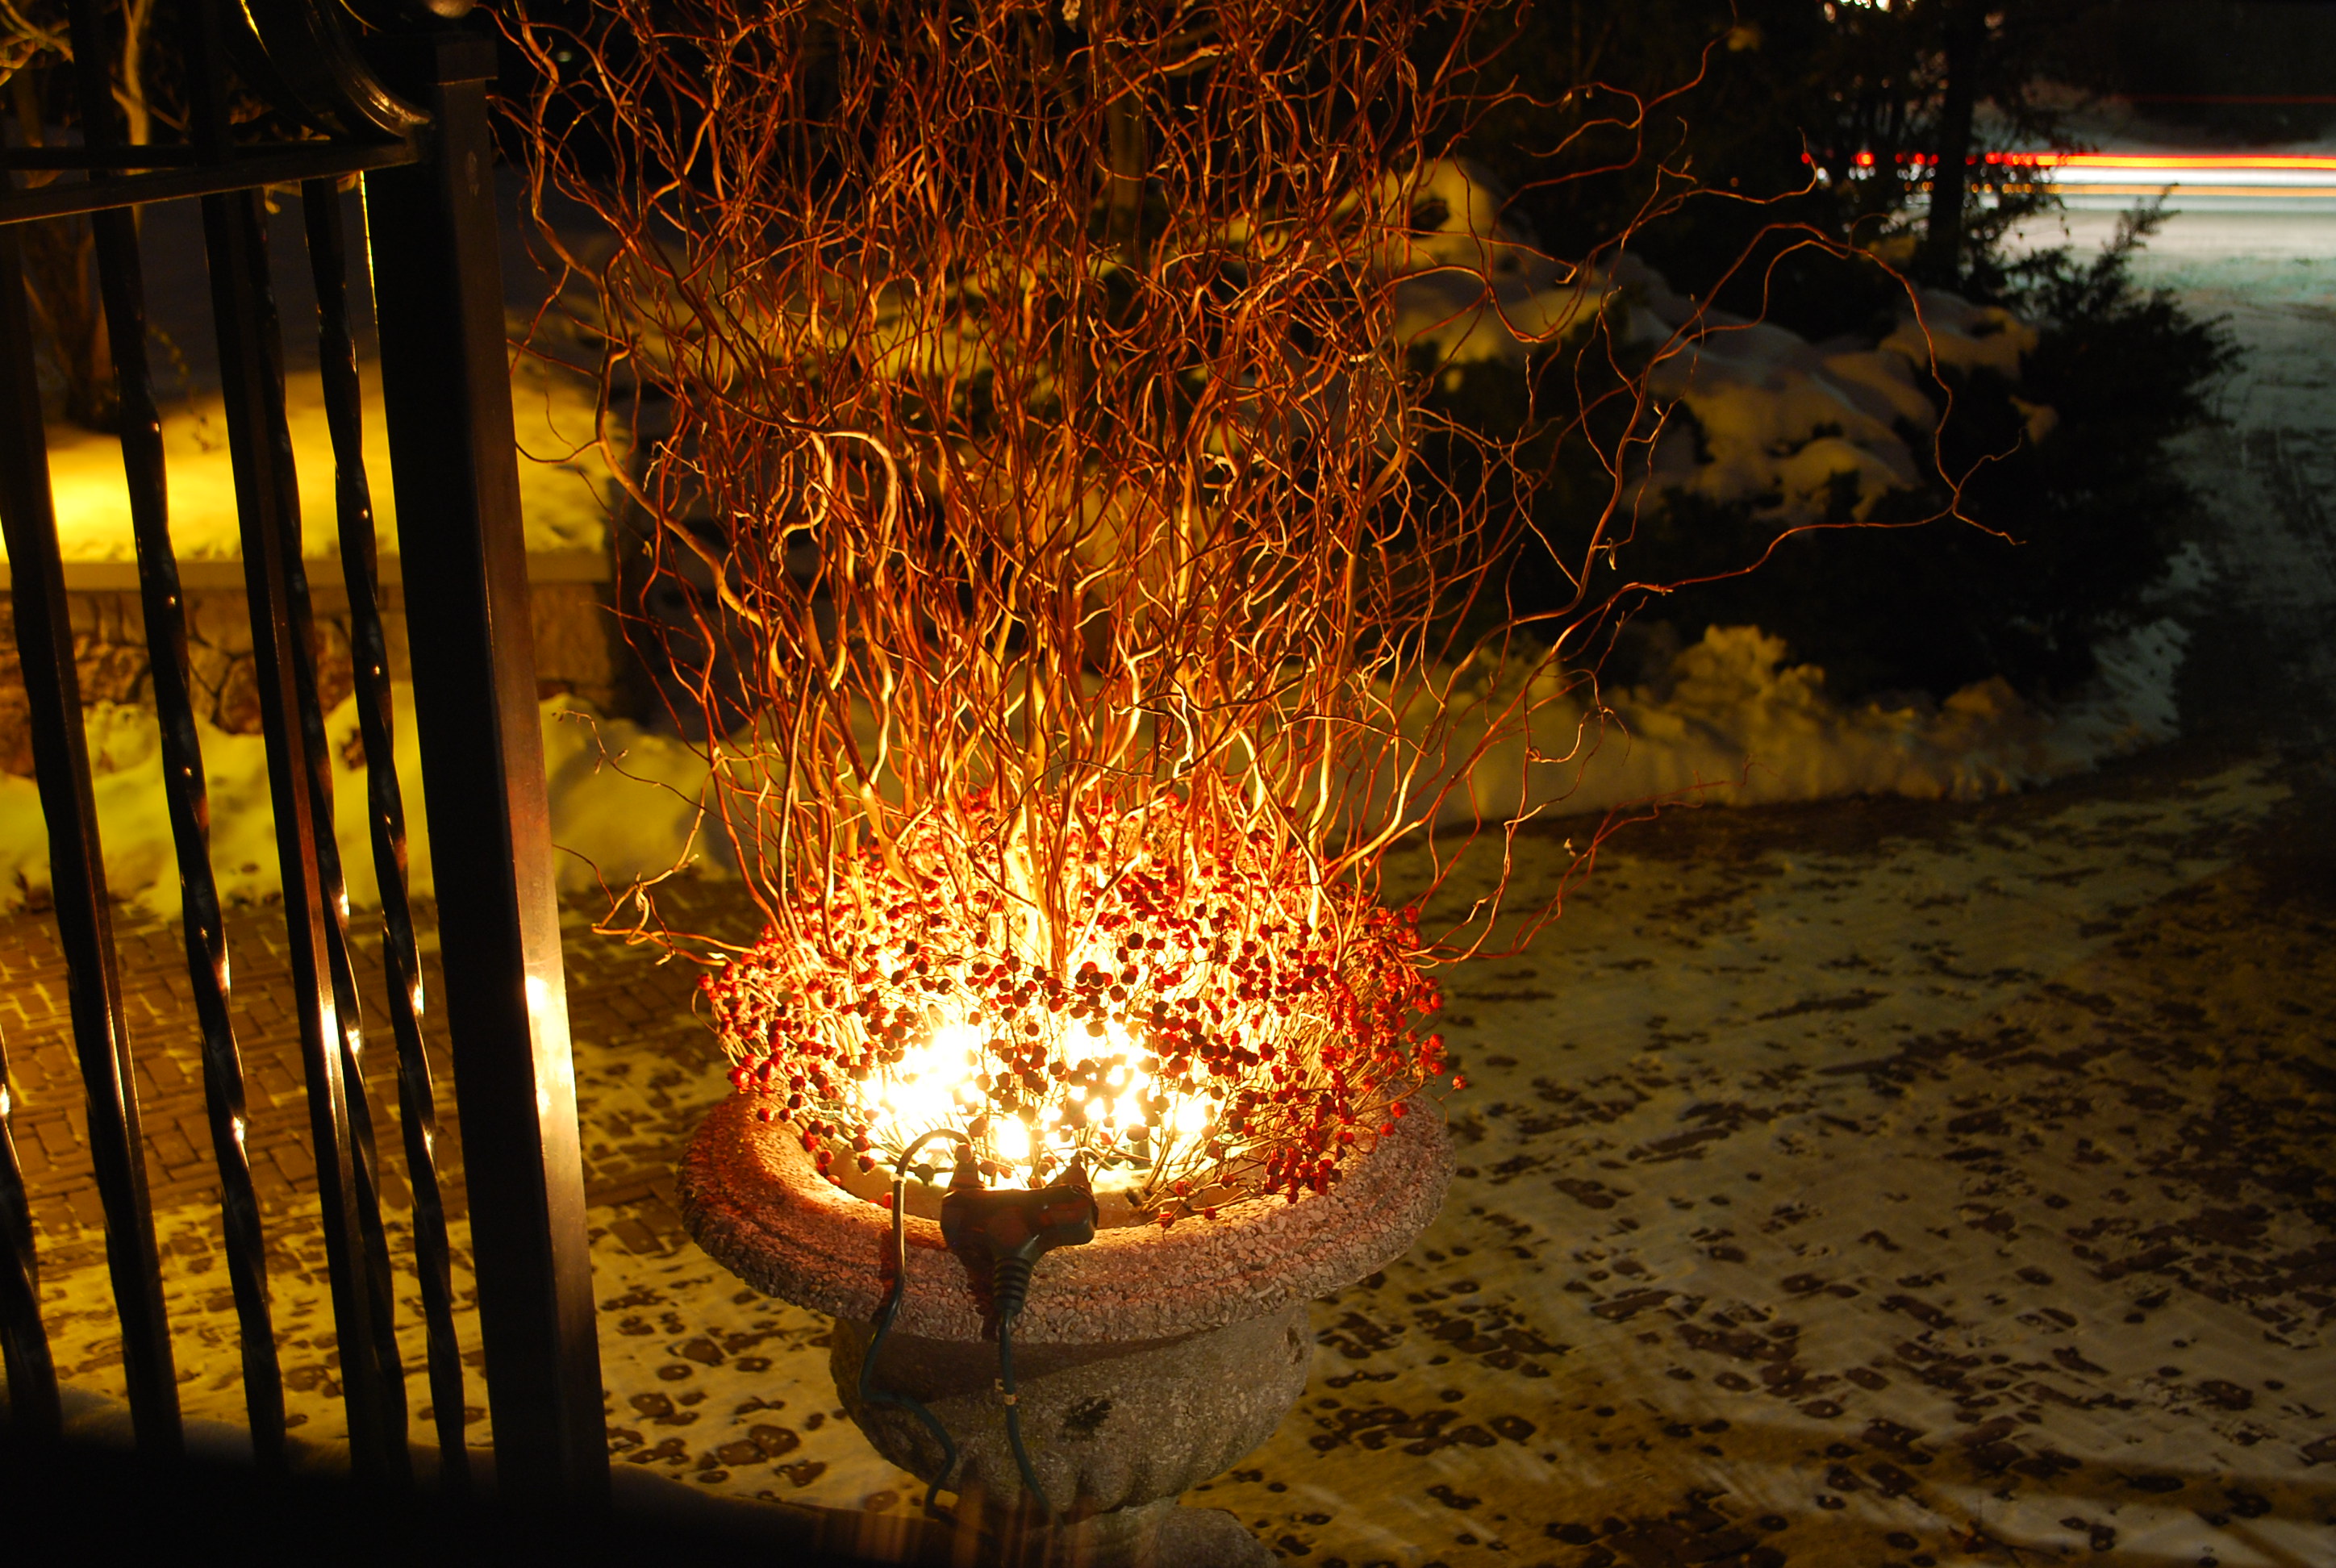
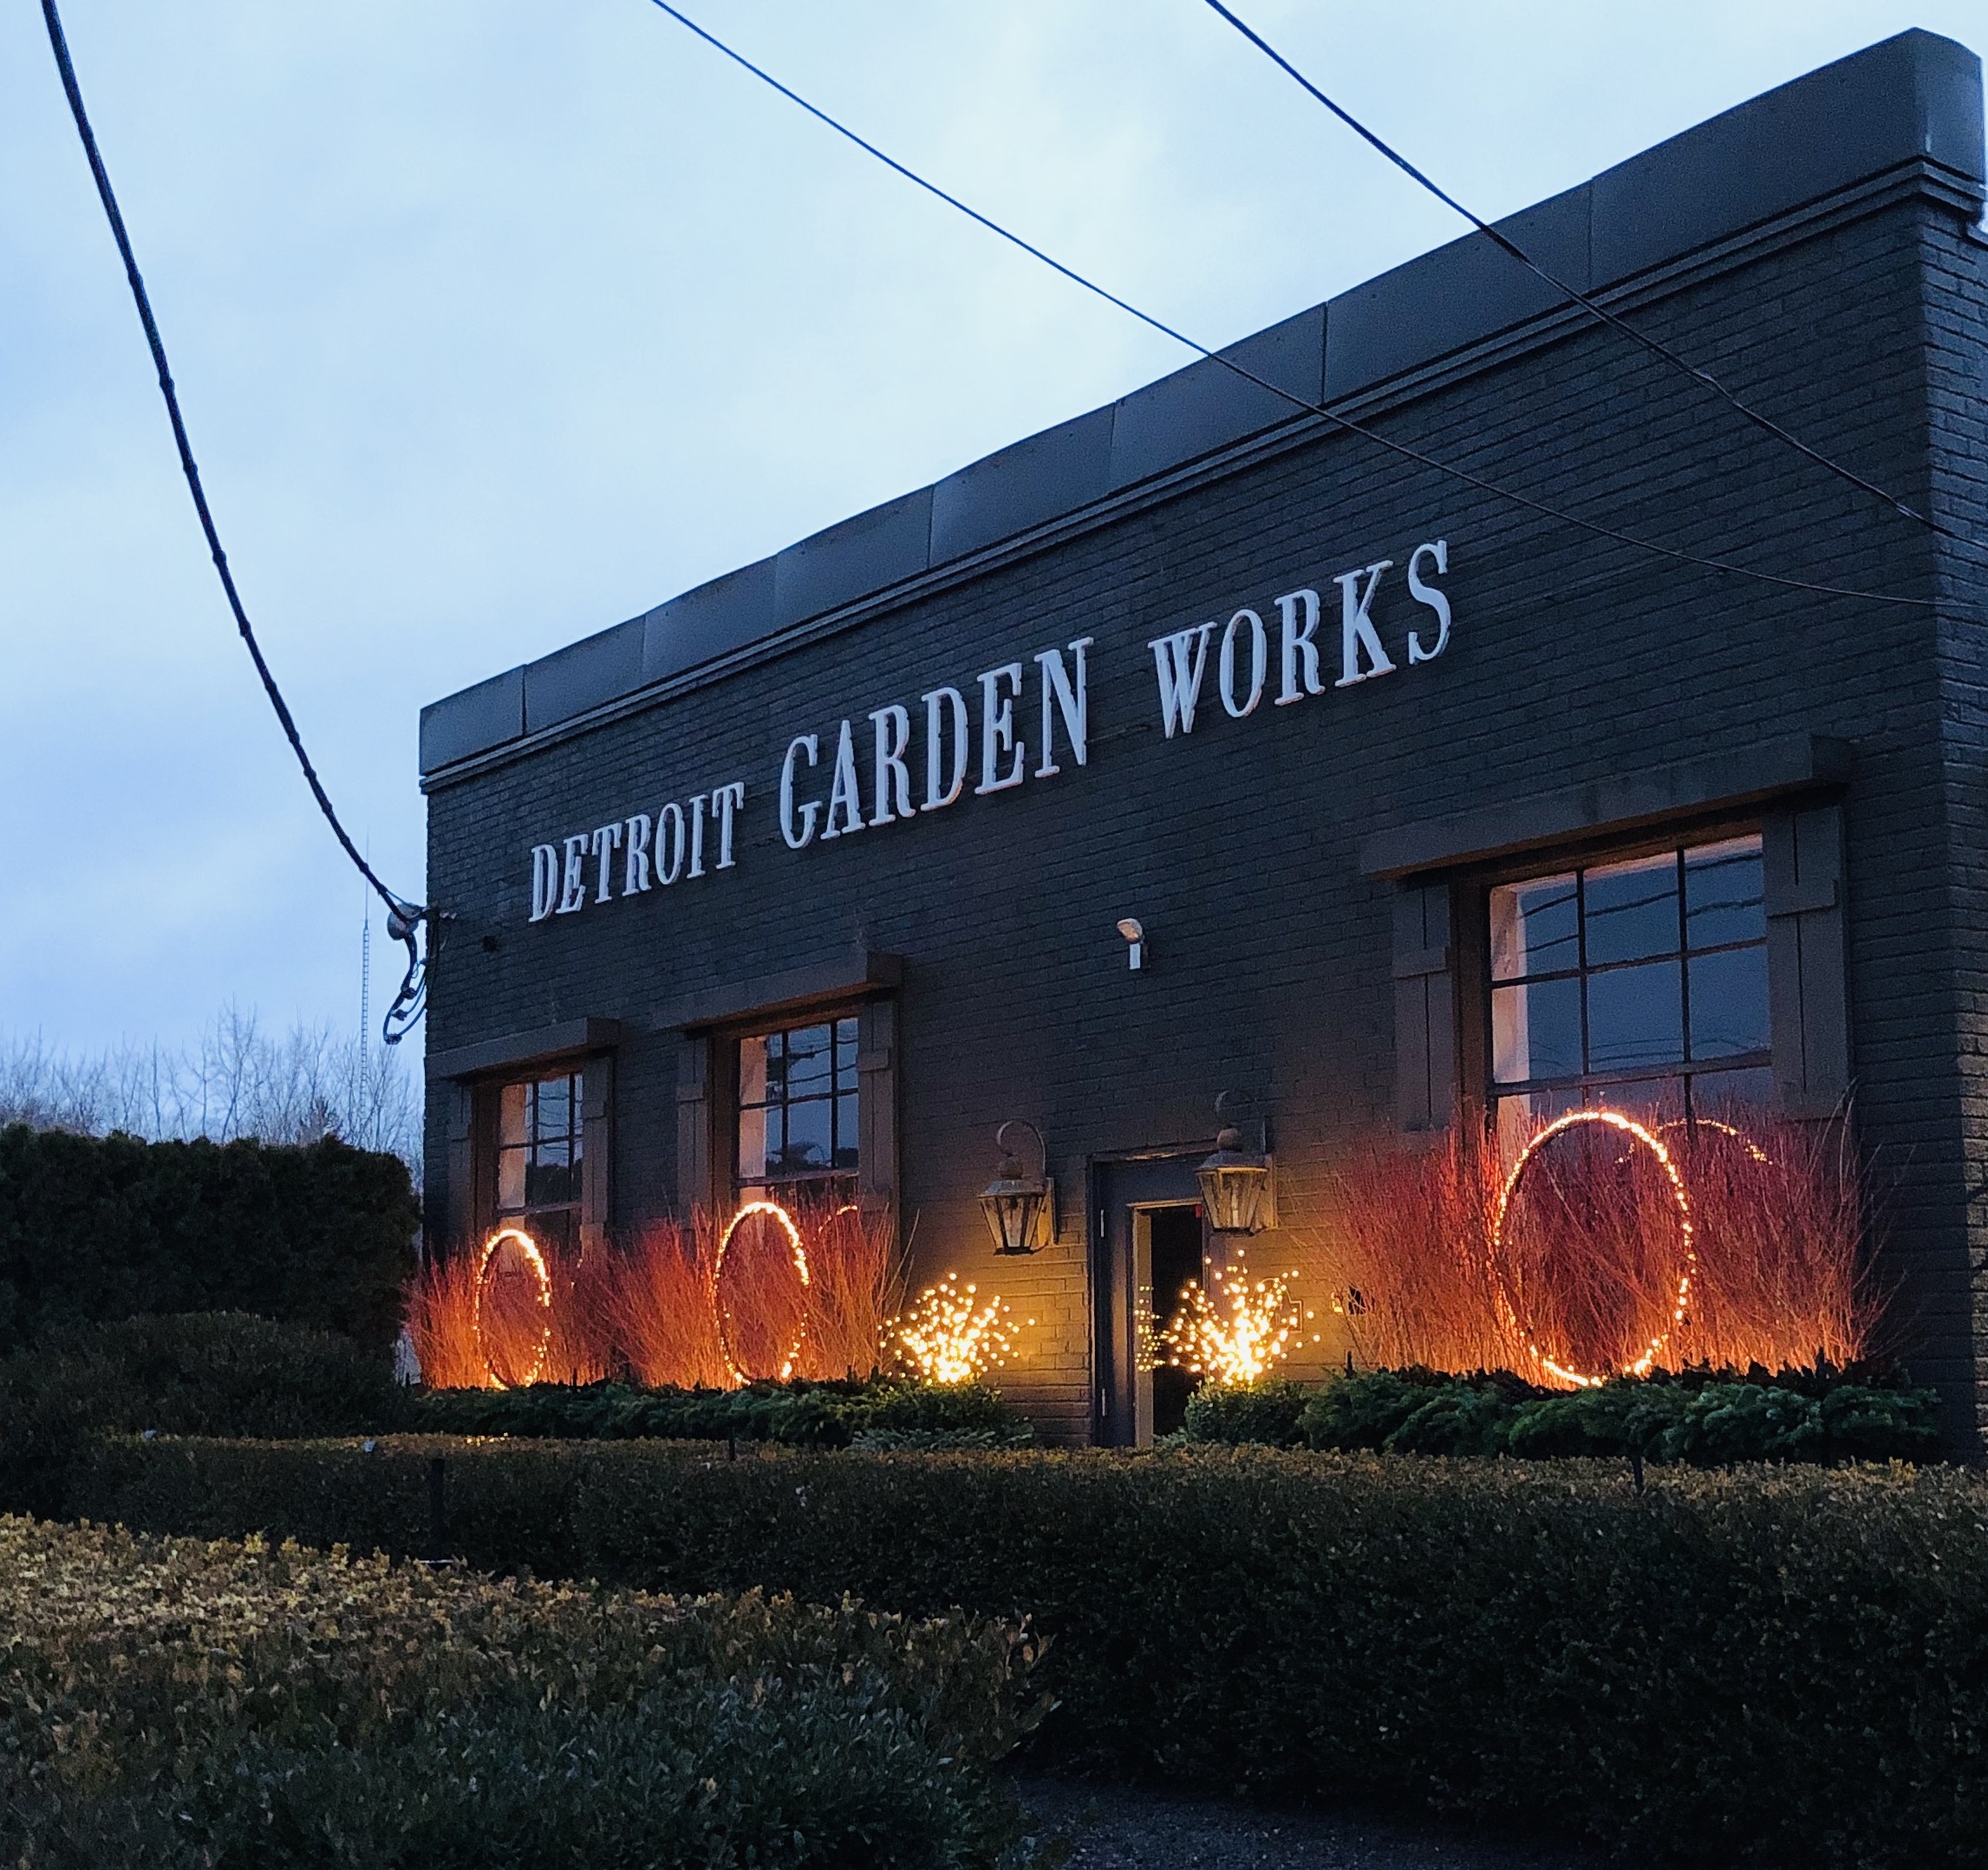
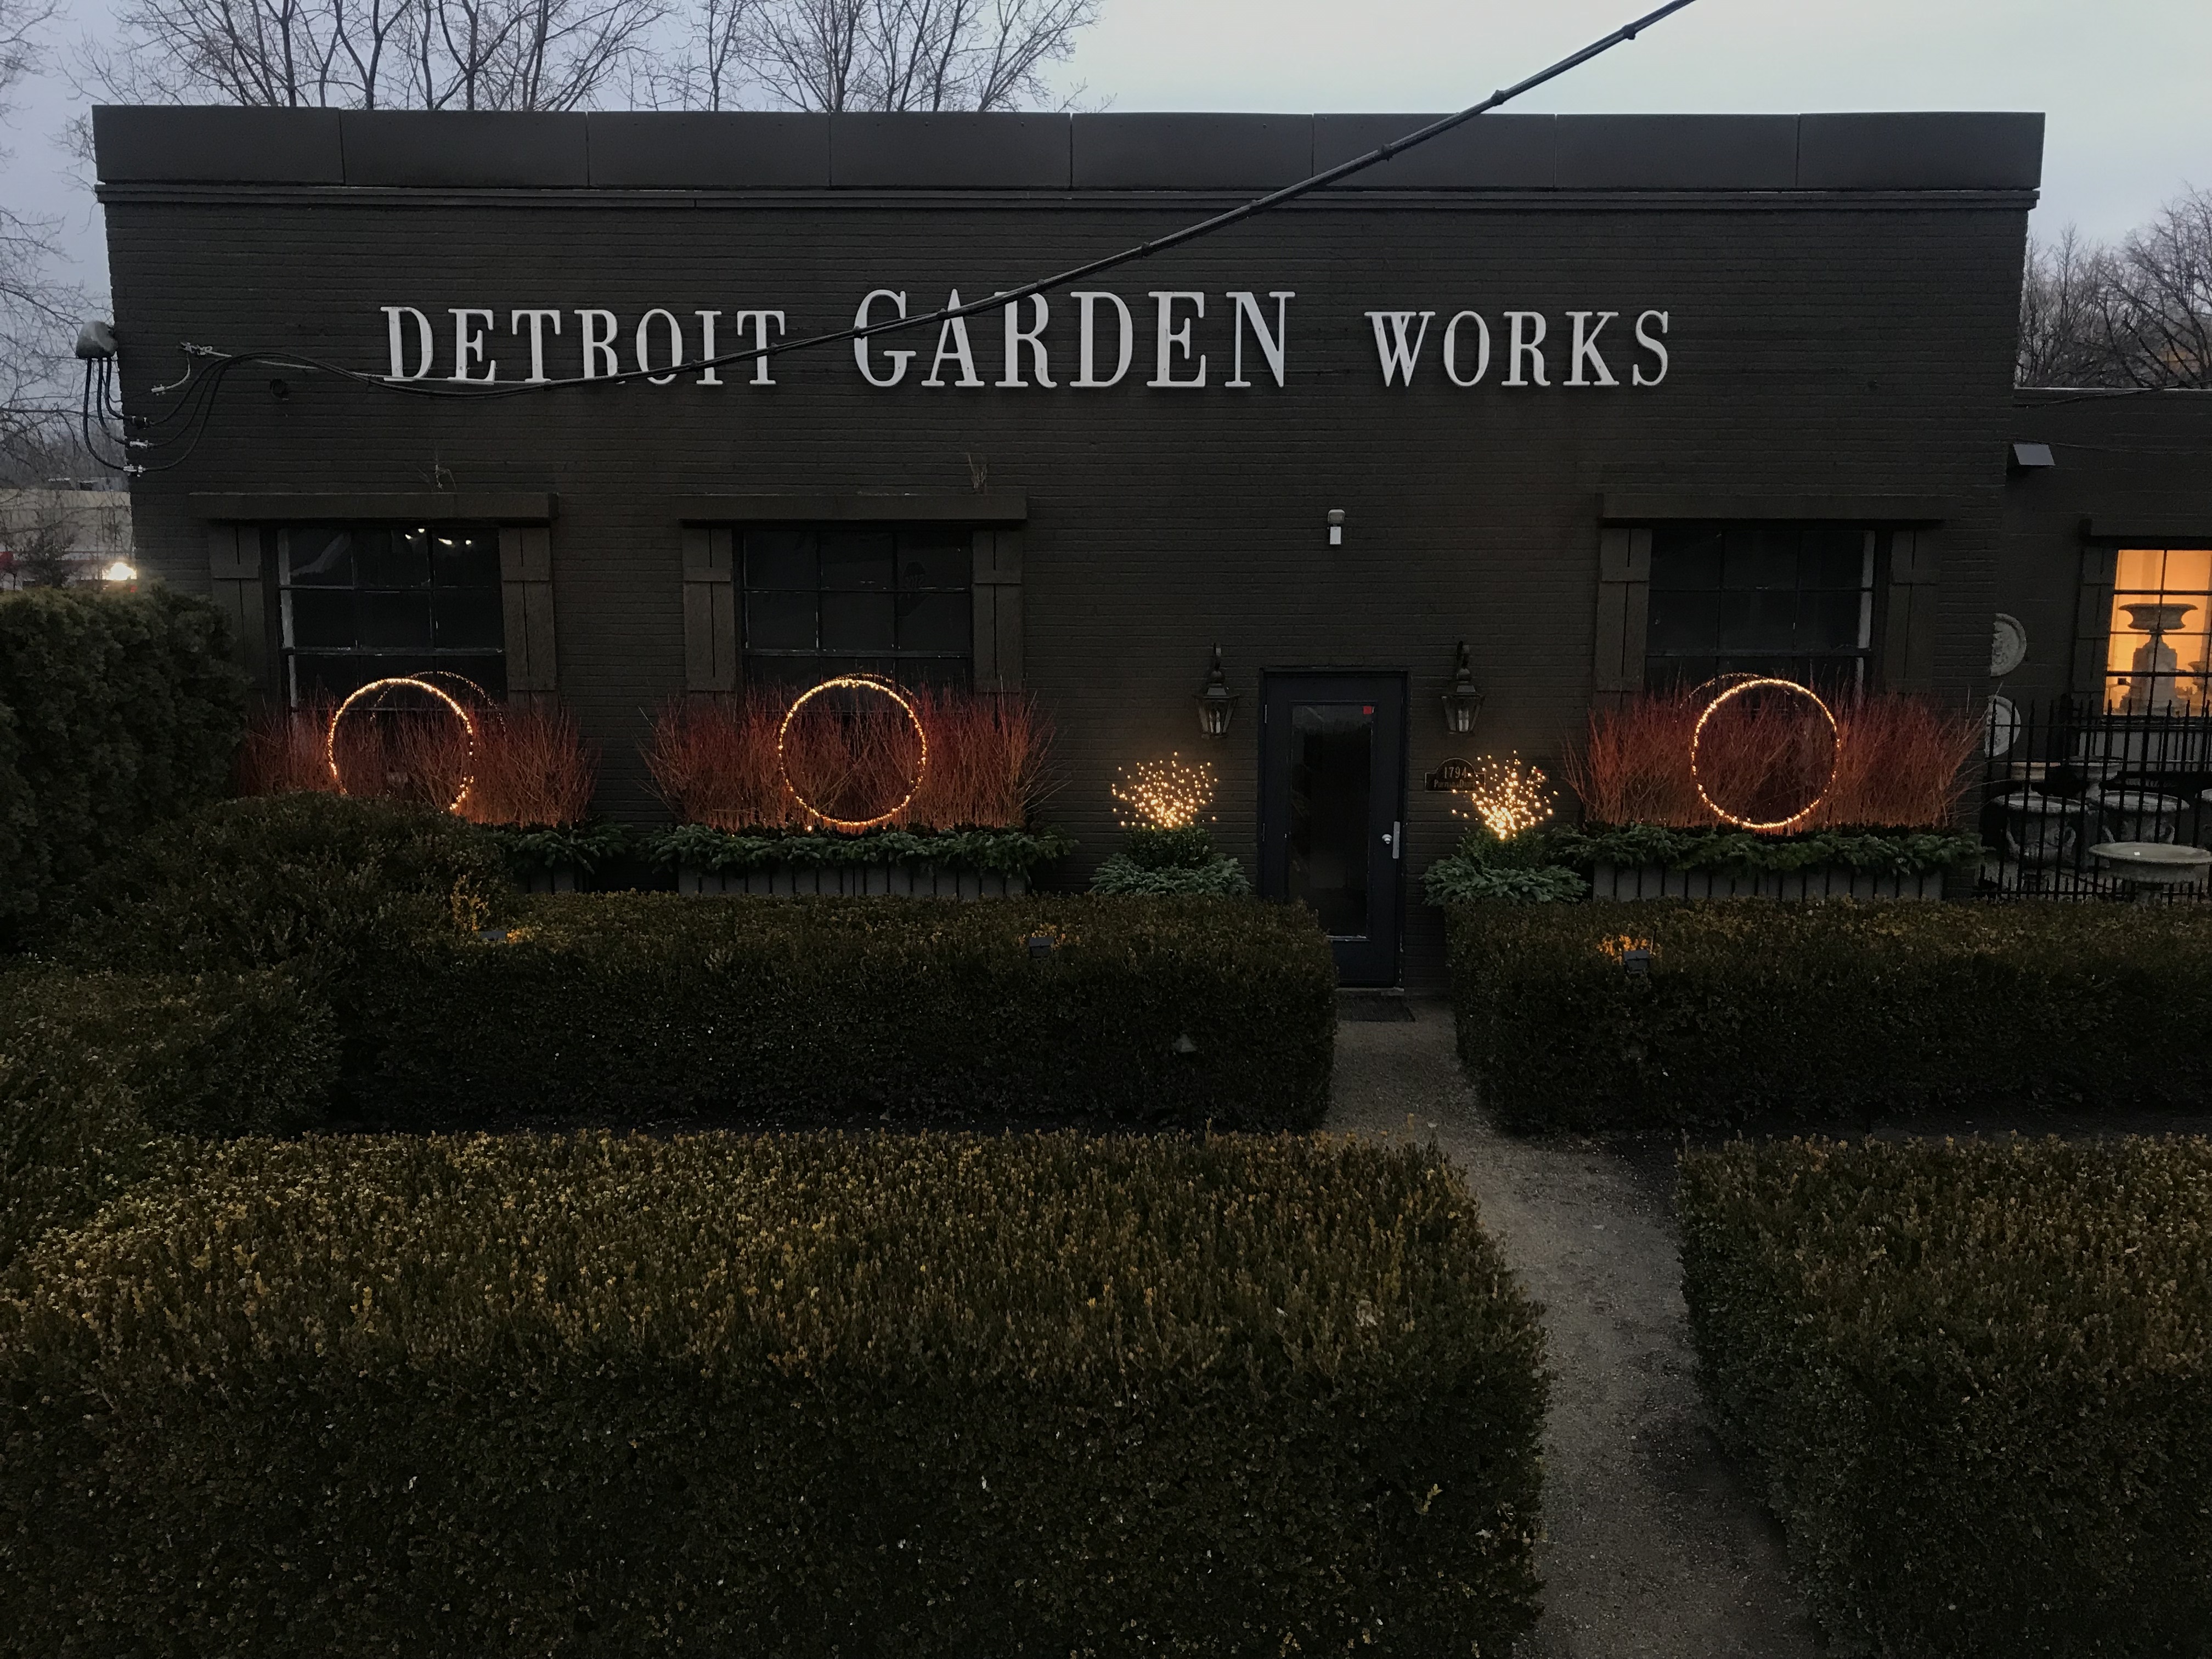
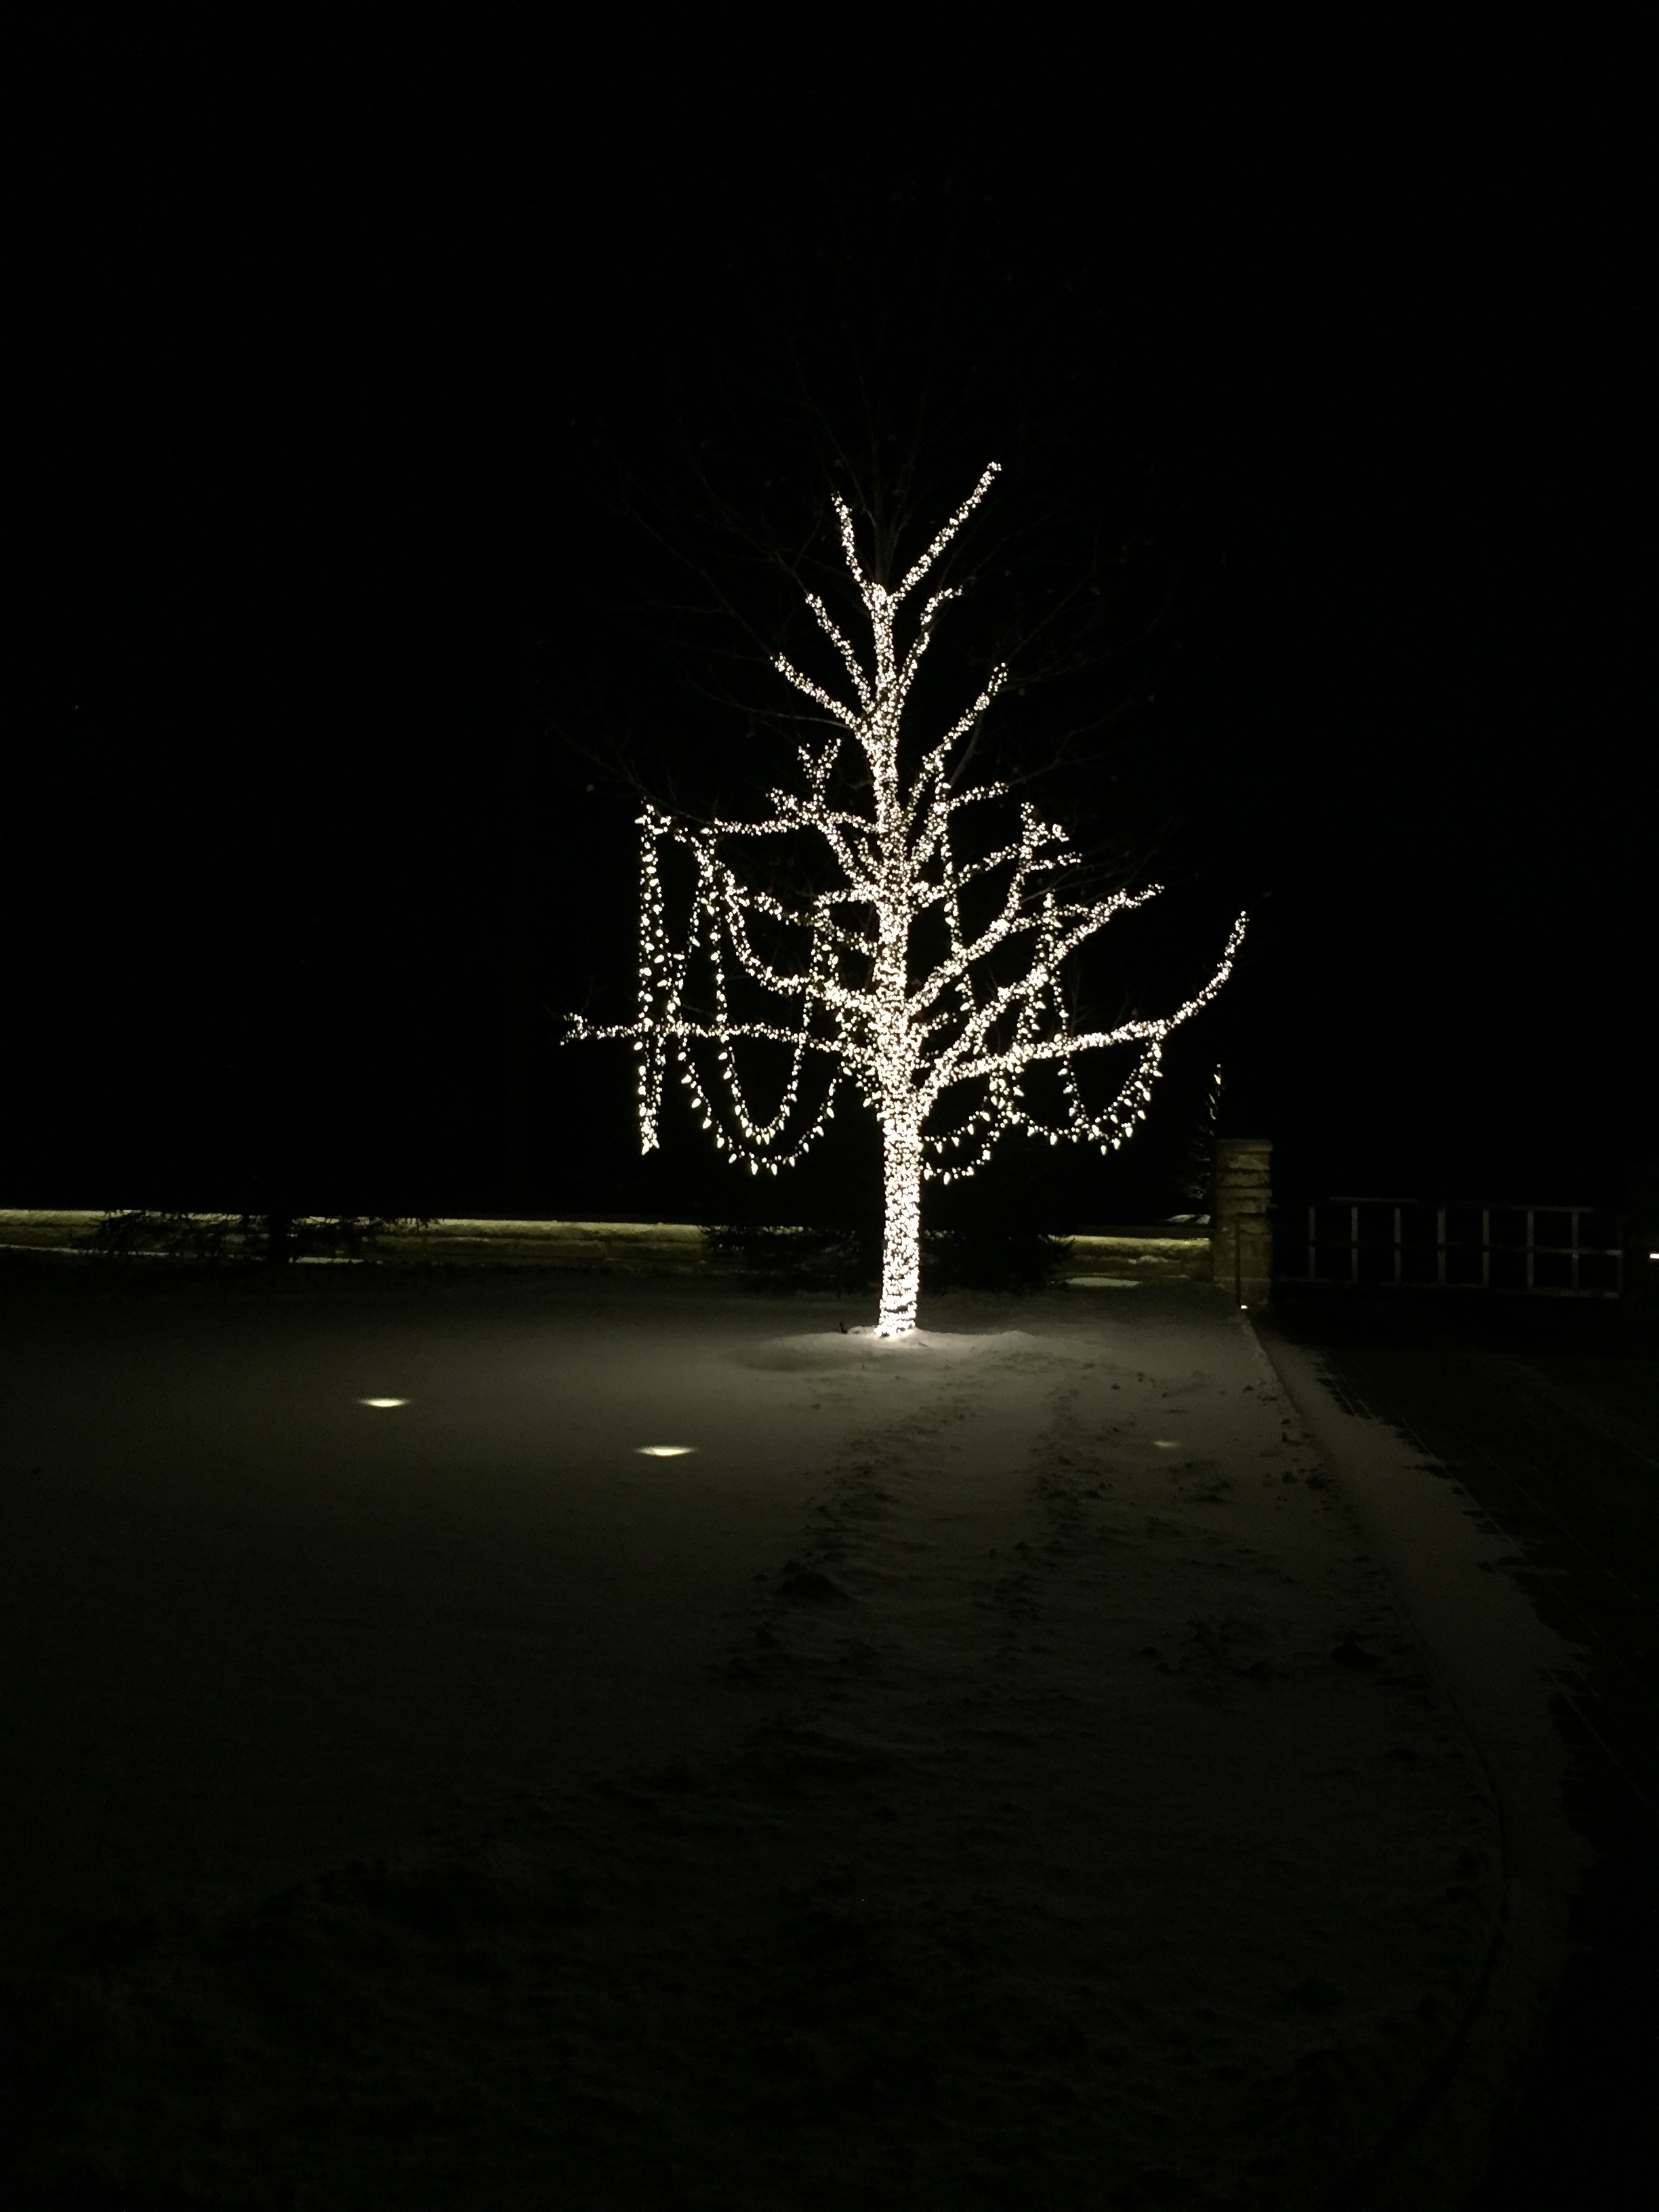
The snow a couple days ago adds yet another dimension-the warm fire contrasting with the cold ice and snow. Winter lighting and weather play off one another in a way that provides a lot of visual punch while the garden is dormant. They shine forth on all but the sunniest winter days. As sunny winter days are few and far between in my zone, I would not do without the lighted winter landscape.

Several of these pictures were taken by my client. I know she is enjoying them.

I am hoping they make her feel like Cinderella.

The Winter Ahead

We finished the last of our winter container work this past Friday, January 4. The pots on my driveway were the very last of the late work. I do not mind that dead last slot. We have a long winter ahead of us. If I am ready for what Michigan winter weather has to dish out come January, my winter will be all the more tolerable. I was fortunate that we had a few cases of mountain hemlock left. It will stay green the entire winter. But the star of the show will be the lights. The technology behind LED string lighting revolutionized the options for landscape lighting. Every year, this lighting becomes more affordable, durable, and easier to use. Since the light is bright, but diffuse, it makes sense to use them in the winter months, and en masse. I know I wrote the beginning of December about lighting as an element in winter pots, but given that our winter is dead ahead, I thought to broach the topic again.

Detroit Garden Works manufactured steel circles expressly designed to hold multiple wrappings of these lights. It is astonishing how much light they emit. The ring has a four pronged base that goes into the foam and soil in the pot.  They are equally stable with an in ground installation. Each of these winter pots have a 110 foot long strand of warm white LED’s in the greens. The burst of lights in the center come from an all in one lighting product called a lightburst. Multiple bark like stems studded with lights are mounted into a pointed base that can be set in a pot. The overall height is three feet, so it makes a statement on its own. Set in the middle of a grouping of twigs or branches, it provides light from within.  Each stem is flexible, and can be positioned to suit. The end result here is the route from the car to the back door is well lit. This is the practical application of seasonal lighting.

The pleasure of the light is equally important, given there will be little sun and no being outdoors gardening for at least 10 weeks. I see this coming from and going to work. I can see it from the balcony above.  Bear with me, as I have said this too many times. Arranging for temporary winter lighting is a form of gardening. Every plant in the garden that I know of needs light.  So do people.

We took the last 10 bunches of curly willow, and zip tied them to a modified tomato cage. We cut the cage open, so we could encircle the two lindens outside the gate at the shop with them. Once they were in place, we zip tied the forms shut. A length of leftover garland covered the zip ties, and the extension cords.  It only took three of the light burst to illuminate that willow from within. David had the idea to bend and bring some of the light burst branches to the outside. Light inside and out-I was game.

At 5pm today, those lights were already creating a visual stir. As the lighting options get more sophisticated, I feel a need to try them out. Rob makes that easy, as he vets every new product. He sees a lot, and buys a few. He furthermore goes to the trouble of displaying how he thinks the lights can be used. I am always behind him in this regard. I just discovered those light bursts two weeks ago. In the garage, I had the time to study his twig display with a light burst tucked inside. He promises to have them again next year.

These five light rings set in the ground in front of a wall covered by Boston Ivy is the antithesis of the summer view. Do I like one season more than another? No. Every season has its time to shine.

pergola with light garlands and a polestar. The light rings in the foreground are so easy to hang in a window or a tree, and plug in.

Winter container arrangement with LED string lighting in the twigs.

Curly copper willow lashed to a tomato cage, and lighted from underneath

Lighted London Planes

We repurposed these dead crab apples as winter topiaries. The branches were hung with nine inch long glass drops. All of the light came from the bottom. Bottom light in a winter pot

winter light

winter light drama, given a substantial snow

lighting the stairs, 2016.

late day lighting

Night light. Winter lighting that looks like fire warms me up.

That cast iron cistern at the end of the driveway at Detroit Garden Works has for years been dressed for the season at hand, and the season to come. This year was no exception. That cistern is ablaze with light. Rob too several days to bring his lighting idea to a finish.

Thanks, Rob.

Winter Window Boxes

A good many posts ago, I described a window box as a hybrid vehicle. It is generally more expansive than a pot, but smaller than an in ground garden bed. A window box is an above ground defined space which is large enough to thoroughly explore an idea, and small enough to finish every square inch beautifully. I like any landscape project that is as beautiful and polished at the finish as it was from the design beginning. This means tailoring seasonal efforts to a size that celebrates aspiration, and acknowledges limits. Planting an area in the garden with seasonal plants leaves me cold. There is too much square footage to deal with. More on the knees work than I am willing to do anymore. Too much poor soil and poorer drainage than I want to address. Get me off the ground, please and thank you. A window box is the perfectly sized venue for a bigger seasonal gesture.

A landscape client with a new house signed up for four window boxes on stands in the front of her house. Branch made them to my specifications. Though the window boxes were fabricated this past summer, it was not until November when the landscape was ready for their installation. Meaning we would address them for the winter season. We made forms for the boxes, and fabricated the winter arrangements in our shop. Dry floral foam forms were a vehicle for a collection of sparkly white picks, cut magnolia branches, faux white berry picks and noble fir. Presiding over all, a three foot diameter light ring.

We do as much of the work as we can, in the shop. We like the better part of the work to be done in a warm space. The construction is faster, and more thoughtful. All of us want to focus on the project at hand, rather than enduring the cold conditions on site. This work included creating the arrangement, and dressing the greens with lights. This layout table was large enough to hold two arrangements at a good height for working.

Each form was moved outdoors once it was finished. The cold temperature outside favors keeping the greens fresh. The palette of materials is simple. The volume and texture of the noble fir does a great job of showcasing the magnolia based centerpiece. A form this long needs support when it is moved, although all of the woody stems of the evergreens helps strengthen it. Though the form is long and narrow, we took great care to provide a rolling shape from back to front.  A good winter arrangement needs to supply a finished shape from the beginning, and create the illusion of motion and rhythm. Though most of these materials are natural, they will not grow. Creating a sense of growth from cut materials informs the best of winter container arrangements.

The form is slightly smaller than the interior dimension of the box, so it was easy to drop it in.

The pots look over scaled for the windows, but that will change once the new shutters are installed. The boxes and their contents have a very formal and dressy look, which is in keeping with the architecture.

After dark, the lights define the shapes and volumes. The view at night is important in my zone. We have a lot of short days and long nights ahead.

By this time next year, this landscape project will have landscape lighting. But for now, the window boxes provide some welcome illumination.

Every year we fill the window boxes at Detroit Garden Works for the winter season. This year, our winter and seasonal pot obligations ran long. On December 21, my crews had gone home for the holidays, and our storefront boxes were still bare. My crew had a long and arduous season, so I was not about to have them fret over the shop winter window boxes. And our supplies of branches and greens were low. Happily, our supplier emailed Rob that he had a late cutting of a new branch for him – were we interested? It did not take long for him to send 12 bales of Midwinter Fire dogwood stems our way. The form in the above picture has its fair share of holes, as this is its third season. But with a few minor repairs, it was ready. My part in the process of our winter pots is the design. My crew does all of the construction admirably well. But given that there was a time when I designed and fabricated, I was sure I could do that again. The idea was simple. Embed a light ring in a thicket of dogwood branches.

Christmas Eve day, the shop was open, so Karen had time to me a hand sticking the greens on the front face and sides of the forms. Rob and Scott helped trim the bottoms off the thickest branches. I set a row of branches close together across the back of the form, and 2 lengths of a 33 foot long light strand in front of them before starting the next row of branches. 4 rows of branches separated by four rows of lights. The branches are pushed in all the way to the bottom of the form.

The work of it was integrating each new branch into the neighboring branches. As they were fresh cut, the stems were pliable. A pair of thick wool gloves made that work easier. There was no need to cover the back of the form, as the window box hugs the window. The bottom layer of foam goes into the box. The soil had already been lowered a corresponding amount. The top layer on the front and sides holds the greens. Short stems of magnolia would separate the greens layer from the twig thicket. The large brown and green leaves not only separate the similar textures of the greens and twigs, they conceal the mechanics of the light source from view.

Though my crew would have sailed through this fabrication, it took me two days. No deadline was looming, and I wanted to enjoy the process. No twigs cover the lower portion of the light ring. The ring disappearing into the thicket and re-emerging at the top implies the thicket has depth. I would consider how to finish that spot once the boxes were installed.

Flipping the switch on the lights once the arrangements were done was great fun. We would indeed have a little midwinter fire.

Marzela and David came in the Thursday and Friday after Christmas. They fabricated and installed 2 projects we had not finished before the holiday. Karen, Rob and Scott joined in. We sometimes remove the light rings after fabrication, and reinstall them on the job. But in this case, it seemed vastly easier to just leave them in. They took care of all of the finishing work and electrical, once the forms were set.

Some of the finishing touches will only be seen by those who walk by or come over to take a closer look. We tried to address the near and far, and the day and night. The shop boxes are just the right size for that.

The pots on either side of the door are stuffed with fir and boxwood, and lit with a single 3 foot tall LED light burst from the shop. It came with a pointed metal stake that is easy to push into a form or soil.

Rob took this picture from the top of a 12 foot ladder, right at dusk. The look of them in the transition between day and night was subtle. The visual changes wrought by the light and weather come courtesy of mother nature.

I never thought about how they would look from inside my office, but I am enjoying it.


From Start To Finish

Once in a blue moon we have a client who decides to buy new pots in December. The process from purchase to finish involves a series of steps, the first of which is the placement. Installing pots in a bed, rather than on a hard surface, is not all that usual. But in this case, I think my client made a great choice. Starting over is an opportunity. For her, and for me. It took us a few days to put everything together, but our idea was to stay on the project from start to finish.

These substantial pots were set to be placed in a pair of beds that once held some very unhappy plant material.  By large, I mean 36″ tall, and 36″ in diameter at the top. The first order of business was to level the ground they would sit on, and provide a way for the pots to drain. Given the size of the pots, elevating them on bricks seemed like a good idea.

There is measuring and more measuring involved in this phase, because none of us want to try and level or center a large pot that is full of soil, and a winter arrangement. Empty pots are the easiest to move around.

The centerpieces needed to be big and tall, to be proportional to the size of the pots. A group of tall birch poles would provide plenty of substantial height. We filled the pot with cypress bark mulch to the center rib on the outside of the pot, and set the birch poles directly on top of that bark. Having a very heavy centerpiece set this deep in the pot will help keep it secure and upright. Few things seem so forlorn as a centerpiece listing out of vertical from stormy winter weather. Once the centerpiece was set, the pot could be filled with soil.

It would not be possible to fill the pots with soil if we set the greens first, so the greens placement was out of our regular order. It came after the setting of the centerpiece. The top of this centerpiece would never fit through the hole just big enough for the birch in the center of the form. The copper curly willow we added to the birch was about 3 feet wide at the top. So we sliced the greens form into two halves. Marzela set the greens in a way that made it easy to cut through her work.

Of course cutting the form in half impacted its strength. The weight of the greens on the outer edge would eventually pull the form and every evergreen stem inserted in it to the ground. Gravity is a force to be reckoned with. The cut form needed some ballast close to the centerpiece.

We secured each half with a pair of long steel rebar poles pounded in at an angle opposite to the downward force of the heavy side.  The rebar sits above the form about 5 inches. Concrete wire was wrapped around the four pieces of steel several times.  This will keep the forms anchored, and just about foolproof once the soil freezes.

We added eucalyptus to that space between the greens and the centerpiece. That plum red is a beautiful foil to the color of the copper curly willow. We zip tied individual stems to a bamboo stake. That slender stake is much more successful an anchor than the individual stems. We also had the option of setting the stems at an angle out, rather than straight up and down.

We also added extra short stem of the willow to the base of the centerpiece, so the hole in the foam would be completely filled. Gaps between the centerpiece and the opening in the foam are an opportunity for the stems to shift. Shifting stems mean trouble.  Once the pot is finished, we look for a tight fit for every element. It should be clear by now that the engineering plays just as big a role as the design.

Once the pots were close to a finish, the lighting could be added. That lighting will do a lot to illuminate this front terrace.

I left the centerpiece visible from top to bottom from the road side view. That seemed like a good idea. We wrapped the centerpiece with its own string of lights. The lighting plays such a big part in winter pots. A few bags of soil covered the bricks elevating the pot. We were just about finished.

Our client felt a second pair of smaller Branch tapered pots nearer her front door would complete the look she was after. The last of this installation was about companionship. We were happy to oblige.

These smaller scale Branch pots near the front door completed the project. They are smaller, but just as robust.

picture perfect, in my opinion.