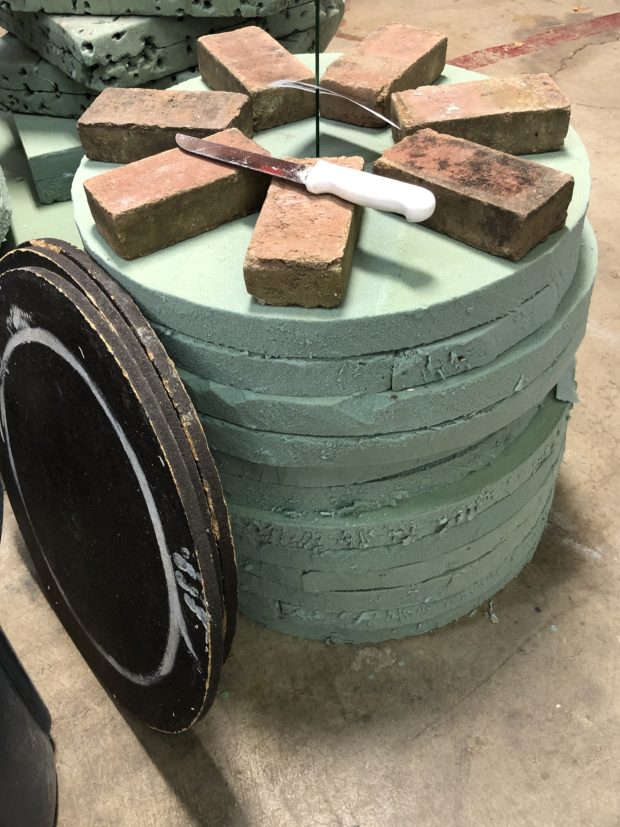
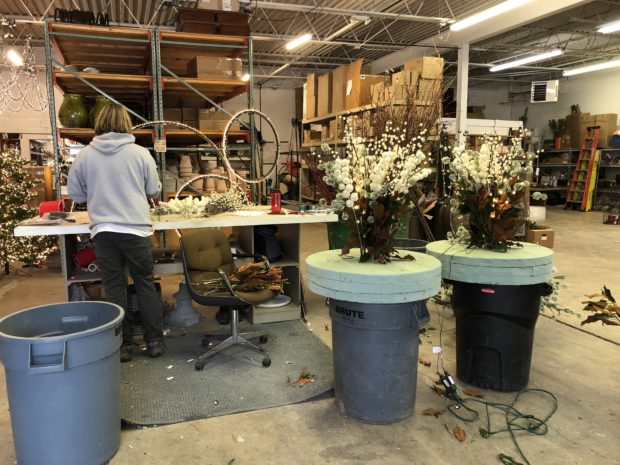
 To follow is a visual tutorial, from start to finish, of how we construct winter and holiday arrangements. We do rely on the armature for both fresh, dried, and faux stems and branches provided by dry floral foam. Once we create forms for a client, those forms are used for a good number of years. The forms you see in the upper left of the picture above are 4 years old. Yes, we patch them, when the forms get elderly.
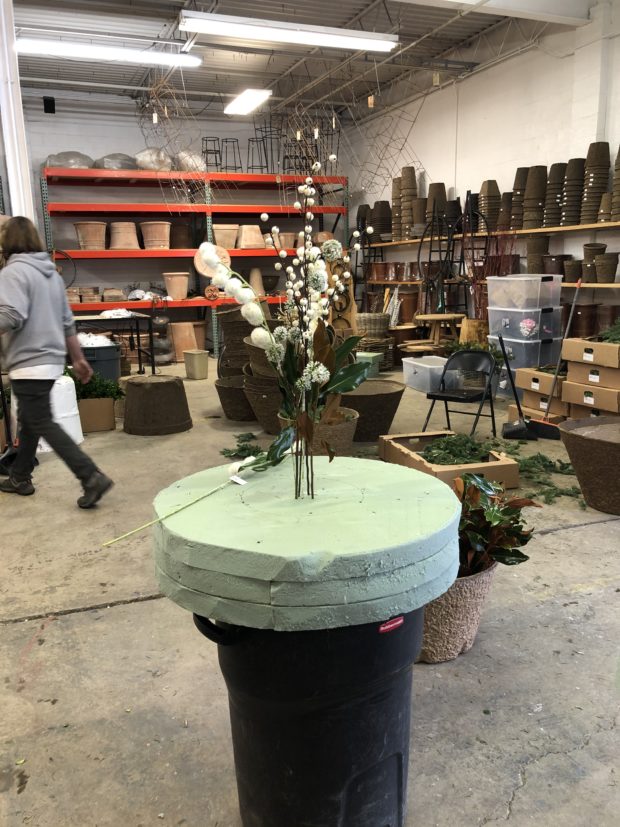 the first gesture, for a new client.
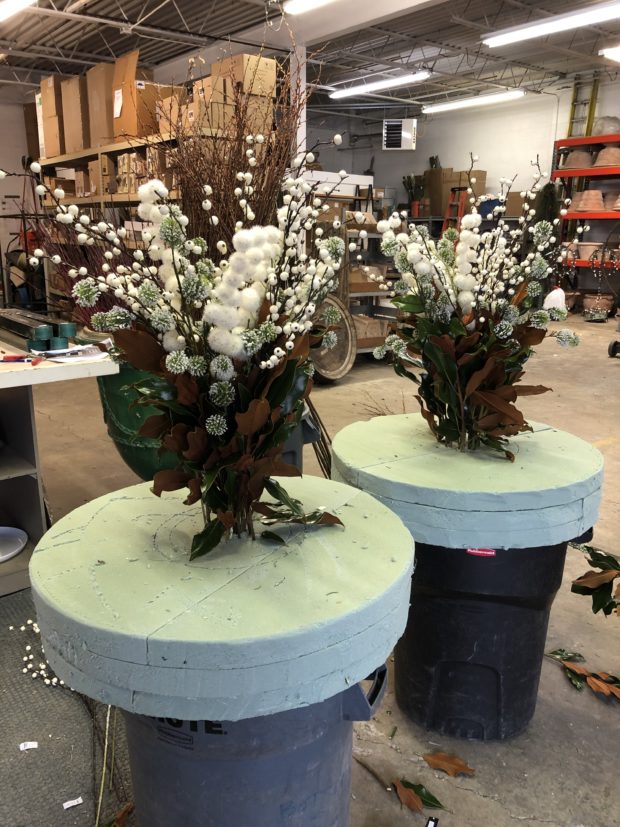 The lines scribed in the forms indicate how wide the centerpiece will be.
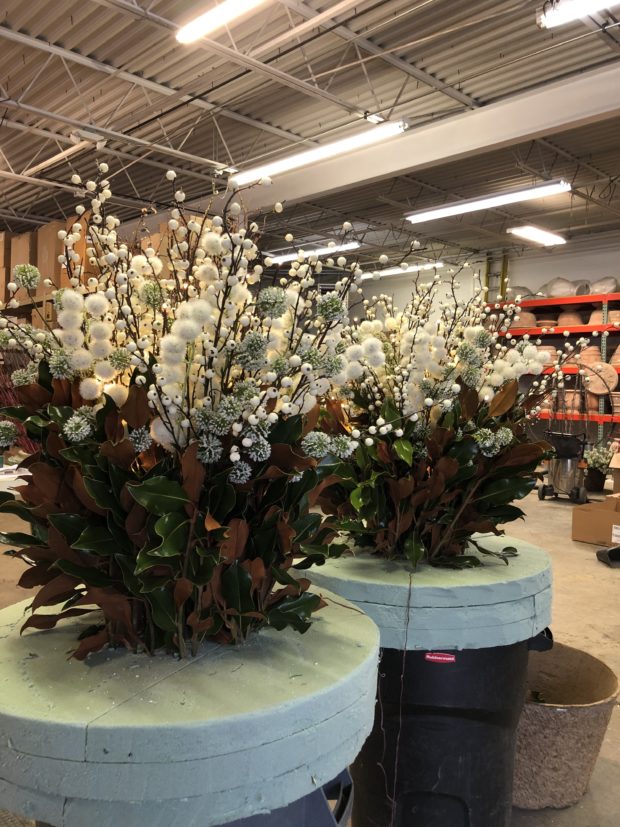 These centerpieces under construction include a mix of faux berry and ball picks, and fresh cut magnolia stems.
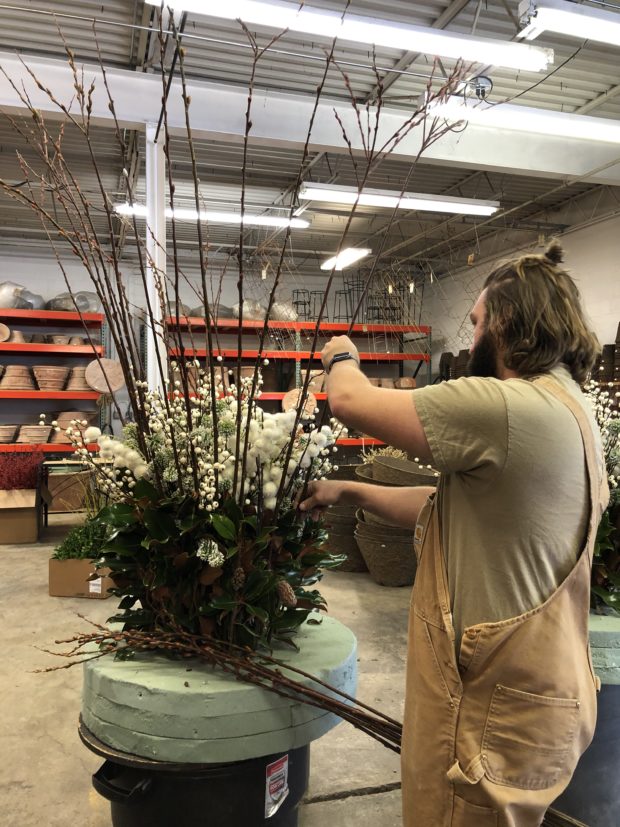 An outer layer of fresh cut red bud pussy willow stems follows all around the centerpiece.
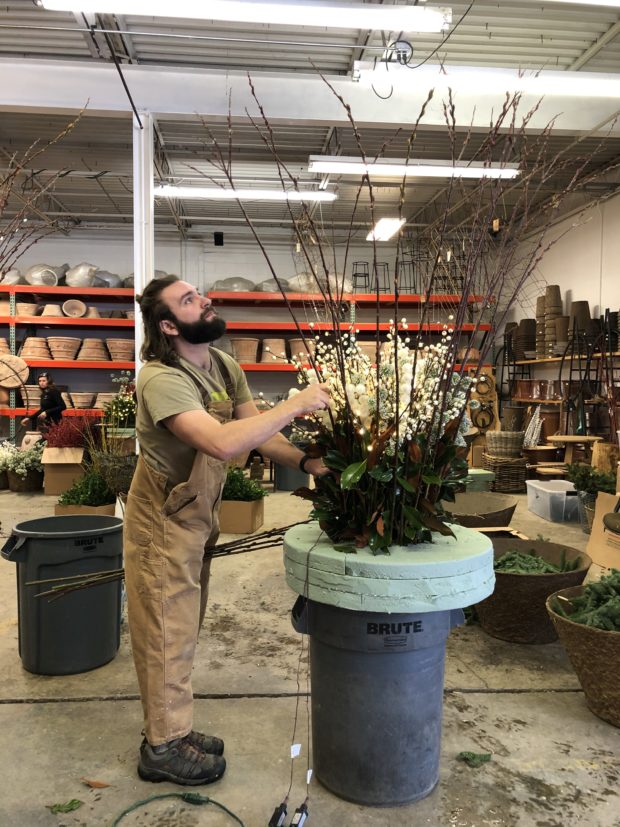 As David is doing here, always look up to determine where you want any element to land.
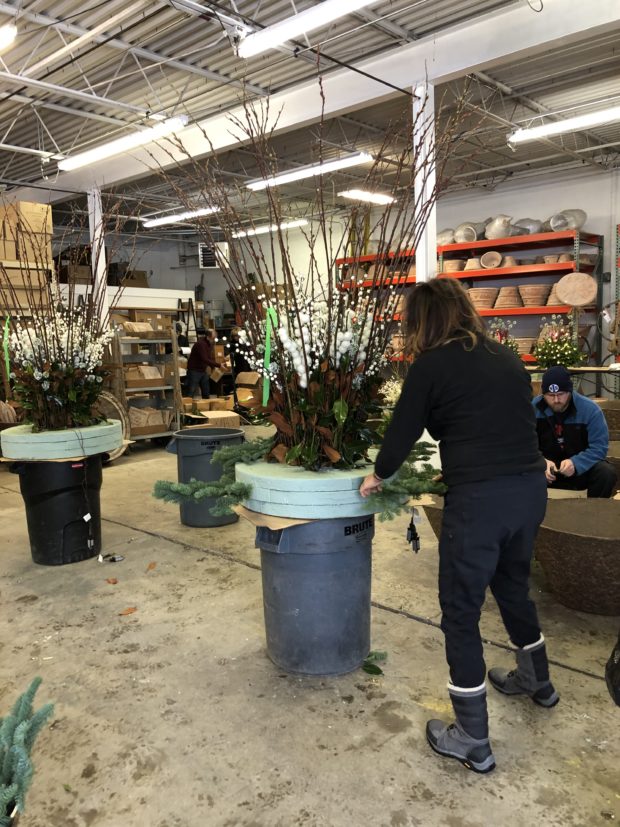 Karen took over the greening of these centerpieces.
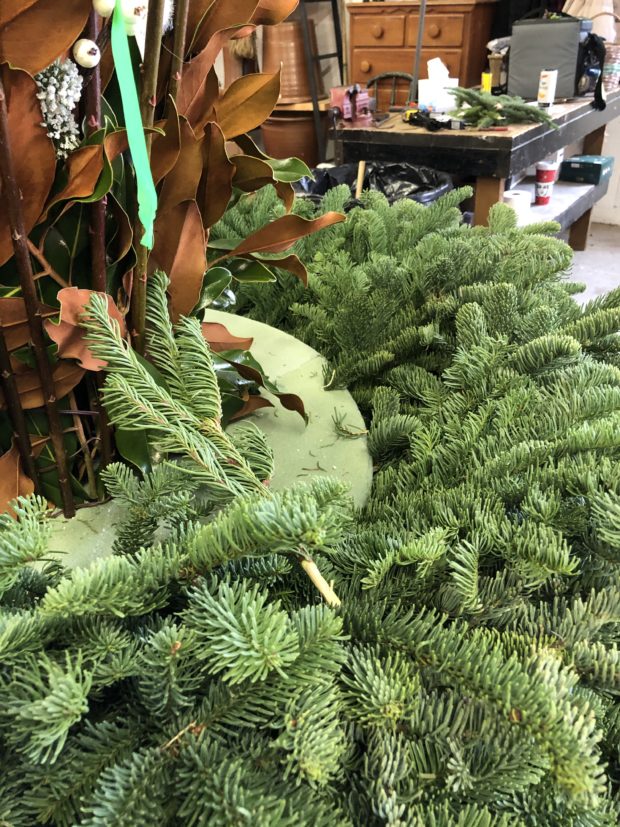 Every fresh cut evergreen stem has been sharpened. The idea is to insure a tight fit between the wood and the foam. We have winter weather ahead of us. This means that whatever we fabricate needs to be winter hardy.
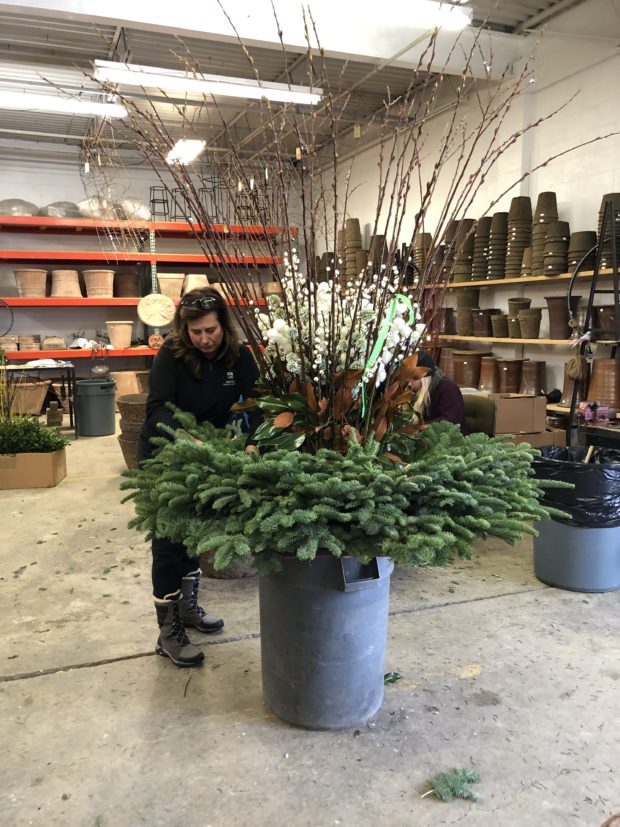 Karen is gifted. She can assess the volume and mass of a centerpiece, and give that centerpiece a green place to be of proper proportion.
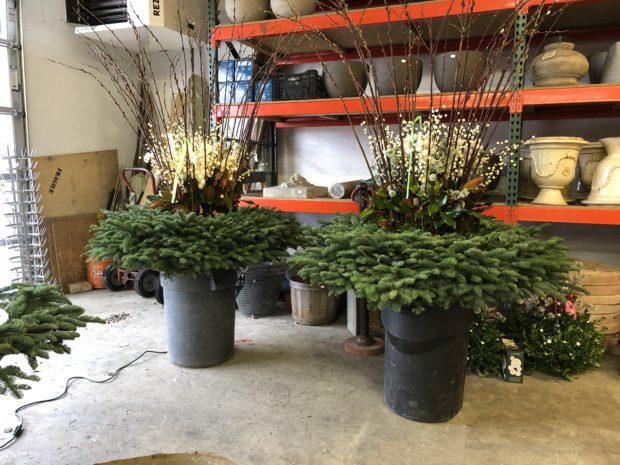 finished centerpieces ready for the installation
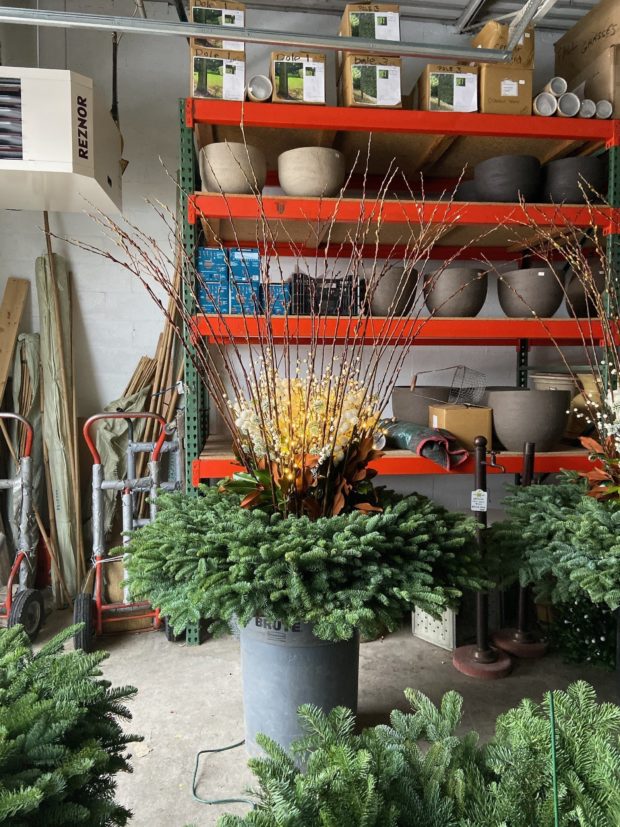 the centerpiece was constructed around a light burst. Lots of LED lights on a twig like structure with stakes in the bottom is such an easy way of lighting the vertical elements in a winter arrangement. LED Lightburst
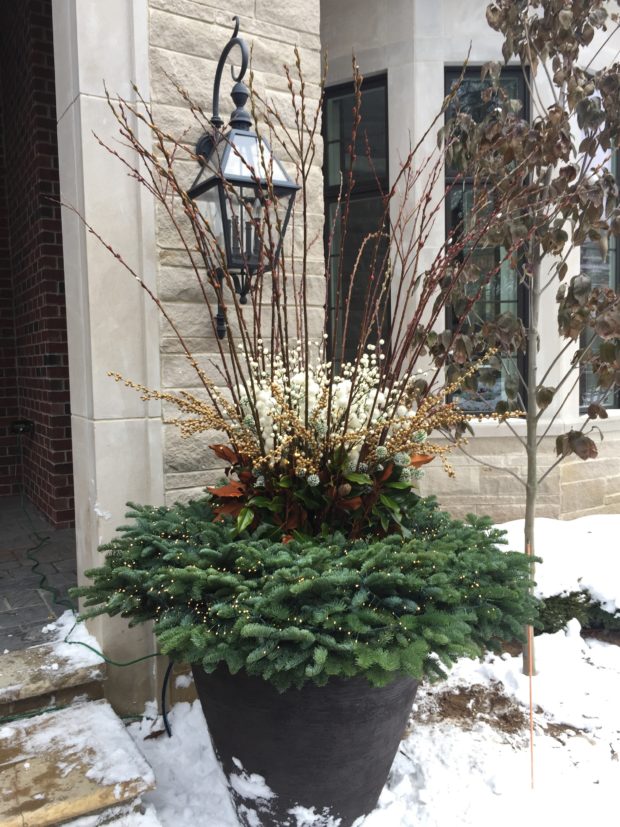 The right hand pot, installed.
 Start to finish, I could not be more pleased with the work my group turns out.
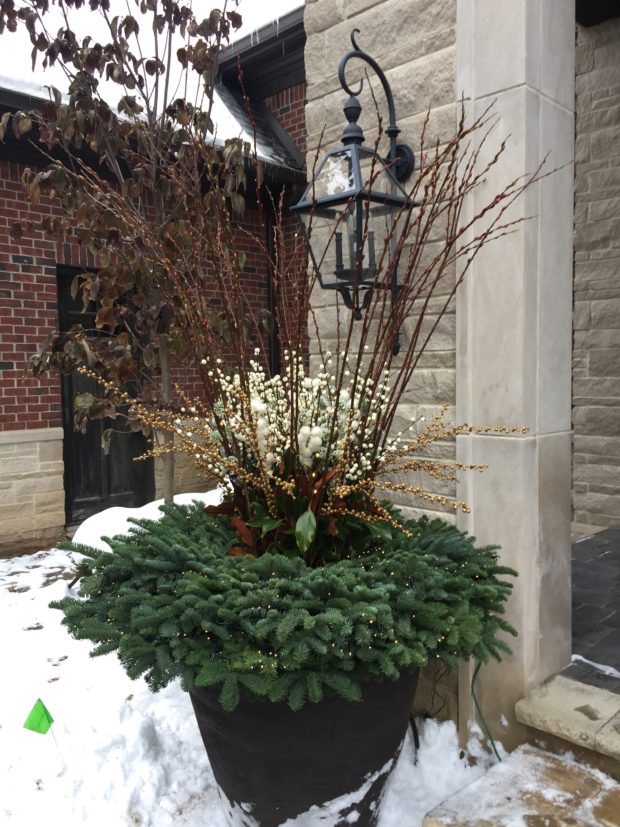
This design is particularly elegant and graceful.
Just when I think the new year’s pots can’t get any better.
You are so generous in acknowledging your very talented staff — a team of artists.
Thanks for sharing your inspiration!
Terry
Dear Terry, they do great work, no doubt. All of them liked these pots – that says a lot. best, Deborah
Love these. Where do you purchase all the stems, magnolia fresh cut. etc?
Dear Suzanne, all of the materials used are available from my shop. detroitgardenworks.com. all the best, Deborah
Just love them!
Dear Laura, me too! They are for a new client for whom we just did a big landscape installation. We wanted them to be as beautiful as we could make them. I do hope to get some pictures at dusk, as they are loaded with lights. best, Deborah
Love your work! Do you use special lights….they look like fairy lights.
Dear Kate, we use LED string lights from Lumineo. You can read about them on the Detroit Garden Works website in the “Seasonal” section. best regards, Deborah
These are stunning! Beautiful work!
thank you!
Your design and your crews work is exceptional!!!
I have to say that I am truly envious of the ornamental kale that you use in your fall container plantings; I live in the Central Valley of California and I have not been able to locate any plants as beautiful as yours.
I retired recently and I have added taking a trip to your shop to my bucket list.
On a different note, what do u use as an adhesive between the foam pieces?
Thank you for your design blogs – I truly look forward to your postings.
Deb
Dear Debra, thanks for your letter. Our c abbage and kale are beautiful, aren’t they? We use hot melt glue between the pieces of foam. best, Deborah
Lovely as usual. I have one question: I live in Santa fife which has it’s fair share of snow, if not as much as Michigan. A great deal falls off the roof in the vicinity of the front pots. While I have always used local cut greens in those pots, that can withstand the snow. What happens to your mixture of faux, dried, and fresh cut branches that encounter such snow? Because of our sunshine we go through cycles of snow and melt which causes the snow dump all winter.
Dear Mollie, we usually have a fair amount of snow over the winter. We choose both materials that are weatherproof and construction techniques that make for strong arrangements. I have broomed snow off an arrangement at home plenty of times. We may have an occasional thaw, but that is rare. Once we have winter, it usually stays wintry throughout the season. best, Deborah
Last year you showed a beautiful interior with Christmas table setting and window sill winter scape. Do you have another setting to show us from that designer?
Dear Linda, they are going away for the holidays to visit old friends-so no post. Maybe next year. best, Deborah
Thank you for your reply. That home and talented designers are worth keeping track of with their great taste in design. Works so well with your Garden Landscape and Design Business.
Linda Gallinatti
Ret. Interior Designer
Such talent. I love everything you do!
Hi Deborah, thank you for posting this! I have envied your beautiful winter pots and finally last year attempted to make one. It turned out okay but with the help of this post I hope to do a better job this year. I love your blog and look forward to your posts. I wish I could visit your shop but alas I live in Maryland! So I thank you for sharing your knowledge and the beautiful work you and your crew do!
Gorgeous! Very festive, yet utmost organic and beautiful. Early Merry Christmas
Inspirational as always!
Greetings Deborah and Co-Workers.
This is absolutely outstanding. Love it. Love seeing work in the shop.
All best wishes.
jeannie
This is such an inspiring blog post. Your photographs are great and there are plenty of great ideas for winter pots here. Thanks for sharing.
Thanks so much for the step by step instruction, they are lovely! Are the greens/floral foam just sitting on top of the rims—nothing else inside the pot holding it all together?
Dear Jennie, the foam form is wedged tight into the top of the pot. The sharpened ends of the greens are inserted into the foam an inch or two. best, Deborah
Awesome! So beautiful! Are the magnolia branches treated? I have tried to include fresh magnolias in my outdoor pots but they turn brown/black as soon as the temp drops losing their dark green luster and contrasting velvety brown.
What’s the trick? I’d love to know!
Sidney
Dear Sidney, they do change color as they dry. But I do not see black on them unless there are temps in the single digits. I never see the brown on the obverse change. best, Deborah
Please consider publishing a hardcover book. You know how important books are for the gardener! I have been viewing your blog for years and look forward to reading and seeing your inspirational creativity!
I love these pots! Really appreciate your step-by-step guidance and detailed photos along the way. Looking forward to creating a version using local California foliage for the holidays out here. Thanks so much for this Deborah.
Lovely, always interesting to read. One question thought, are you using wet foam
or dry?
Dear Cynthia, we use dry floral foam. best, Deborah
What are the white Pompom looking stems?
Hi Deborah,
Do you find that the cut Noble Fir branches dry out quicker in floral foam than they would in soil, we are up in Toronto Ontario and generally create on site, in soil/sand in Wintery conditions. Thanks
I only do cut evergreen branches in DRY floral foam.If I am concerned about the boughs drying out, I spray them with Vapor Gard-an antidessicant.
Beautiful! Where do you find dry floral foam sheets that large?
Detroit Garden Works sells it in 24″ by 36″ sheets, either 2″ or 4″ thick.
Can you tell me if I need to soak my evergreen clippings in water (for how long?) so they will last longer? Thank you.
we do not soak our greens, no. The winter weather keeps most every cut green fresh looking. That said, I do not use cedar or white pine, as they dry up so quickly. Fir is great. Mountain hemlock has the best longevity cut of any evergreen.