Lighted Steel Hoops

I don’t remember how long ago it was that Rob began experimenting with attaching lights to steel forms, but I would guess it was at least 10 years ago. There was a series of steel augurs, wound with rope lights, and hung from stout branches in the linden trees. Any farm tool was fair game. This was in the very early days of our winter and holiday season, so Rob haunted every store within driving distance for different kinds of exterior lighting.
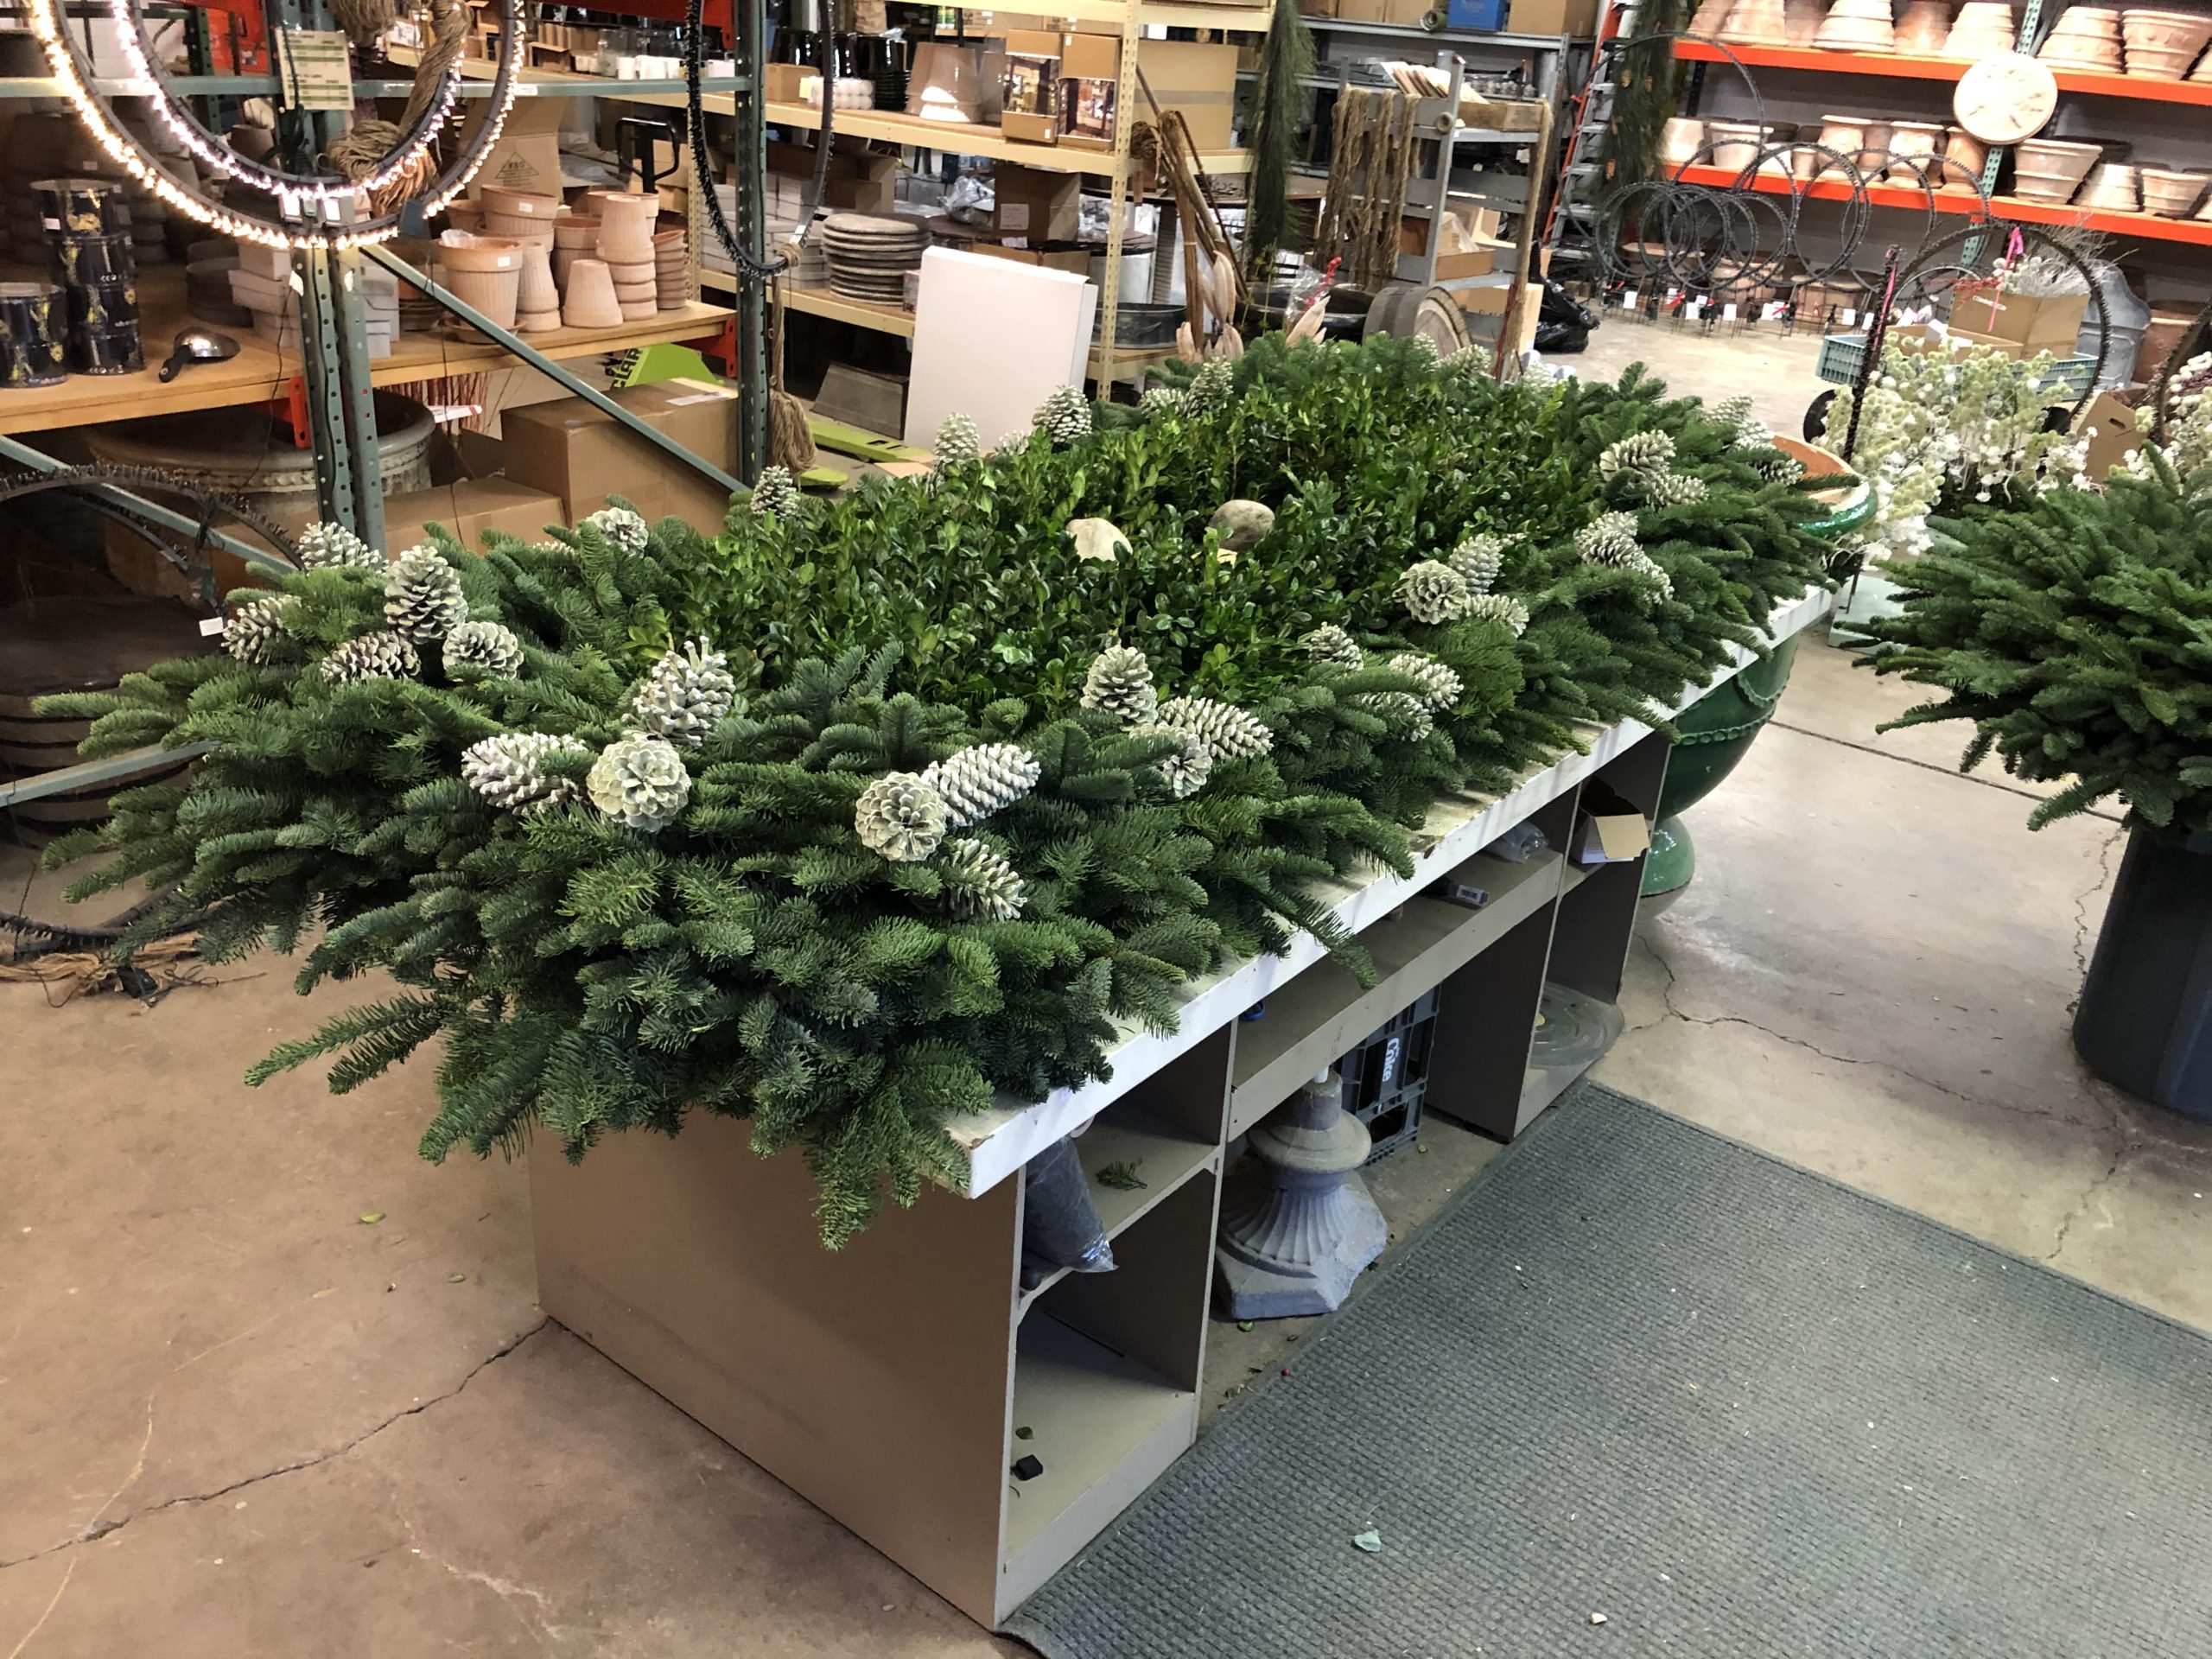
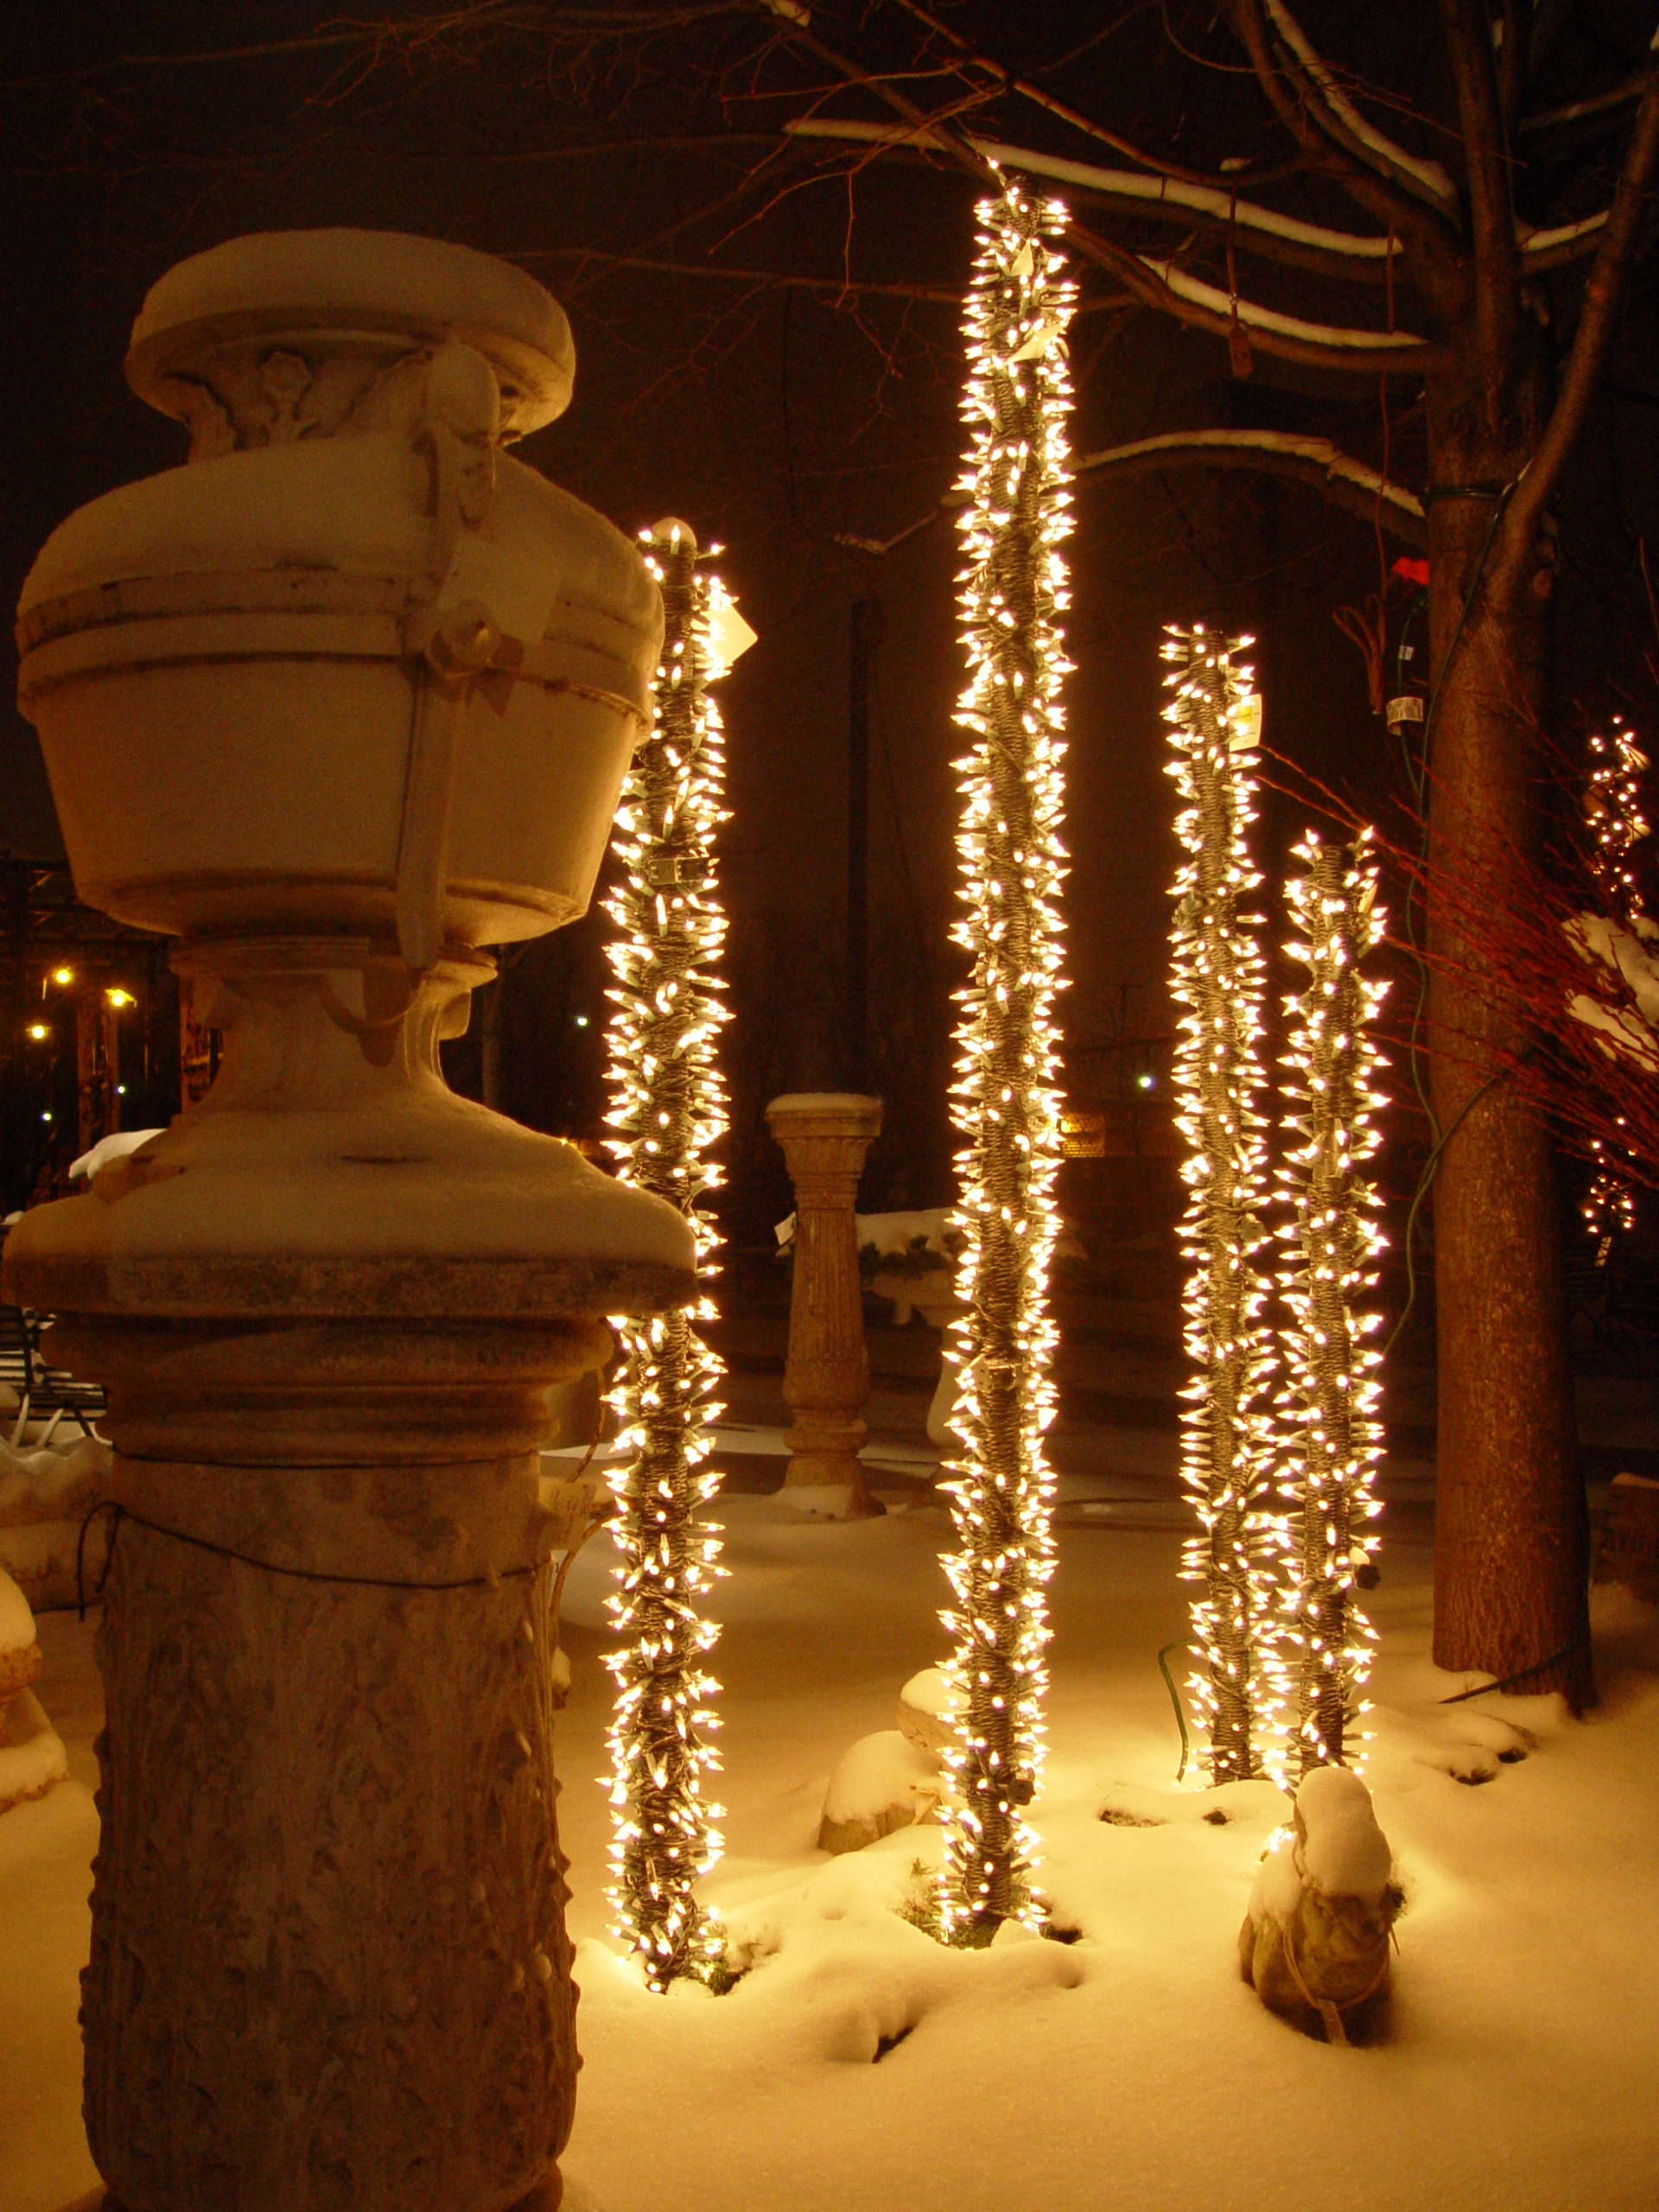
There were galvanized steel pipes of varying lengths completely covered with light strands. They were threaded over a solid pipe that had been driven in to the ground. The quality of these incandescent light strings was on the poor side, and they furthermore required a lot of electricity to run. LED outdoor lighting was in its infancy, and the harsh bluish light was reminiscent of gas station bathroom lighting. Light to be interrogated by, as it were. There were winter arrangements that had lighting wound around the pots. There was a phase when he made his own lighting by assembling cords and bulbs bought one at a time. There were galvanized buckets with lights, greens and cones. Set it on your porch, plug it in, and celebrate the winter. Rob never was one for overly elaborate or complicated displays. He likes simple and casually striking. There were winter container arrangements that had light strings as mulch. Strands of C-7 and C-9 lights were piled high. Eventually we had to upgrade all of our existing exterior circuits to 20 amps each, and we added more circuits for good measure. We were lit.

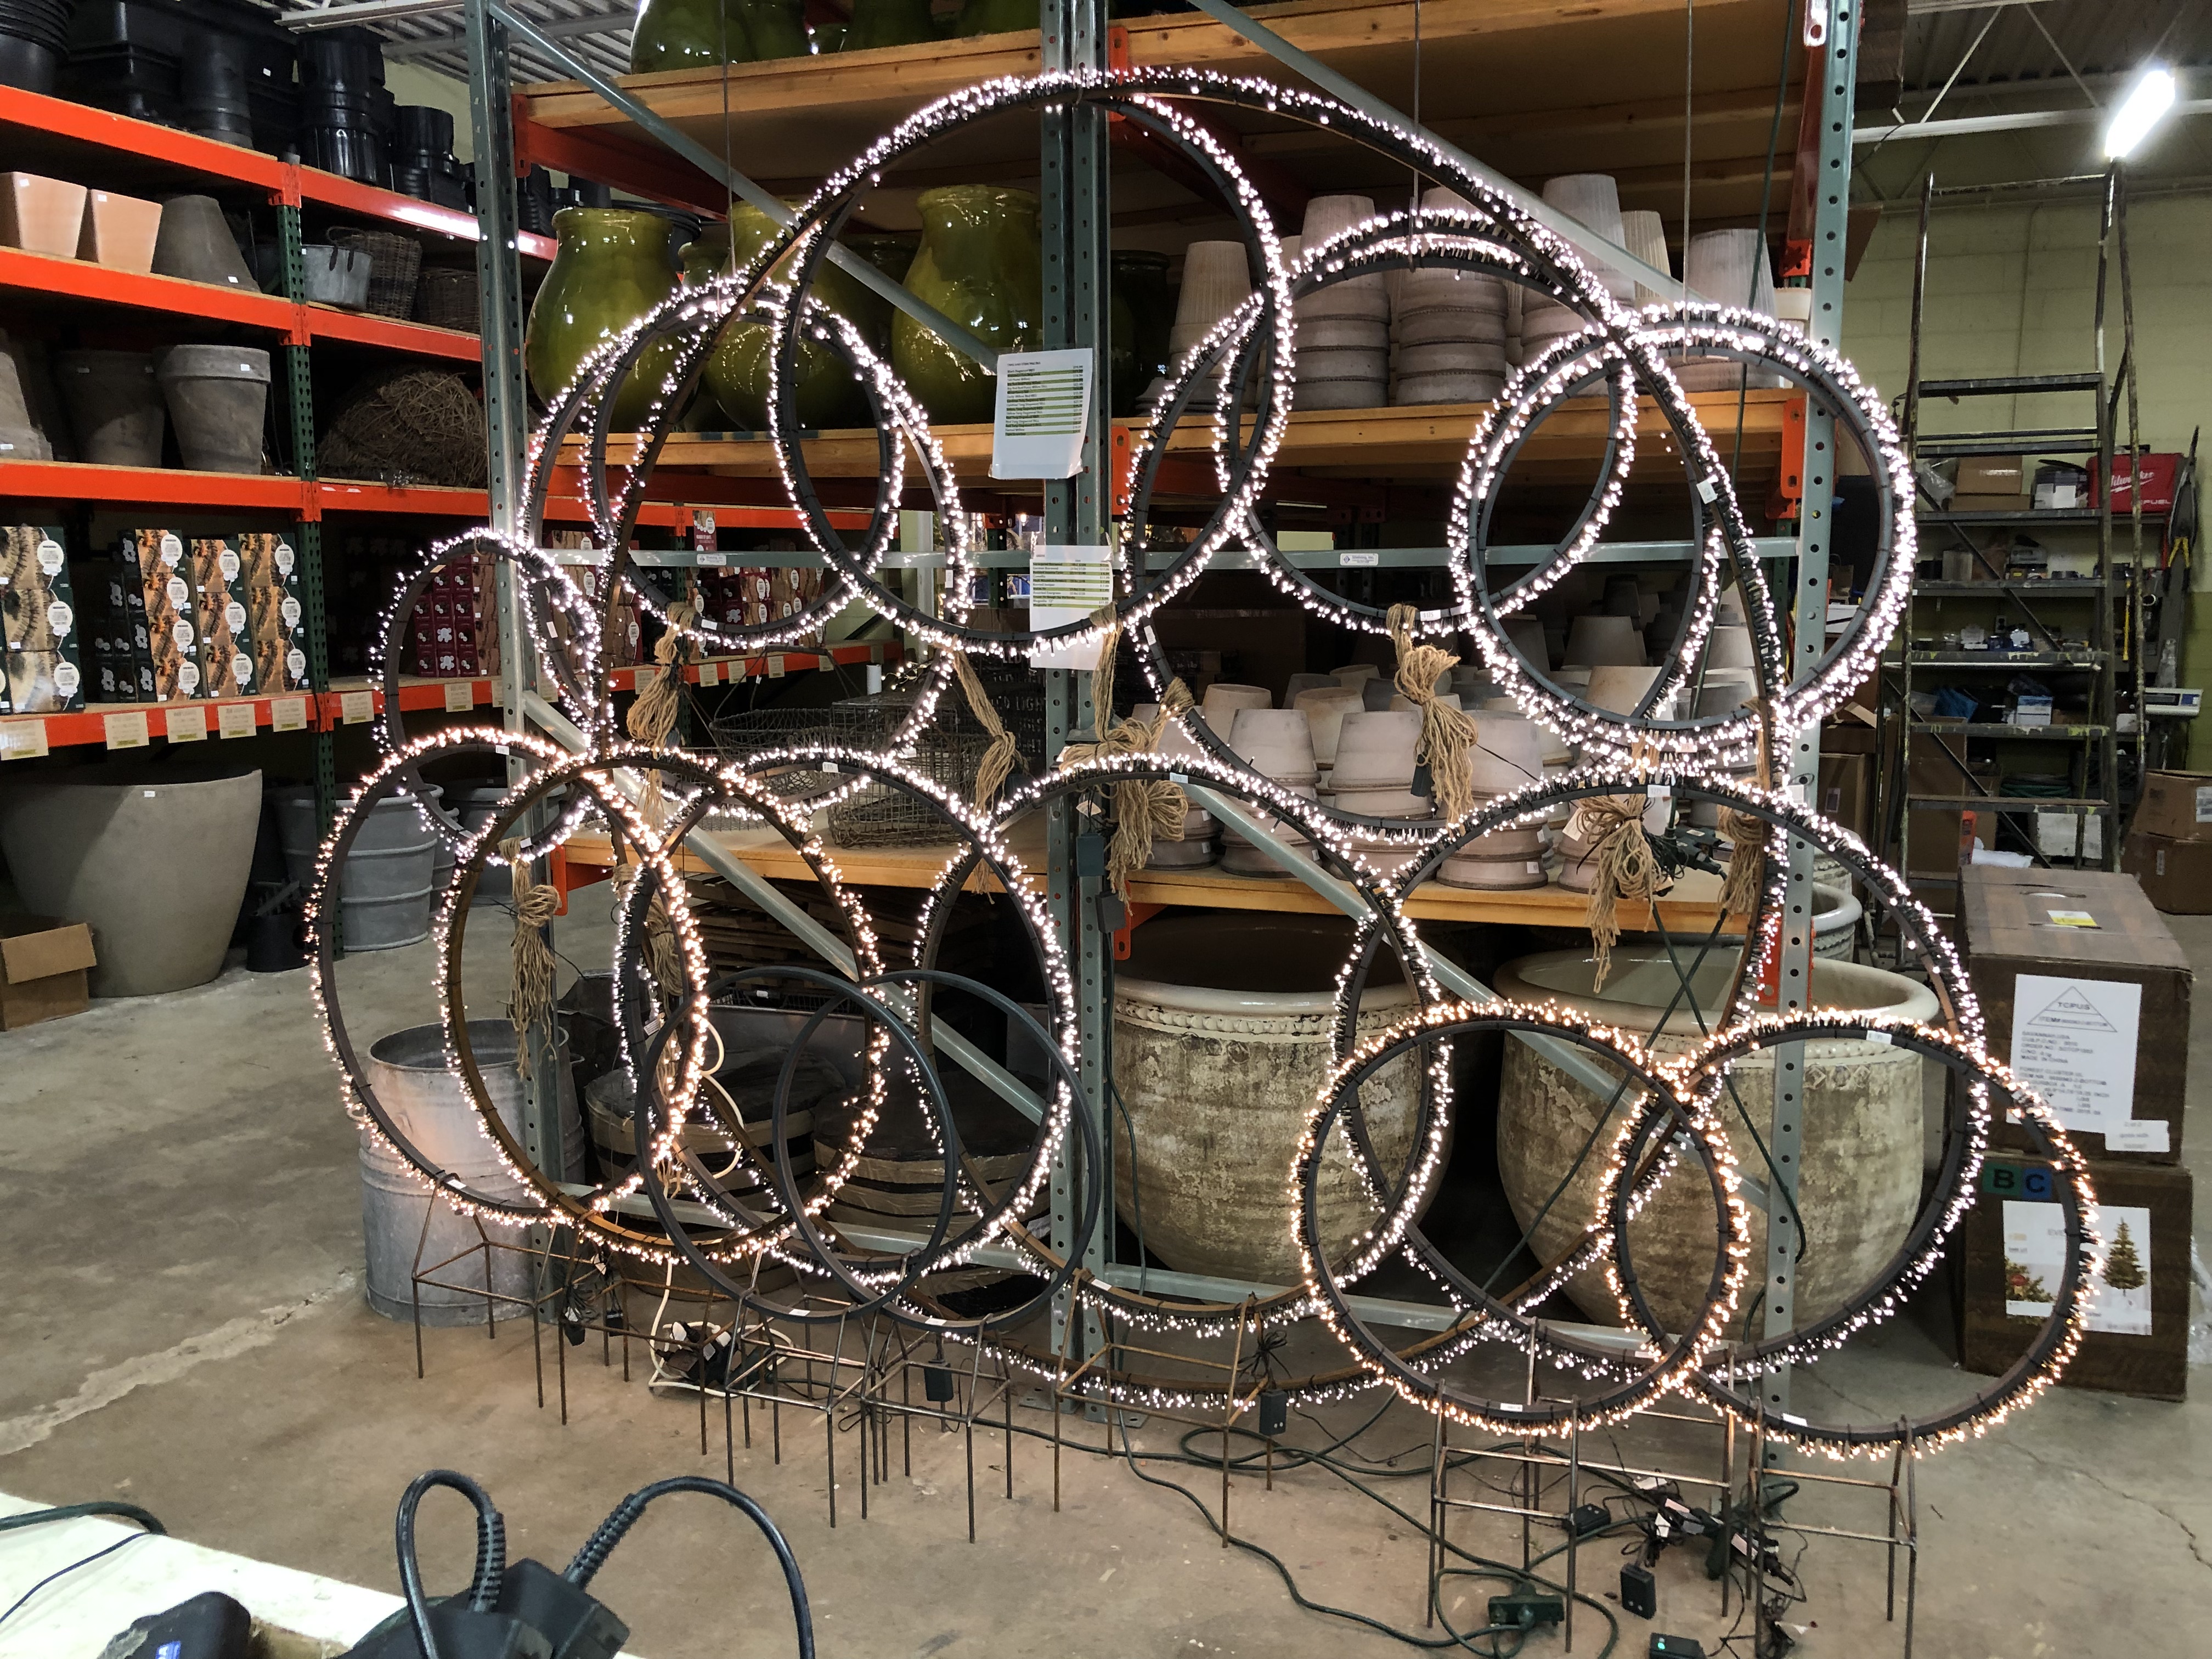
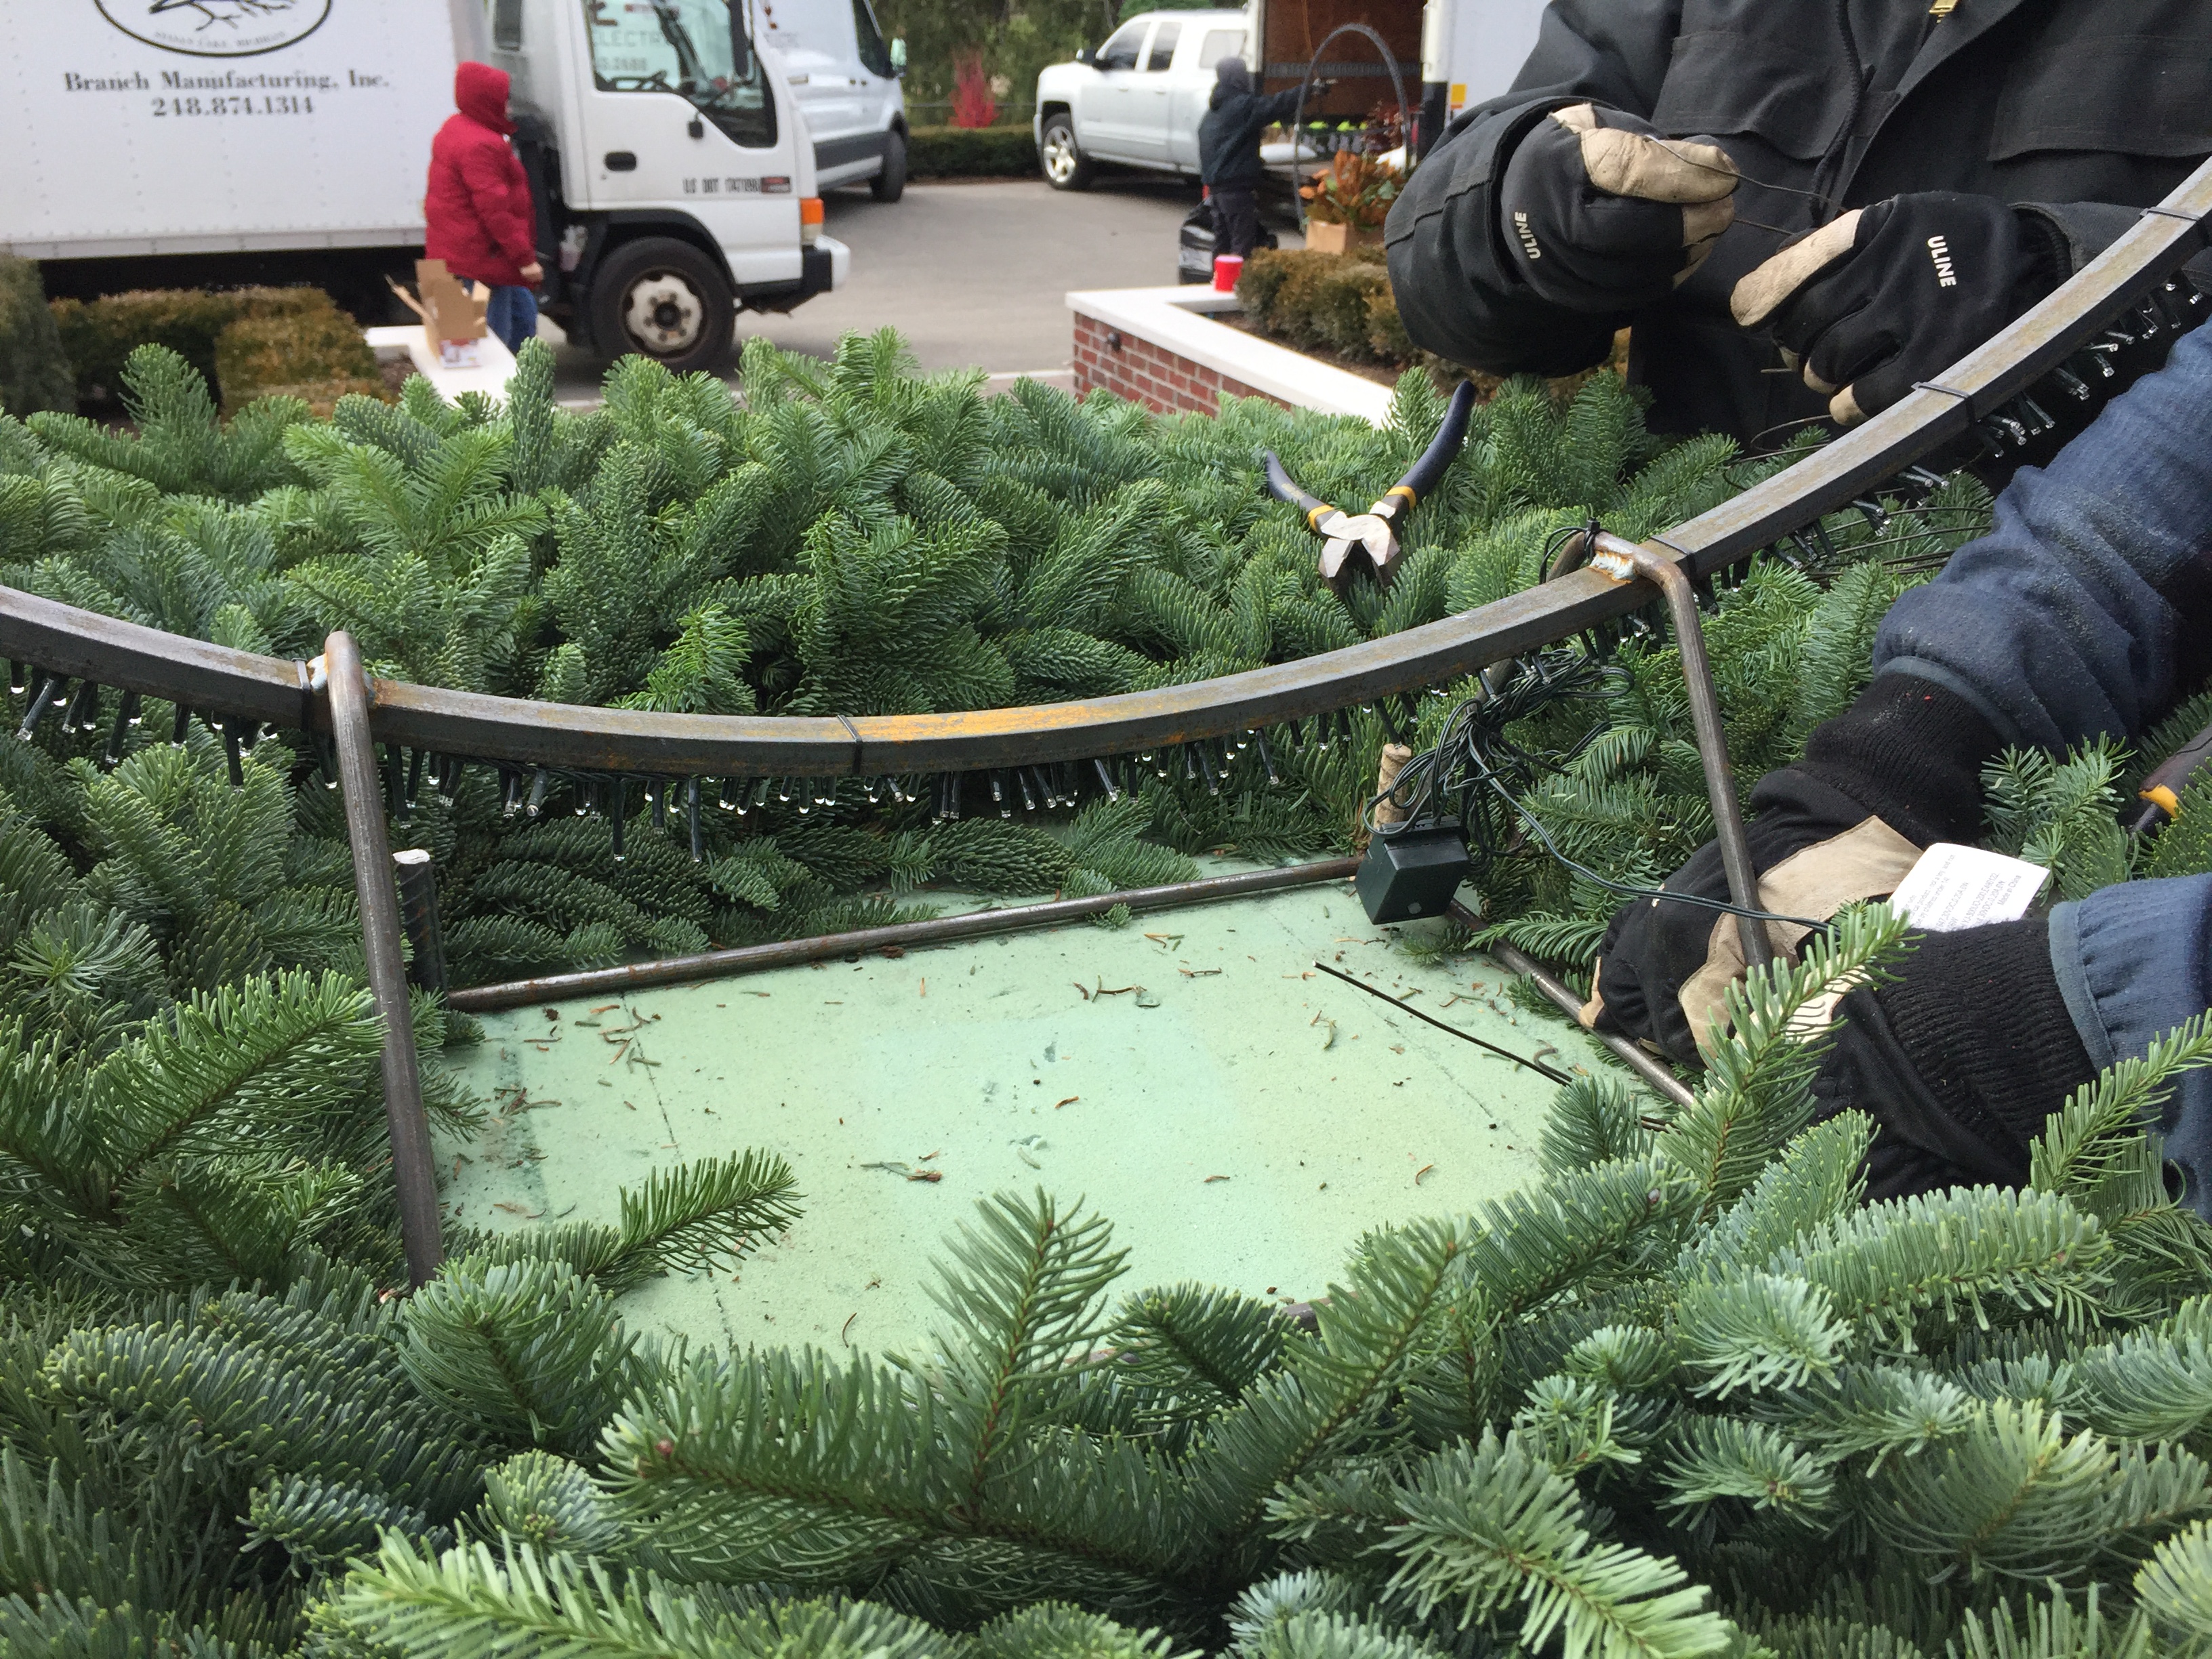
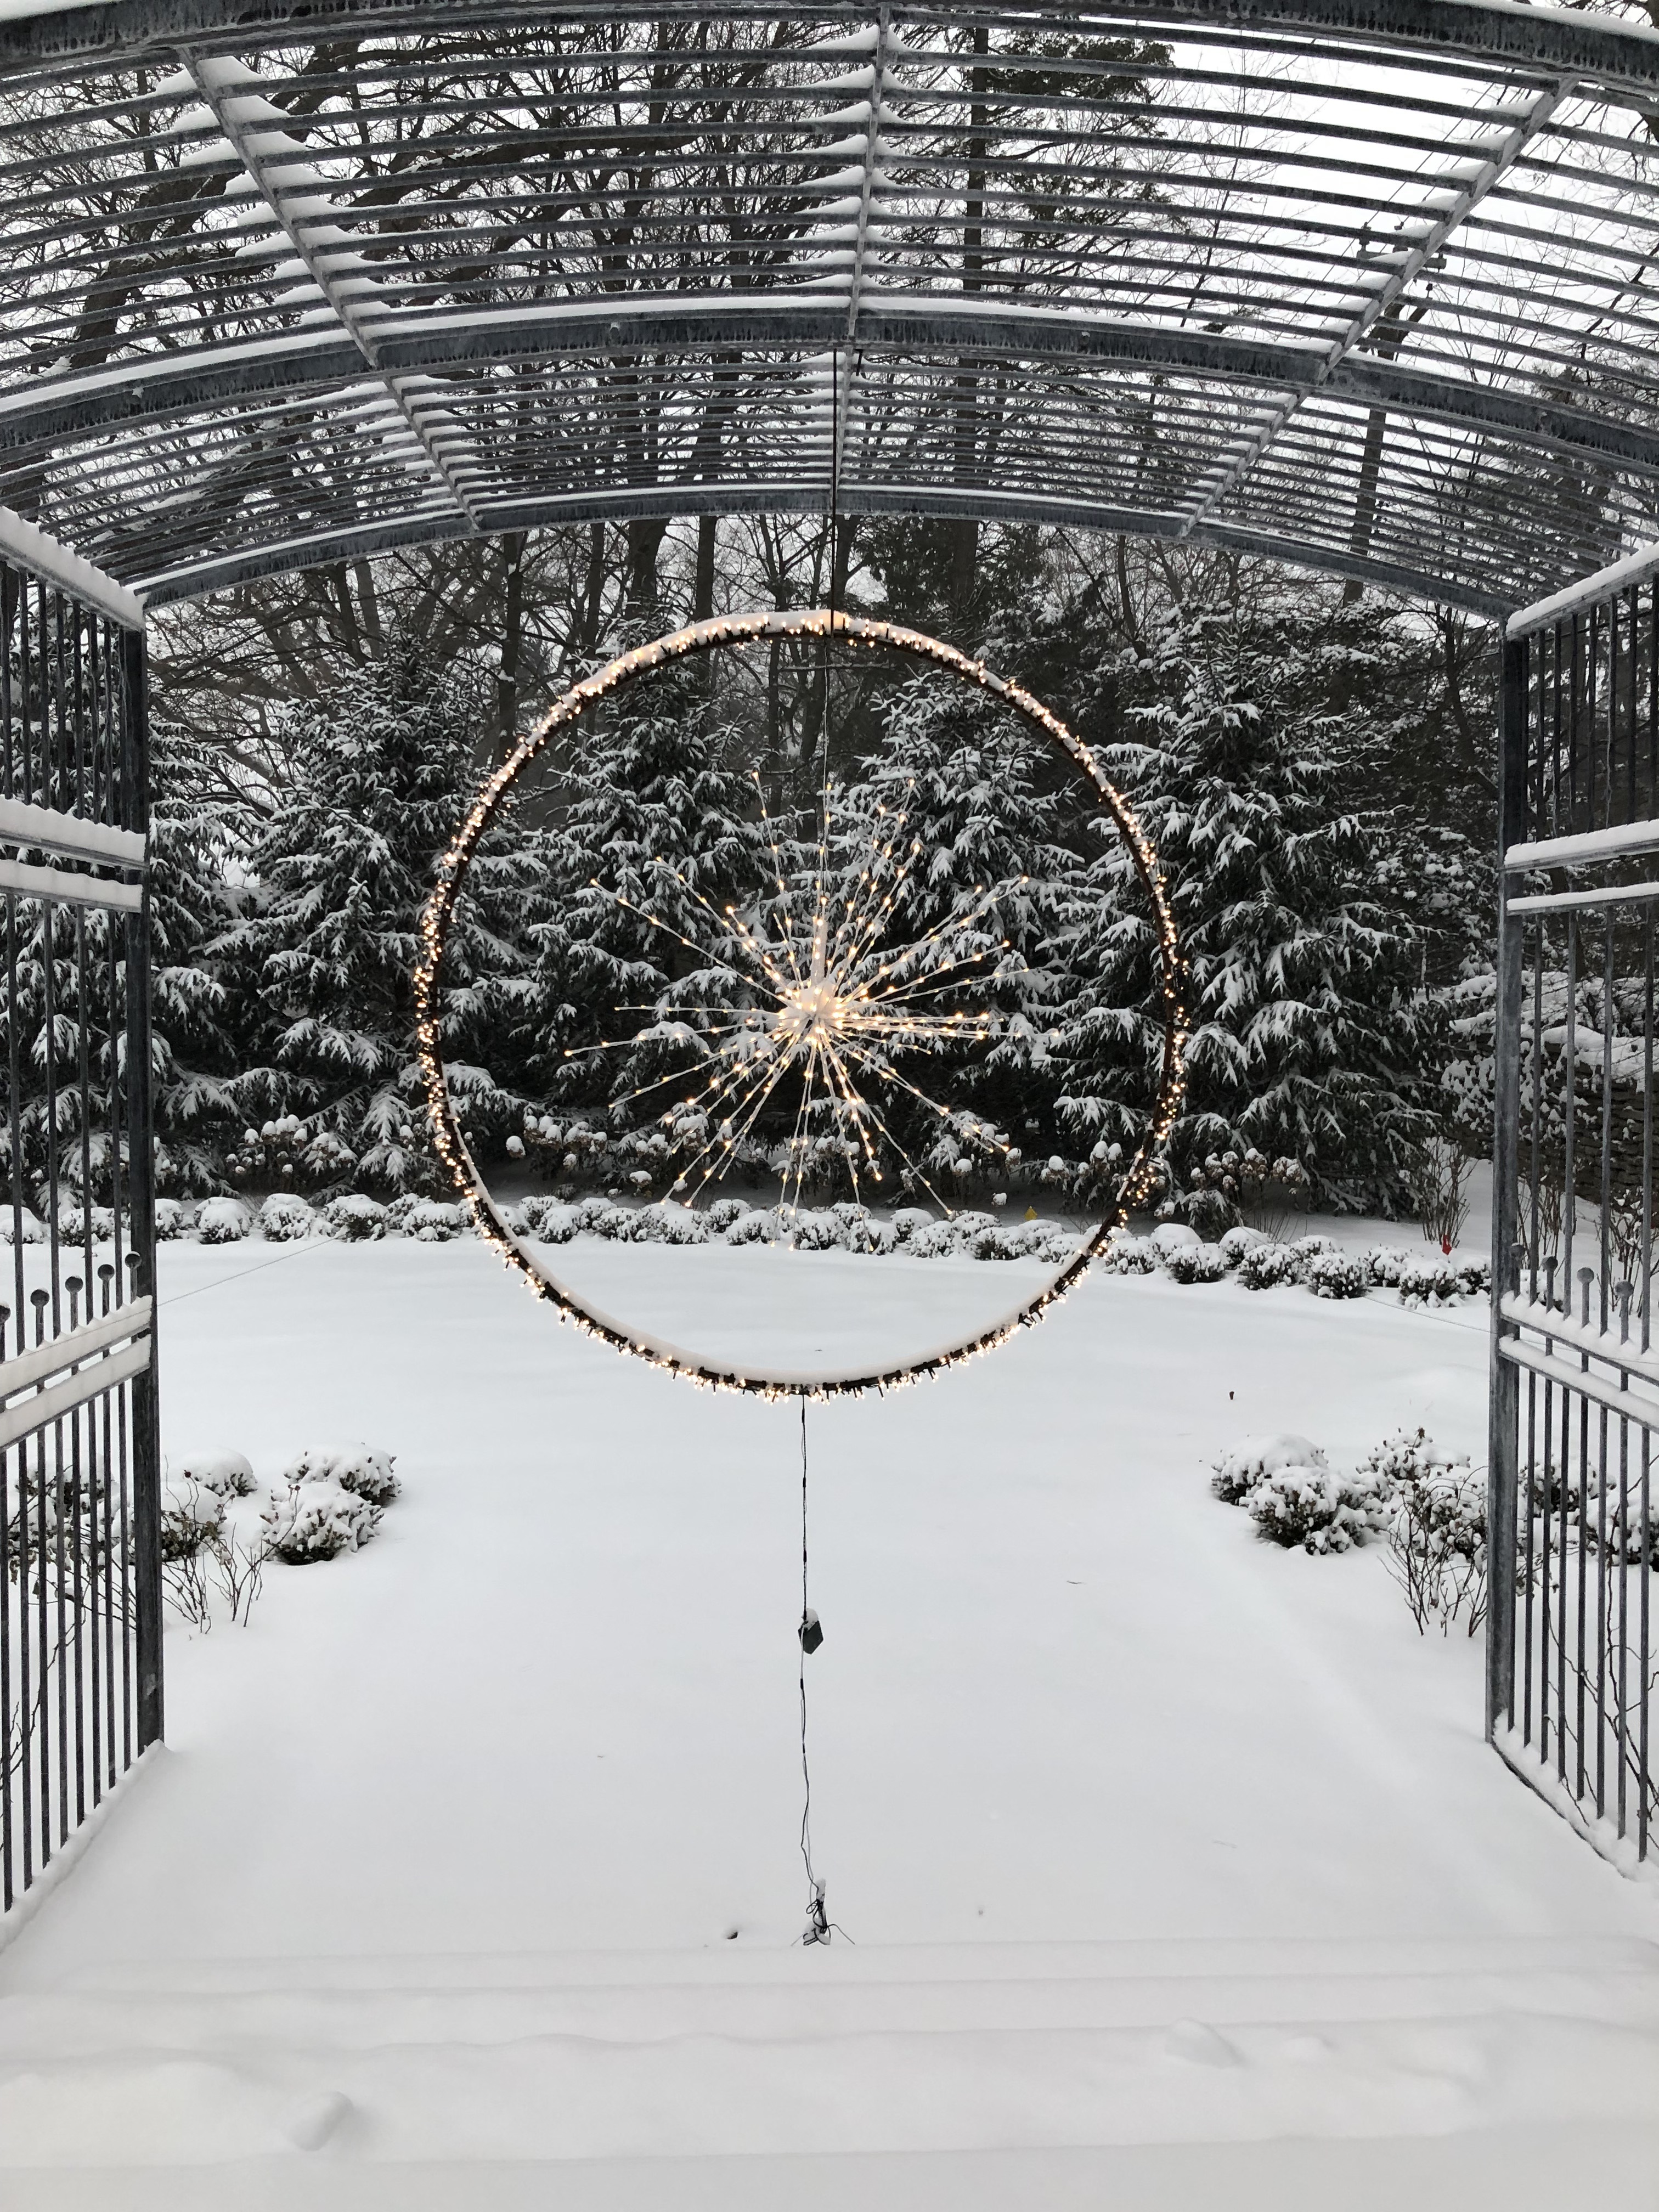
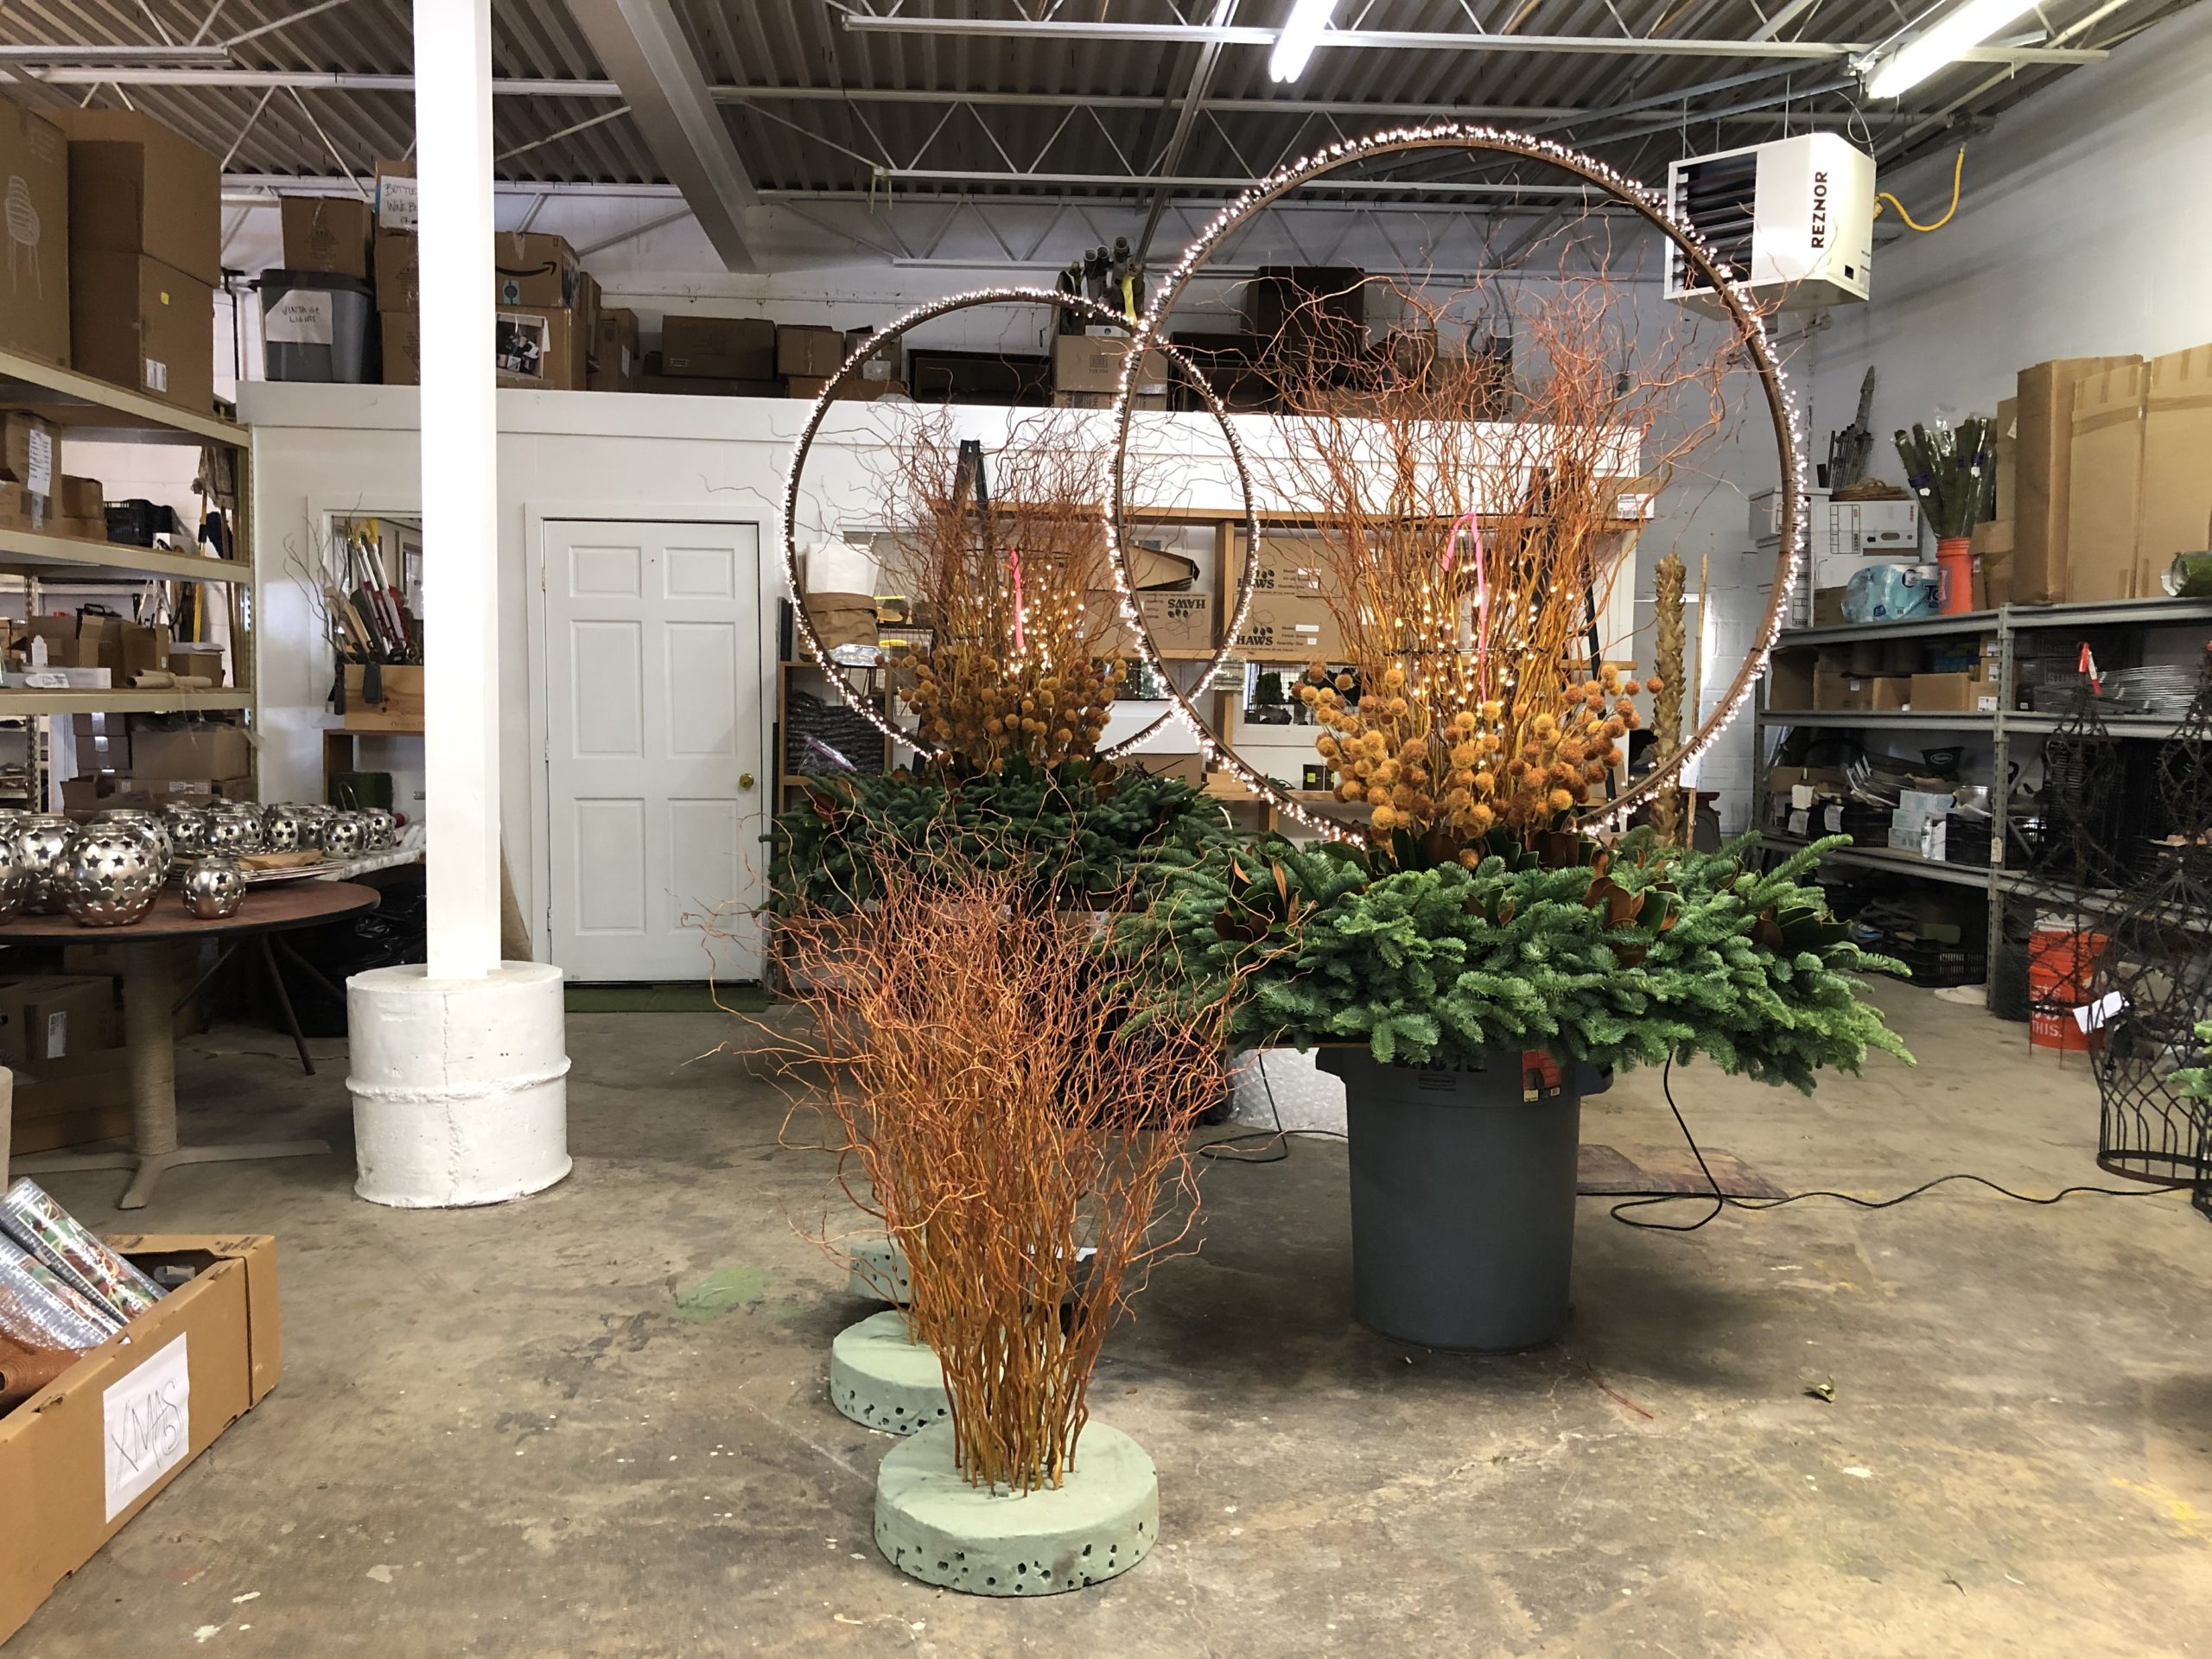
Sooner or later, something solid was bound to come from all of his tinkering. The day he came home with a pair of vintage wagon wheels that he wound round with lights, and hung in the airspace in the shop, I could tell something was in the air. There was something about that circle of light that was as satisfying as it was fascinating. A client bought them both in short order. That winter, he spent a lot of time designing a steel hoop especially engineered to hold and securely capture the lights, and we manufactured them in different sizes.
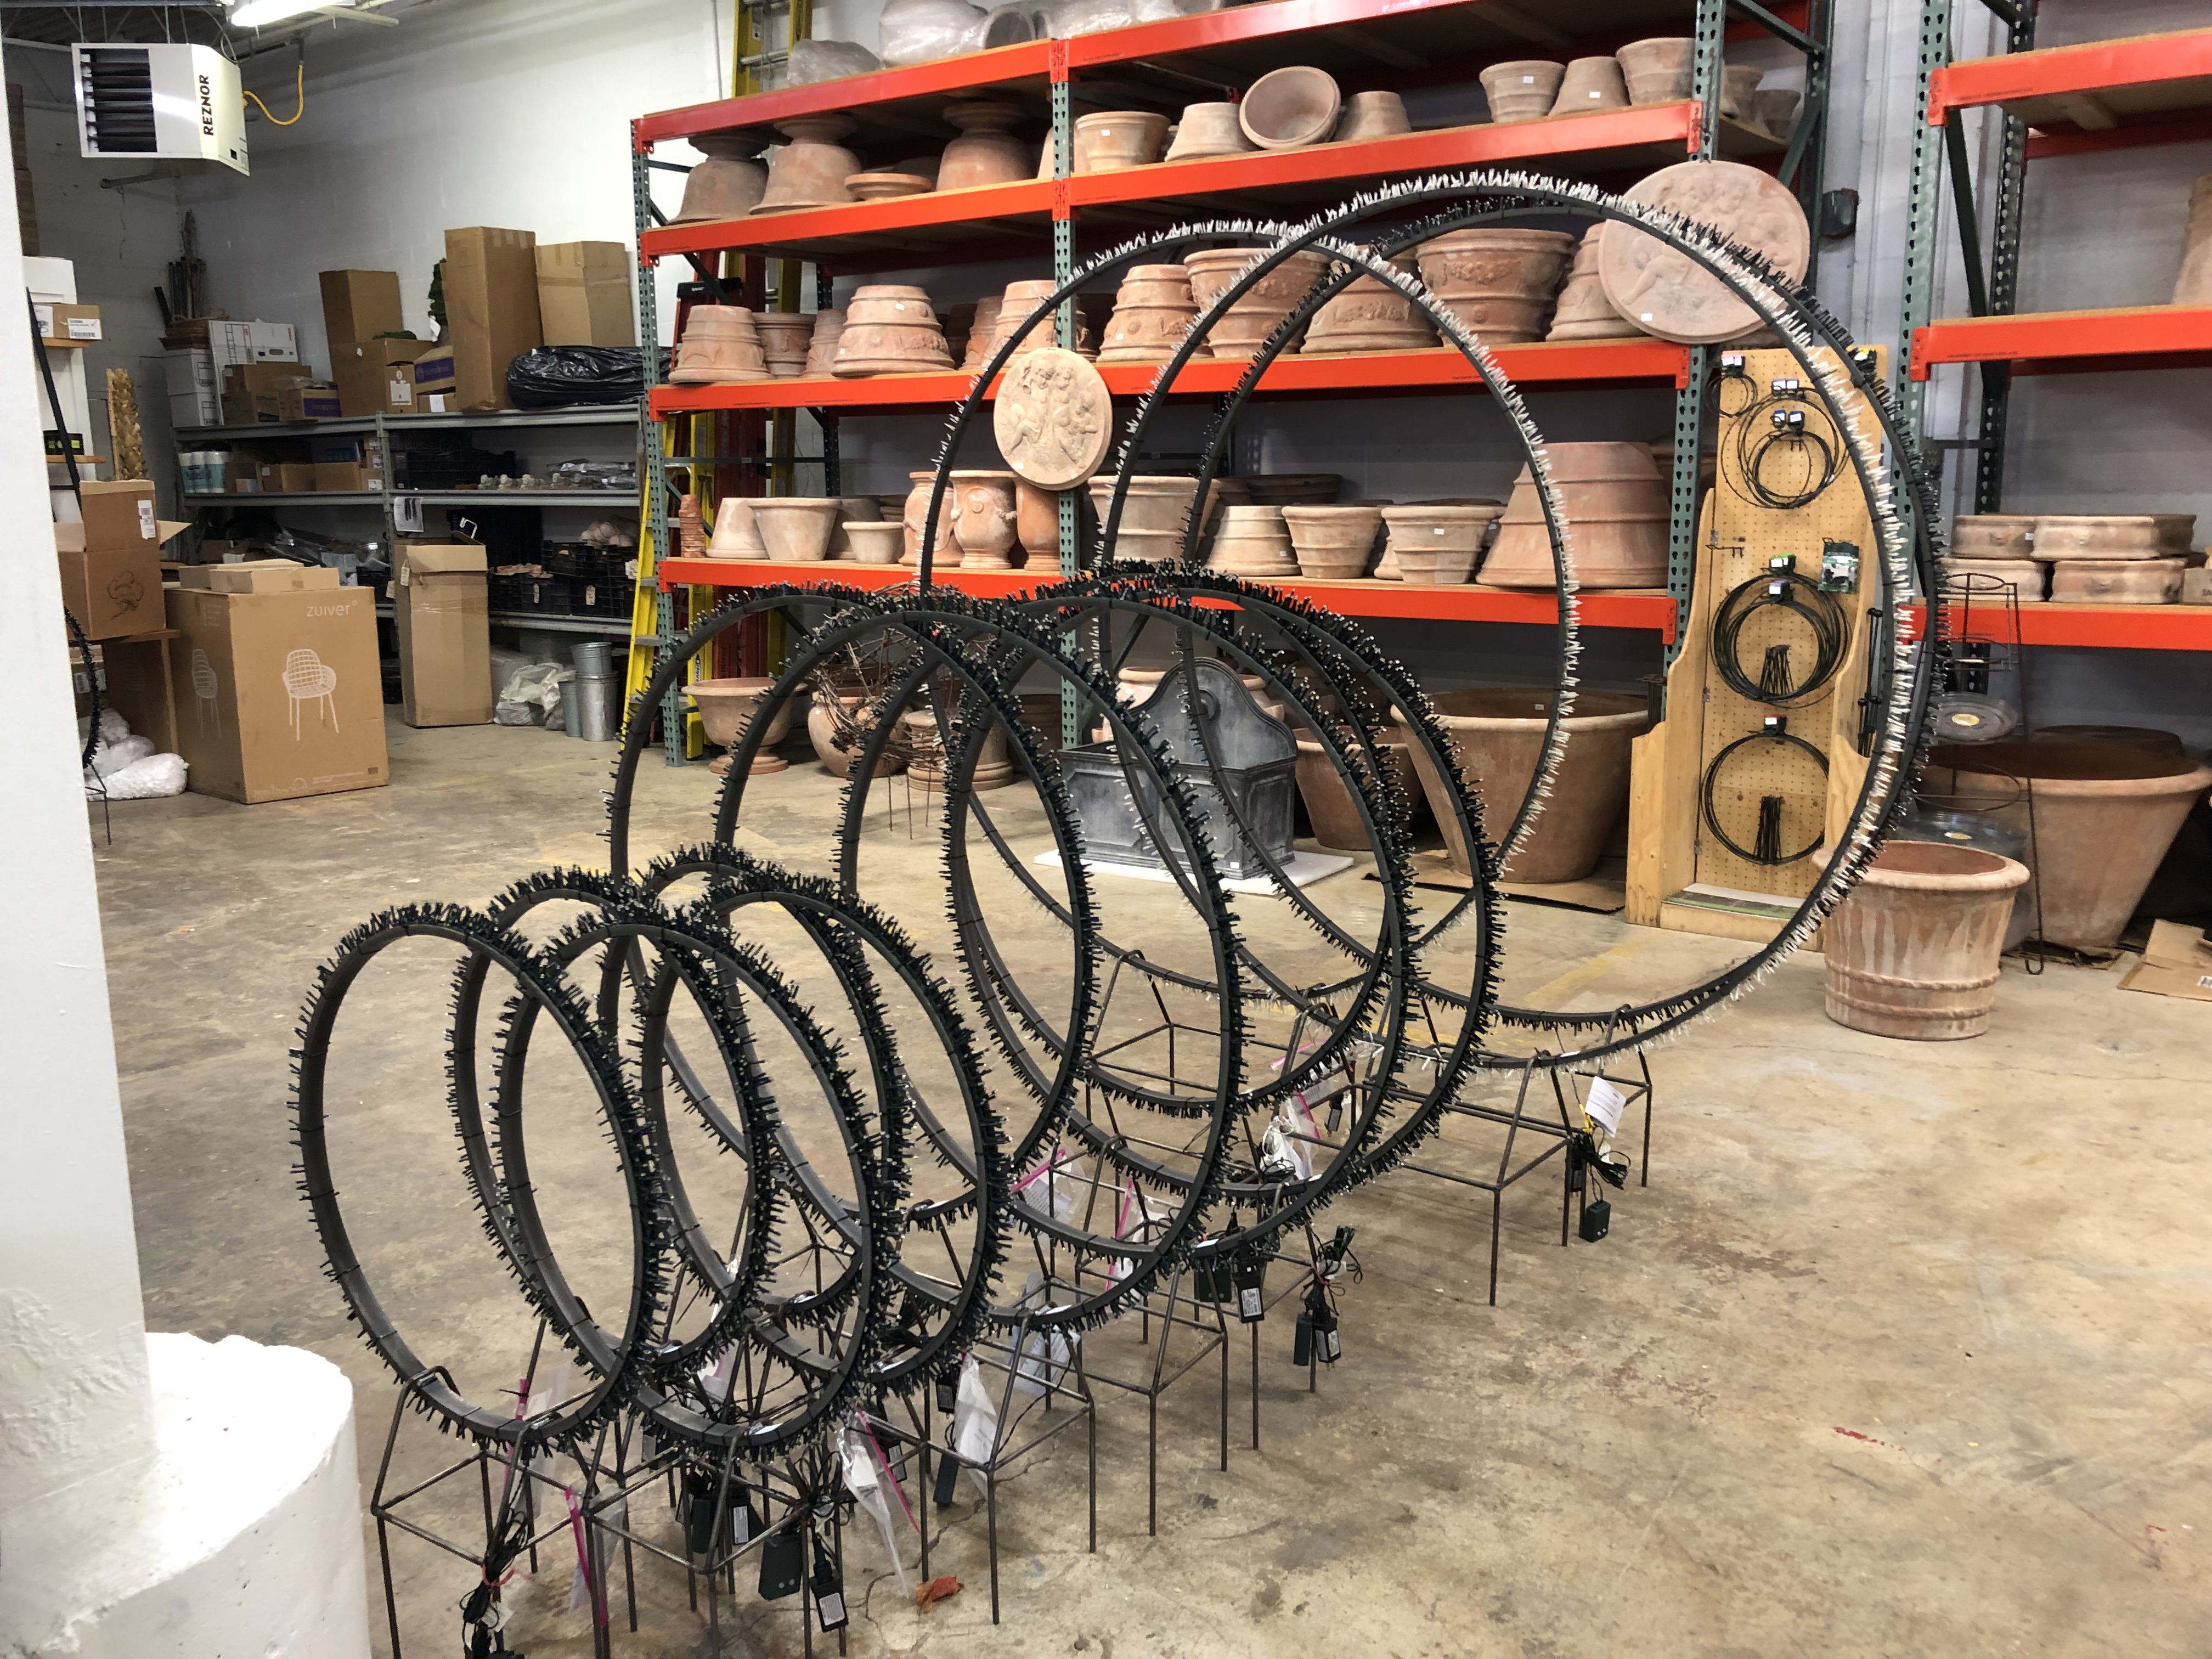
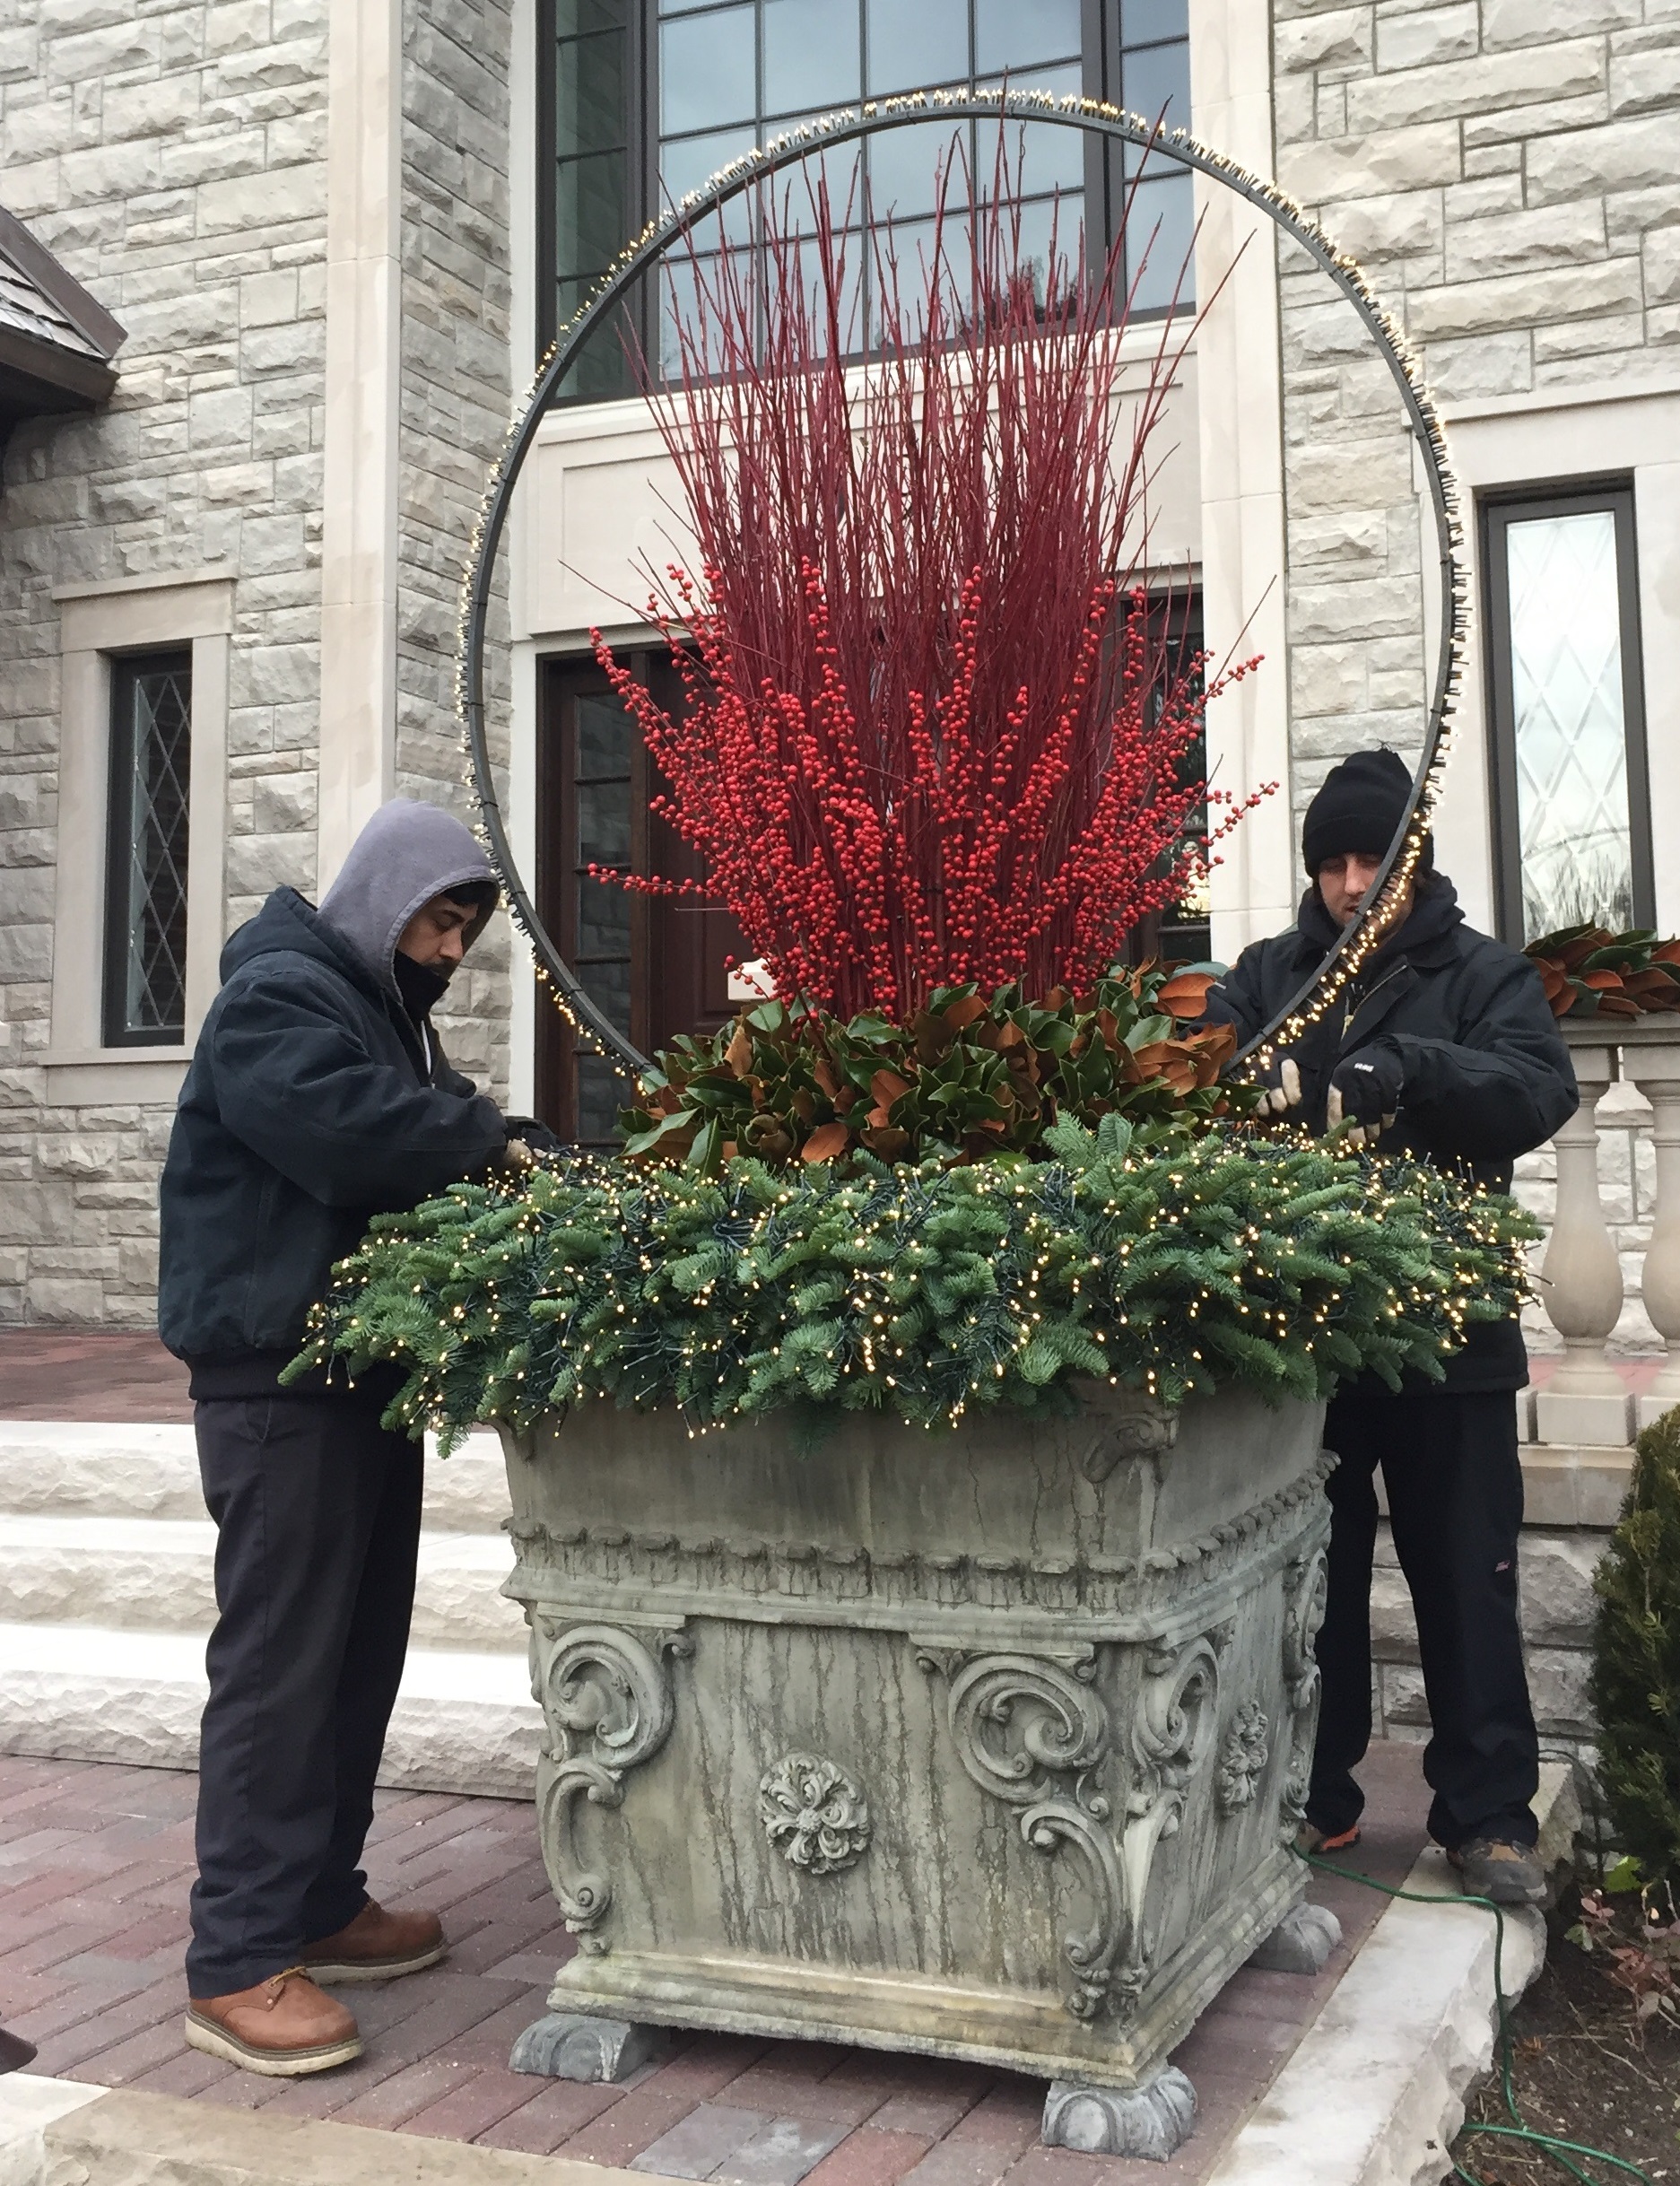
A year later, he designed an integral stand for the rings. This meant they could be securely inserted into a pot, or in the ground. In the air, or in the ground-you can take your pick, or do both. By this time, he had found an LED lighting line that he liked. The lighted hoops were a winter decoration that could be enjoyed year after year. Three years in to the lighted hoop manufacture, he suggested that perhaps it was time to move on to another shape. I was incredulous. That circle of light was so simple, so visually striking and so easy to use, I couldn’t imagine him giving it up. So we have fine tuned the engineering, and continued to make them. Jackie has shipped them all over the US and Canada. To gardeners, and not gardeners. To designers, florists, and restaurateurs. A sure sign of a great design, they adapt instantly to any setting.

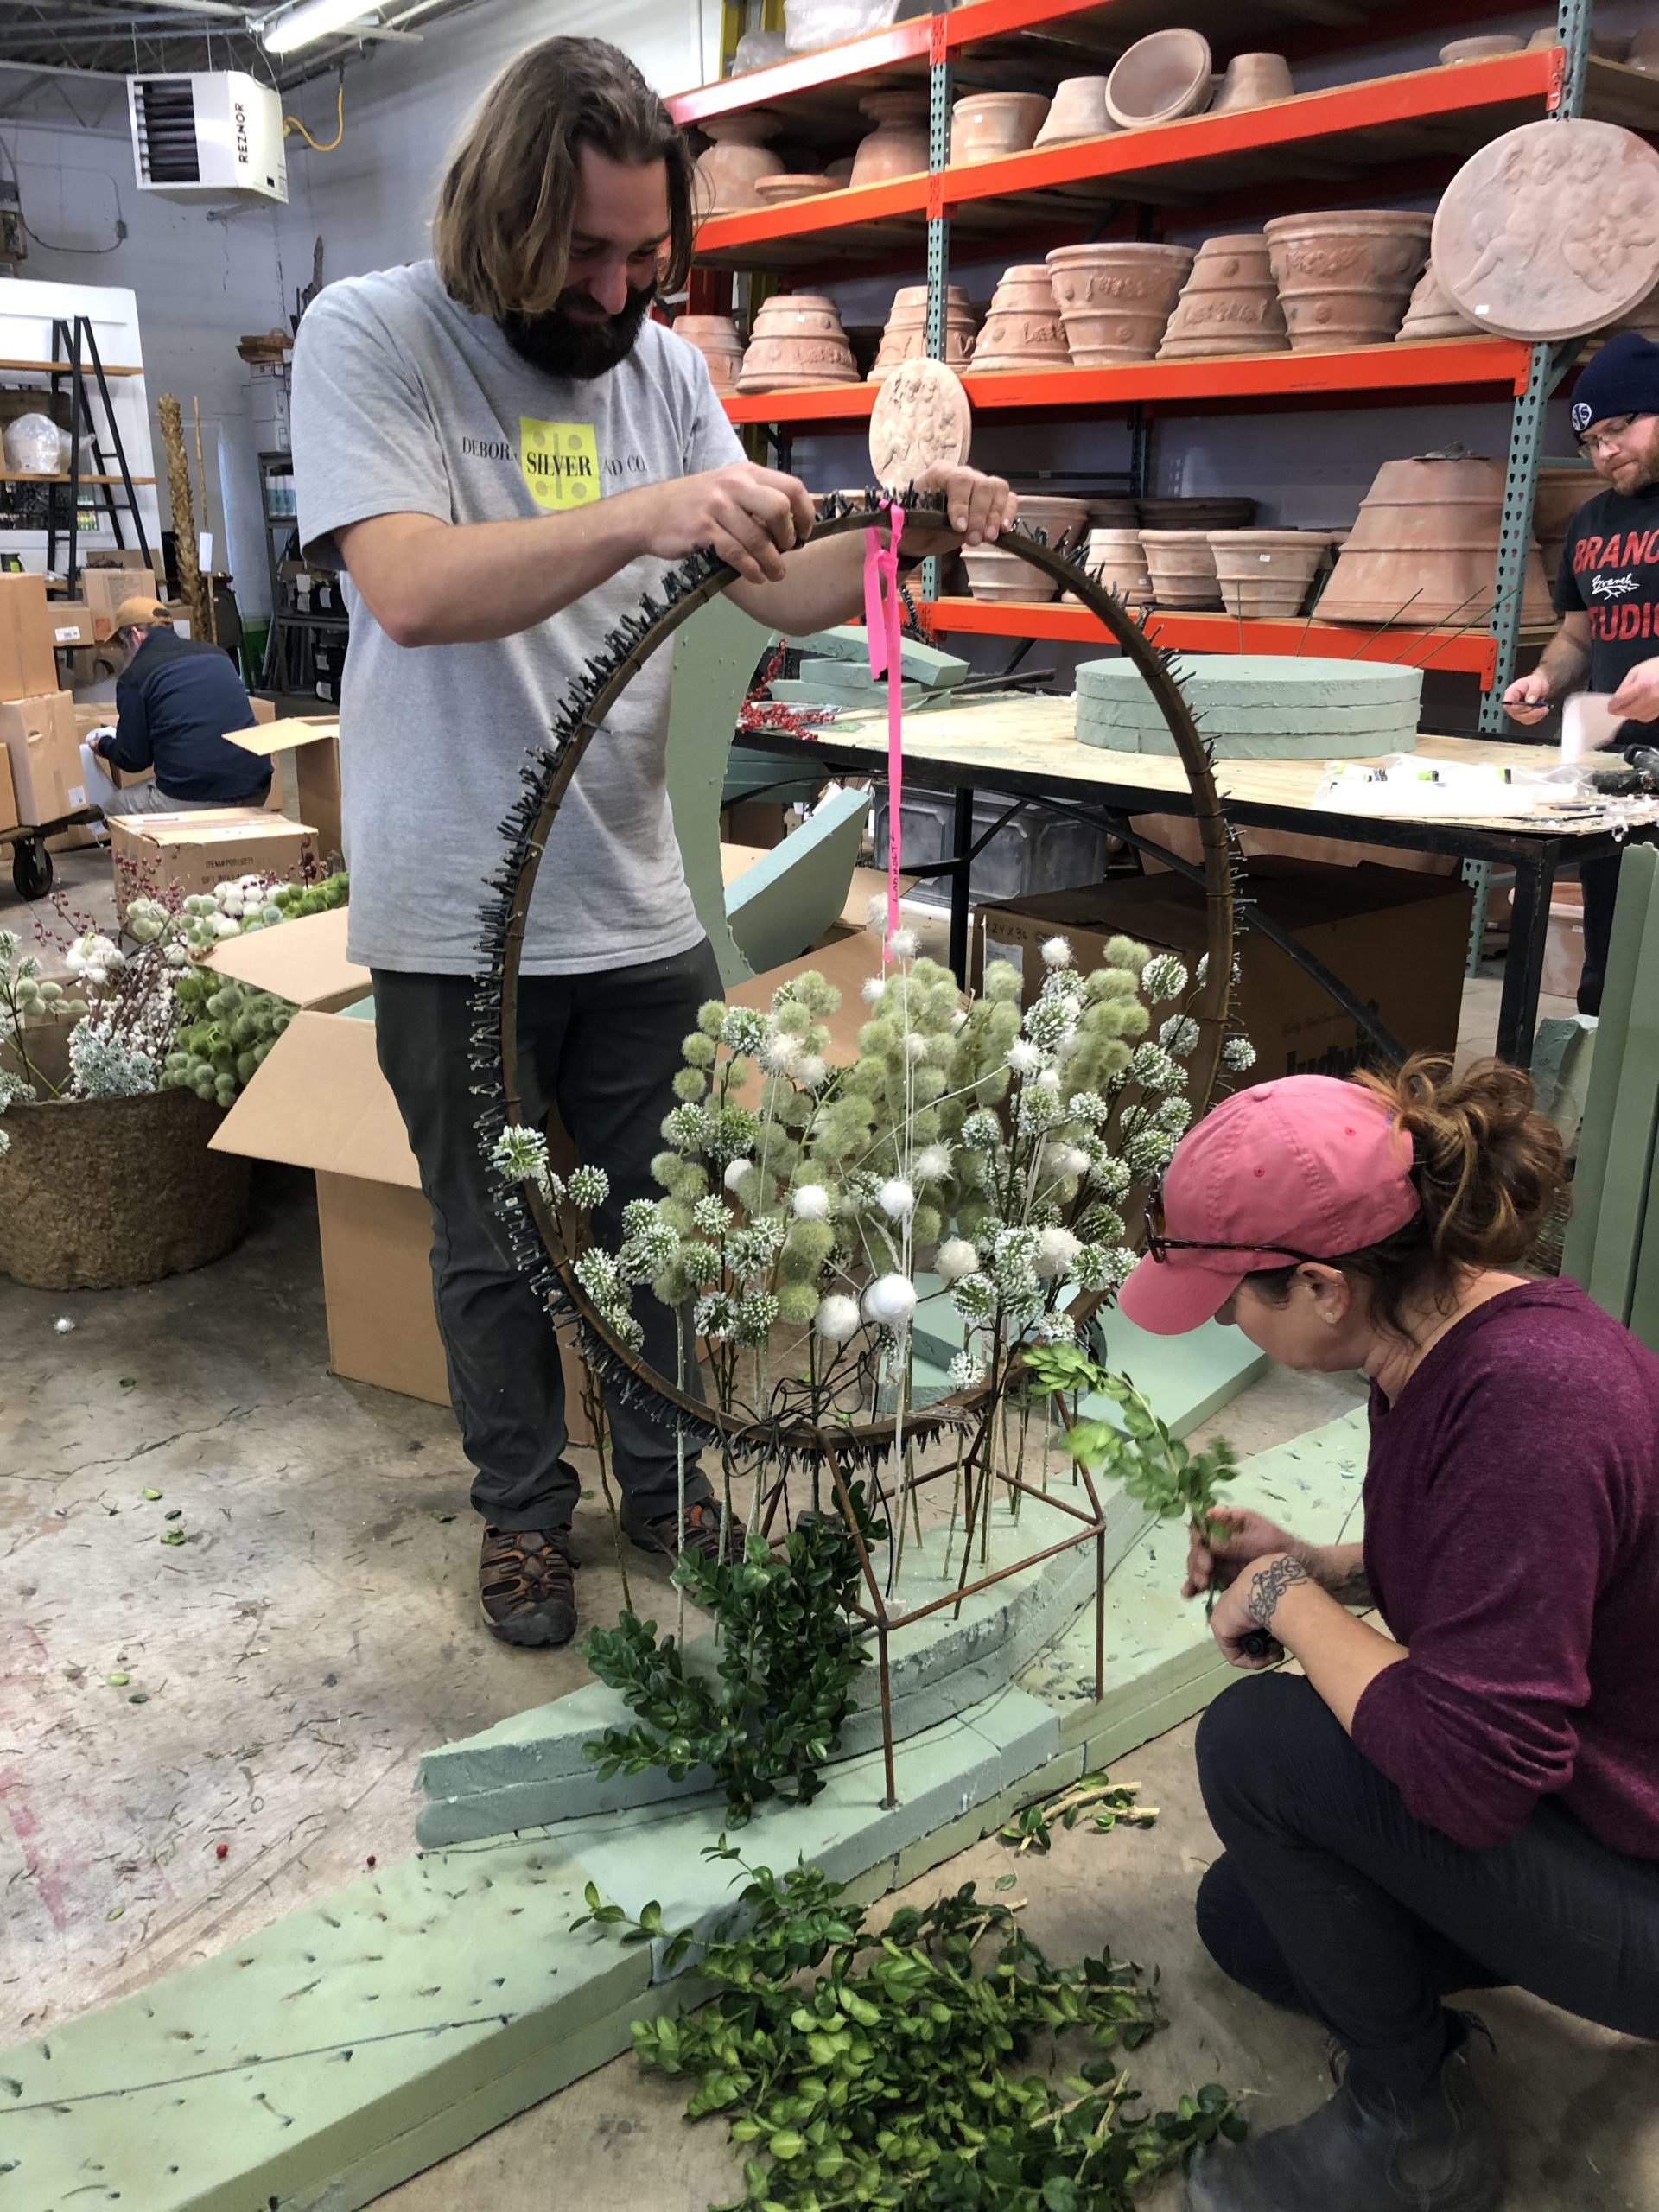
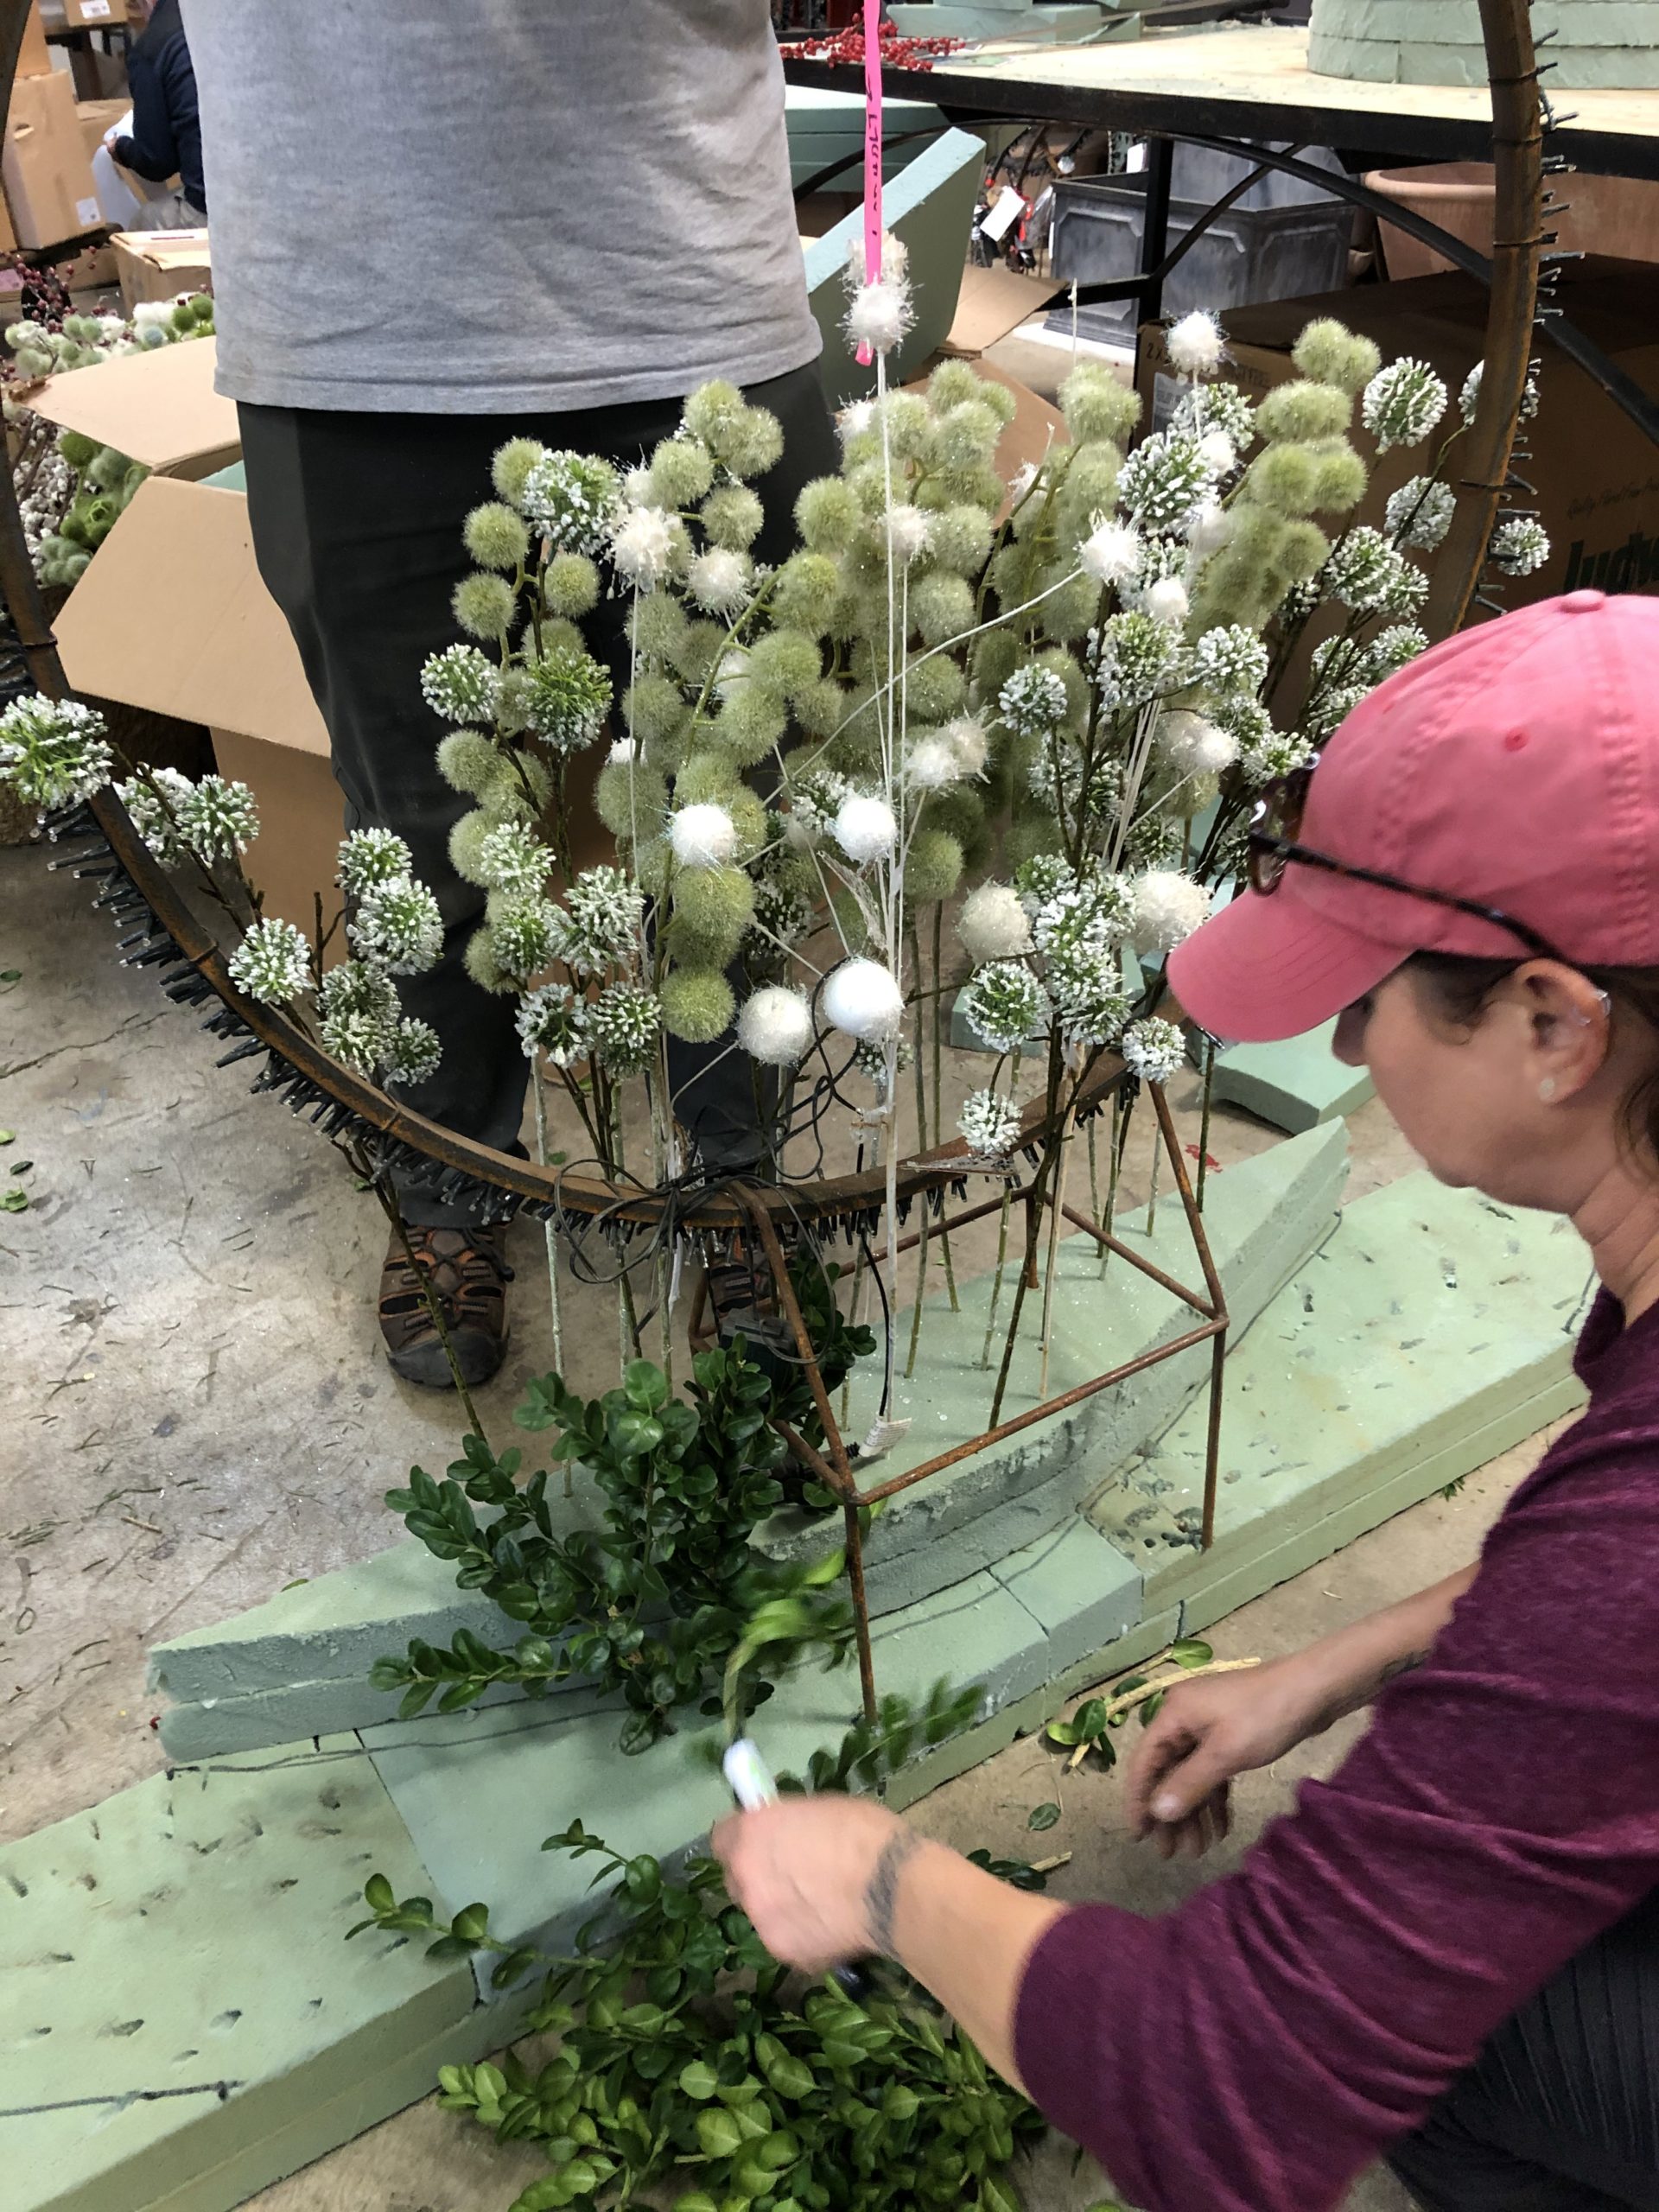
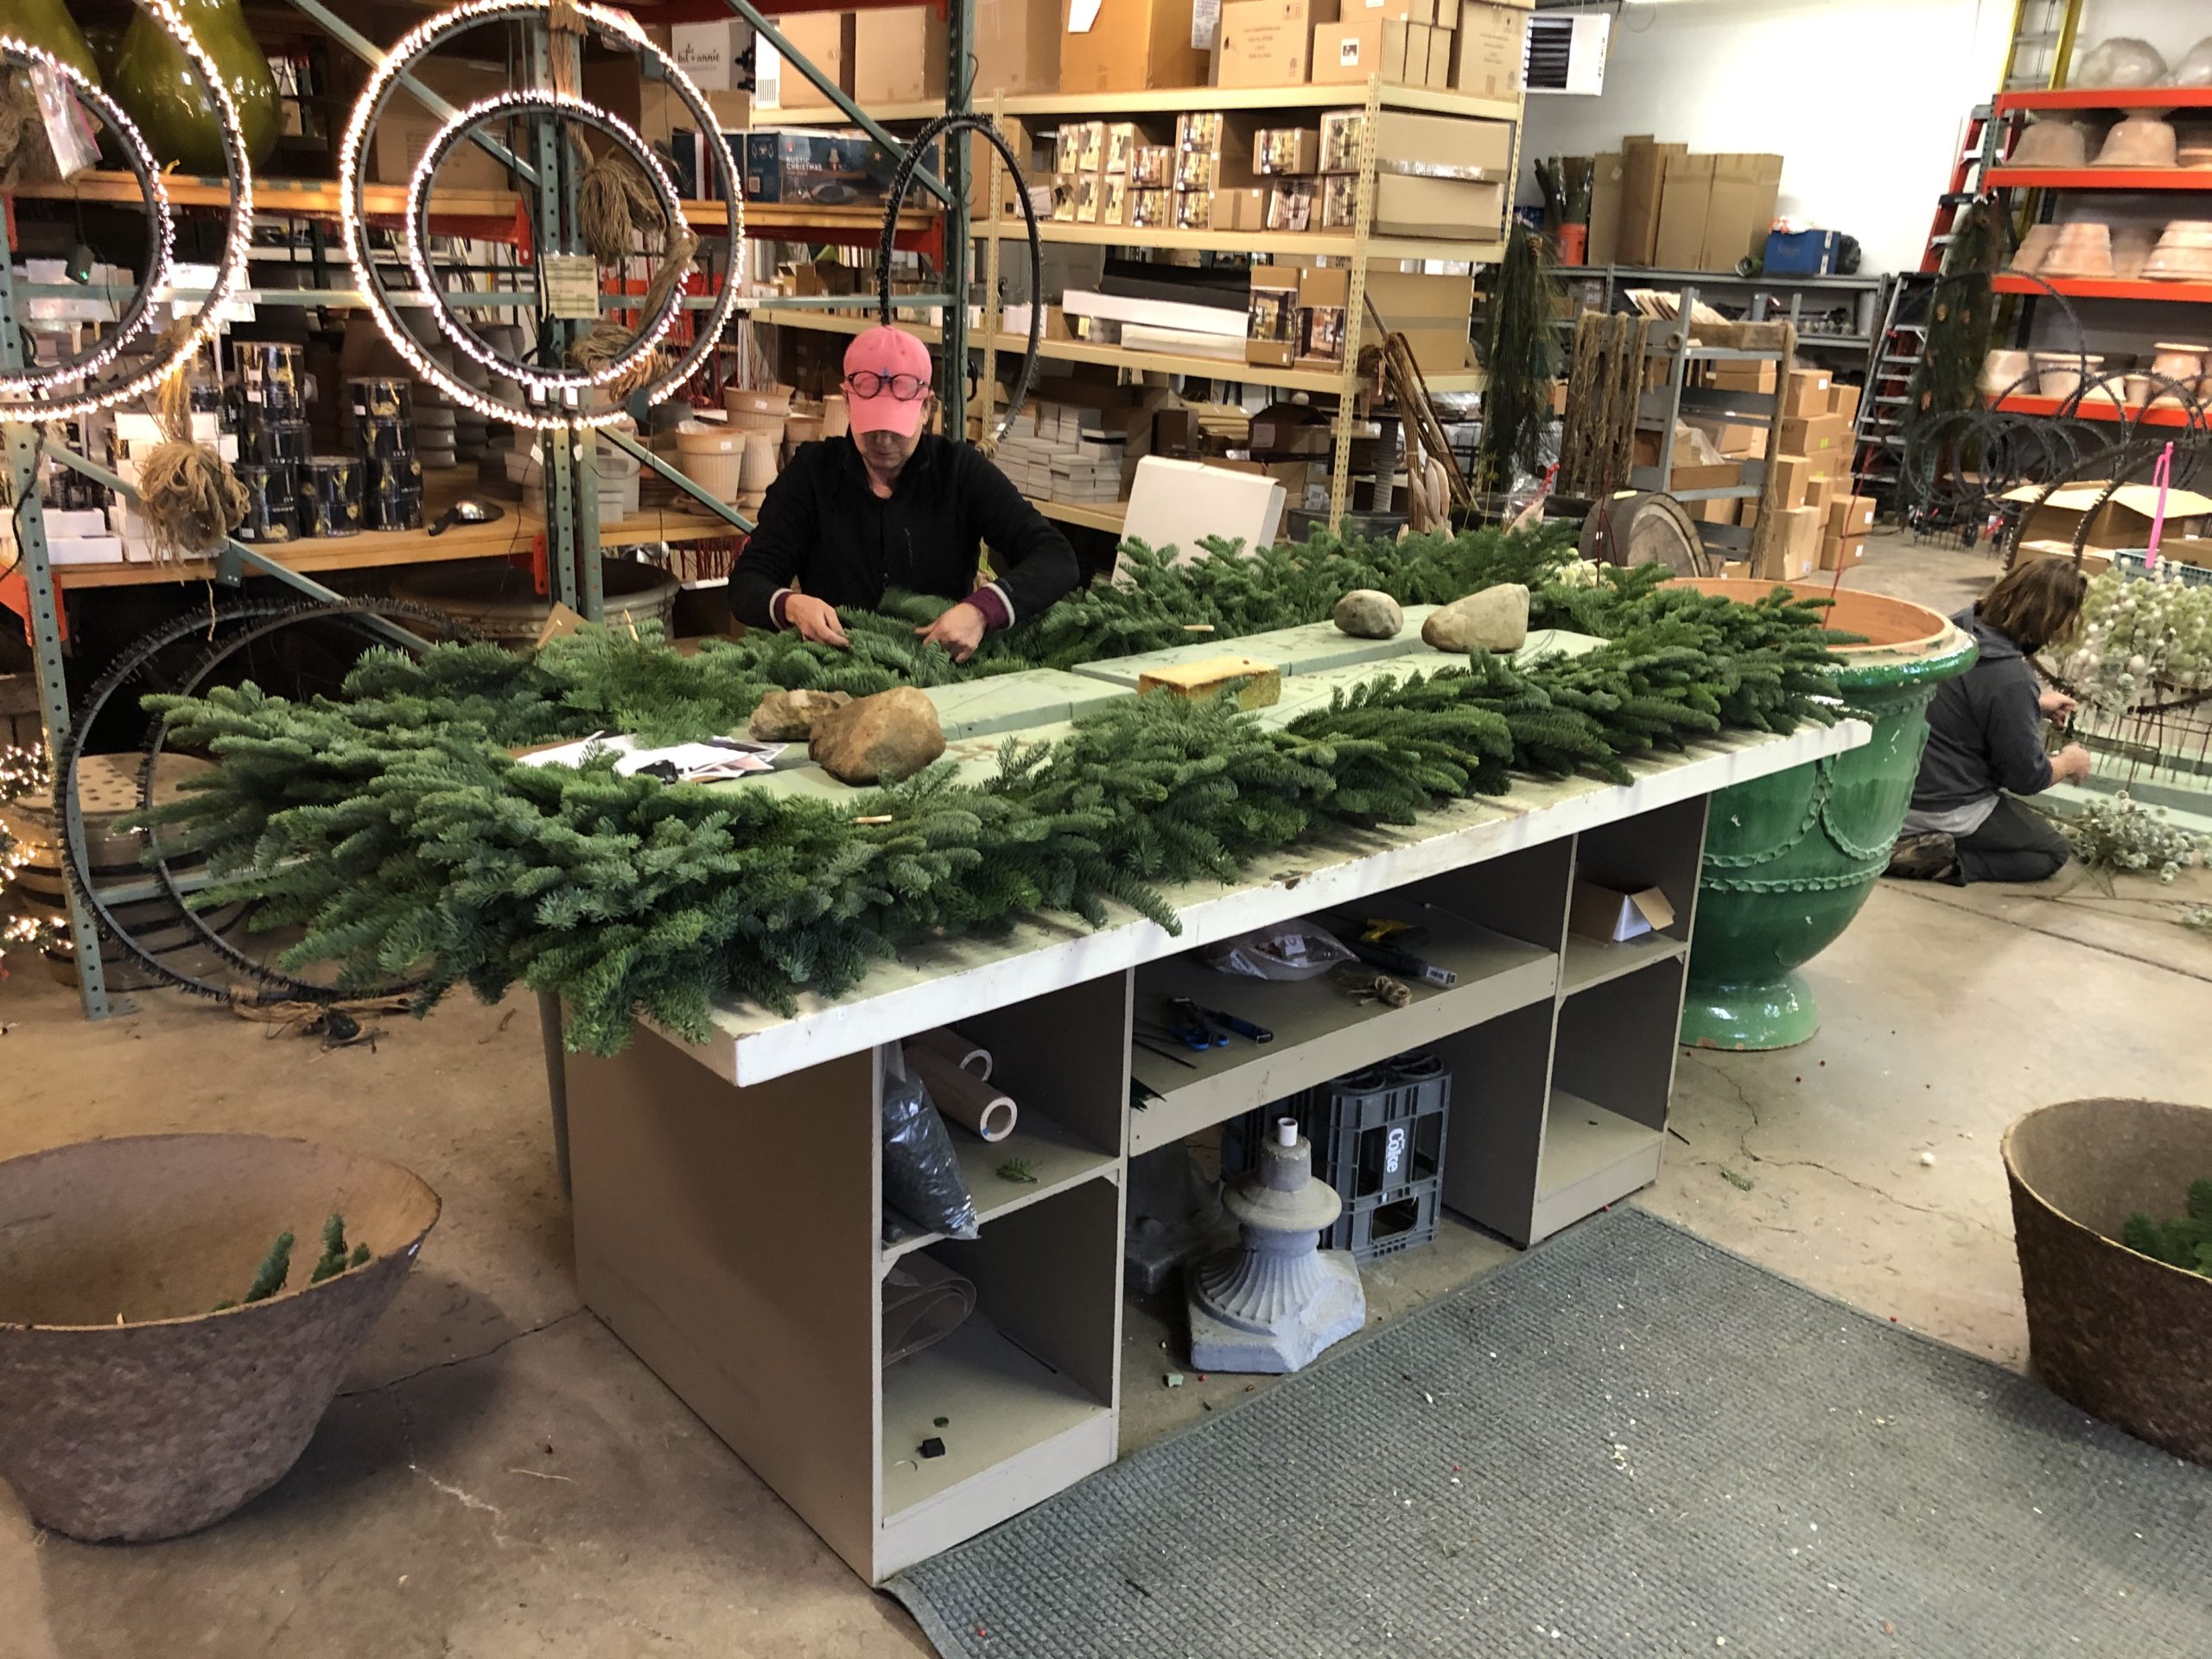
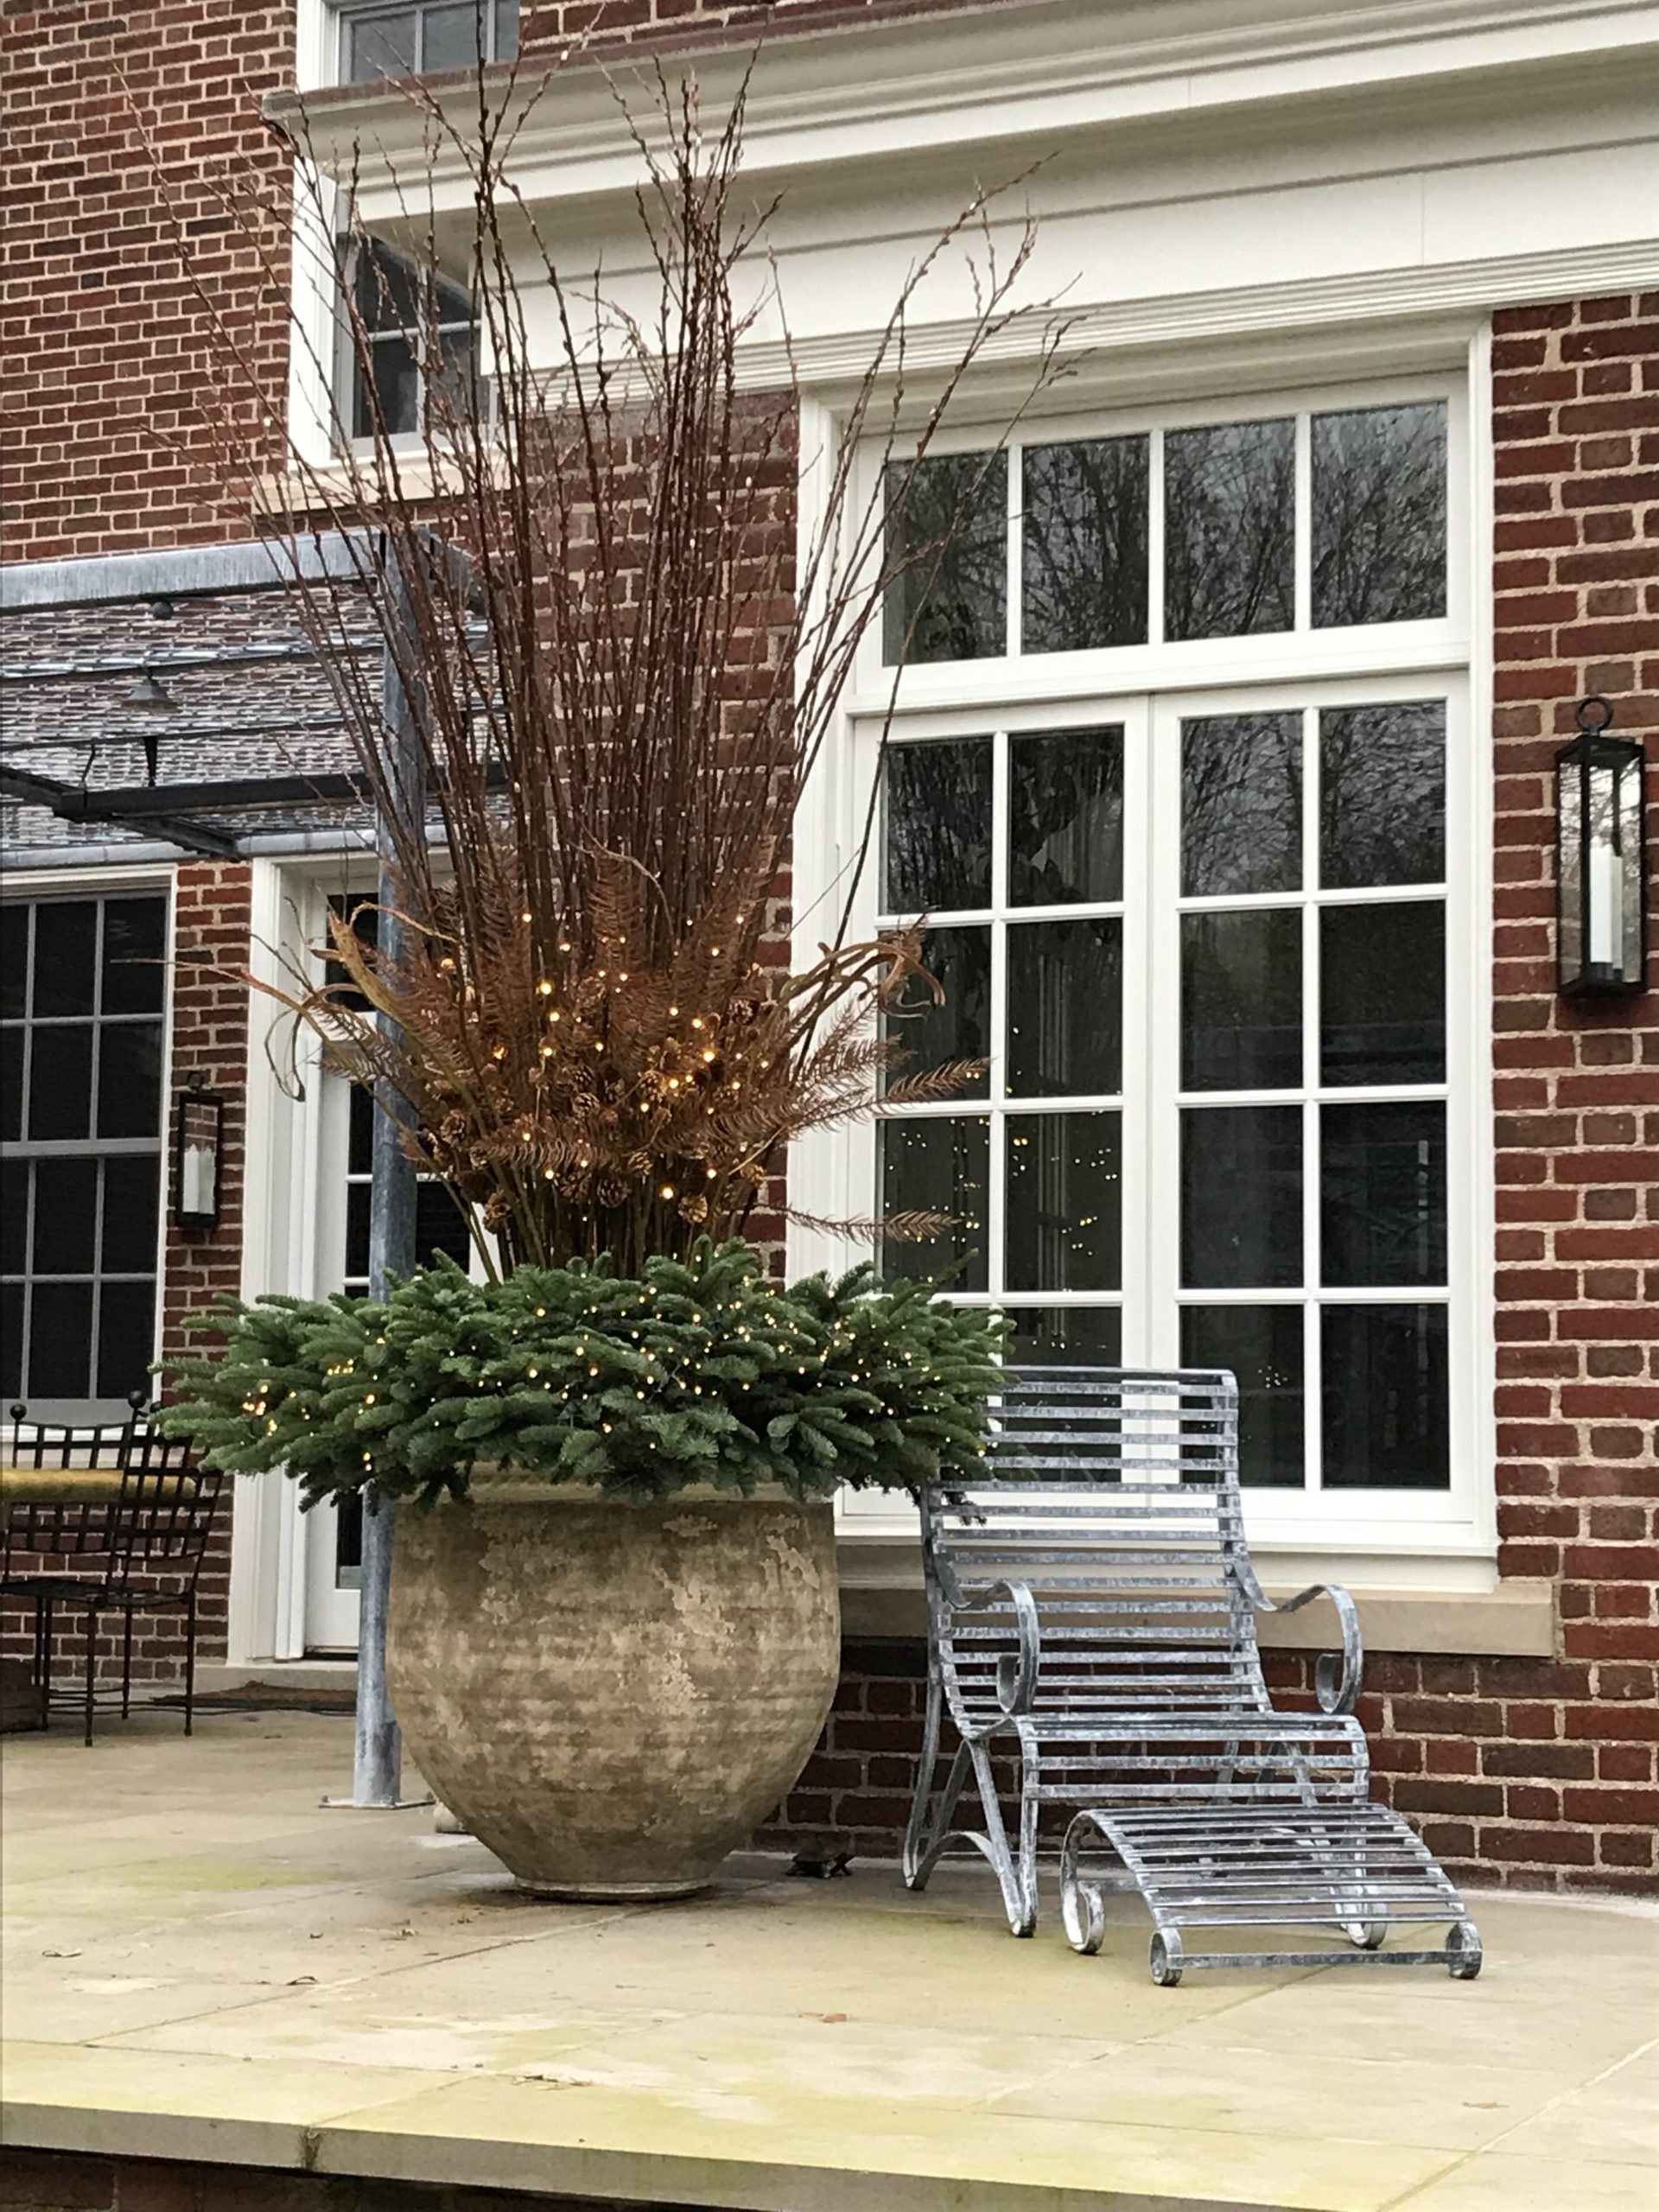
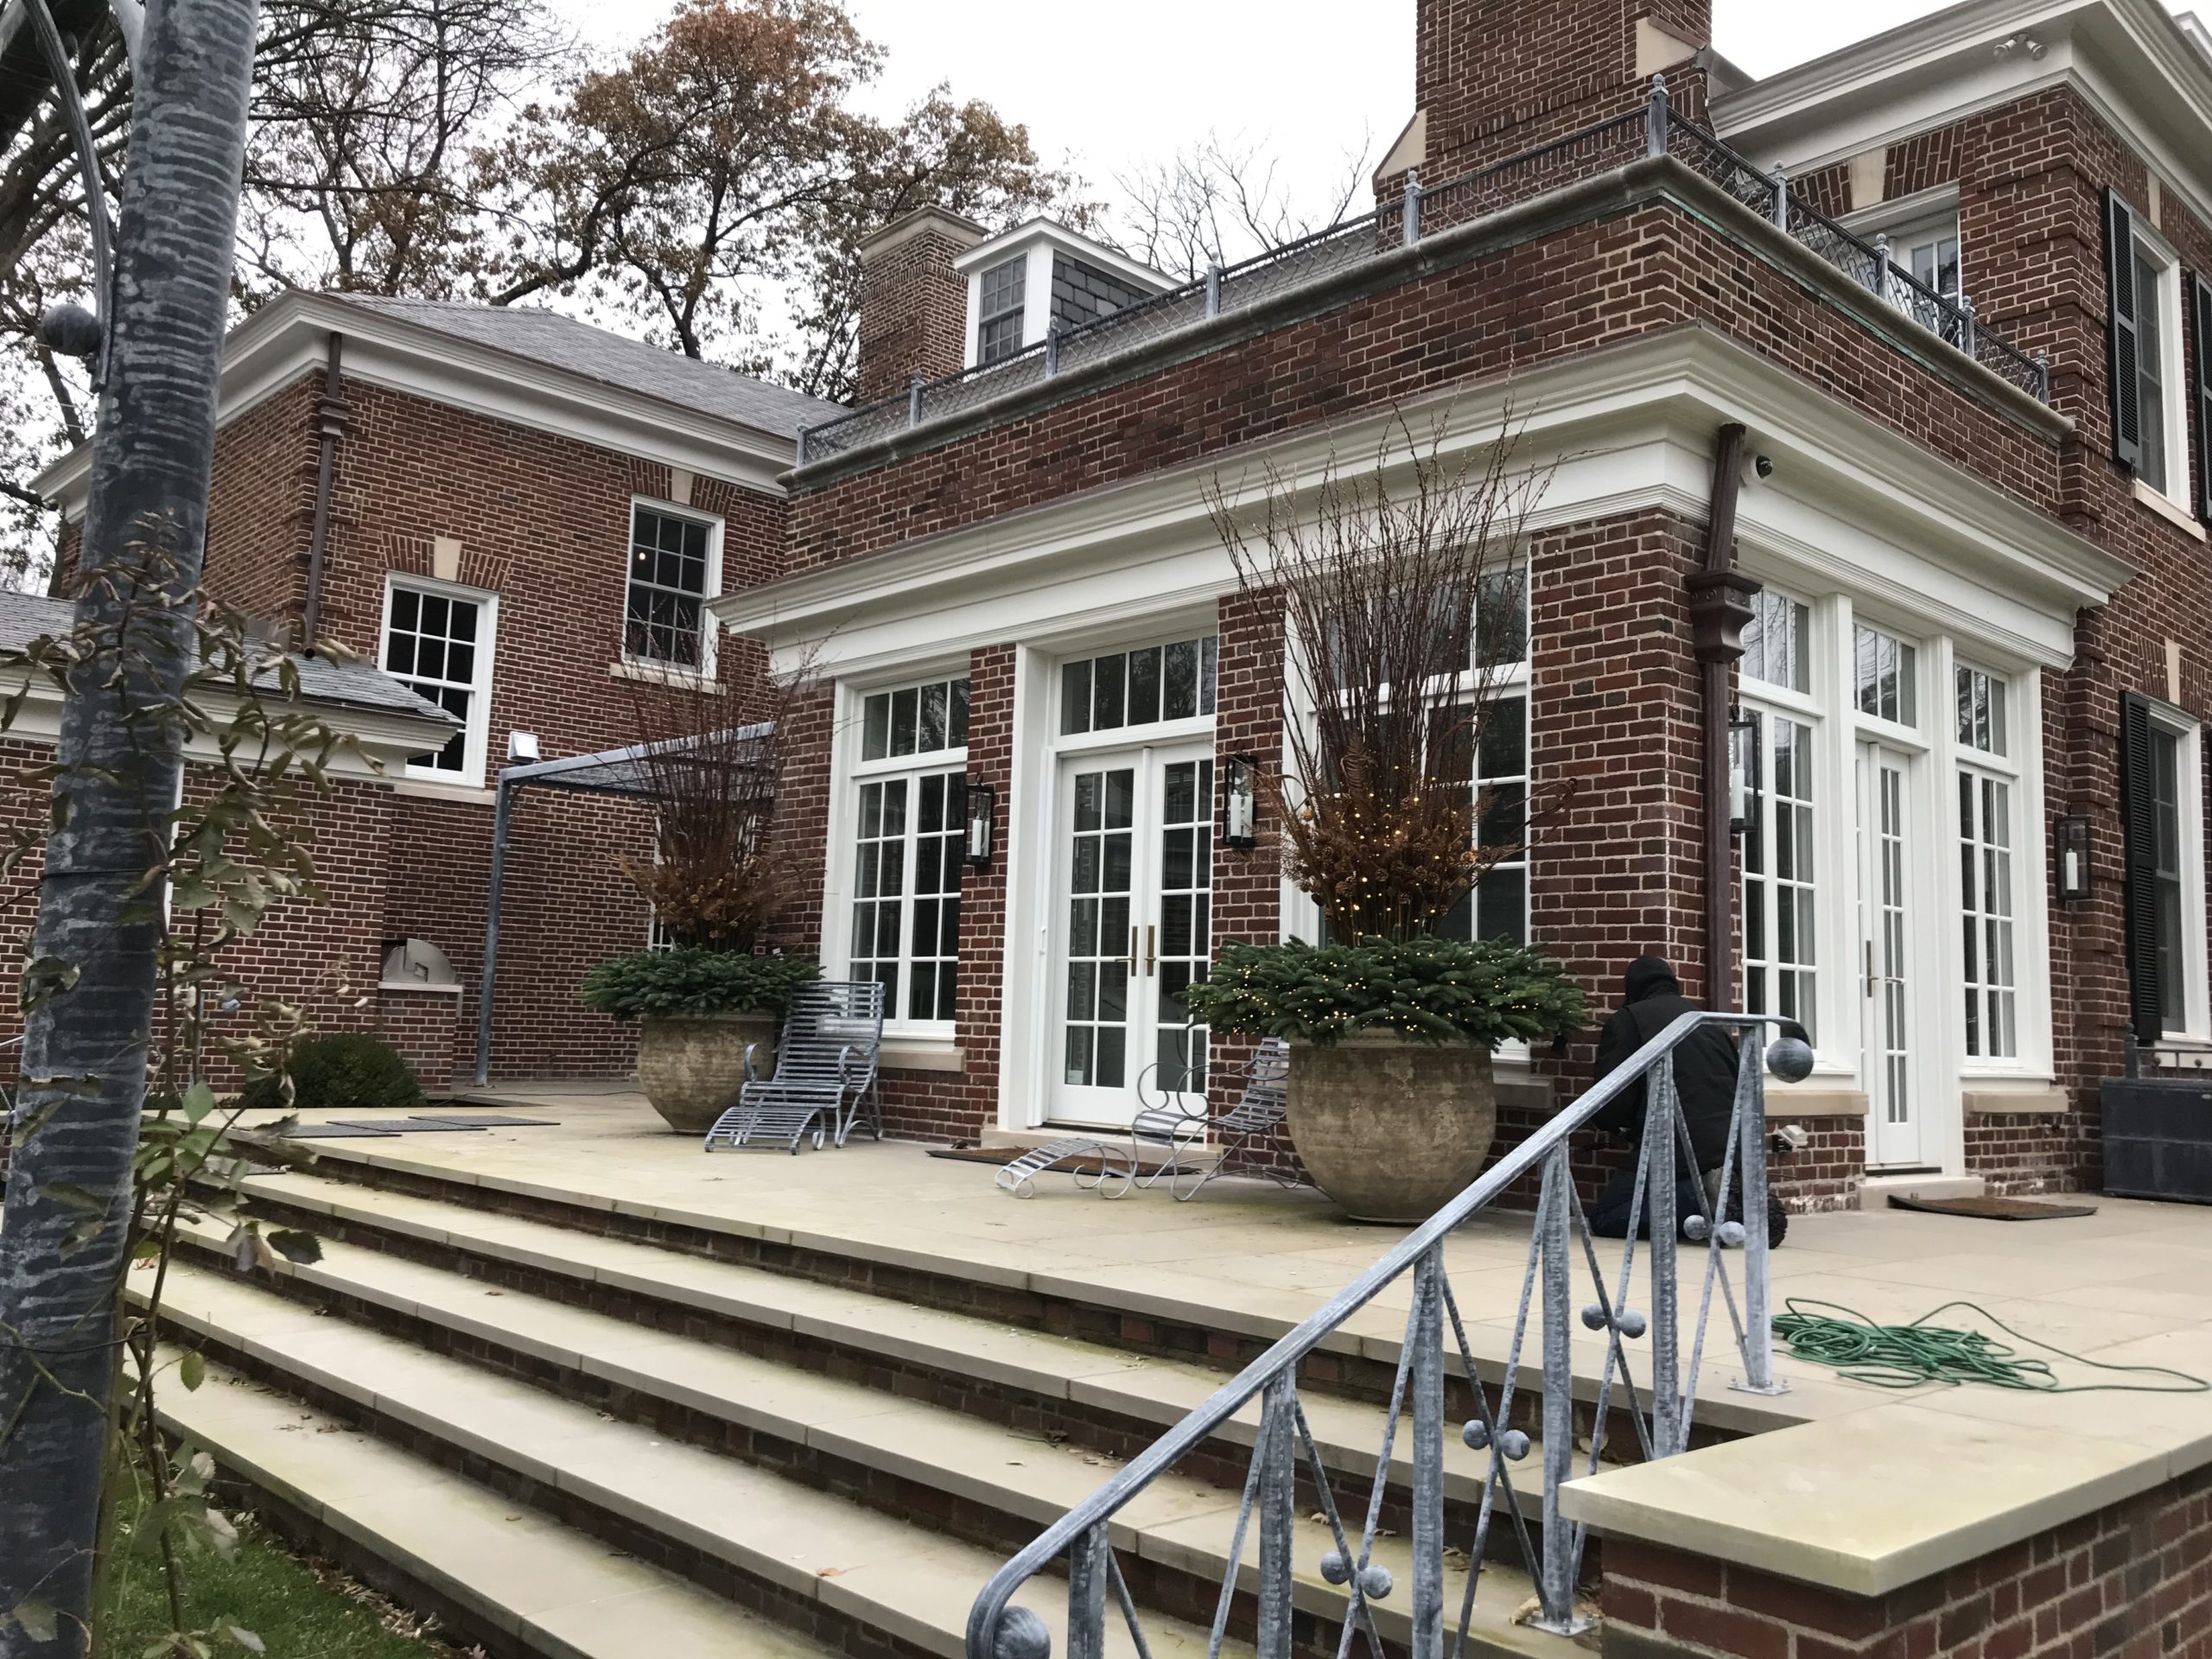
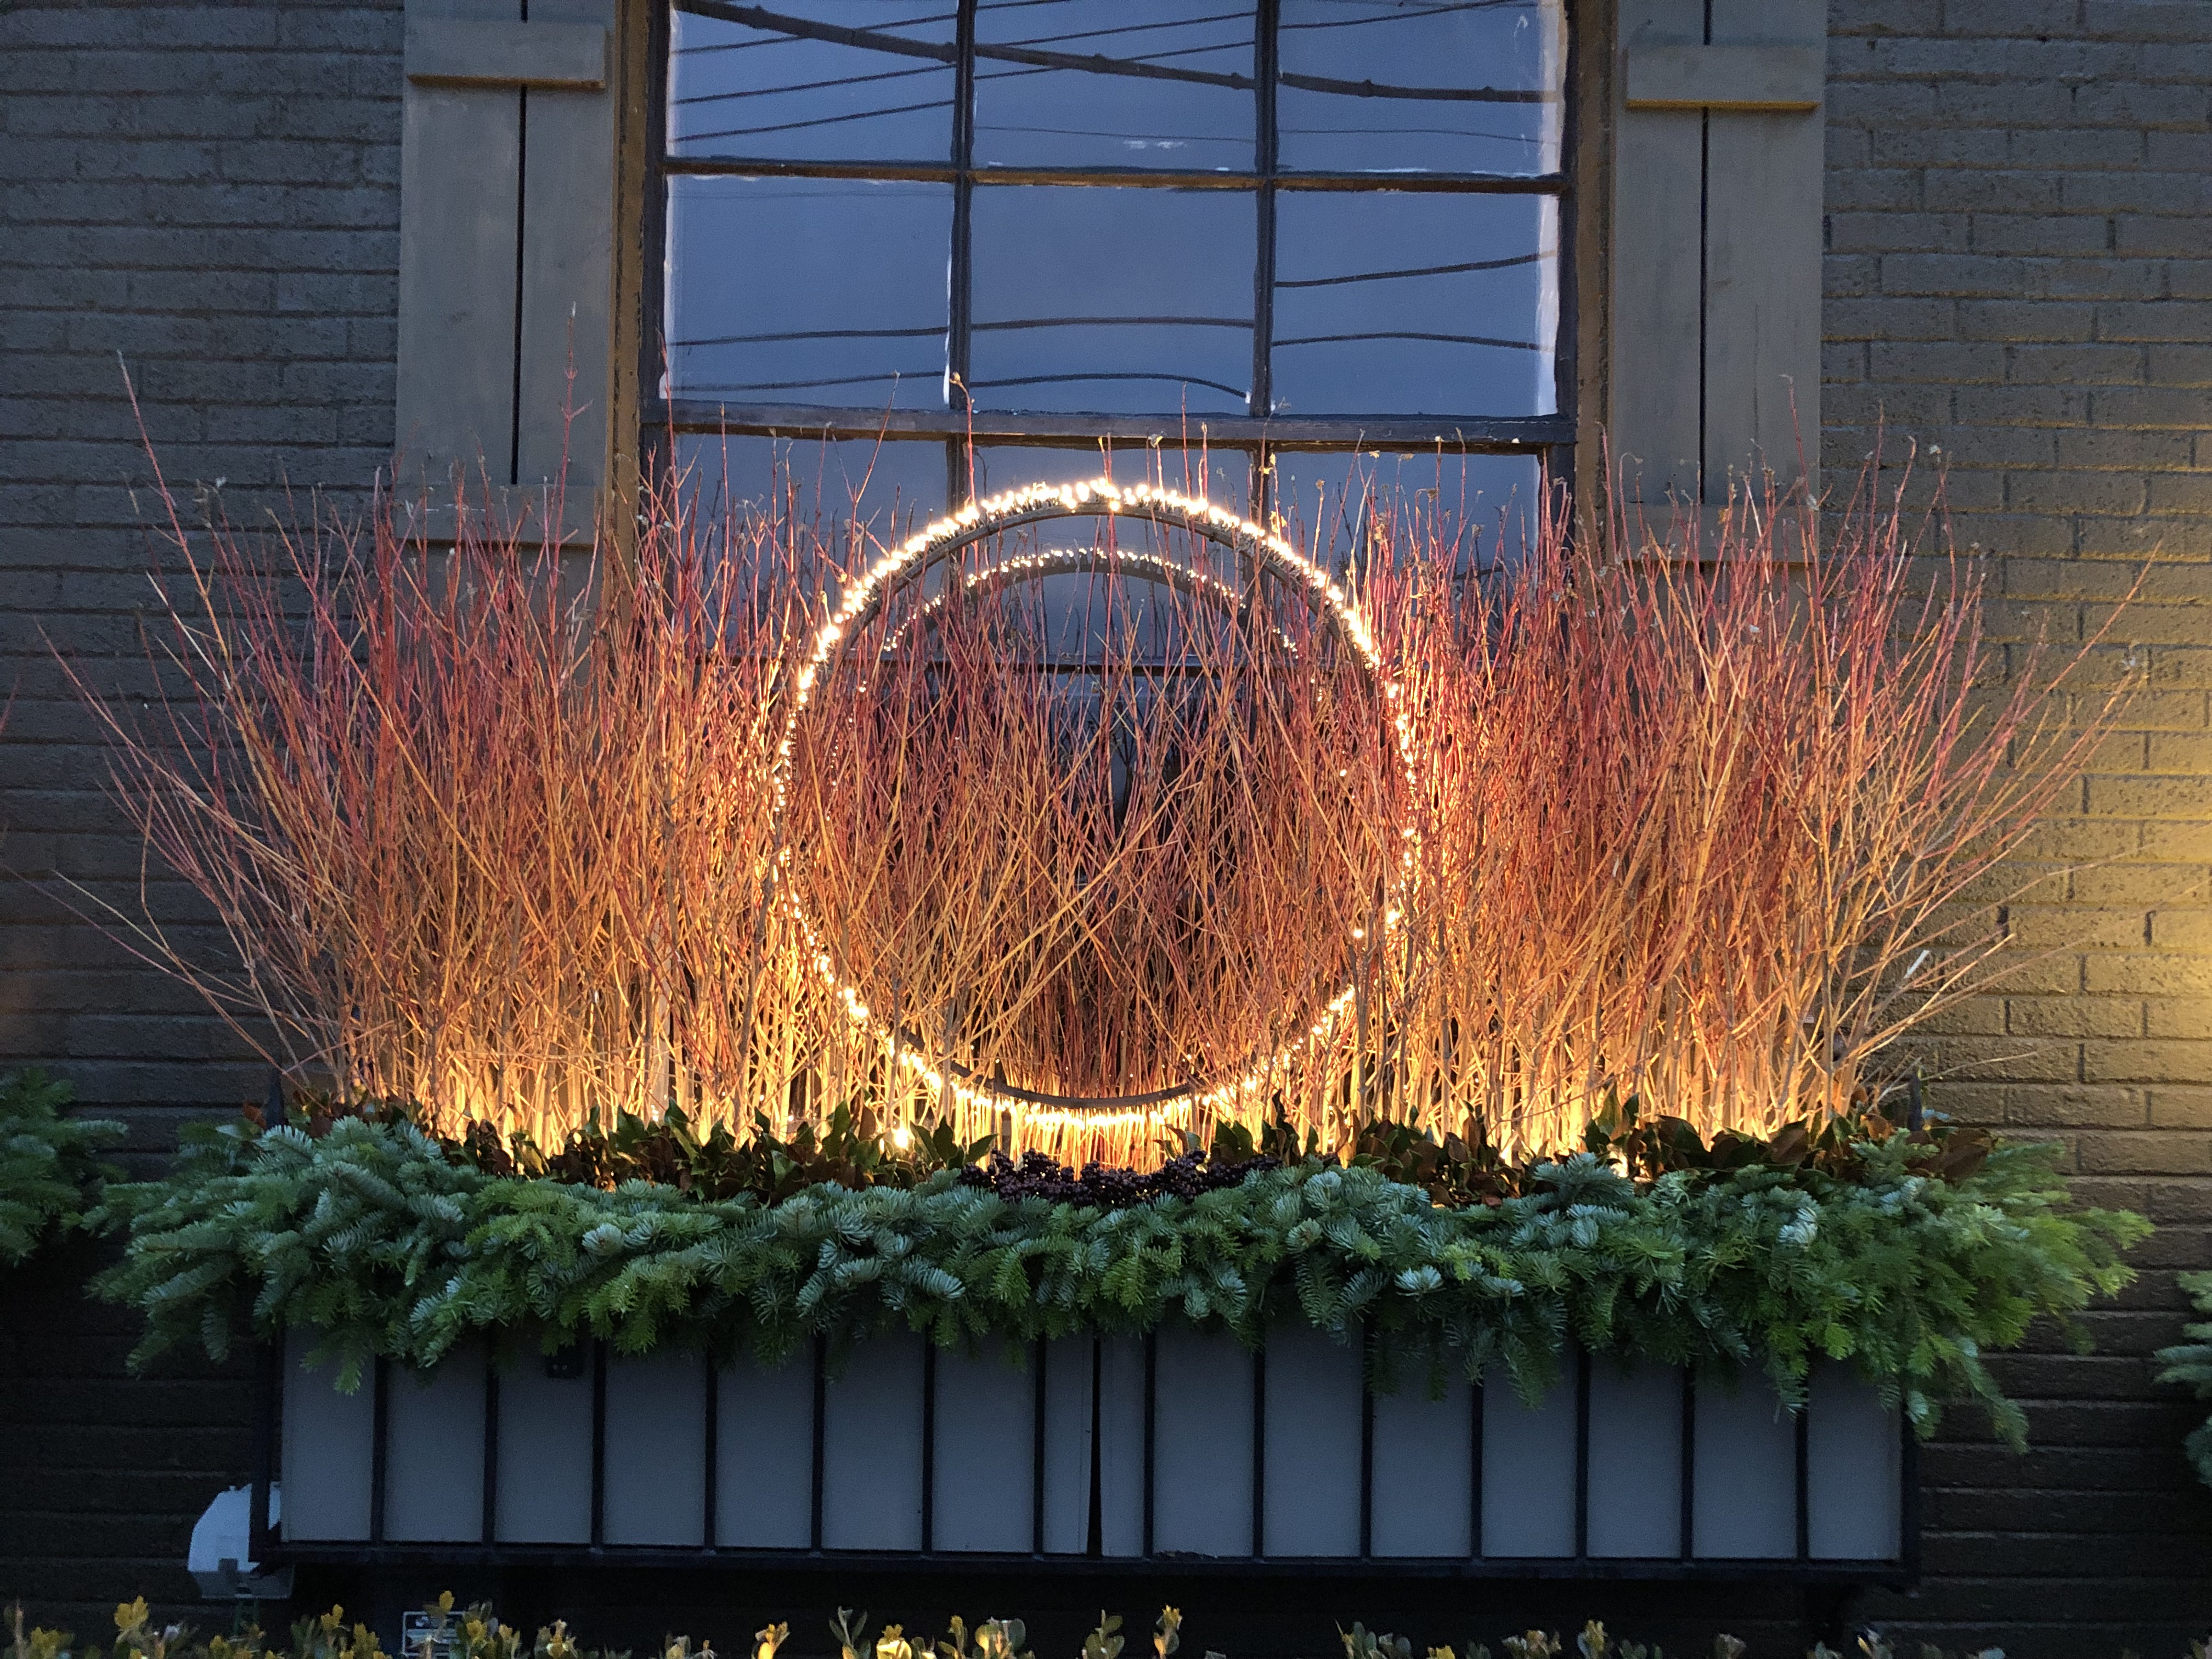
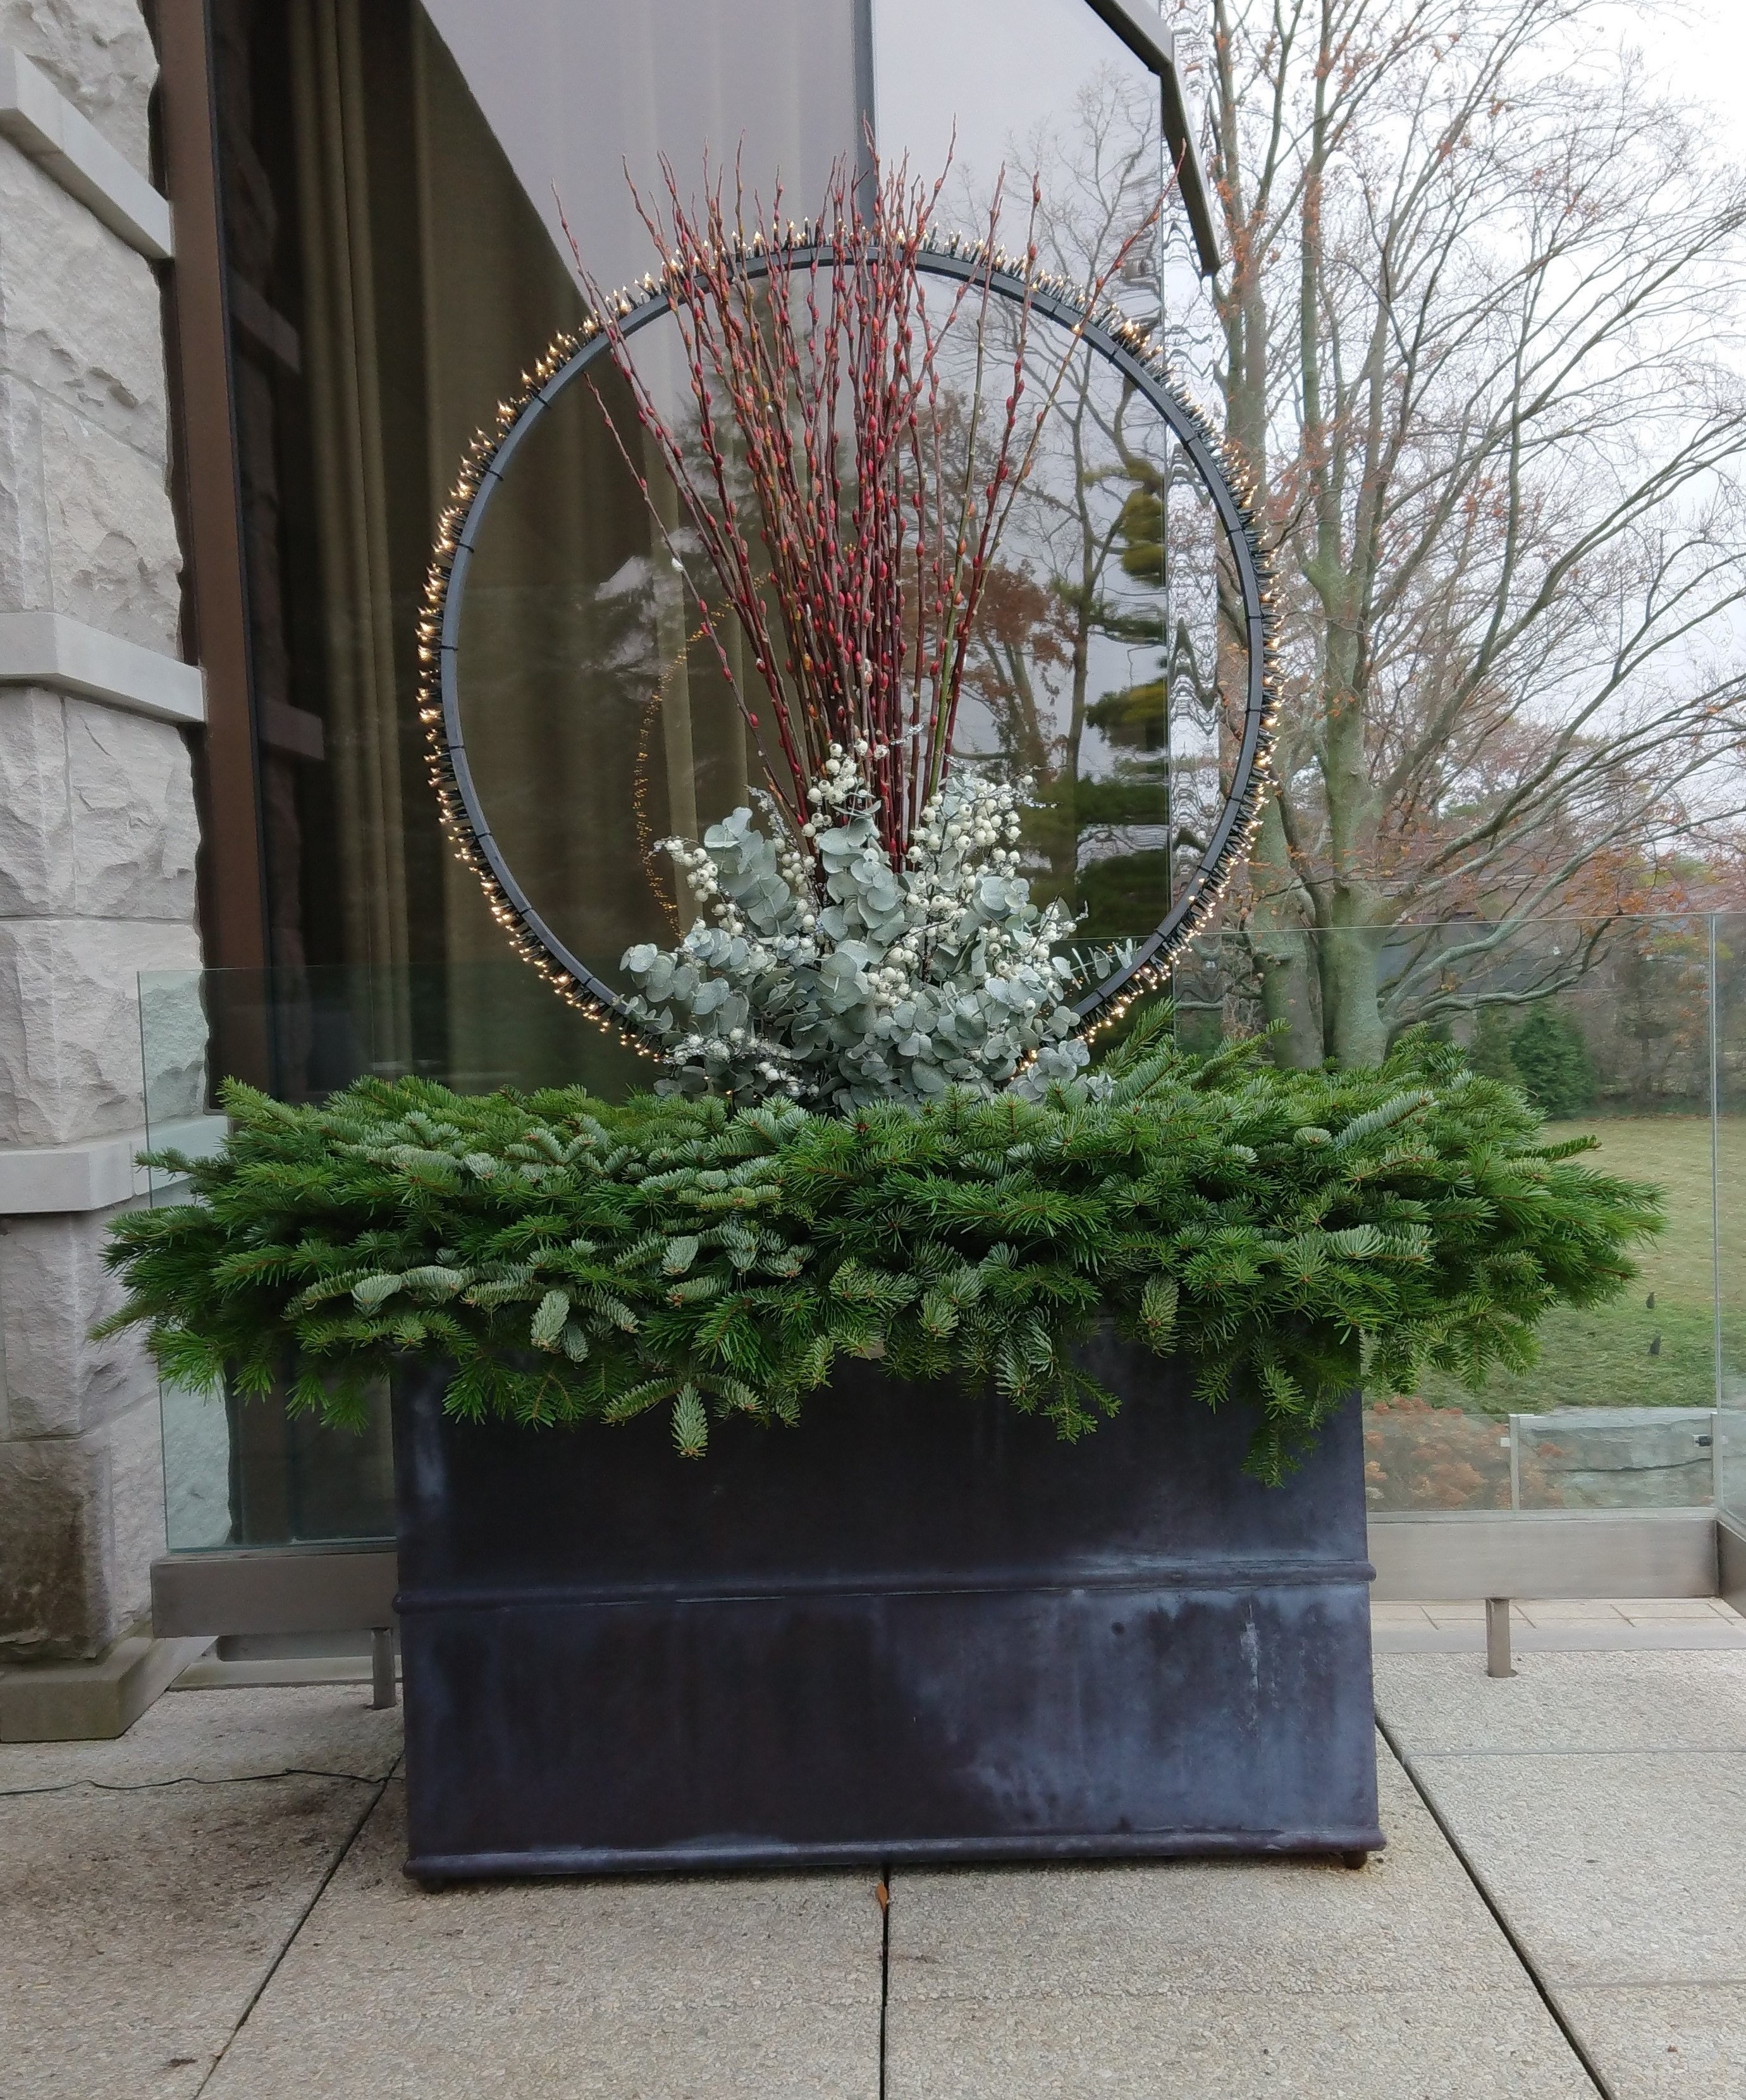
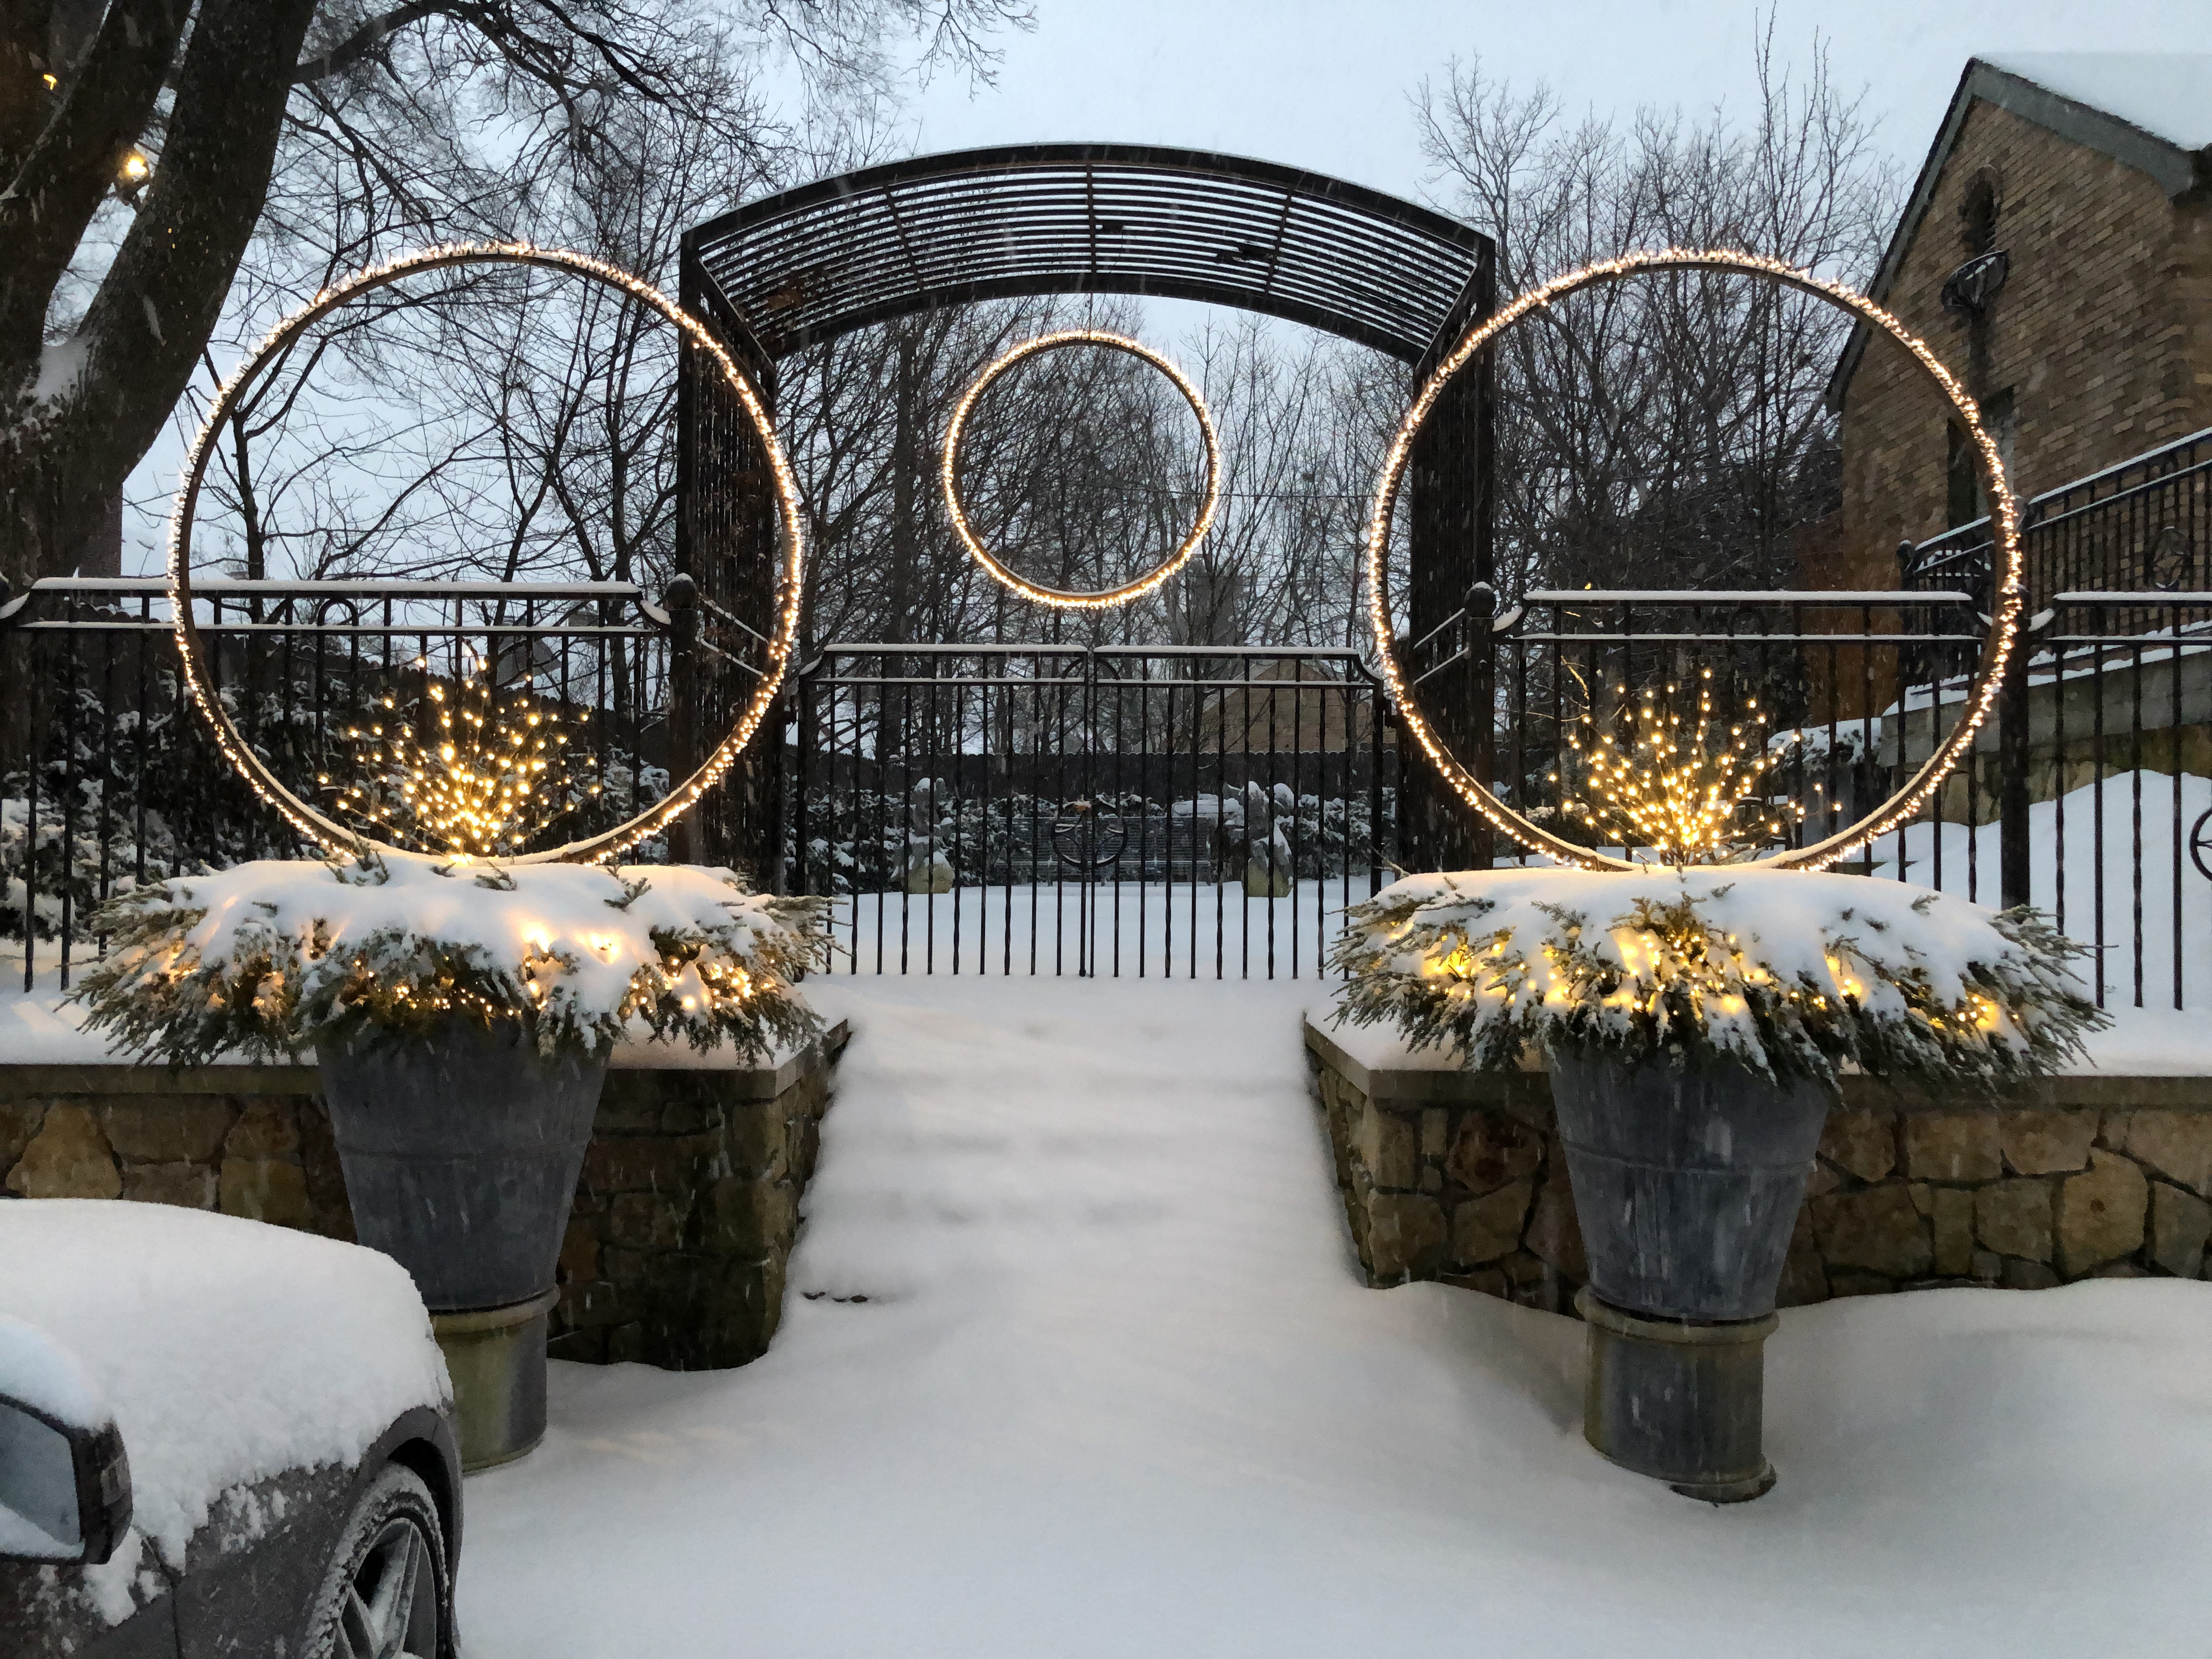
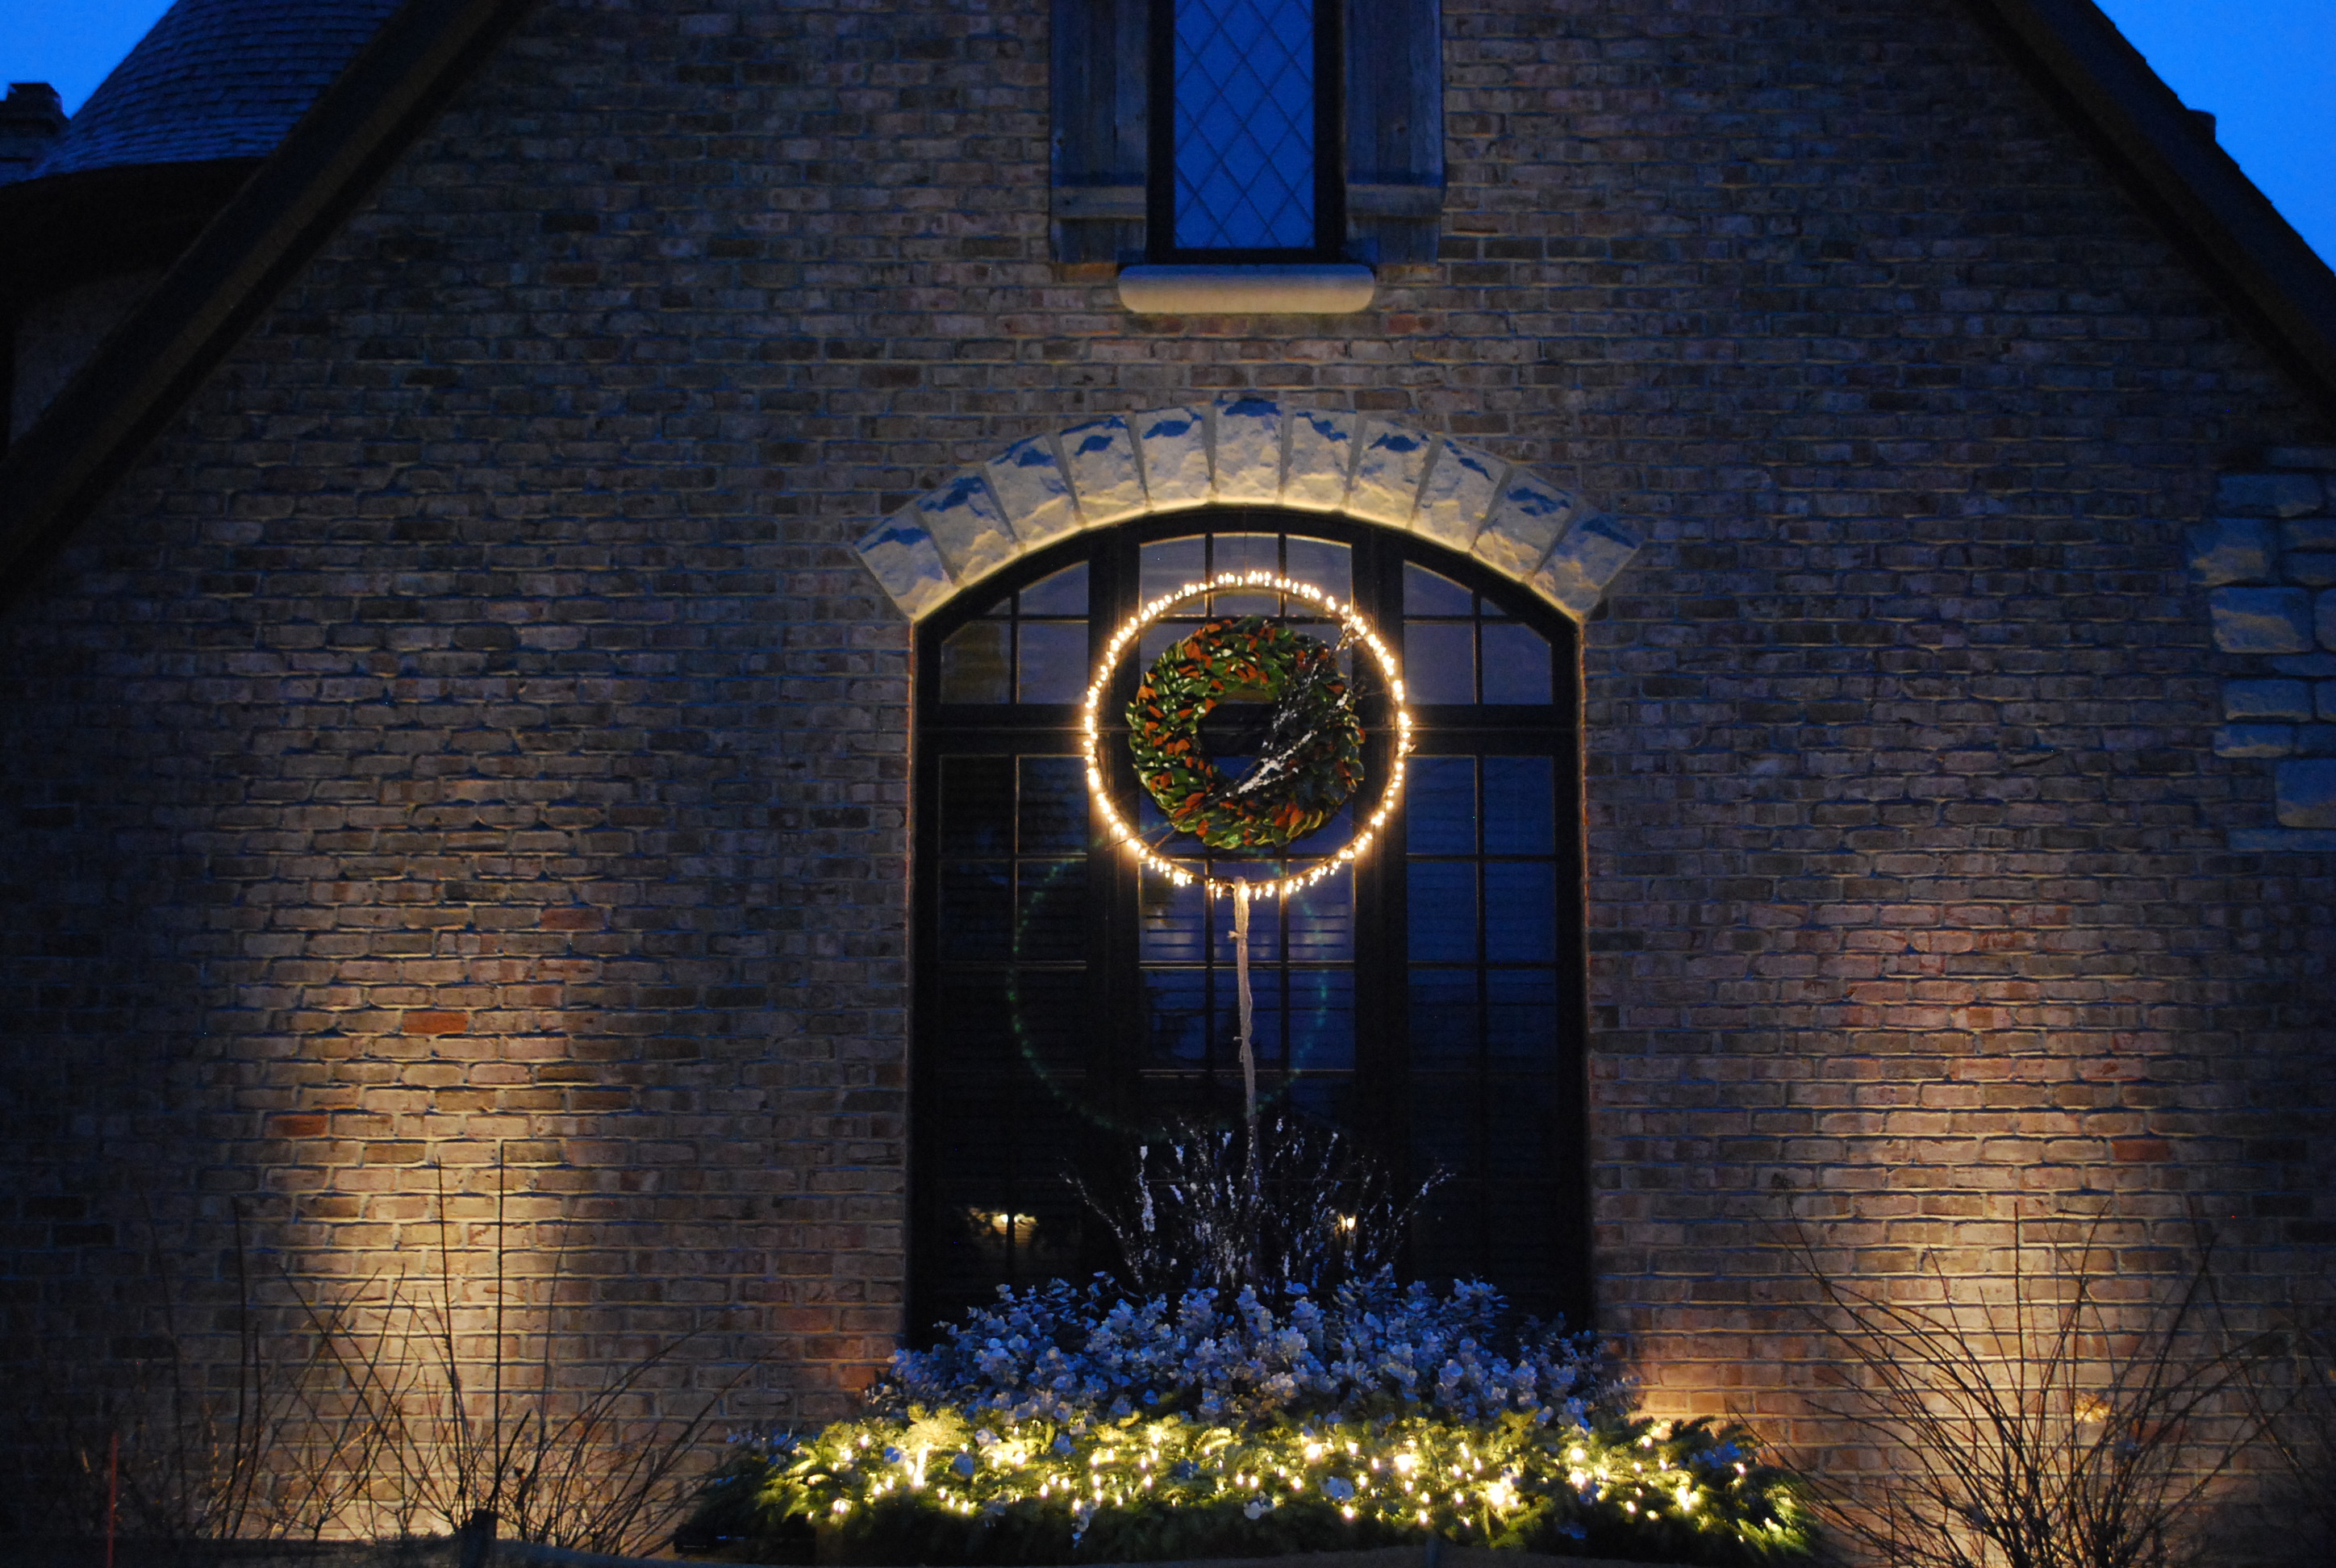
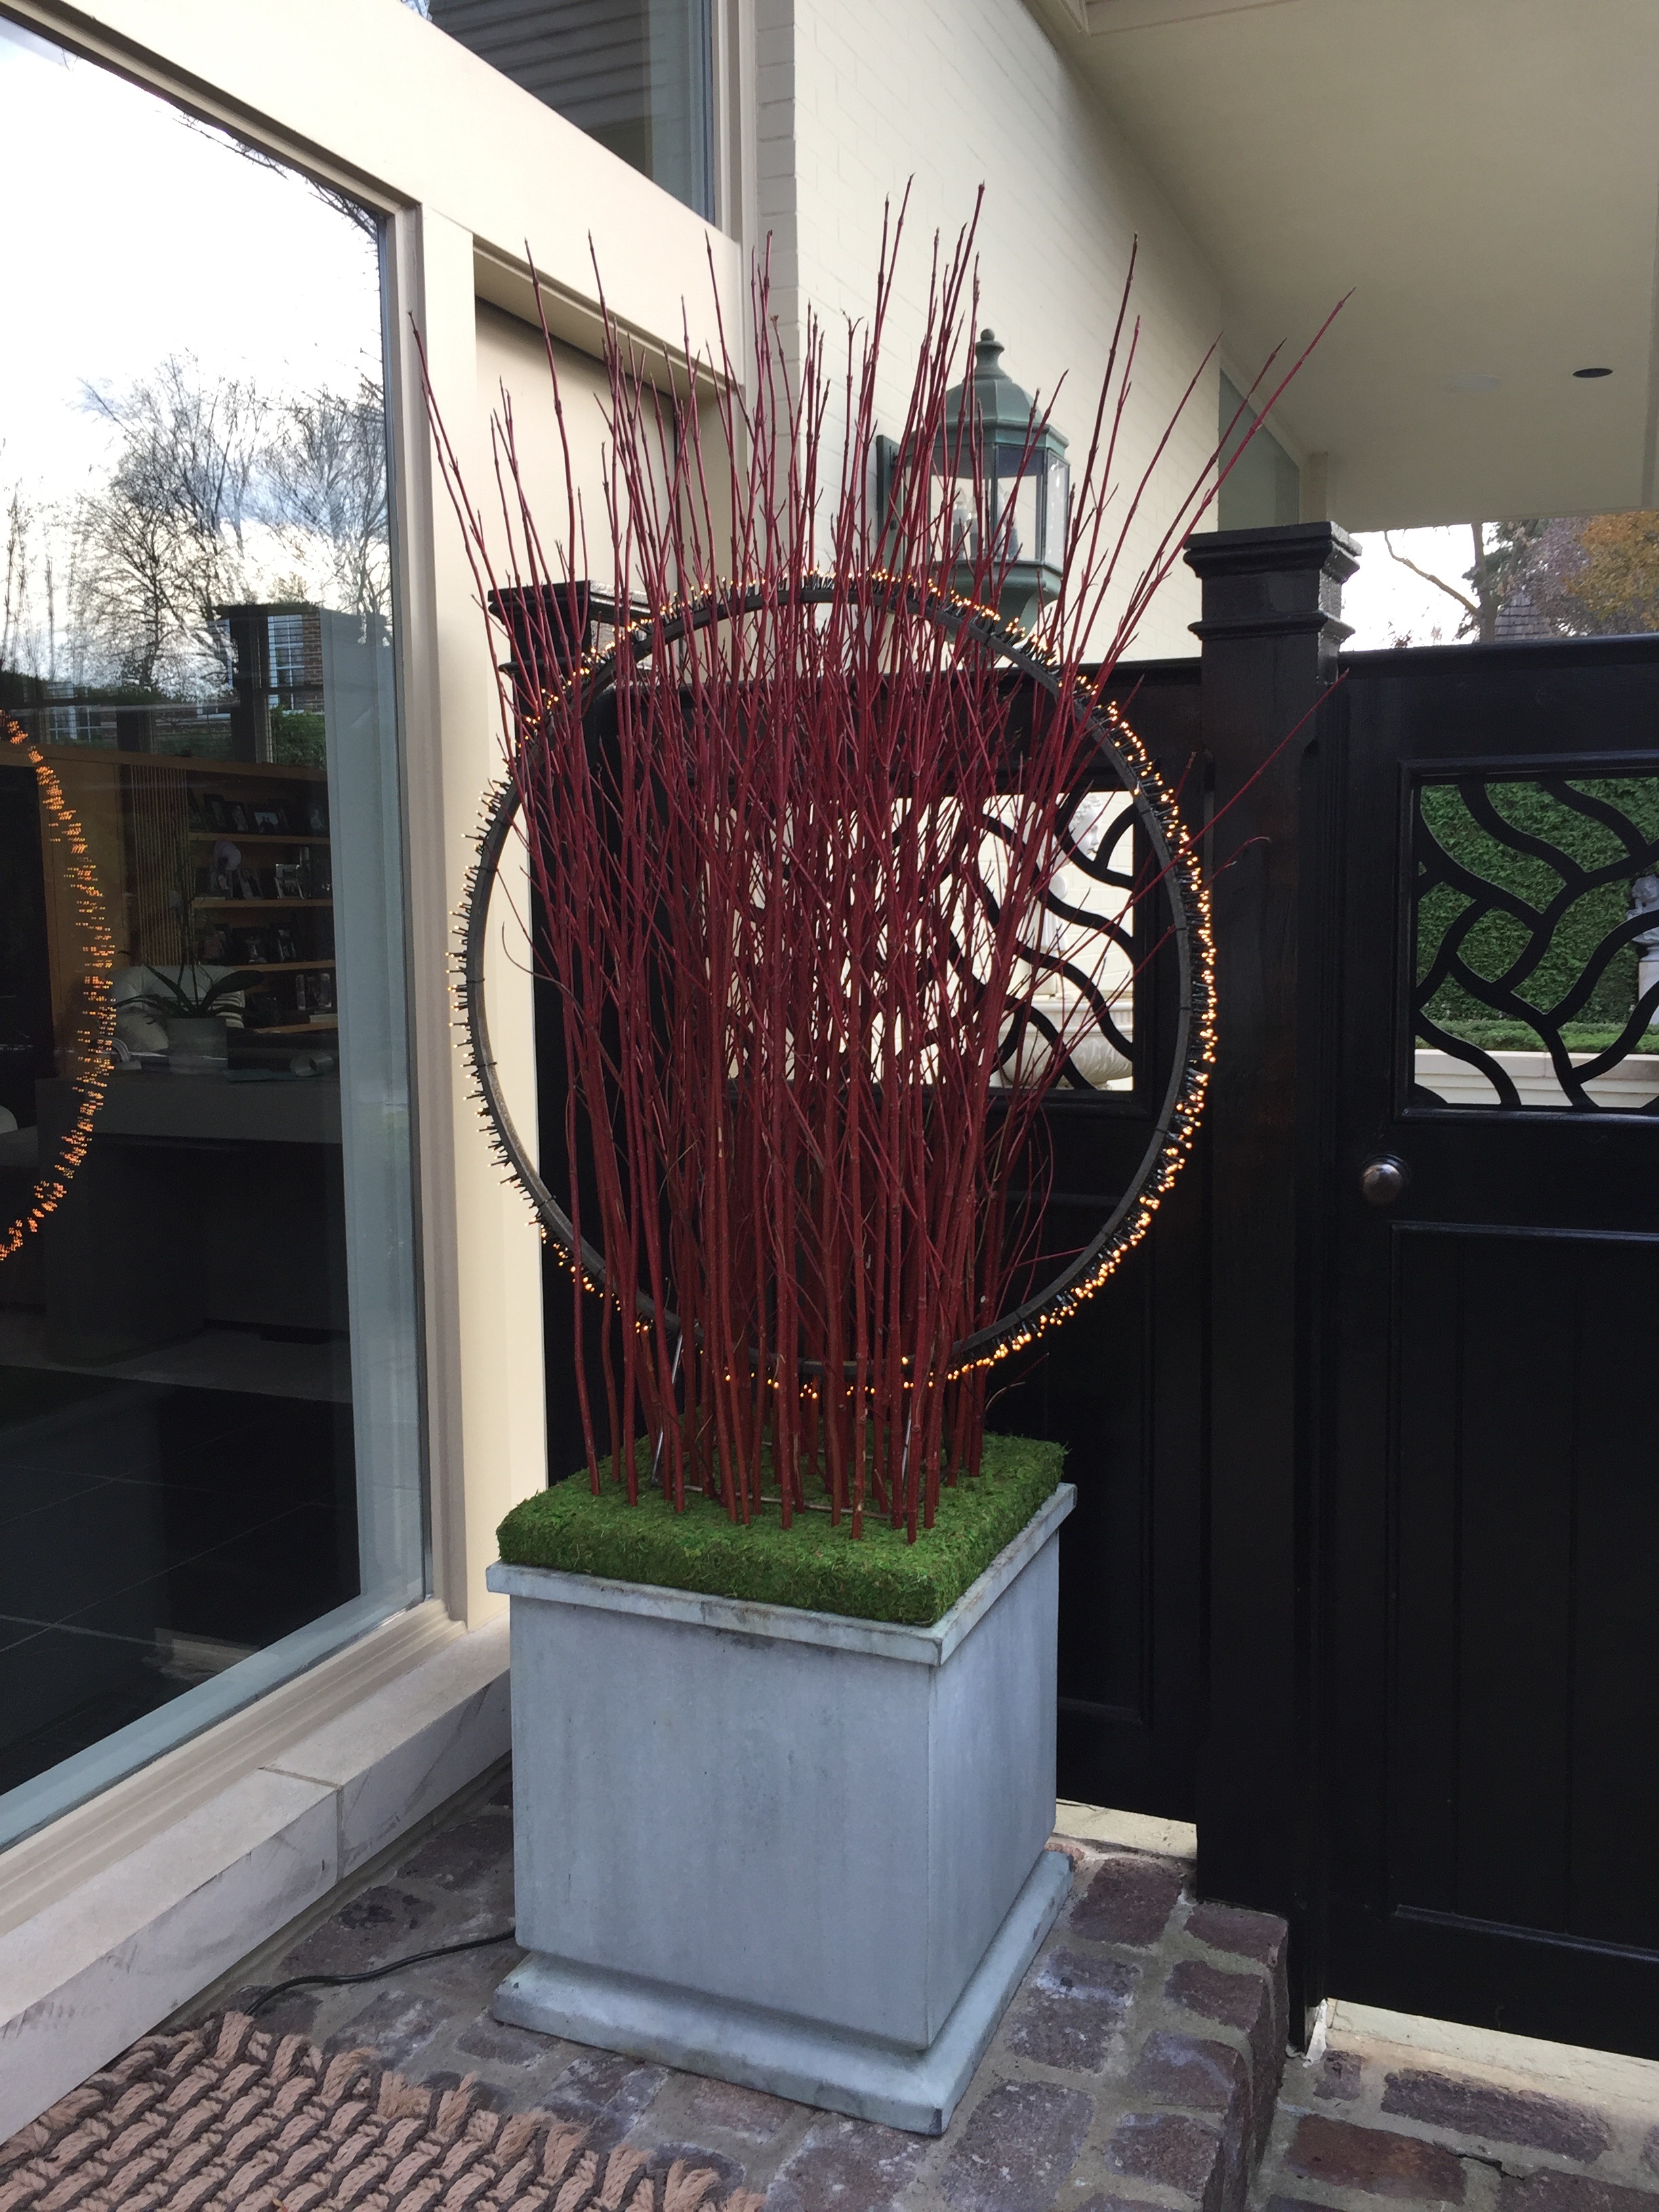
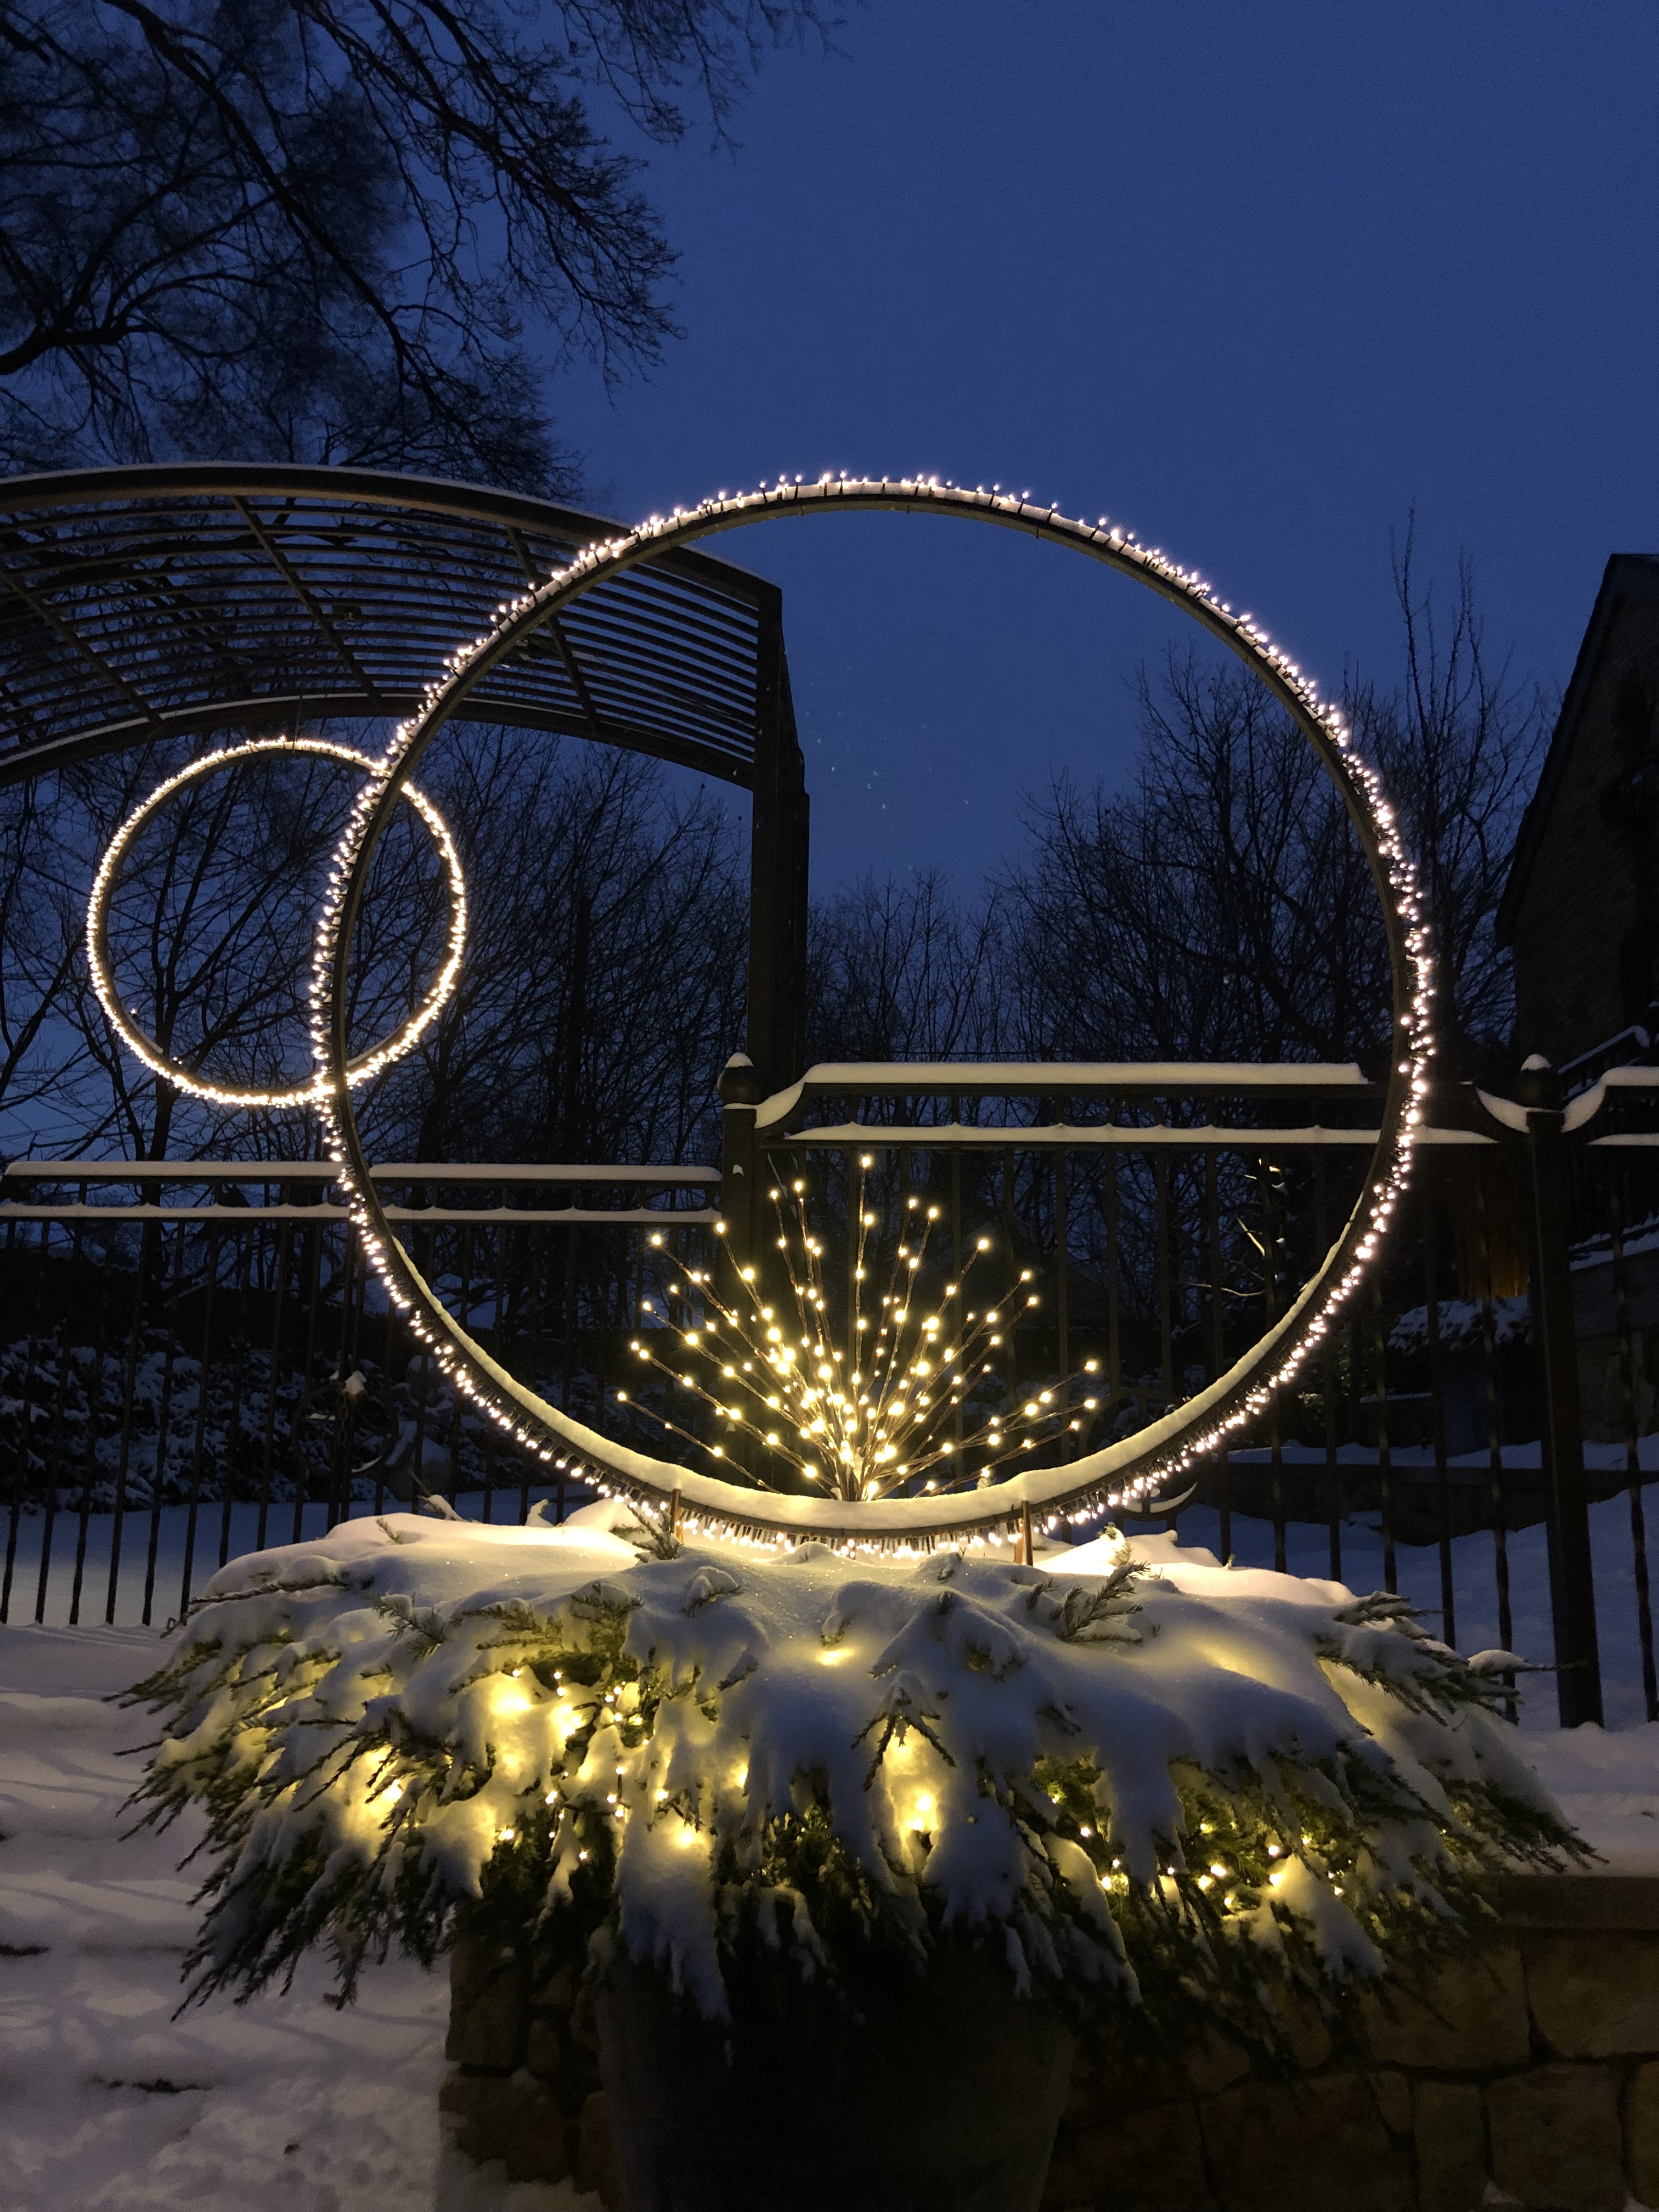
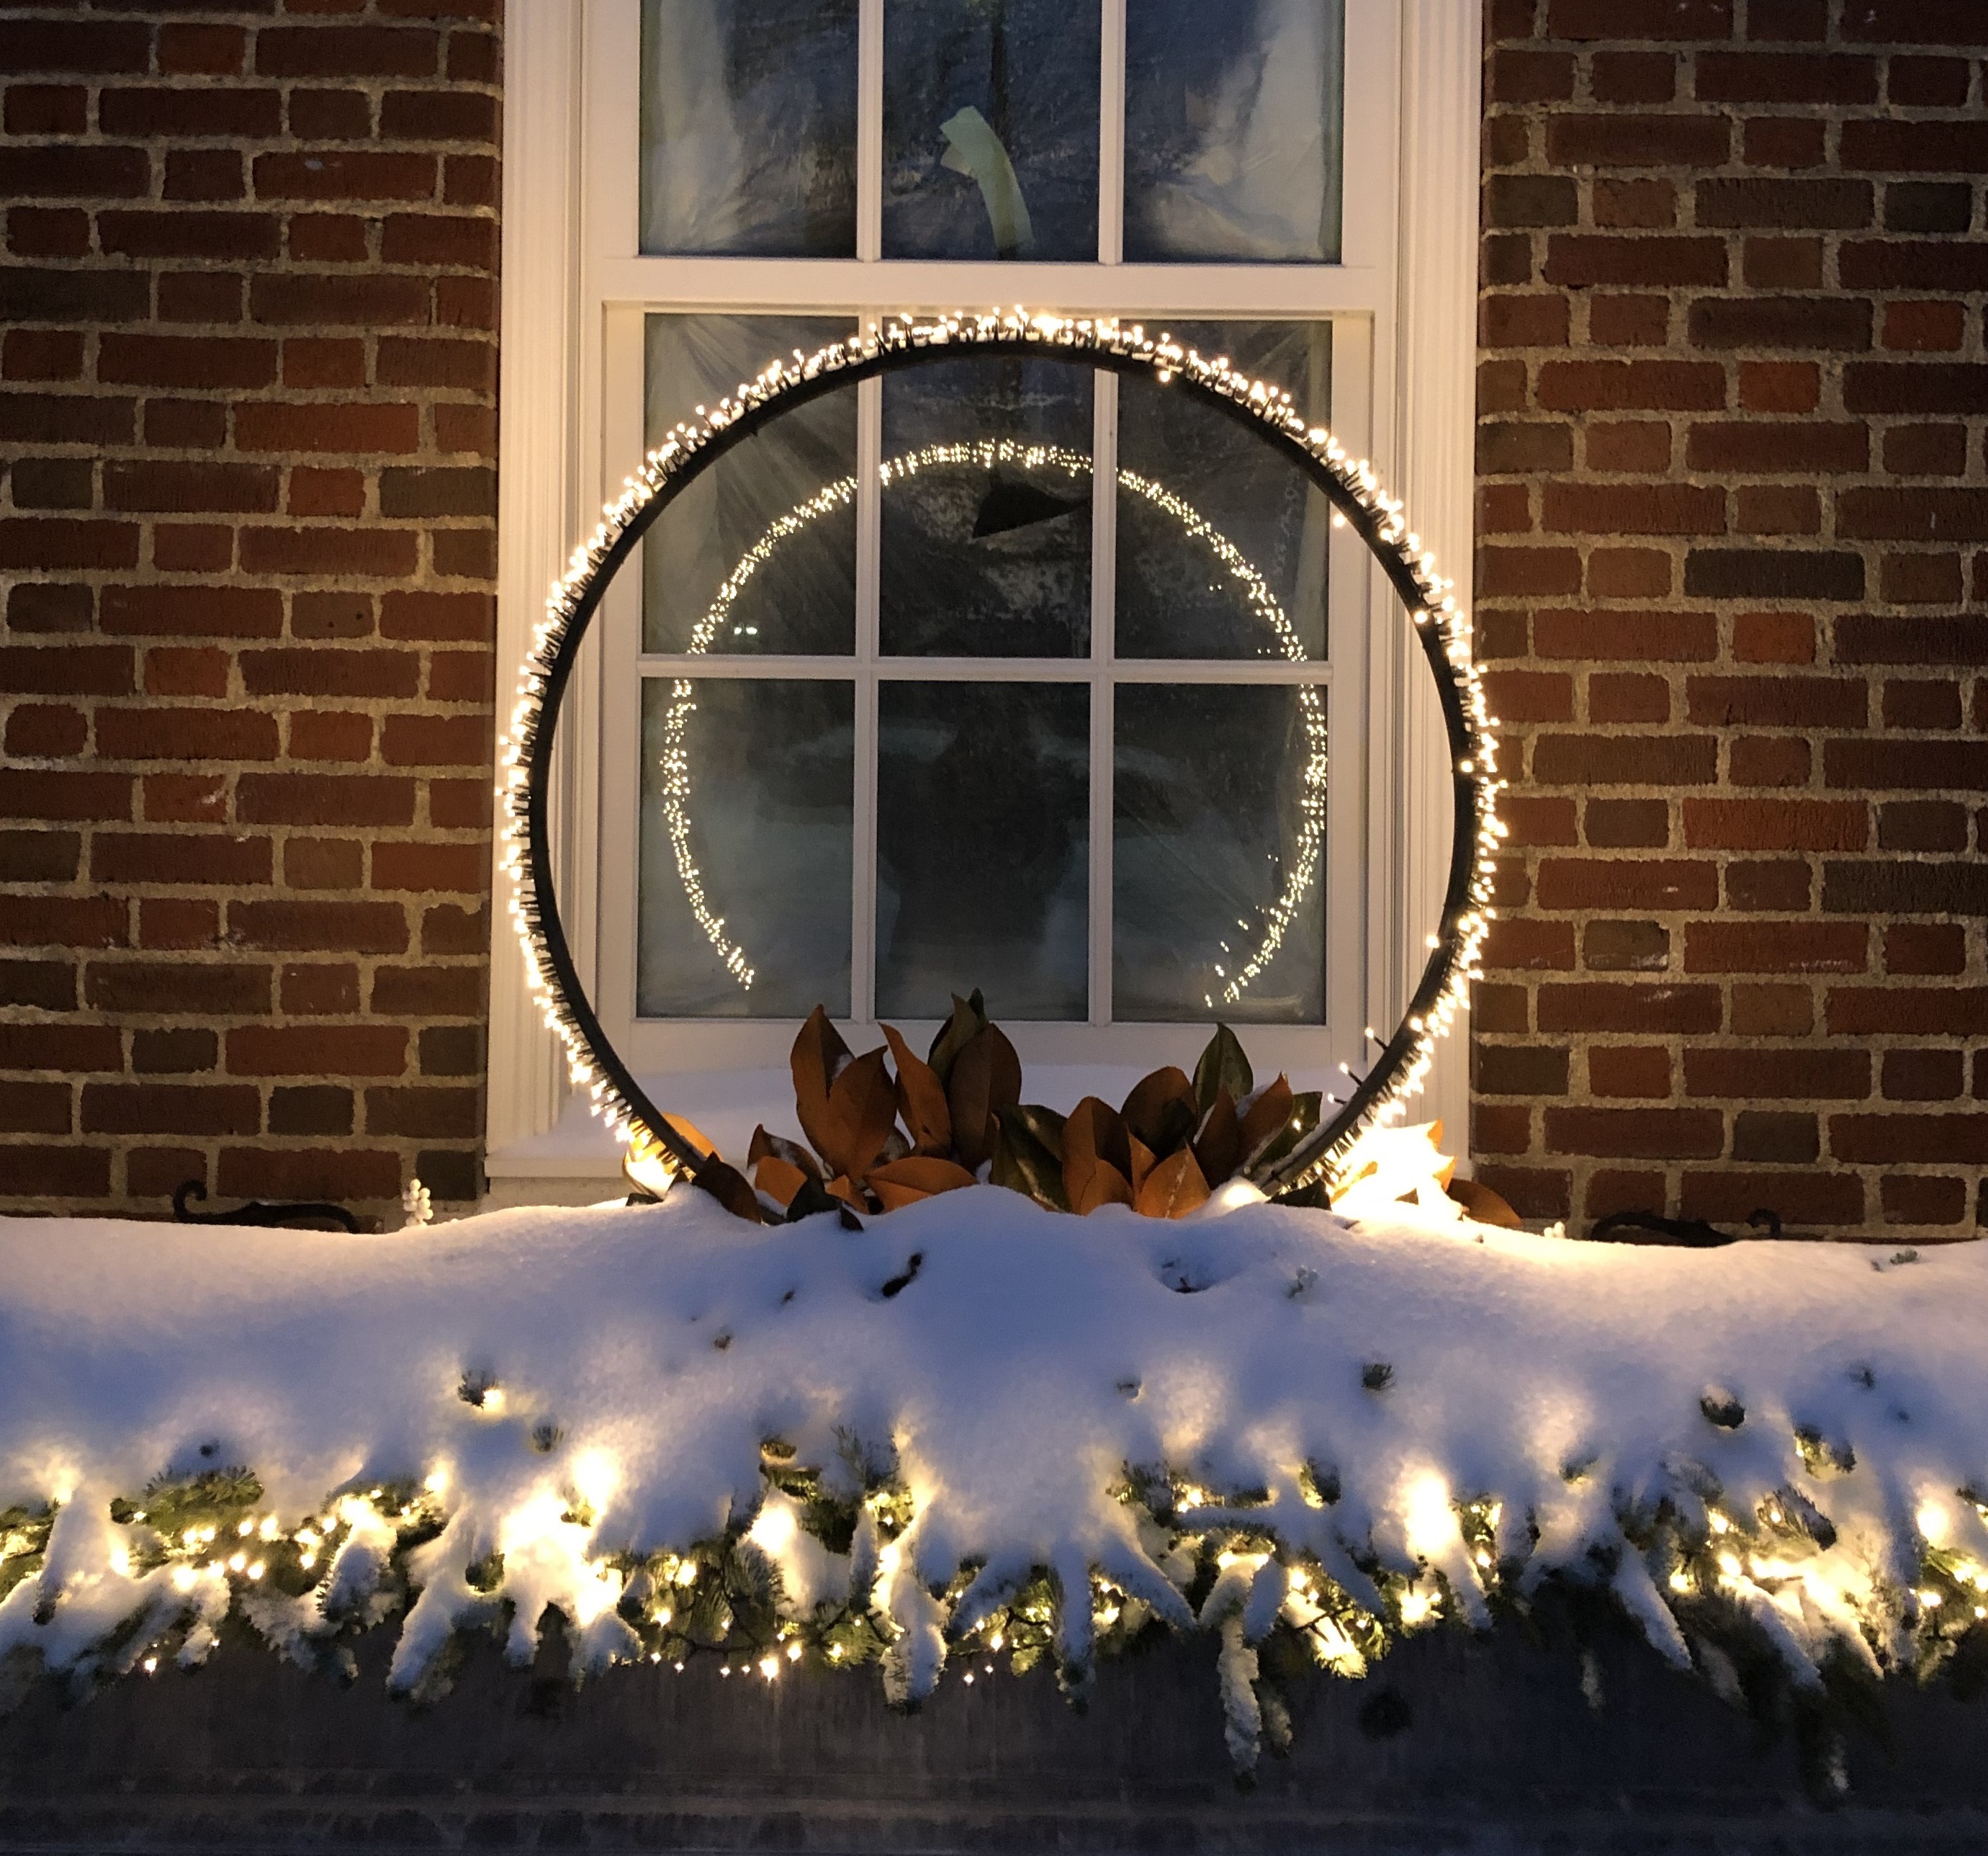
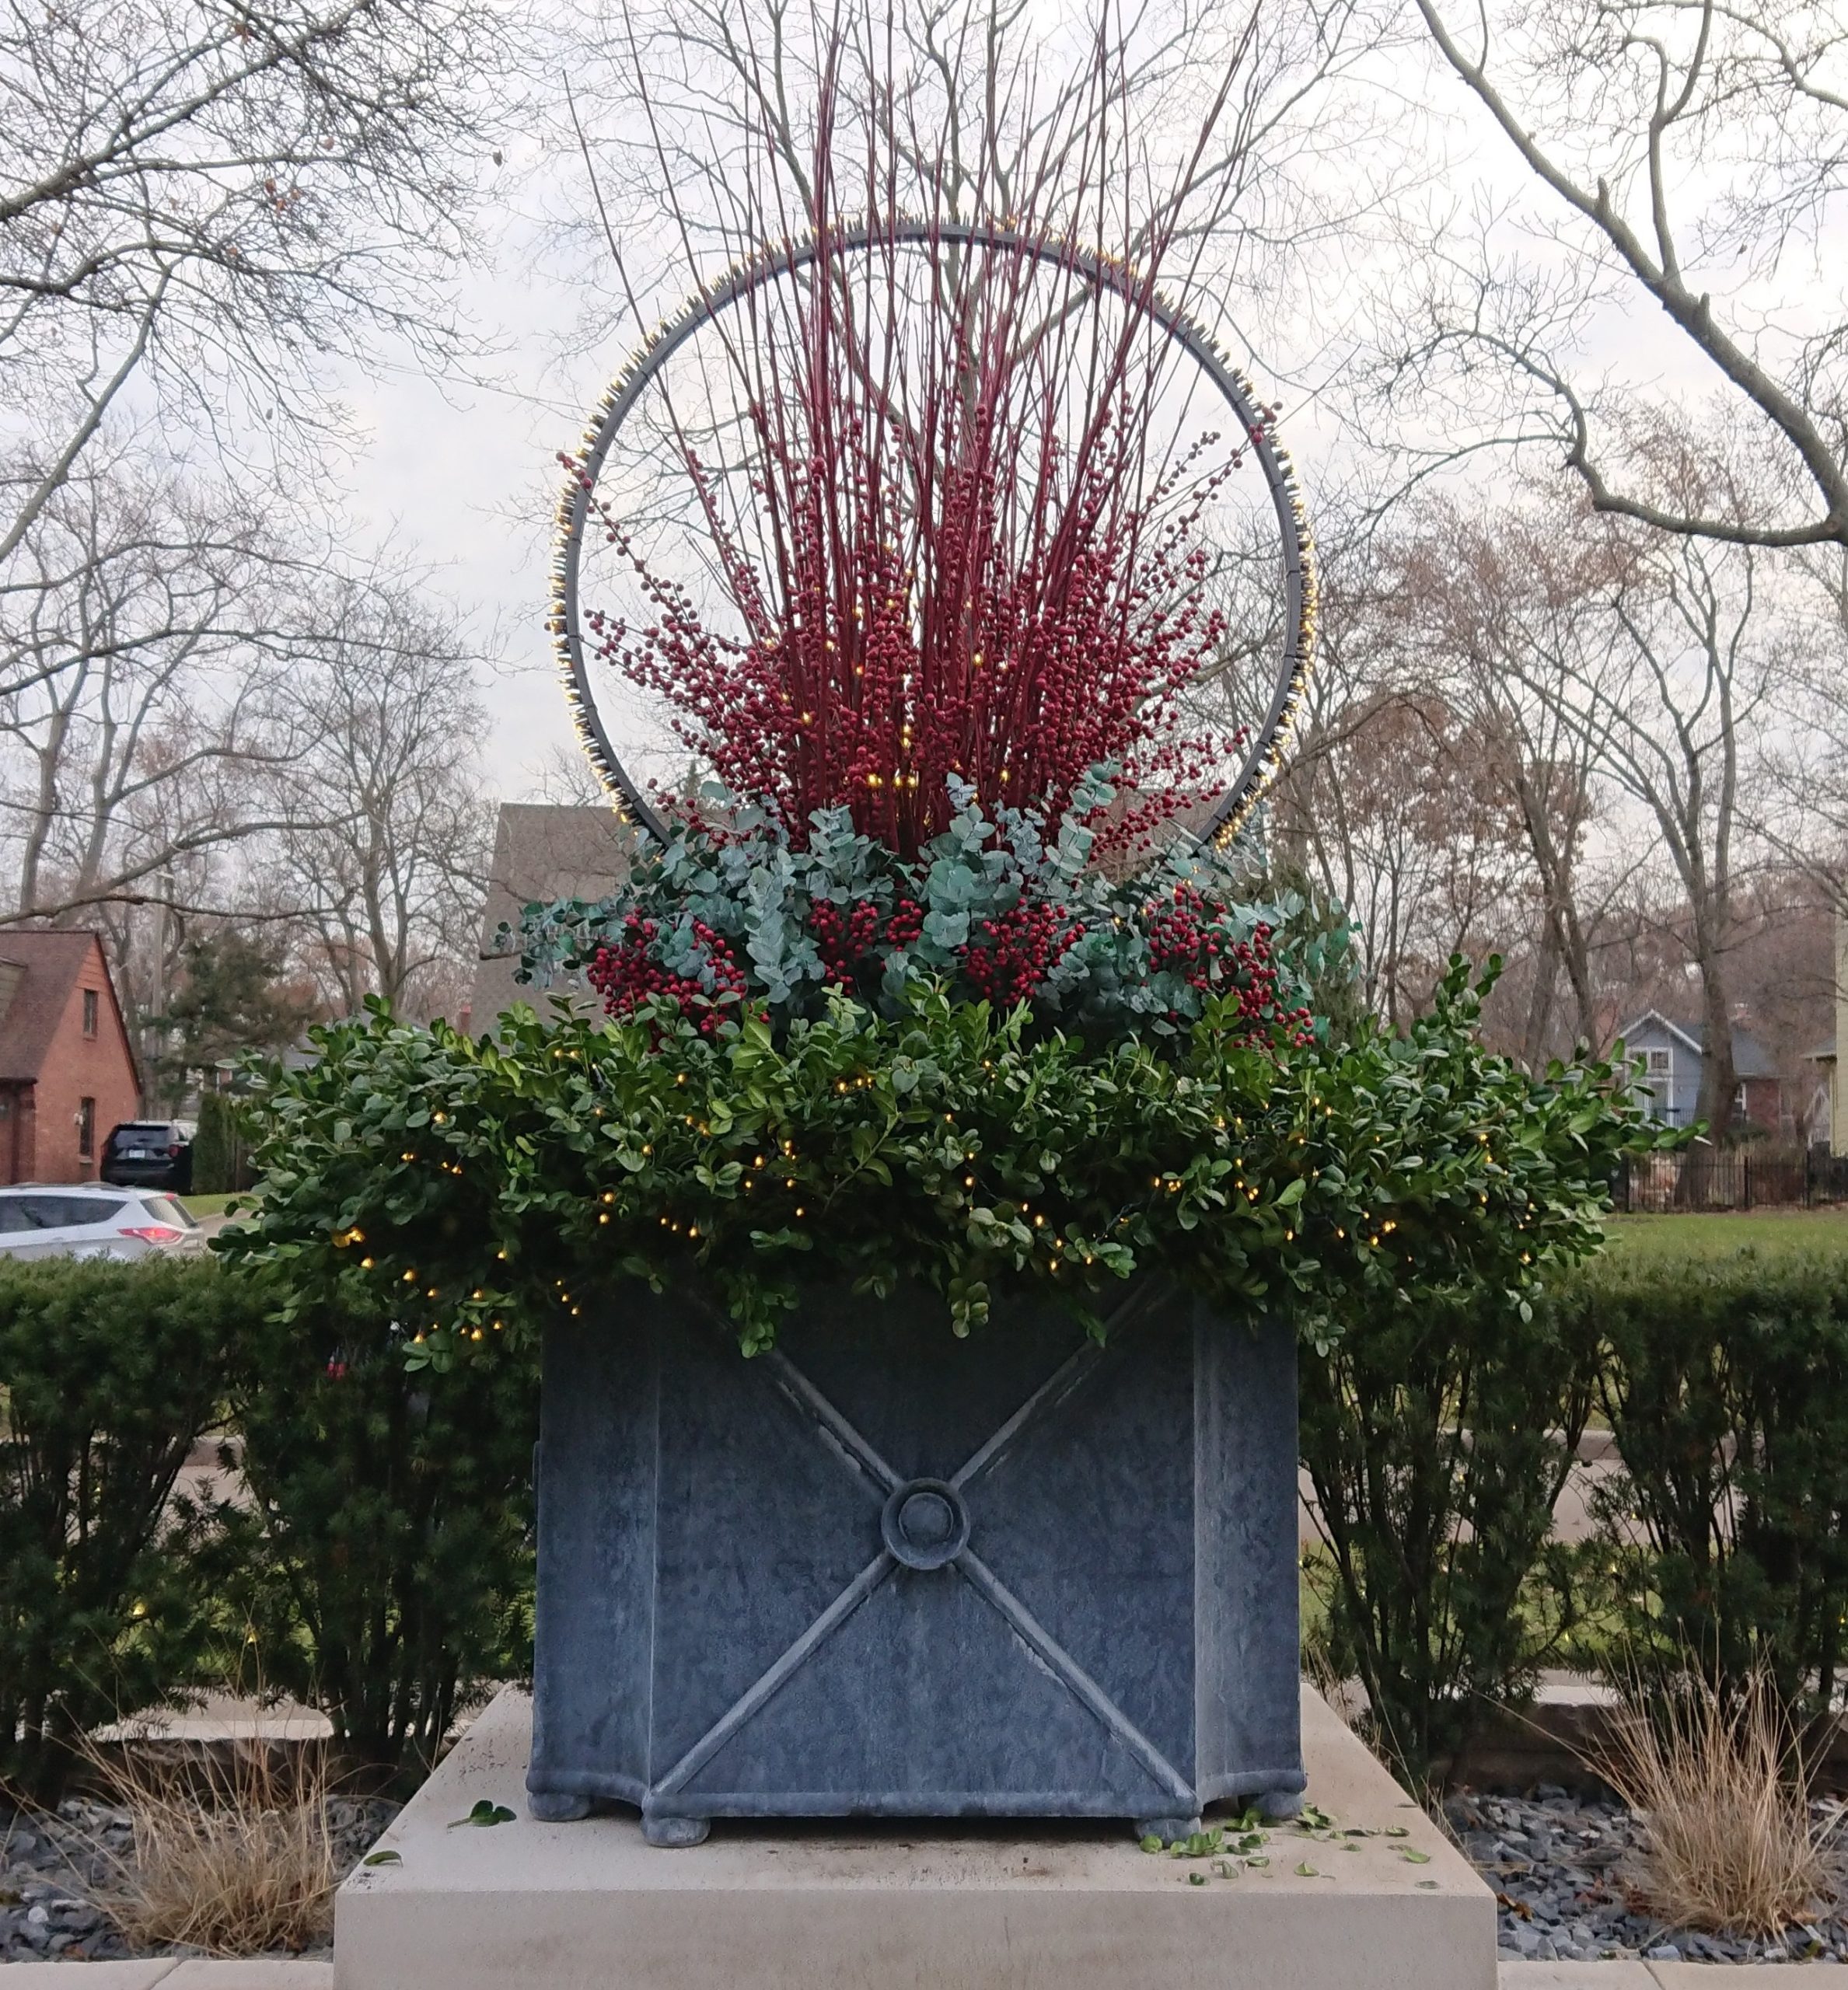
Clients for whom we do winter pots ask for them now, and we are happy to oblige. That ring of light features the fixings in a winter centerpiece in an elegant and stunning way.

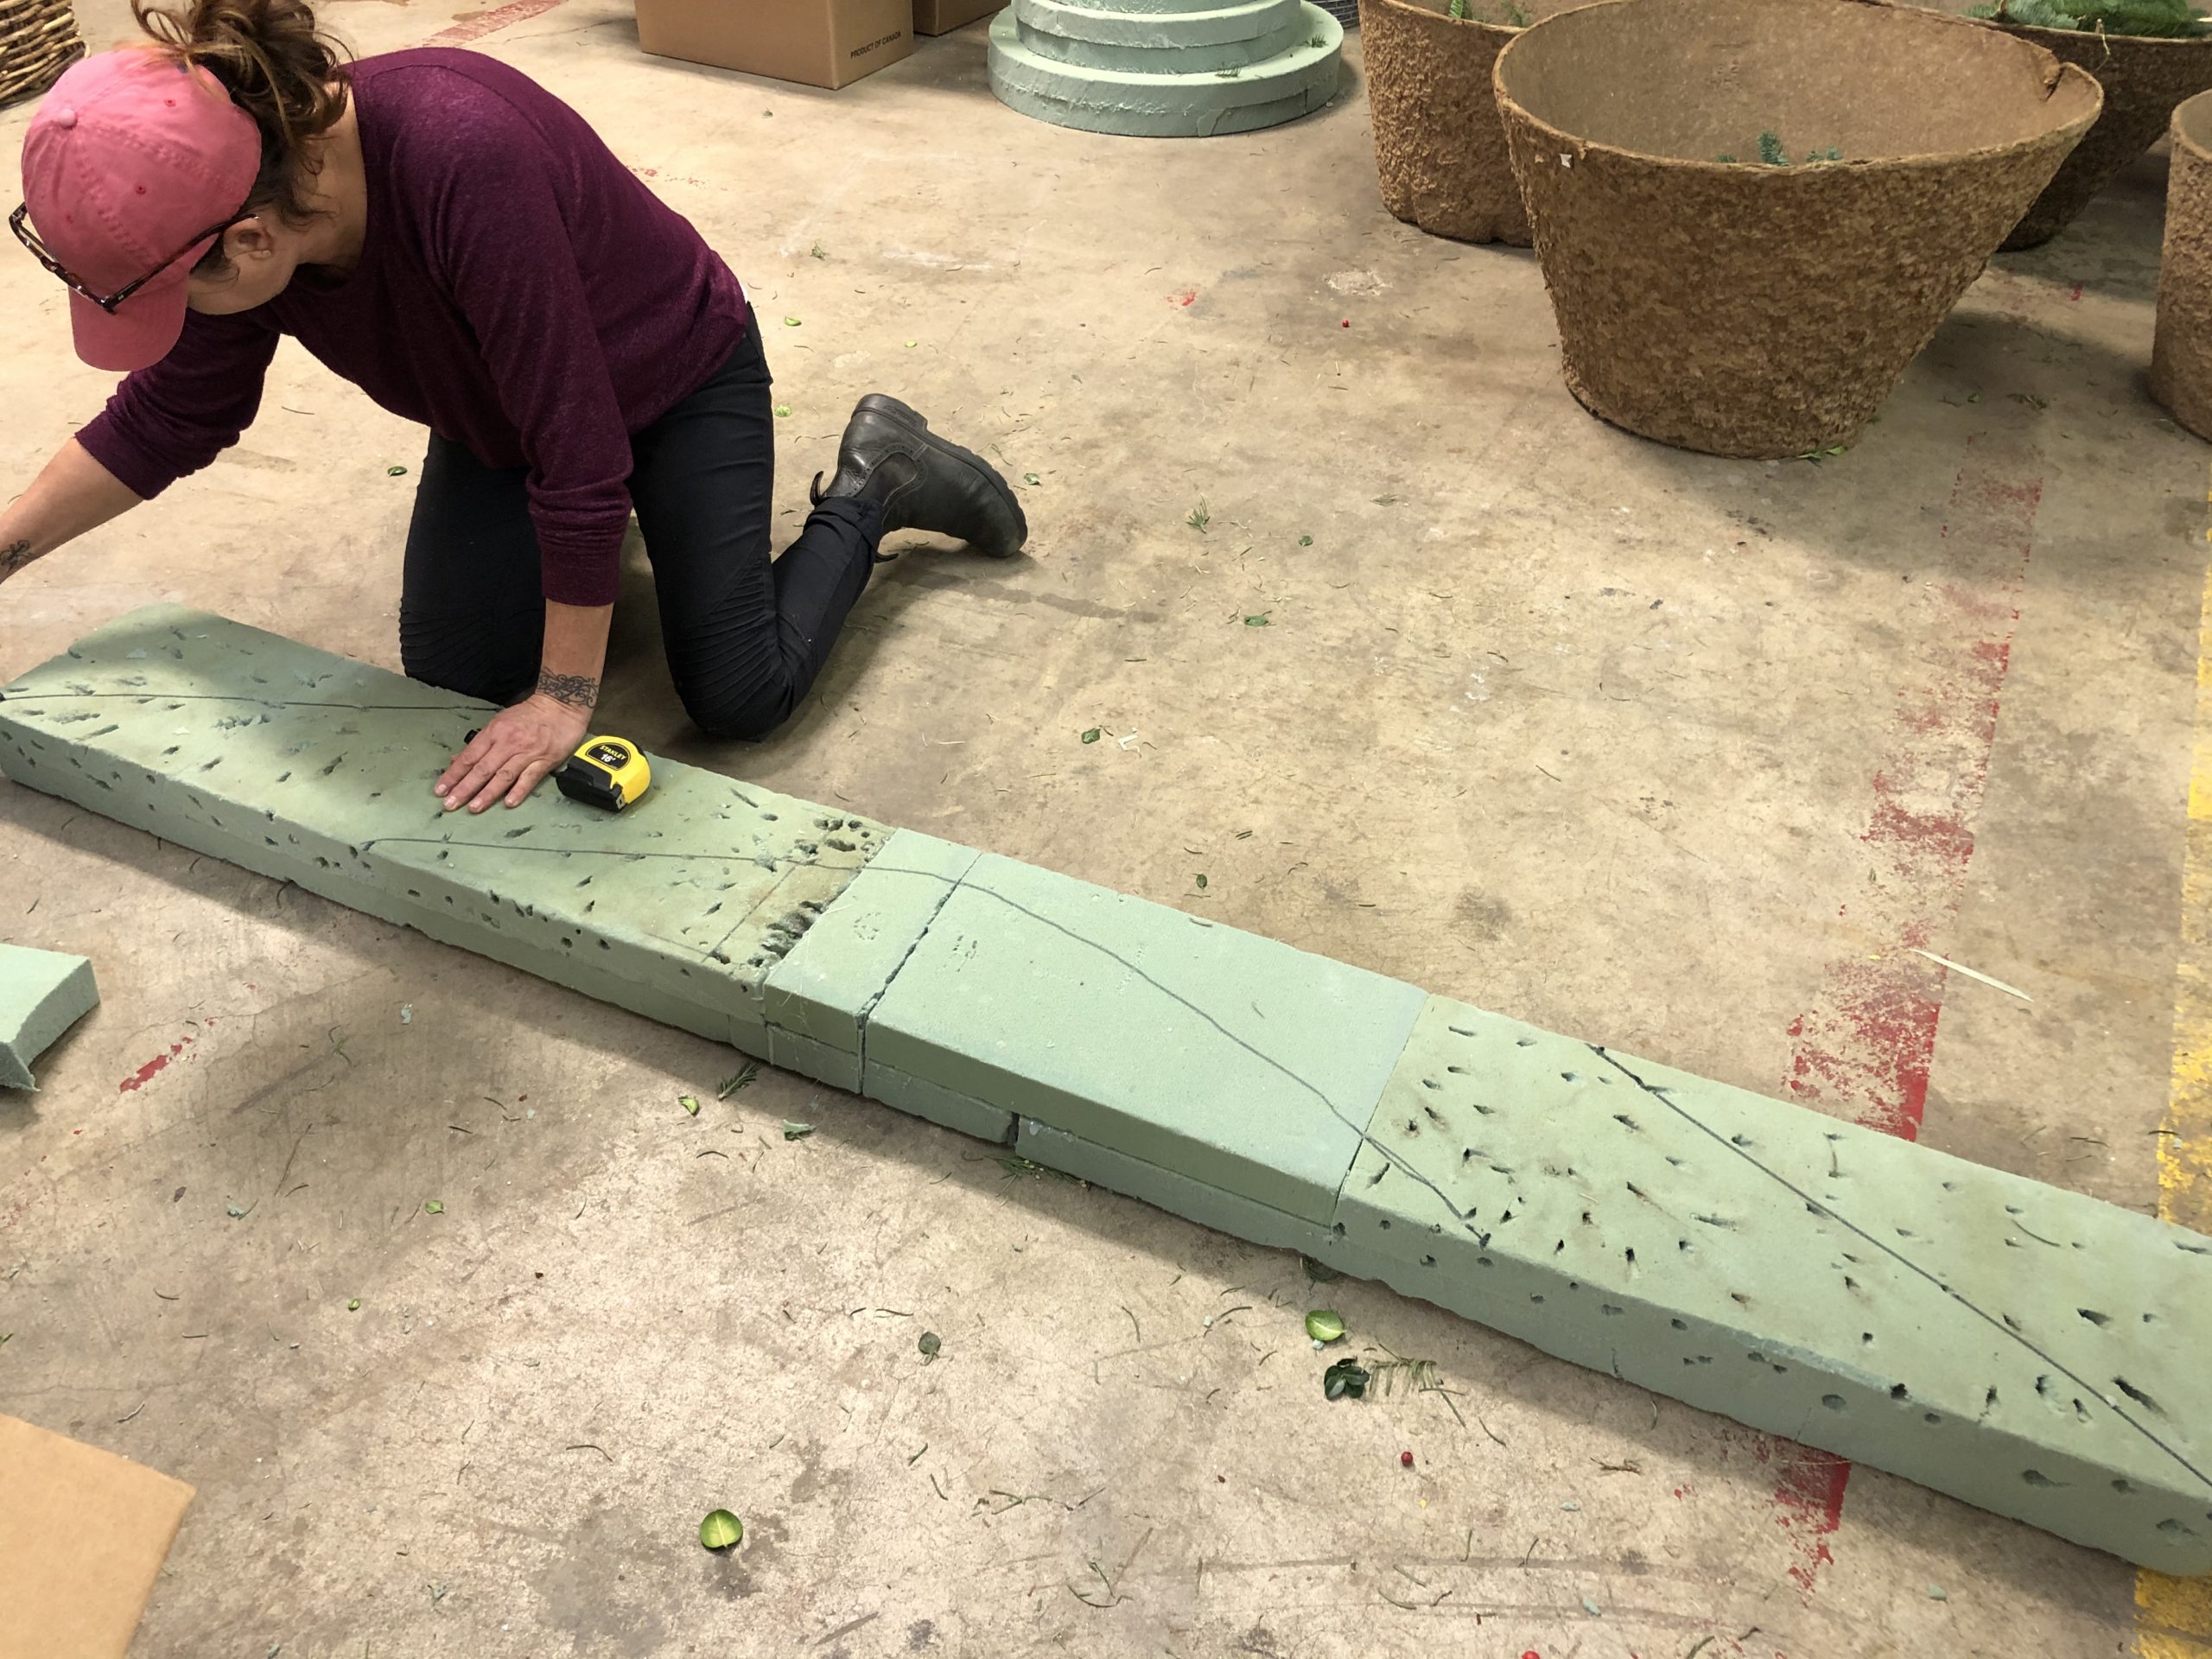
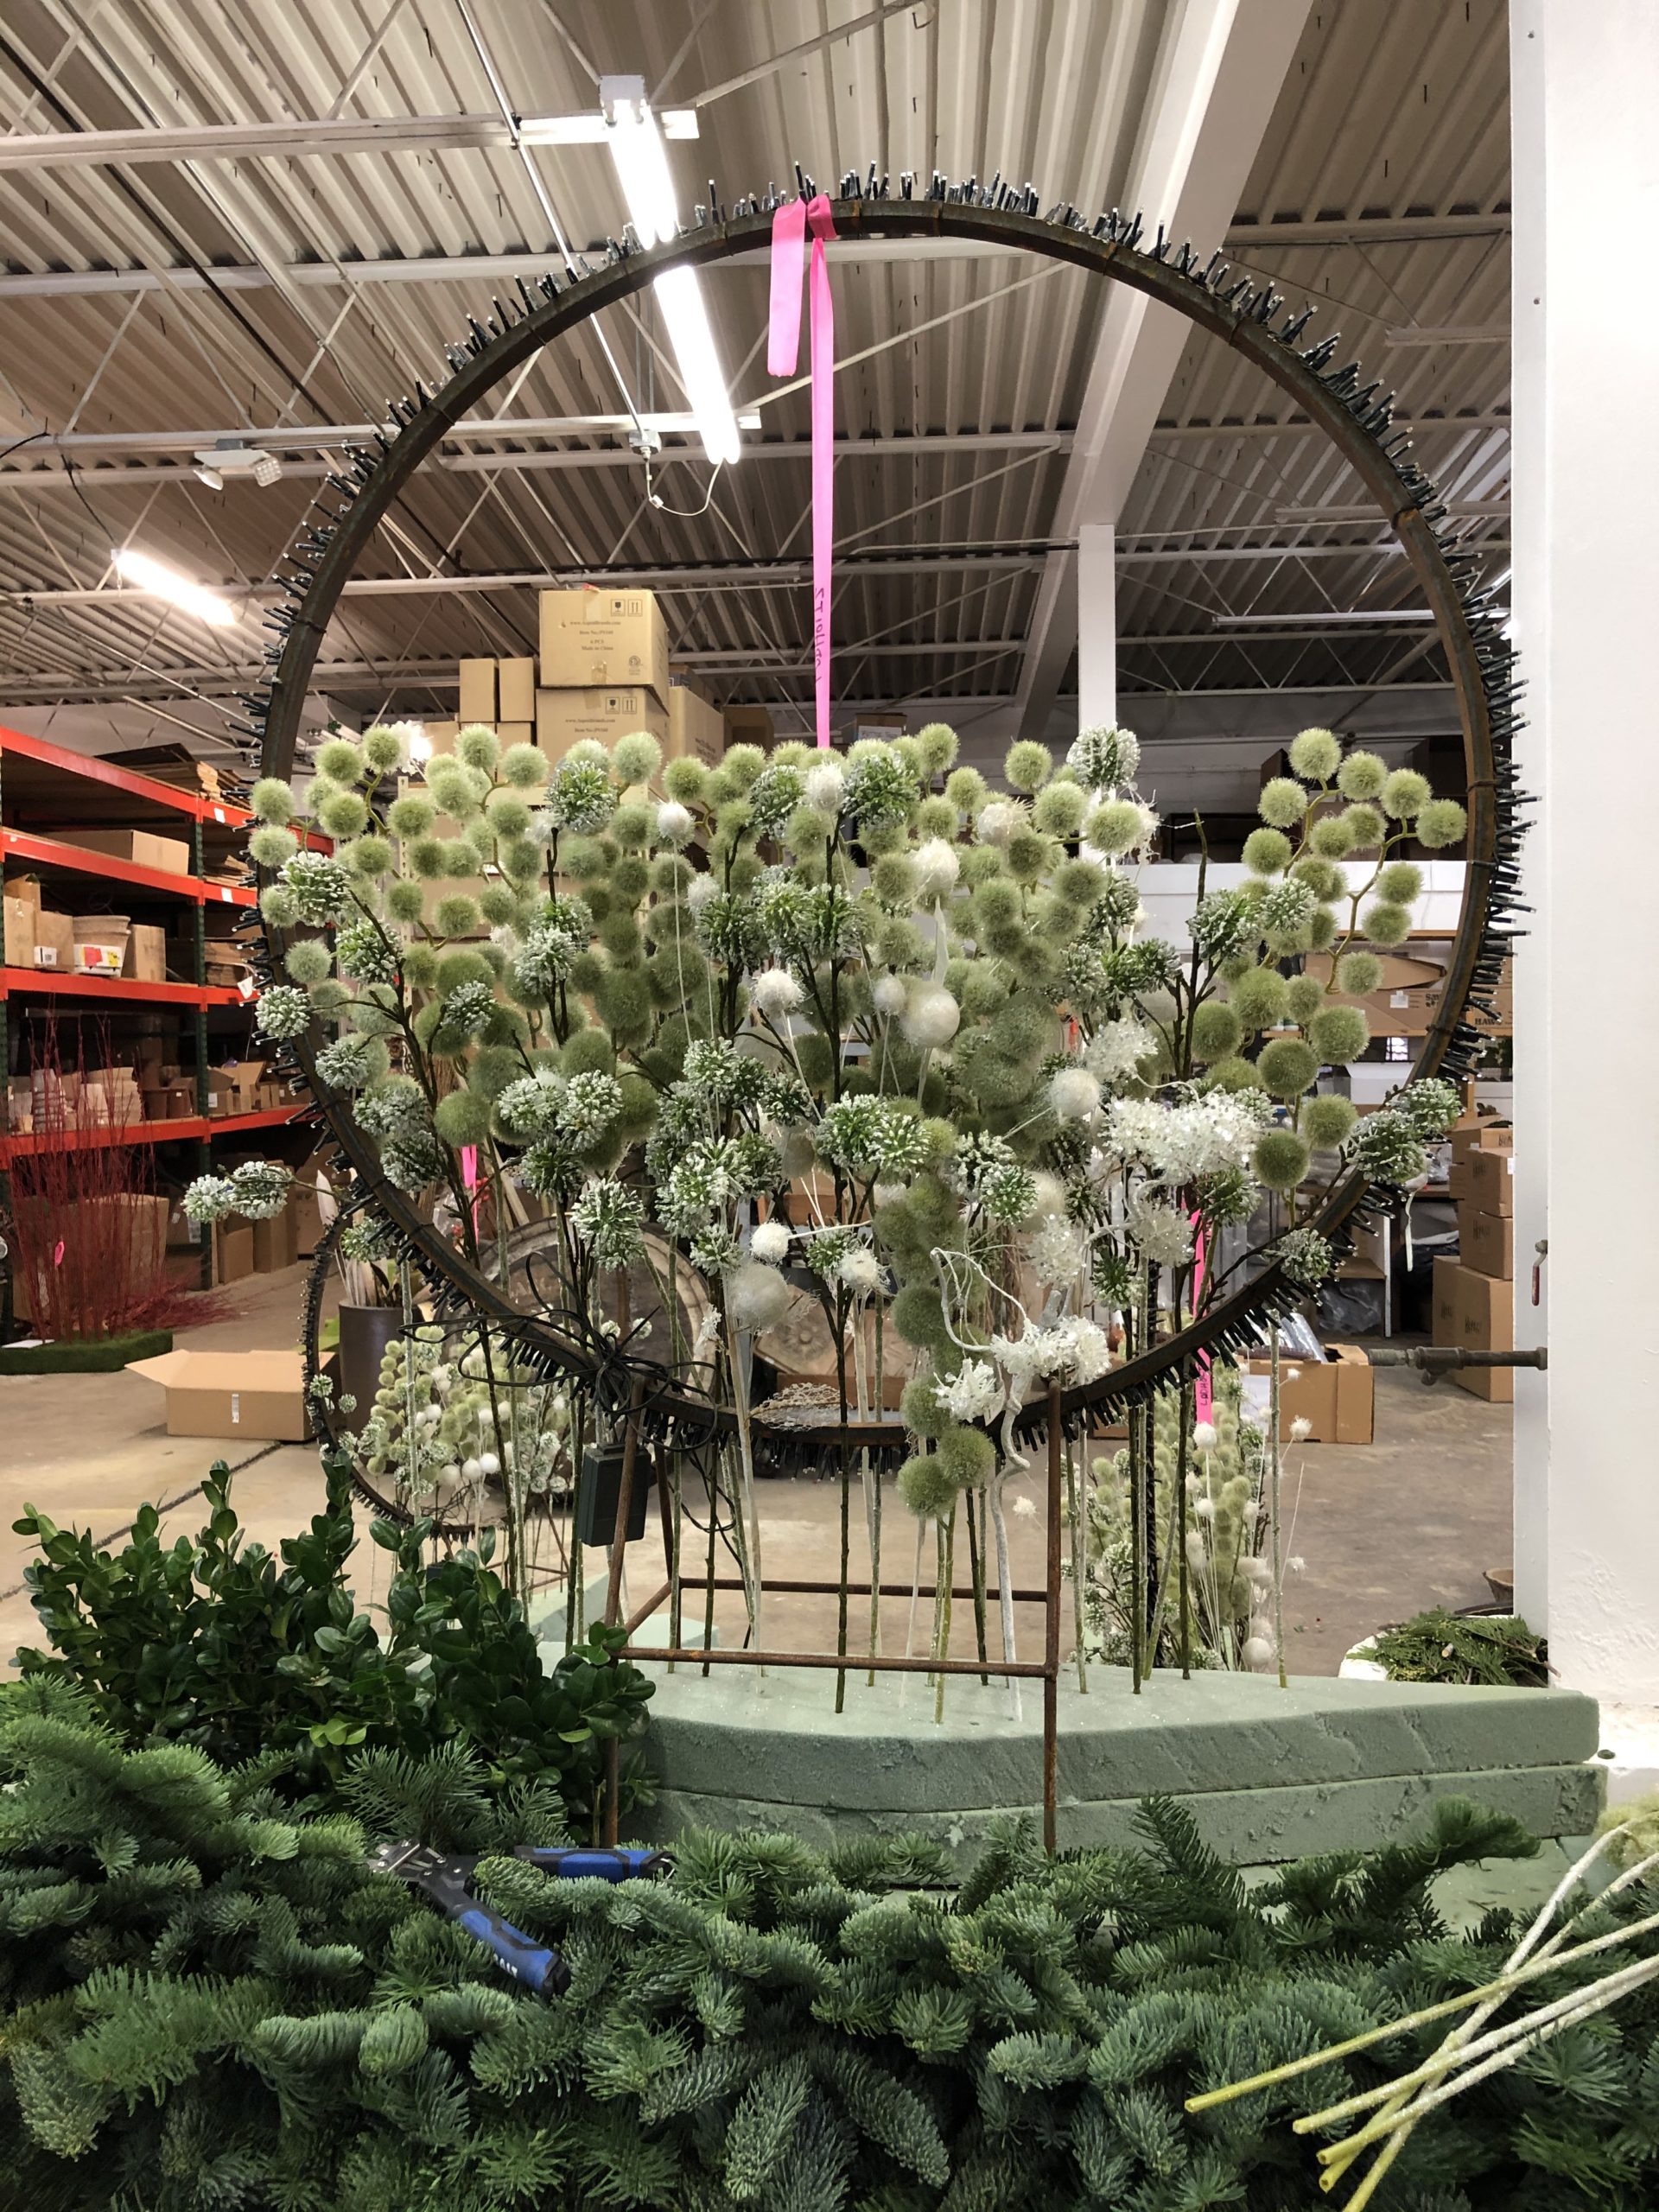
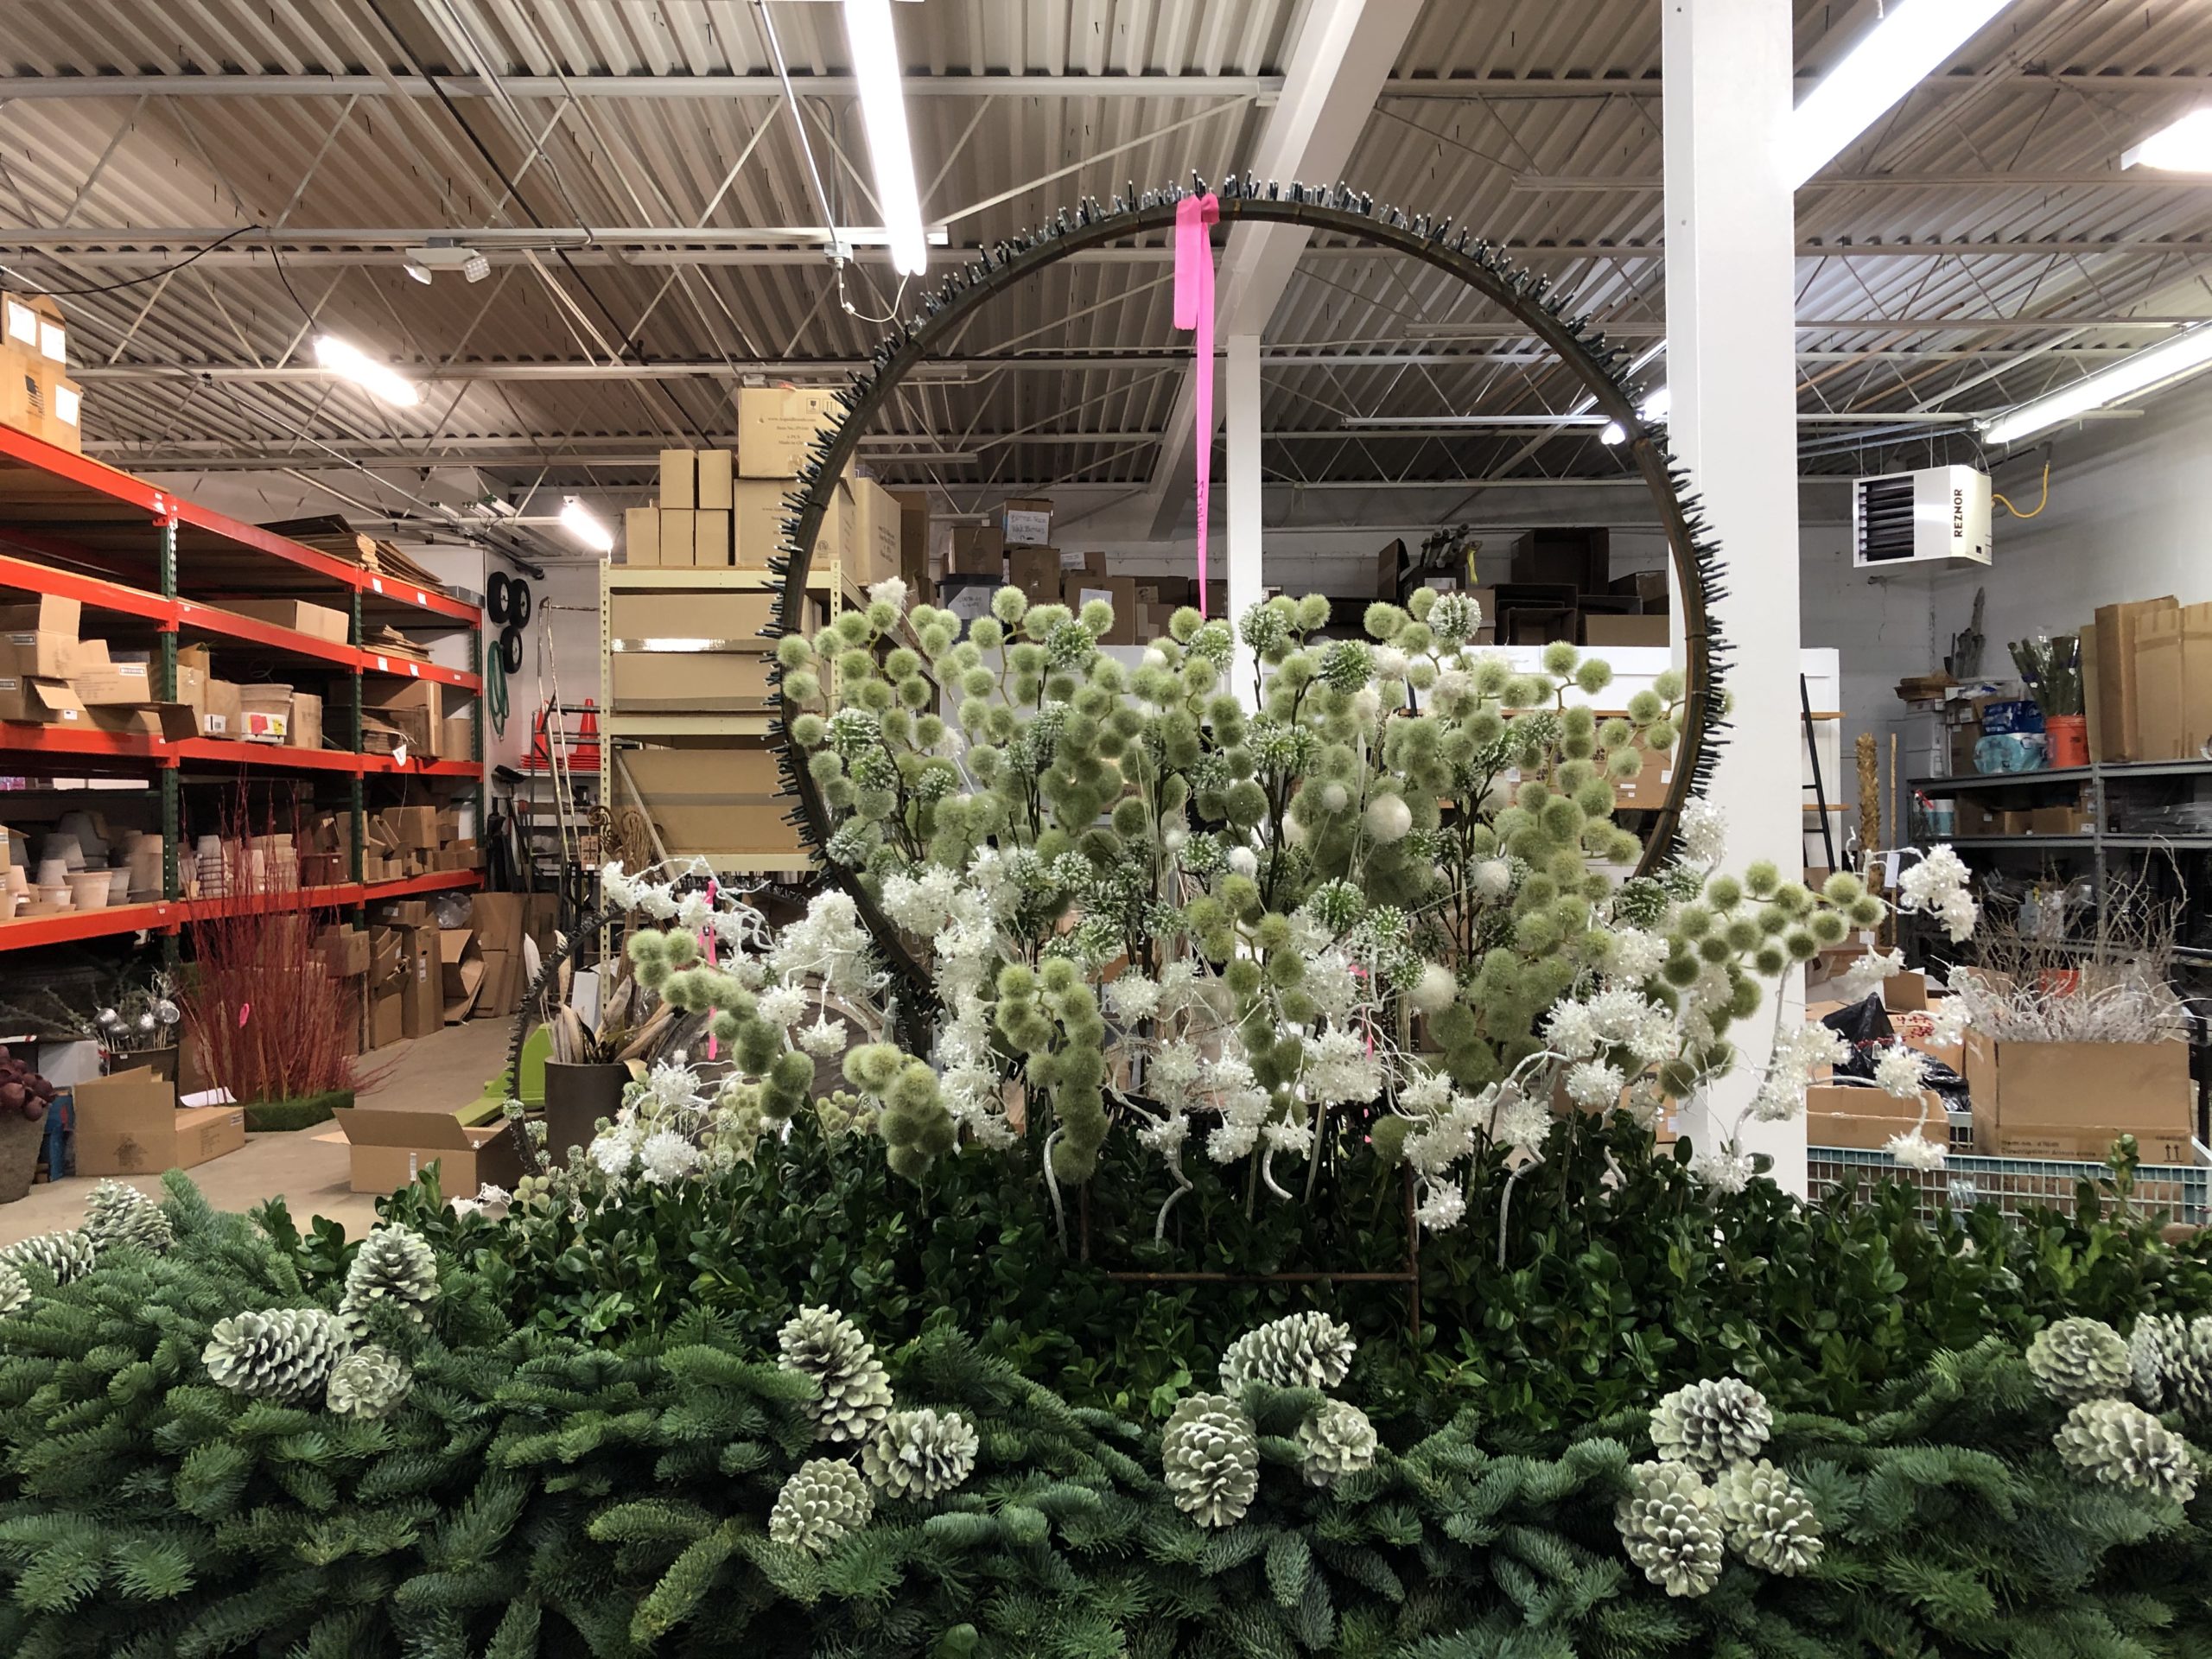
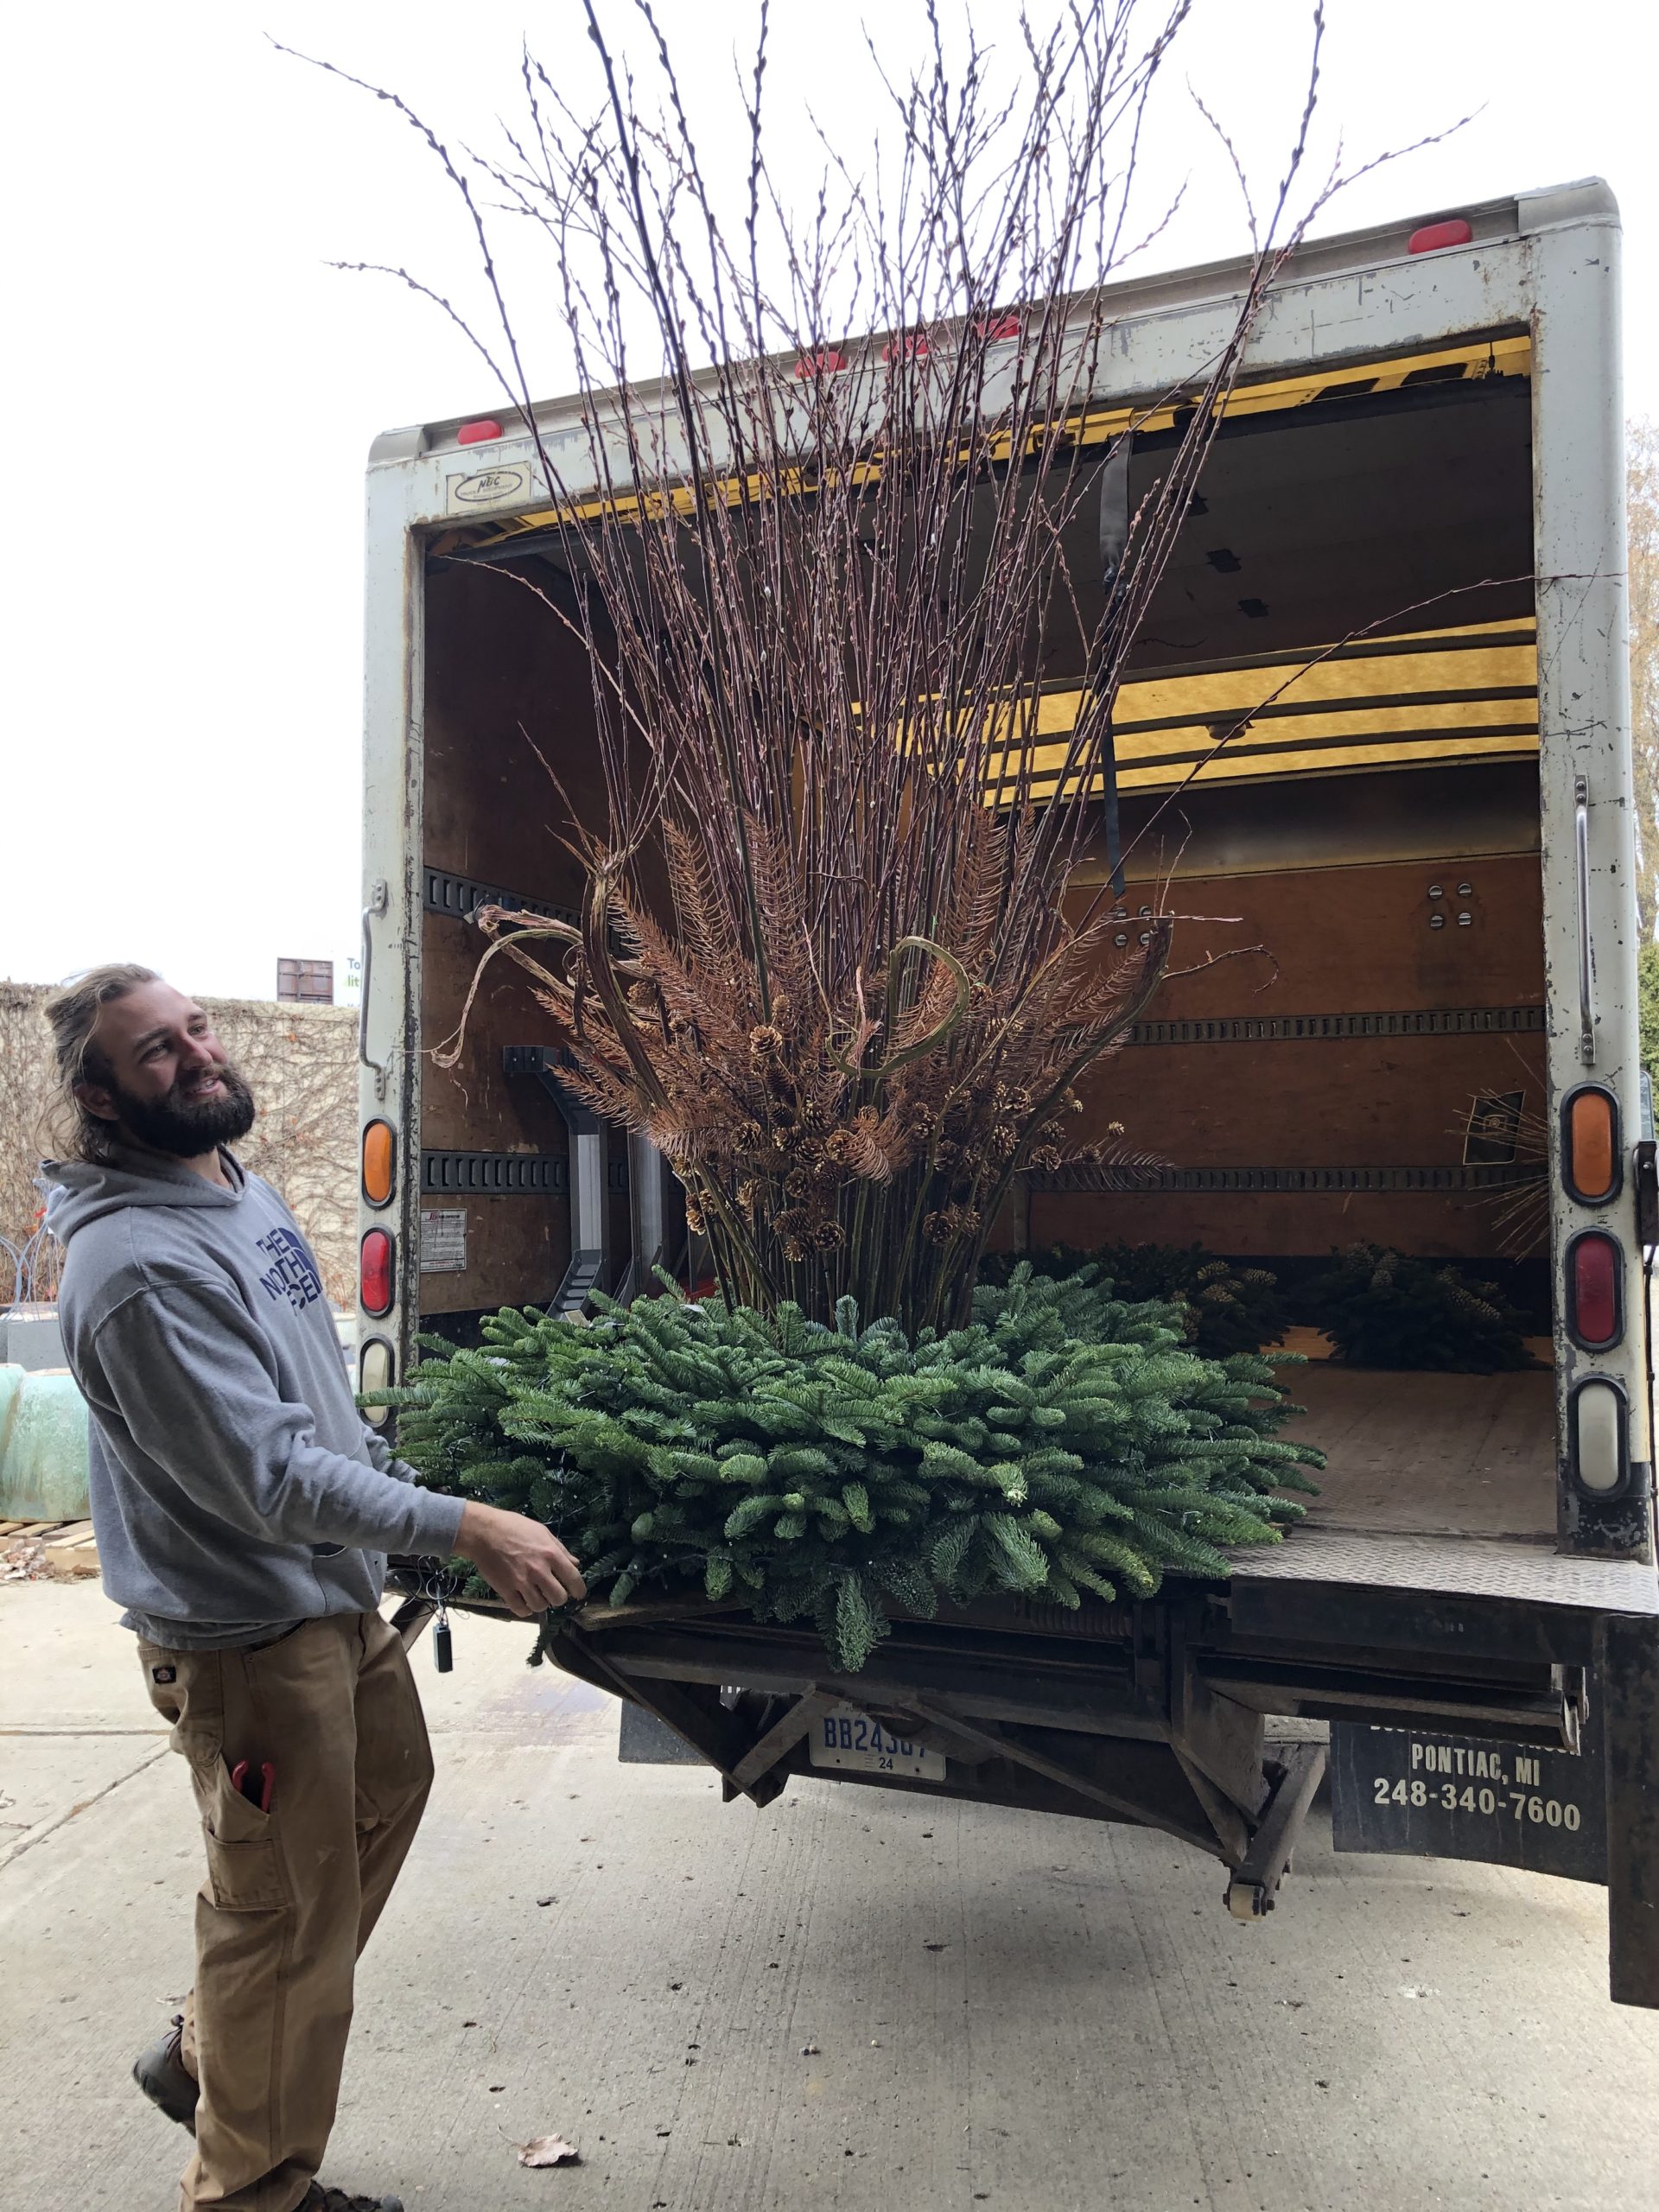
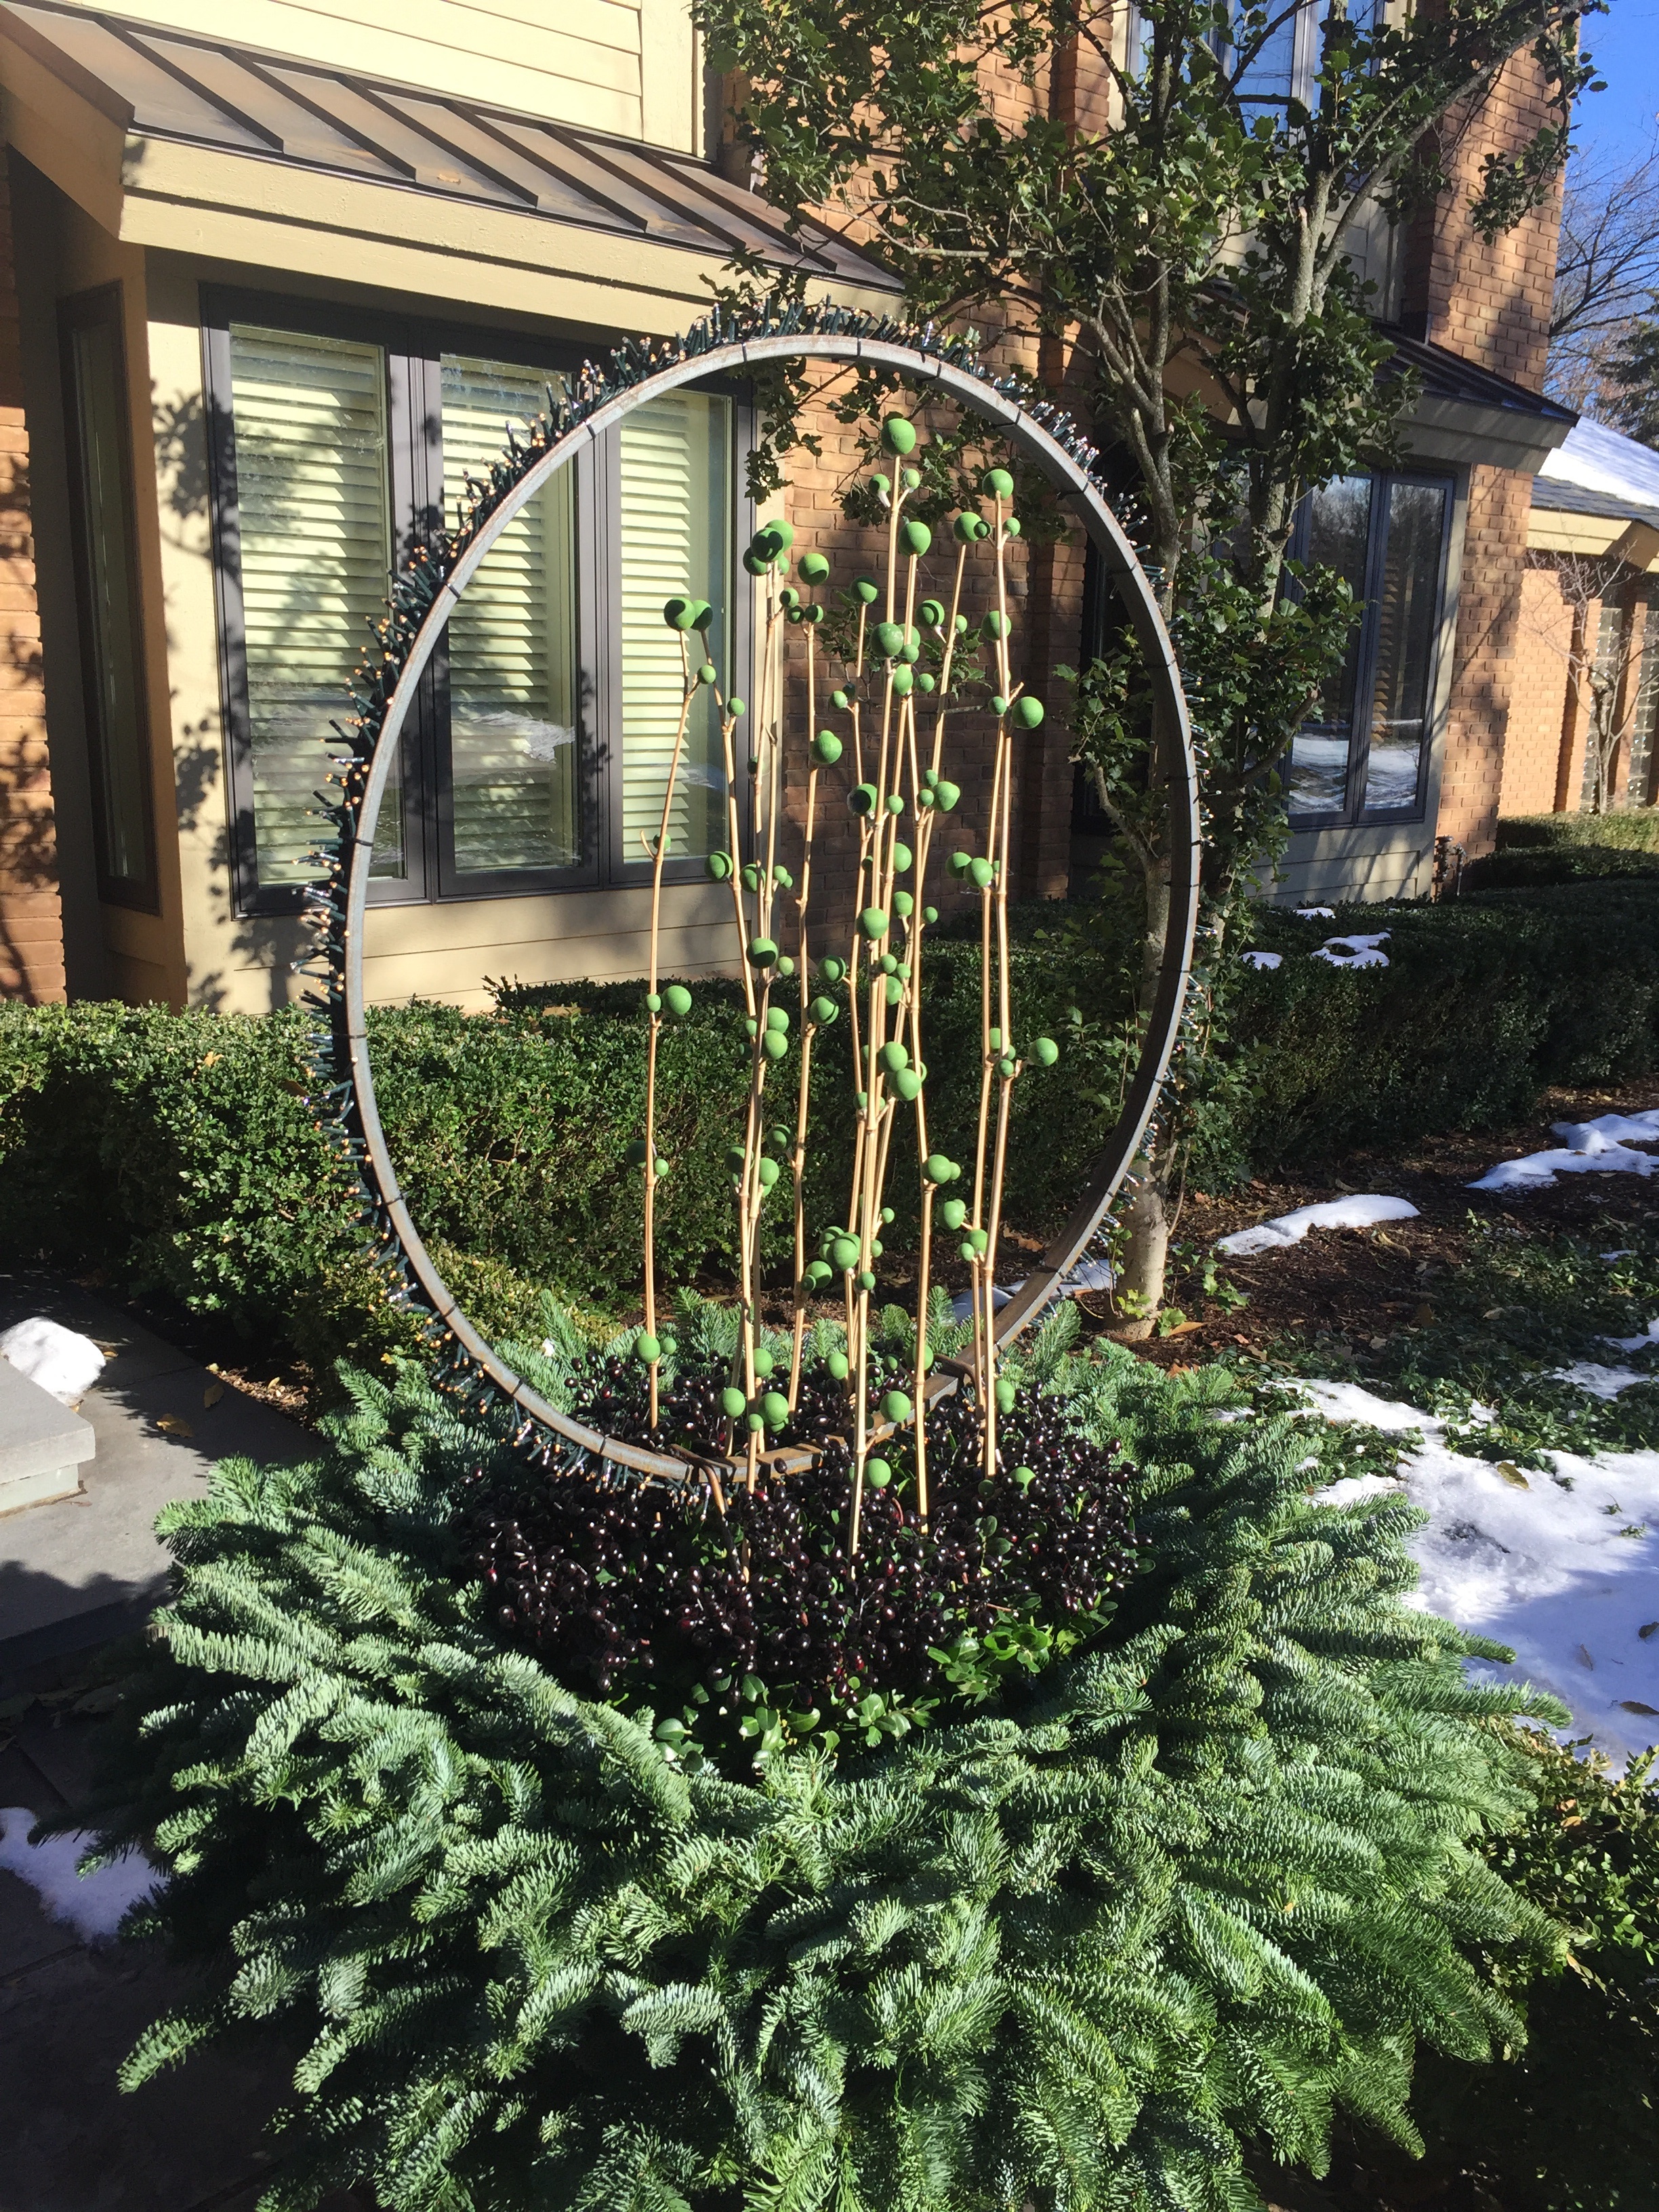
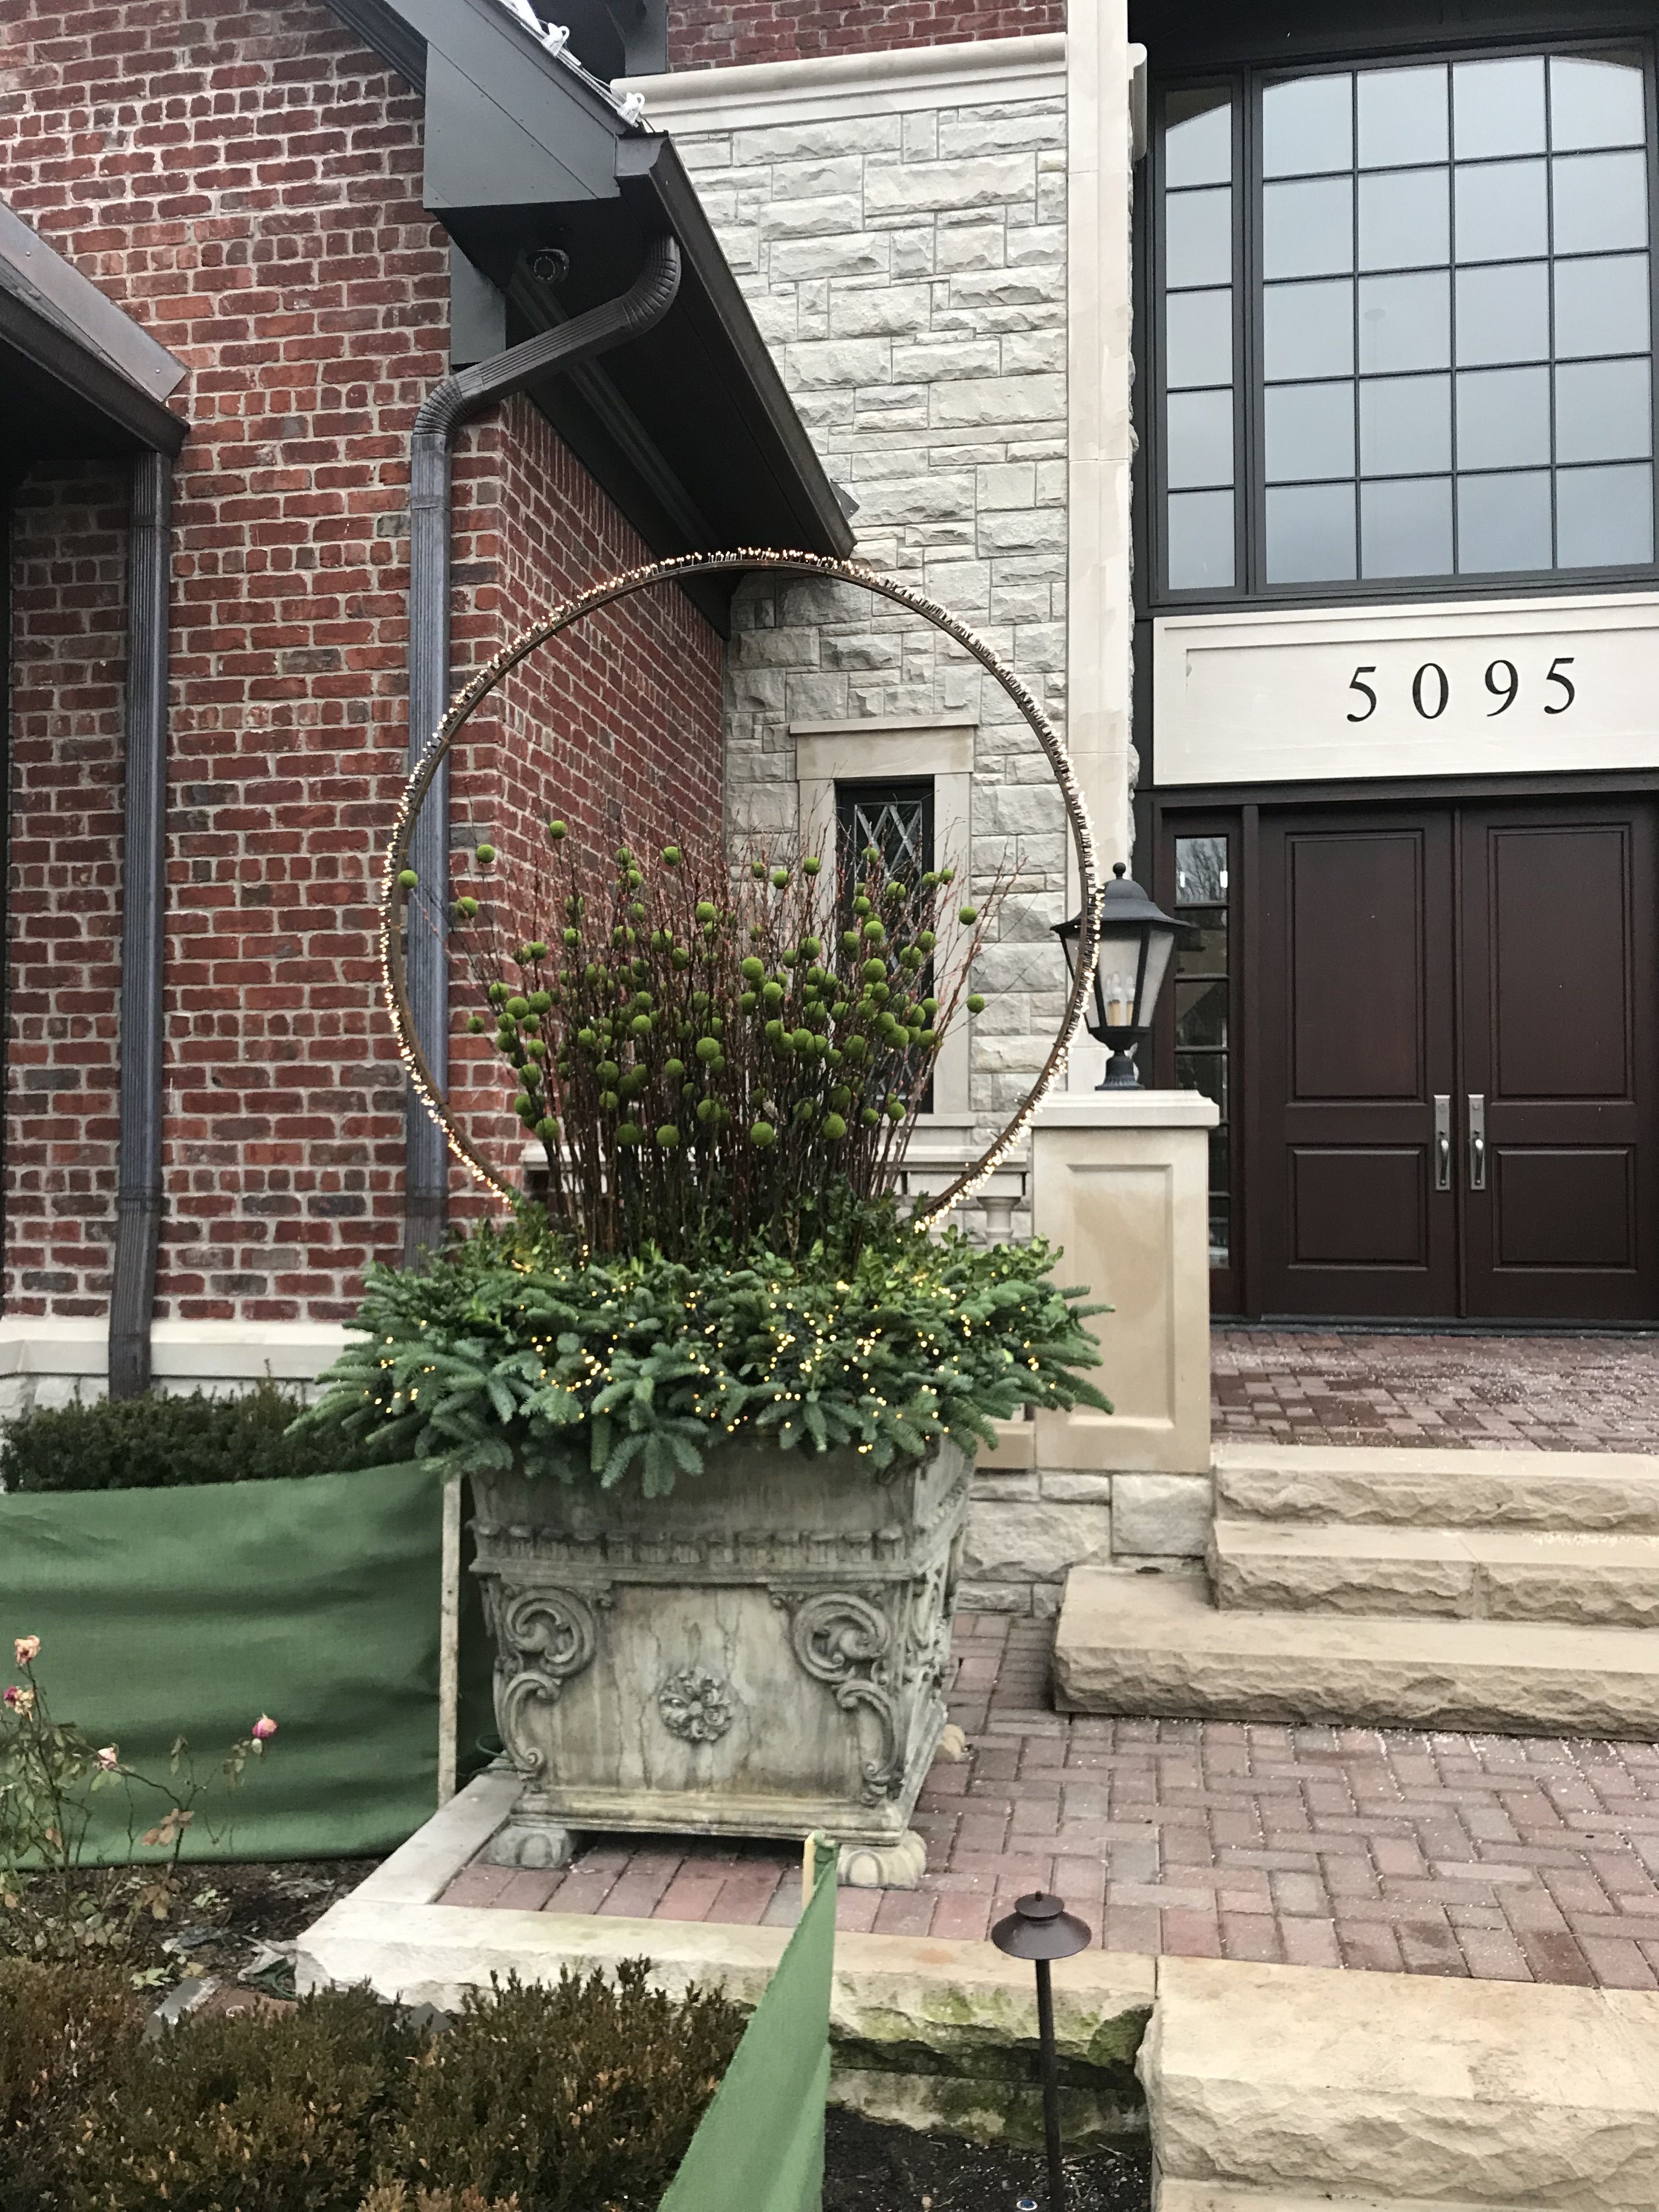
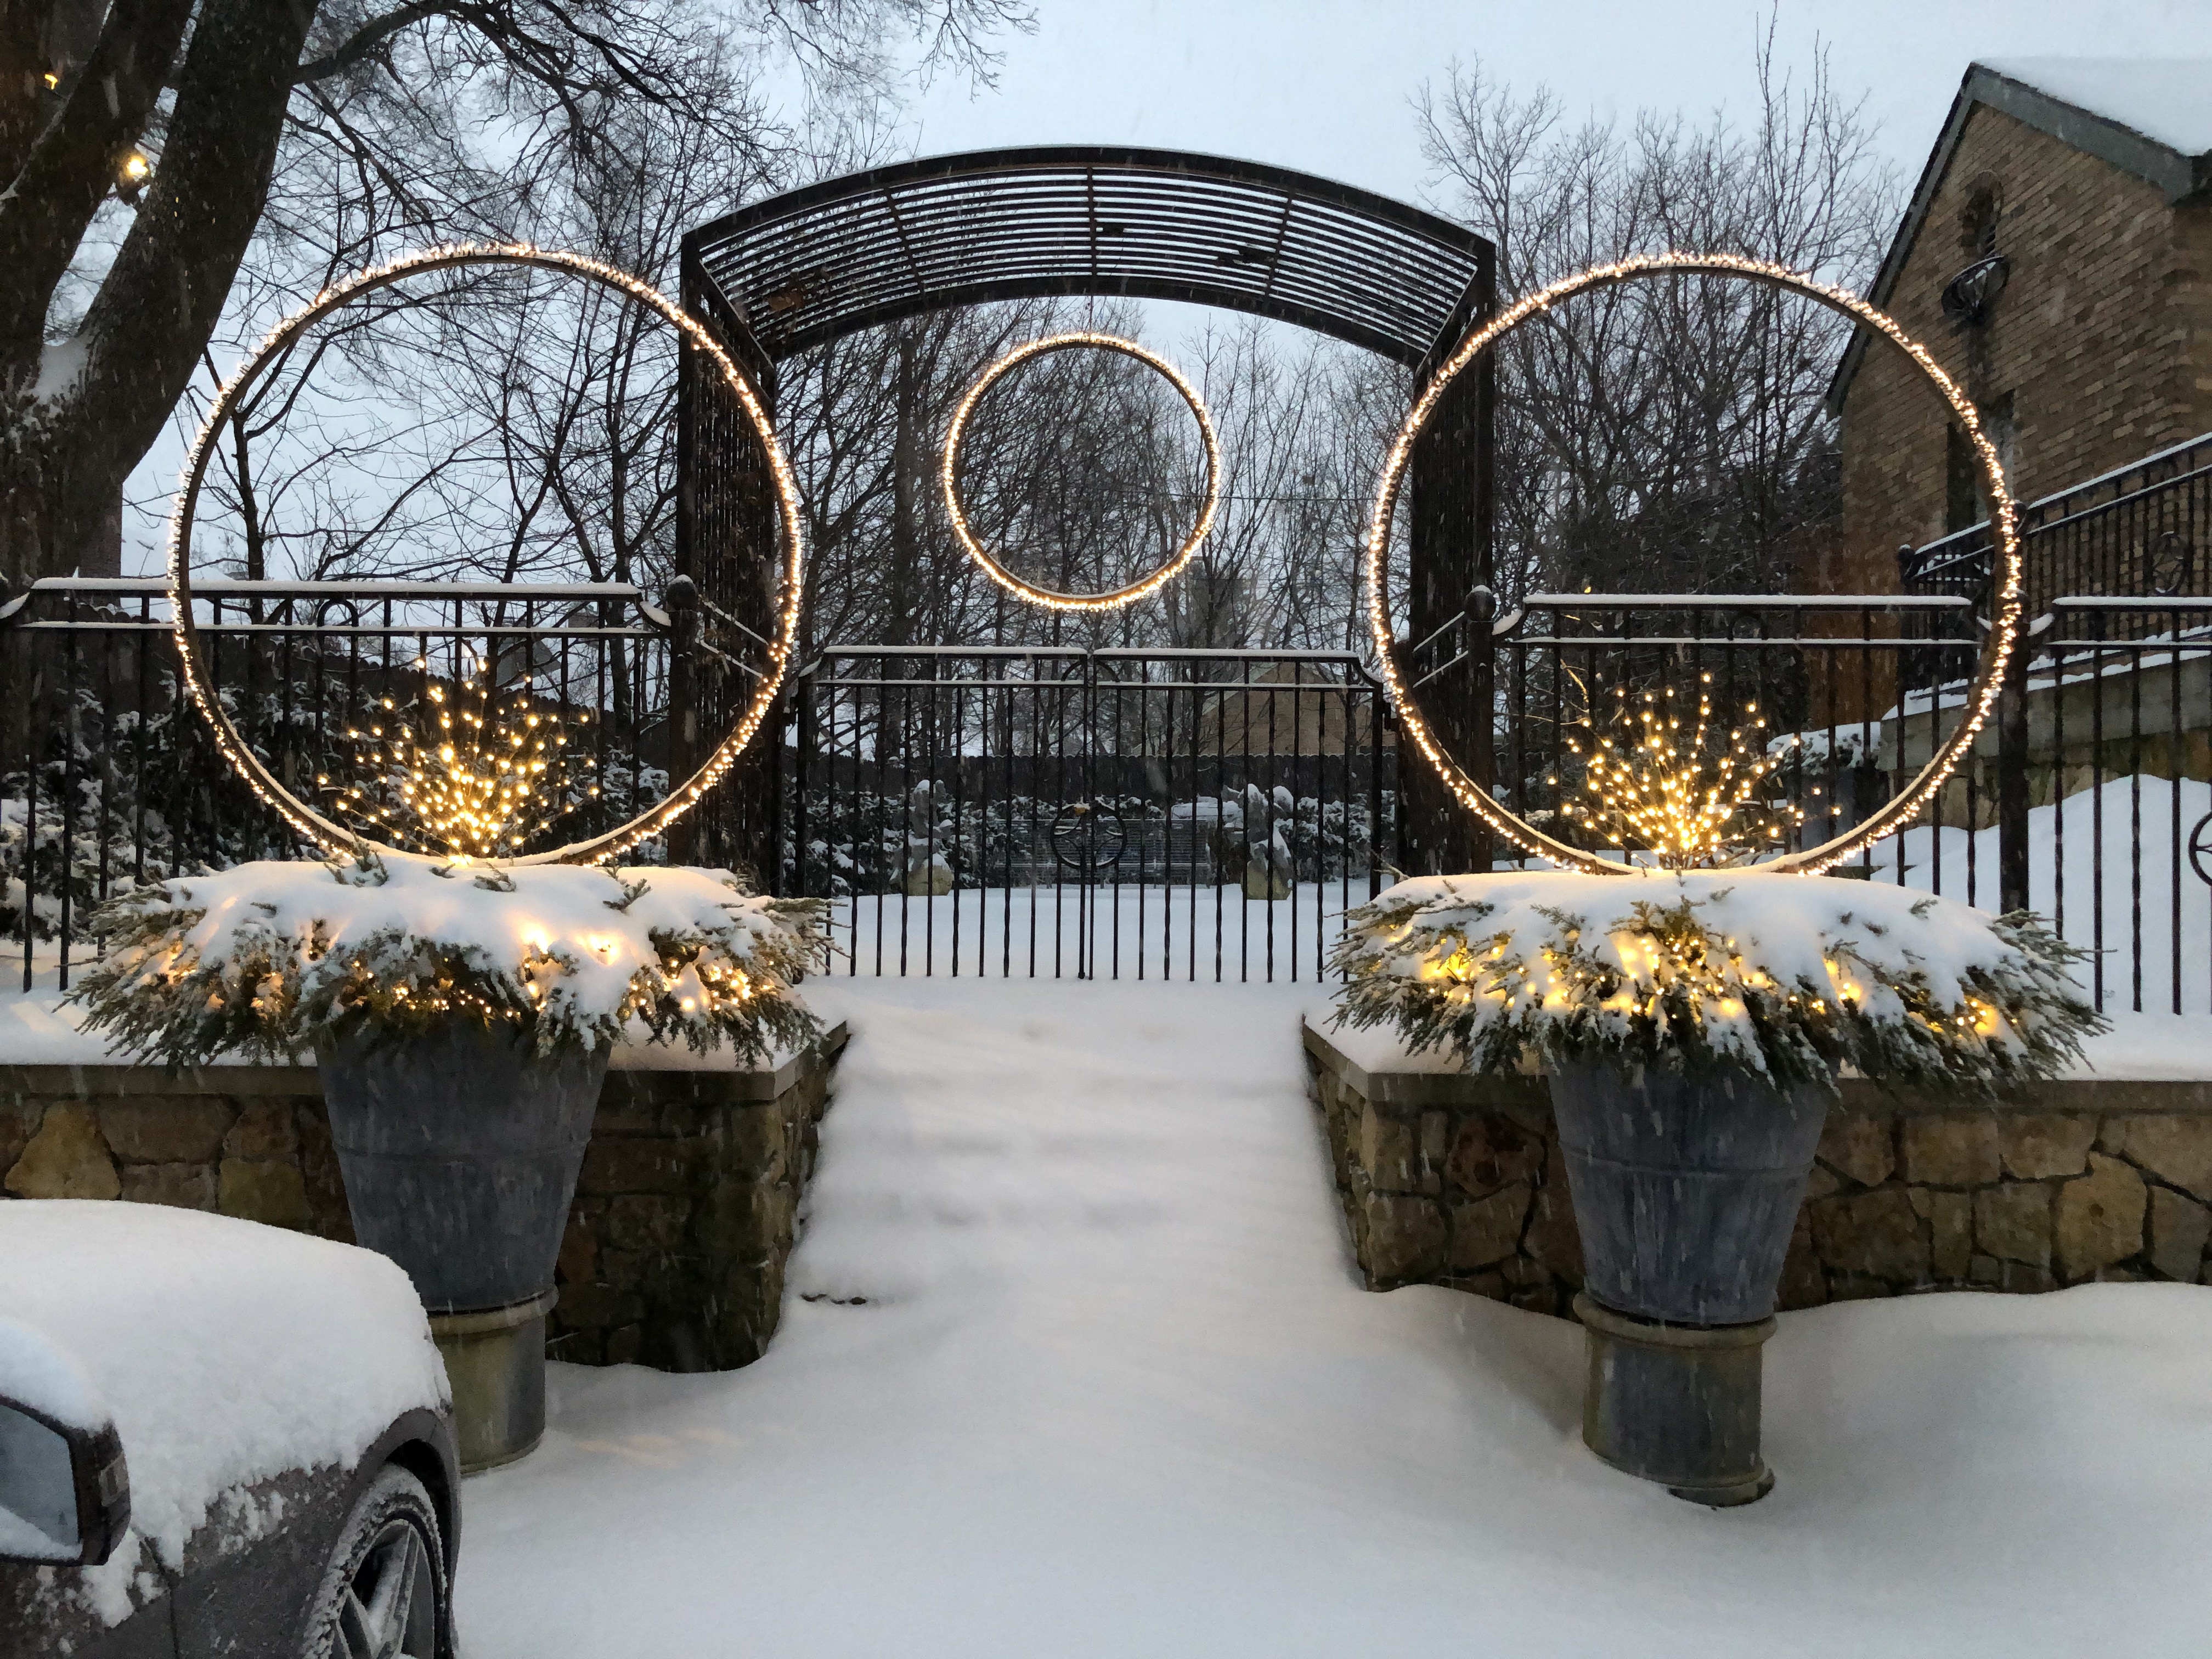
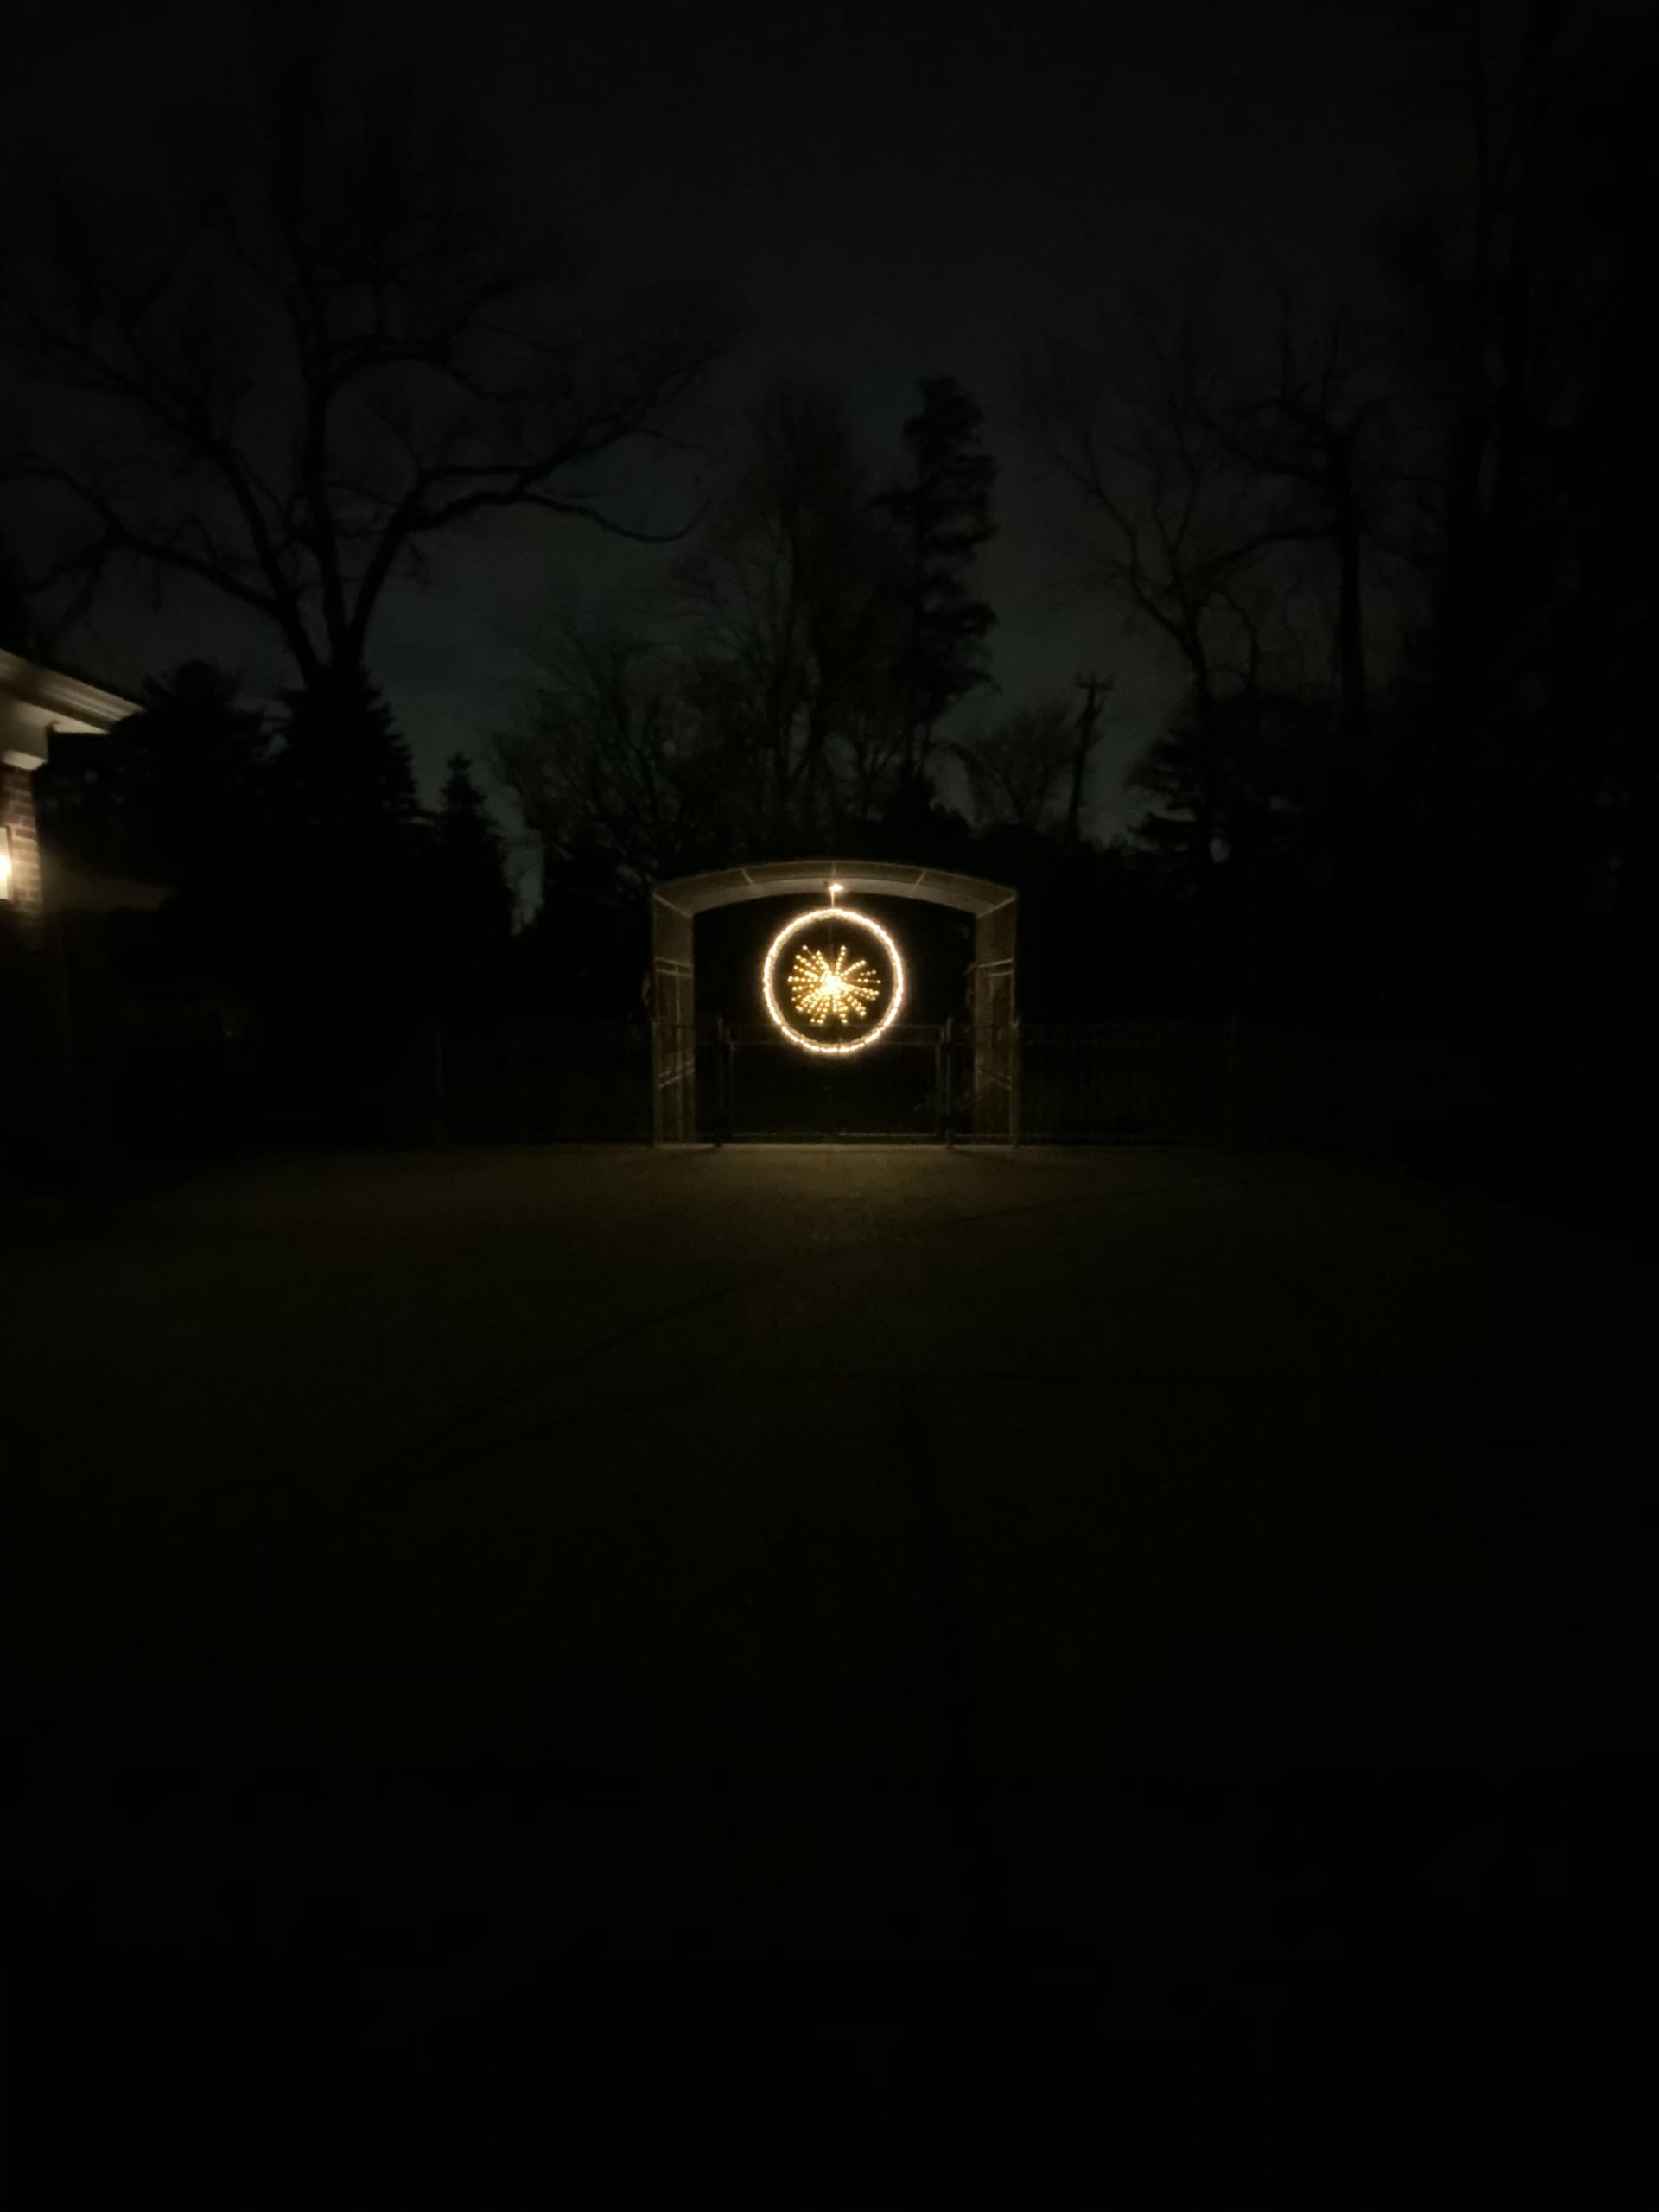
Rob manufactures them in sizes starting with a 2 foot diameter, on up to a 7 footer. Pictured above is a 5 foot diameter light ring. Since the lights are on the outside of the hoop, we sometimes install string lighting at the bottom of the centerpiece, and or in the greens.

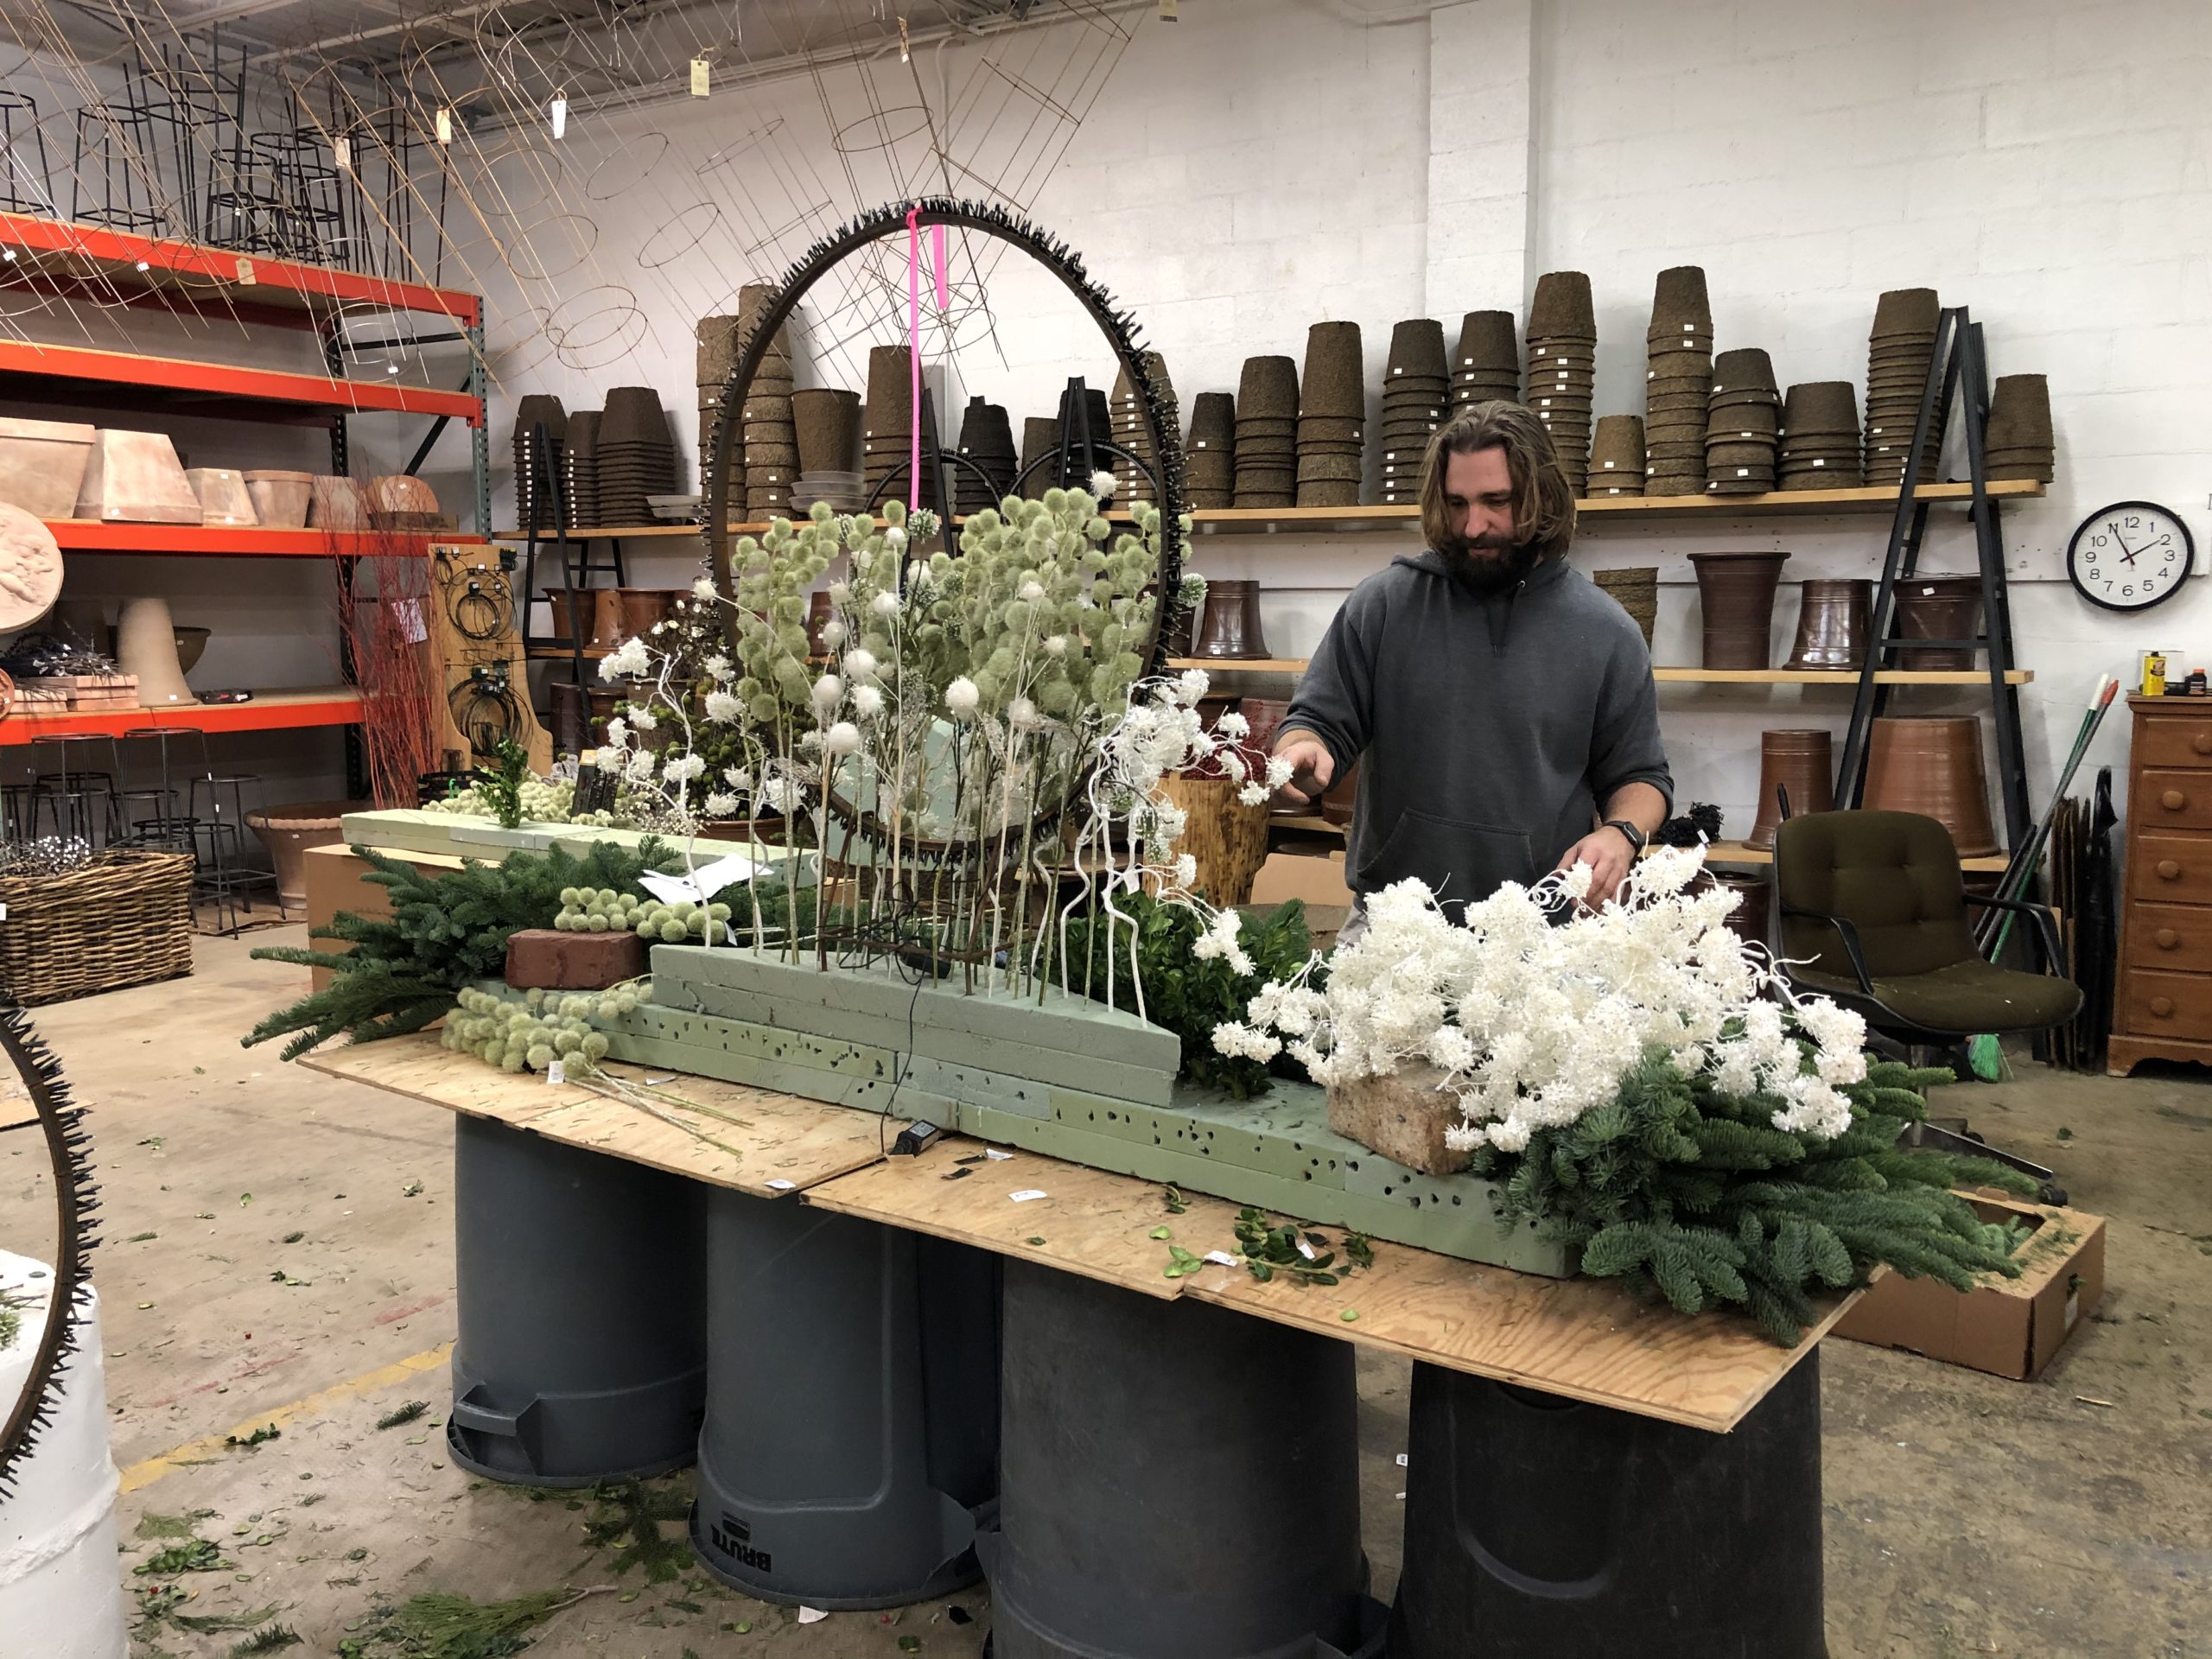
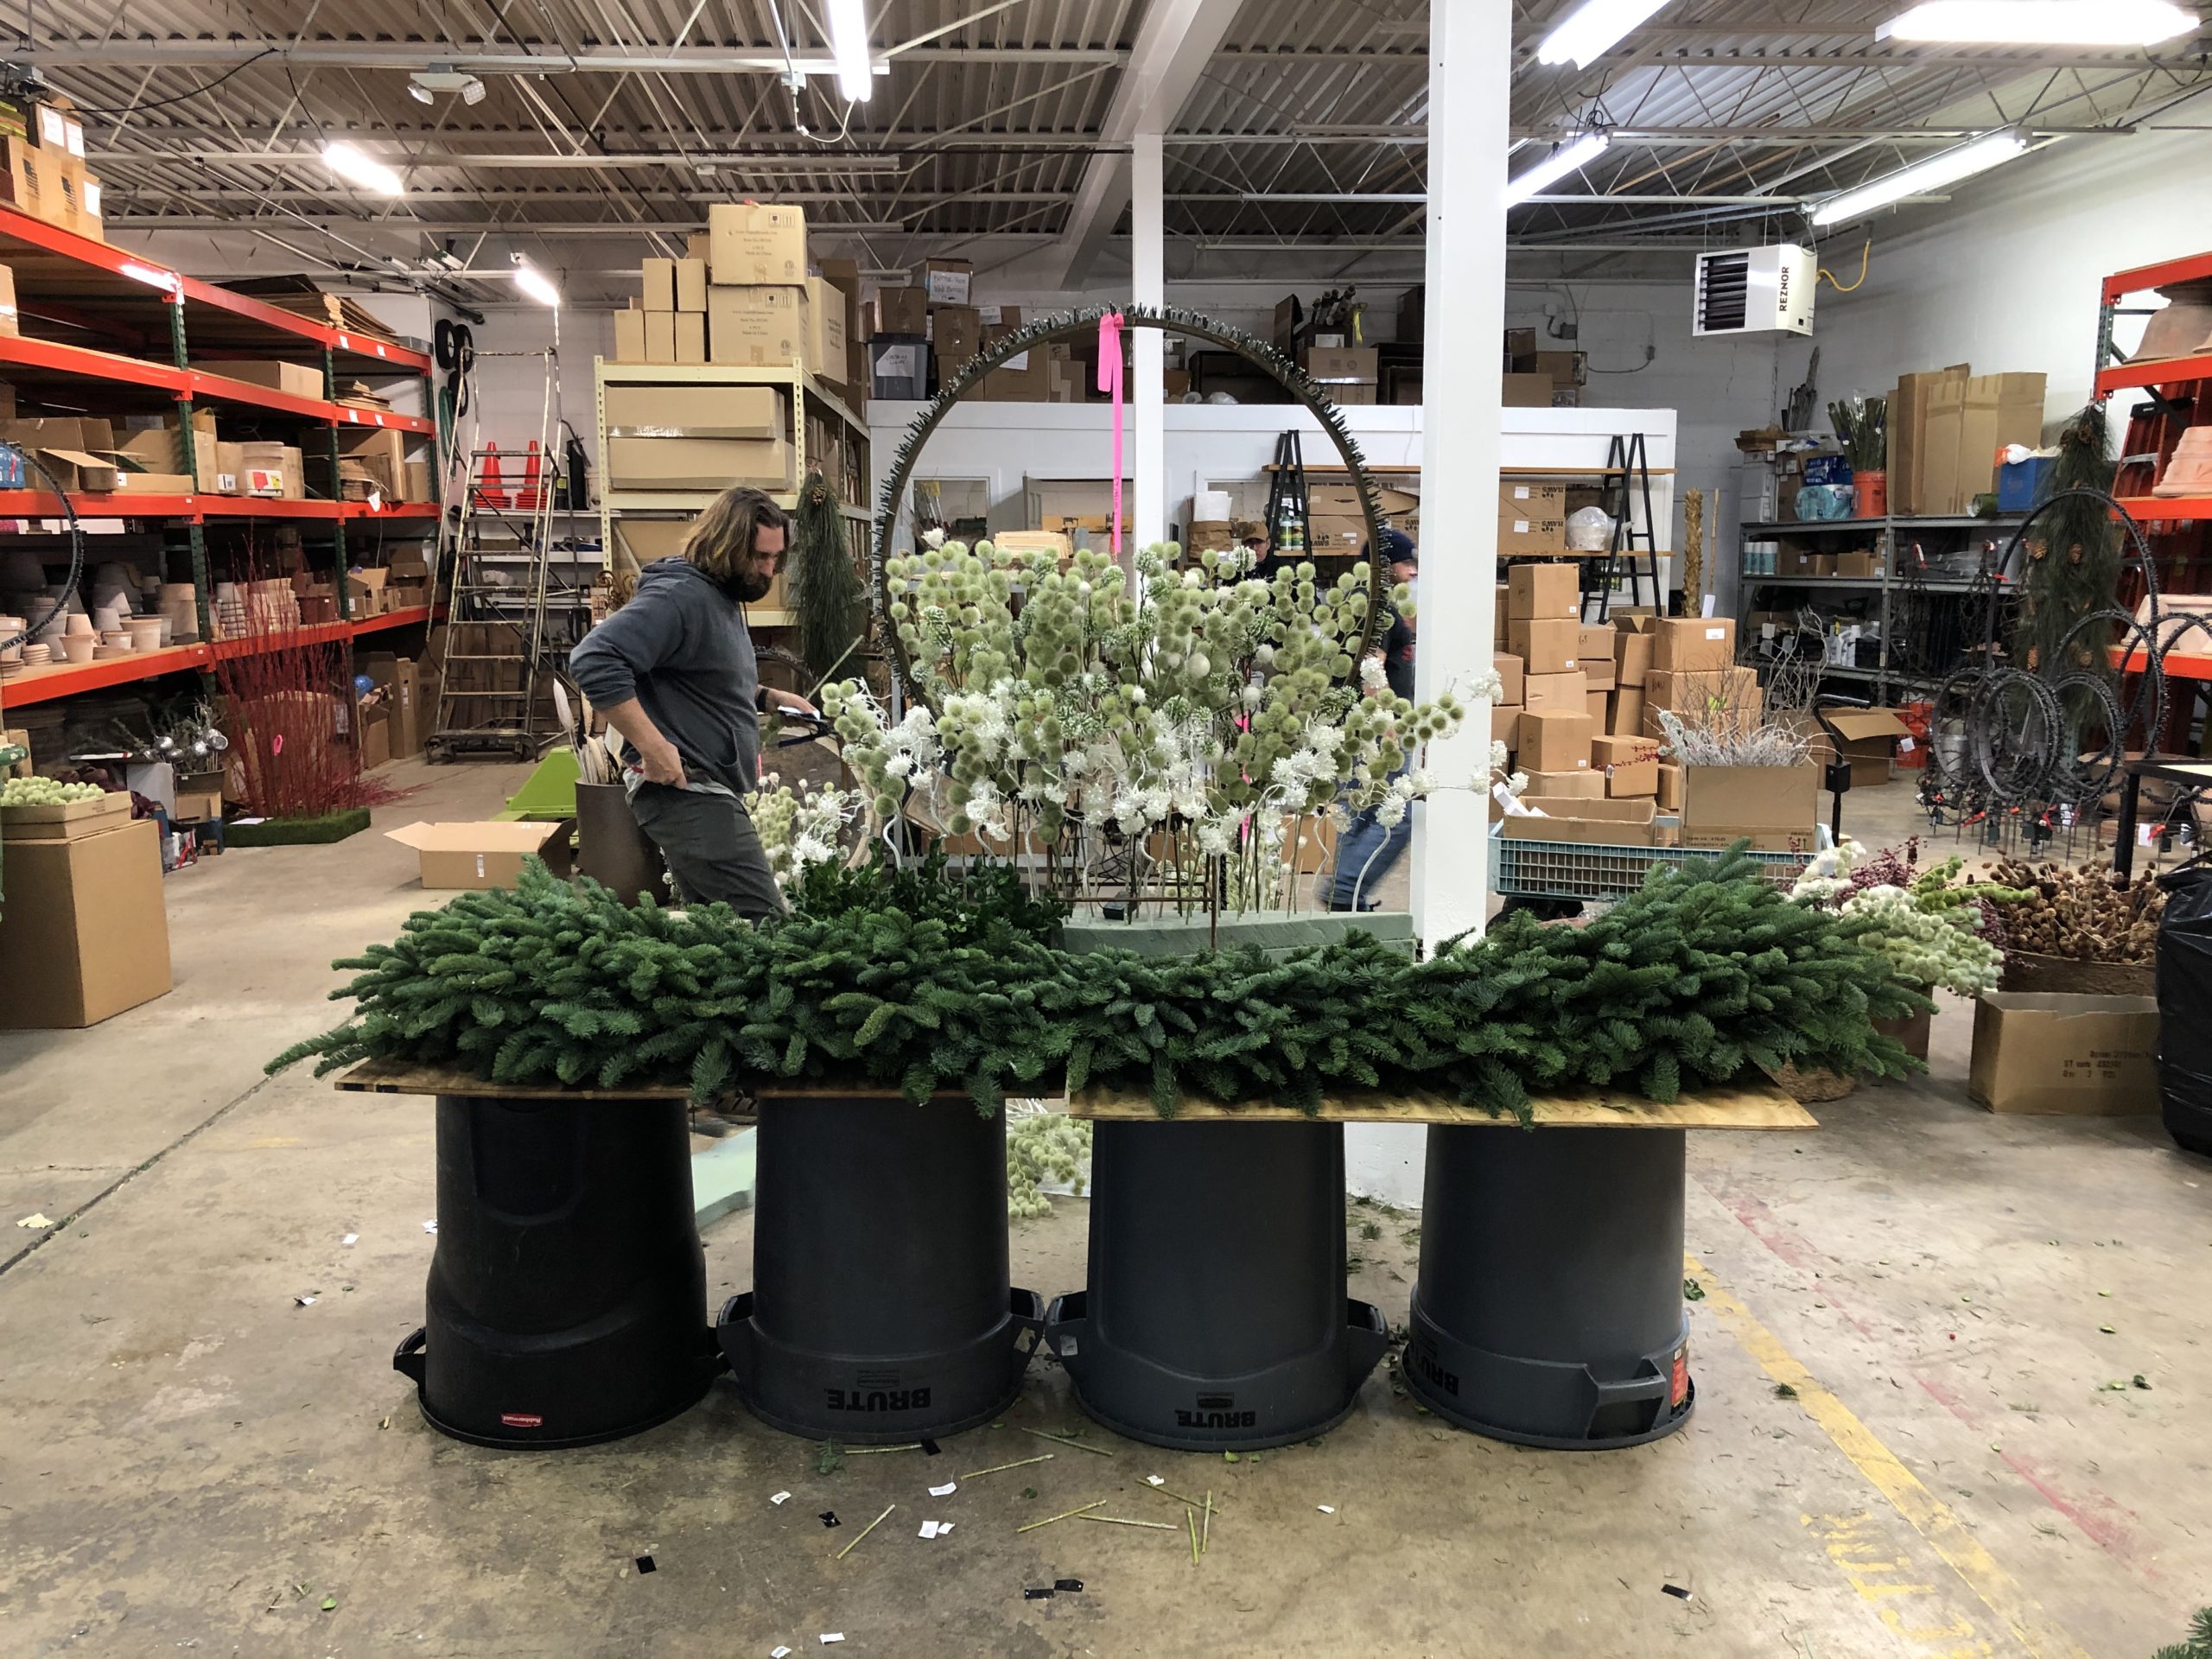
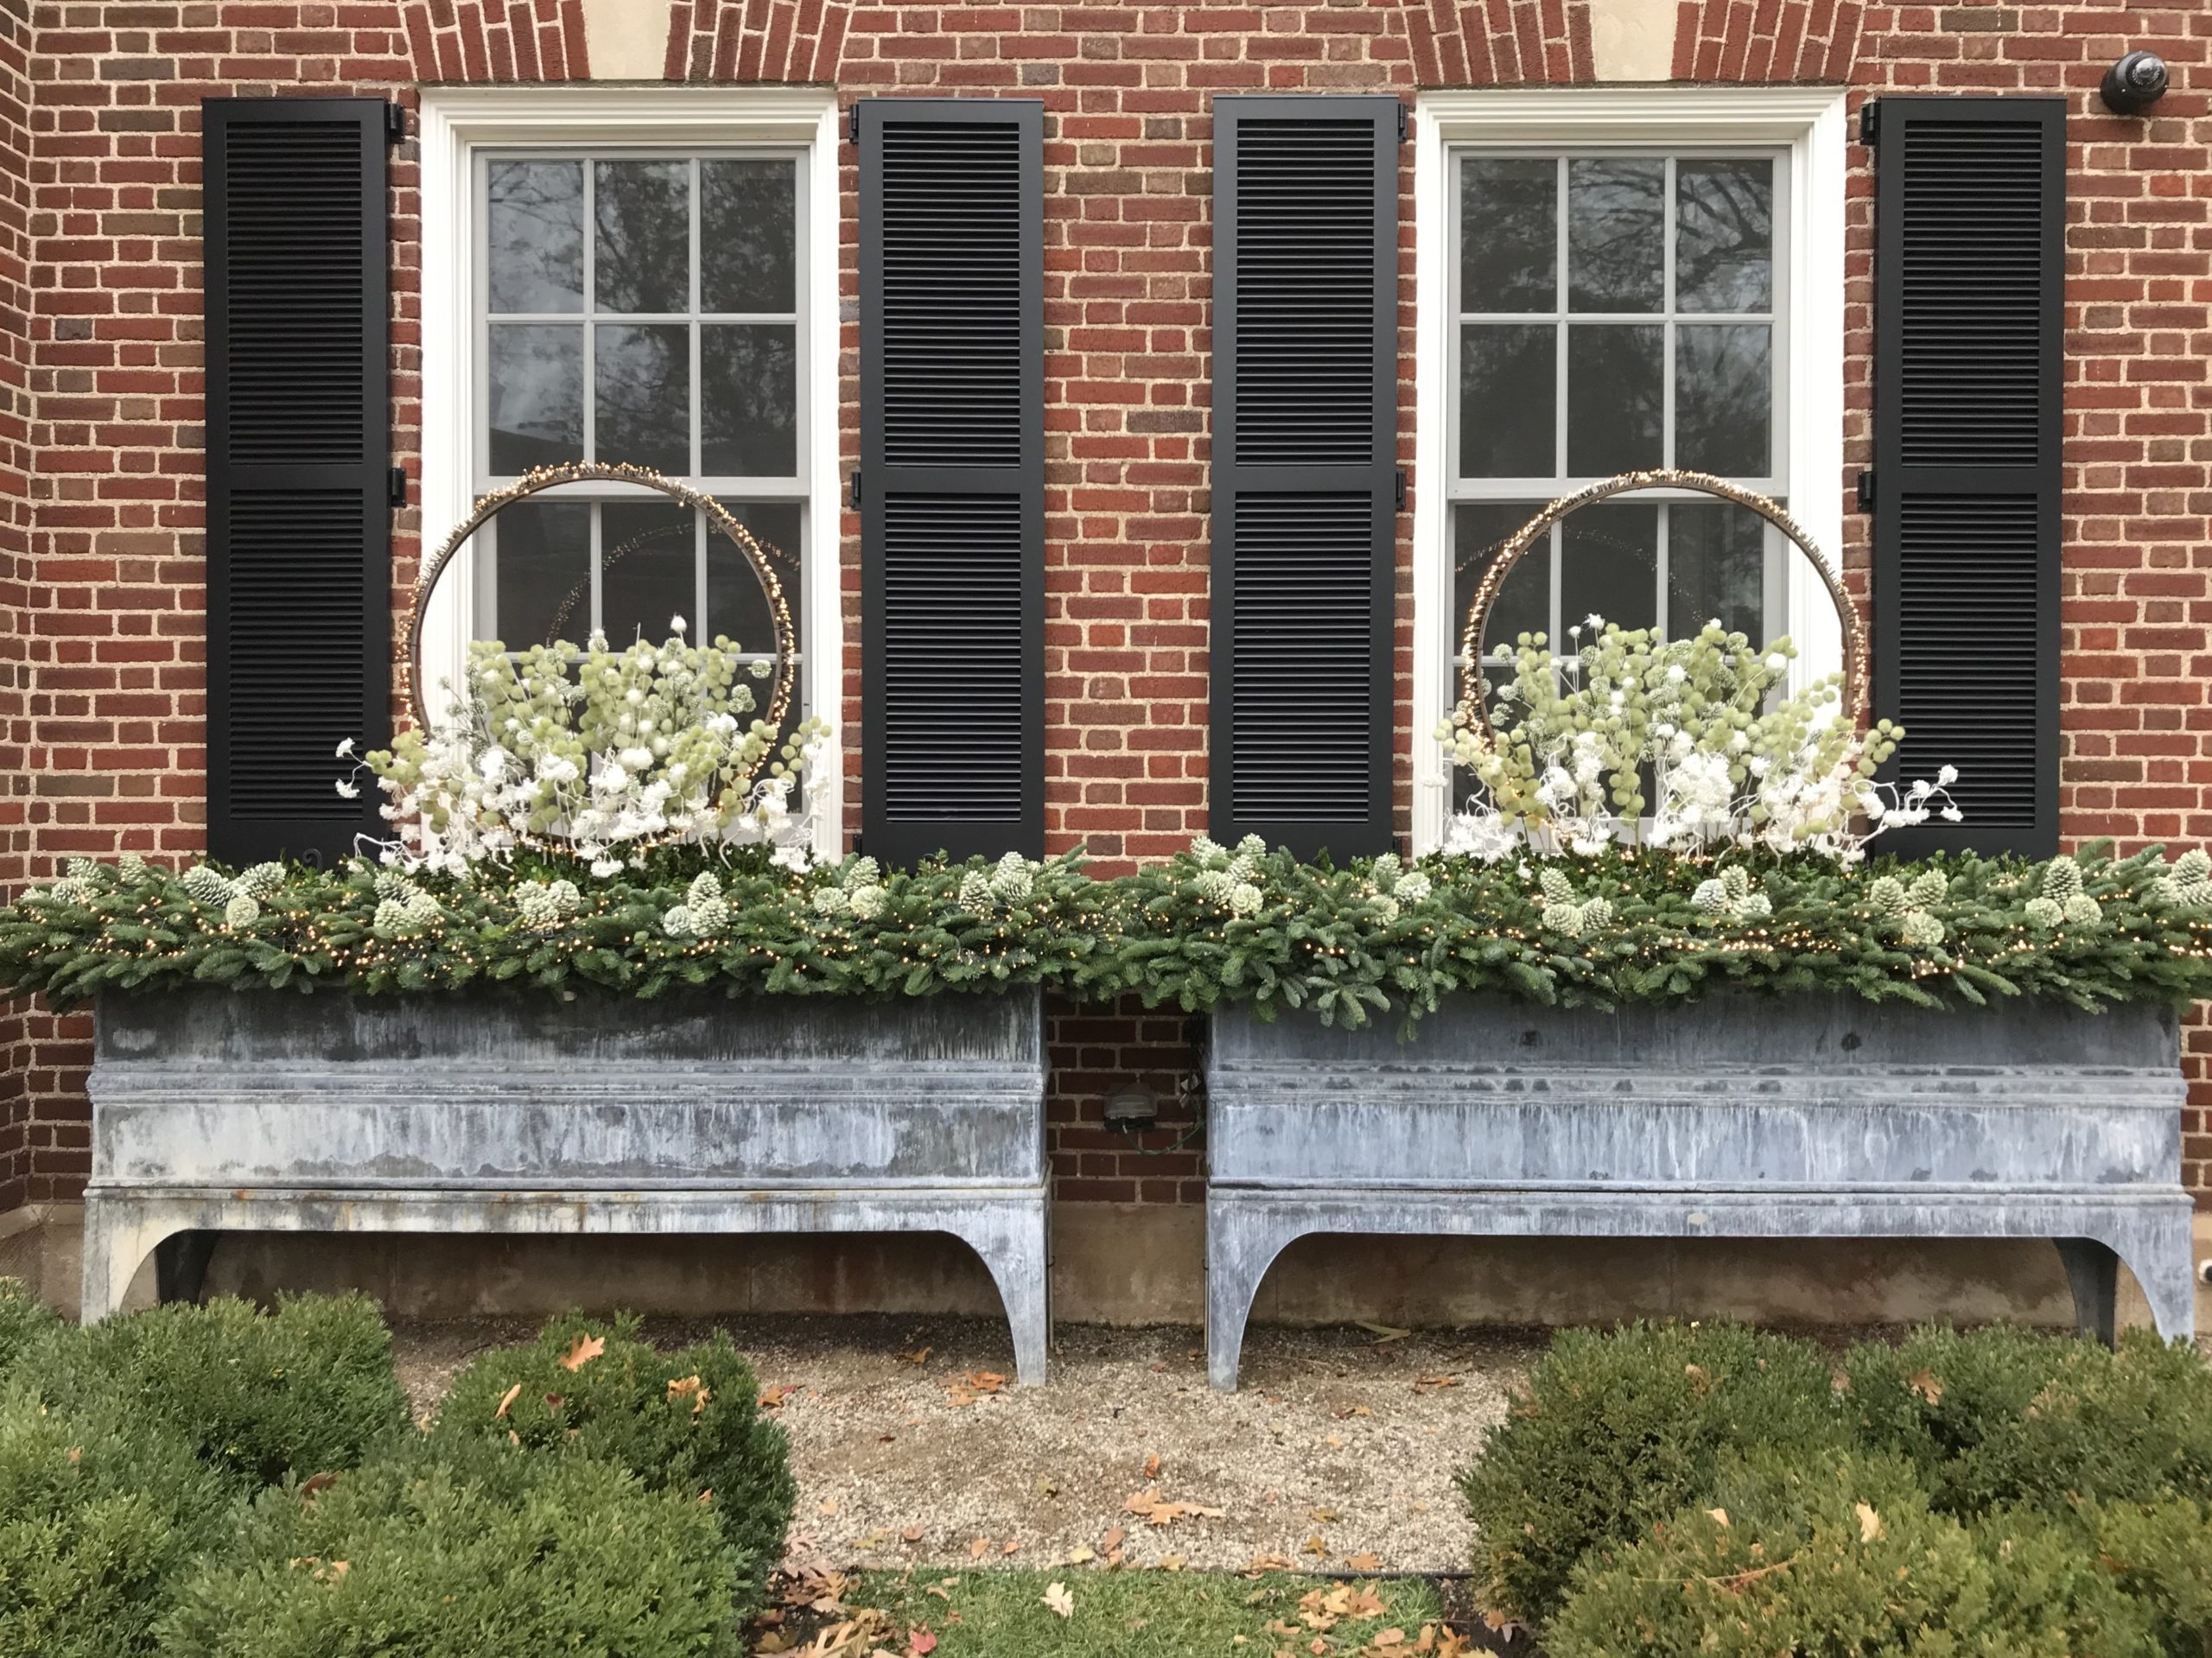
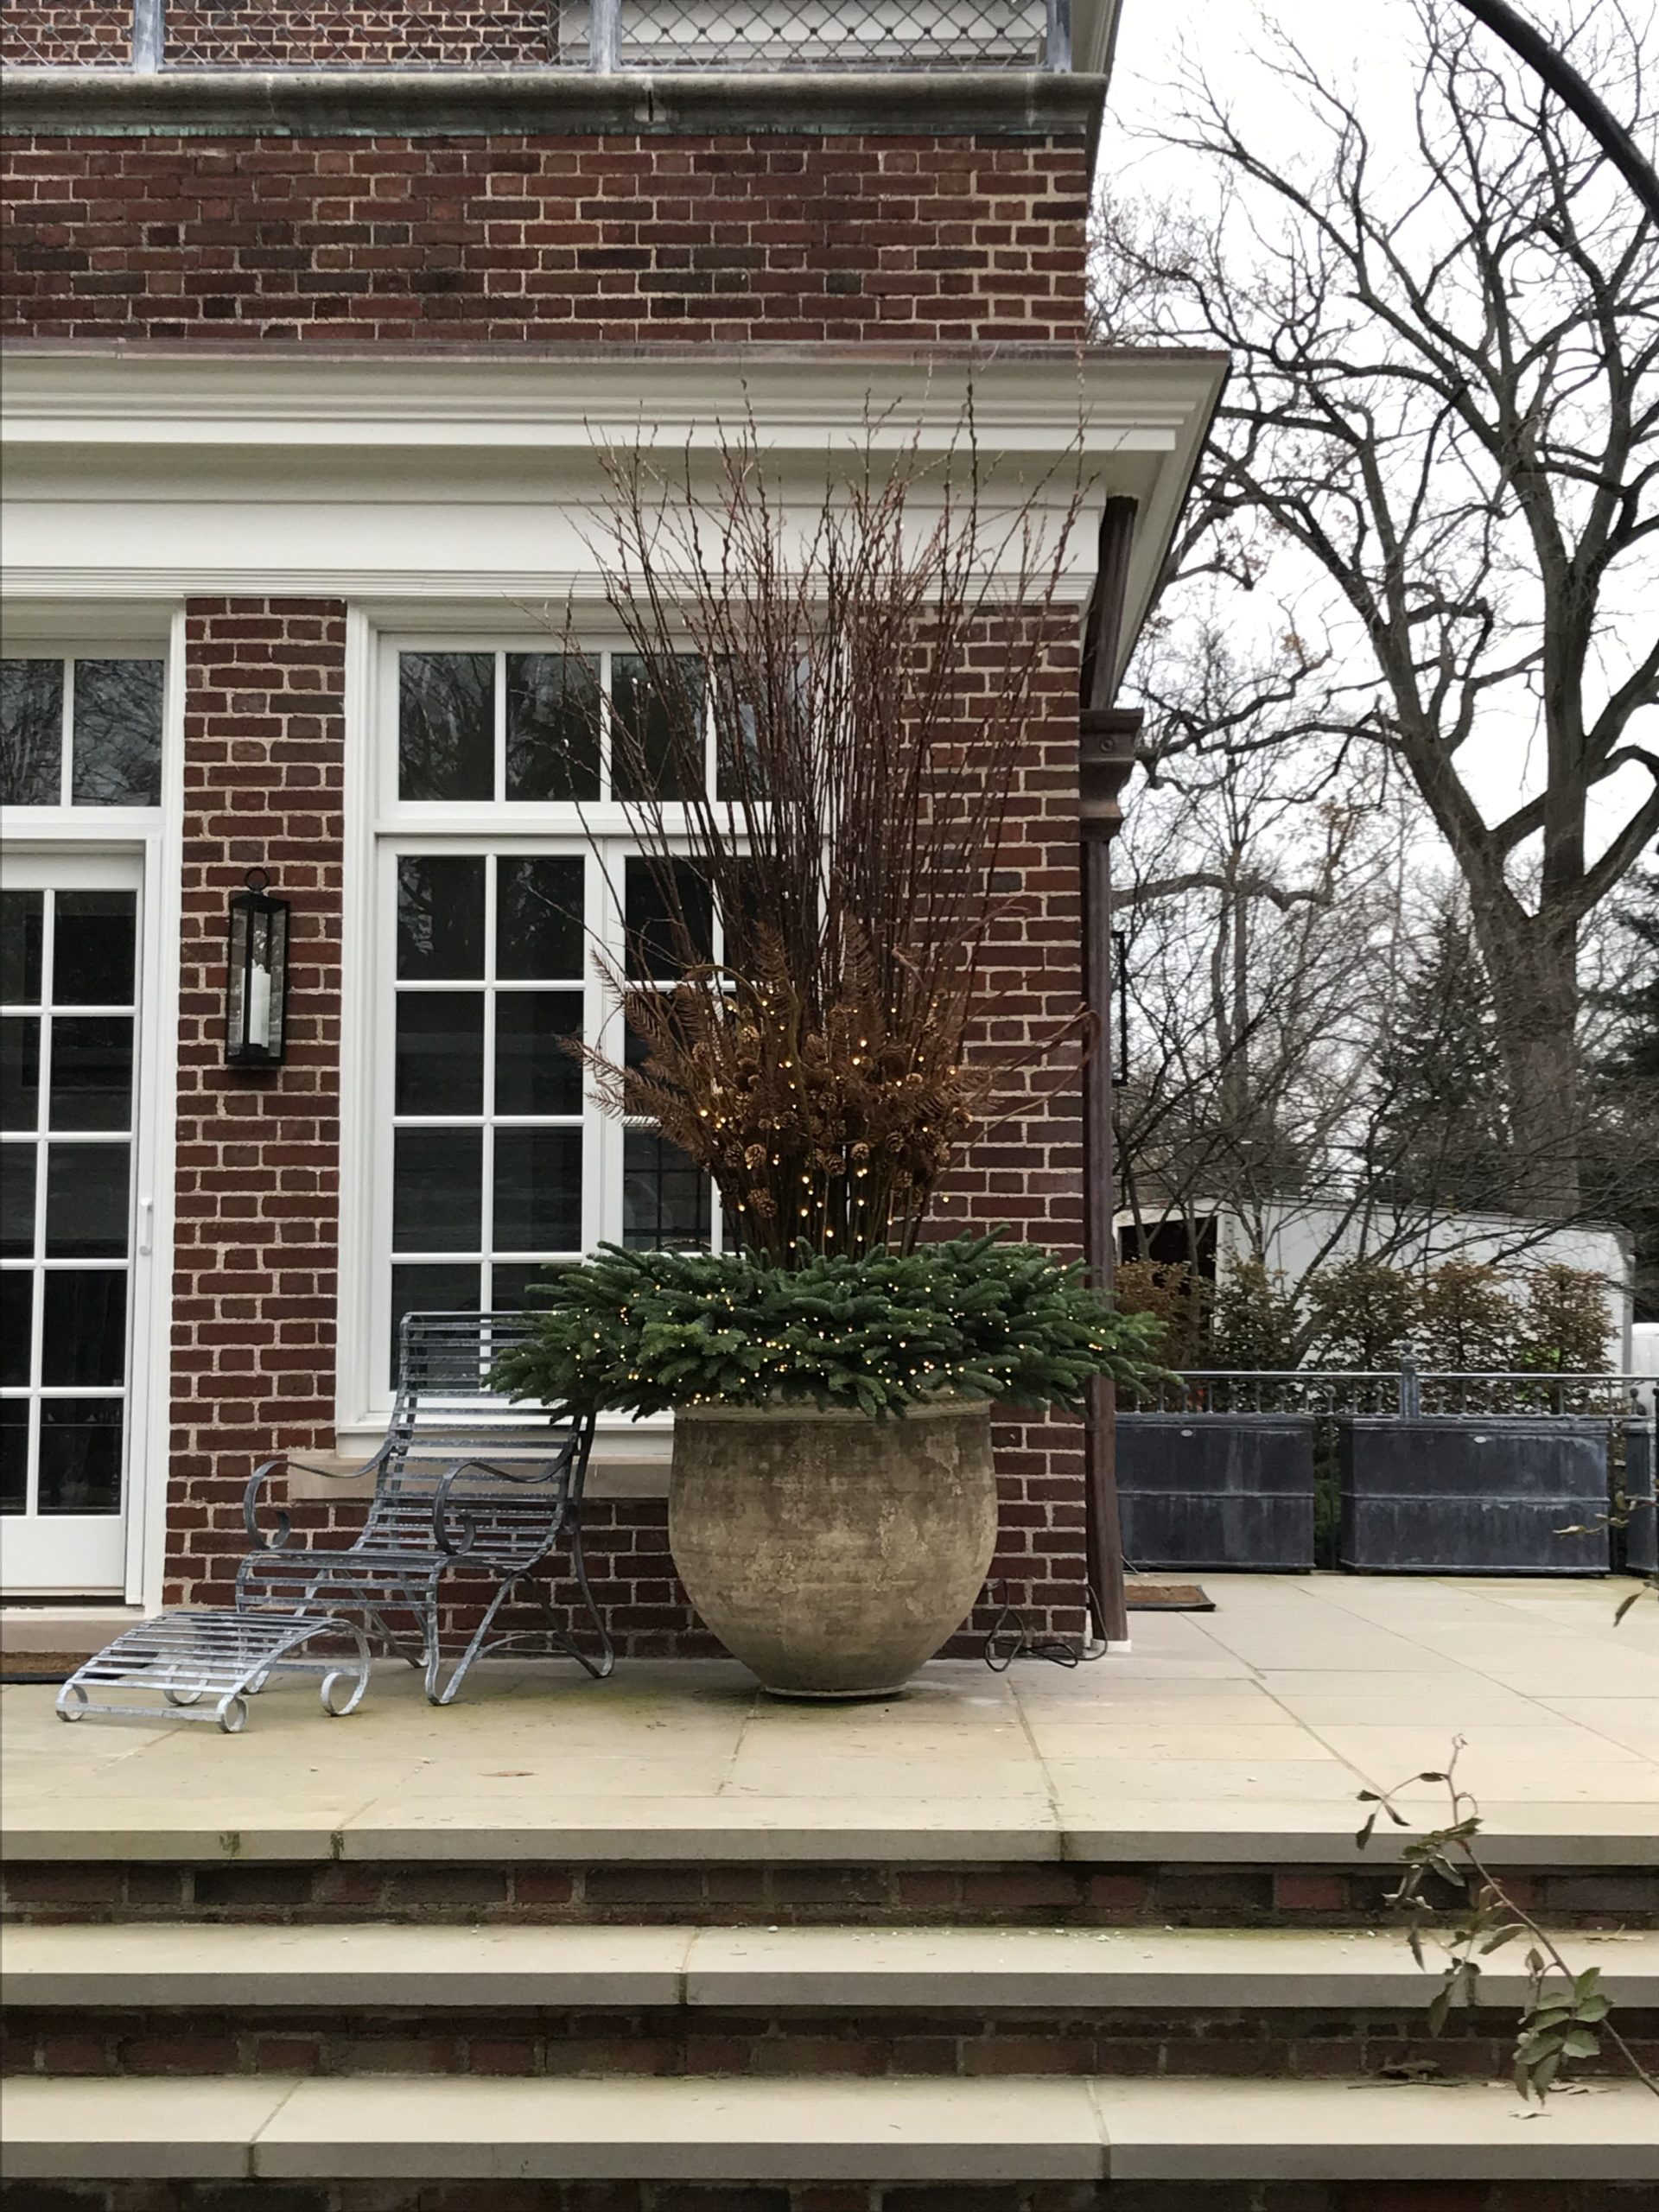
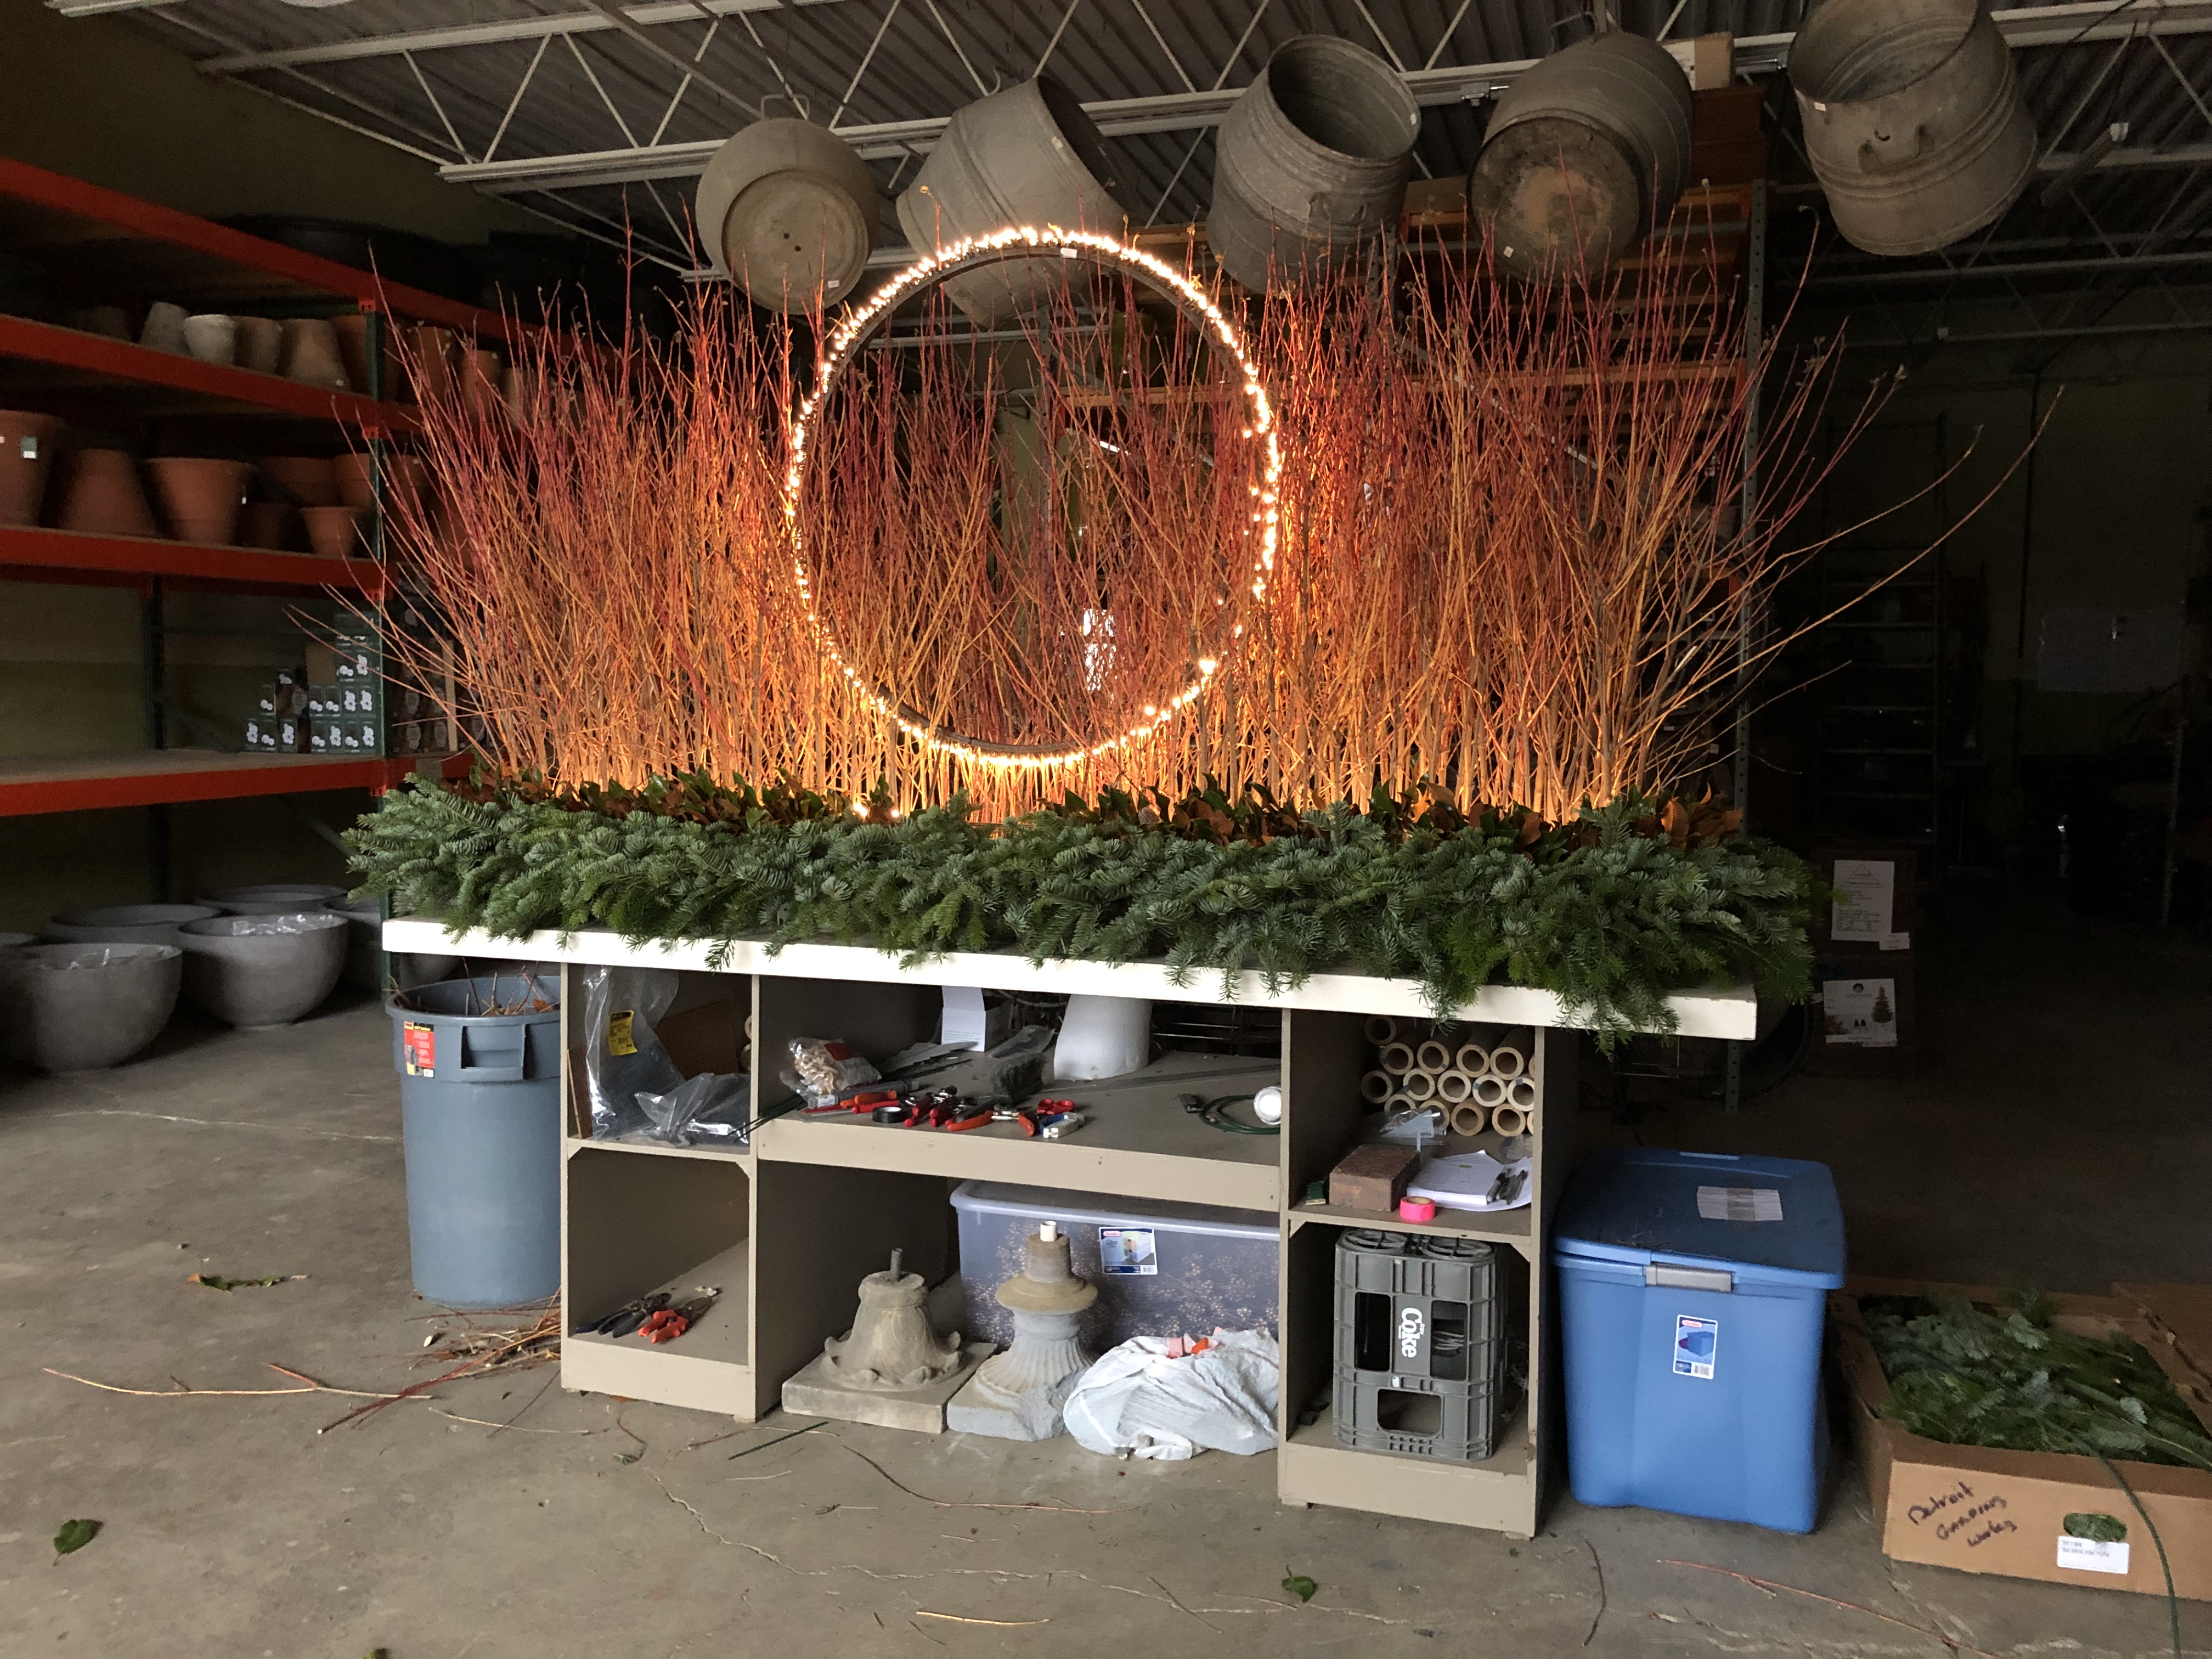
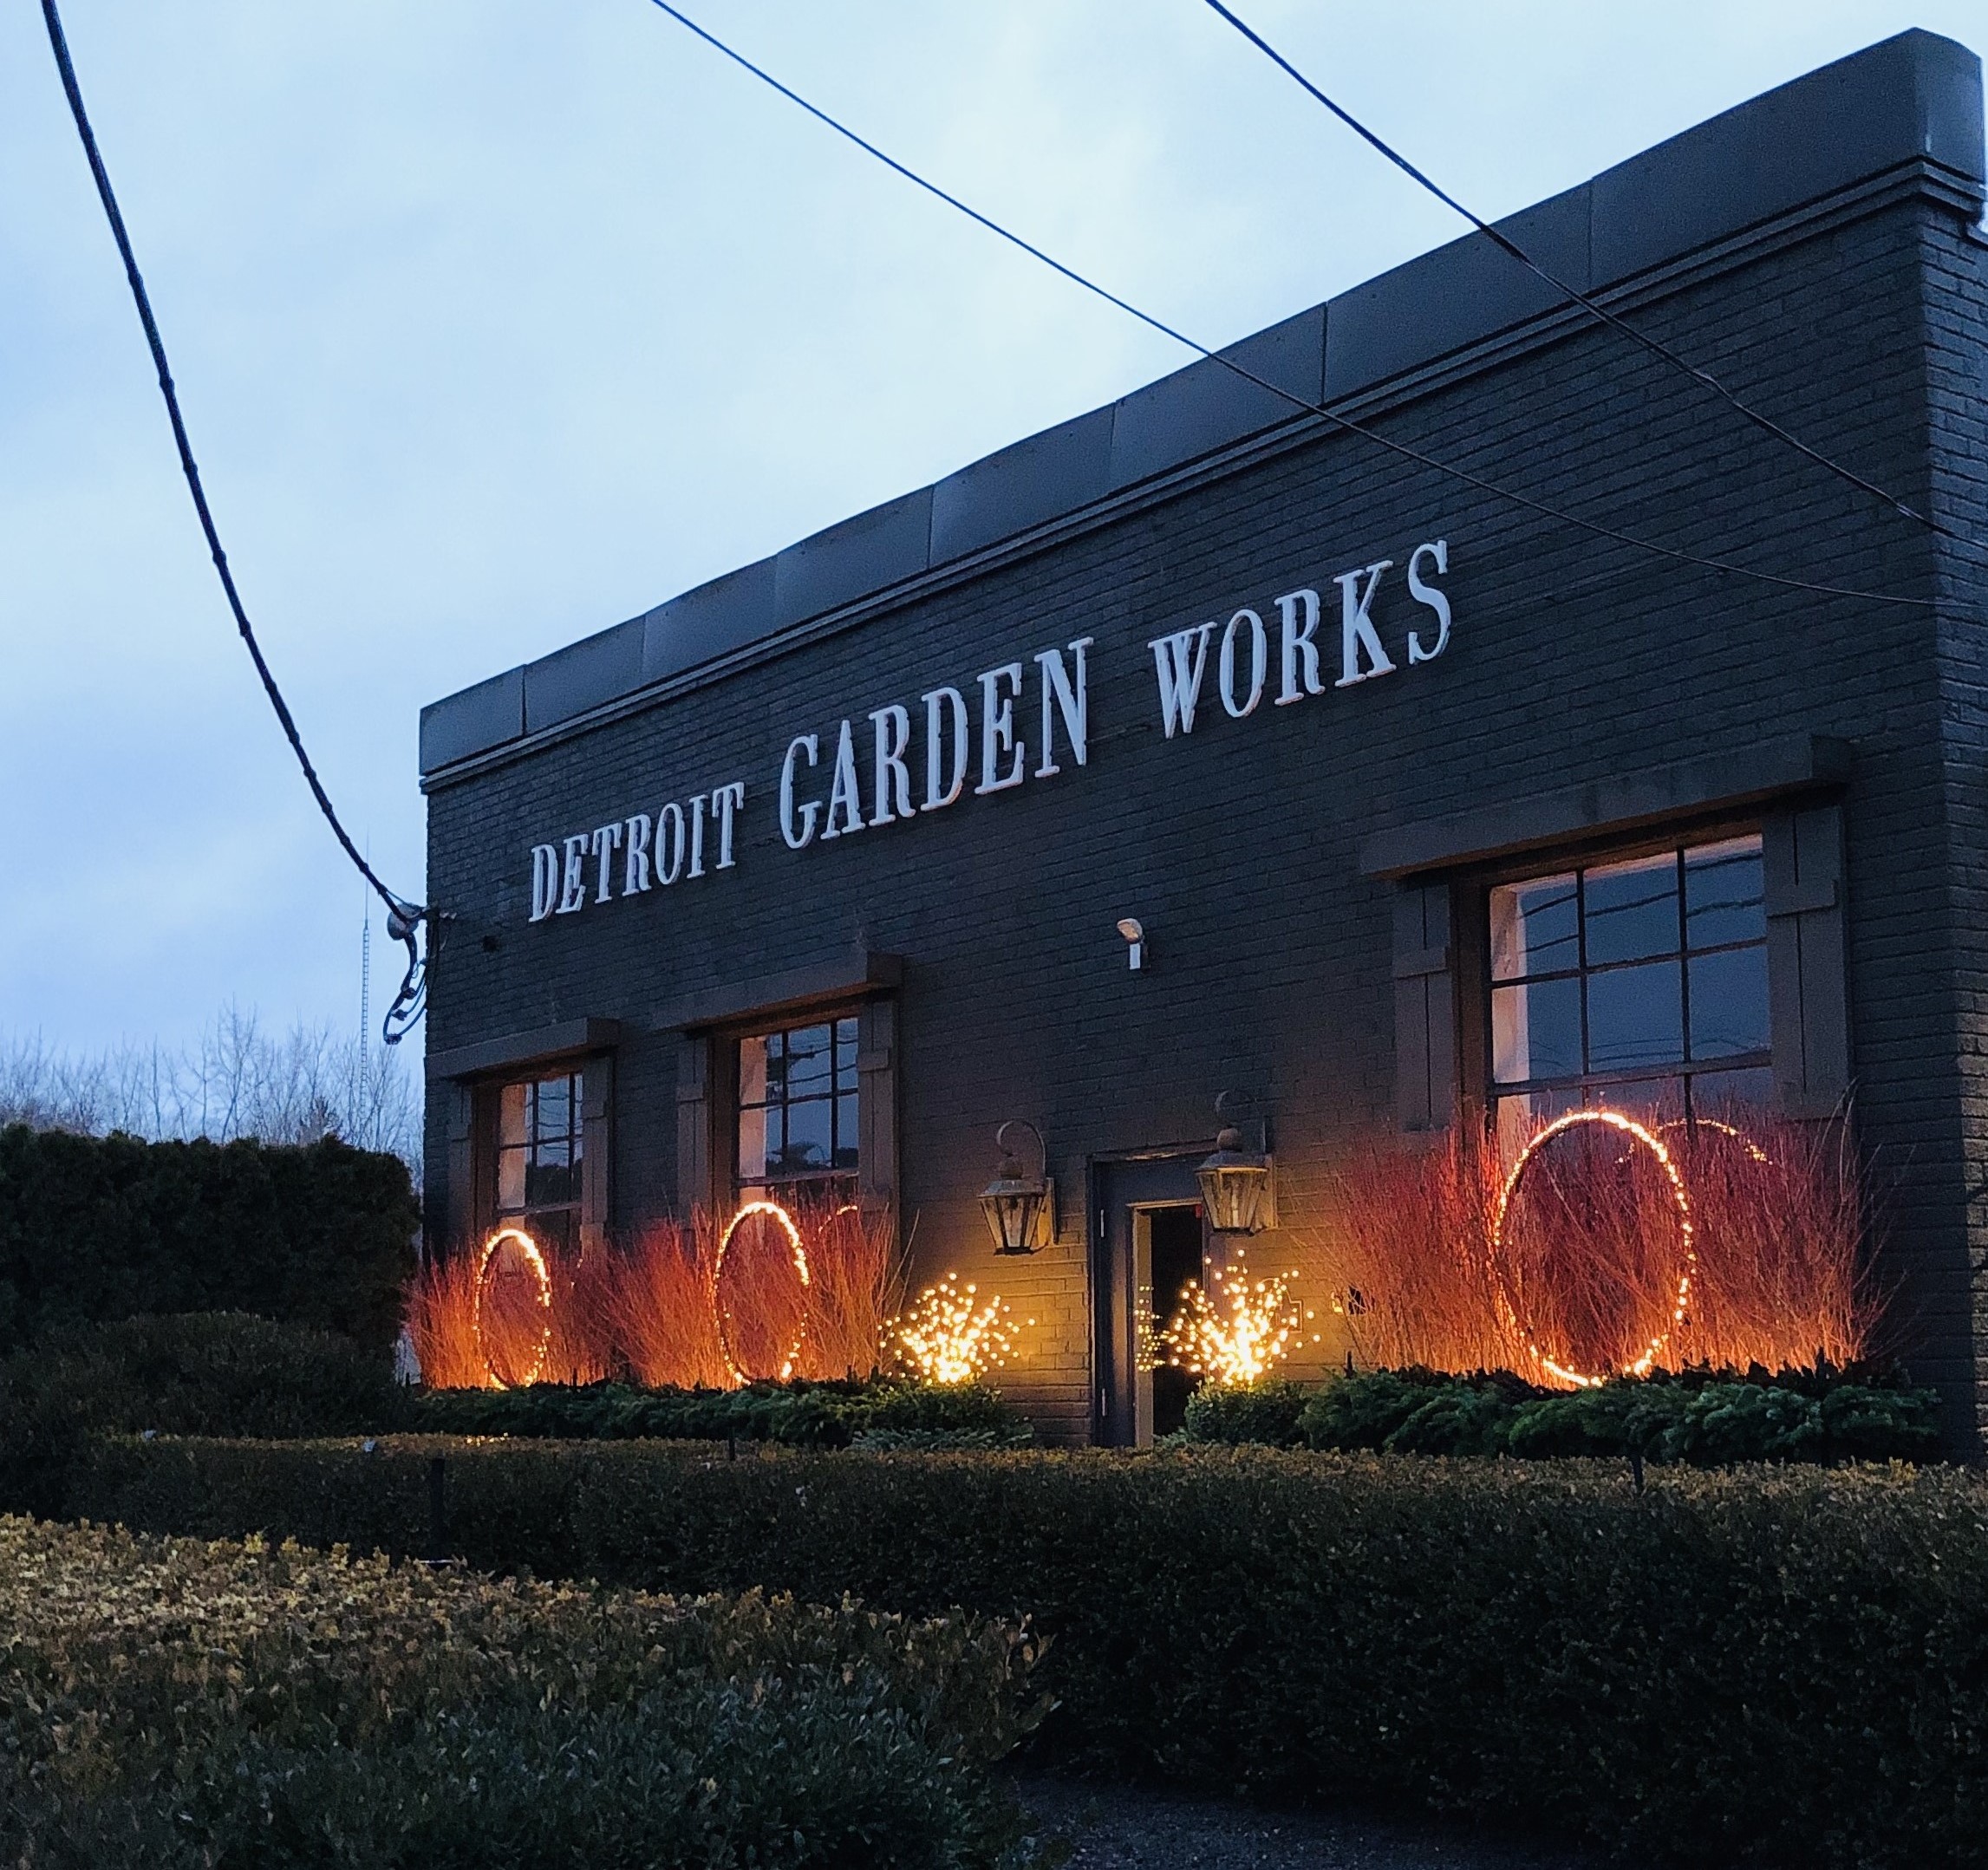
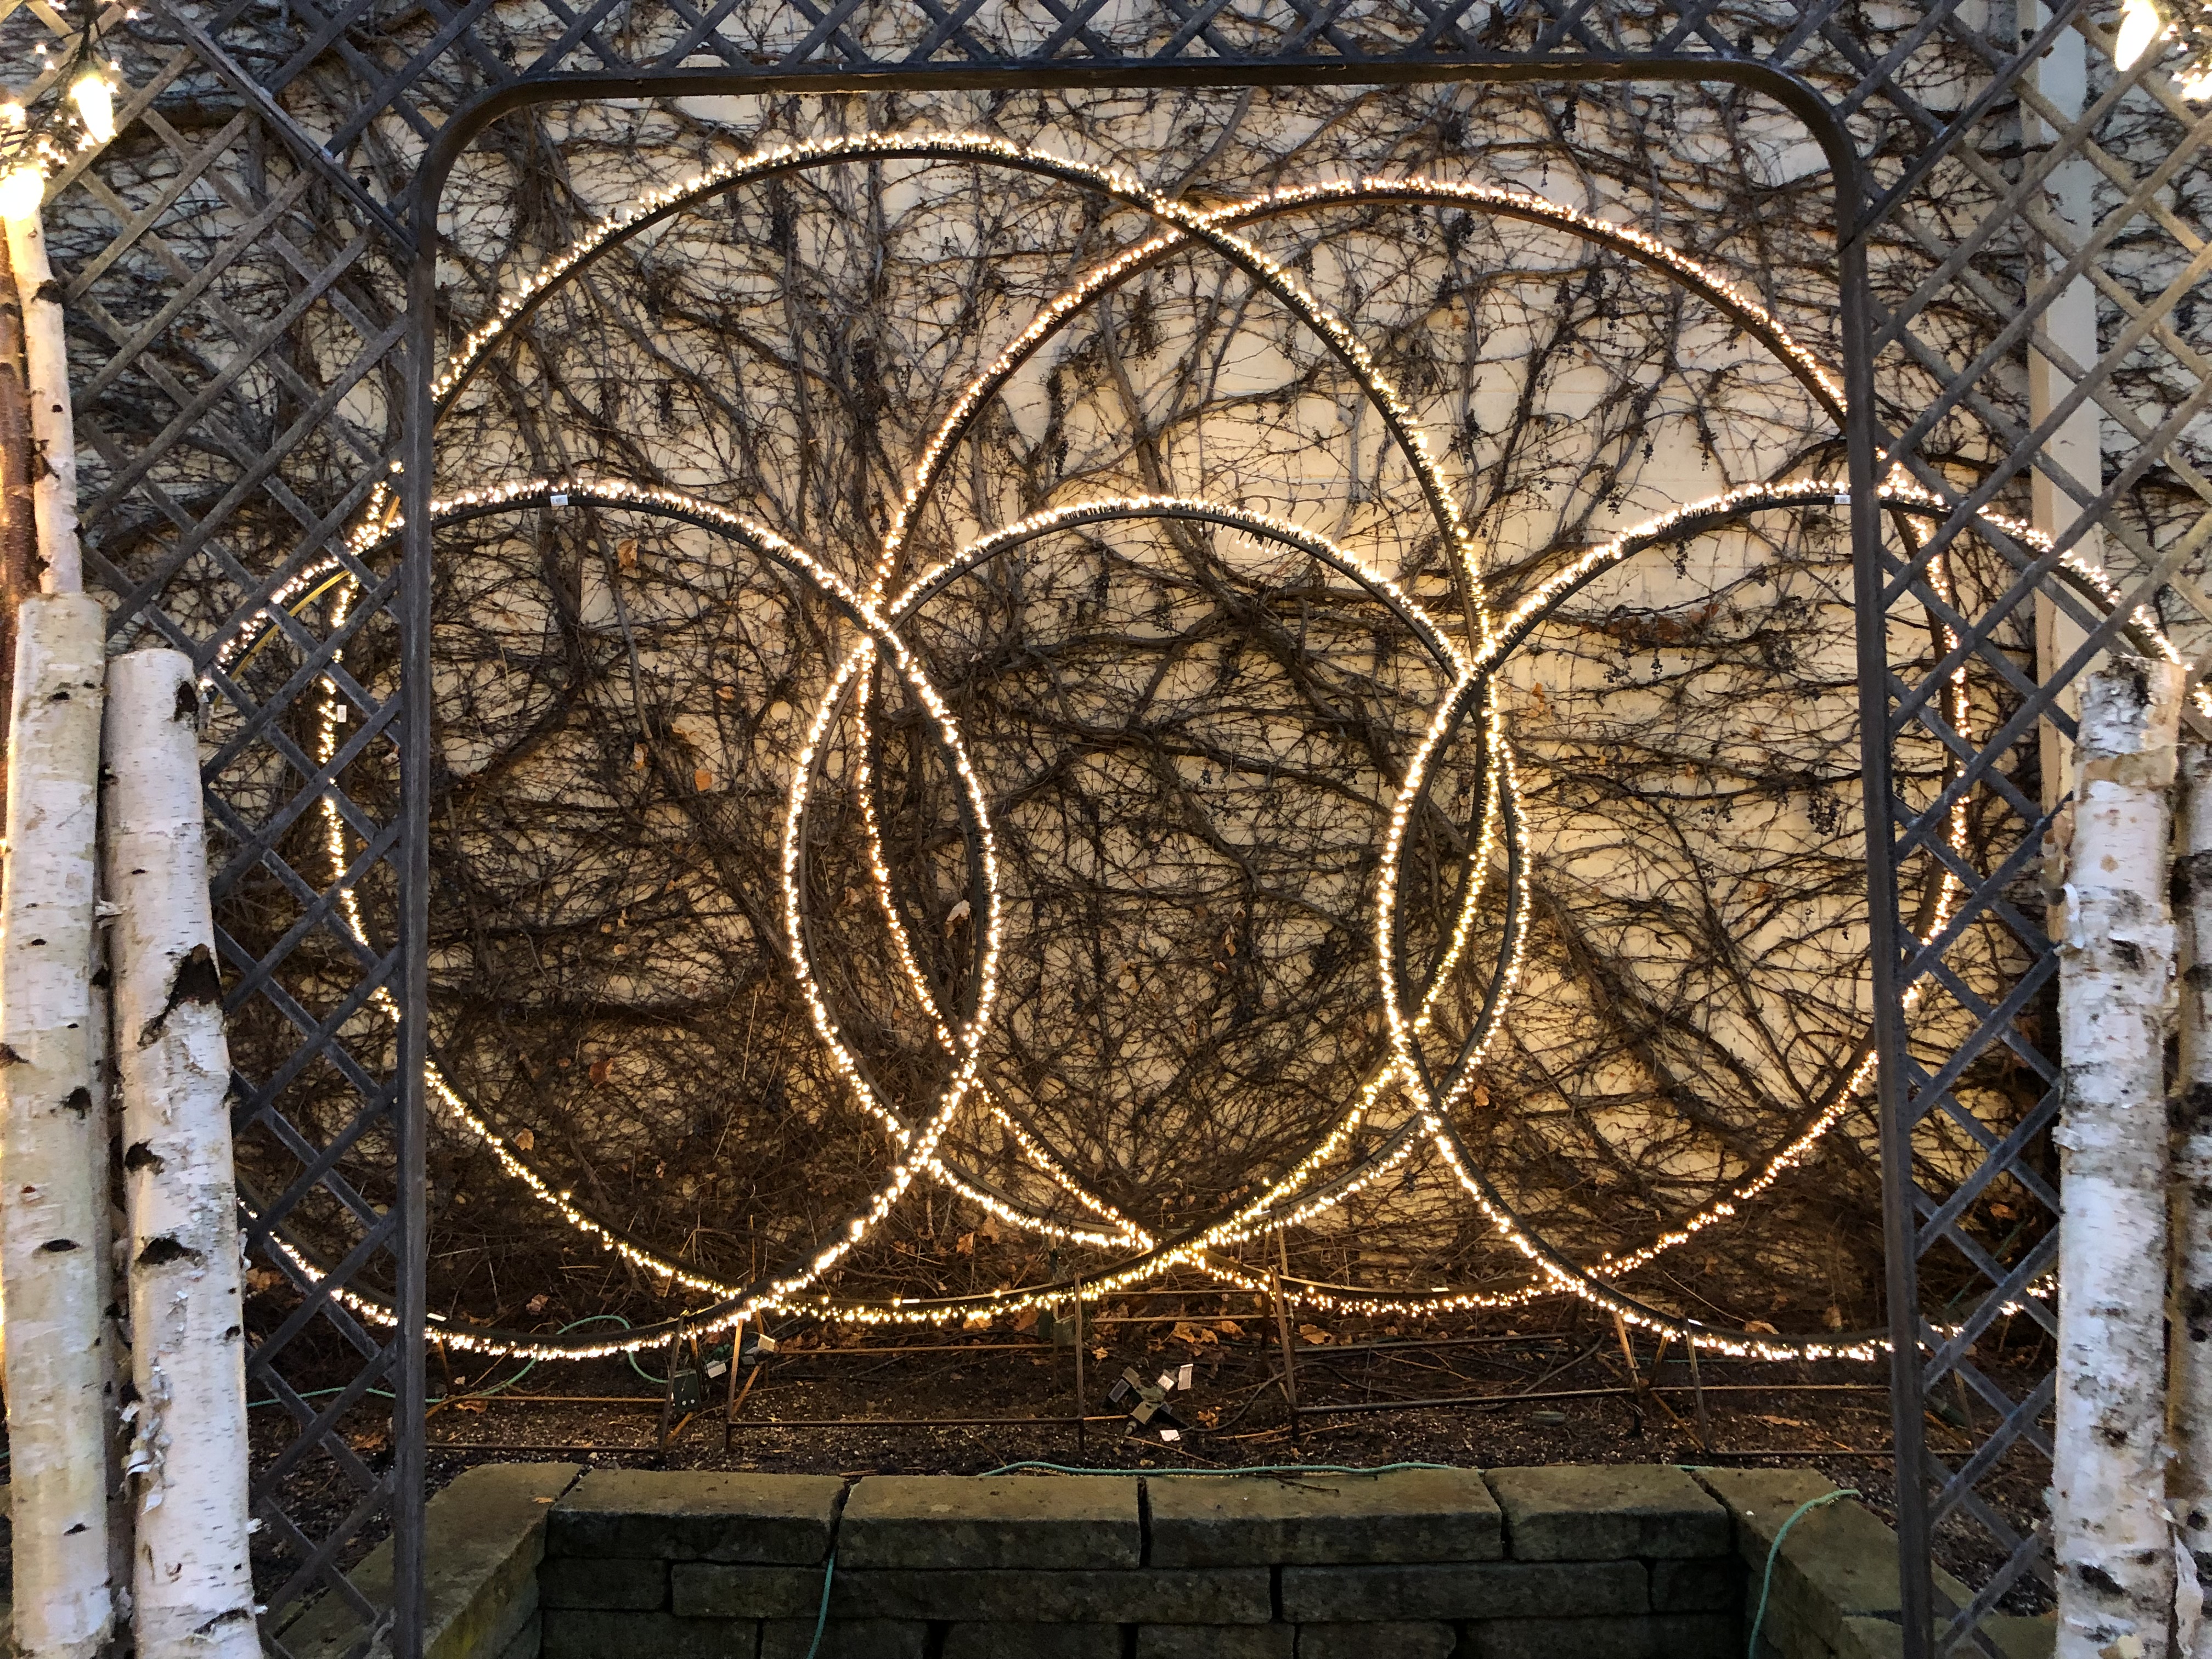
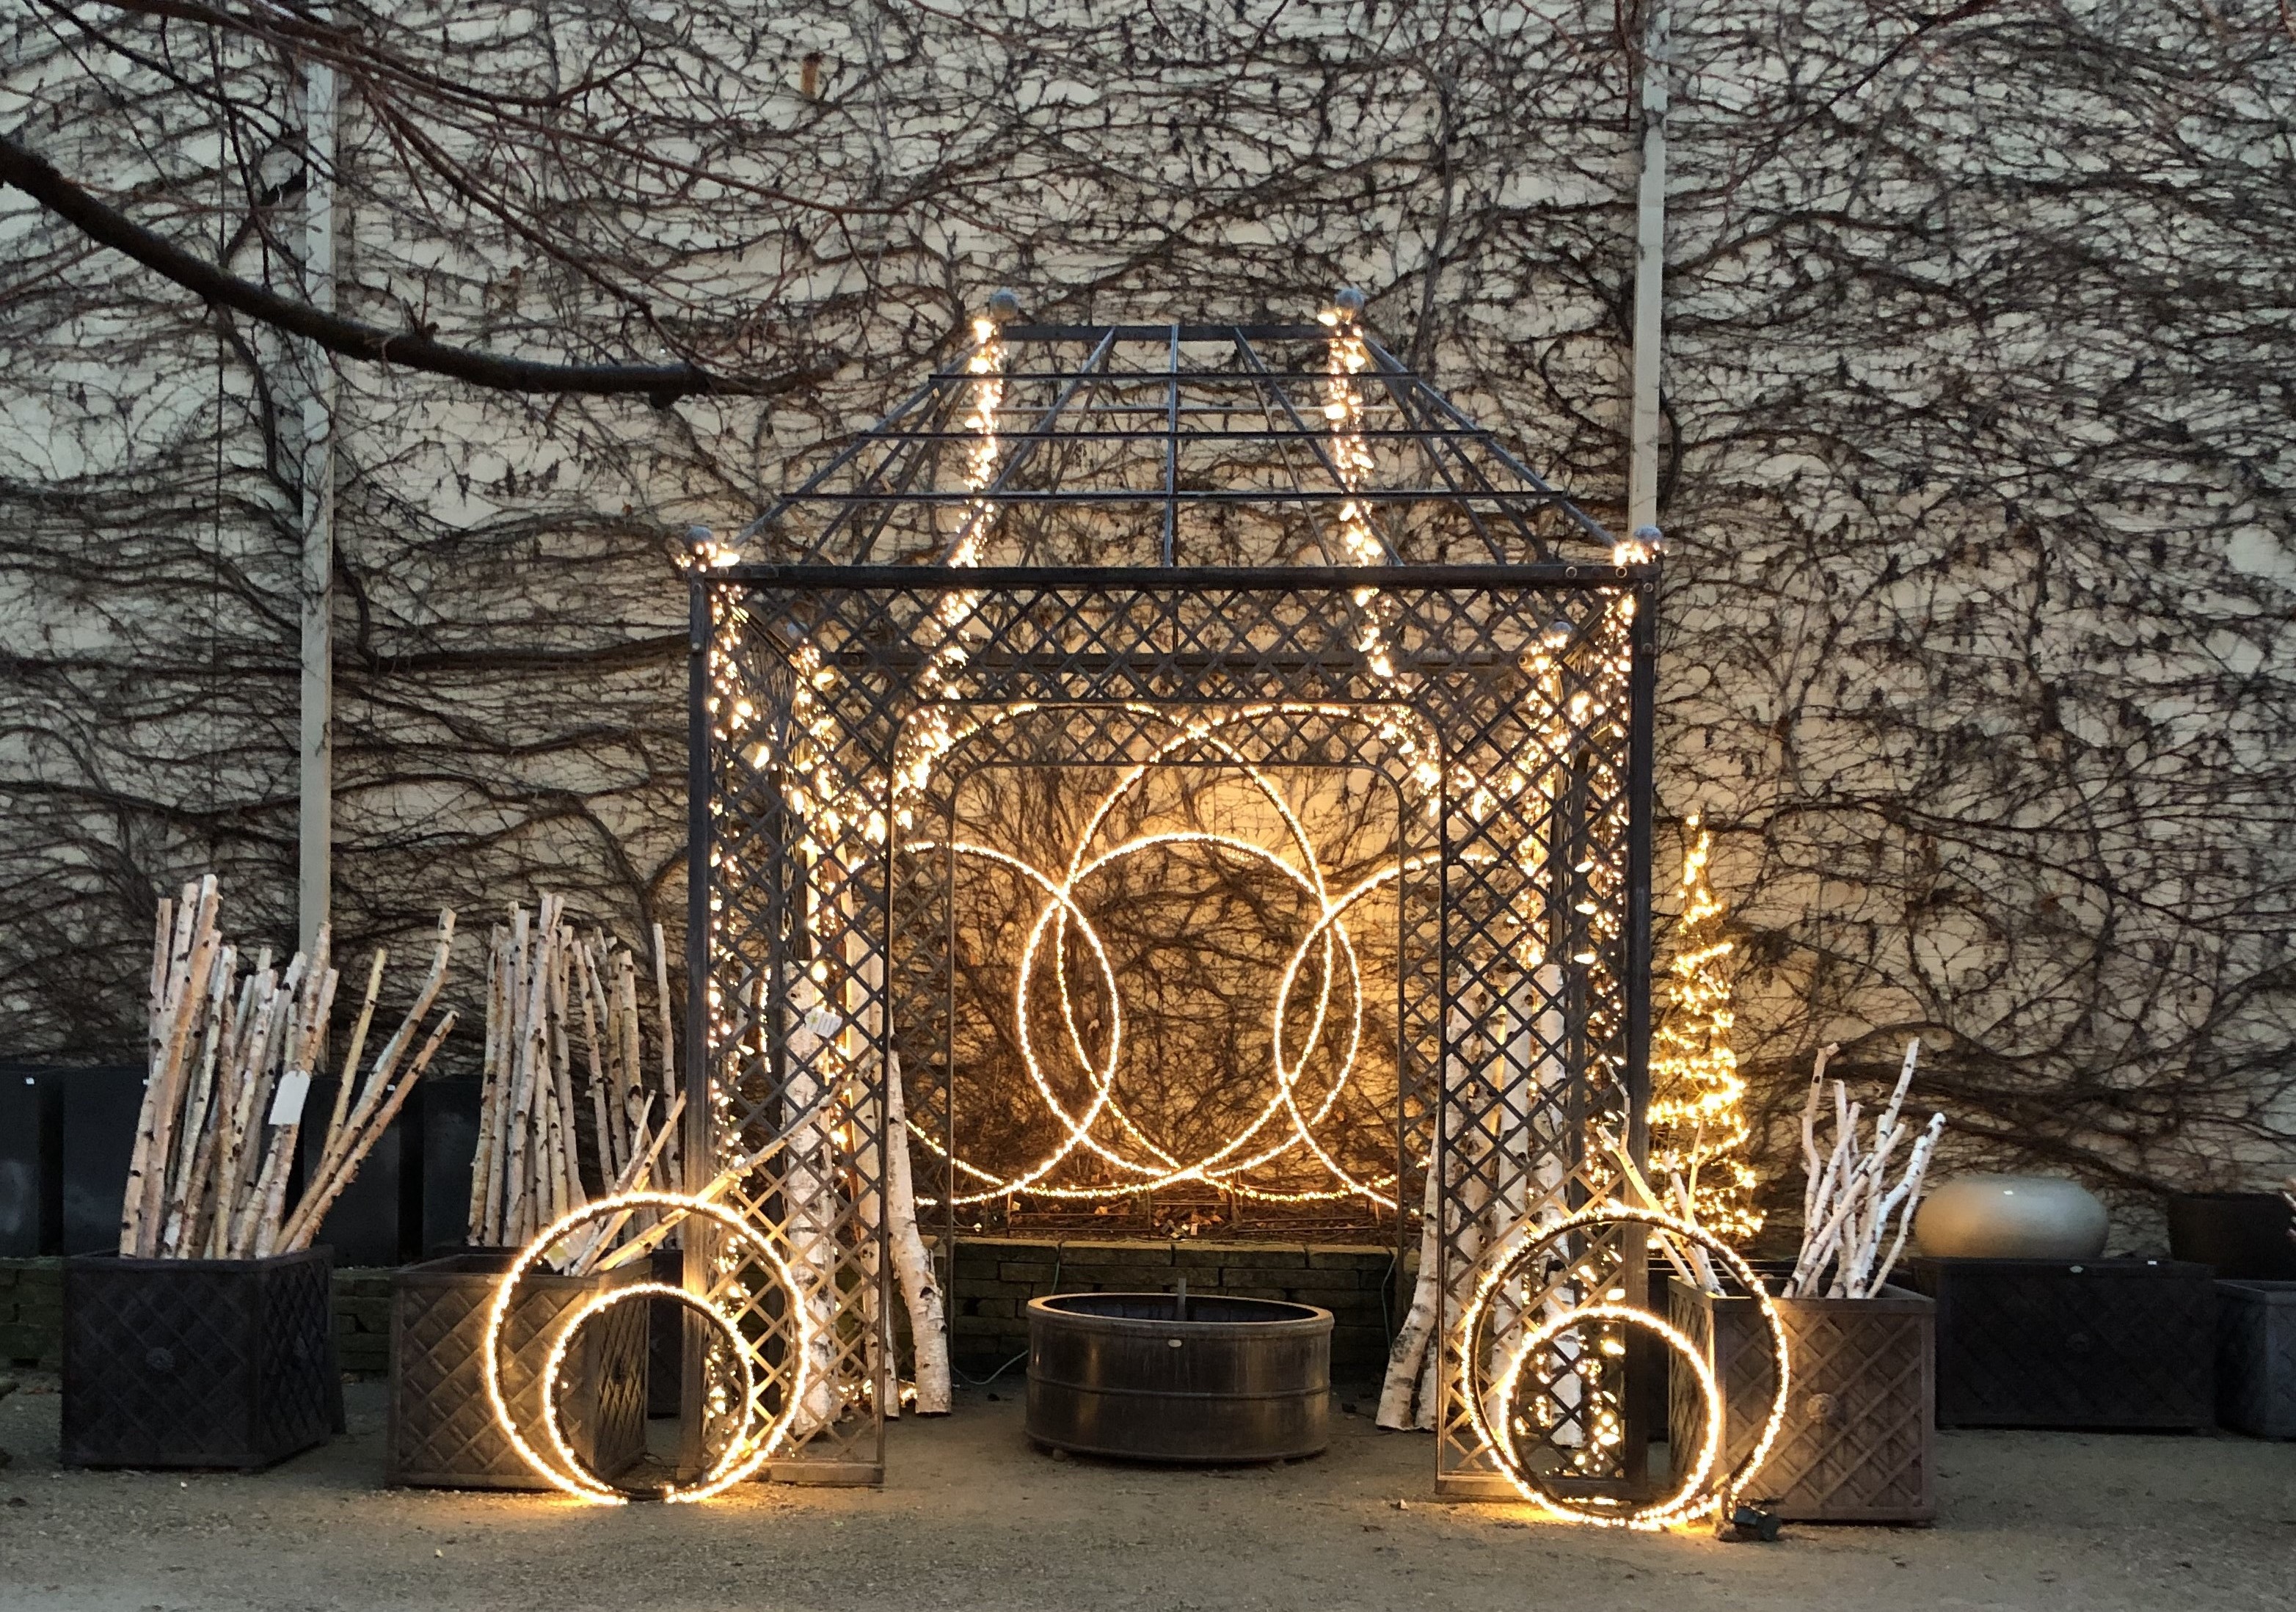
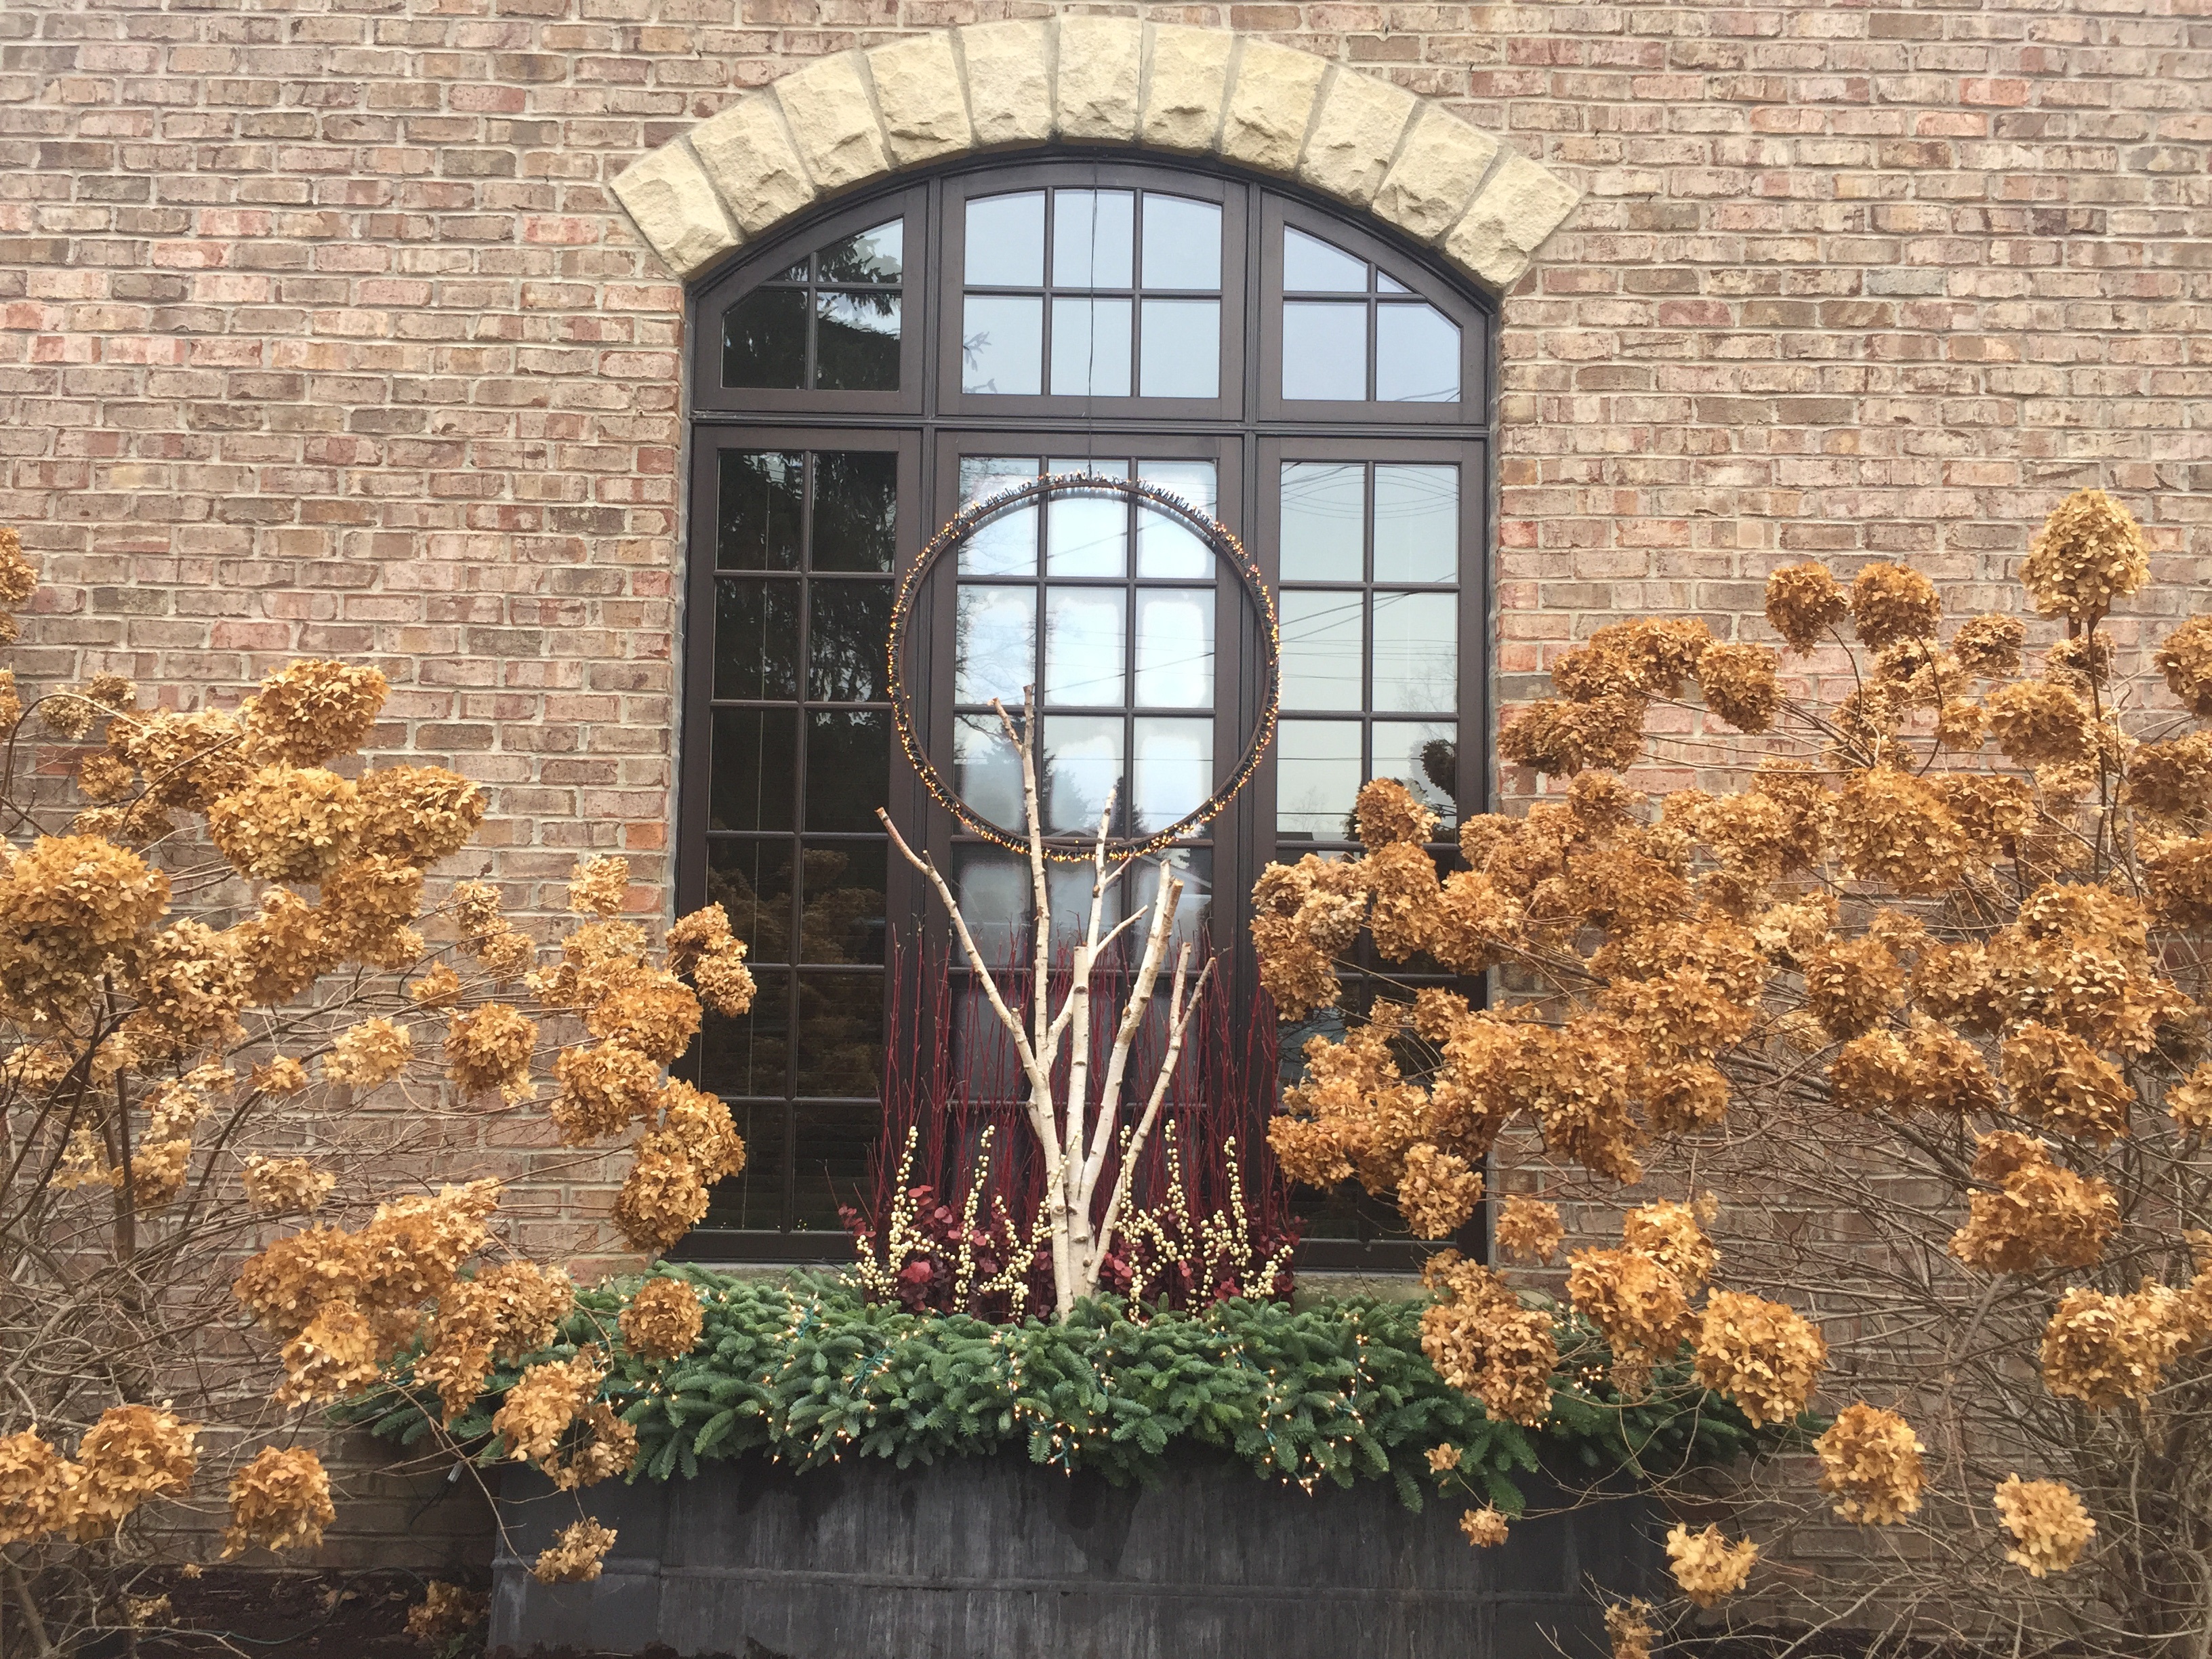
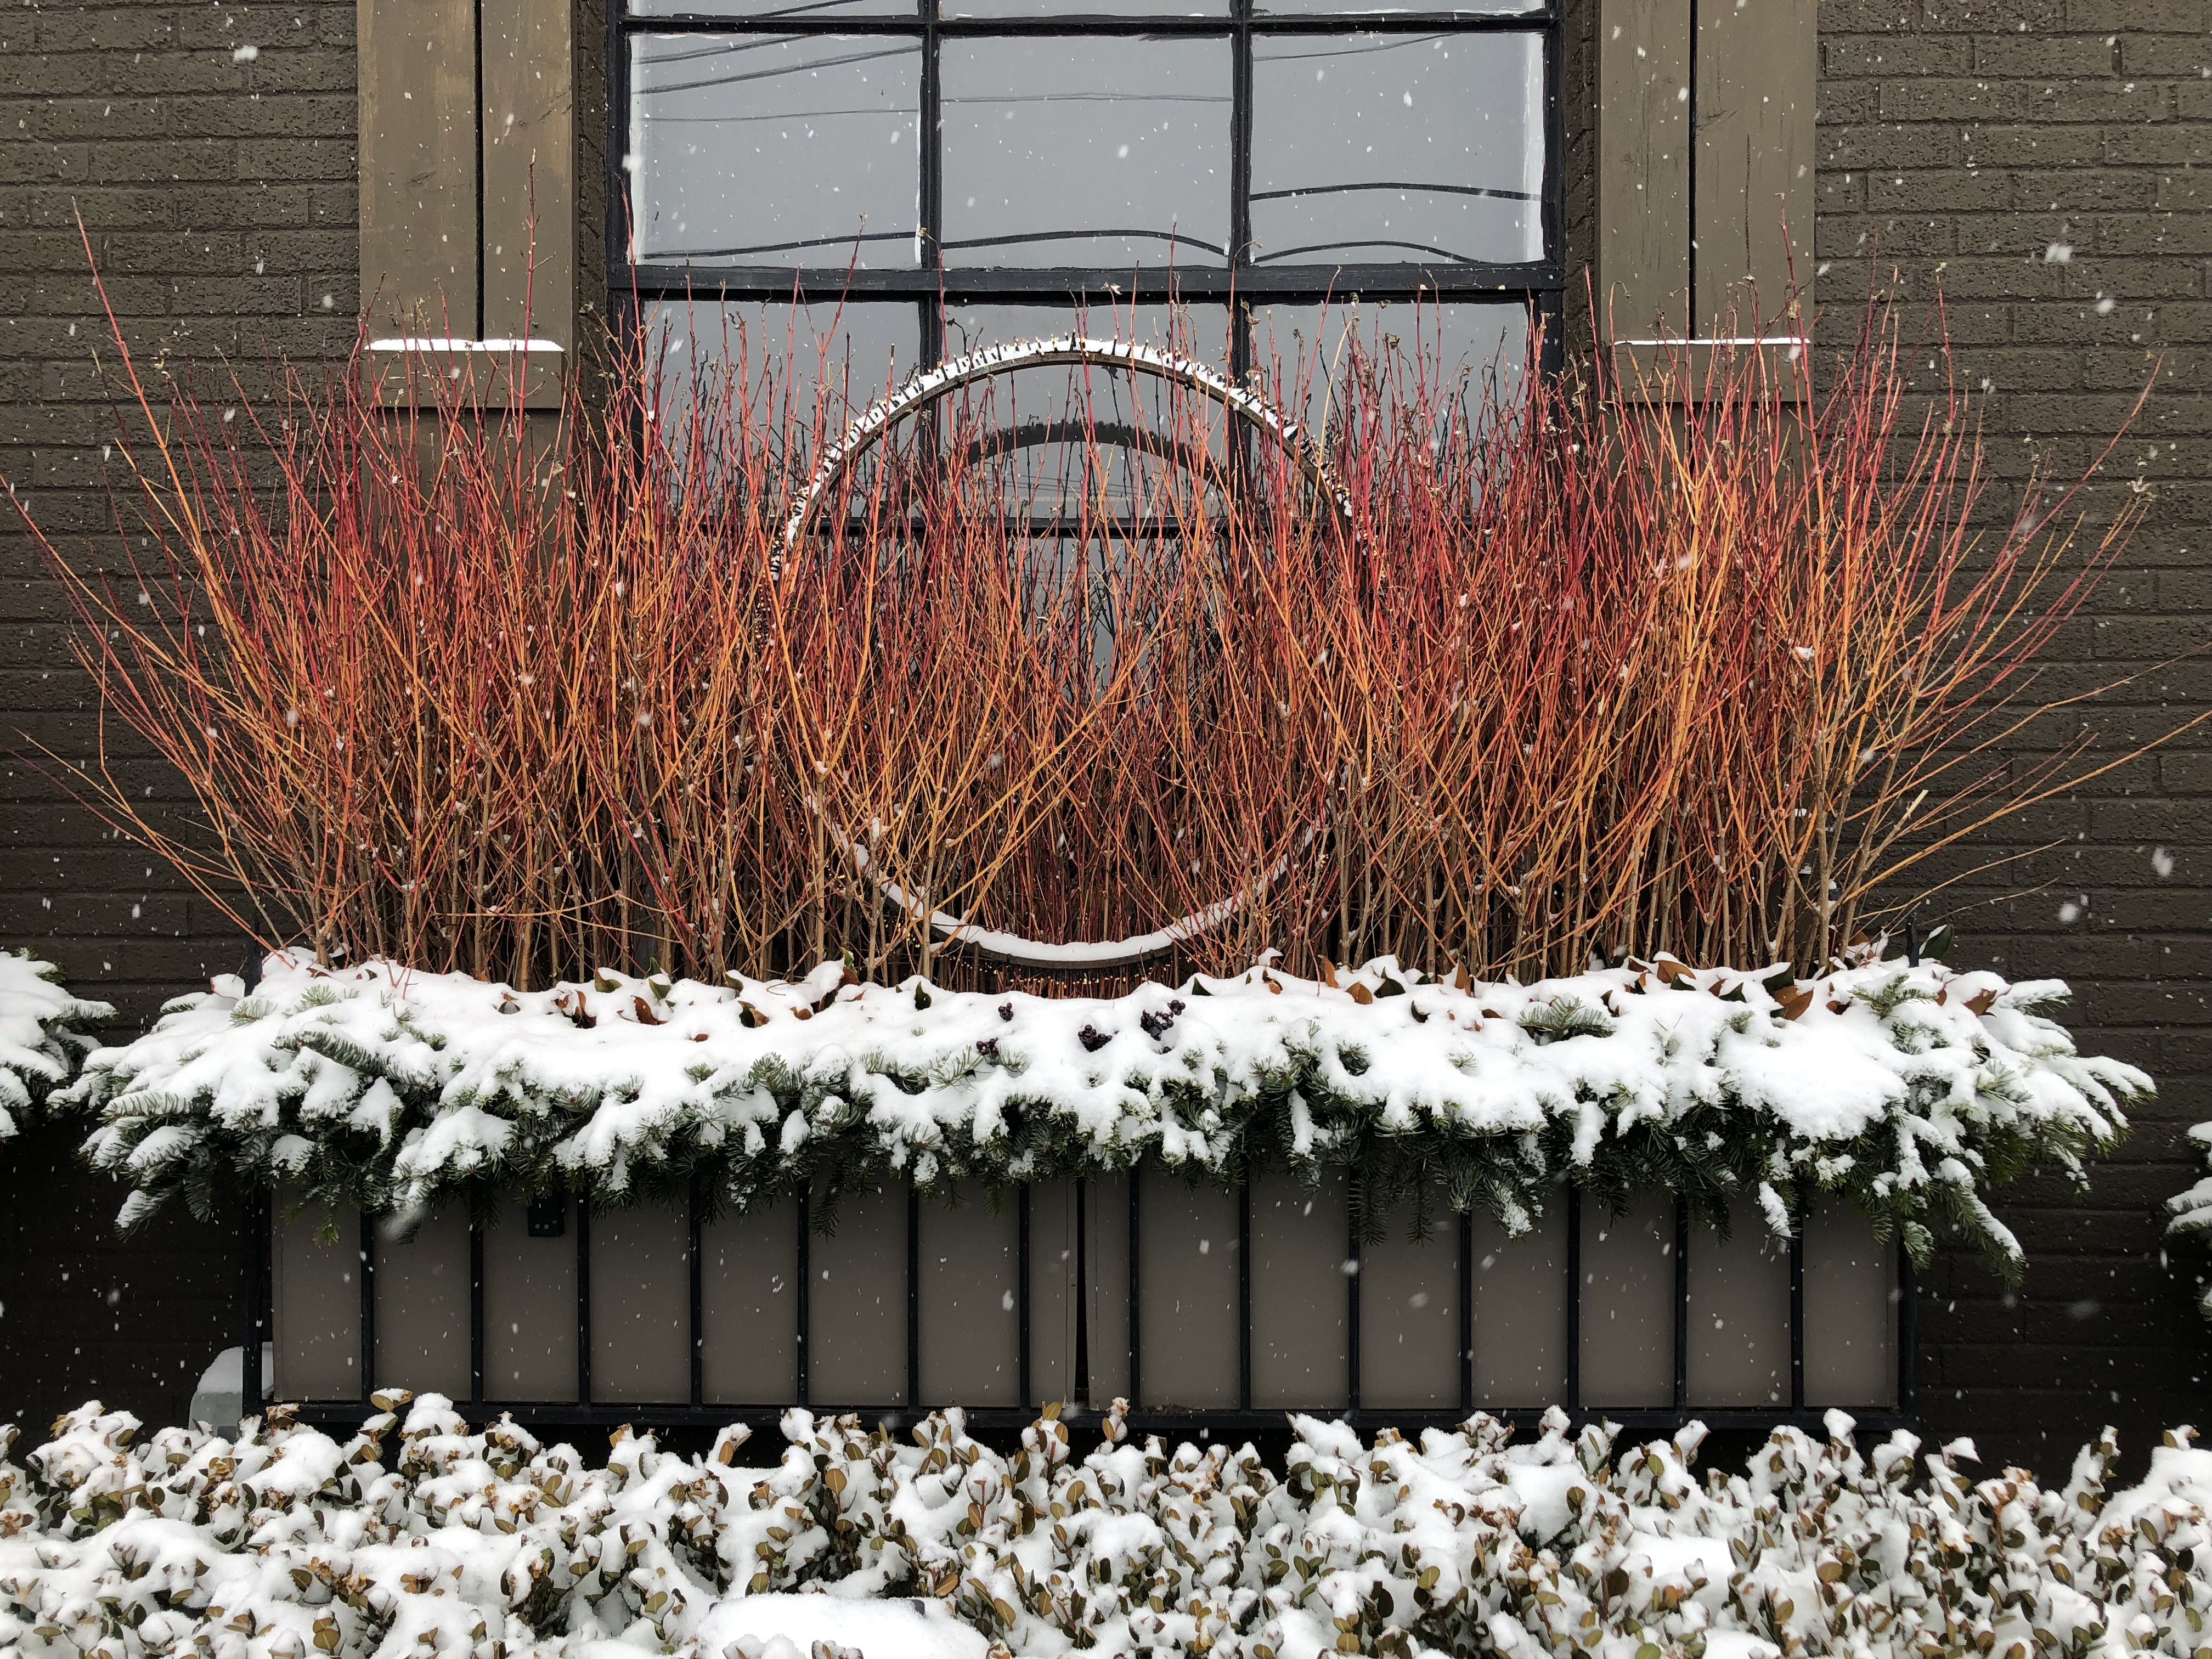
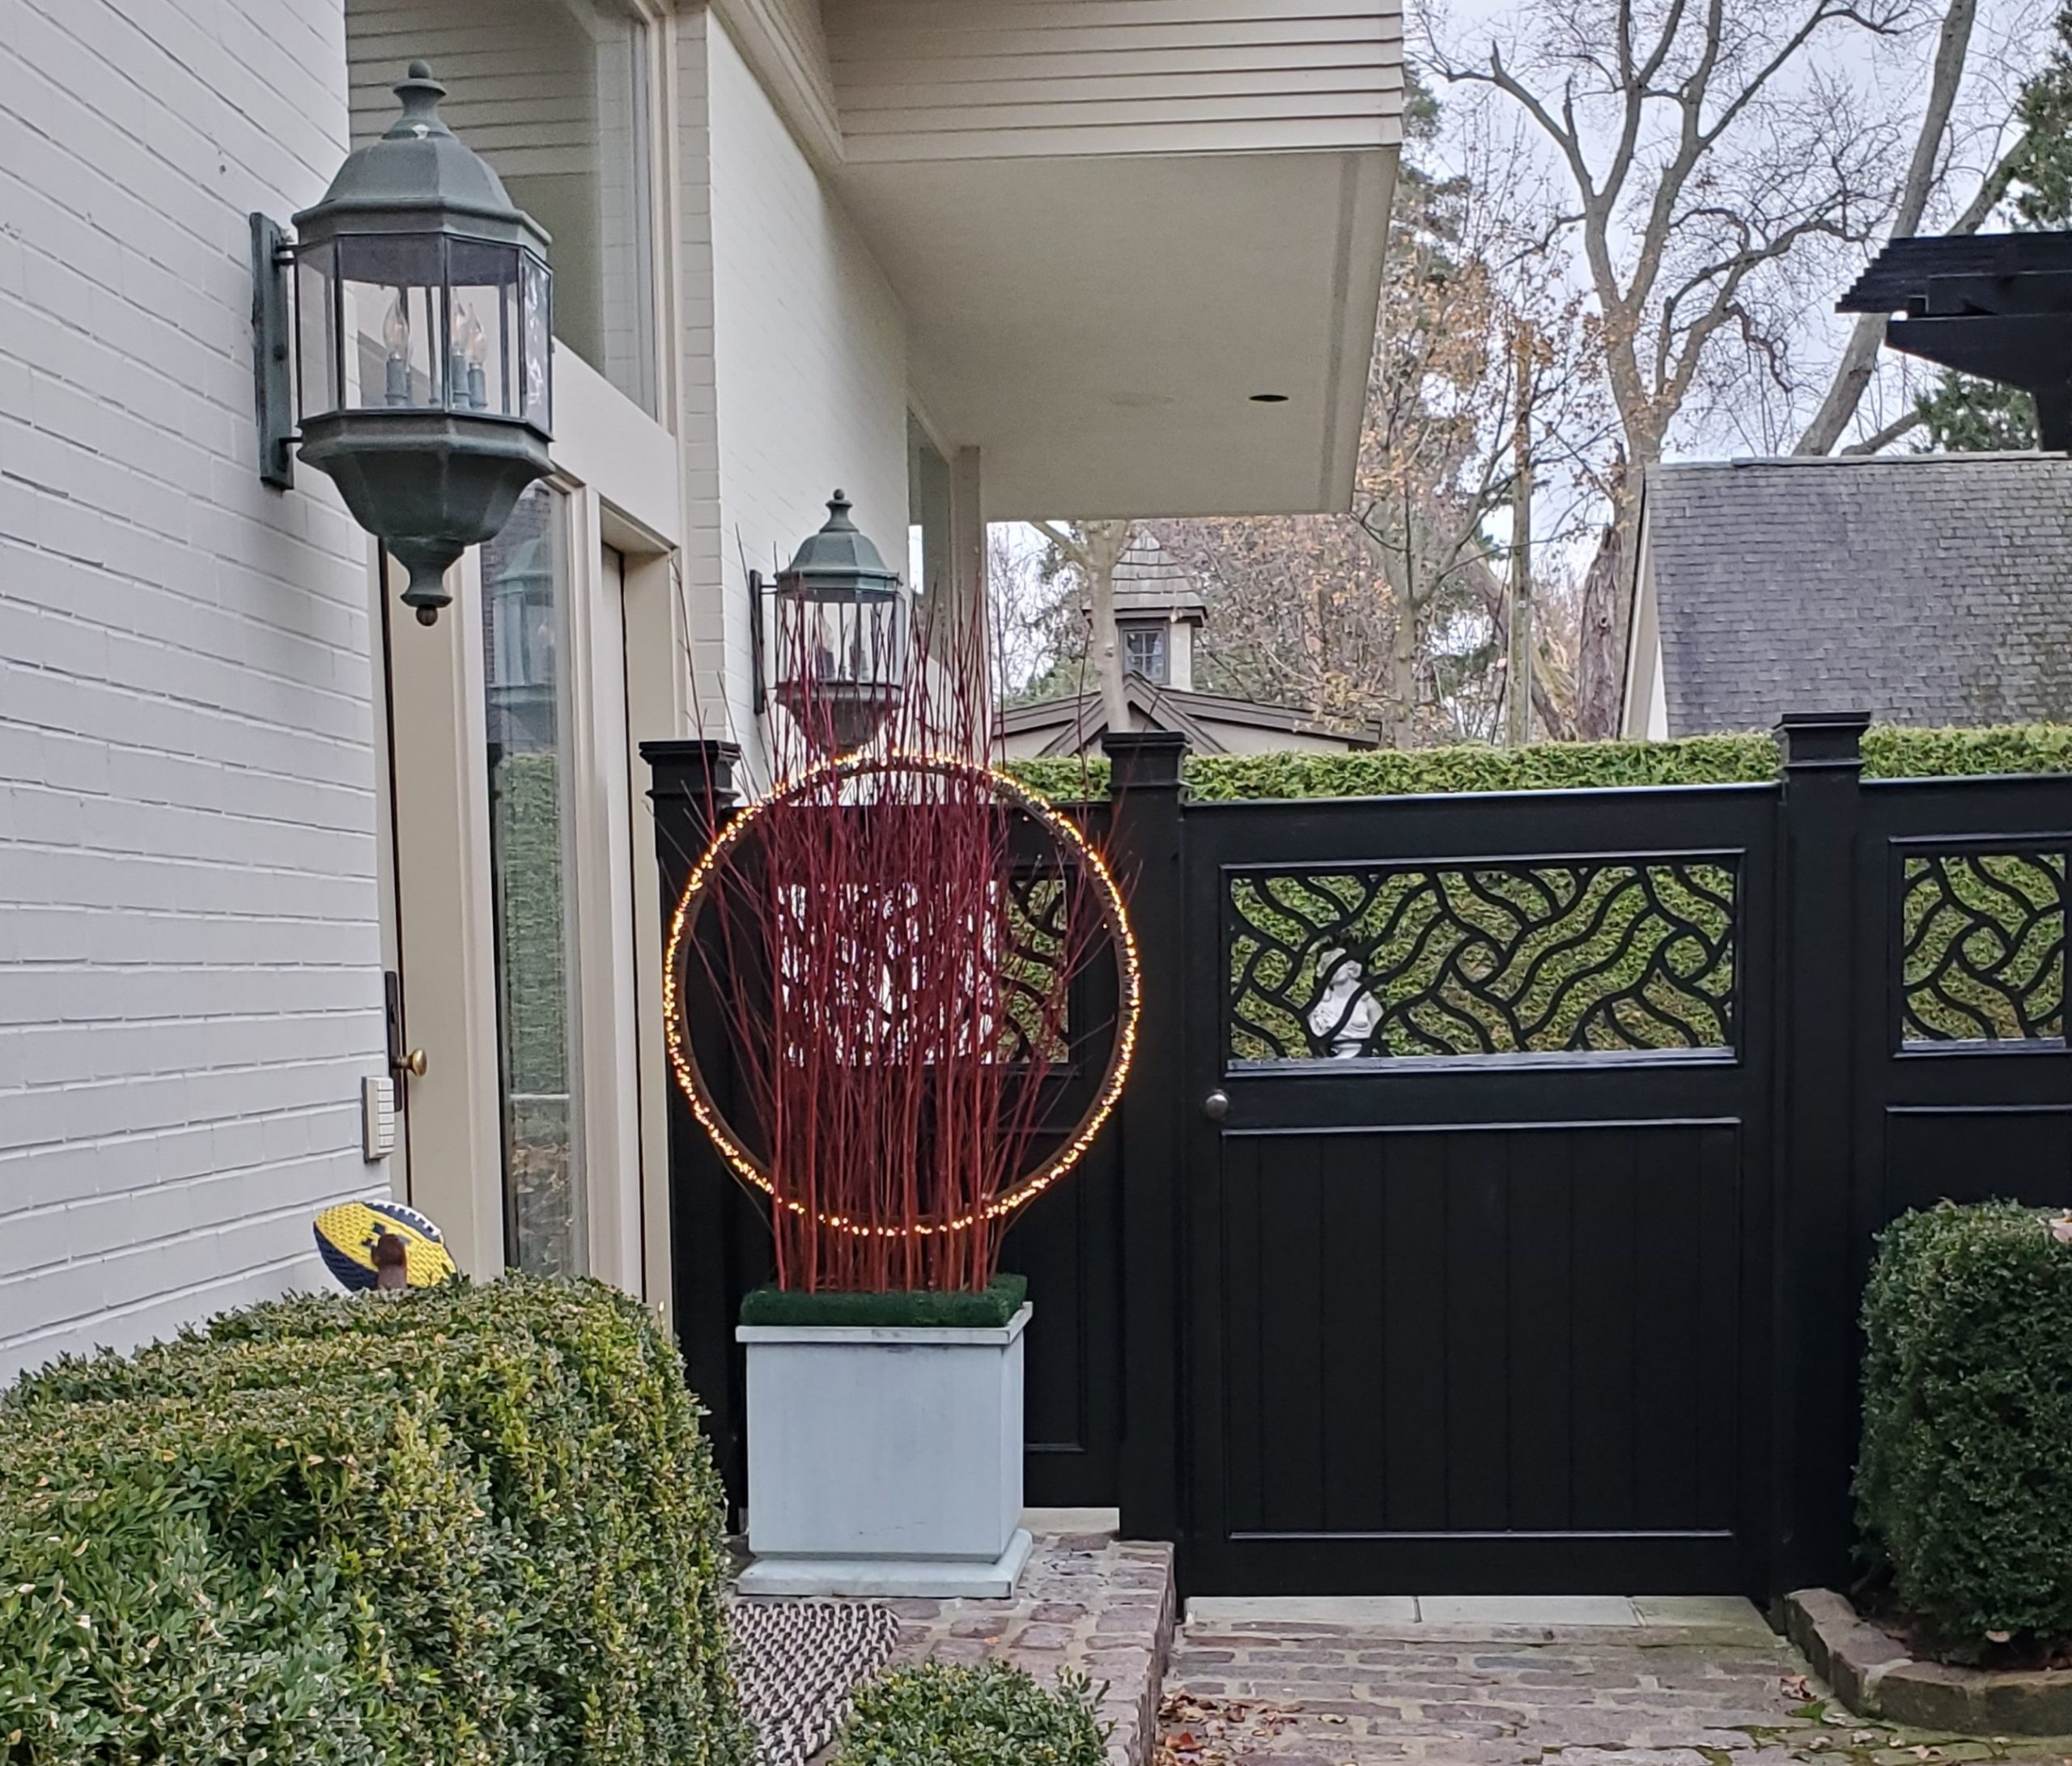
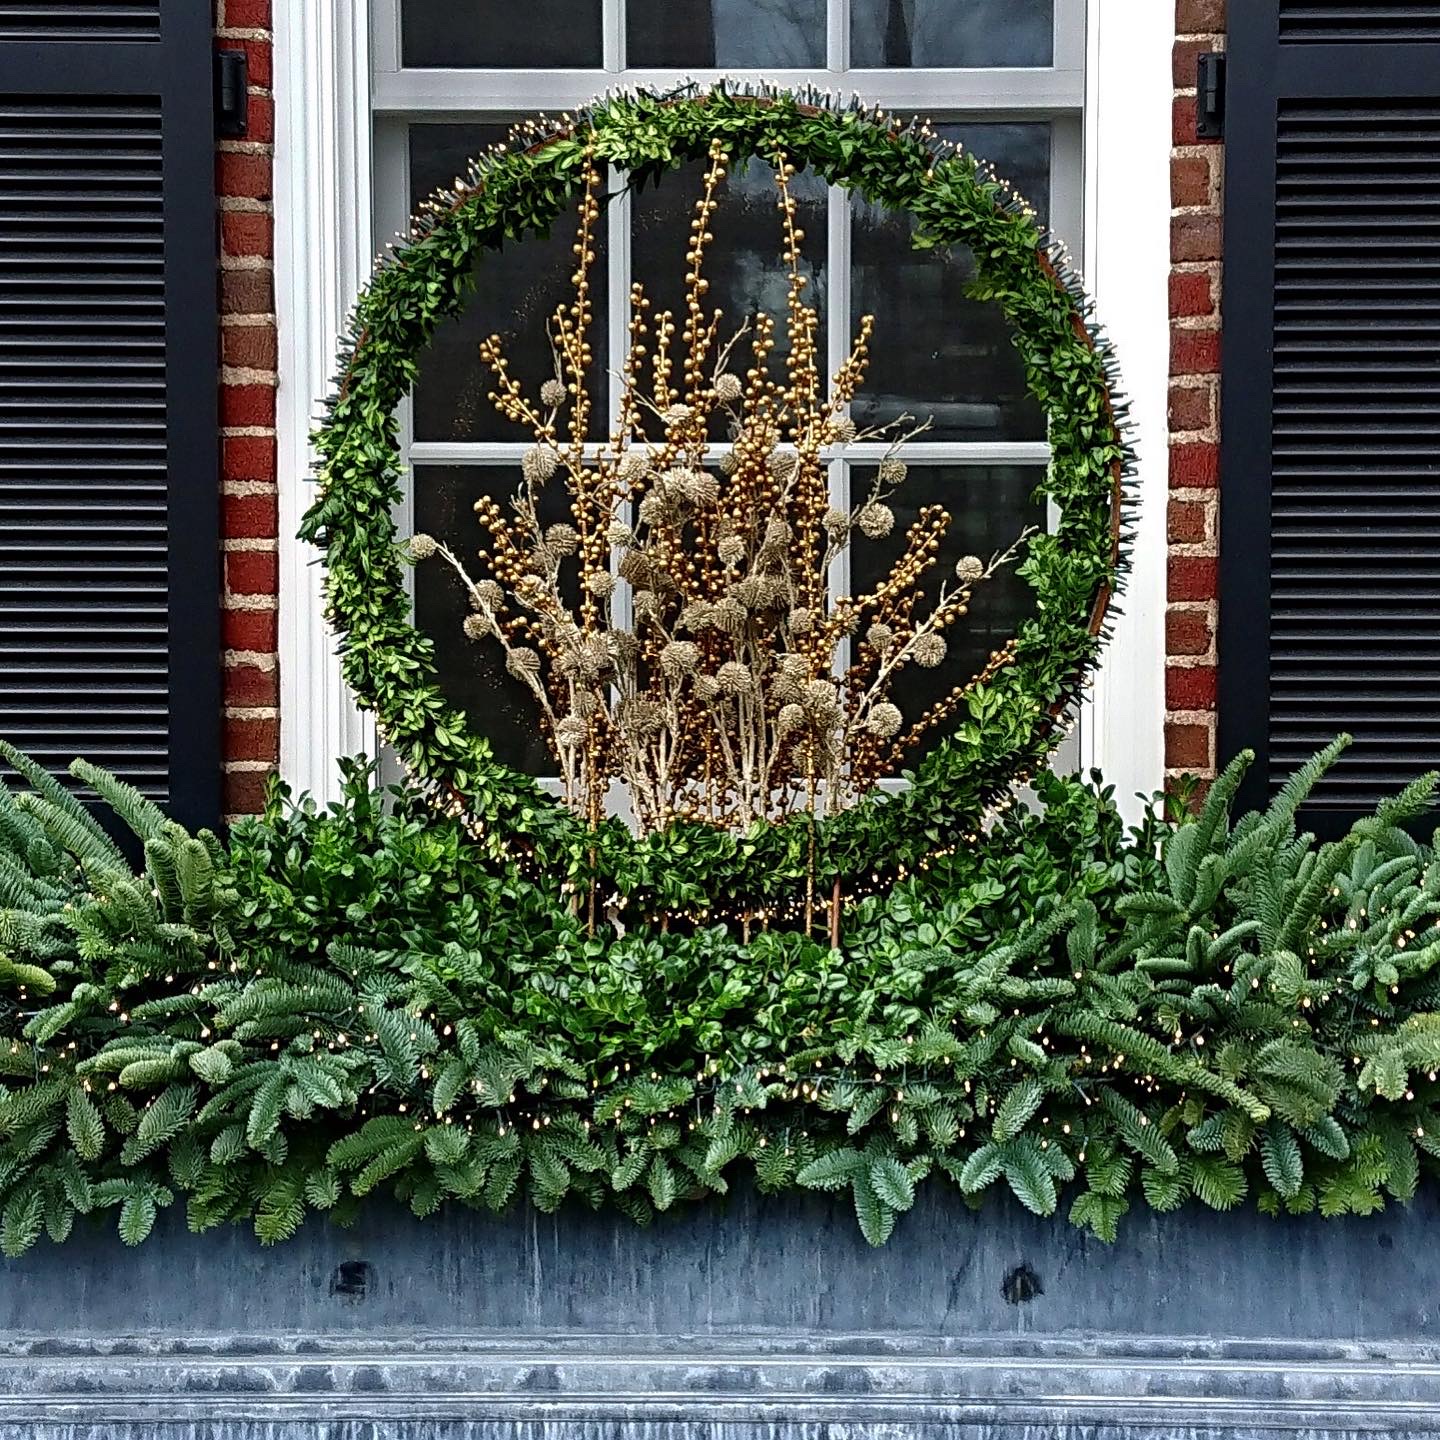
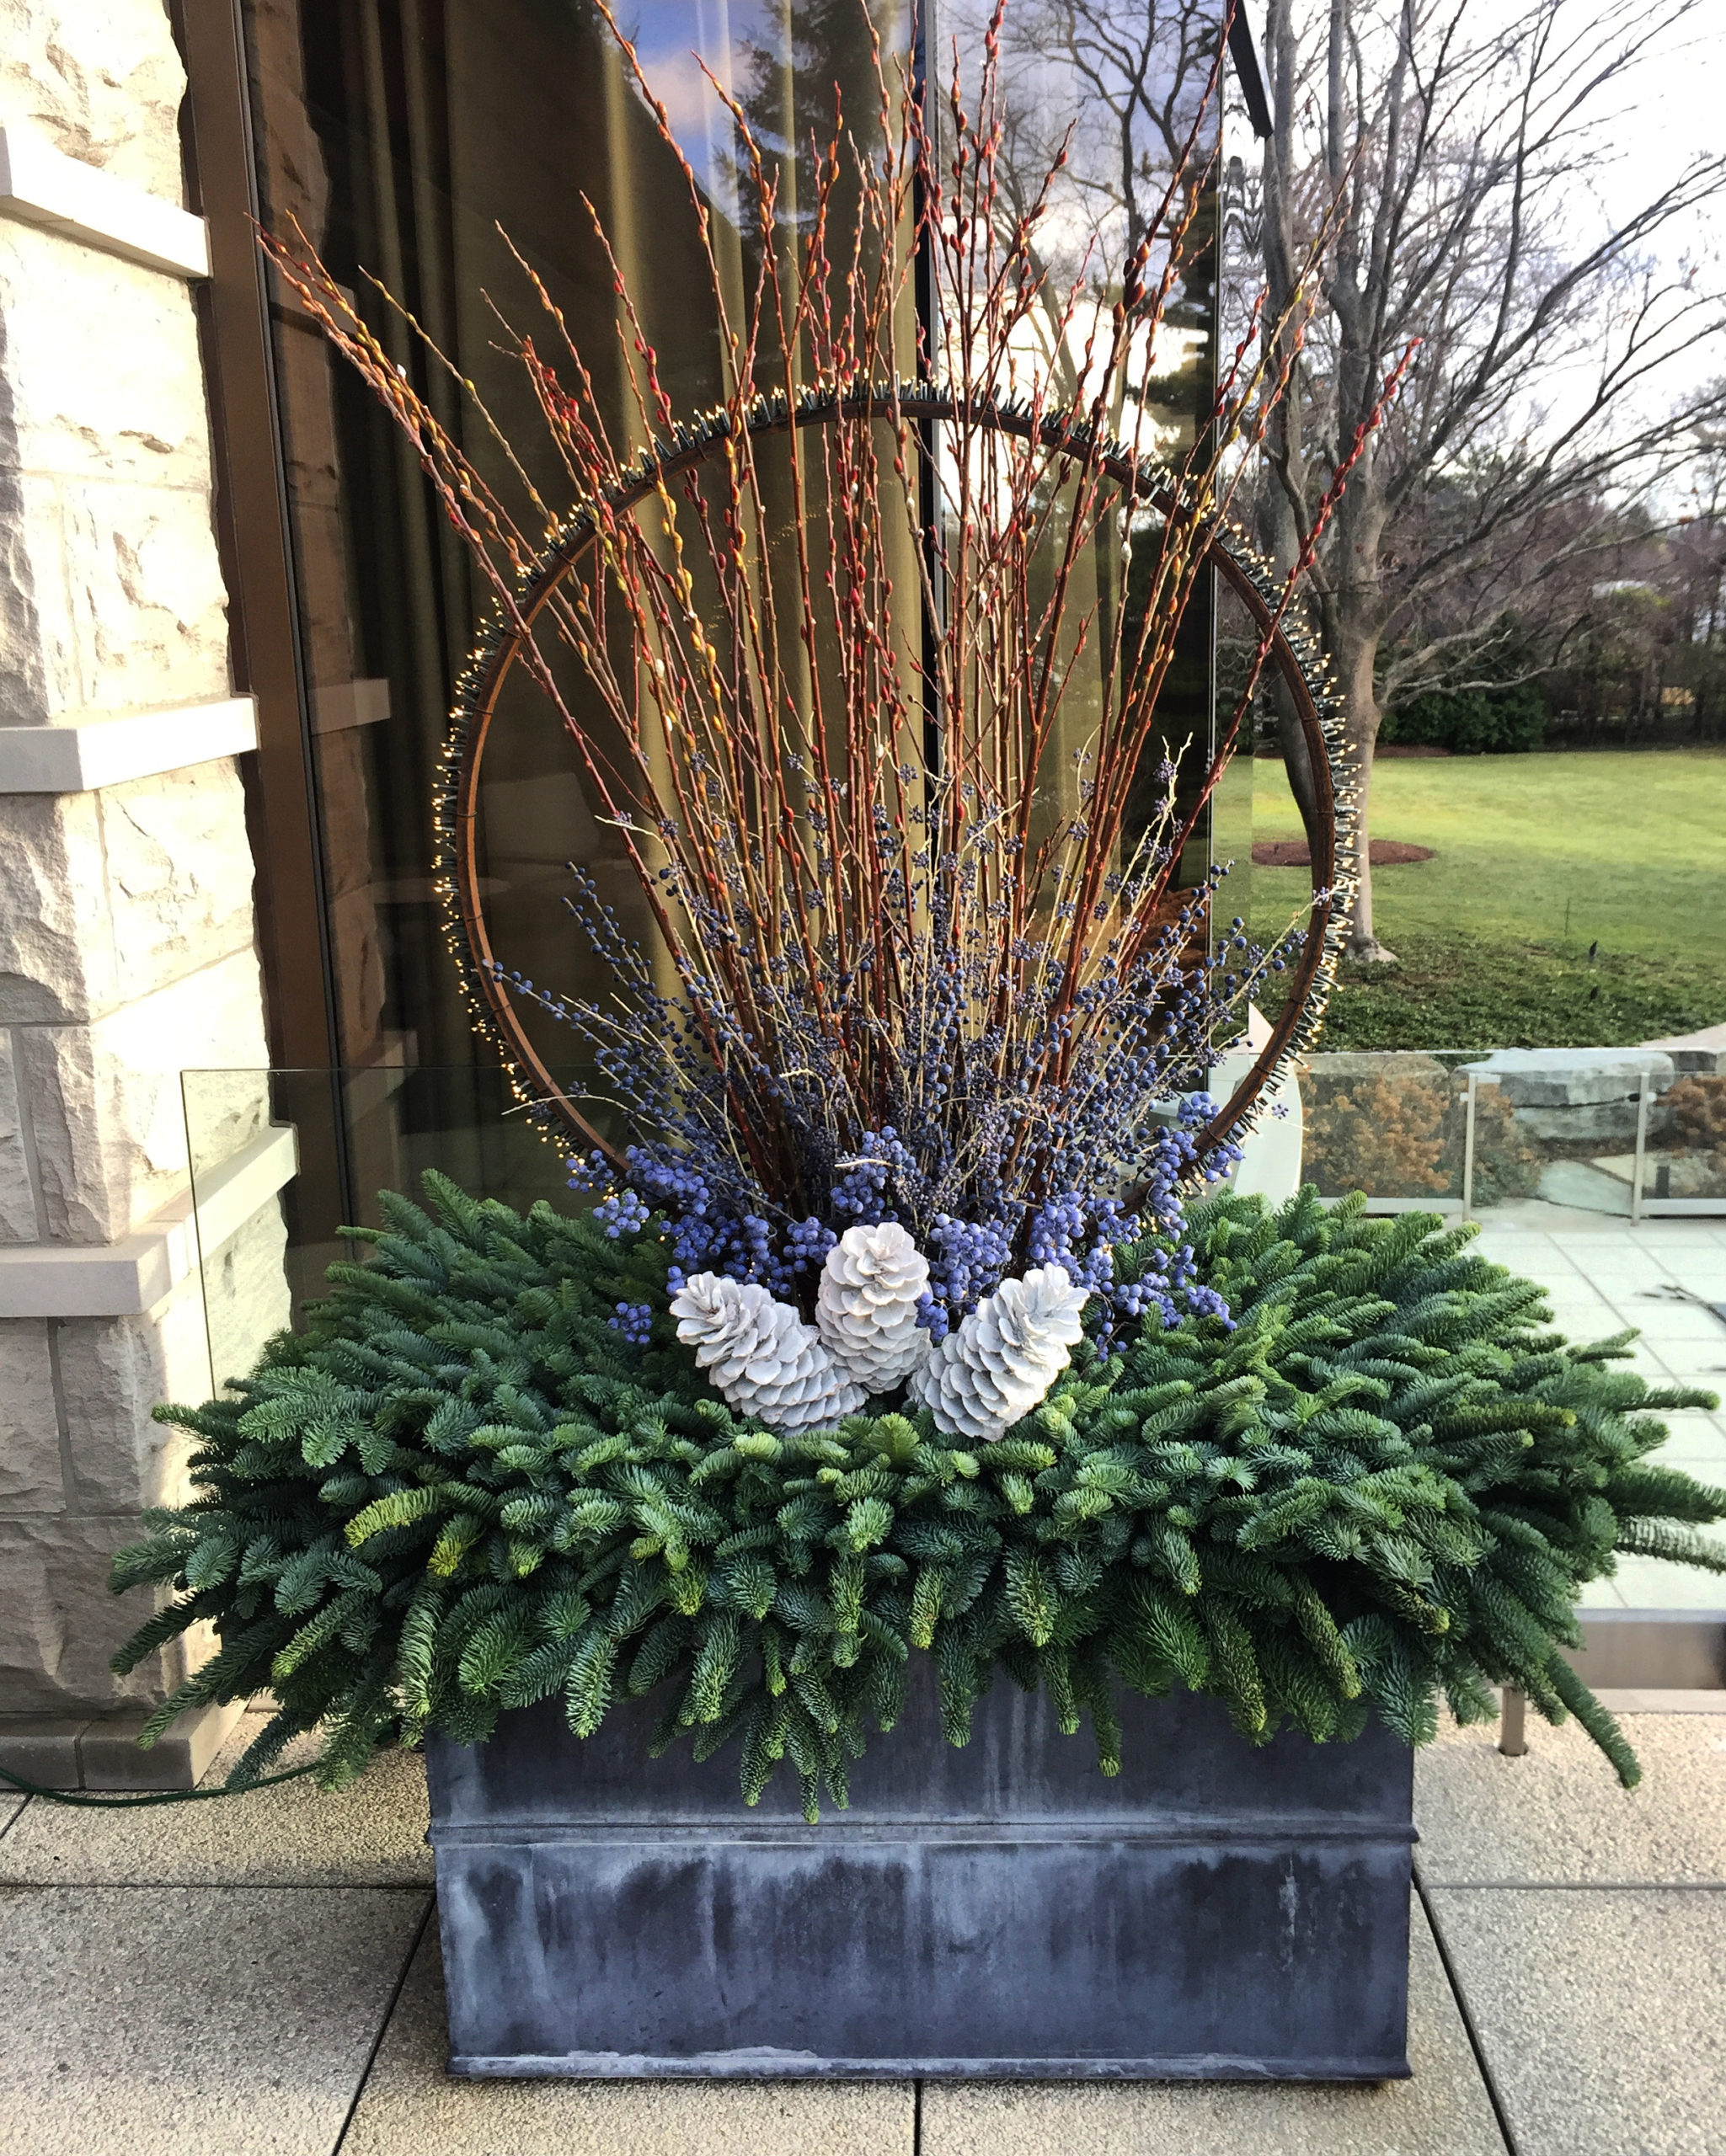
The sculptural quality of the hoops make them a design asset even during the day. I have no idea how many hoops Rob has out there now, but there are lots. Every time I see one, I think about his long term interest in lighting the garden and landscape in the winter. He tells me he enjoys seeing the work of others fabricating their own version of lighted hoops. It is a testament to a great idea that variations on this theme have sprouted in other places by other people. To follow are pictures of winter arrangements new and old that feature his light rings. They are all different in execution, and all the same in their successful effort to keep the winter dark at bay.
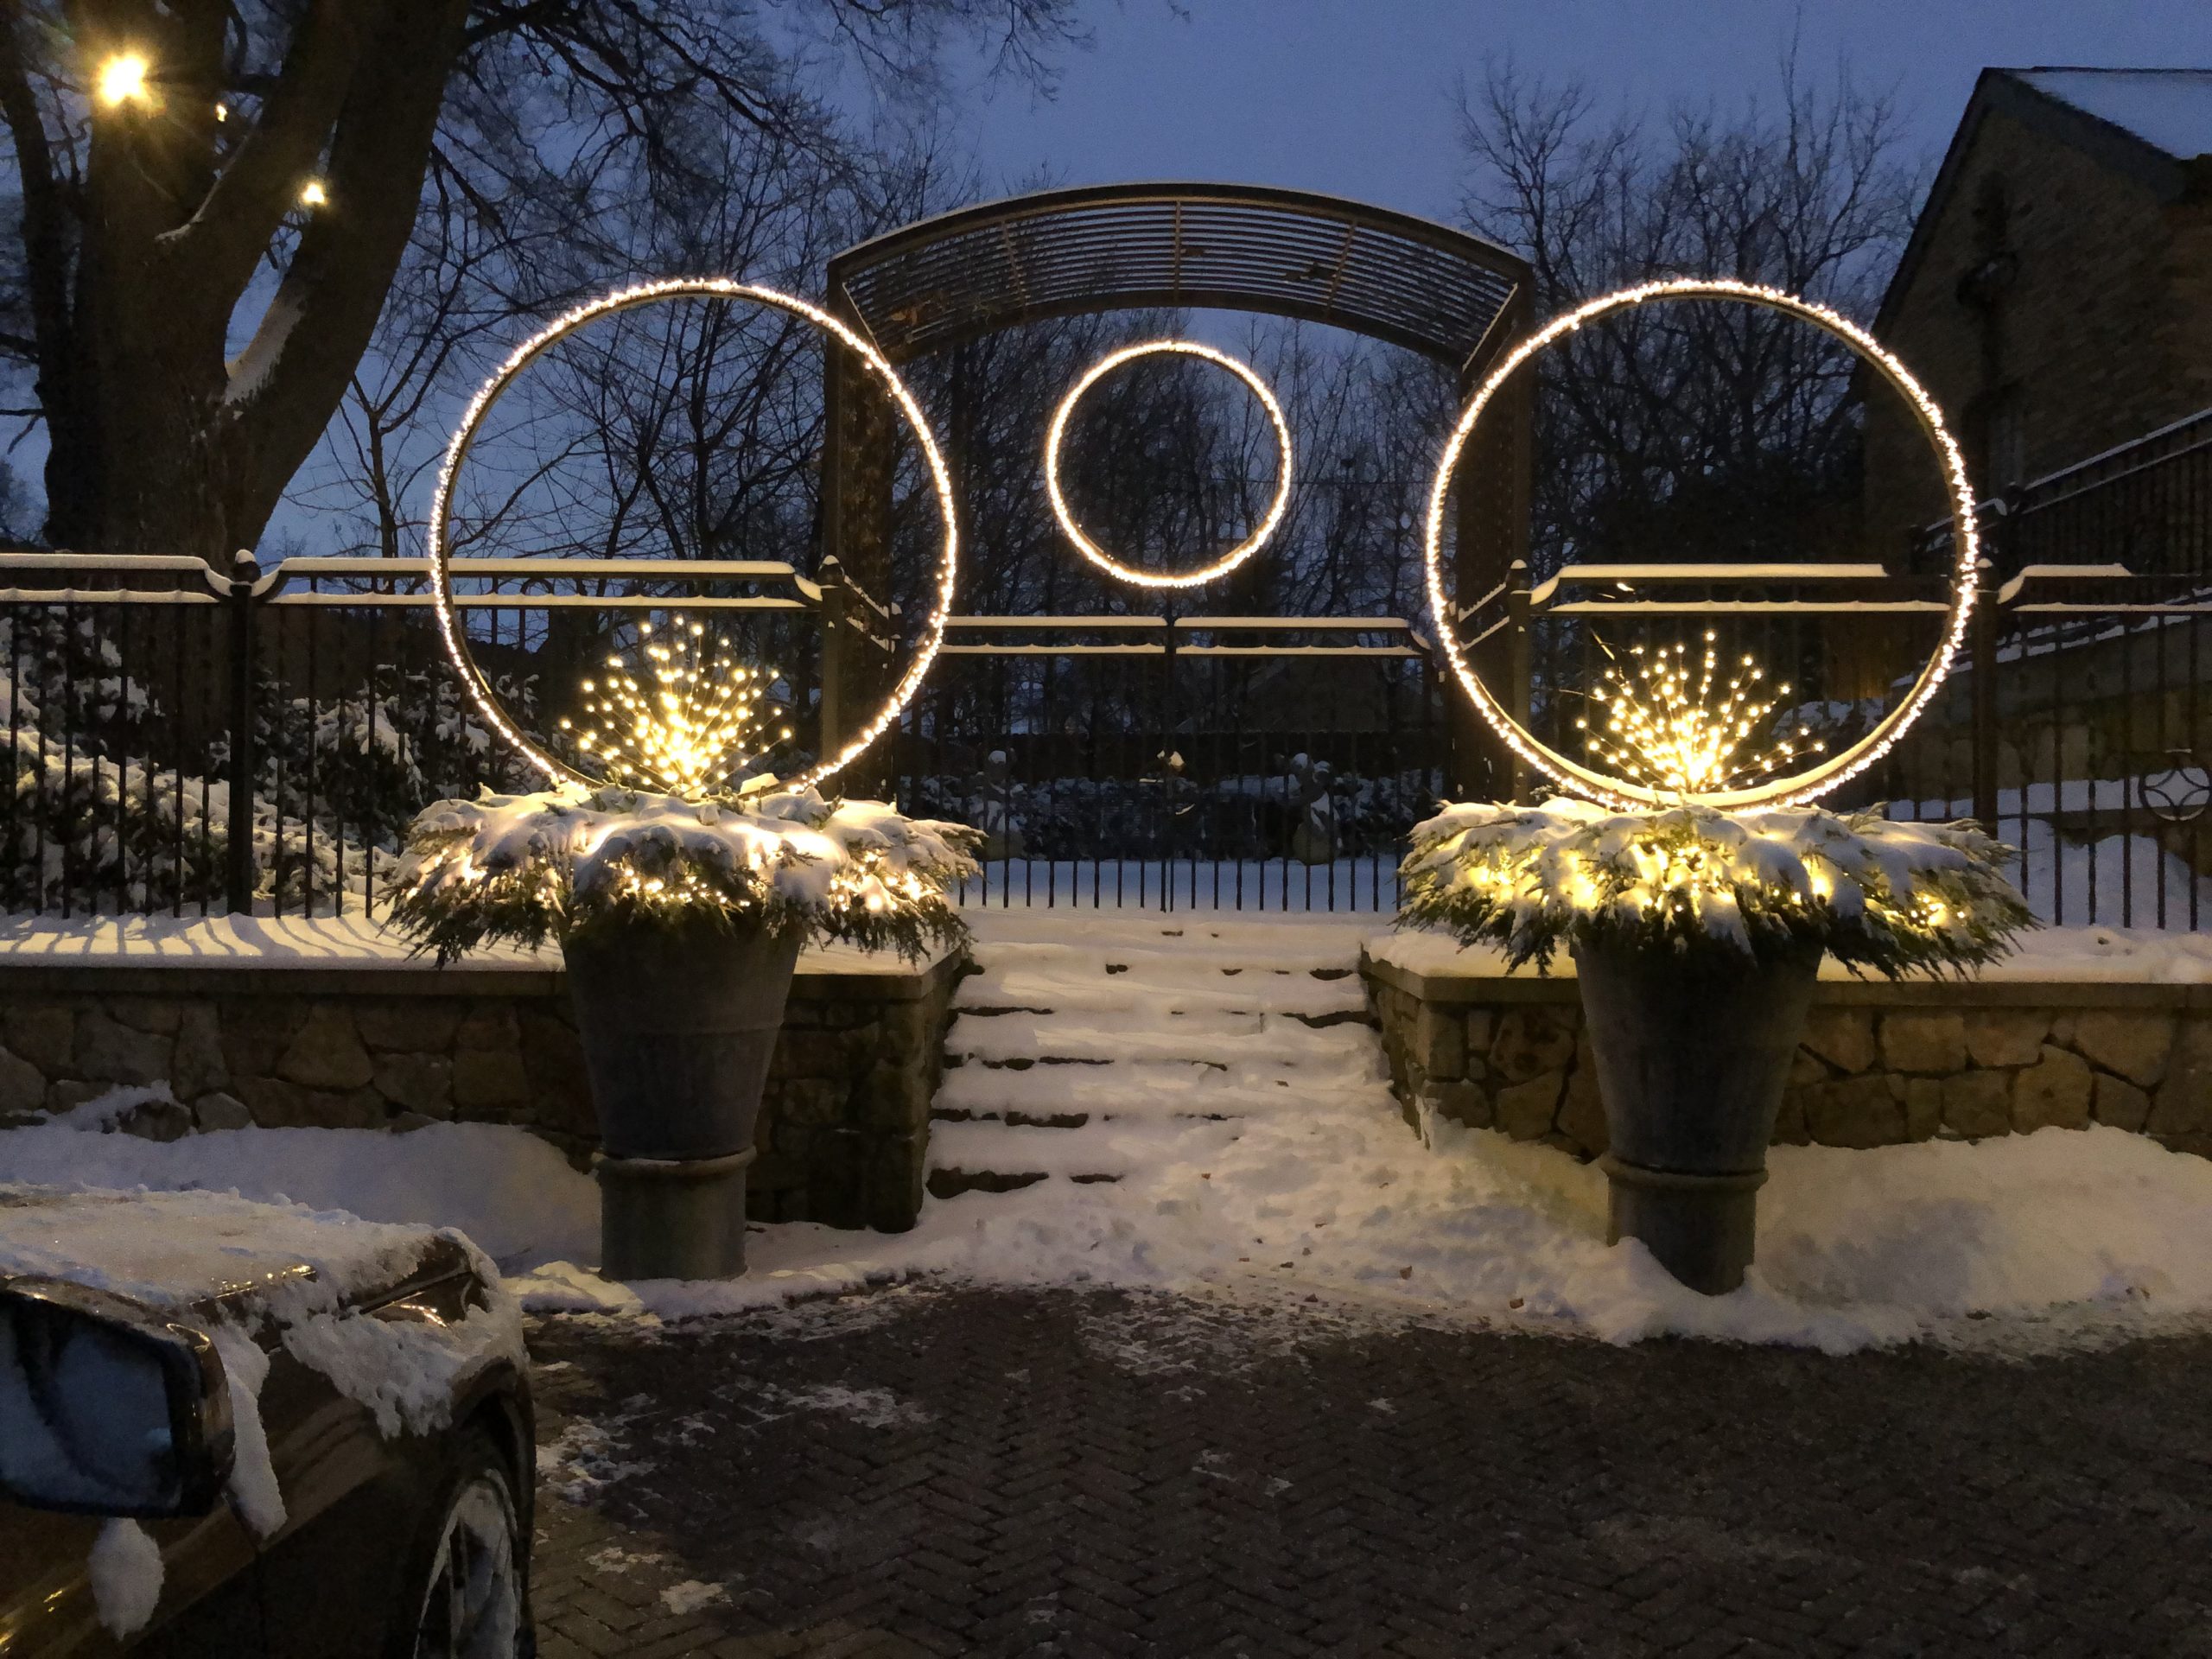
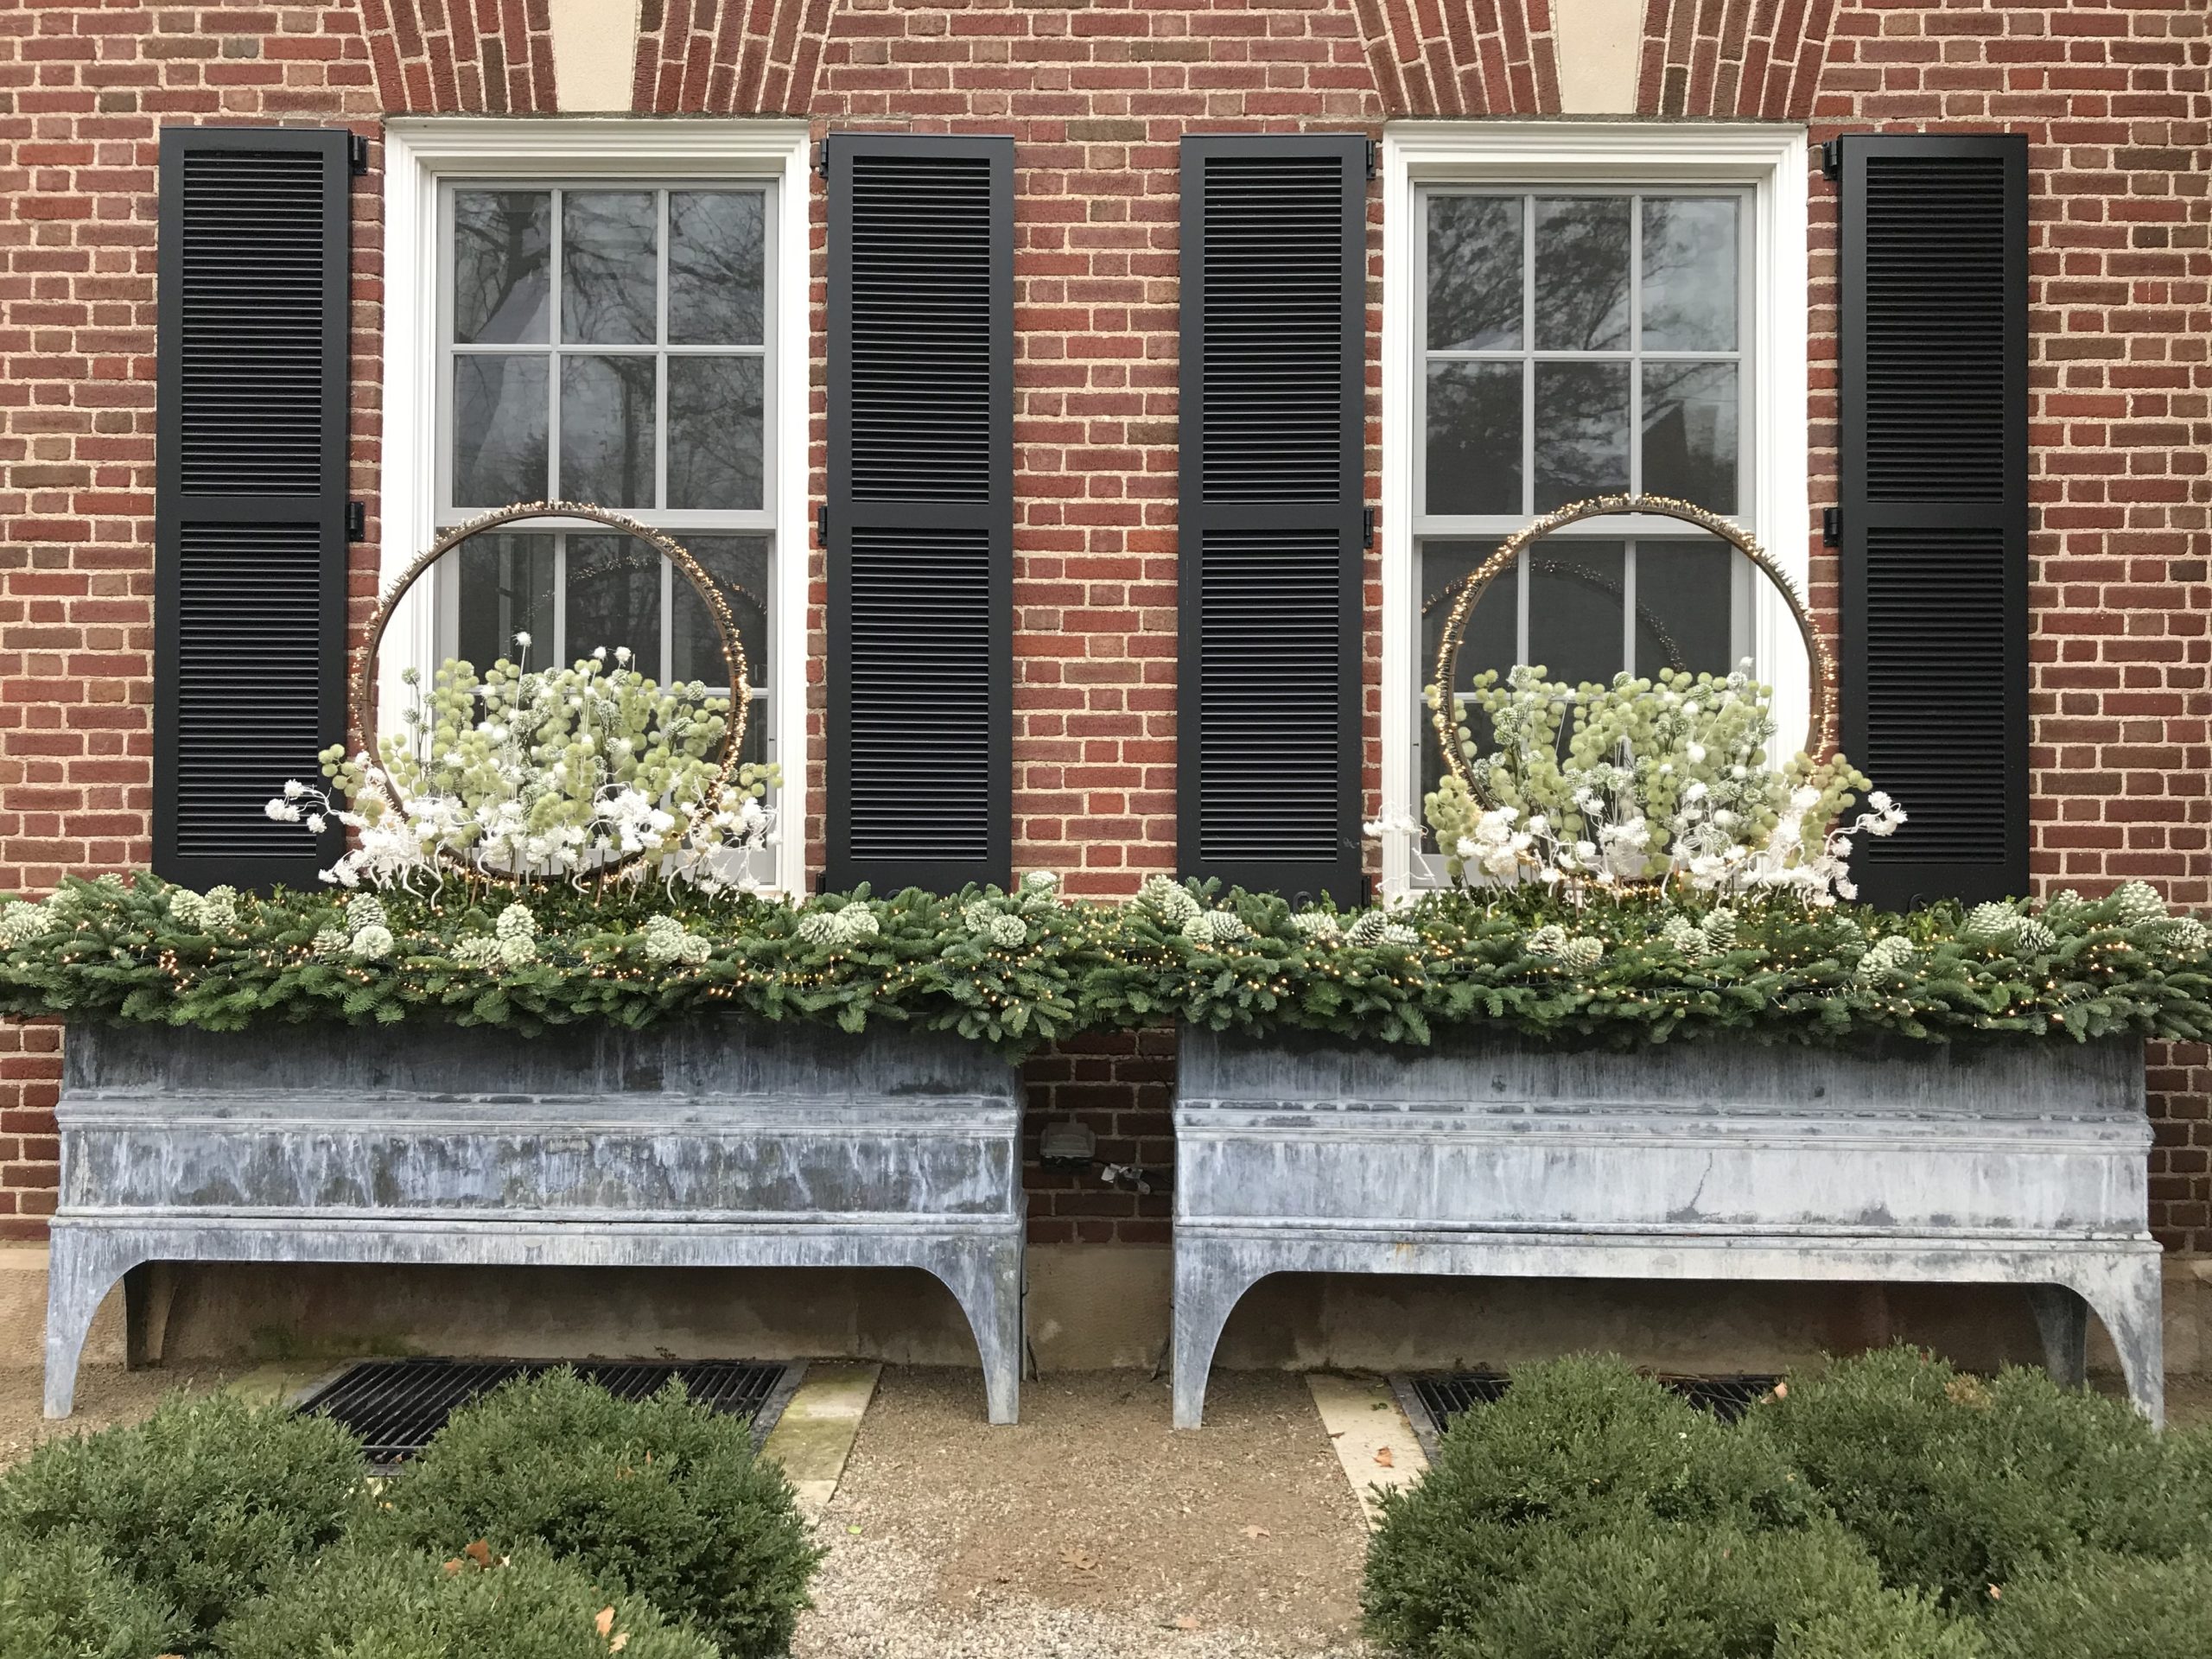
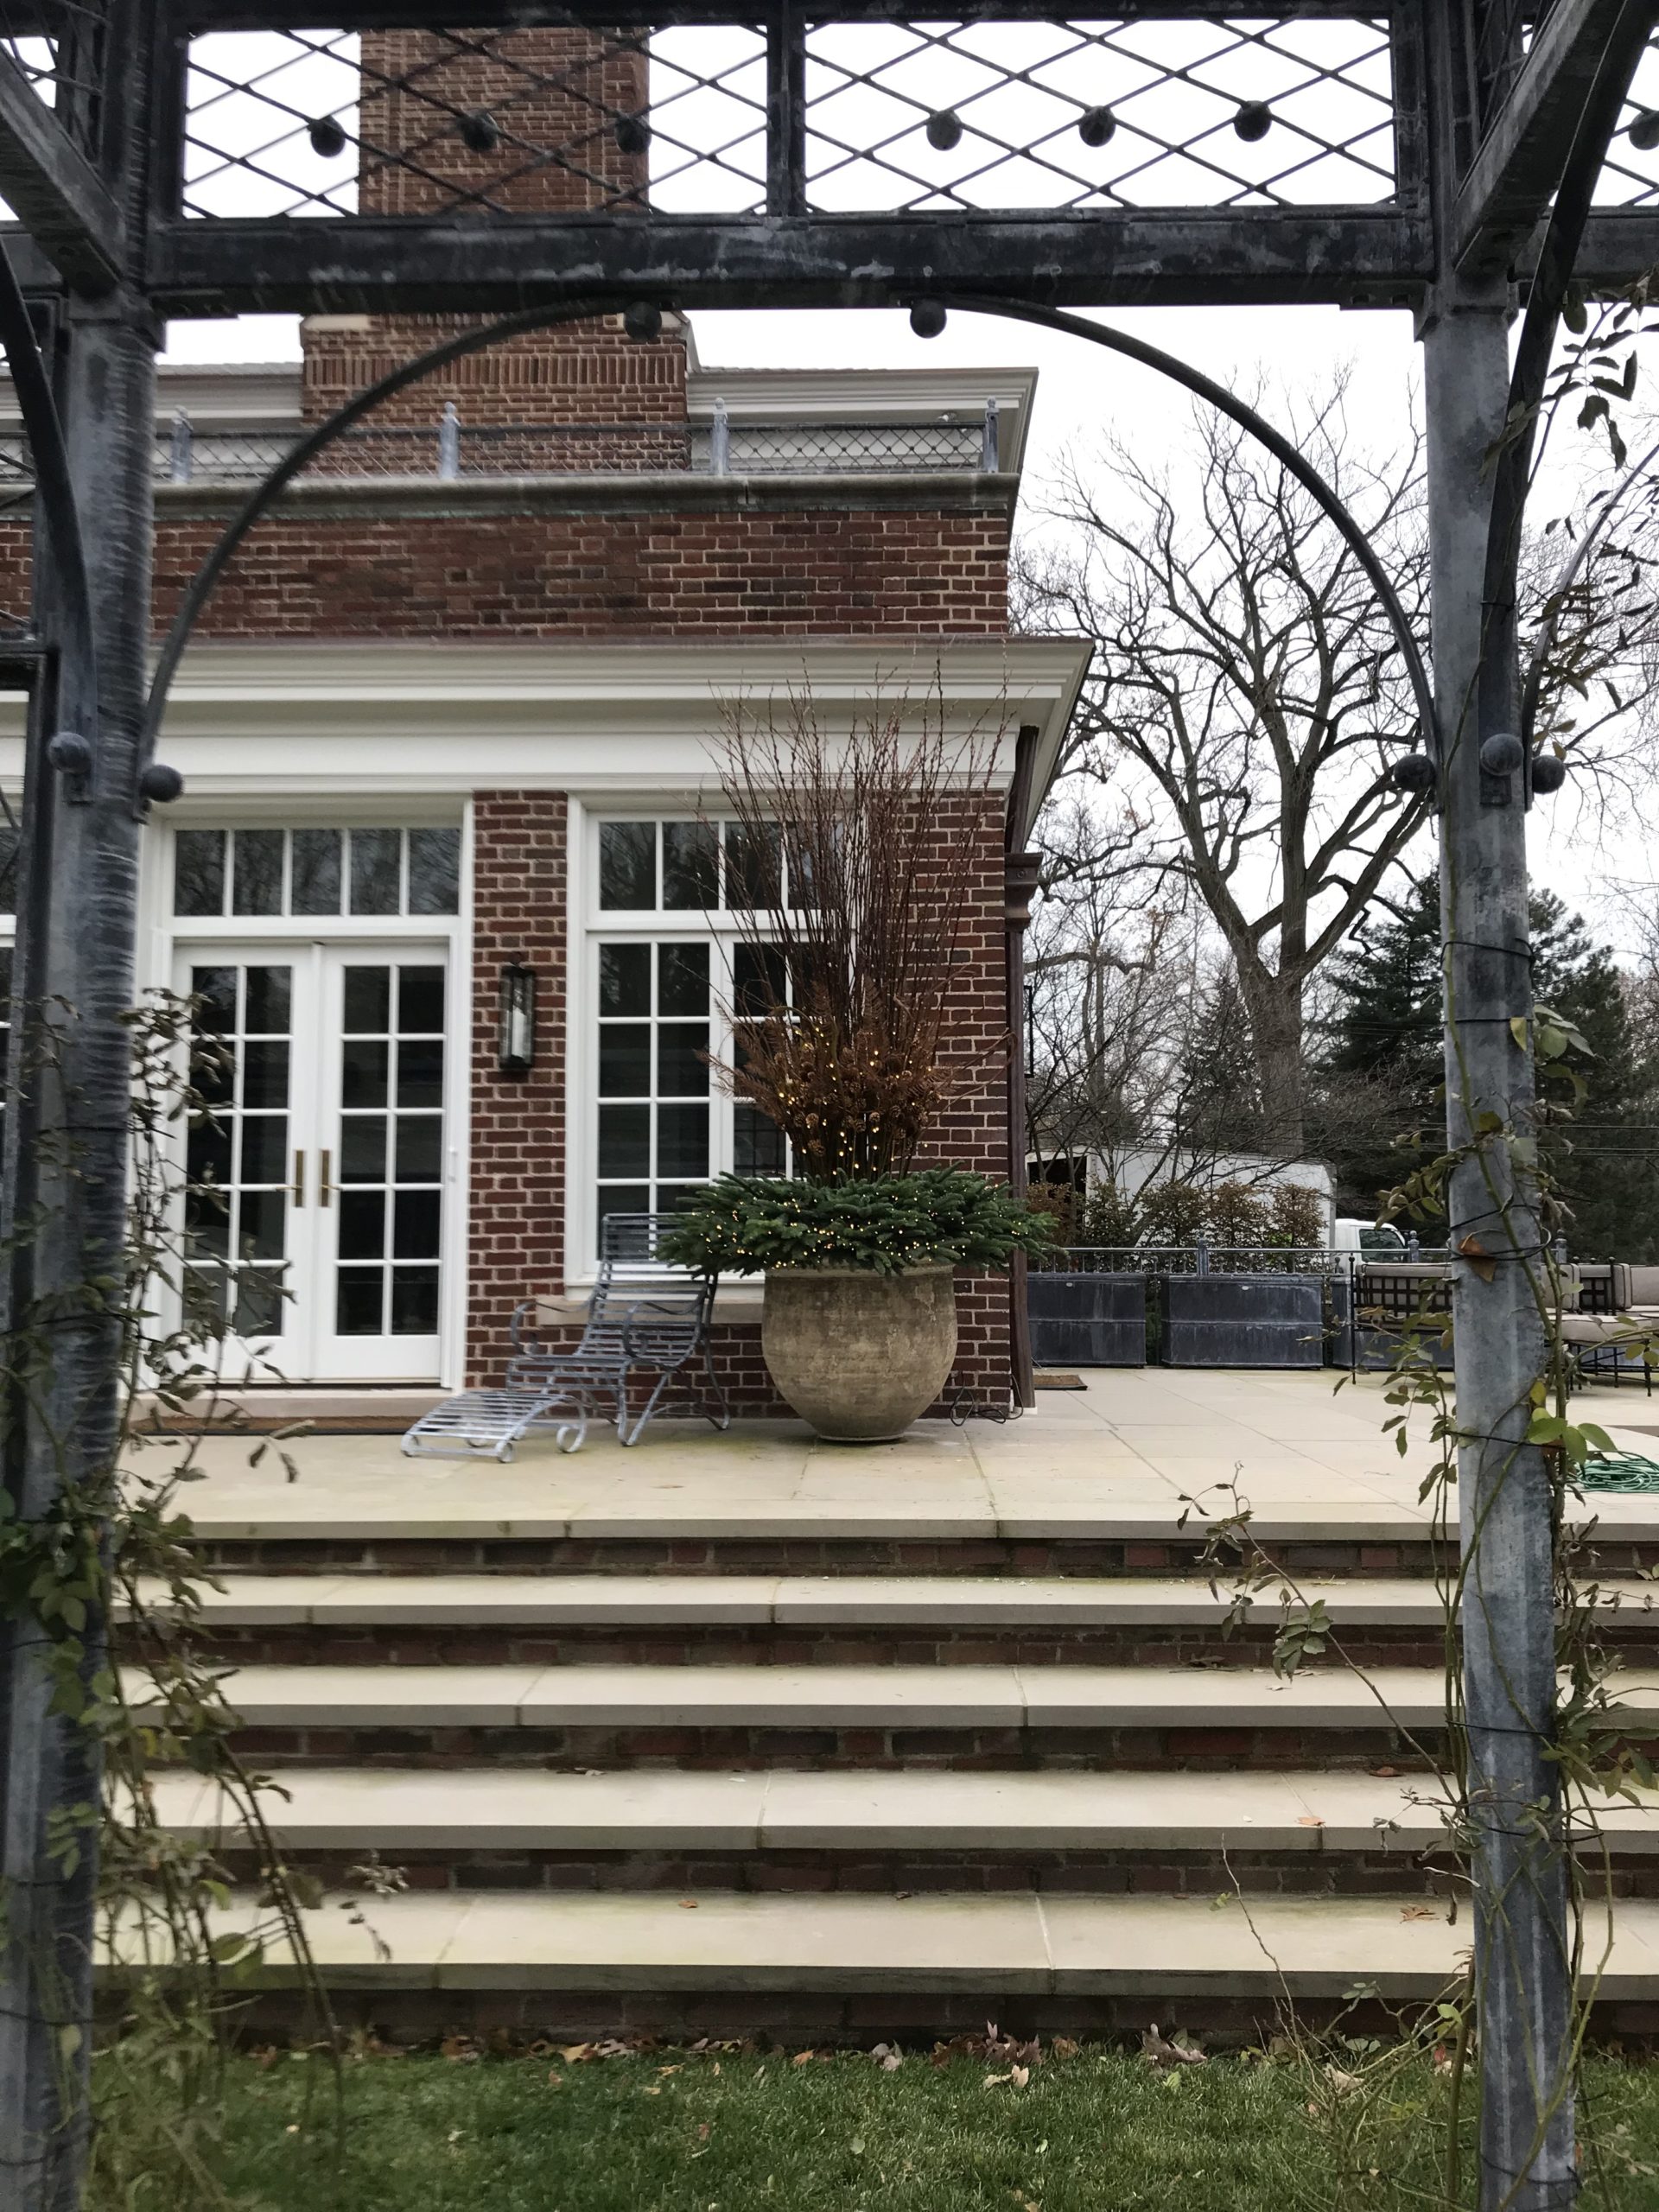
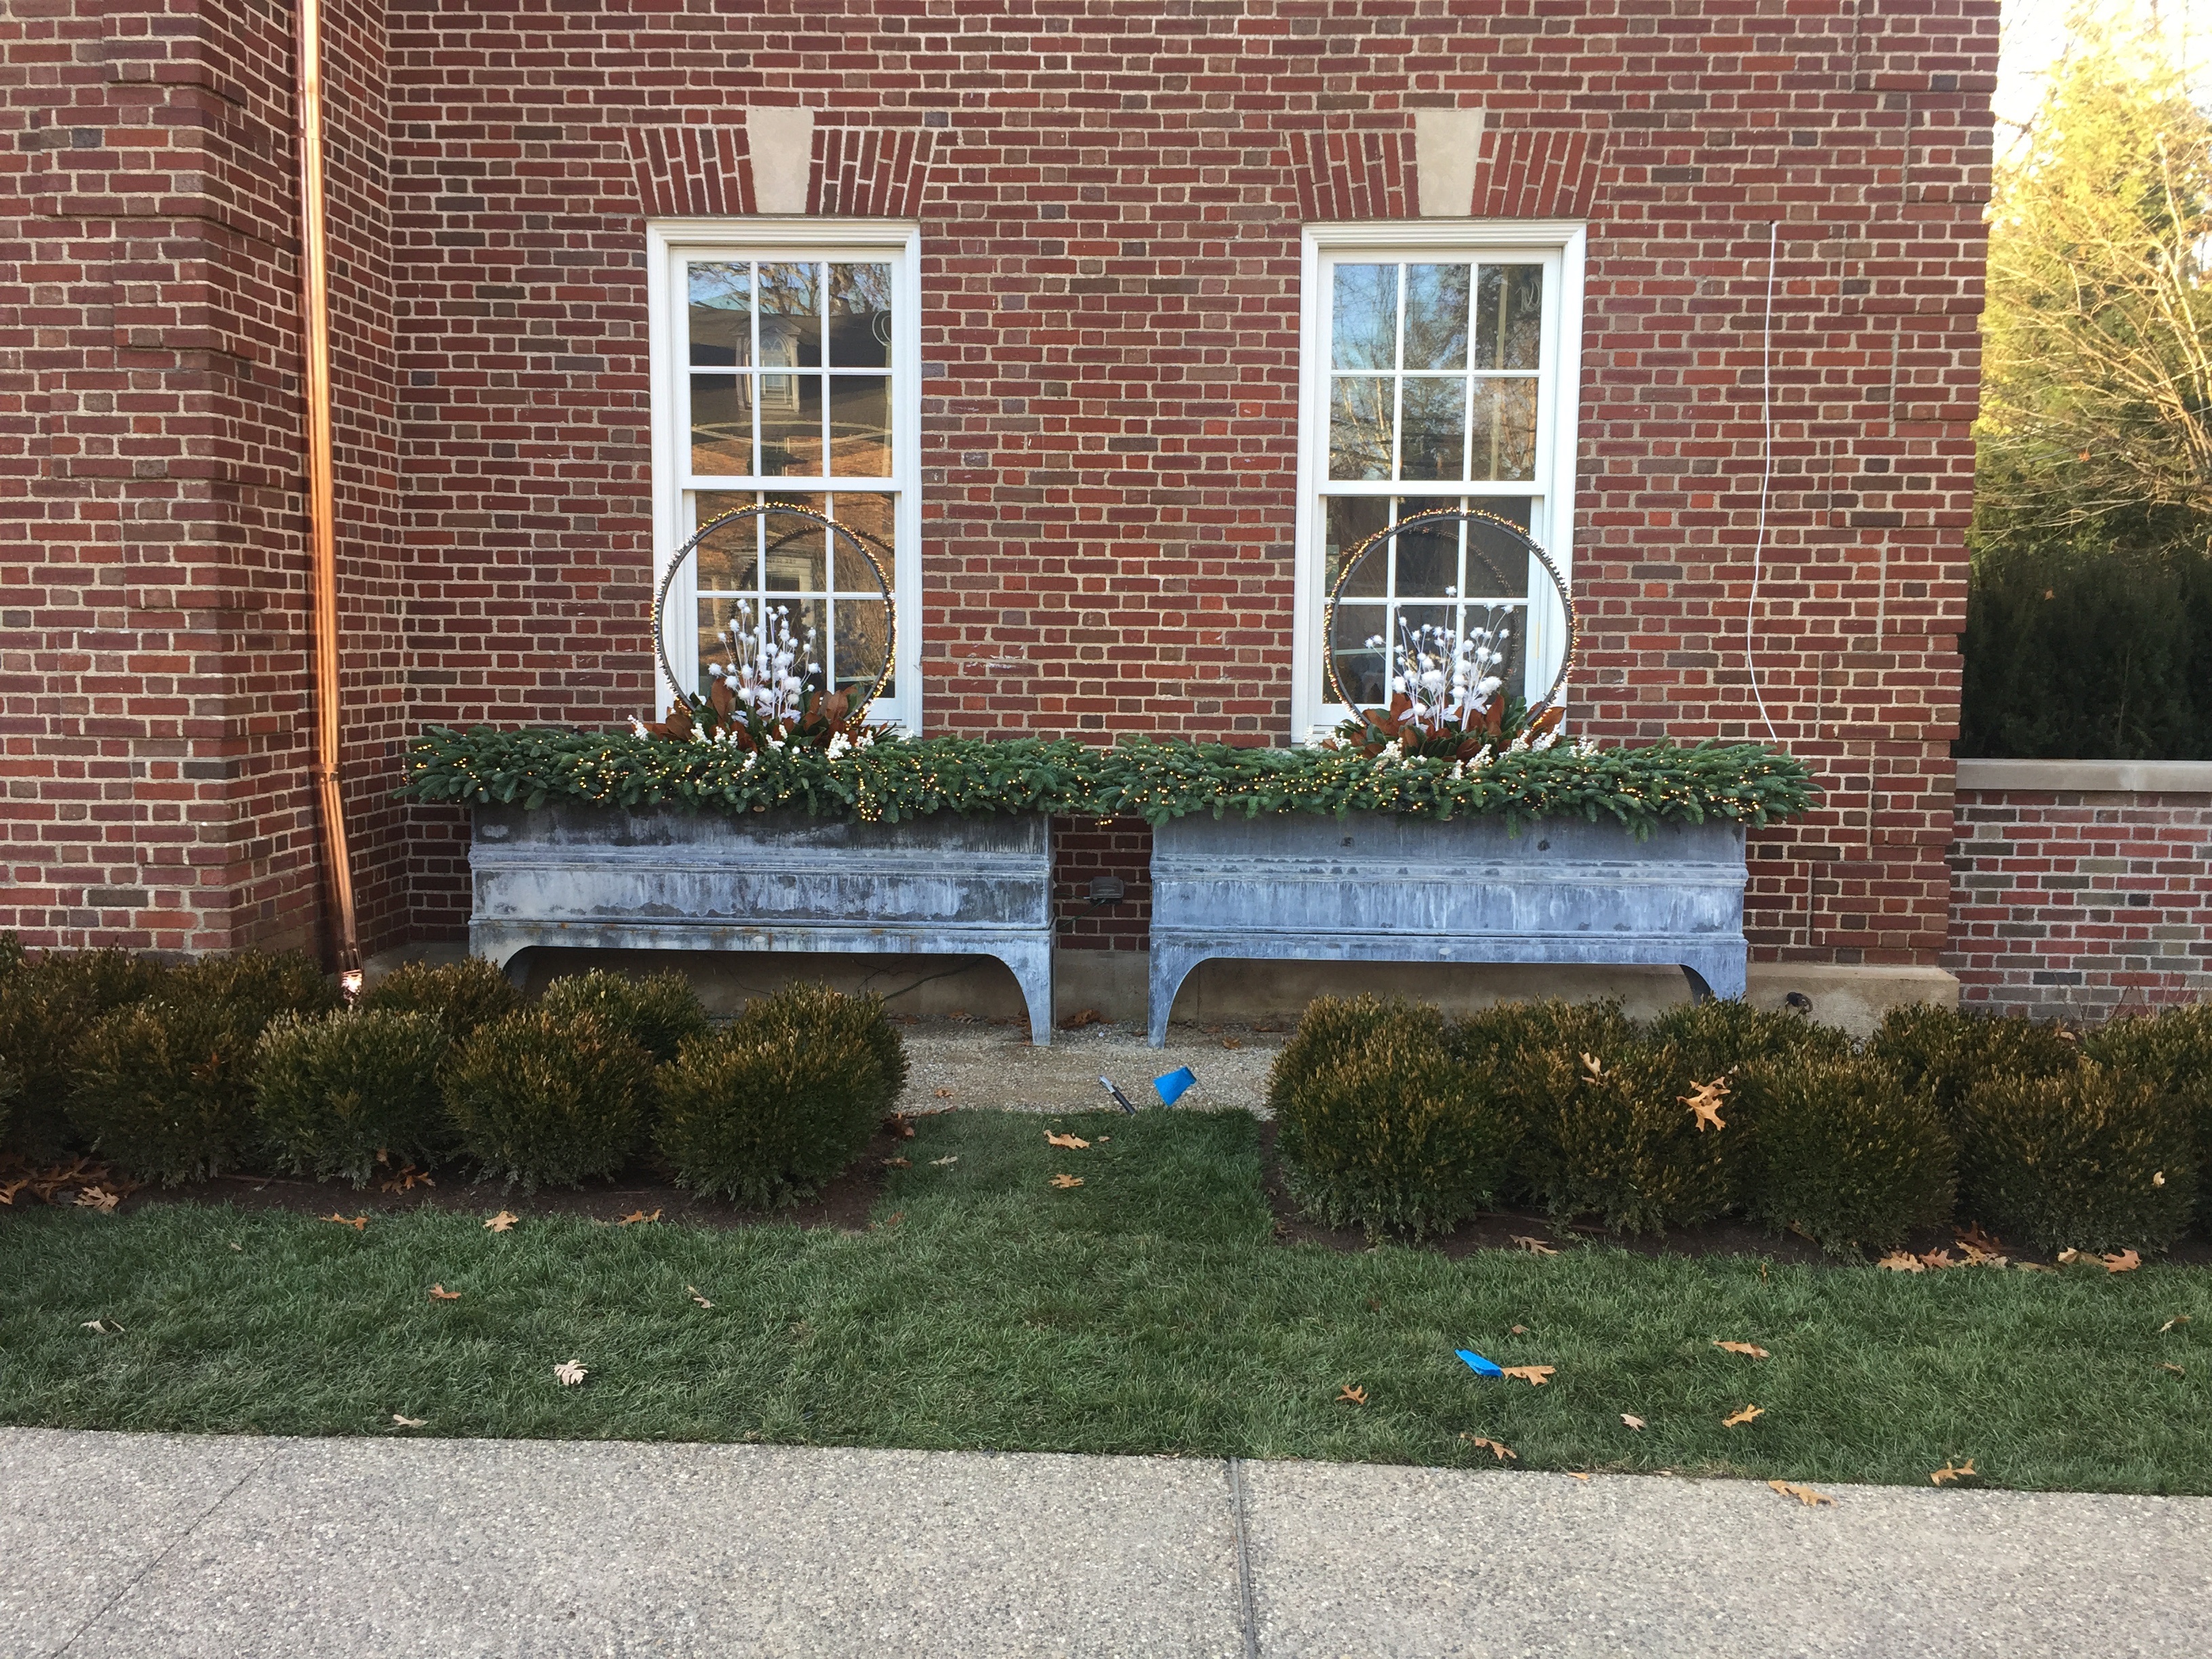
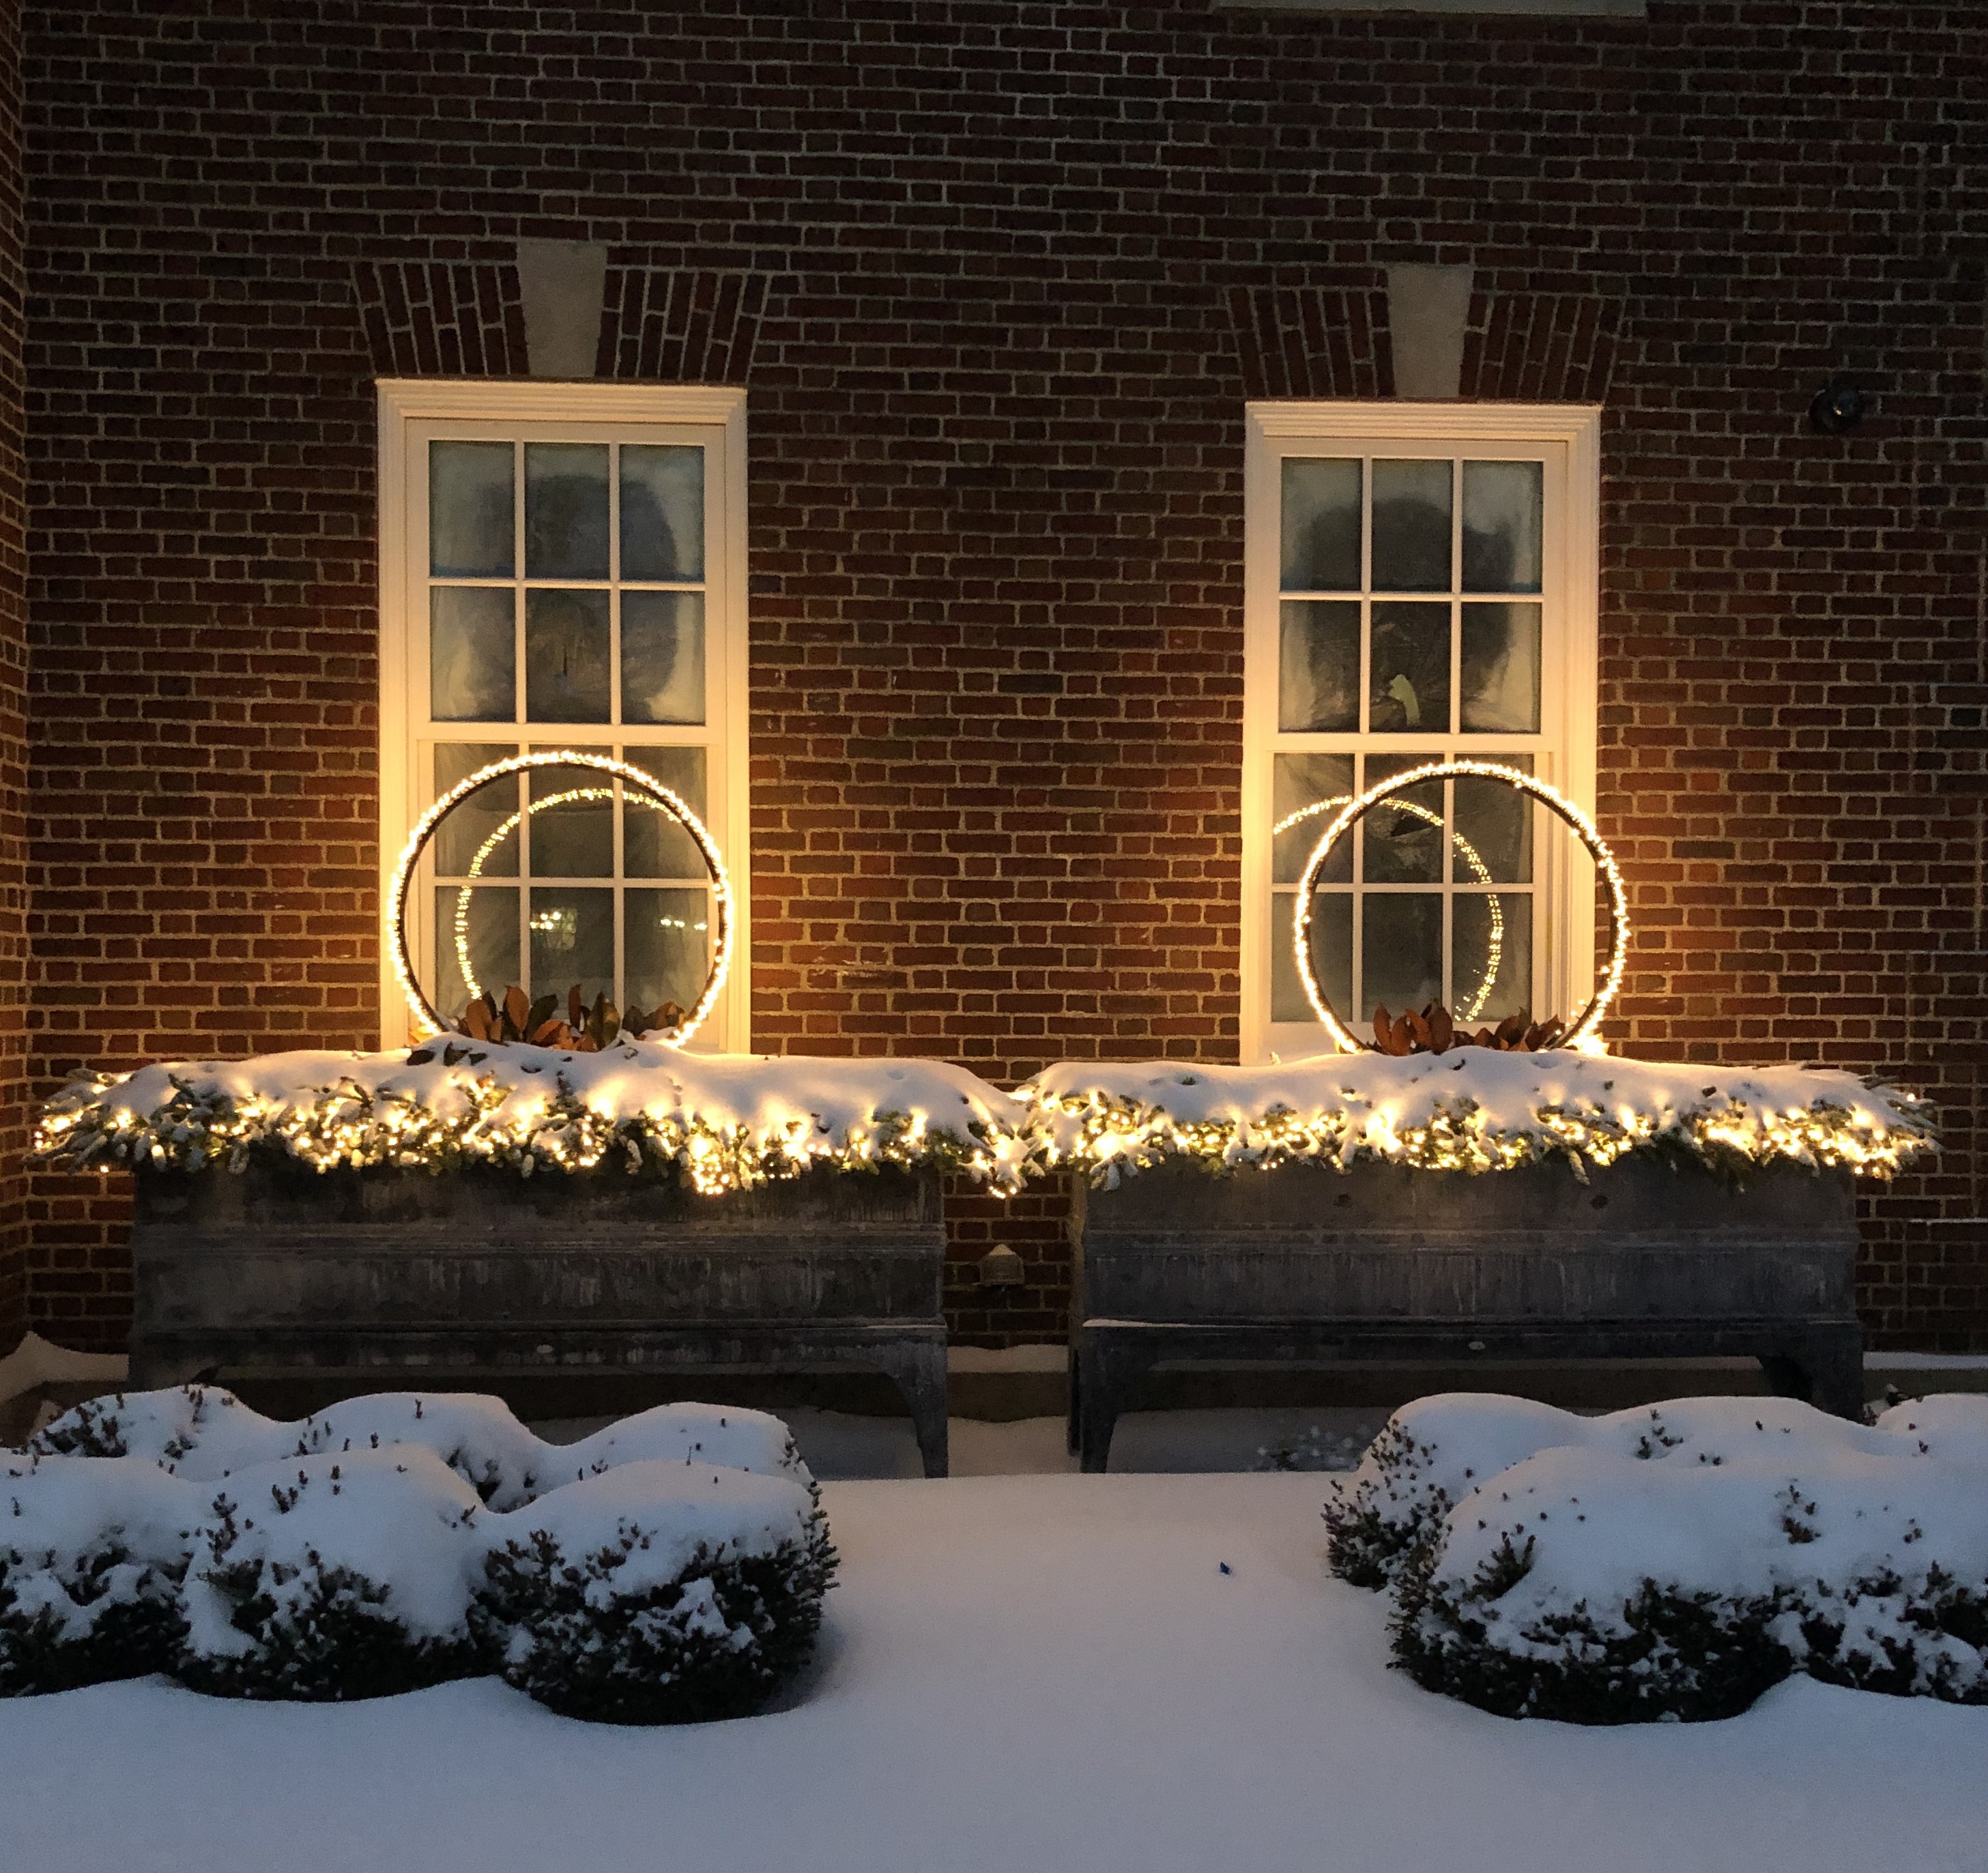
See what I mean?

Winter Pots For Ms. H

Every project we do for the winter season begins with a good deal of discussion. The winter containers for Ms. H is the subject of a particular discussion. That astonishing level of discussion on her behalf is simple to understand. We have a big love for her. This year, we had two issues to address. The forms were very long and narrow. This meant there was always the danger, and sometimes the reality that the foam would break in the middle. The fact that all four pots had steel light rings 3 feet in diameter inserted into the forms piled on additional stress. This made for a rather nerve wracking installation. It was a simple matter to split the long forms into two shorter ones. The forms could be stuffed with greens side by side, and labelled as to their position in each pot. In the picture above, Karen is detailing a plan drawing of the most significant innovation-a separate form for the light ring and all of its fixings would be set squarely on top of the spot where the pair of greens forms would meet. The half oval shape drawn on the form above would dictate the position of the light ring form. The widest point of that half oval would just about cover the spot where the two shorter forms come together. The swoop de do would be stuck with German boxwood. The rest of the lower forms would be stuck with Noble fir.  What??

It is much easier to explain this new construction protocol in pictures. I am happy to say it was entirely of David’s invention. He not only constructs winter arrangements, he is an expert at installing them. It took longer than I really want to admit for me to understand what he was proposing, but once I understand, I could appreciate the pure genius of it. The plan called for filling the interior of the ring with various picks. Why not have a separate form for the ring and its fixings? This would provide a stable base for the ring to travel in the truck. None of the picks would be disturbed trying to remove the ring for transport, and putting it back in exactly the right location during installation. The shape of the ring form was determined by the design and arrangement of the picks. The rear prongs of the ring would go through both layers of the mini form. The front prongs would rest on the lower form. If you are still unclear about the plan, don’t feel bad. David had to show me before I fully understood what he wanted to do. See the following picture.

The ring 2 layered form would sit on top of the 2 layered greens forms. That long curved upper form would cover the split forms which would be the bottom layer. Once set on top, the rear legs of the ring would be pushed all the way through both layers of foam and a little bit into the bottom forms. The picks are stable in the top two layers of foam, but they do not provide any structural connection between the two layers of foam, and the bottom two layers. Small diameter green bamboo stakes would be driven through all four layers of foam and into the soil in the pots. That would provide structural stability to the entire affair.

The top of the ring form would be stuck with German boxwood. That same boxwood would be used to cover the face of the upper form.

This rear view tells the story. The lower two layers of foam tell last years story. The very bottom piece of foam is wedged into the pot. The layer immediately above that has holes in it. Those holes are from the greens we stuck in last year. One of the advantages of using large scale evergreen boughs is that it does not take that many stems to create a lush appearance. This is why we are able to reuse the forms for a good many years. The forms are quite strong, as long as no undue stress is put to them.

The other critical design issue is all about the placement of the bottom of the ring. I like it to be set such that the bottom of the ring is visible, both during the day and at night. This placement and finish creates the illusion that the ring is floating. This means that the legs of the rings will need bamboo stakes or rebar zip tied to it, to both prop and keep it up at the desired level. I am not crazy about burying the bottom of the ring in twigs, picks or greens for another reason. Though the light sets are factory sealed, I don’t like them in a situation where water can collect and persist. If there is an electrical problem, I want easy access to the cord and transformer.

Karen does a terrific job of greening the lower forms. How she sticks them creates the illusion of a shrub growing. She does a terrific job of so many facets of the holiday installation.  How I value her work. Thanks, Karen.

The greens are heavy. They are composed of fresh wet wood, and water saturated needles. This explains the need for rocks and bricks to keep the forms from tipping over.

This table top was made from a full 4′ by 8′ sheet of plywood. This table holds 4 forms-enough for two of the four boxes. These lower forms, greened up, and punctuated with pine cones, are all ready to go to the installation phase.

This shop shot taken in process details how much work we do prior to an installation.

Once our fabrication group gets a project to this moment, we know we are ready for an installation.

The installed winter containers boxes to the right of the front door. Perfectly beautiful, to my eye.

The installed containers to the left of the front door. Be advised that we work very hard to keep the construction issues behind the scenes. The finished pots show no signs of what it took to get them to this point. Except the fact that they look deliberately composed, and finished.

Dressing the French pots in the back for the winter season was a new addition to this project. David did a great job of taking on a pair of winter container arrangements that asked for considerable size and scale.

Karen lending a hand securing the picks

A discussion of the transport scheme was lively, but the tops of these fresh cut pussy willow twigs had no problem bending over for the trip across town.

See what I mean?

Set in place, the scale of this winter arrangement works well with in this space. The materials reflect the landscape that can be viewed from this vantage point. The color is very friendly to the color in the glaze of this French bugadier. The pot is filled with gravel, so there is proper ballast to handle the height of the arrangement. The foam form provides another service. As it does not absorb water, it prevents water from getting in to the pot. This form is 6″ thick overall, so the lower 3″ is wedged tightly into the pot.

winter arrangements in the back yard

framed view

There is no doubt a viable, approachable, and beautiful winter season ahead in the garden. Every gardener needs to determine how they will handle that. I garden in every season. The winter pots help speak to that.


Hoop It Up: Lighting The Winter Landscape

The benchmark of our winter and holiday season is the seasonal lighting made available at Detroit Garden Works. Any current year’s collection becomes available towards the end of October. We measure all else we offer for winter gardens to clients by the effort we make to have something of value available to light the landscape. Providing for some light is never more urgent than it is in the winter months. The daylight hours are few, and mostly gray. That night that starts in the afternoon, and persists late into the following morning asks for intervention.

Rob Yedinak is entirely responsible for anything lighted we have to offer the winter landscape. He not only buys a variety of lighting materials, but he imagines and fabricates light sculptures from those materials. What he manages, to the delight of any gardener facing the dark days to come, is an engaging answer. His best known effort is a collection of steel circles wound round with LED string lighting. These light rings come in two versions. One style of hoop can be hung from a stout tree branch or pergola. It can be laid flat in a birdbath or pot. It could be hung against a wall or a garden gate. The hanging hoops come with multi strand jute rope. That jute helps to disguise the wire at the end of the light strand. It is a very simple and beautifully made lighted sculpture.

A later incarnation provided a four pronged steel base which enabled the ring to be securely installed in a pot, or in the ground. A free standing lighted sculpture, if you will. The above picture illustrates a 3 foot diameter ring installed as an integral part of a winter window box at the shop. Every element of that arrangement is stuffed into a dry floral foam base. I was interested that the lighted hoop be an integral part of the arrangement. A hoop on four legs made it easy to evenly sink those legs into to the foam base, and stuff branches, magnolia and evergreen boughs all around it. The very best part of this process is the ability to construct the arrangement in a warm and dry space.

Though we glue several layers of foam sheets together, that foam has no strength. It can hold hundreds of stems, and the spiked legs of the light ring securely. But unsupported, that foam will break. During the construction phase, it sits on top of a piece of plywood. We slide the arrangement off the plywood into the container just like a cookie coming off a baking sheet. This process does require very careful measuring to insure a good fit.

But the big story here is how Rob’s spiked and lighted hoops look at night. They appear to float over the arrangement. Thought we covered the foam with light strings before we stuck the branches into the foam, those circles of light are as distinctive as they are satisfying. They stand out from the glow.

This picture clearly illustrates the standing mechanism. The base is securely welded to the ring. This is a very large ring, so the spikes that go into the soil are wired to 4 pieces of rebar that go deep in to the container.

This lighted hoop is 5 feet in diameter. It does a terrific job of highlighting the centerpiece During the day, that steel hoop is very sculptural. The light rings add a whole other dimension to a winter container arrangement. The LED lights draw very little in the way of electricity. We have clients who run them in their garden all year round. To follow are as collection of pictures of winter arrangements featuring the hoops. If I had a mind to make just one winter gesture in the garden, I would hang or spike one in a spot where I could see all winter. It is a lot of look in a small and durable package.

Why am I writing about lighted hoops for winter containers in October? Jackie has been steadily shipping them out all over the country for the past 3 weeks. Whether you are local or far away from the Works, if you have a mind to hoop it up this winter, you may want to contact her now.  Jackie@detroitgardenworks.com.  Further interested in sizing and pricing?  Lighted hoops from Detroit Garden Works

The Light Rings

If my memory serves me correctly, it was 7 years ago that Rob wound strand lighting around a few vintage wagon wheels, and suspended them from the ceiling of the shop for the holidays. I doubt they were on display for a week before the lot of them was purchased by an enthusiastic client. Over the next several years he designed and redesigned custom made steel circles, carefully engineered and fabricated to accept lights that would hang from a stout tree branch. Of course the light cord was disguised by a substantial hank of jute. An extension cord run up the trunk of the tree would connect to the plug at the top of the branch. They were so beautiful. Arresting. A circle of light with with no visible means of support shining in the winter night. What could be more simple and more joyful? This version of winter lighting is spare and eminently satisfying, both in its shape, and installation. Tie the ring to a substantial branch, and plug it in. Winter gardening in my zone is all about the quality of the light. Not only the body benefits from vitamin D.

A later design of Rob’s included a four pronged mechanism that would enable the light rings to be set securely into the ground, or the soil in a container. This revolutionized my winter container design. How I love incorporating lighting in winter pots. The ring set in the pot encouraged a whole new avenue of design. A few years ago, he suggested that his lighted circles had run their course, and perhaps he should move on to another design or shape. I was incredulous. Those light circles had enchanted clients both near and far. A restaurant in Newfoundland Canada bought 7 of the largest size, and five of the medium size-for their outdoor dining space. They, and countless other design and private clients both local and nation wide have spoken for those lighted circles. Year after year. I suspect I will never tire of them.

A circle is a simple shape. It is a closed and regular curve that divides a plane into two regions. The interior, and the exterior. This from Wikipedia. The interior of this light ring is inhabited by a brightly burning light burst. The exterior is the greater landscape. The circle here is a means by which to focus on a particular albeit temporary feature-the light.  A circle has no beginning or end. It’s recognizable symmetry is a source of visual delight in nature, and in designed spaces of all kinds. The circle is the basis of all kinds of graphic design, of which the polka dot dress is a familiar example. The circle was also the basis for the wheel, which makes all manner of modern machinery possible. It is interesting to note that all circles are the same, except for their diameter, and the width of their border. Circles of different materials and sizes that intersect create other shapes.

The space between 2 endpoints marked on a circle is called a chord. I do not know the history of this definition, but I can attest to the fact that landscape designs that strike a chord with a client or a viewer are engaging, and emotionally satisfying. A circle is a complete entity unto itself. A circle comes standard issue with a sense of completeness. As in the rotation of the seasons.  Though I may not have so many words to put to the experience, circular shapes and spaces evoke a response. In laying out a curved area in the landscape, I start with a chord-or a section of a circle. This is fairly easy to do, with a bamboo stake and string. Finding the center of that circle which will produce the desired chord may take a while, but eventually there will be consistently curving line.

Taking the time to draw the chord on the ground helps to eliminate the squiggles. By squiggles, I mean those bed lines that curve in and out in rapid succession around this shrub and that tree – without an overall sweeping curve that is visually cohesive. It helps to provide focus to what landscape elements belong in the exterior of that partial circle, and what belongs outside. The light ring pictured above is made from steel, but that steel does not need to be that thick. Steel rolled into a circular shape is as stable and strong physically as it appears to be. The ring celebrates the centerpiece. The pussy willow that pushes past the edge of the circle creates a relationship between the geometry of one element and the natural form of another. Both materials are stronger visually given the form of the other. The ring also compliments the rectangular geometry of the planter box, and narrower and wider rectangle of the greens. The composition without the ring would be fine. But its presence completes the composition in a way that organizes all of the other shapes and materials.

Rob has the rings made in a variety of sizes, from two feet in diameter up to seven feet. The ring pictures above is five feet in diameter – a good size considering the size of this pot. The first rings were strung with strands of incandescent twinkle lights that had brown cords.  Now we use only LED lights, for longevity’s sake. The lights go around the outside of the ring, and each bulb faces out. We ship them out with and without lights, and we have made them in custom sizes for a particular application.

This ring is hung high in a window, so it can easily be seen from the street.

Led lights produce little in the way of heat, so the snow has collected on the inside lower edge of the ring pictured above. The contrast of the snow and the light provides a little welcome interest to the winter landscape, even during the day.

This is my first year with light rings at home. I drive up to them, and I can see them from the deck above.

The 6 inches of snow that fell yesterday just made them look better.

H sent me these pictures of her winter boxes last night. She is enjoying hers too.

I have indeed talked before about these rings recently, but the fact is we are looking at more weather that looks just like this for quite a while yet. These lighted circles make it easier to bear with the winter.