A Pergola From Branch Studio


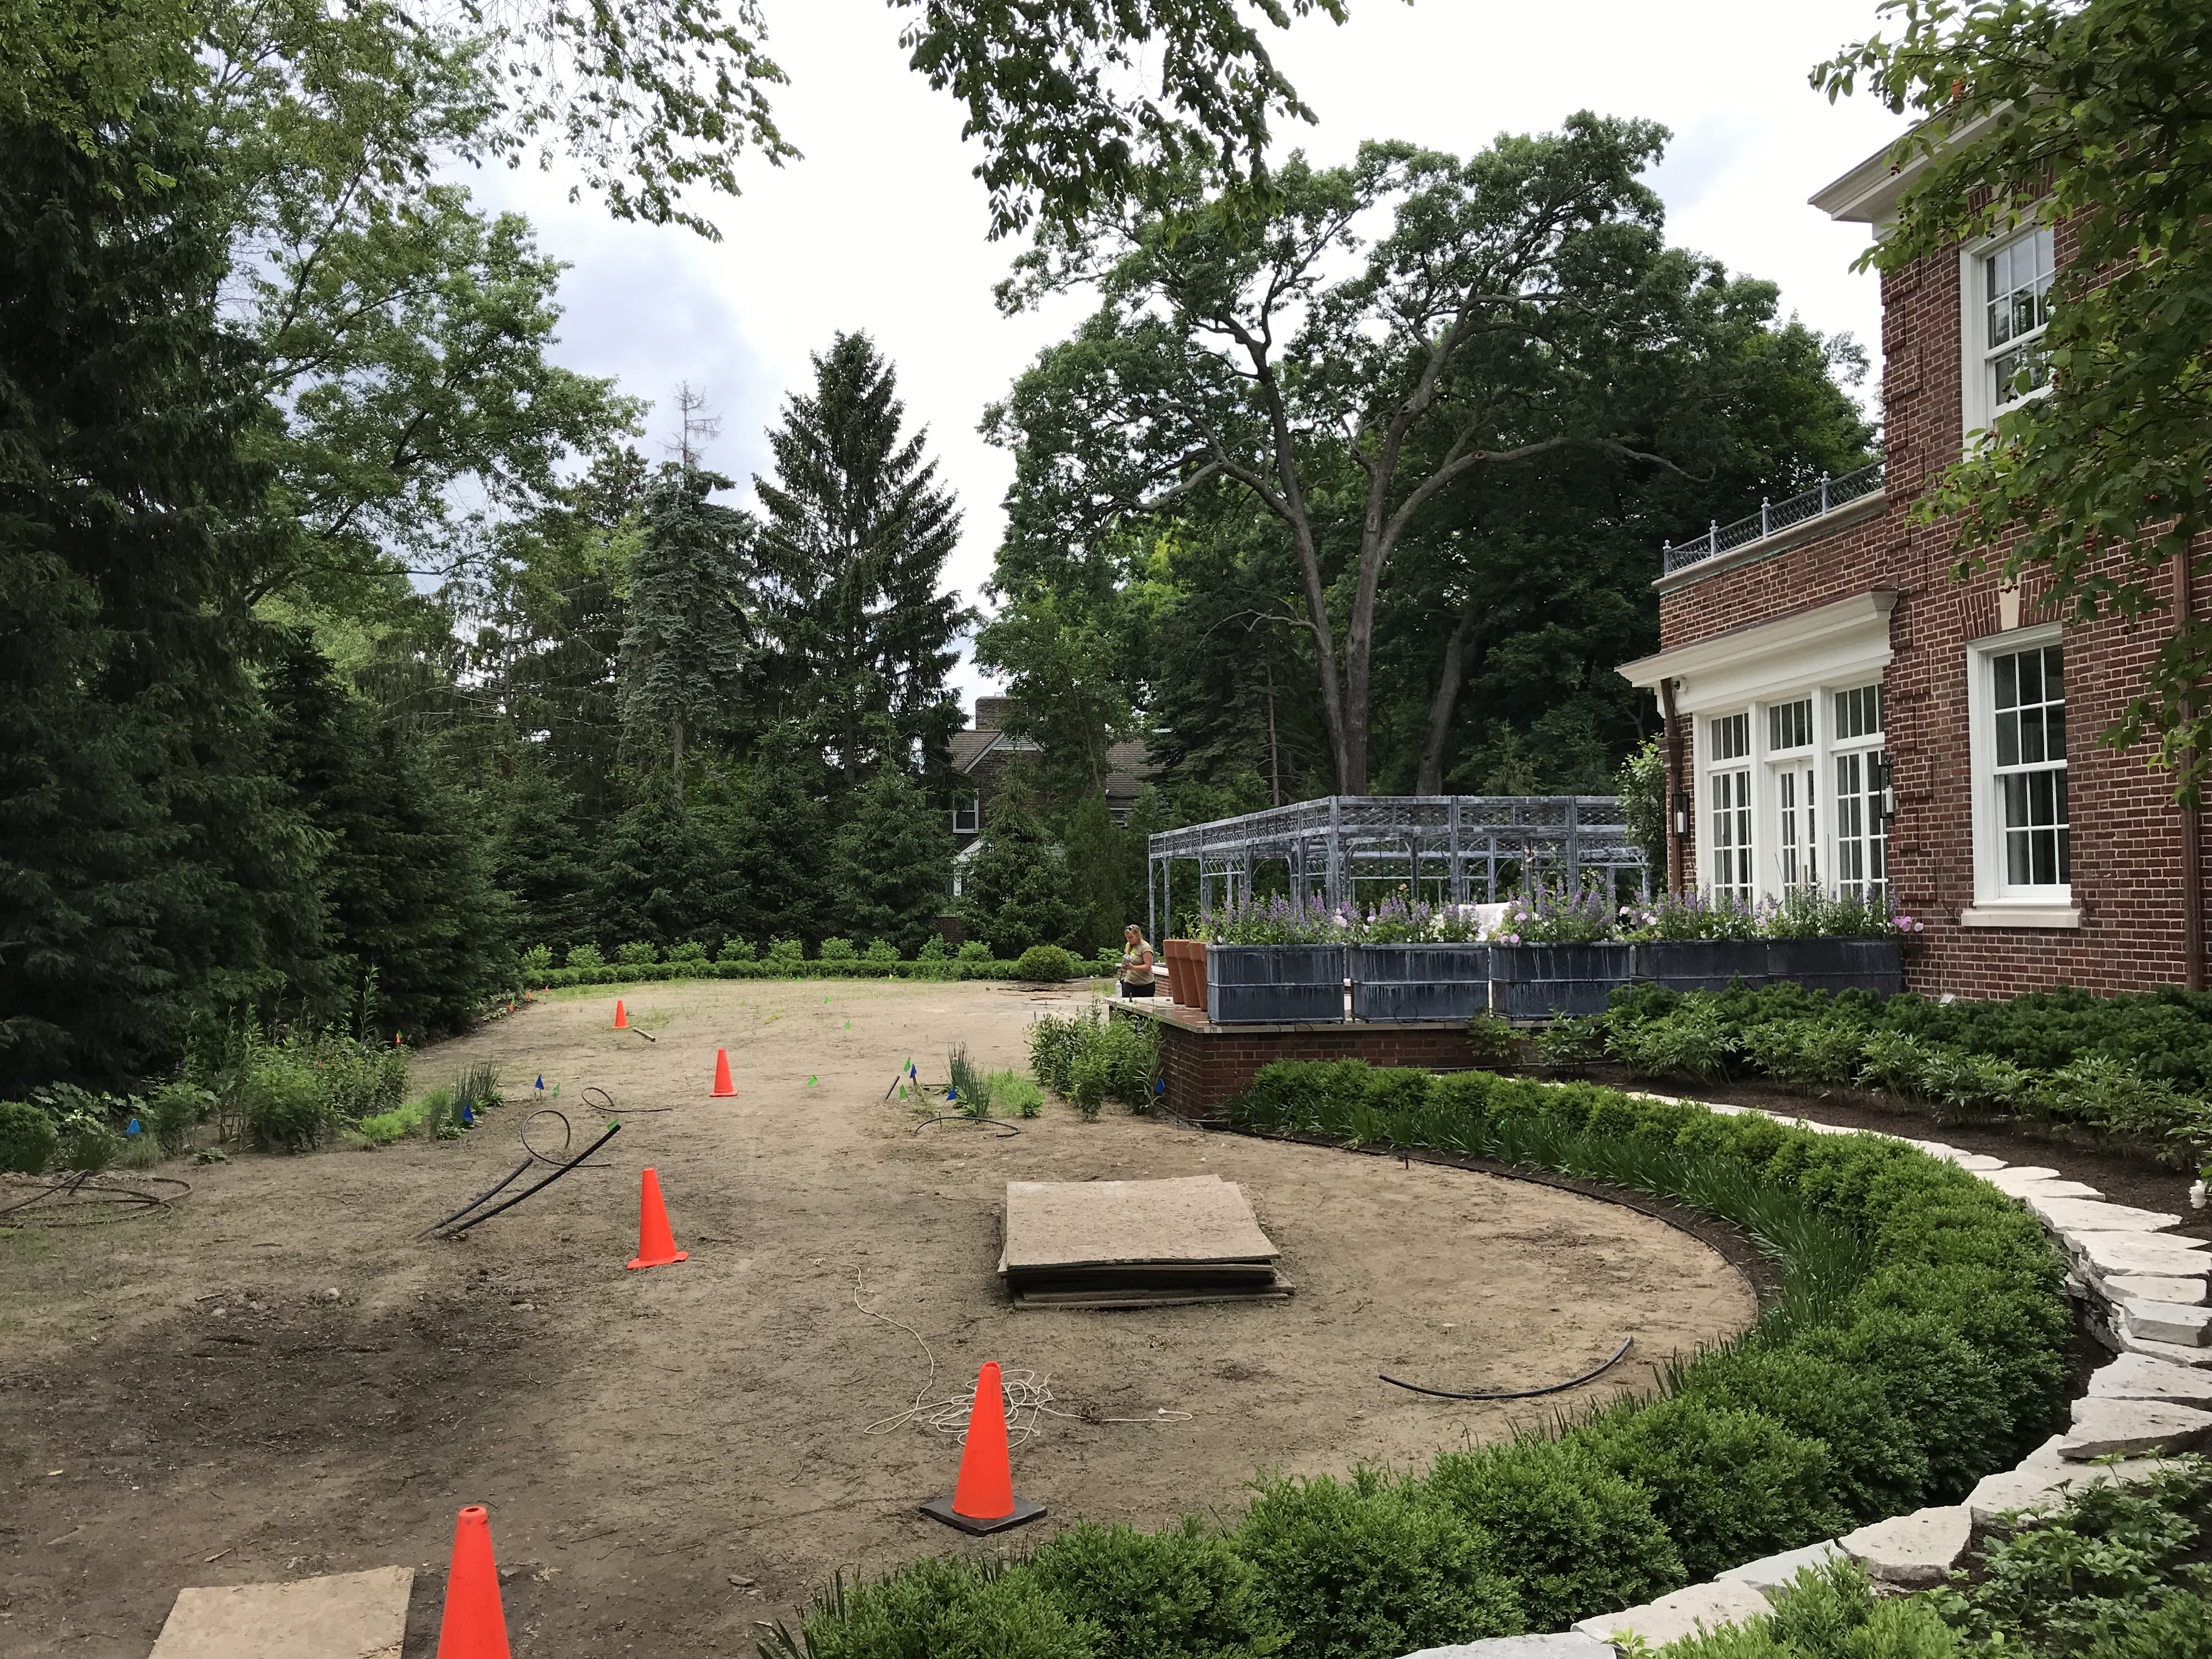
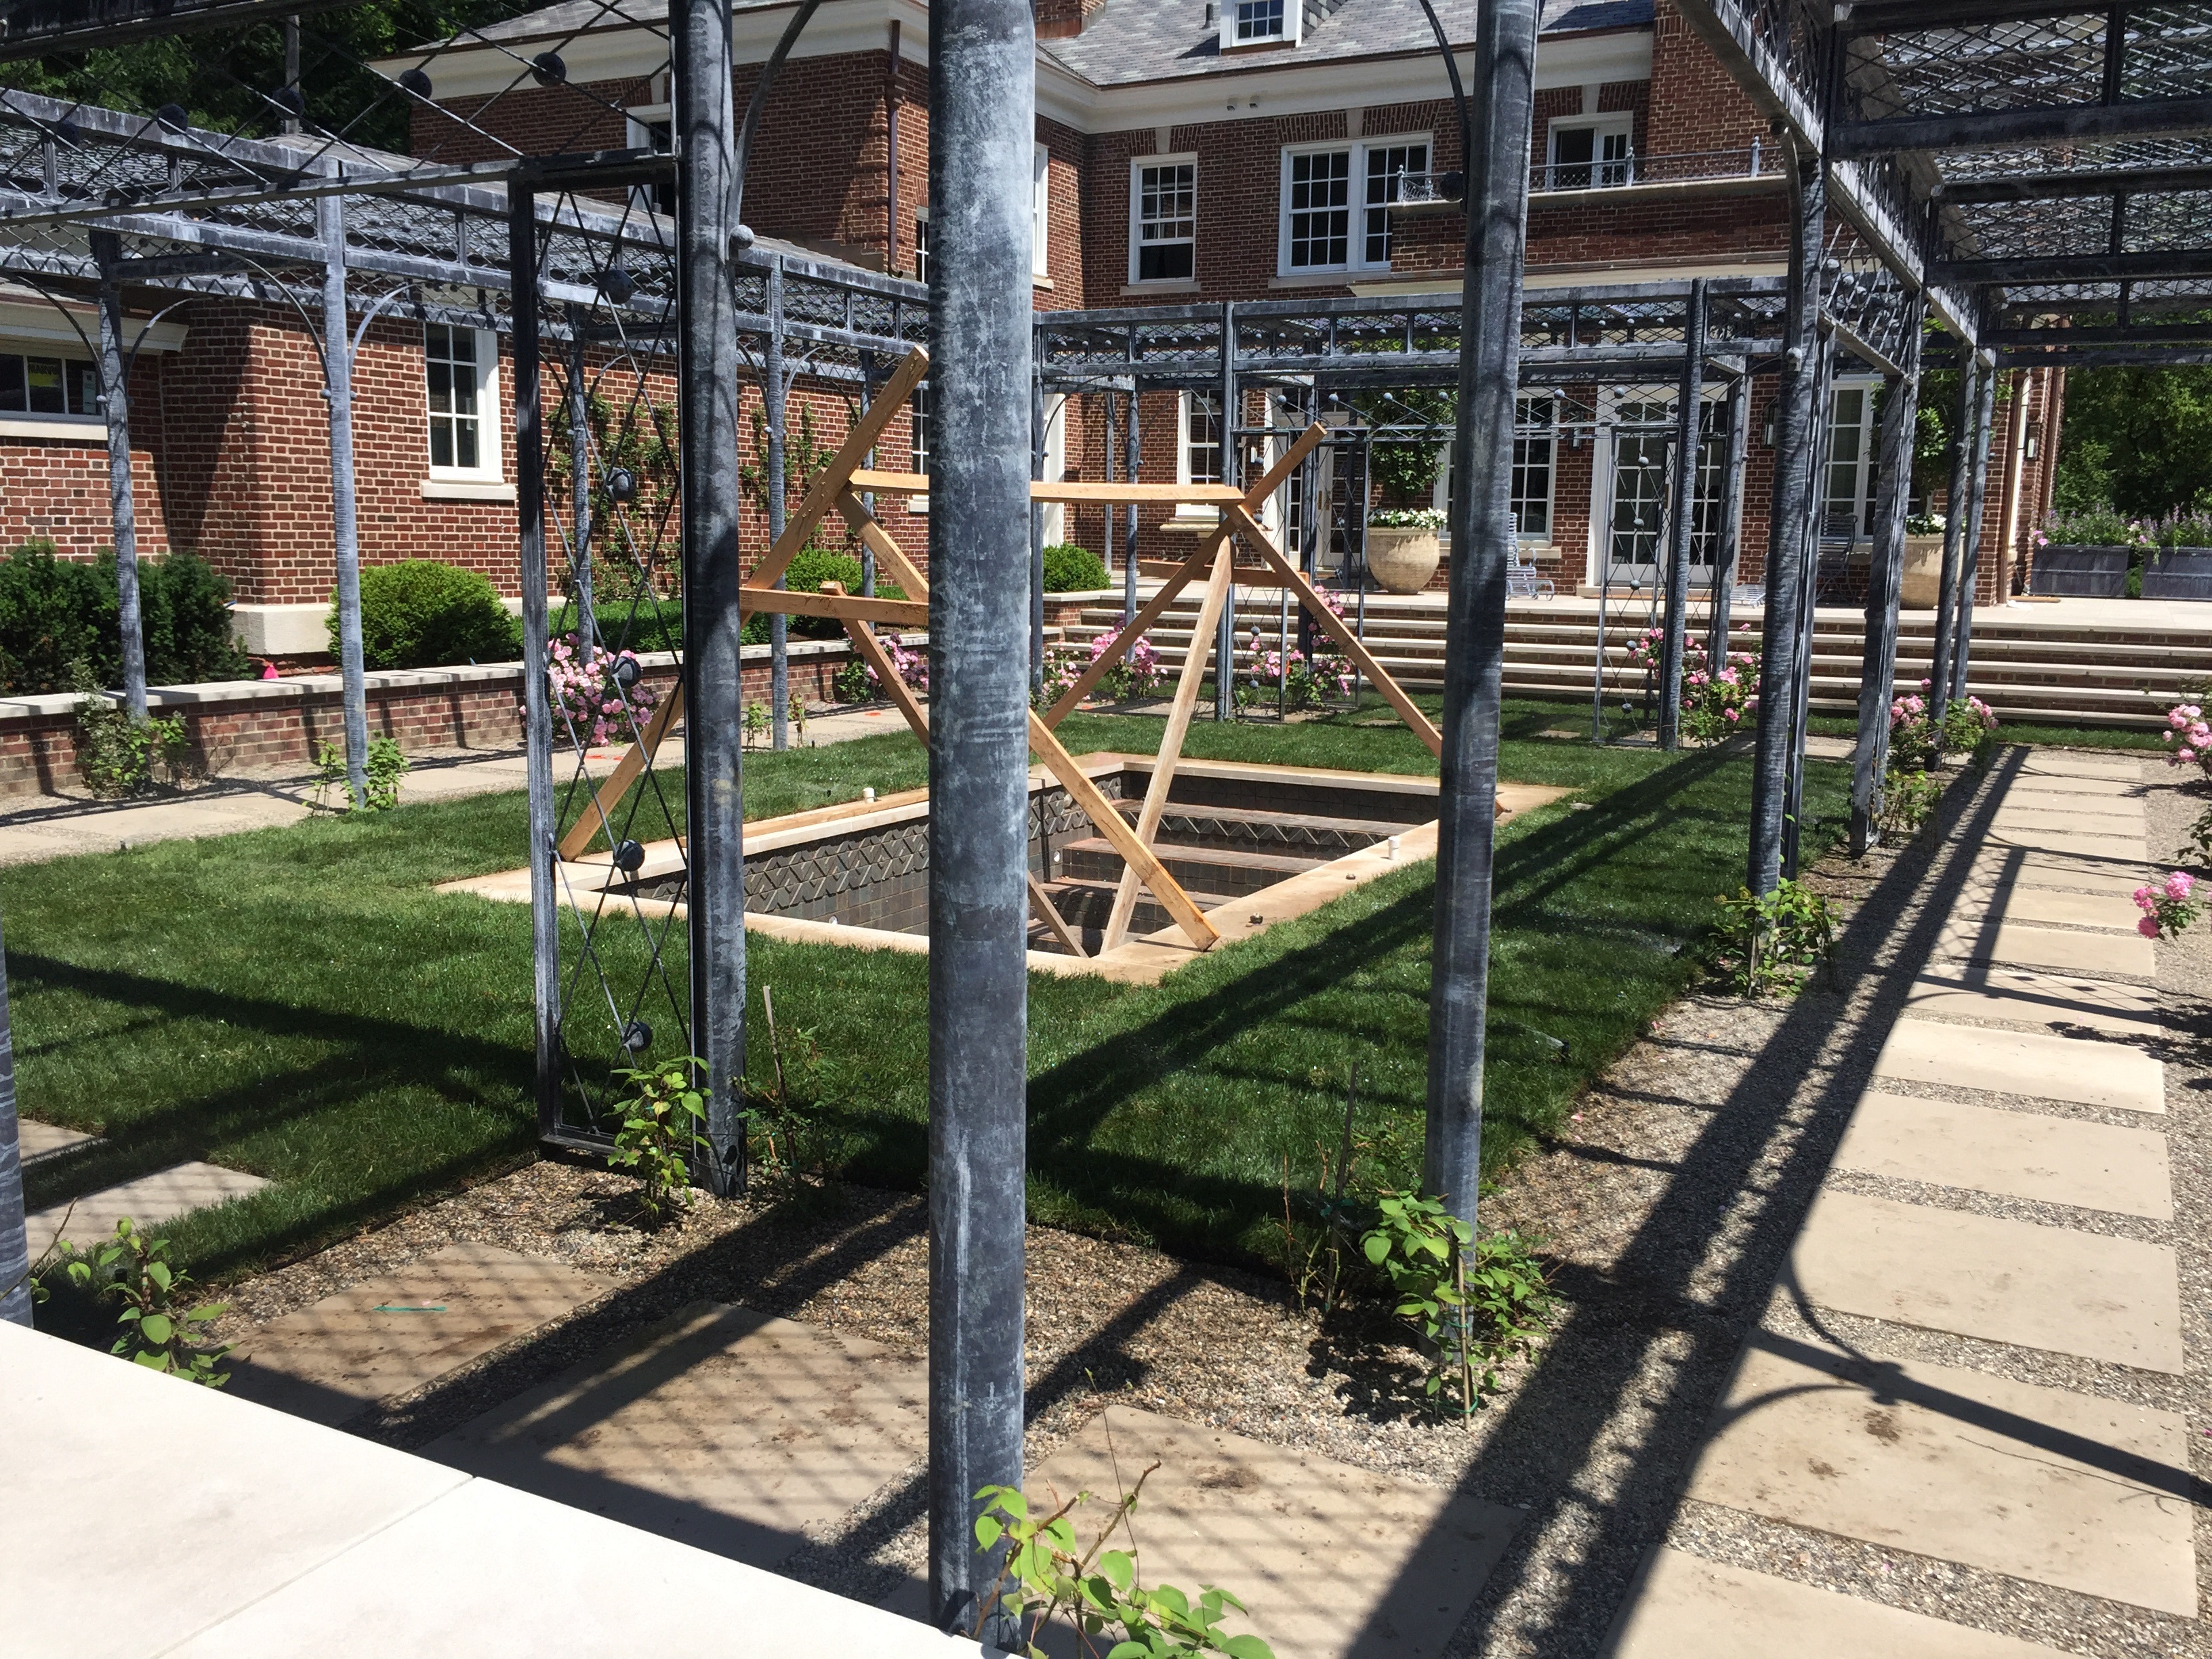
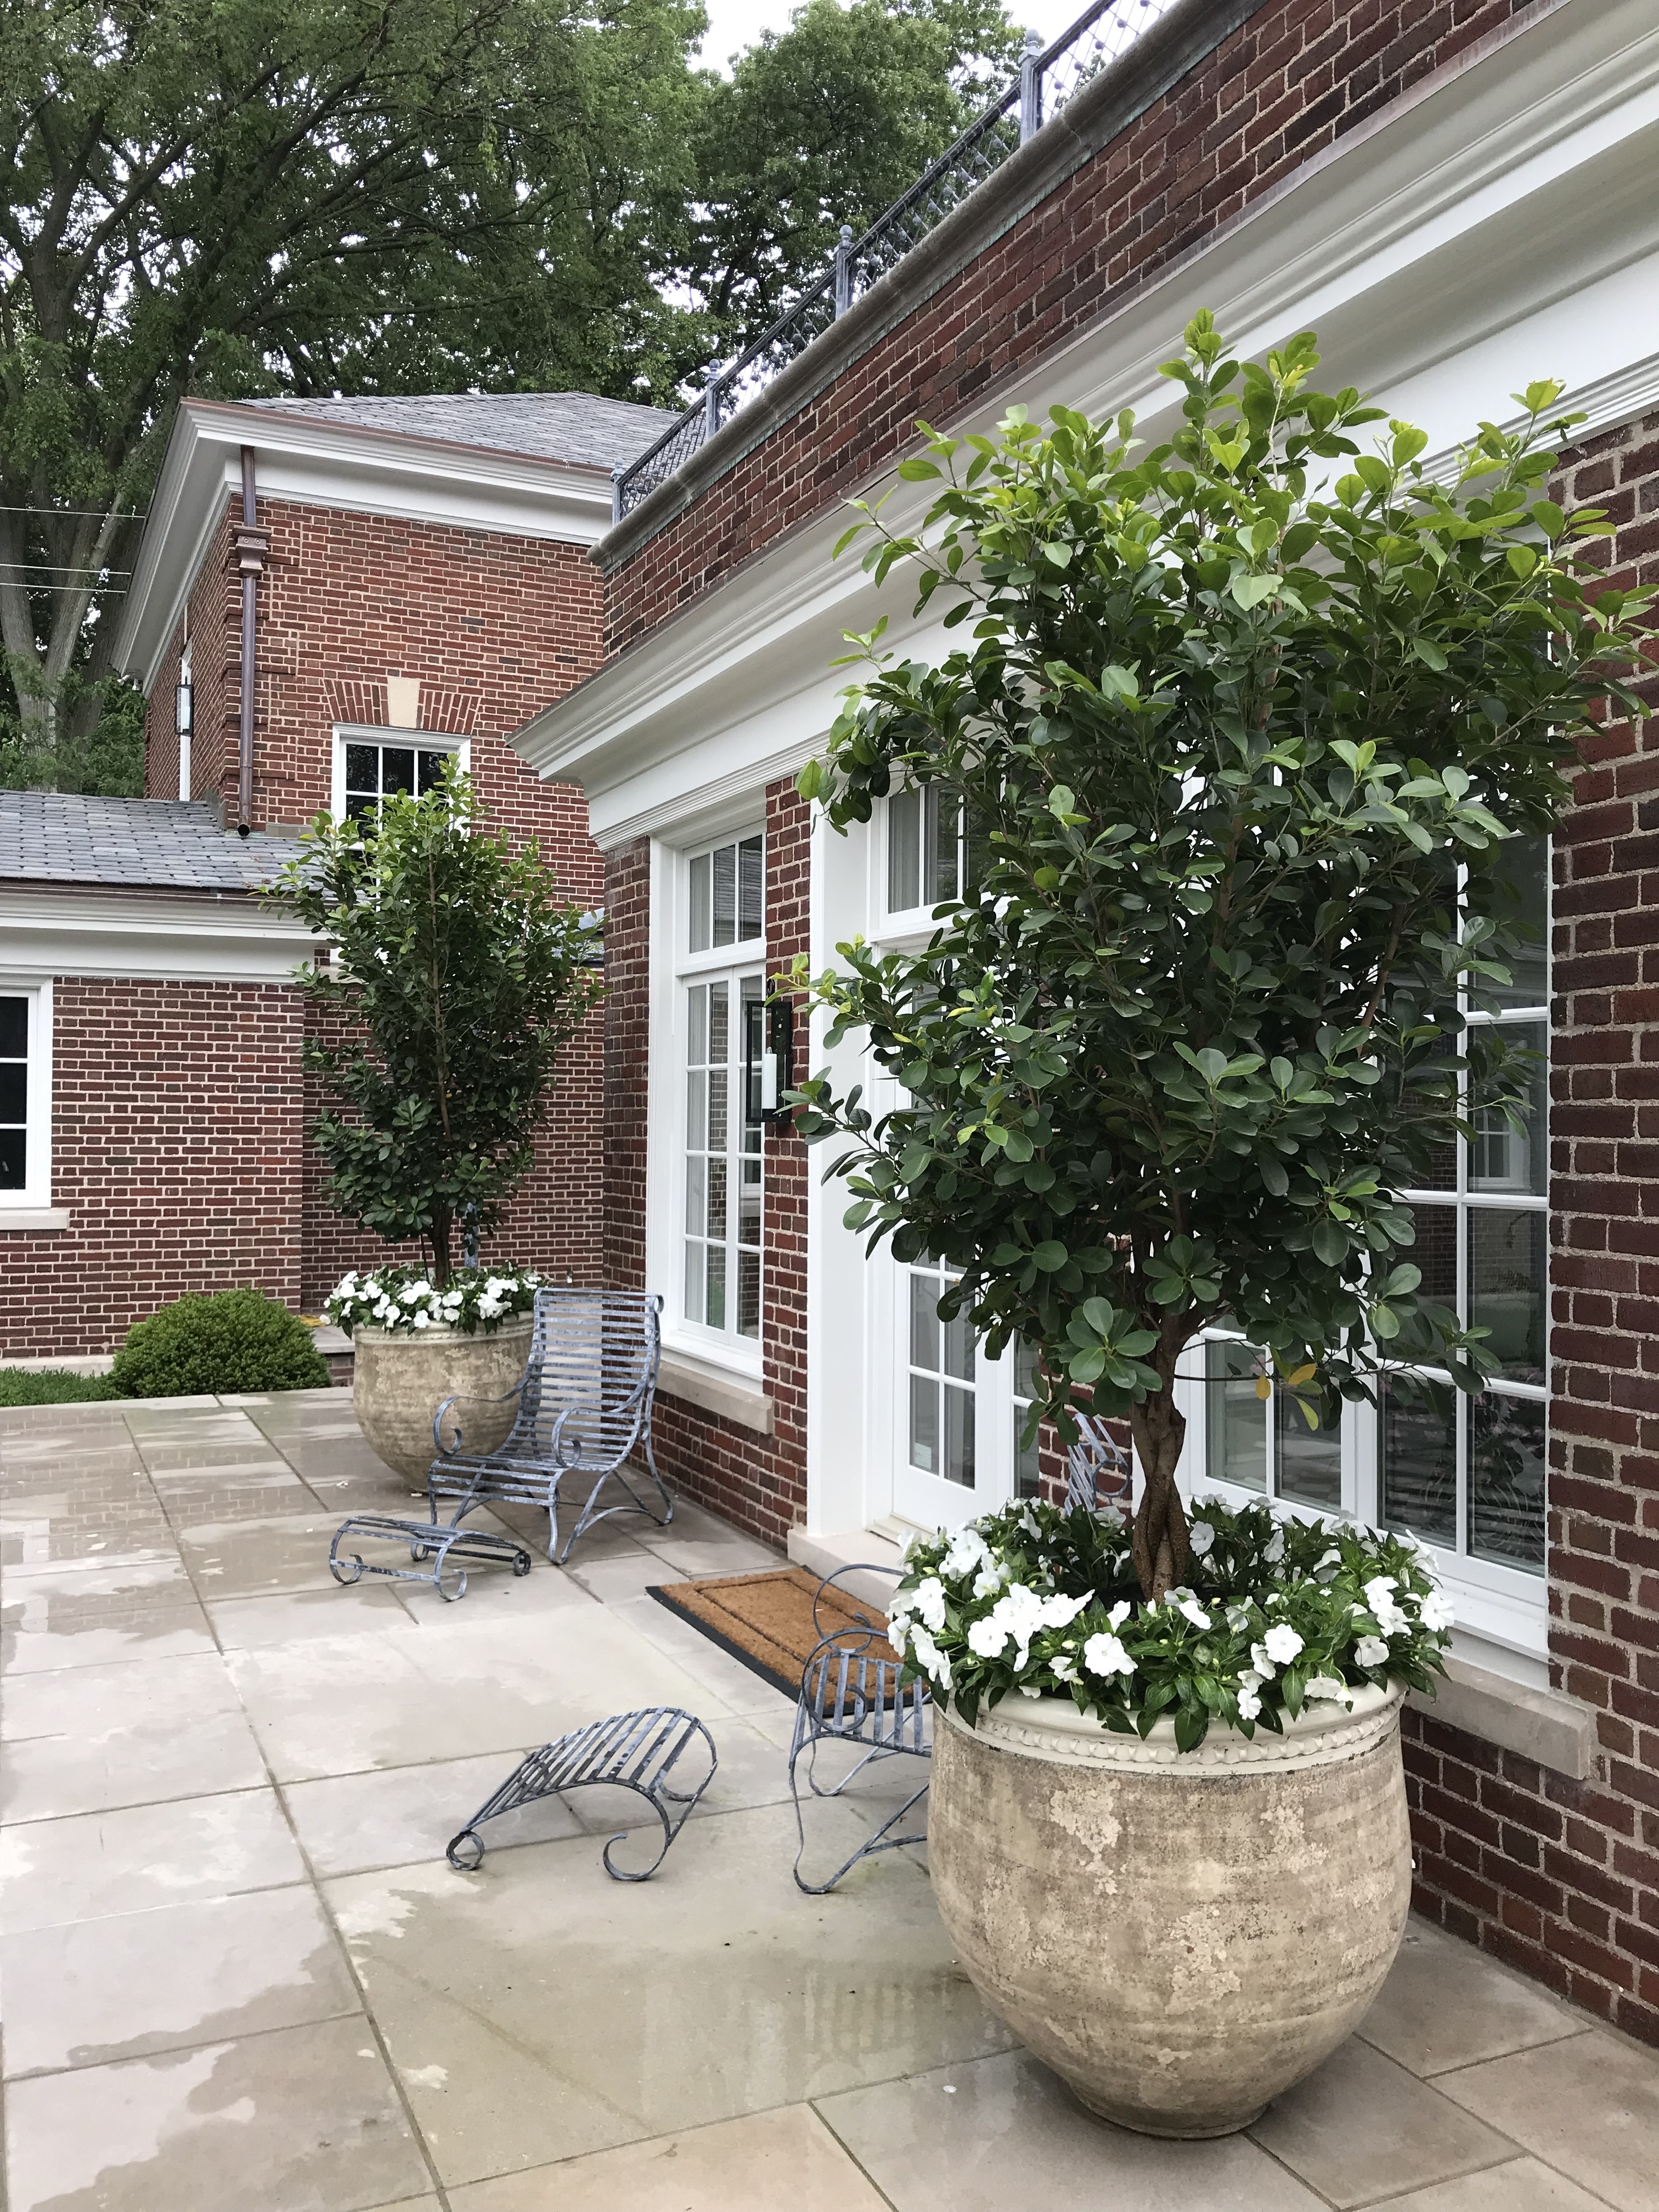
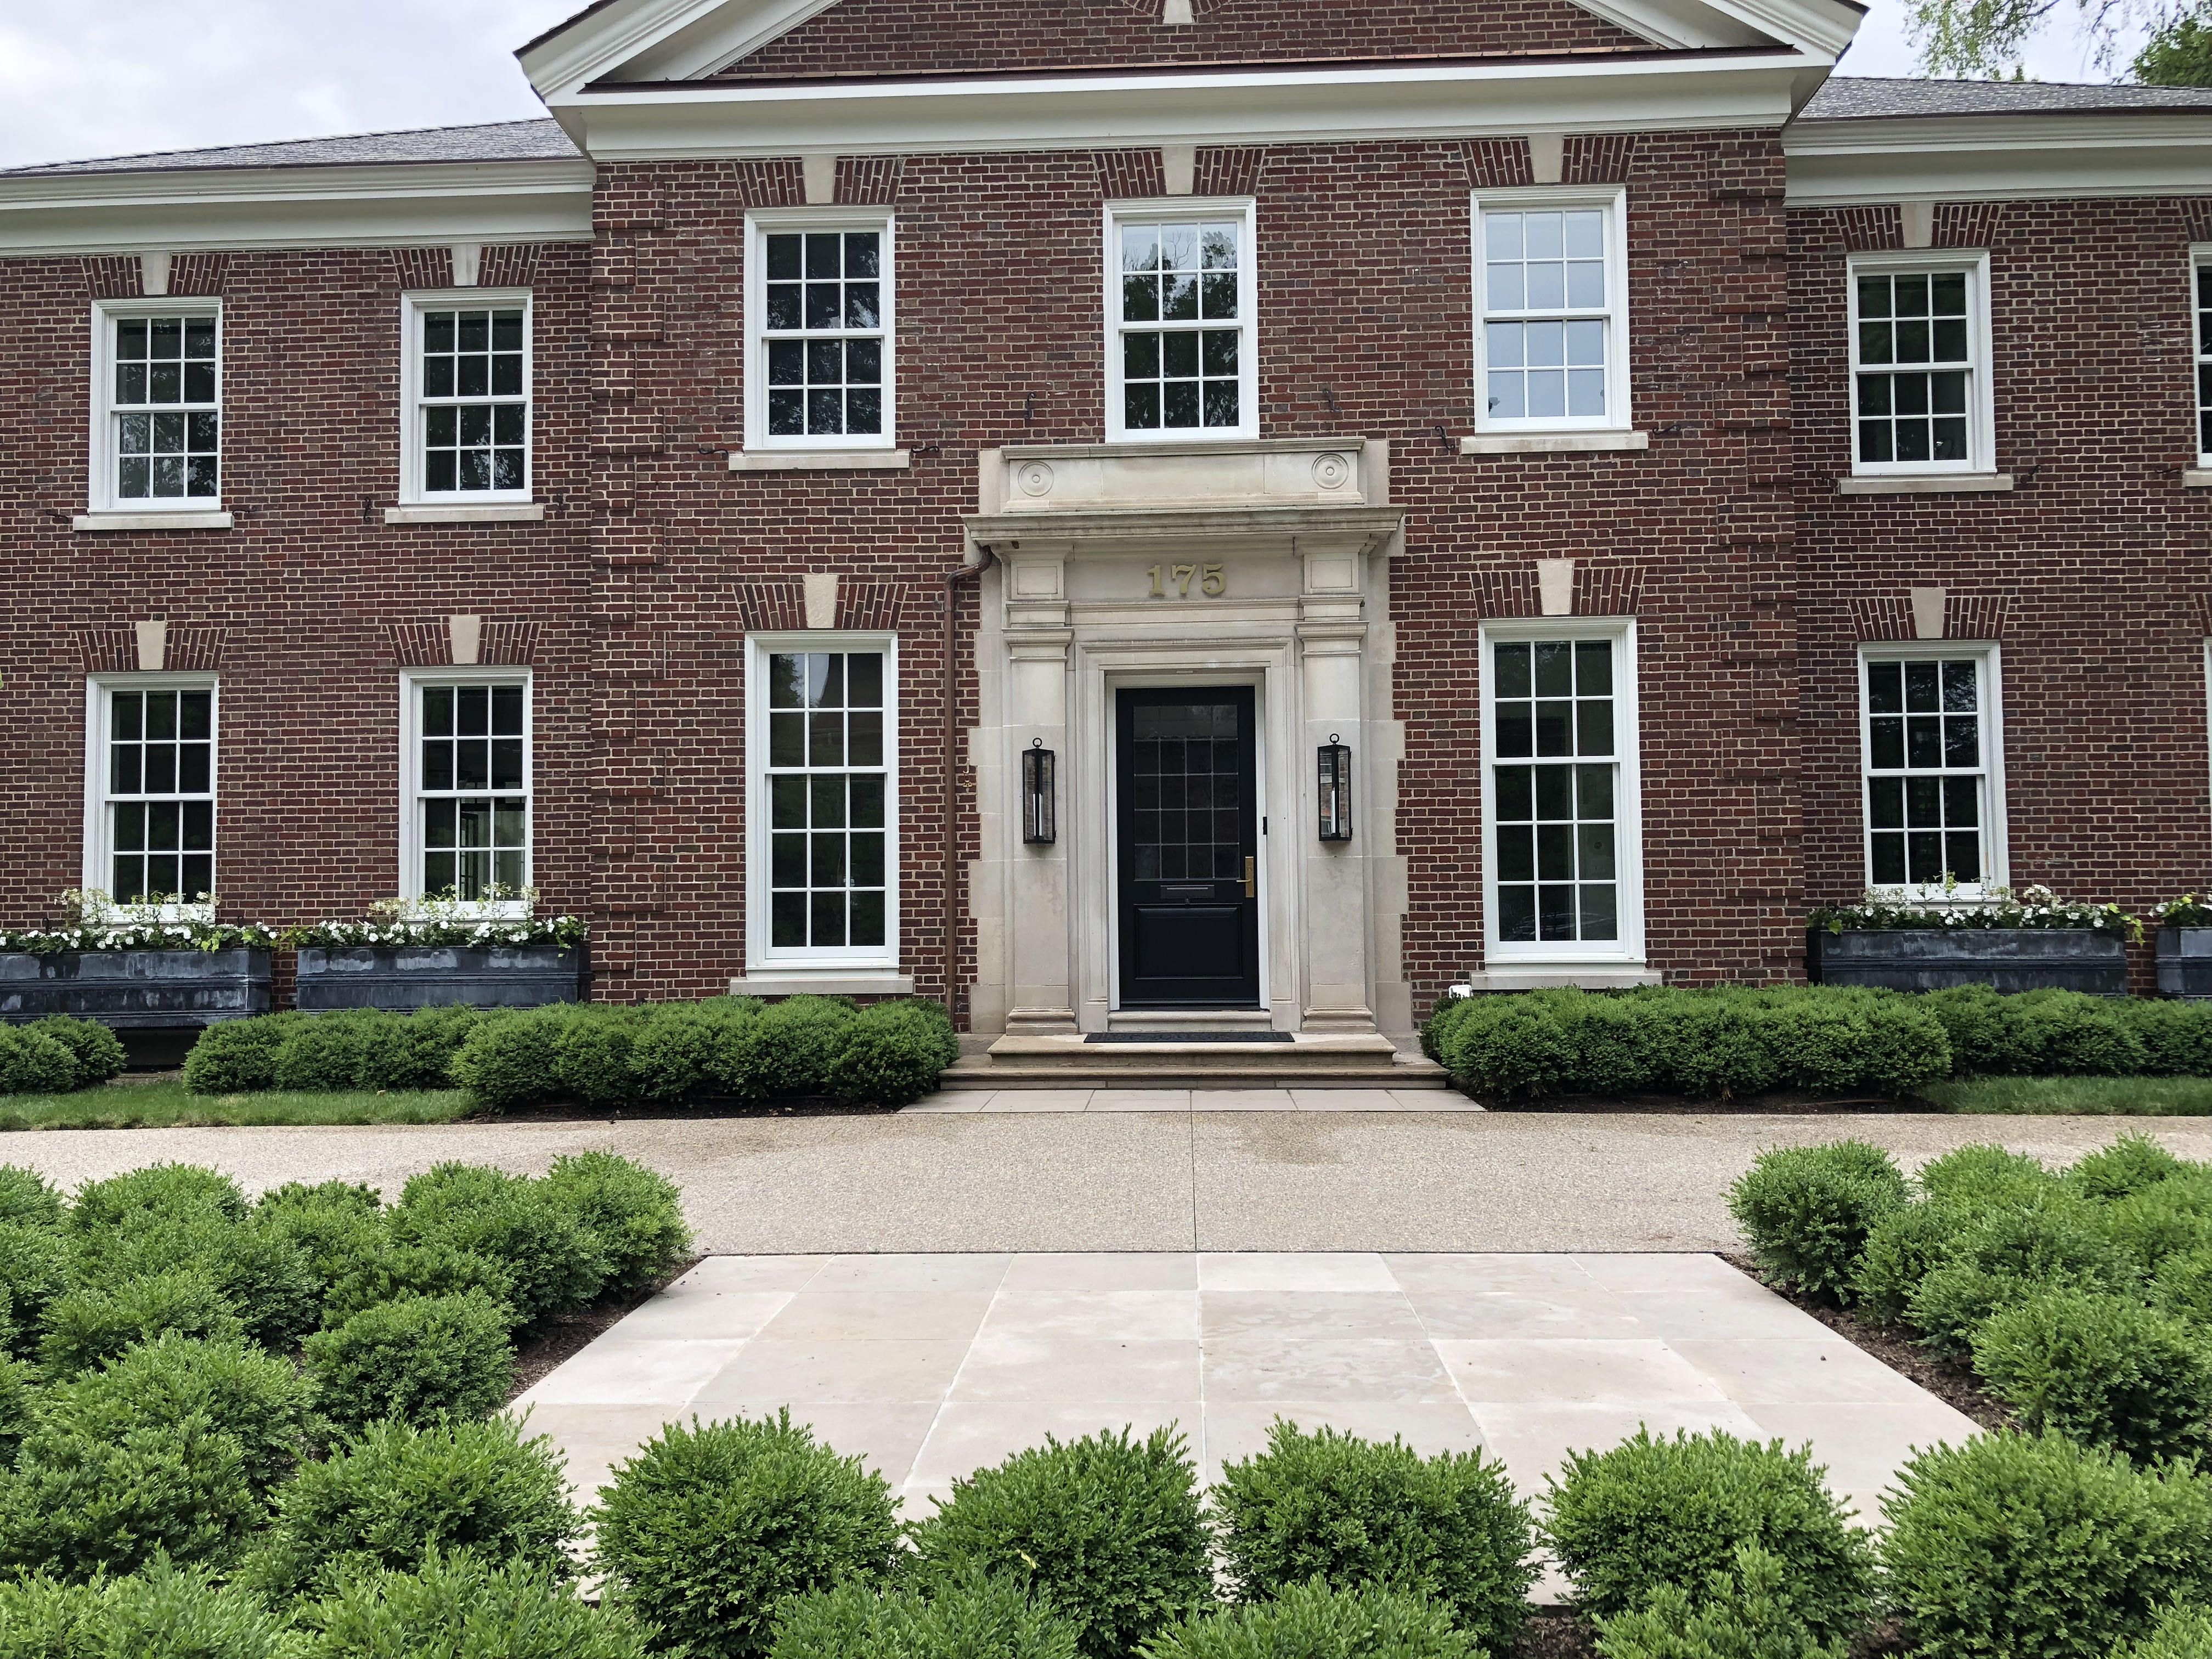
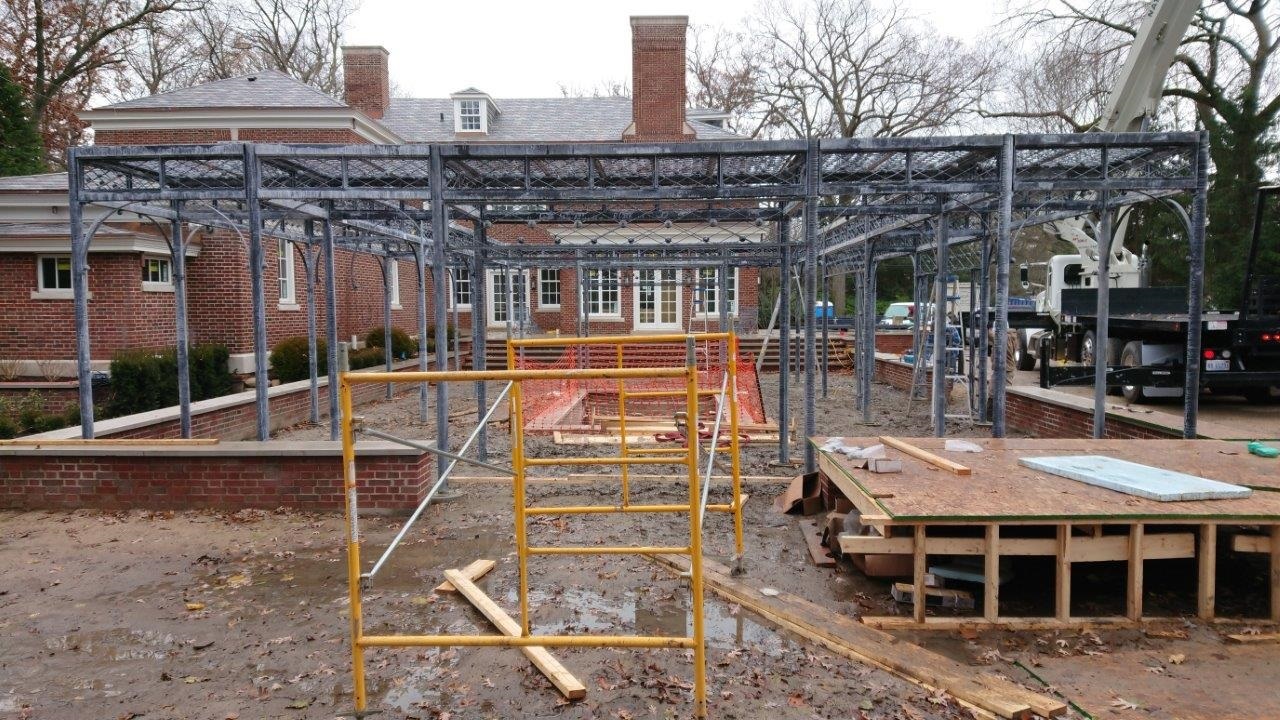
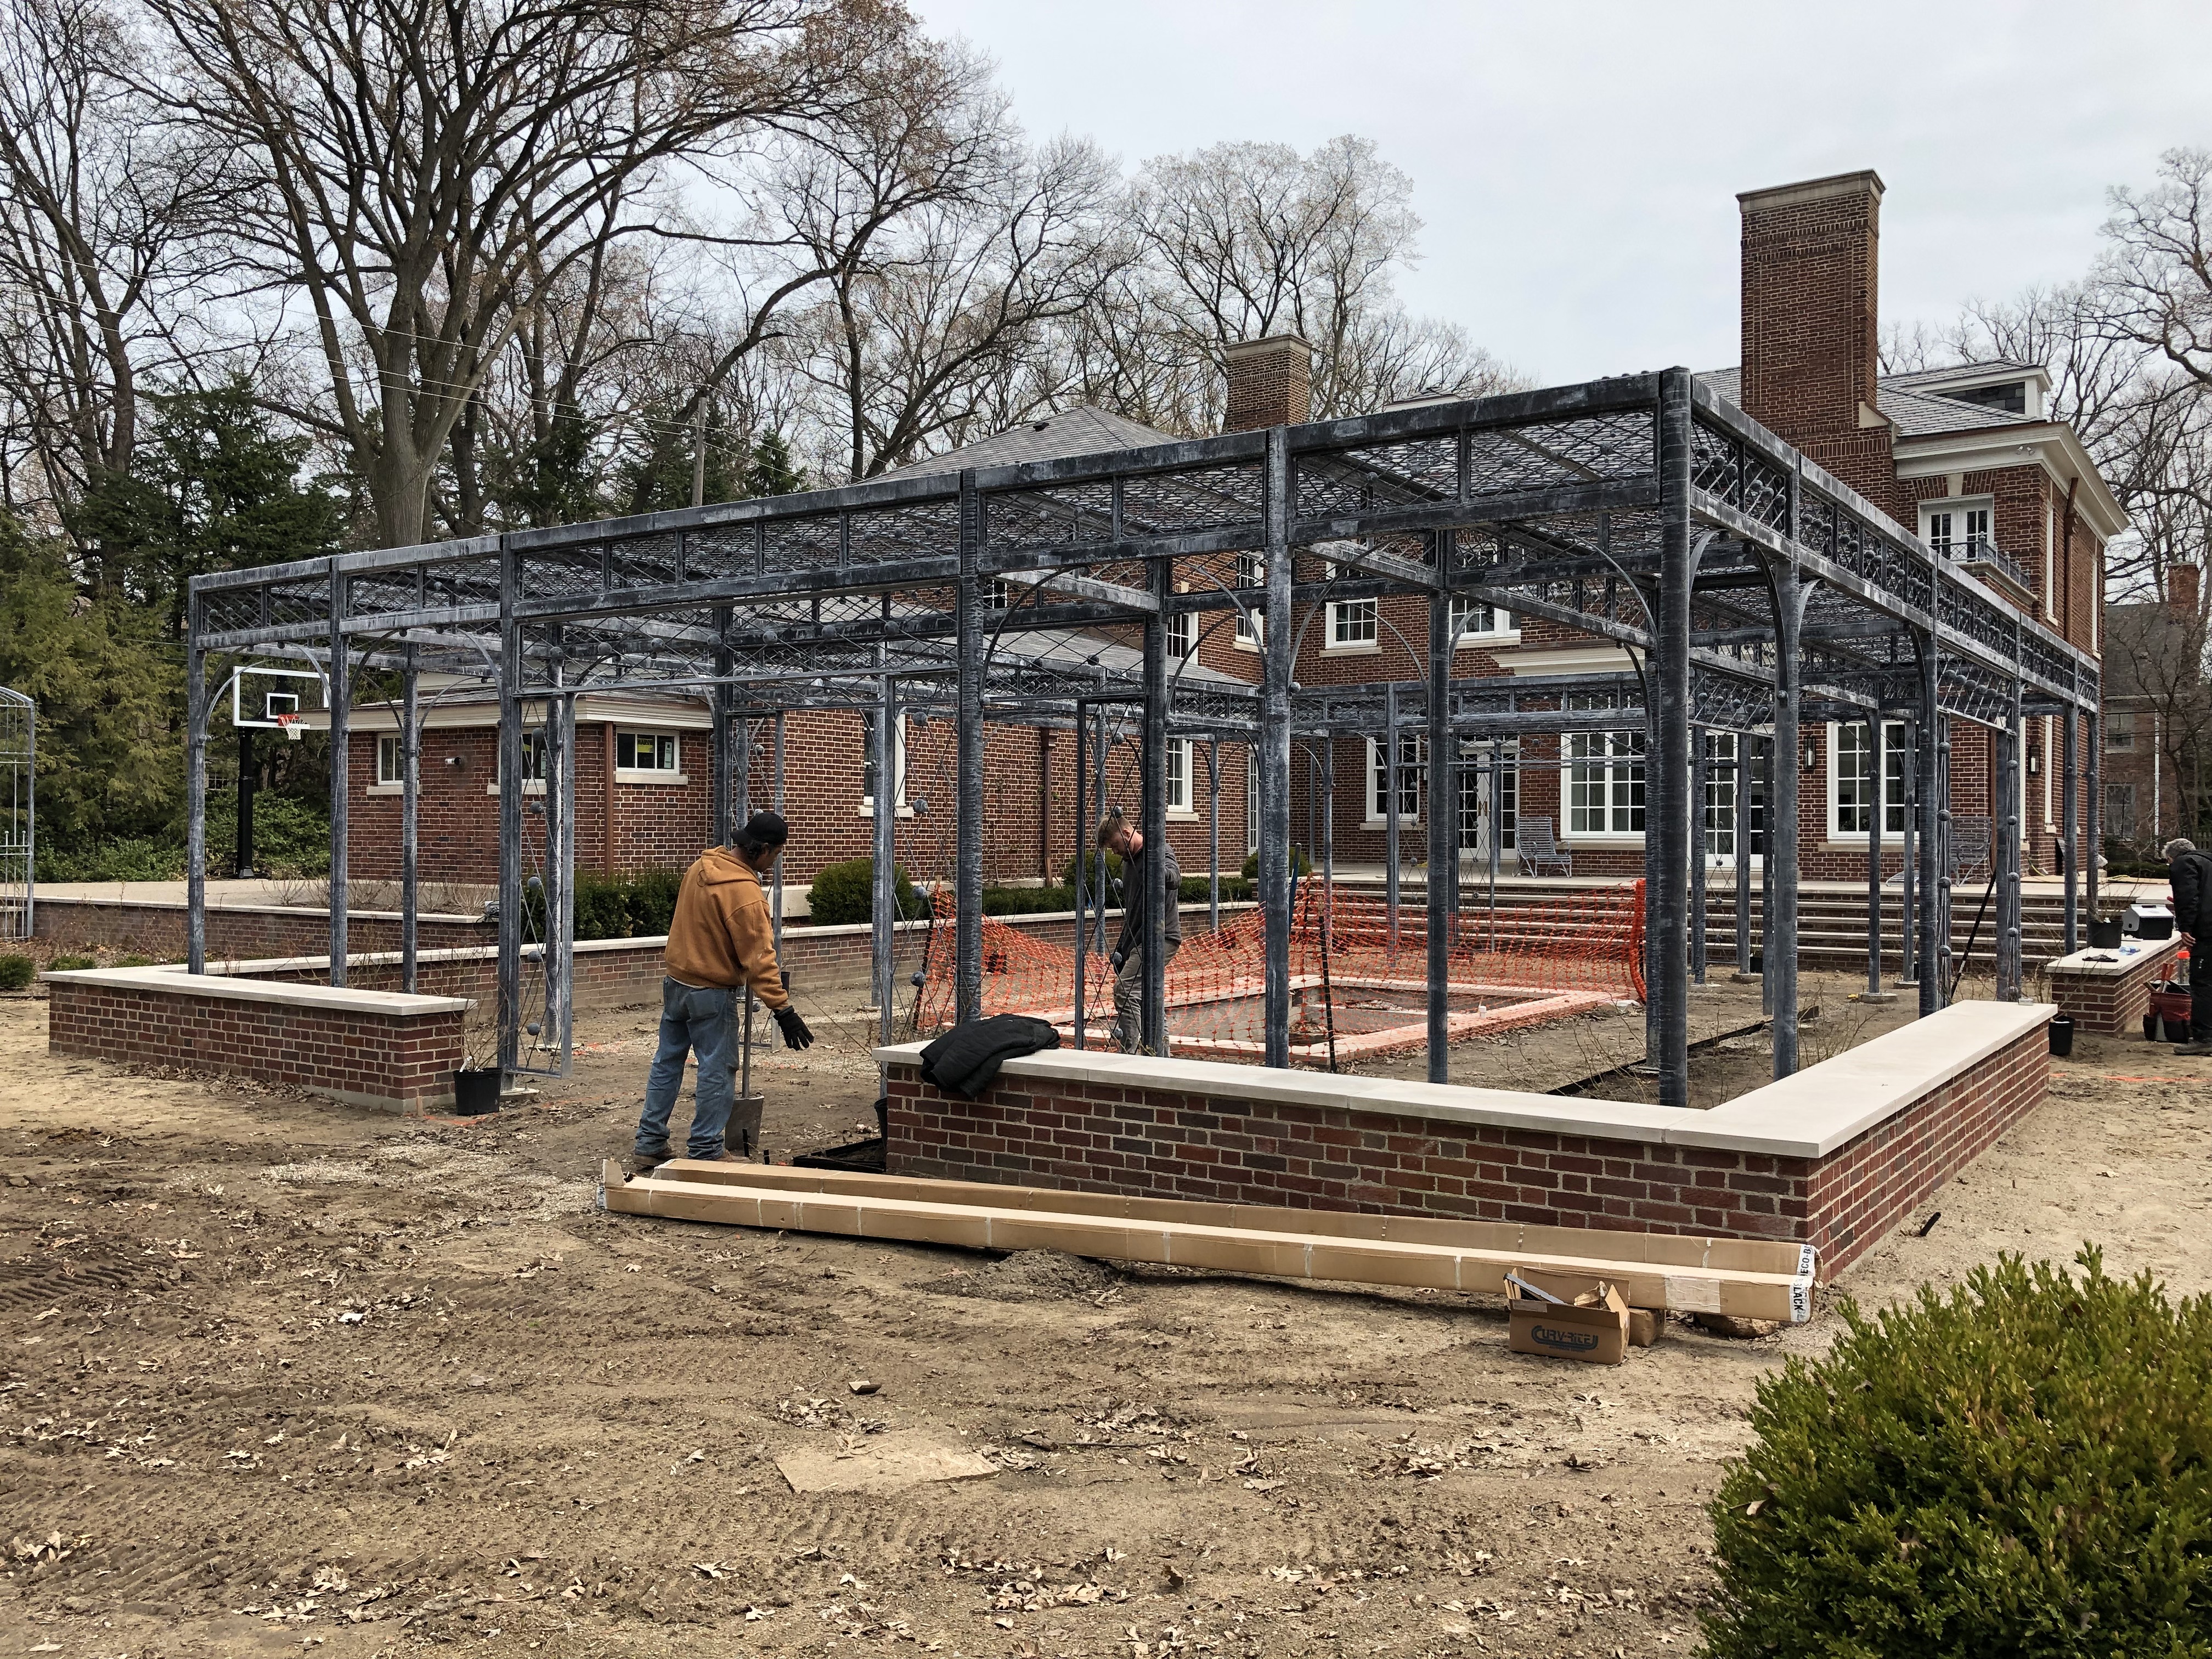
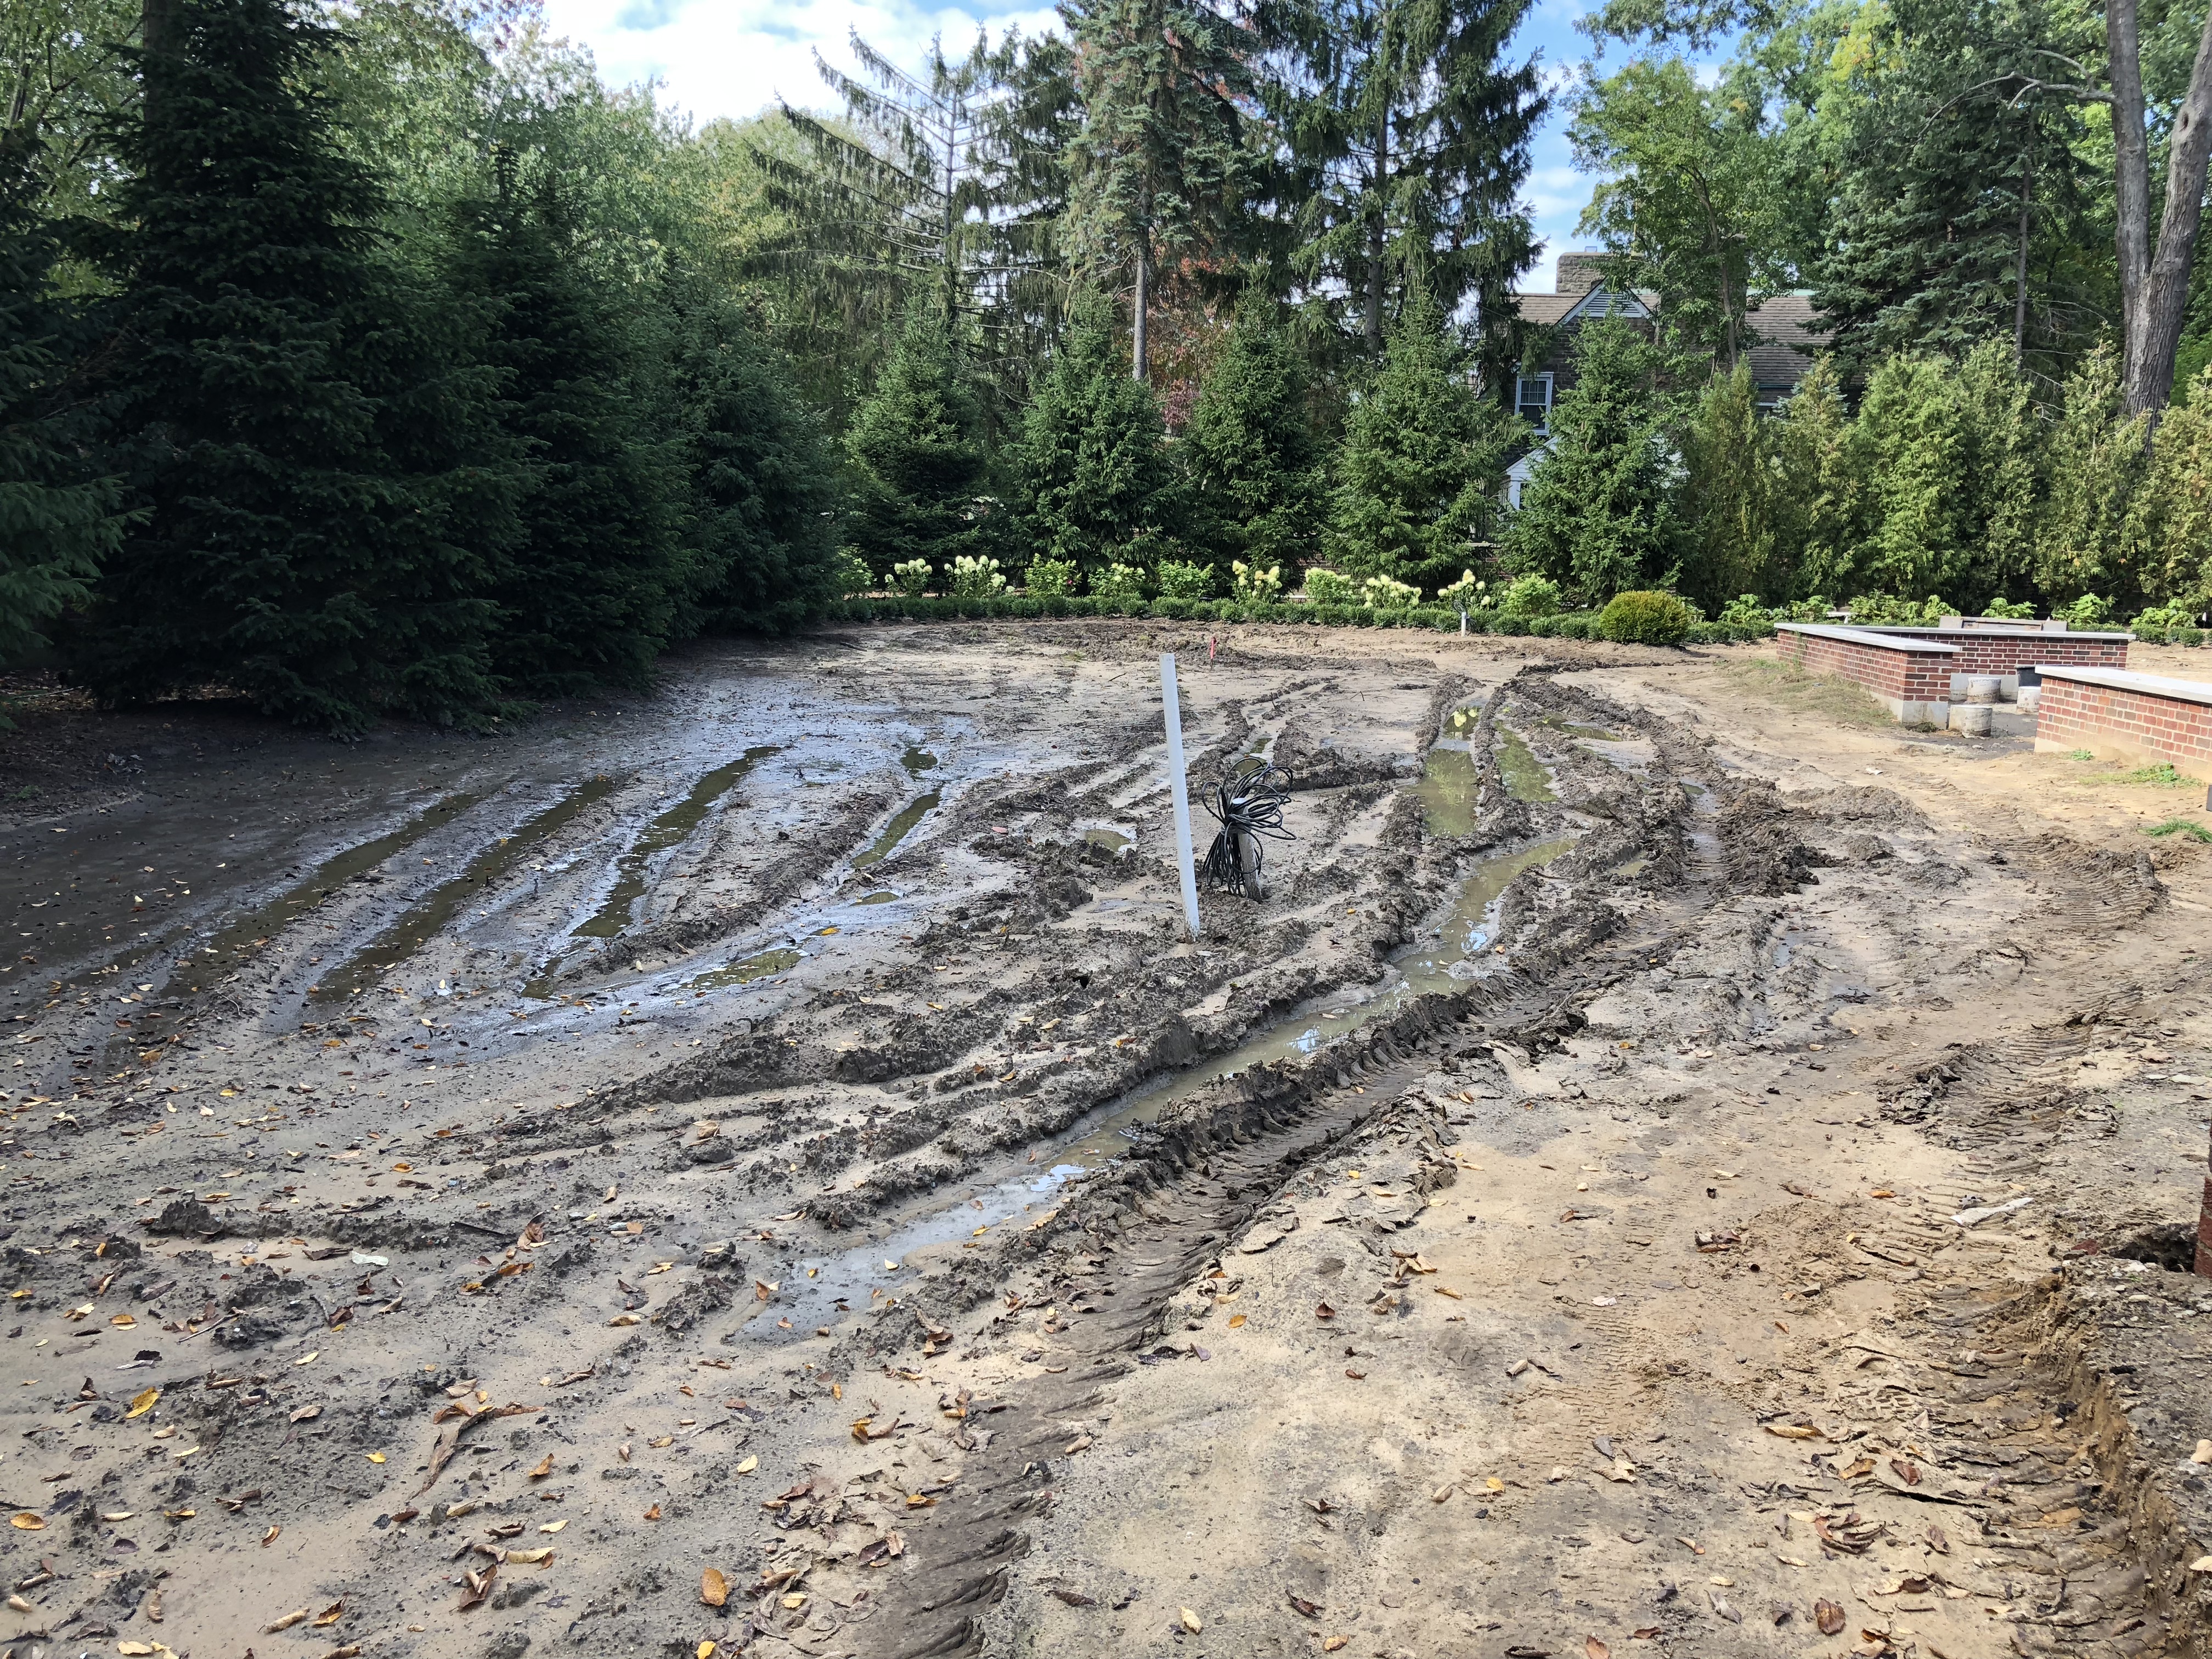
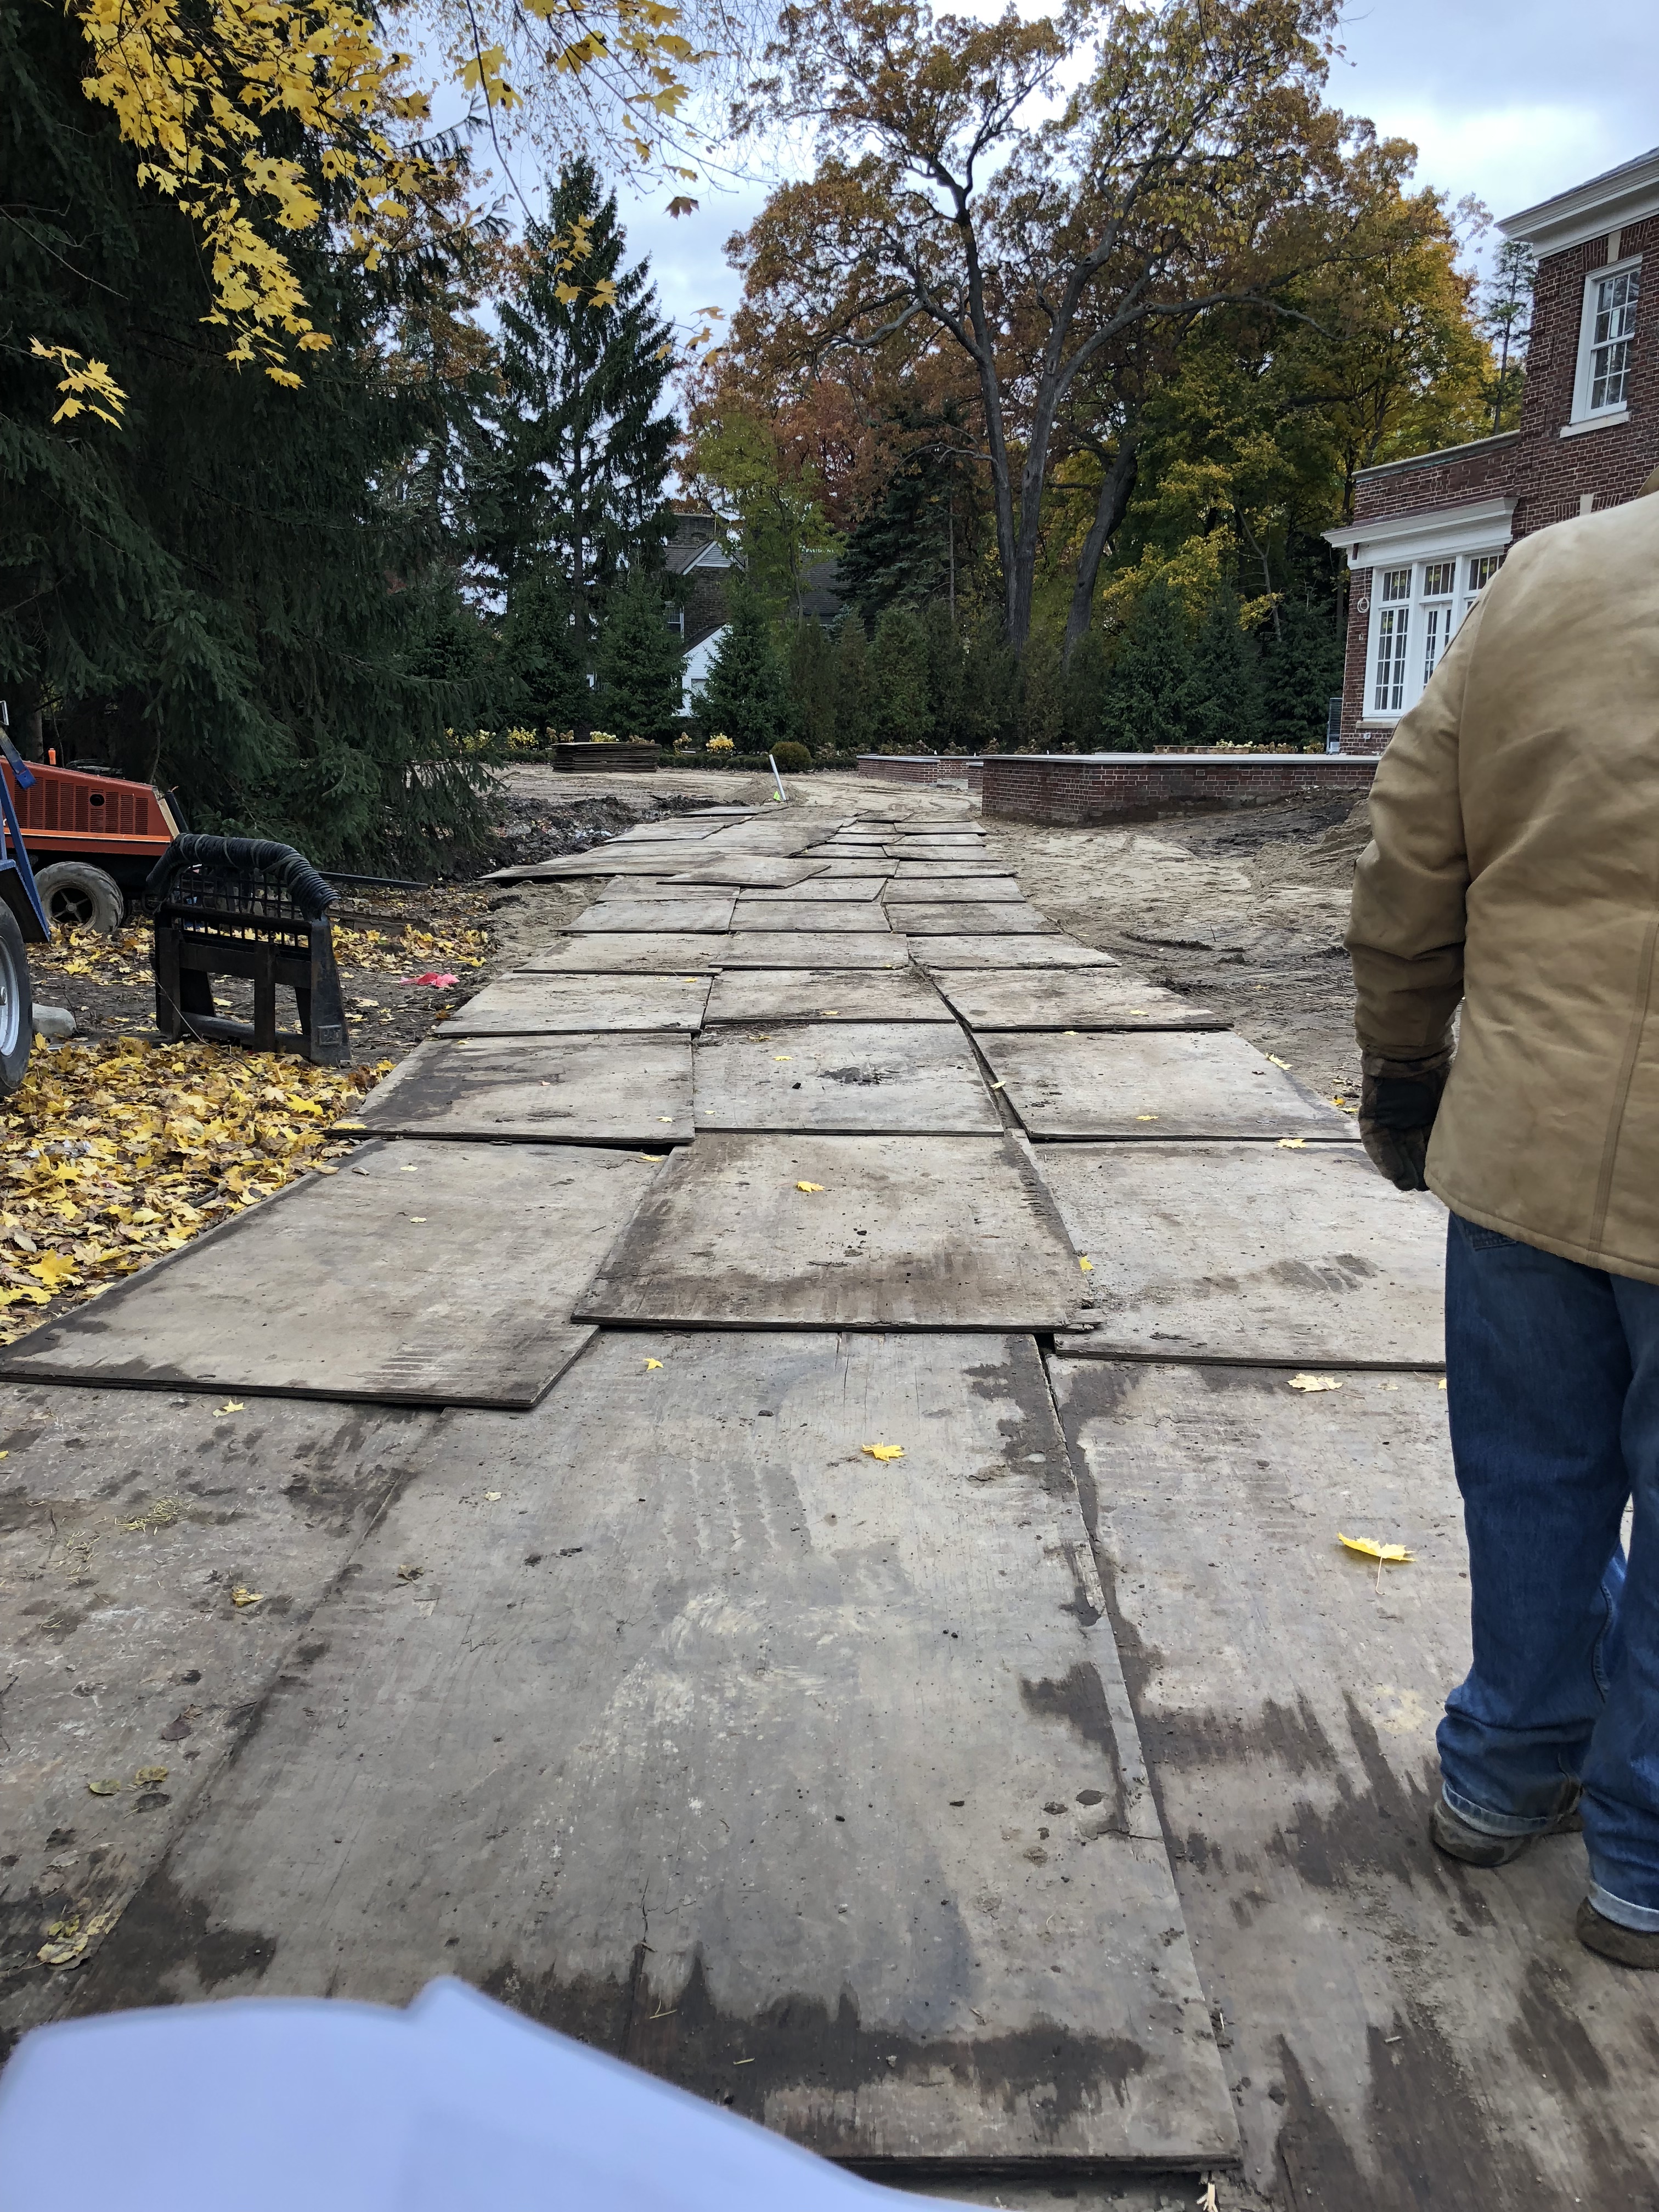
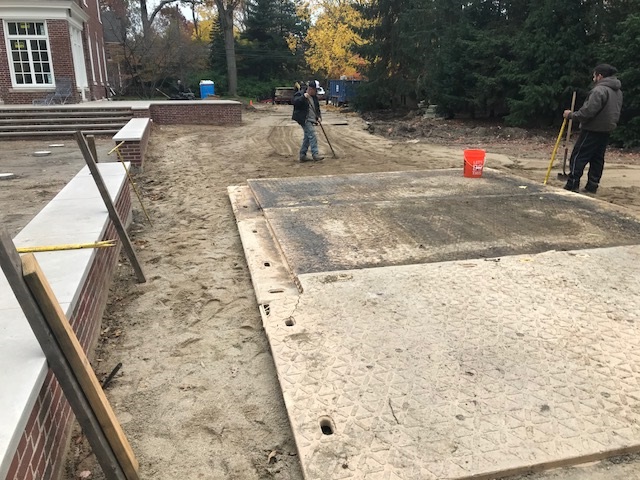
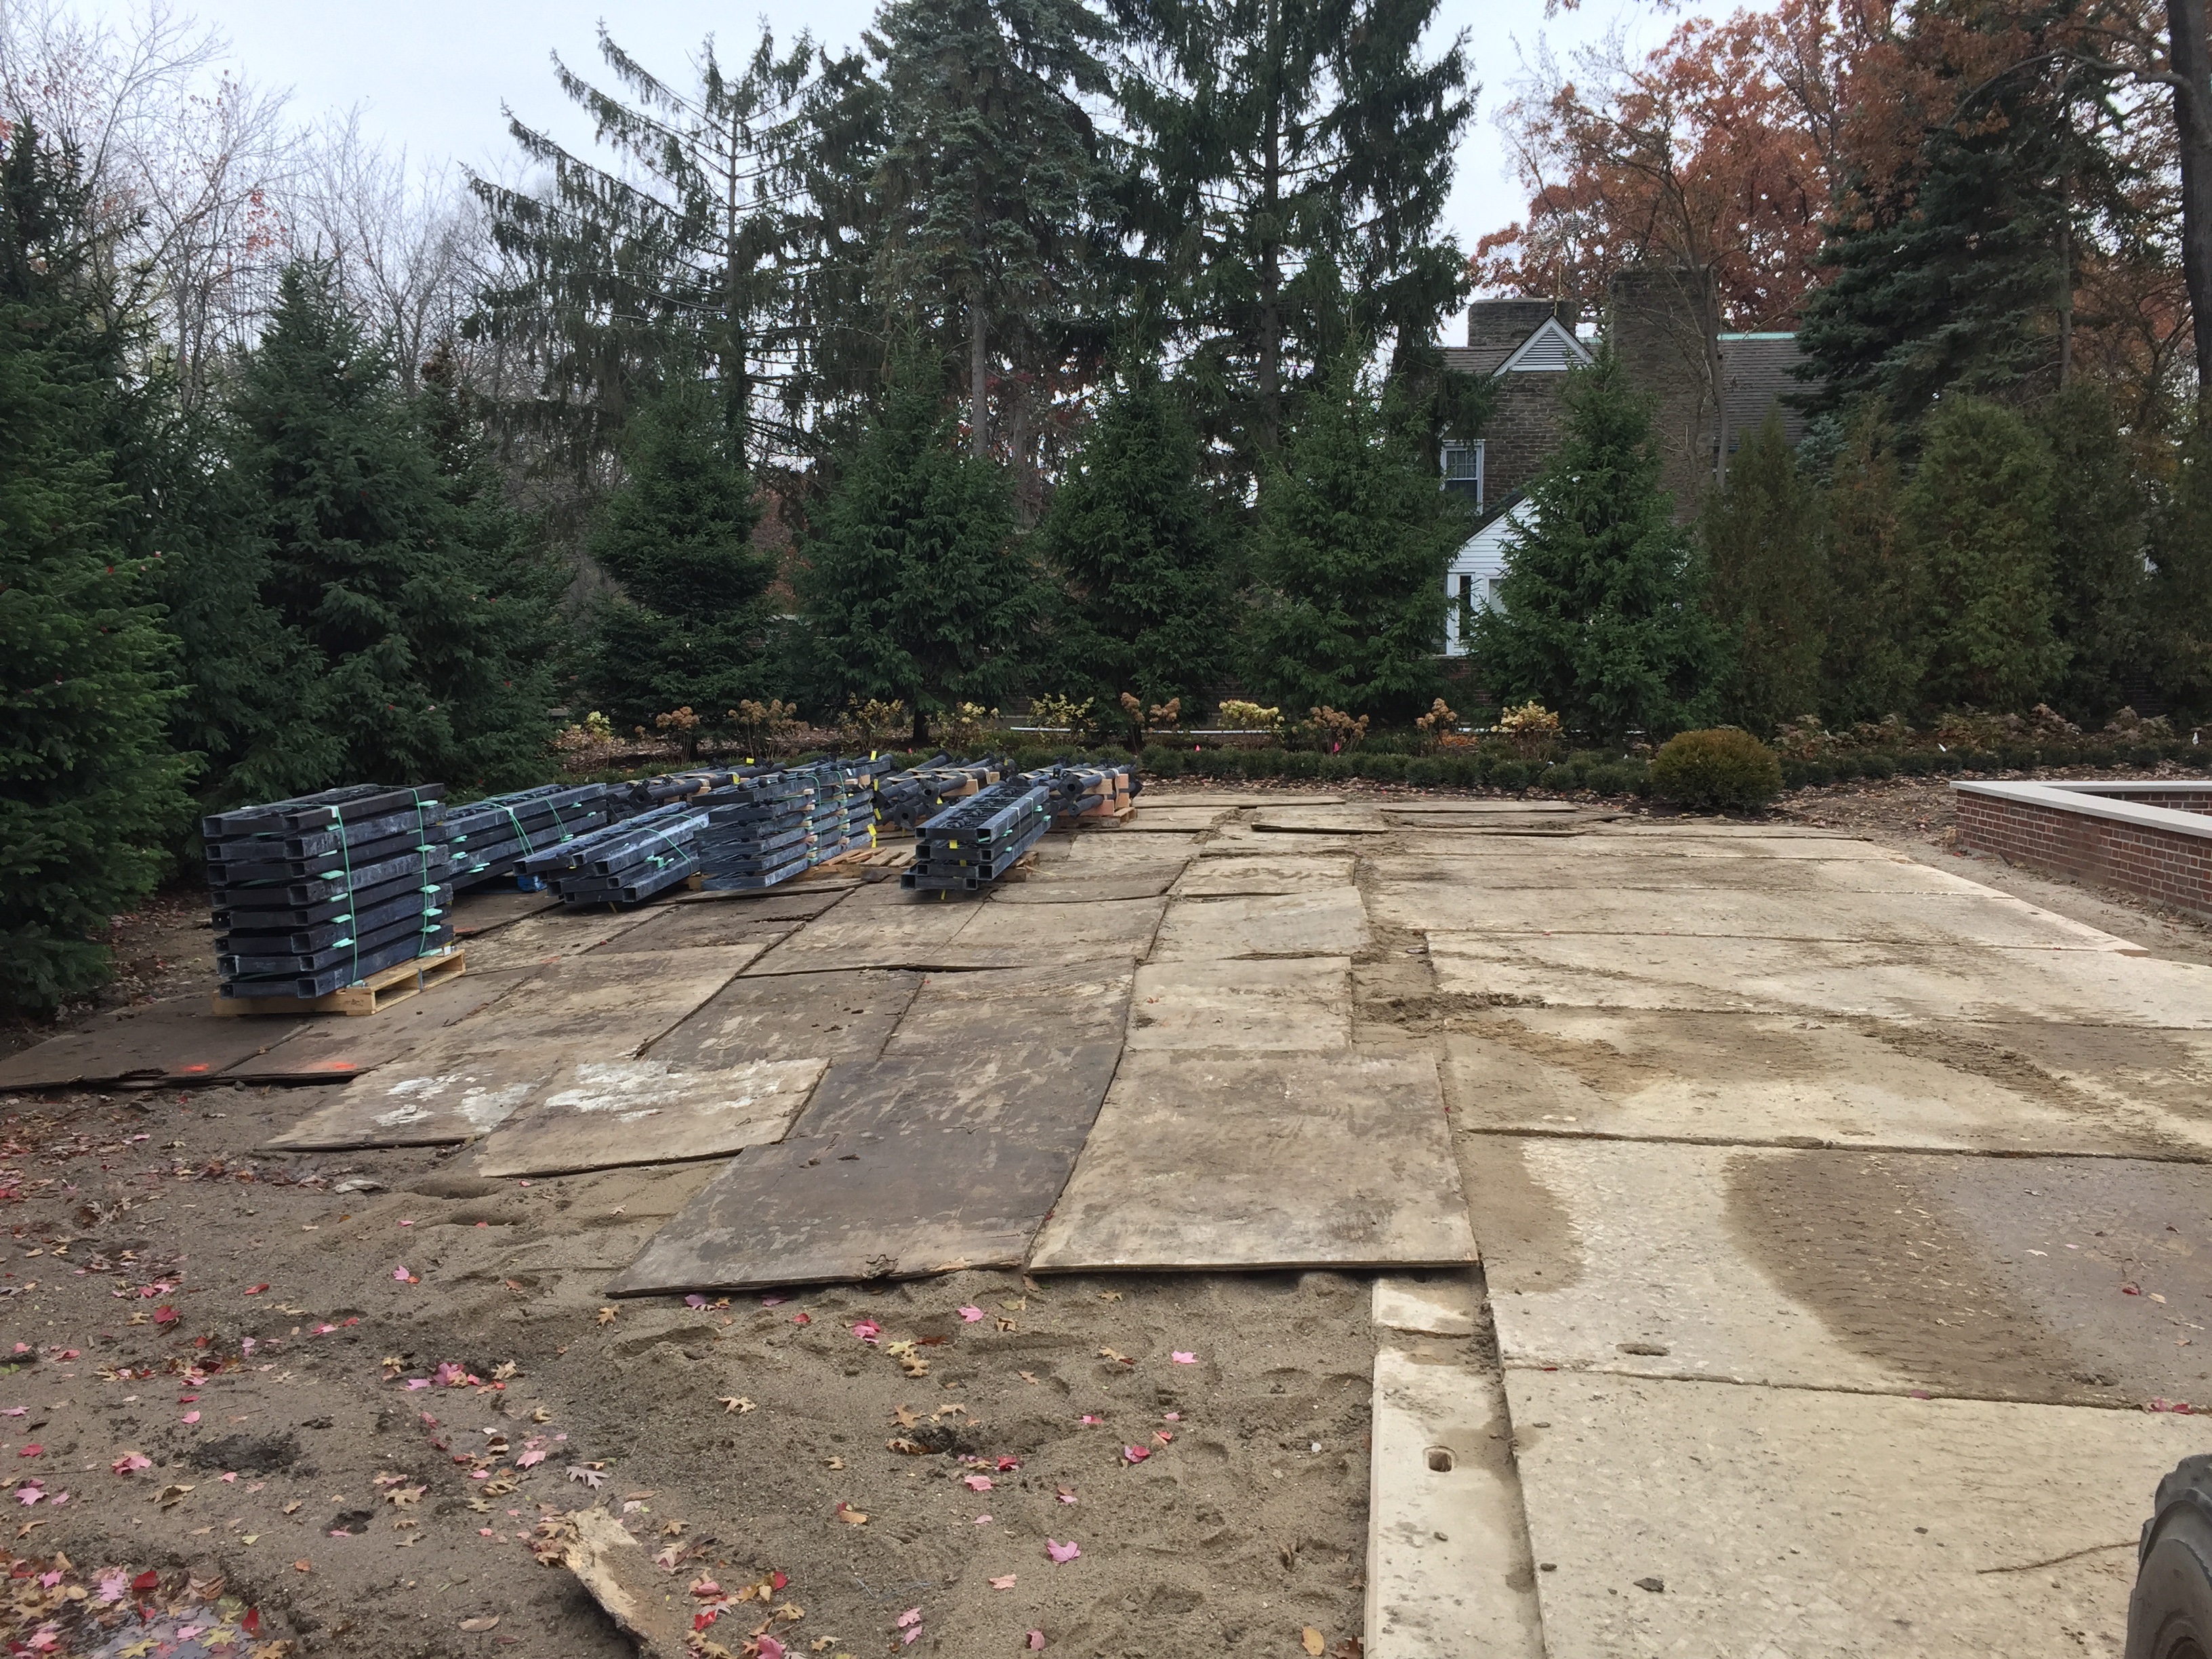
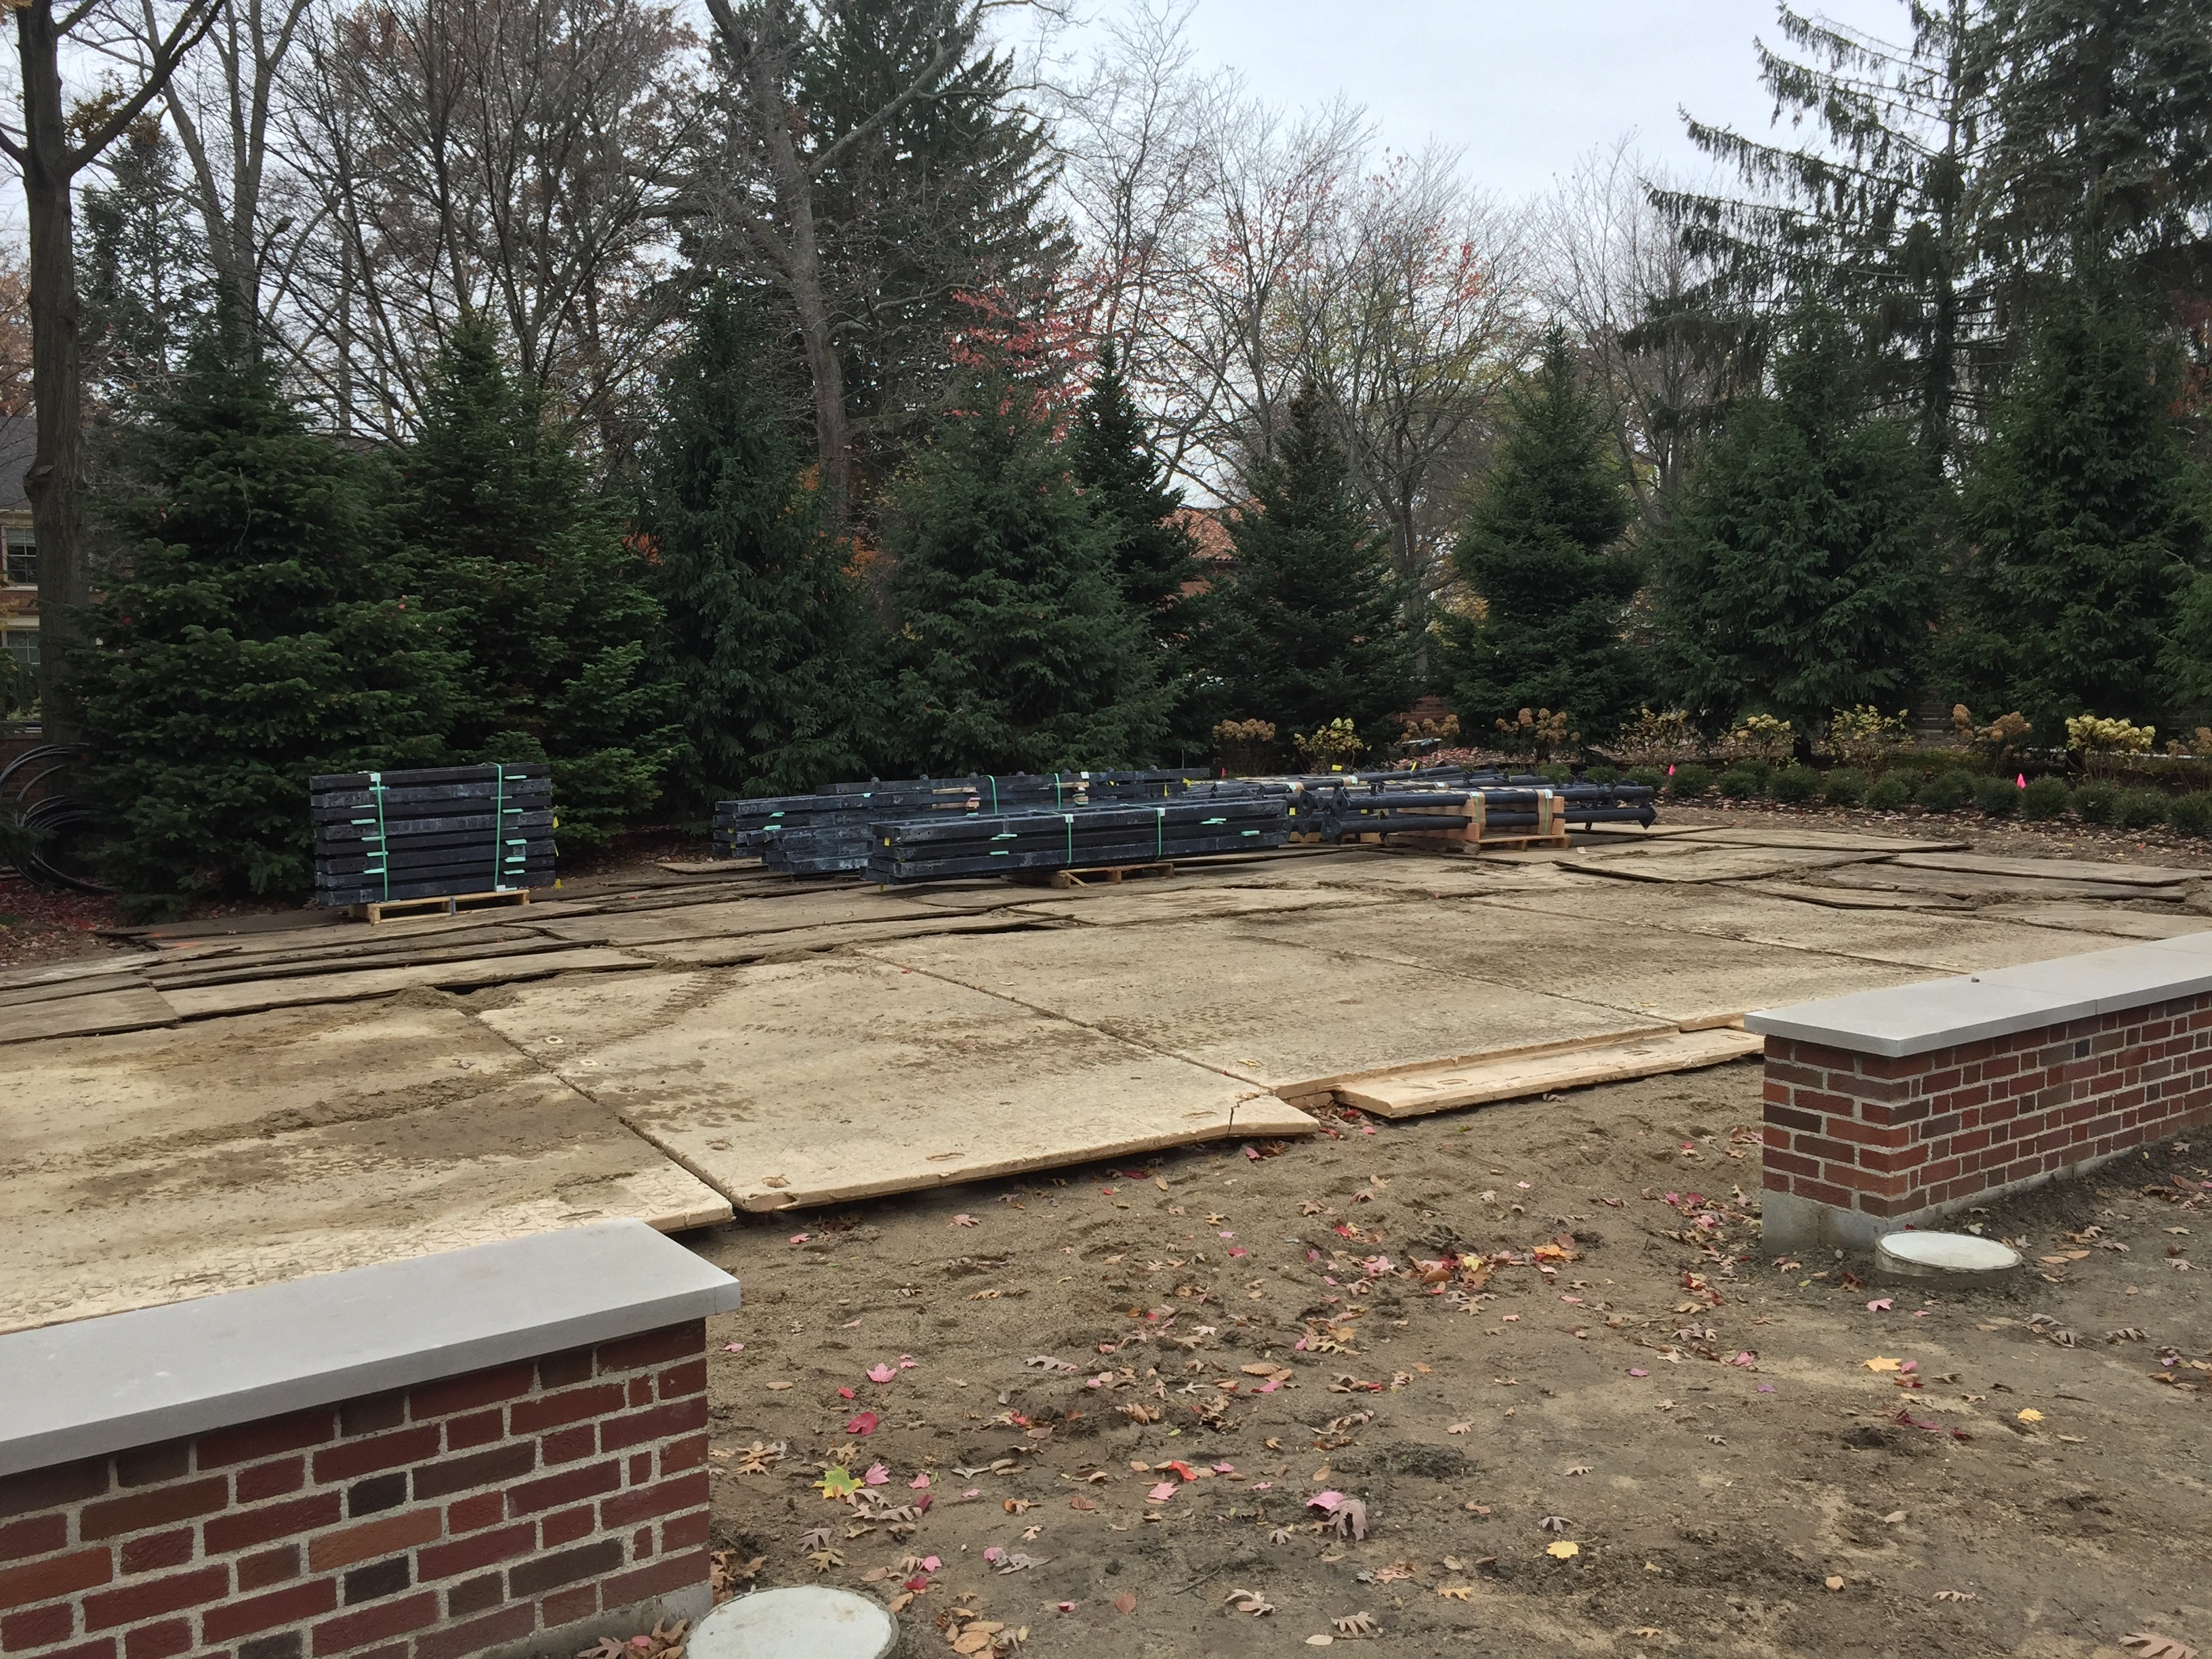
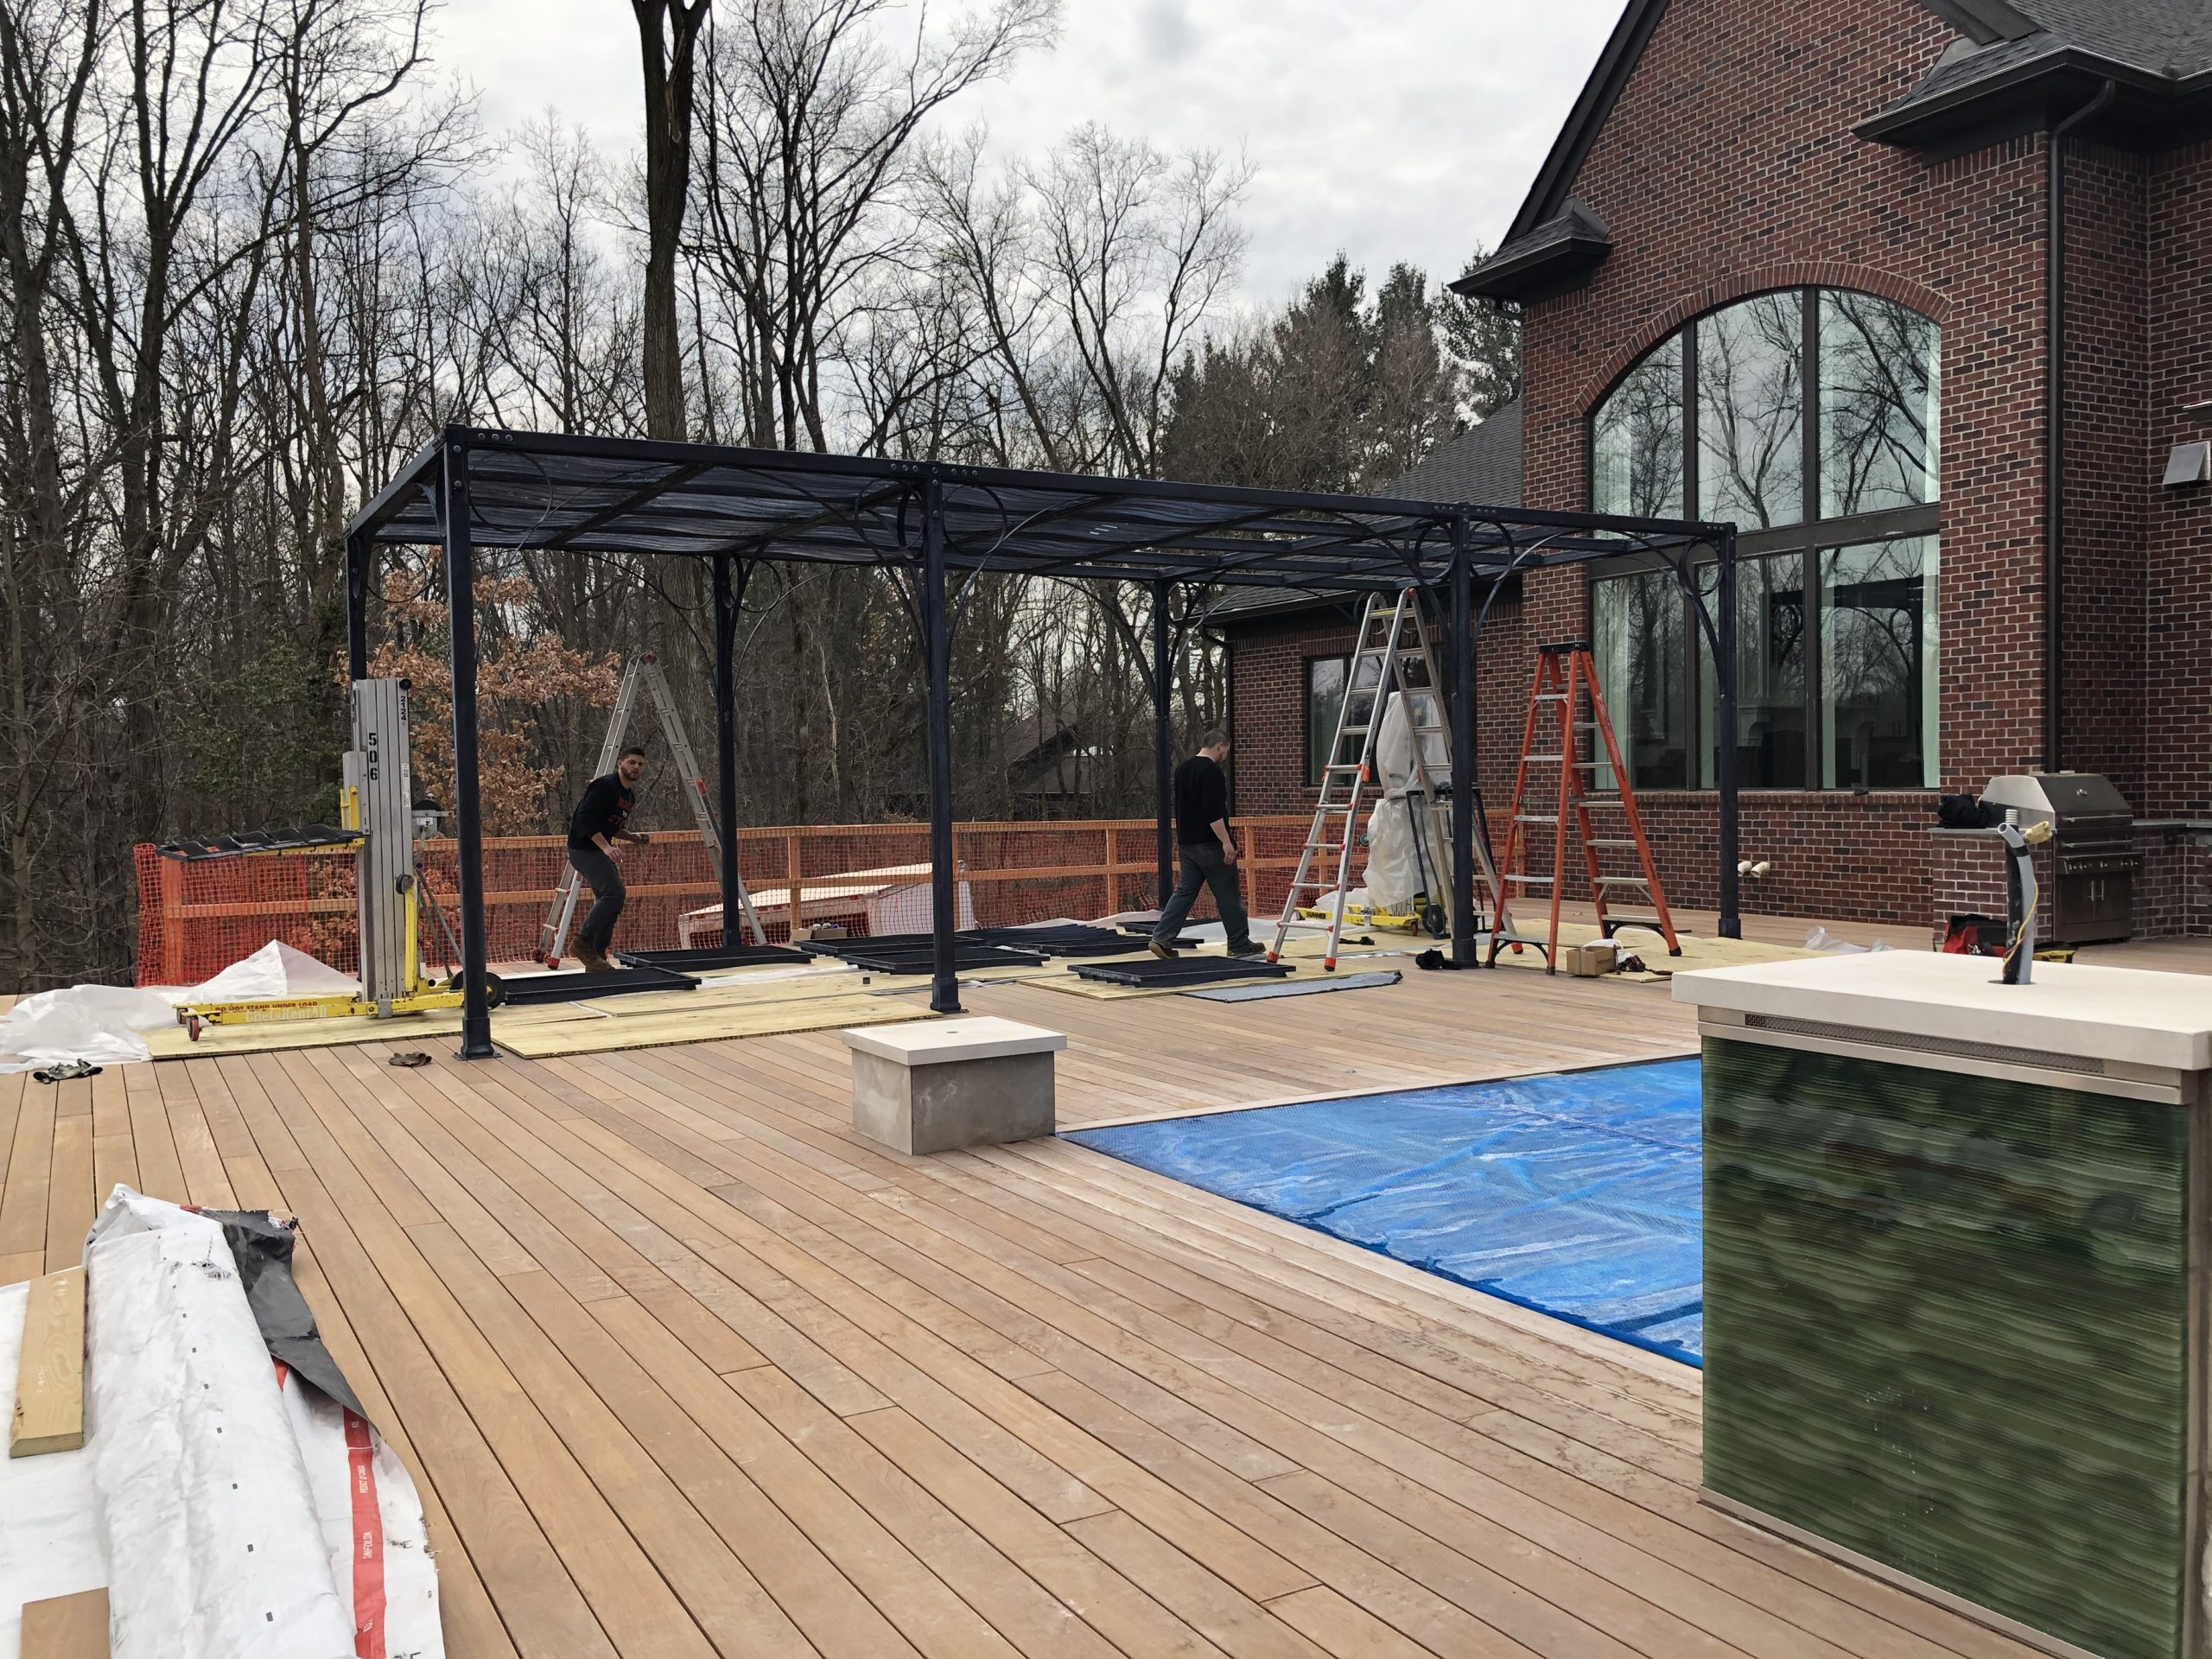
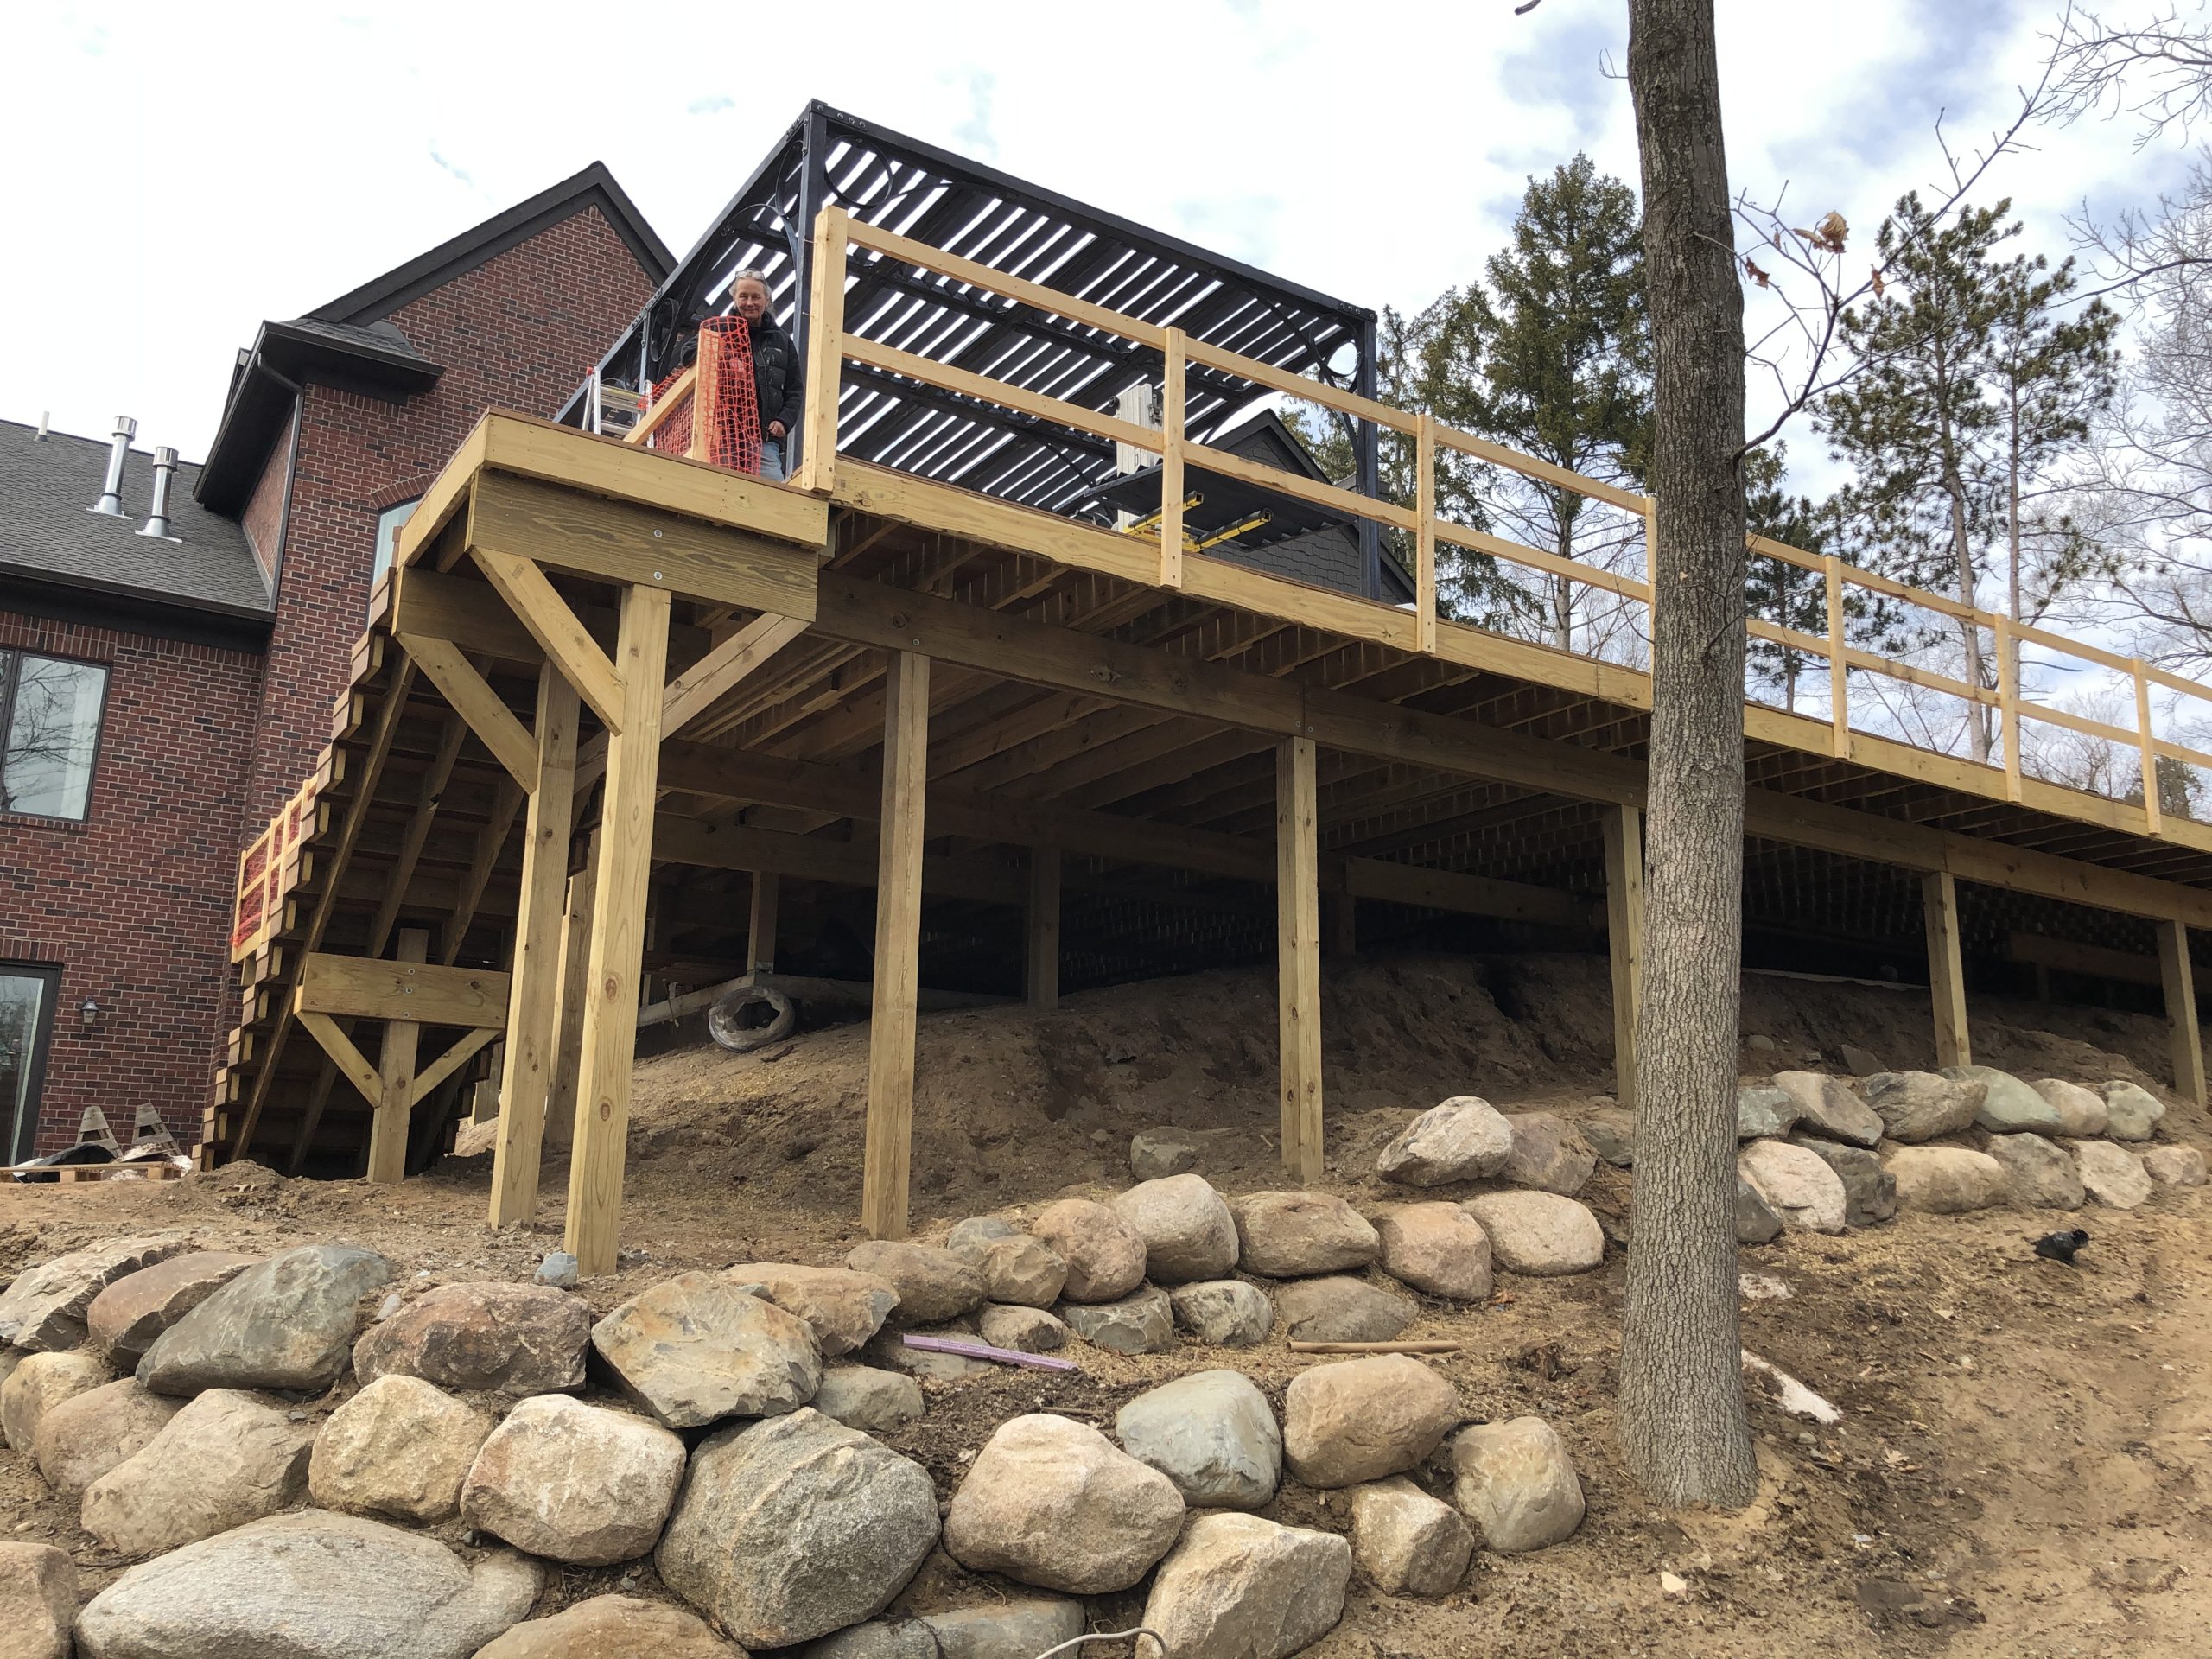
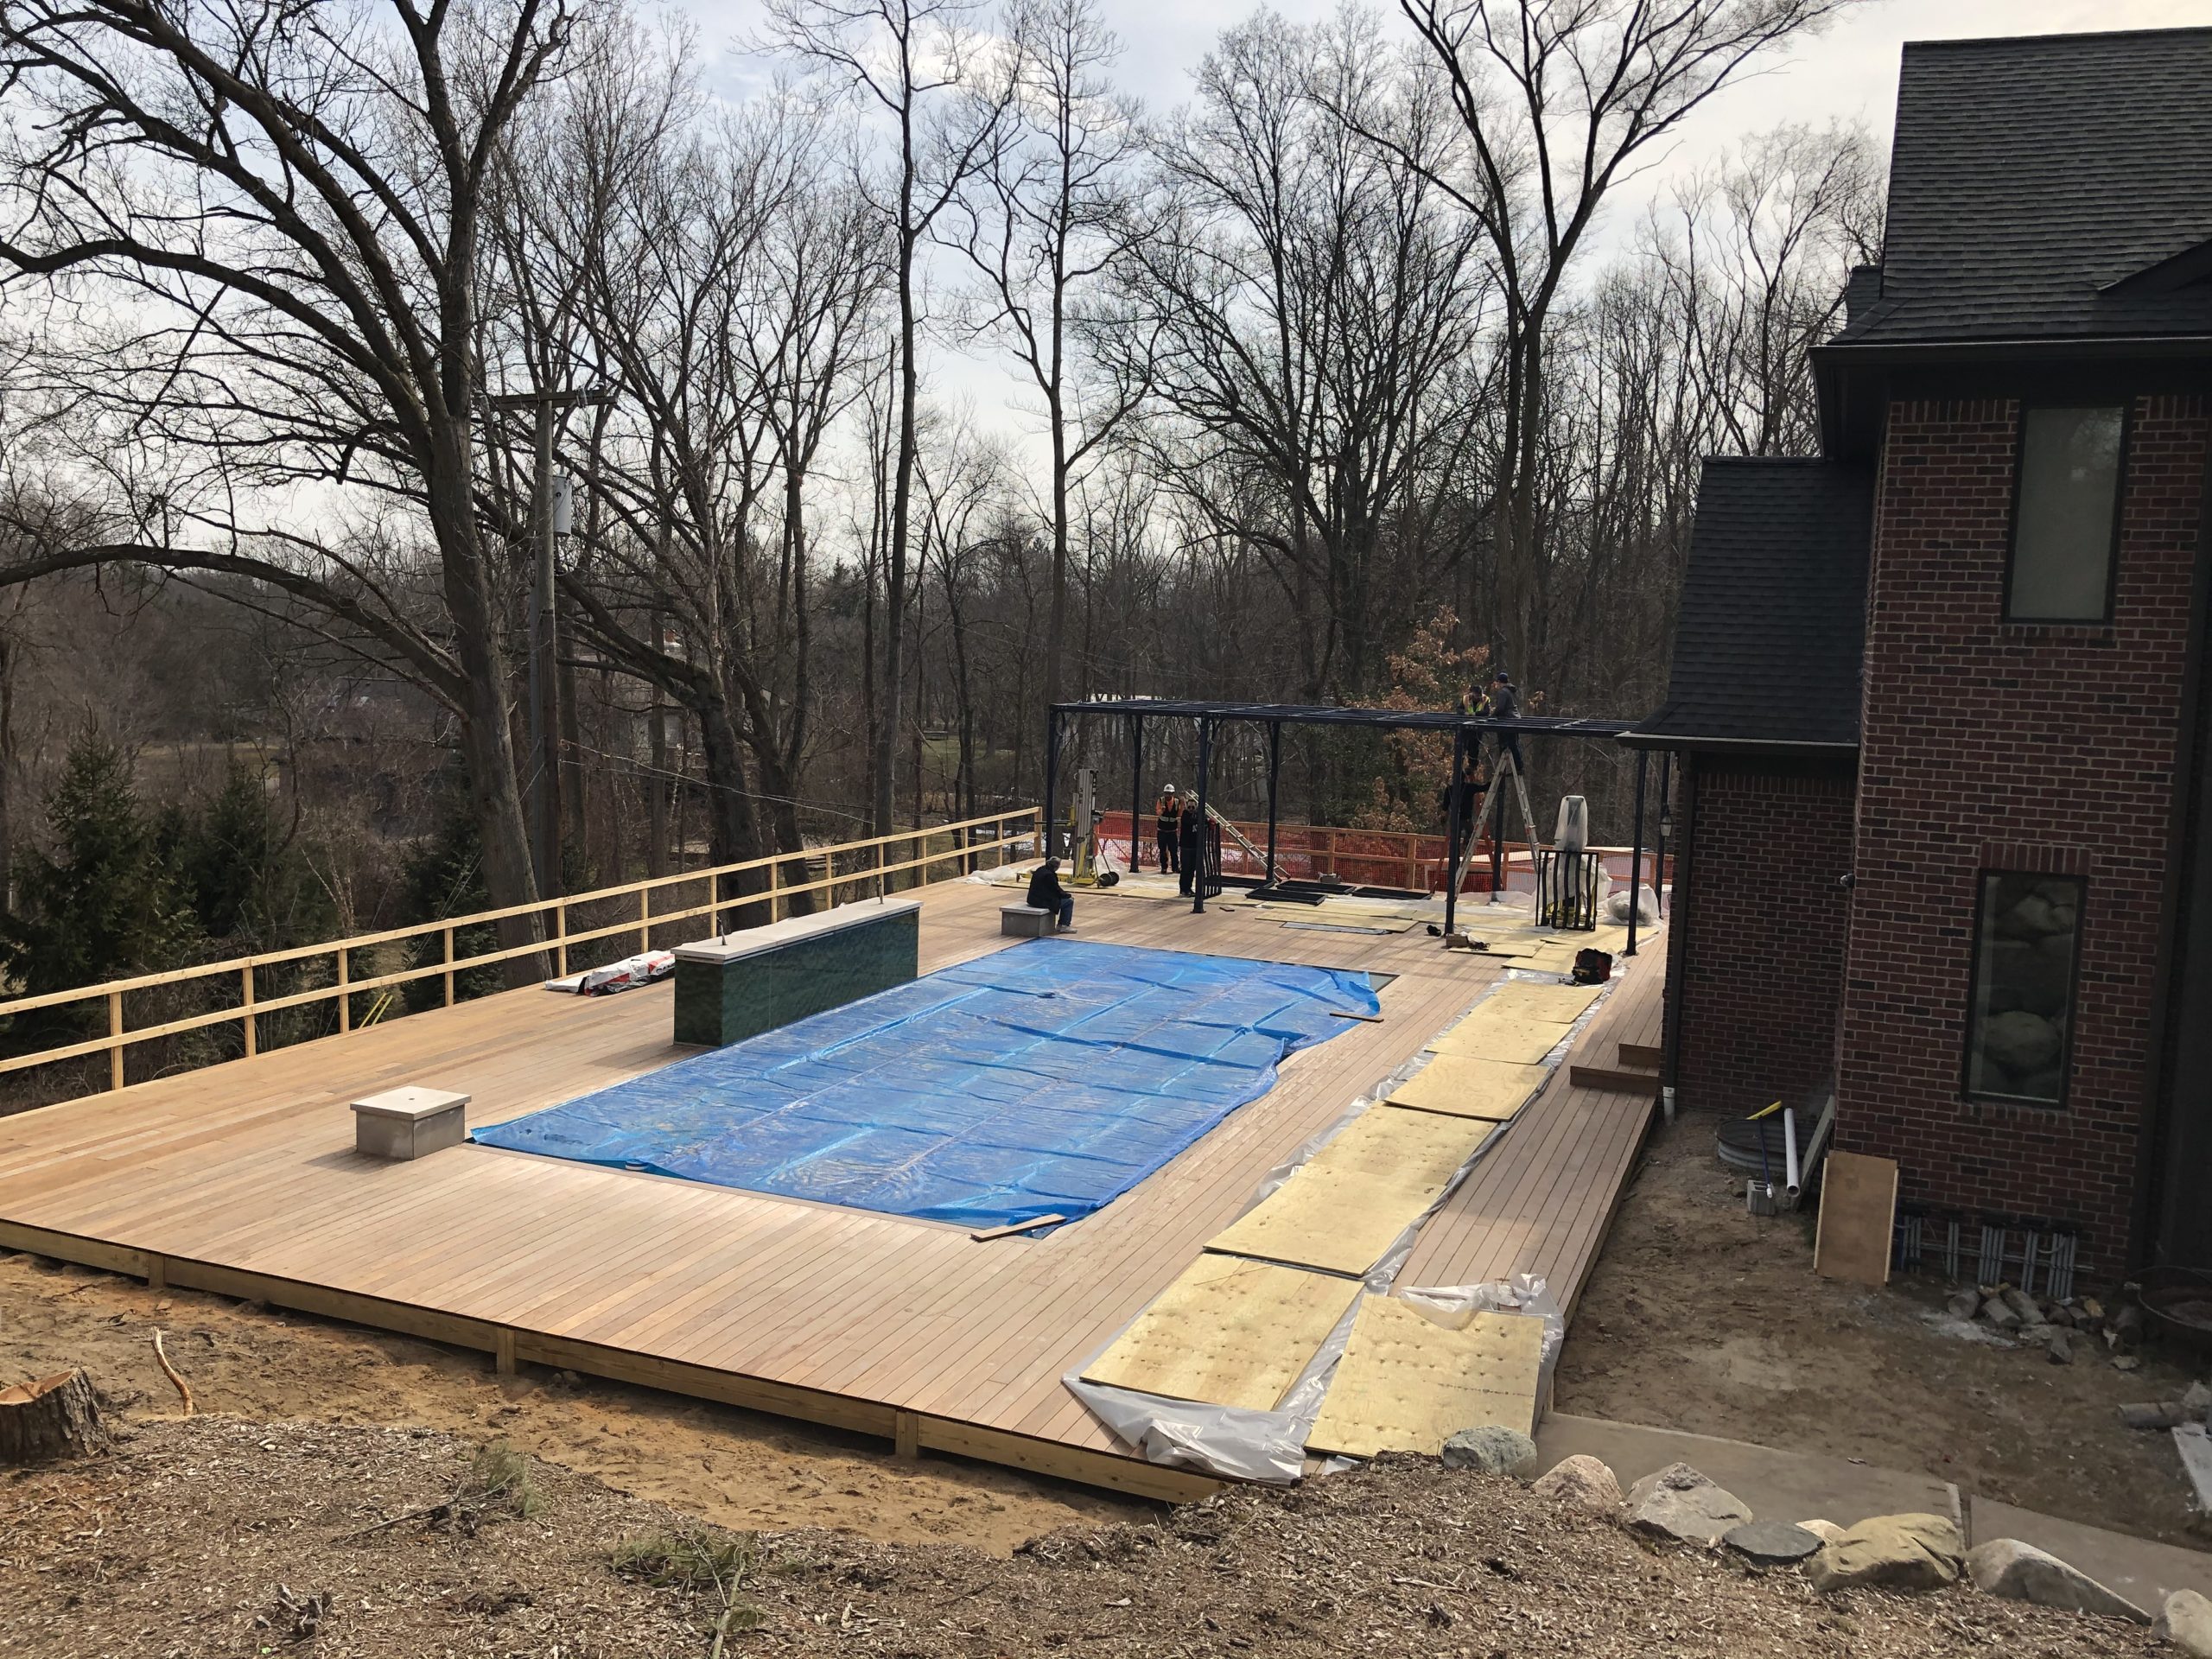
I am several years into a landscape project with great and ever so patient clients. In 2019 we removed their old dysfunctional driveway, regraded the entire front yard, and added back a new driveway and a landscape to go with. So far, so good. The back yard has been the subject of our efforts for better than a year. As the house is built on and into a steep hill, the rear yard had no flat usable space outdoors. Unless you count the 400 odd square feet pictured in the photo above. A large scale ipe deck with a swimming pool –  part of which is cantilevered over an 11 foot drop in grade –  has strongly addressed that problem. They like to entertain, and they are actively involved in supporting their greater community. They also like spending time out of doors. They were keen to create a place that would be beautiful and functional. The deck and pool were monumental undertakings, due to the sheer size, the difficulty accessing the site, and the extreme grade.  We are very near the end of that part, but for the glass rails that will surround the deck.  I am hoping the project will be entirely finished by the end of May, so they have the rest of this season ahead of them to enjoy it.

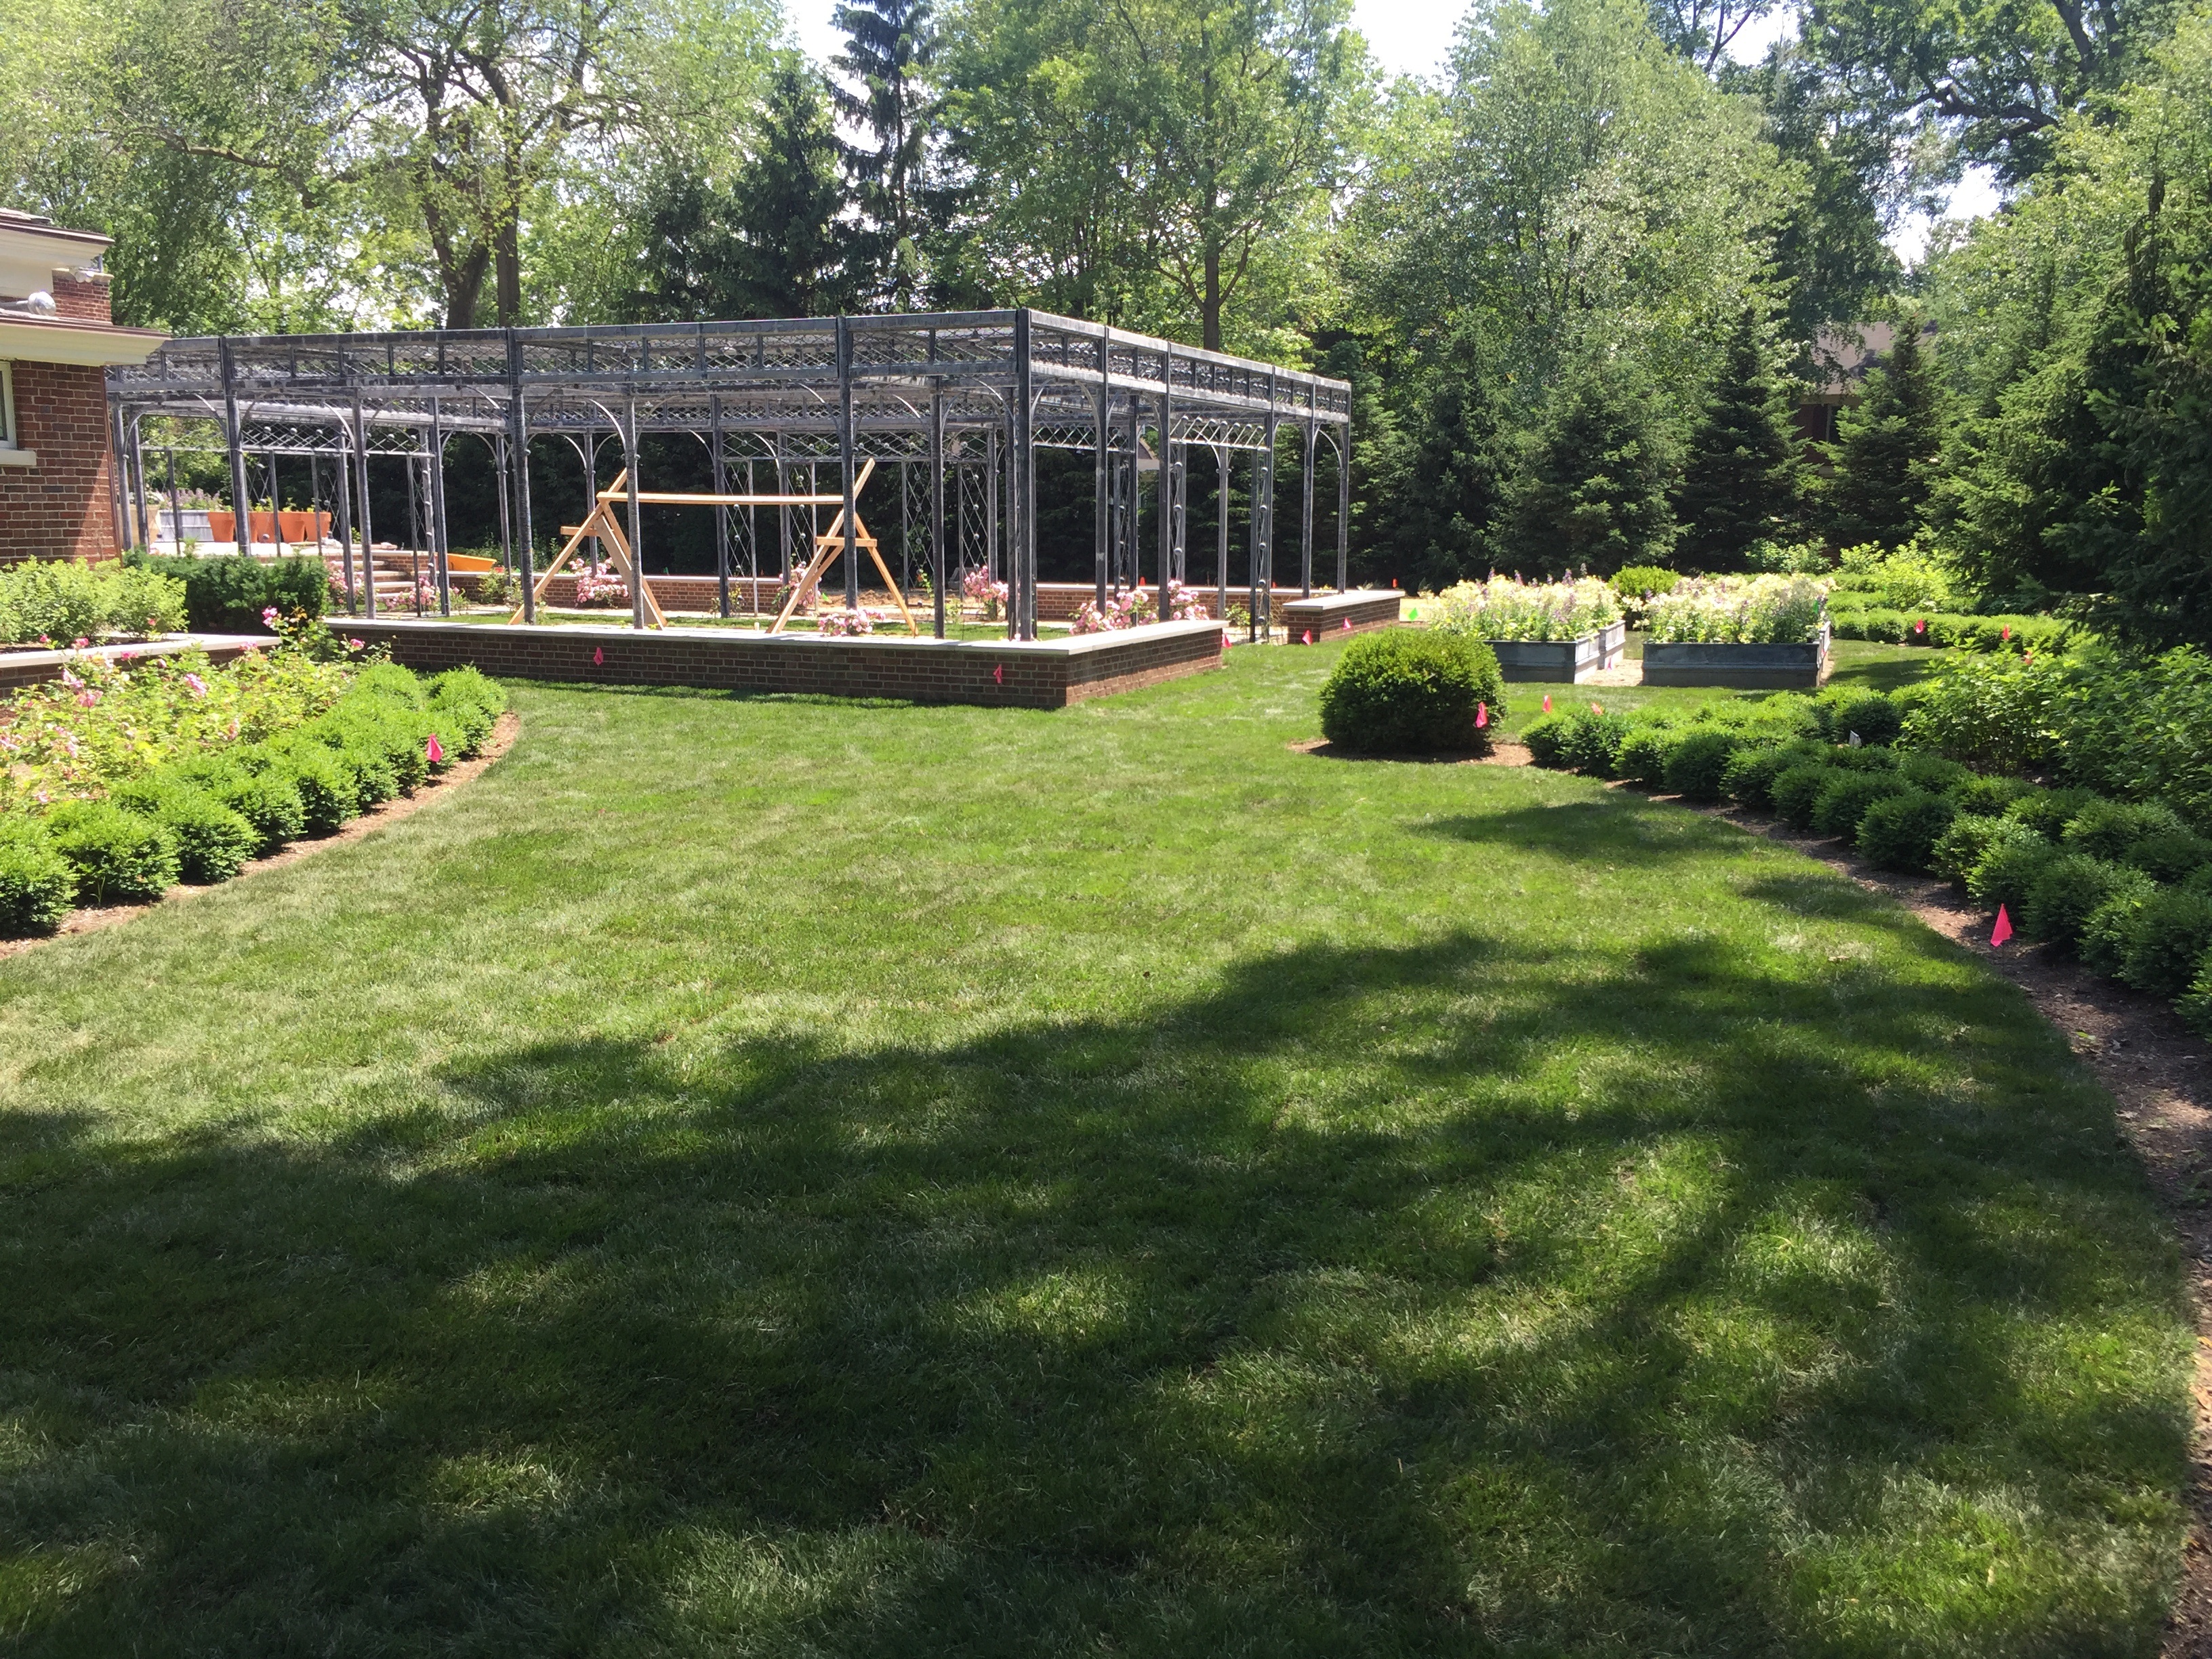
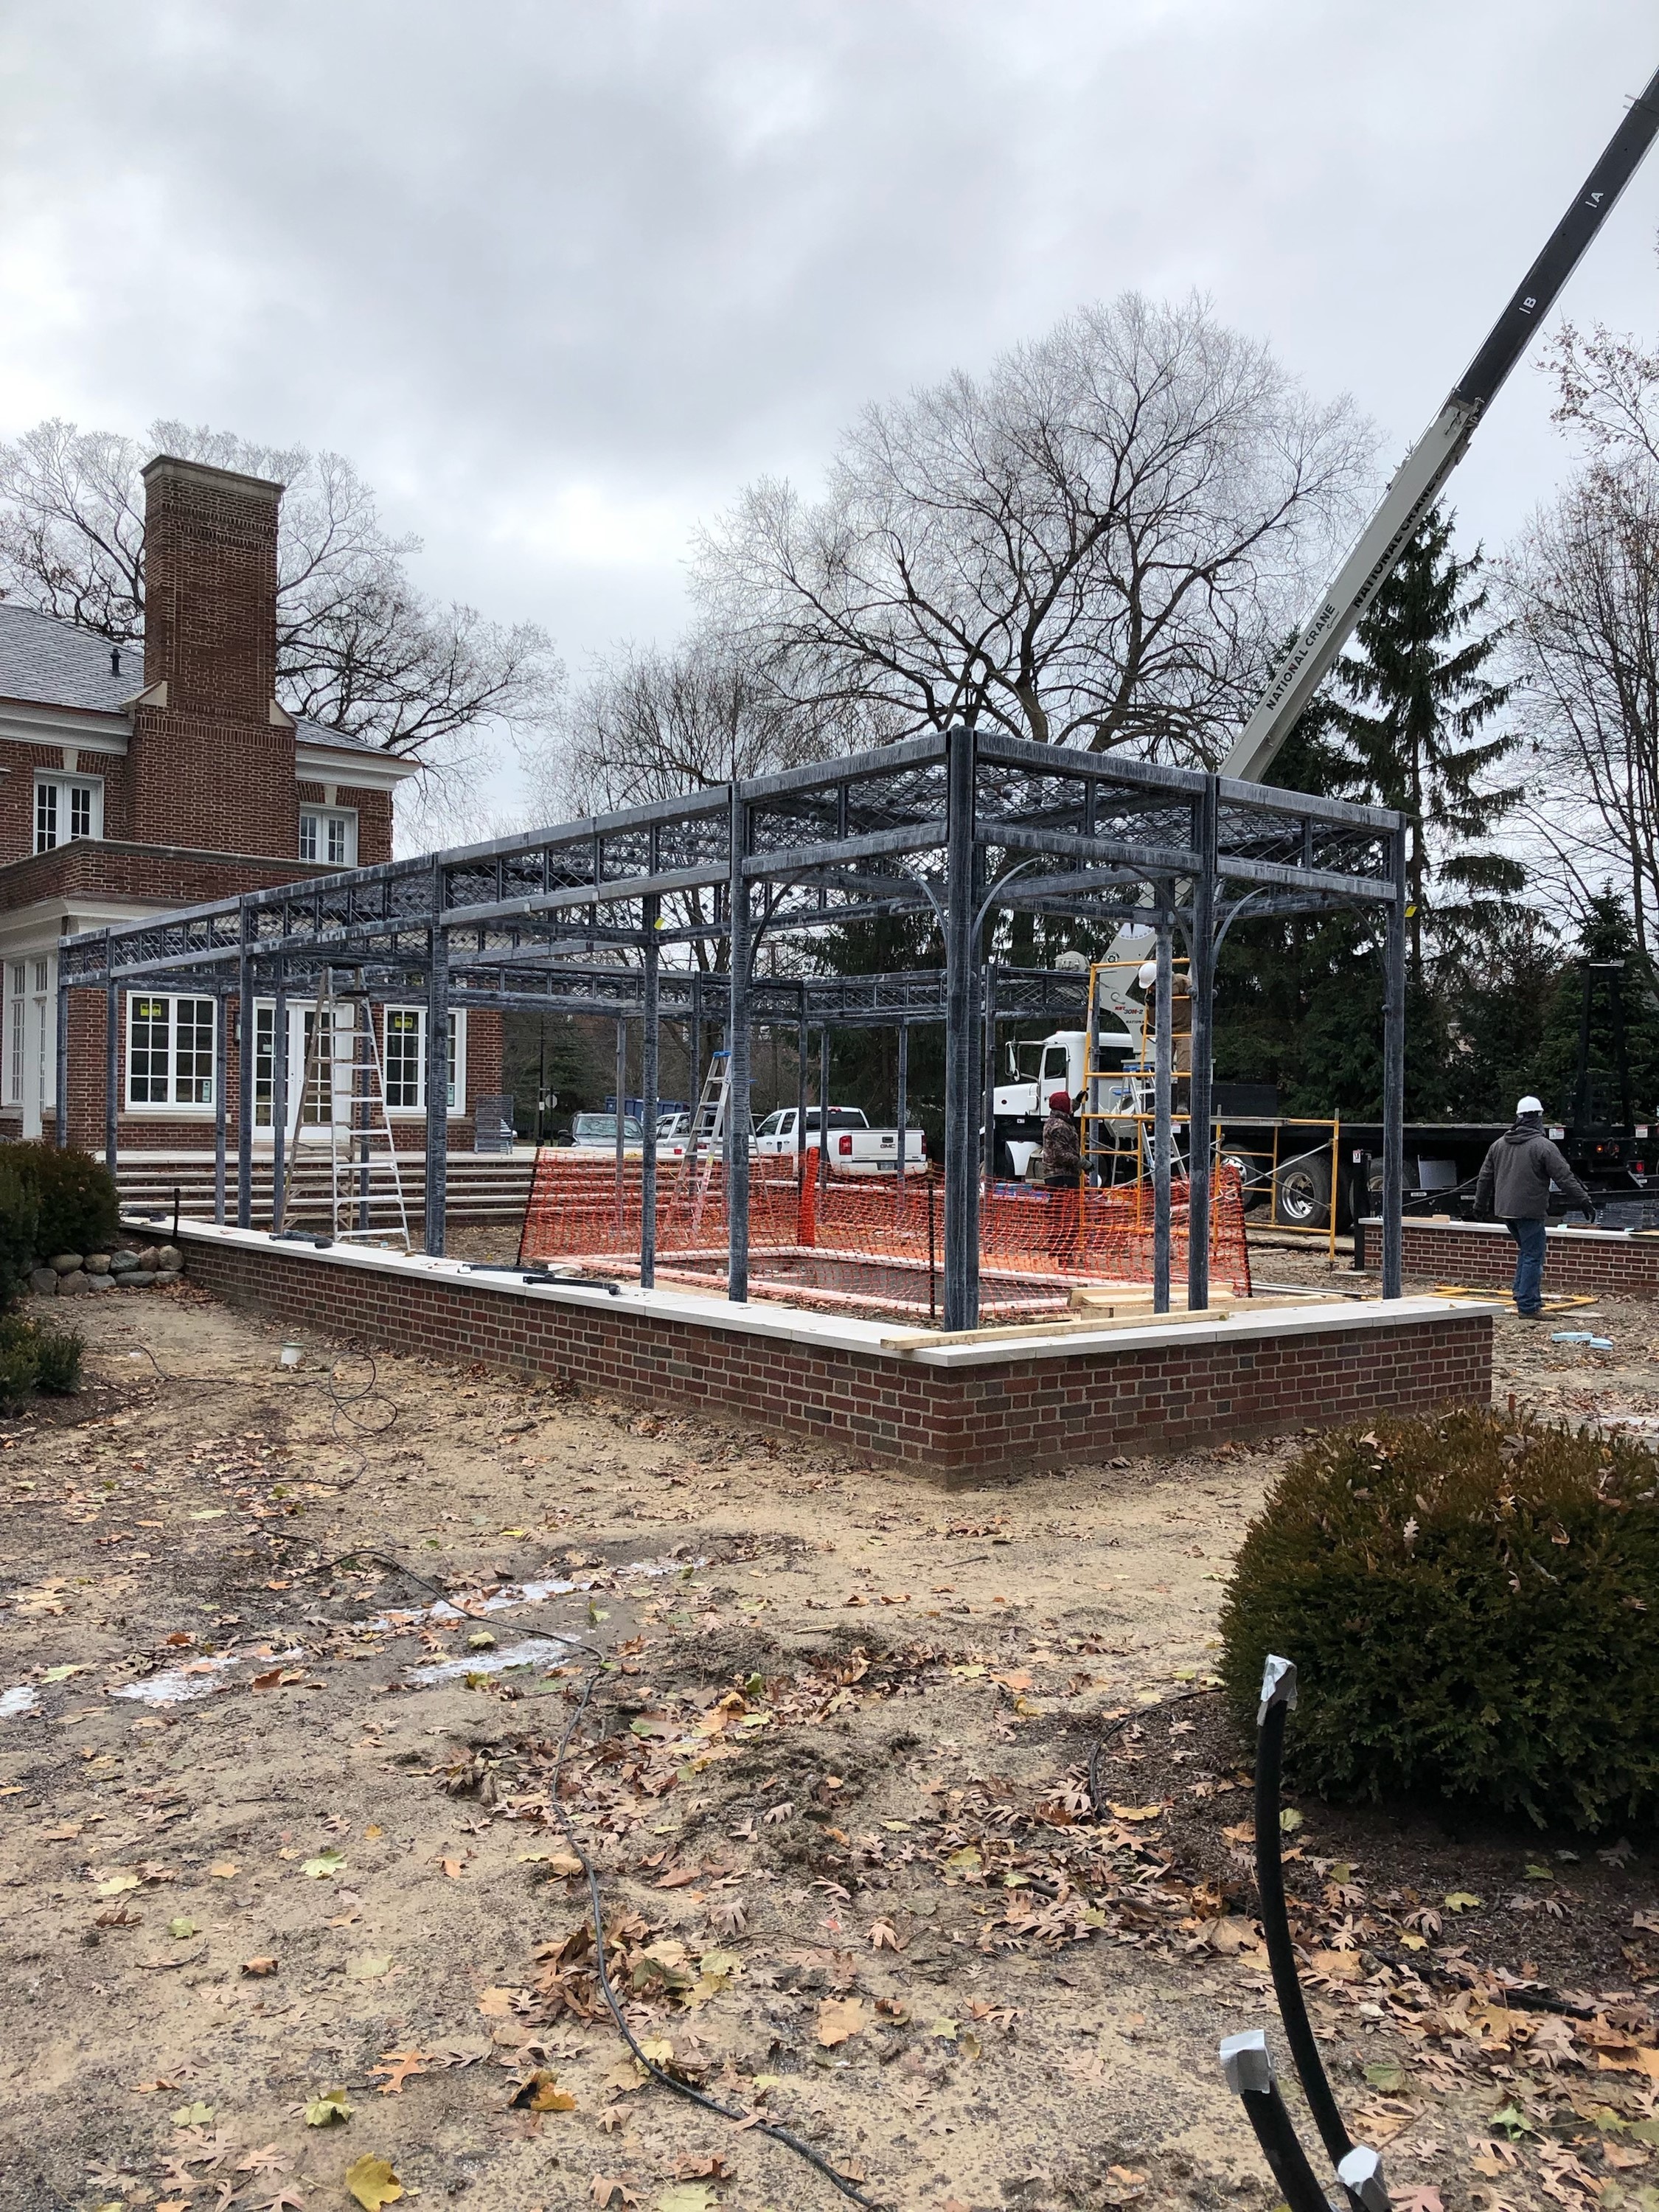
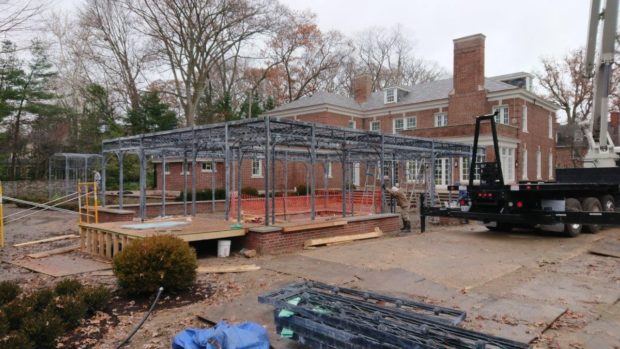
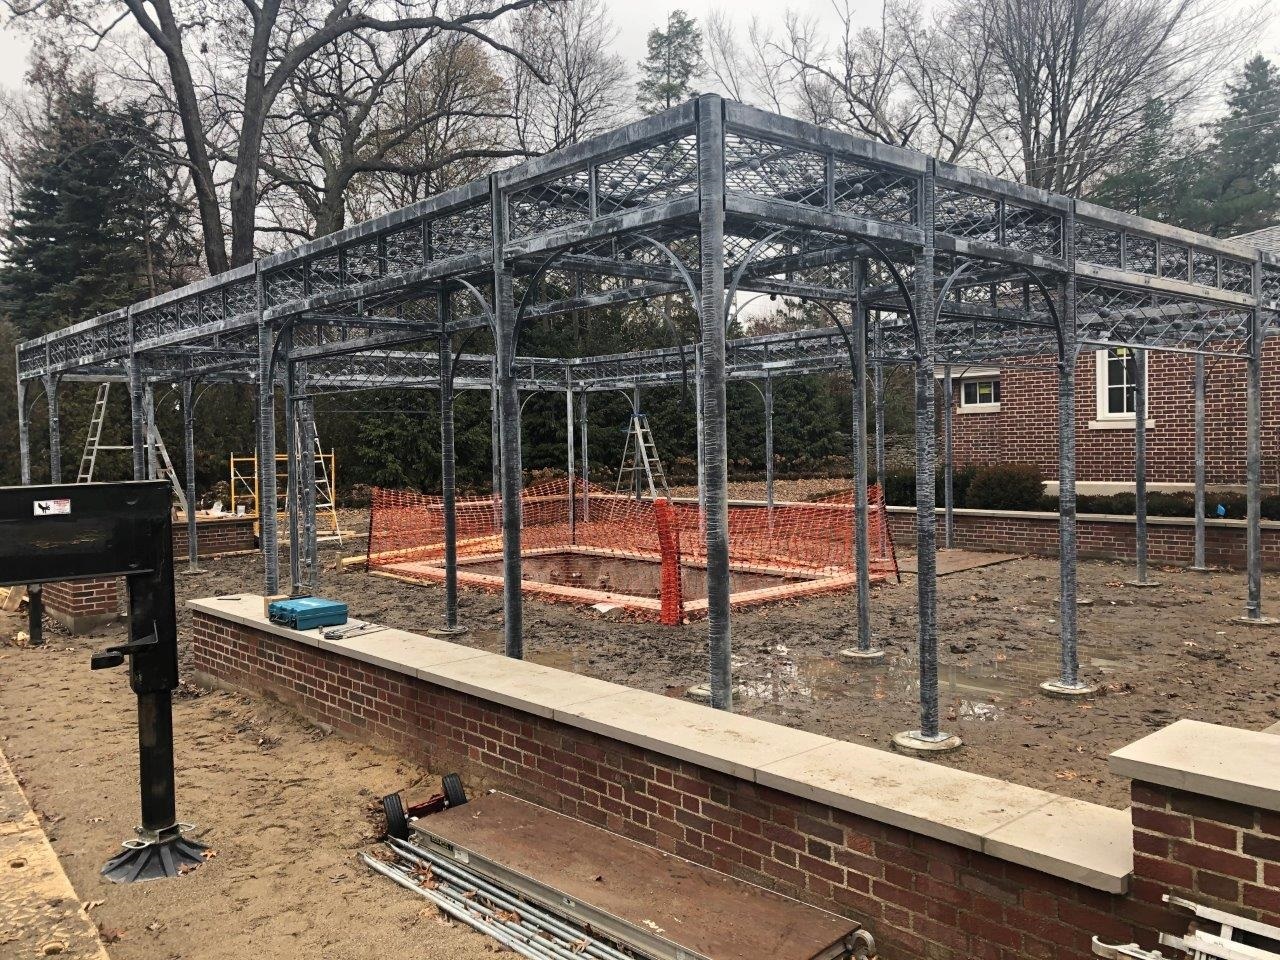
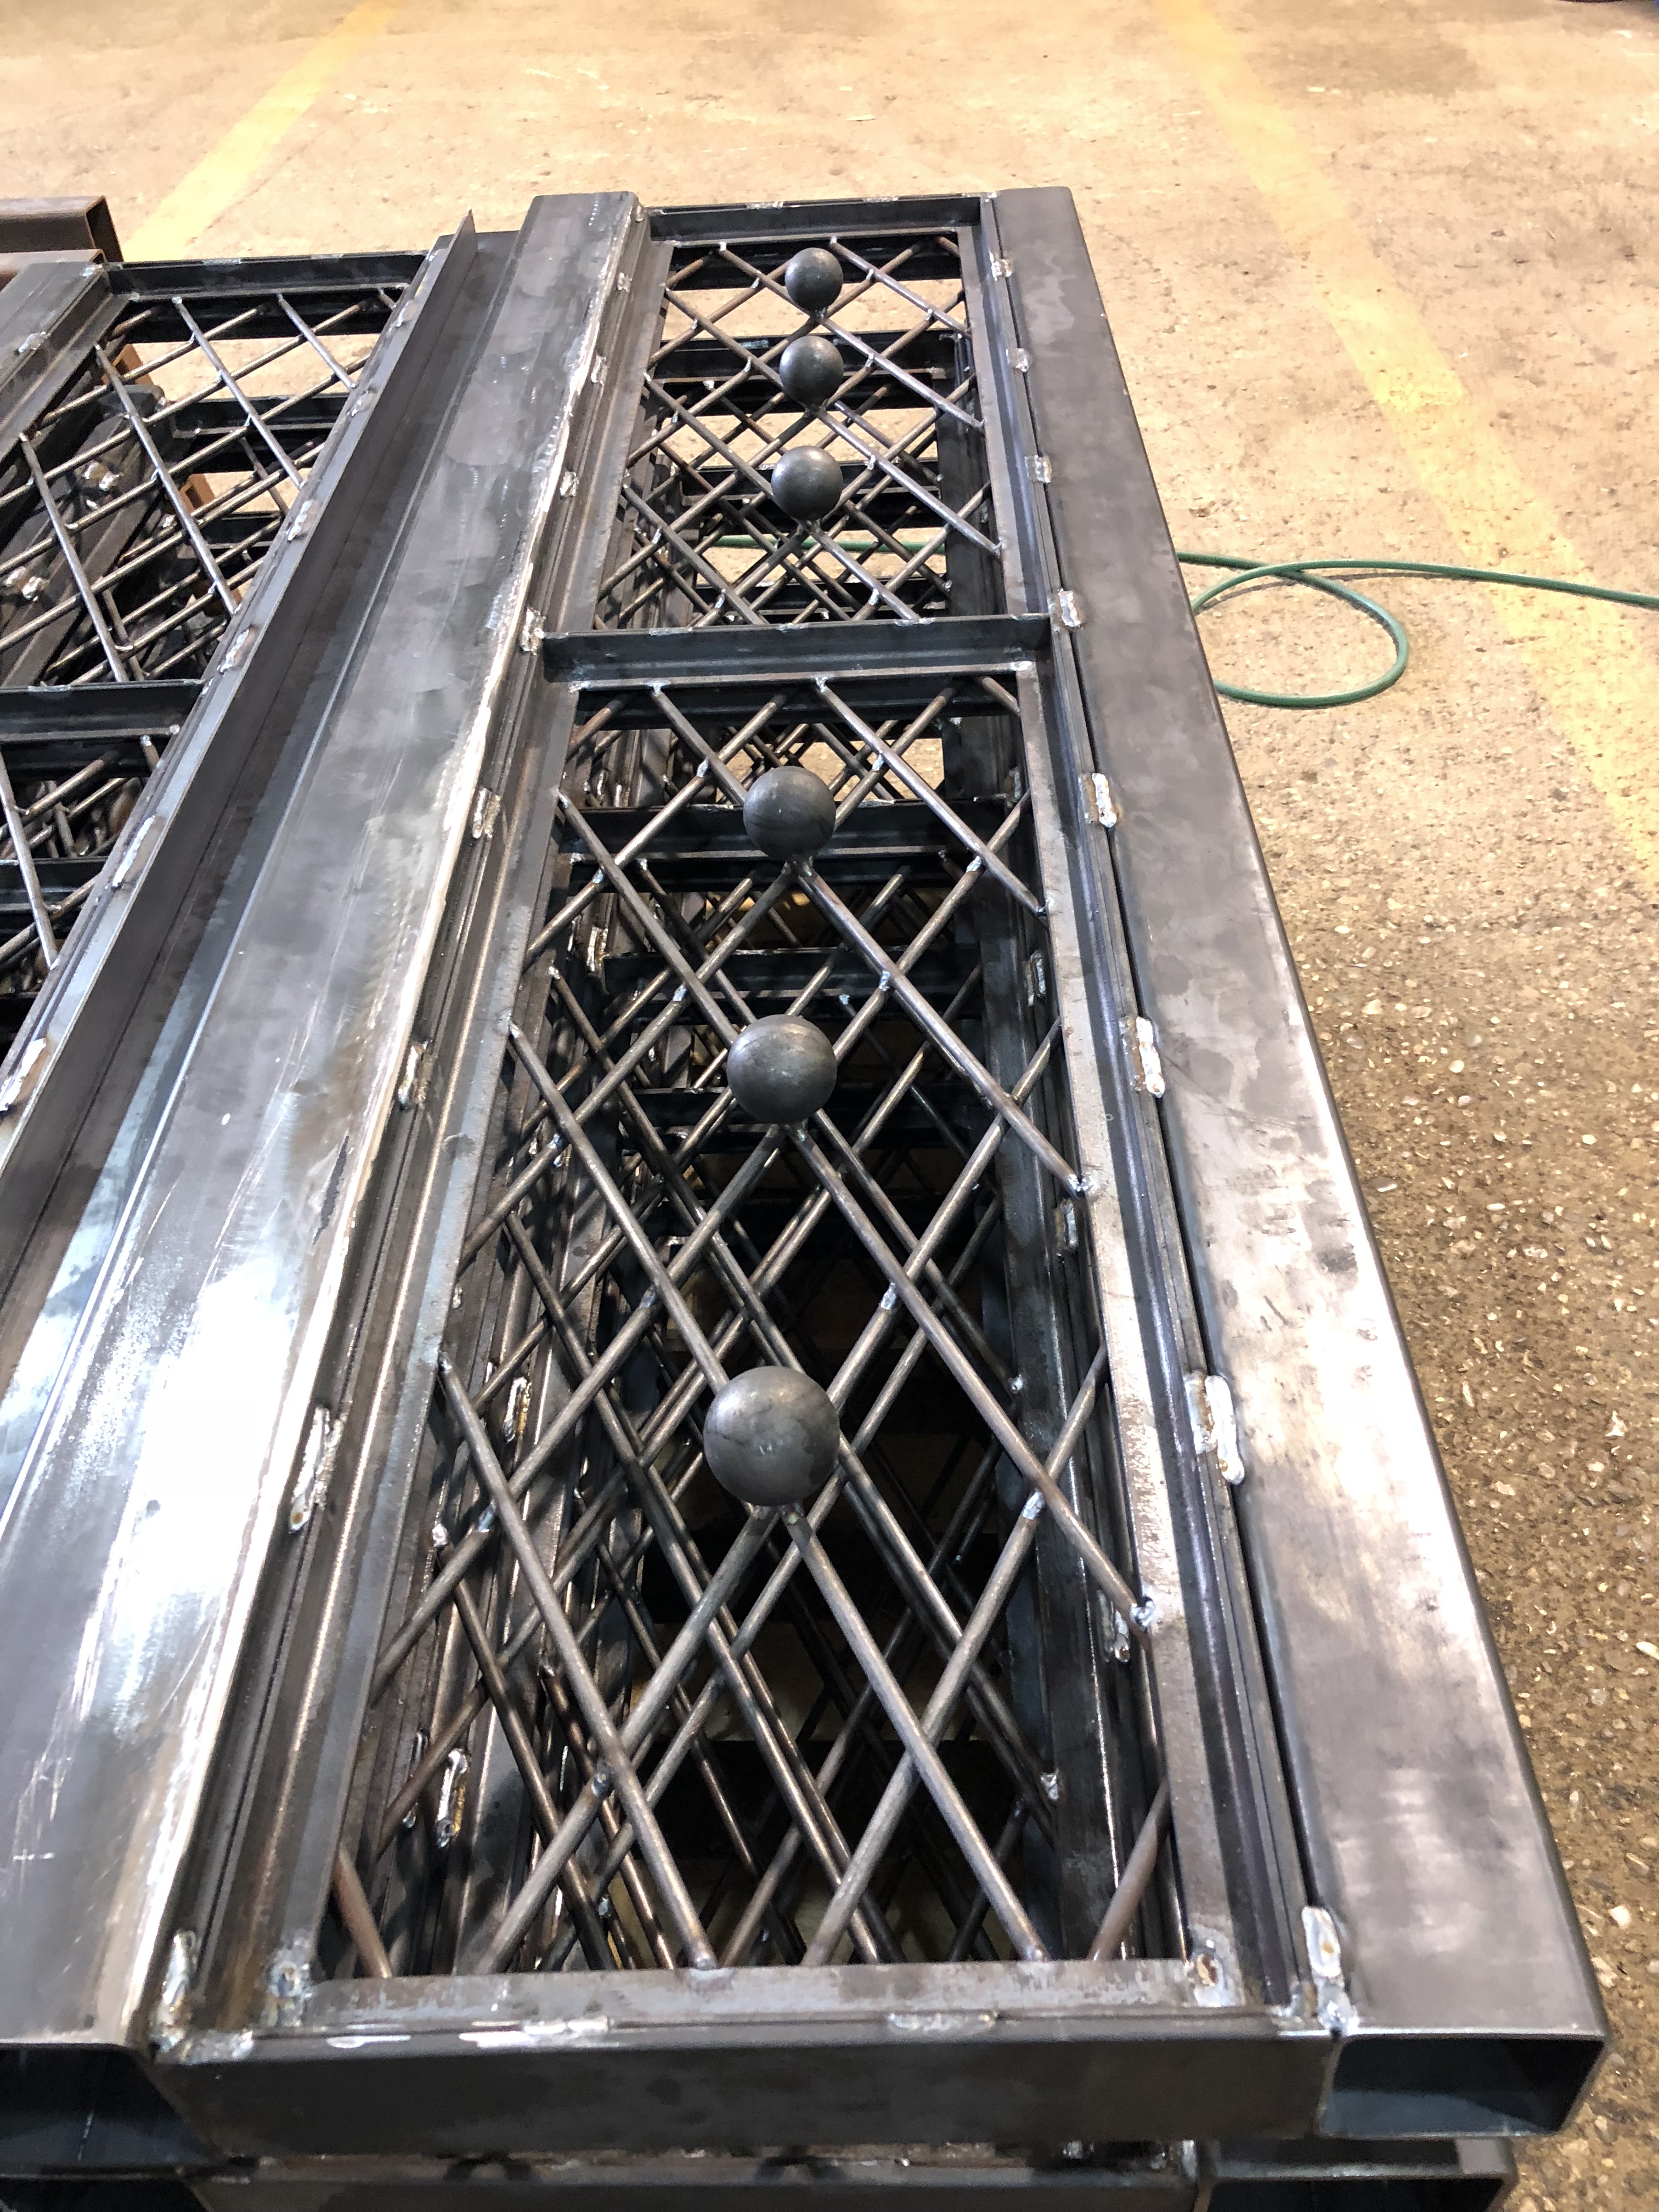
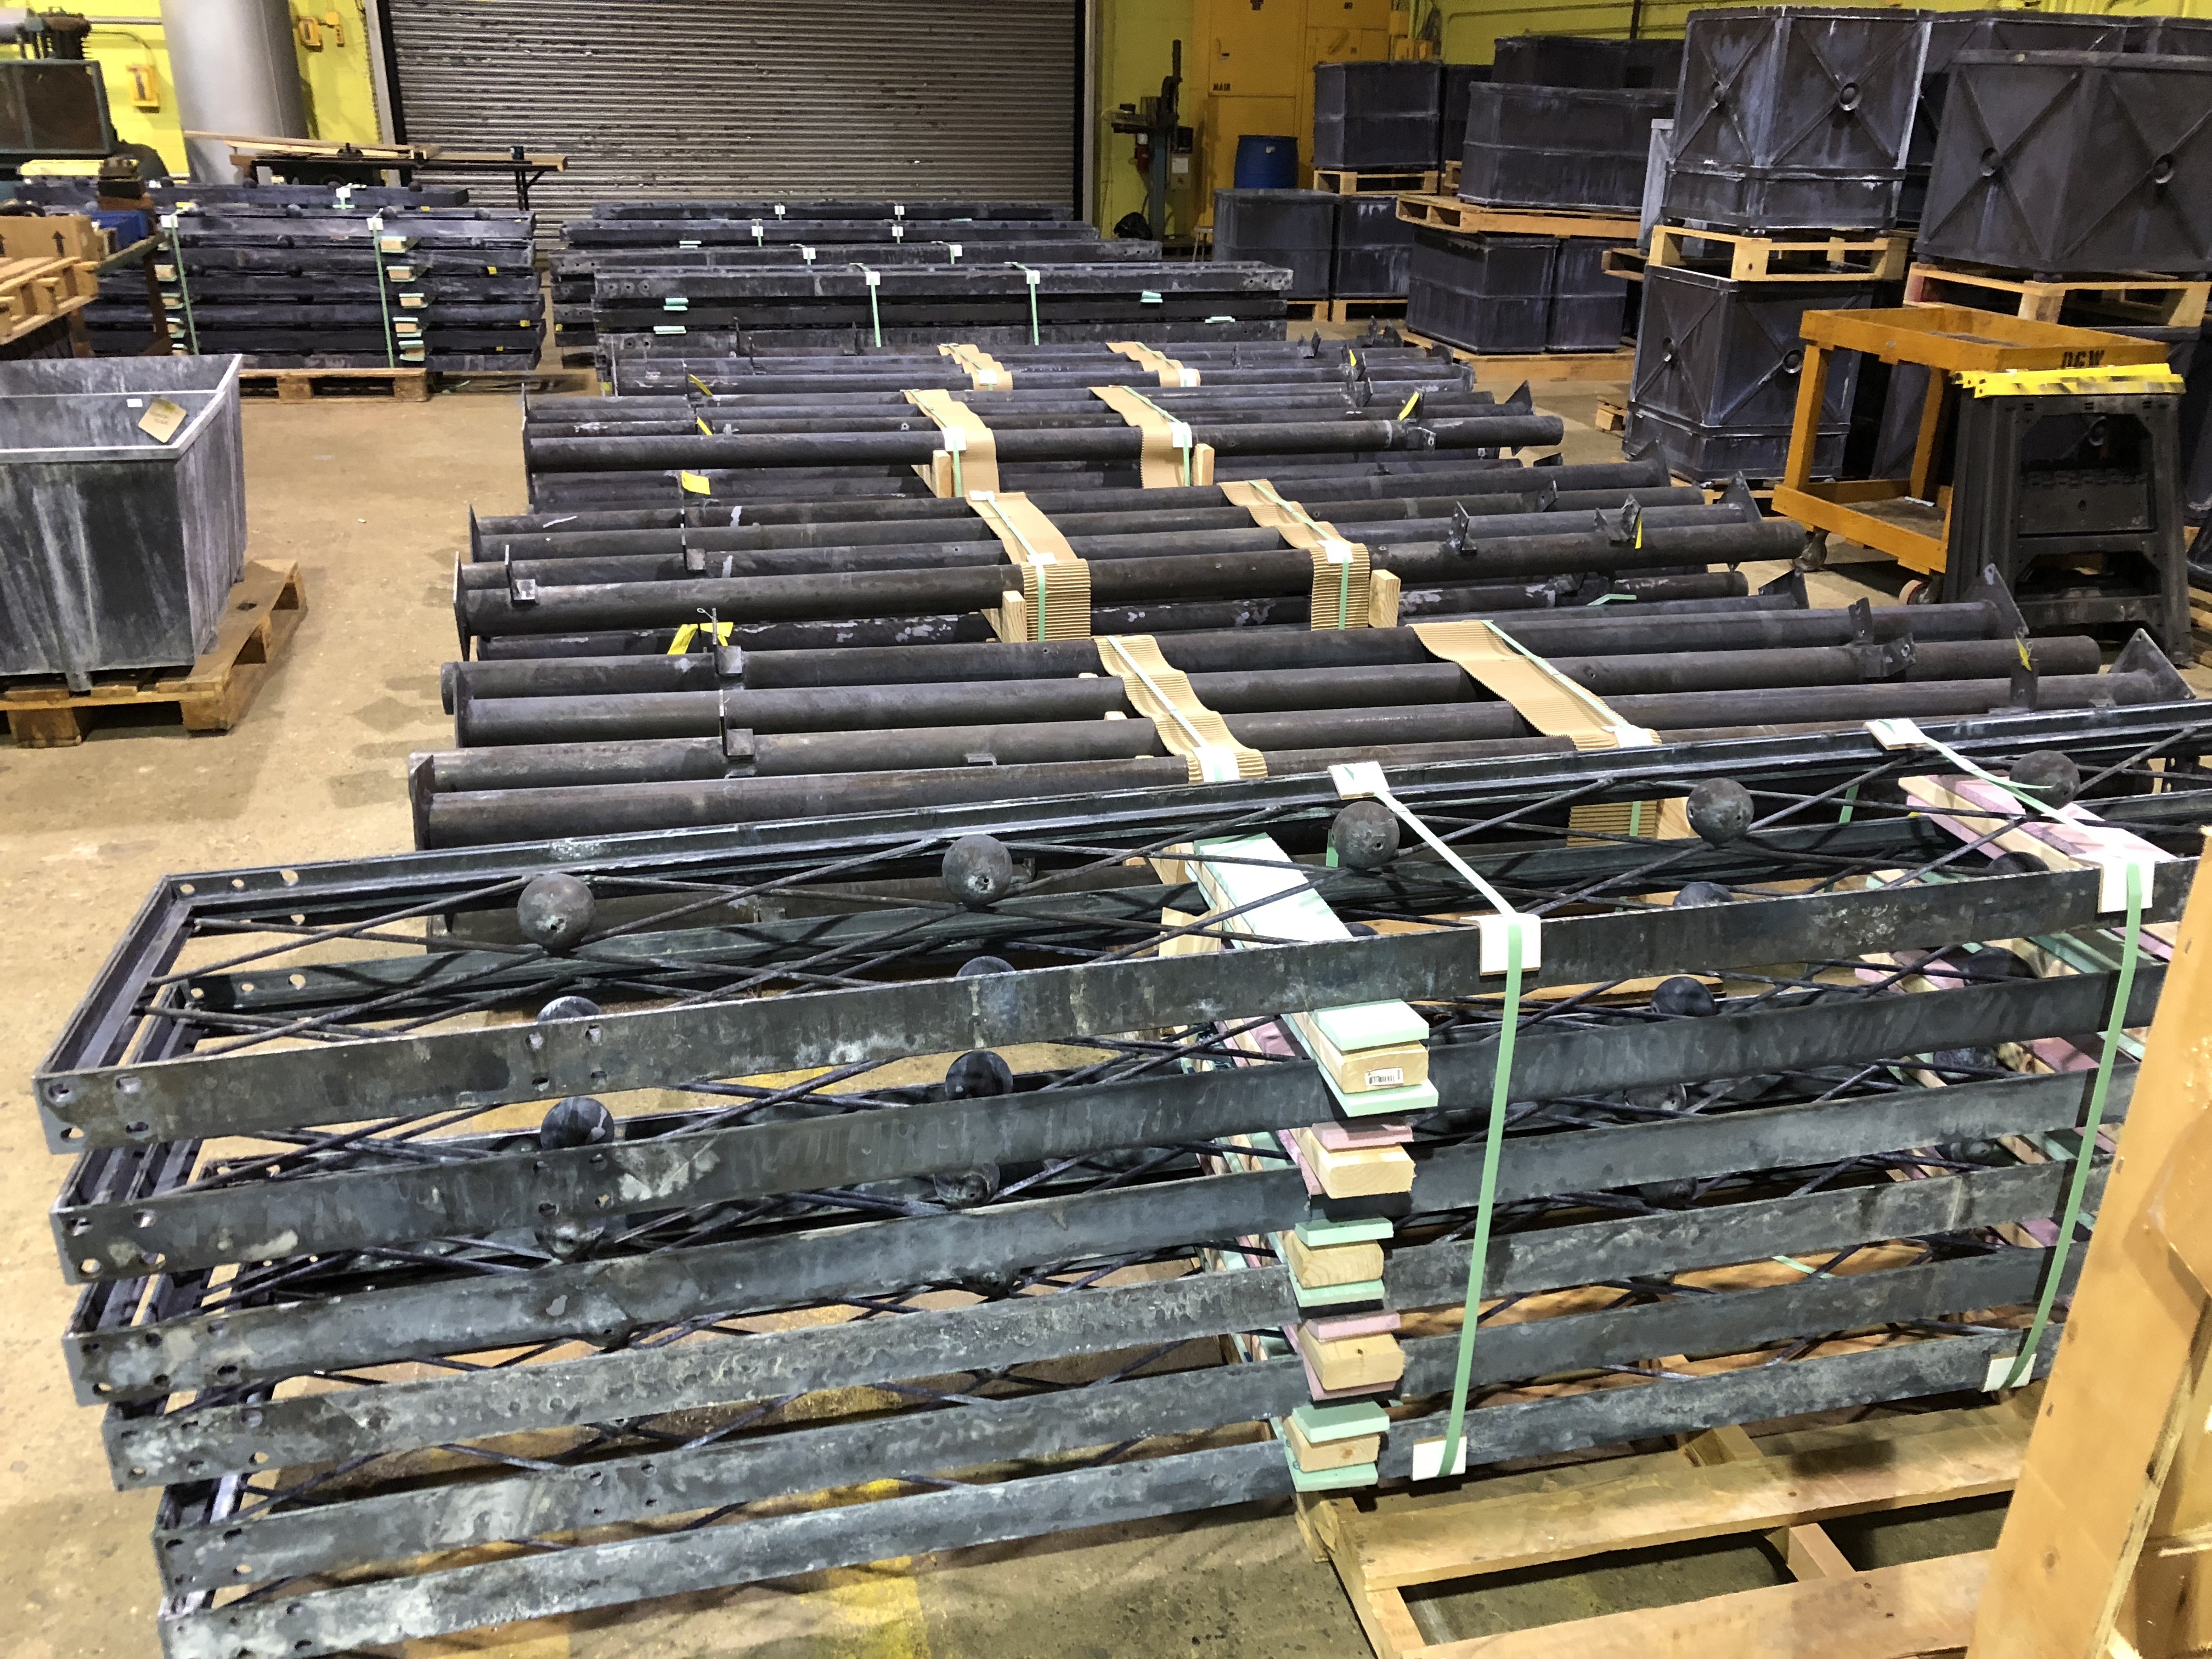
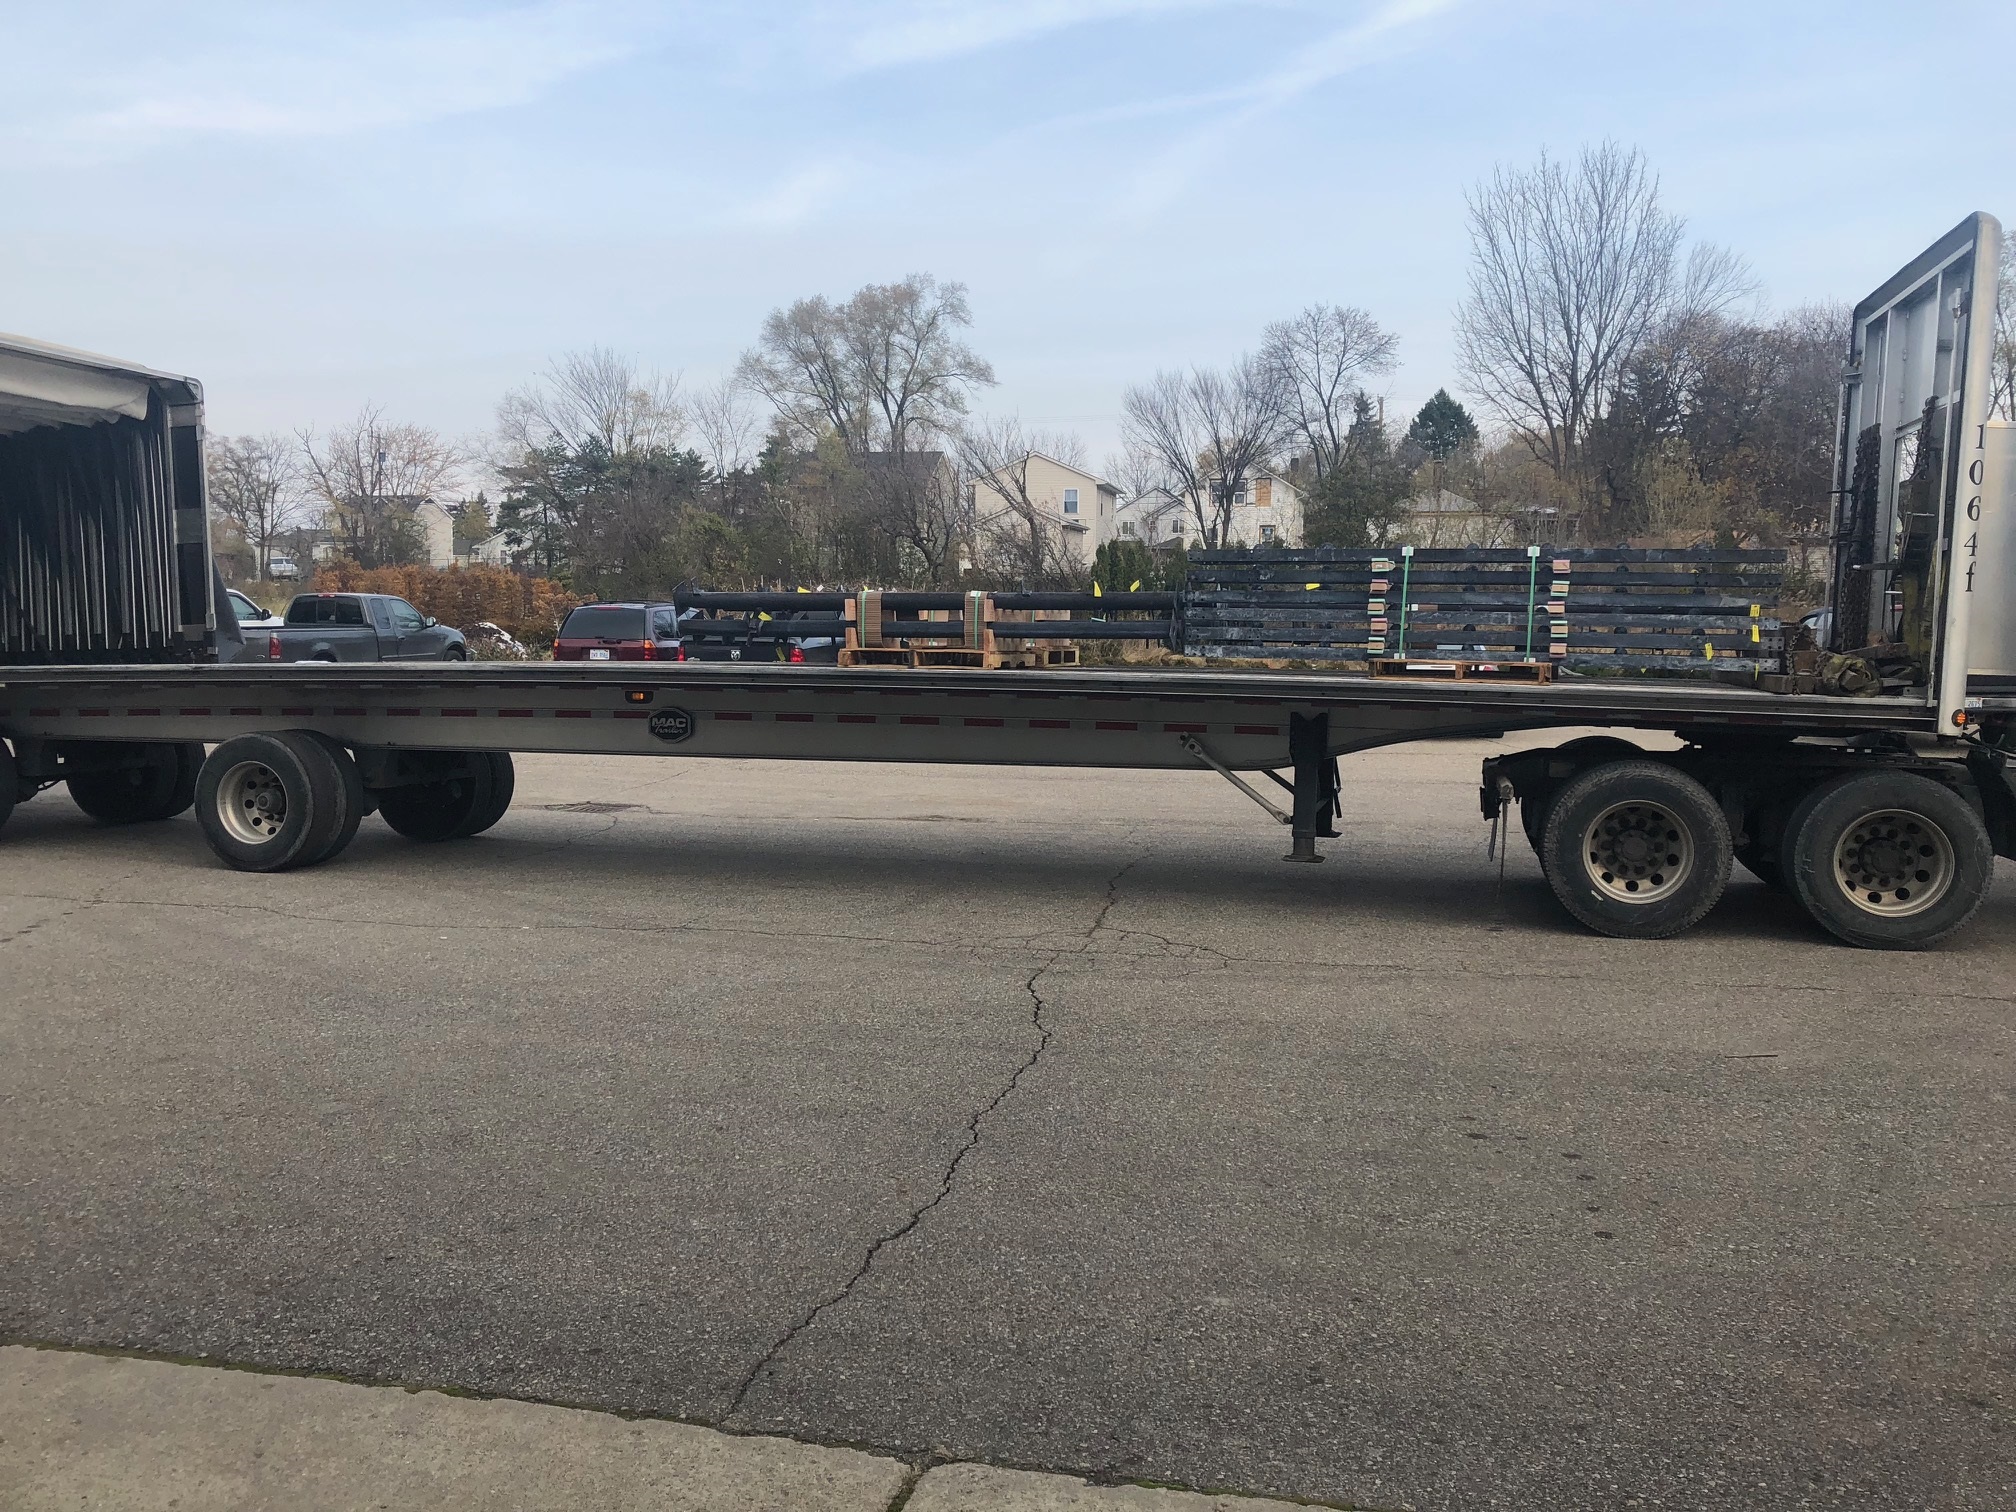
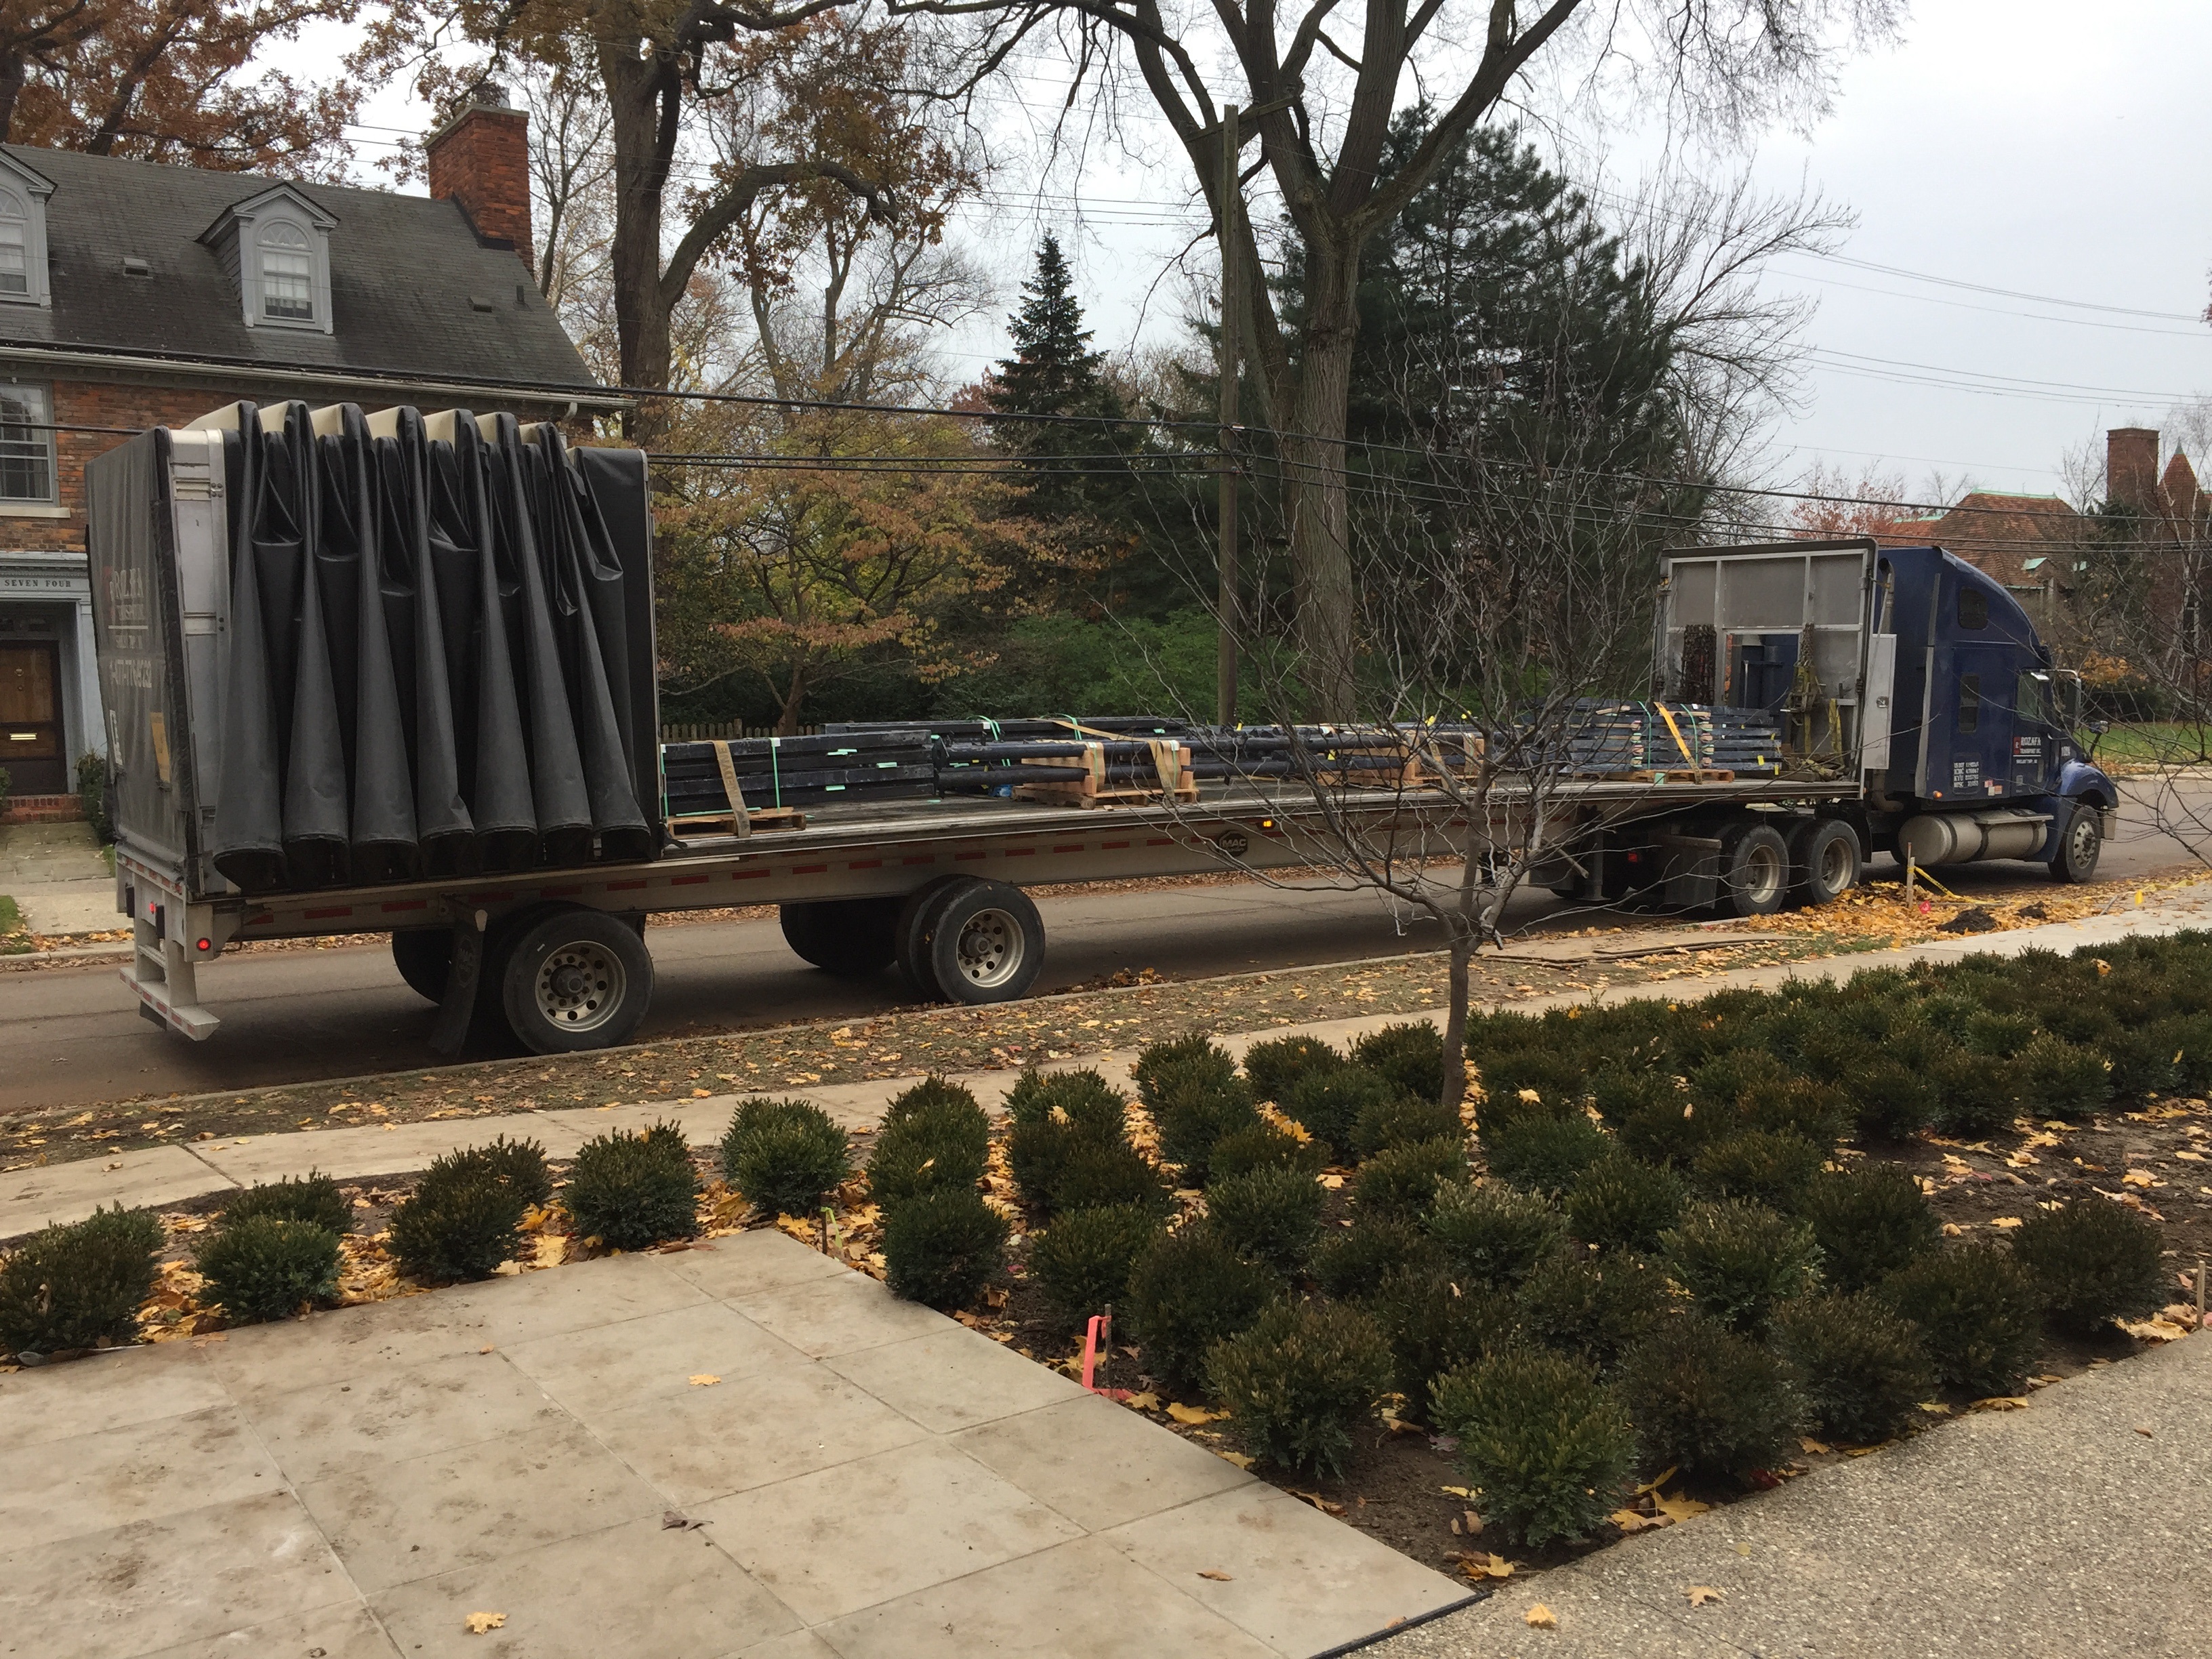
One component of that landscape was a pergola to be fabricated at Branch. Those of you who follow this blog know that I bought a 7 acre property with industrial buildings and large capacity bridge cranes in 2004, with the express idea of designing and fabricating heirloom quality objects for the garden in steel. We have been at exactly that over the ensuing years. The years have provided an opportunity to tune up fabrication protocols. And they have provided a framework for the evolution of design. Our original pergolas from years ago were designed primarily to provide large scale, organizing structure to a landscape. Seating areas under them naturally came to mind. They also could support large growing lax vines. Think climbing roses, climbing hydrangea, grapes and wisteria, or sweet autumn clematis. Both the strength of the steel and the permanent performance of the finish made them a great partner for vigorously growing vines that would put on weight, year after year. Those leafy plants that eventually grow over the roof would eventually provide shade.

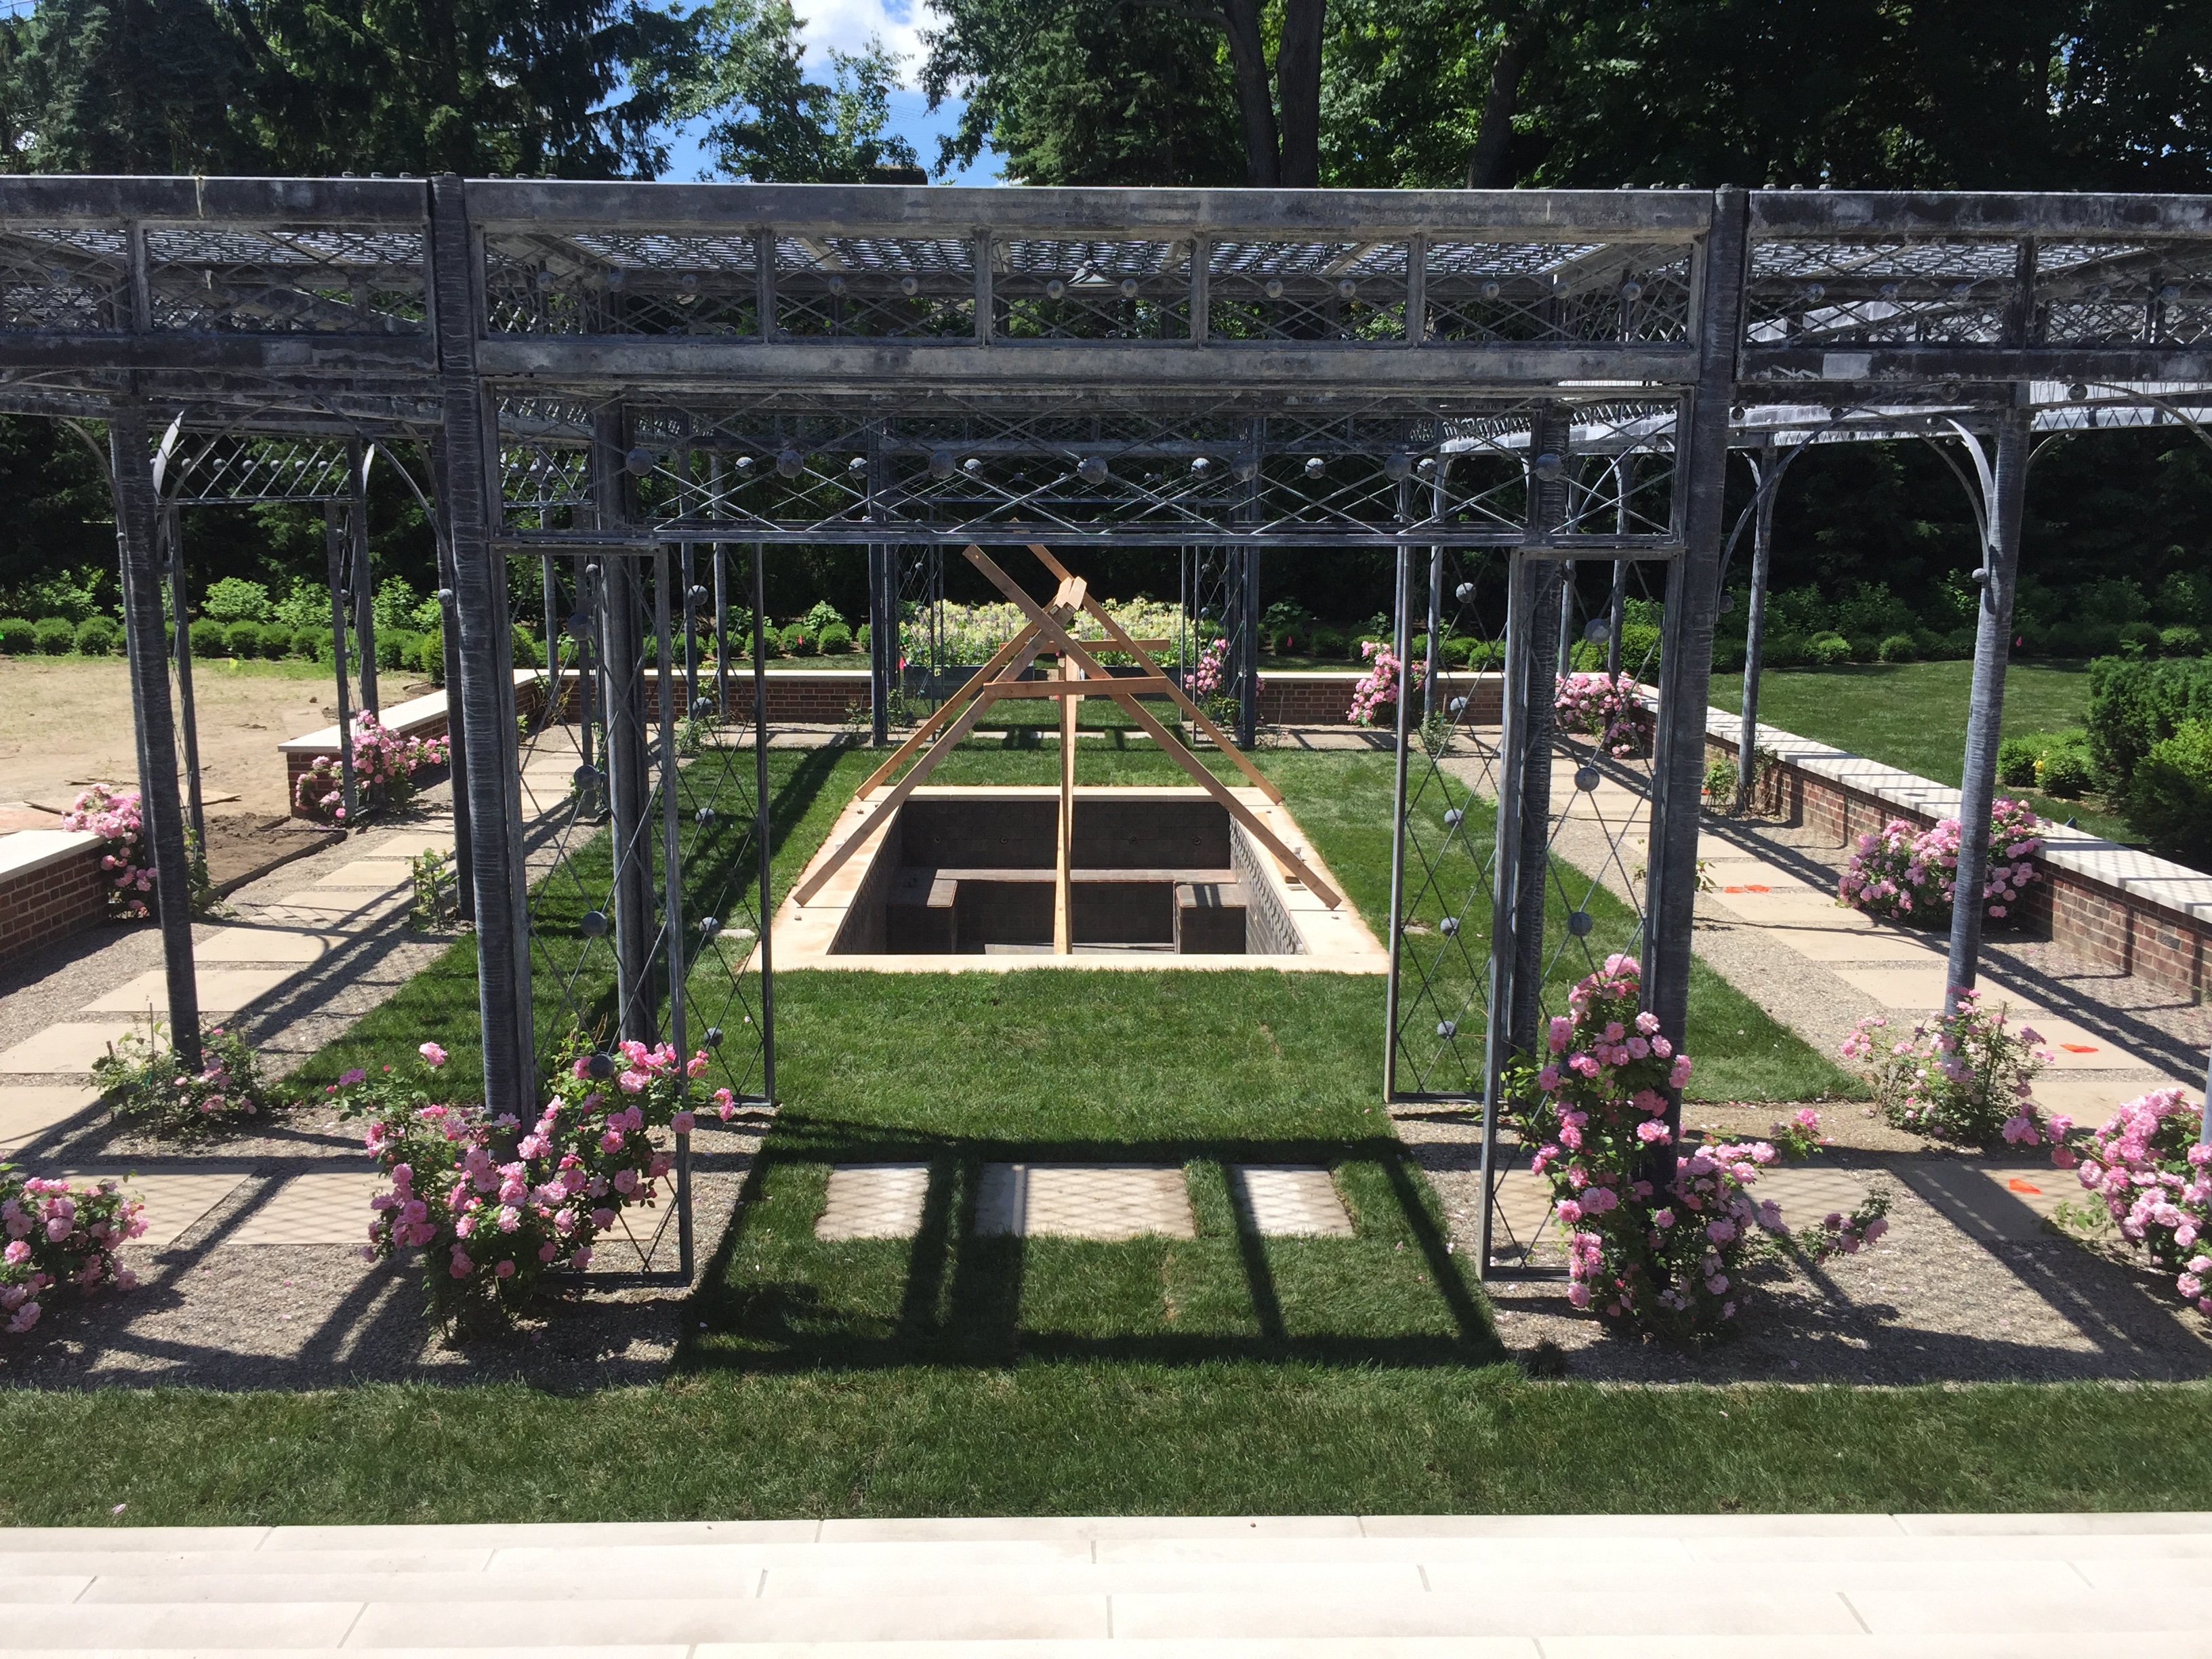
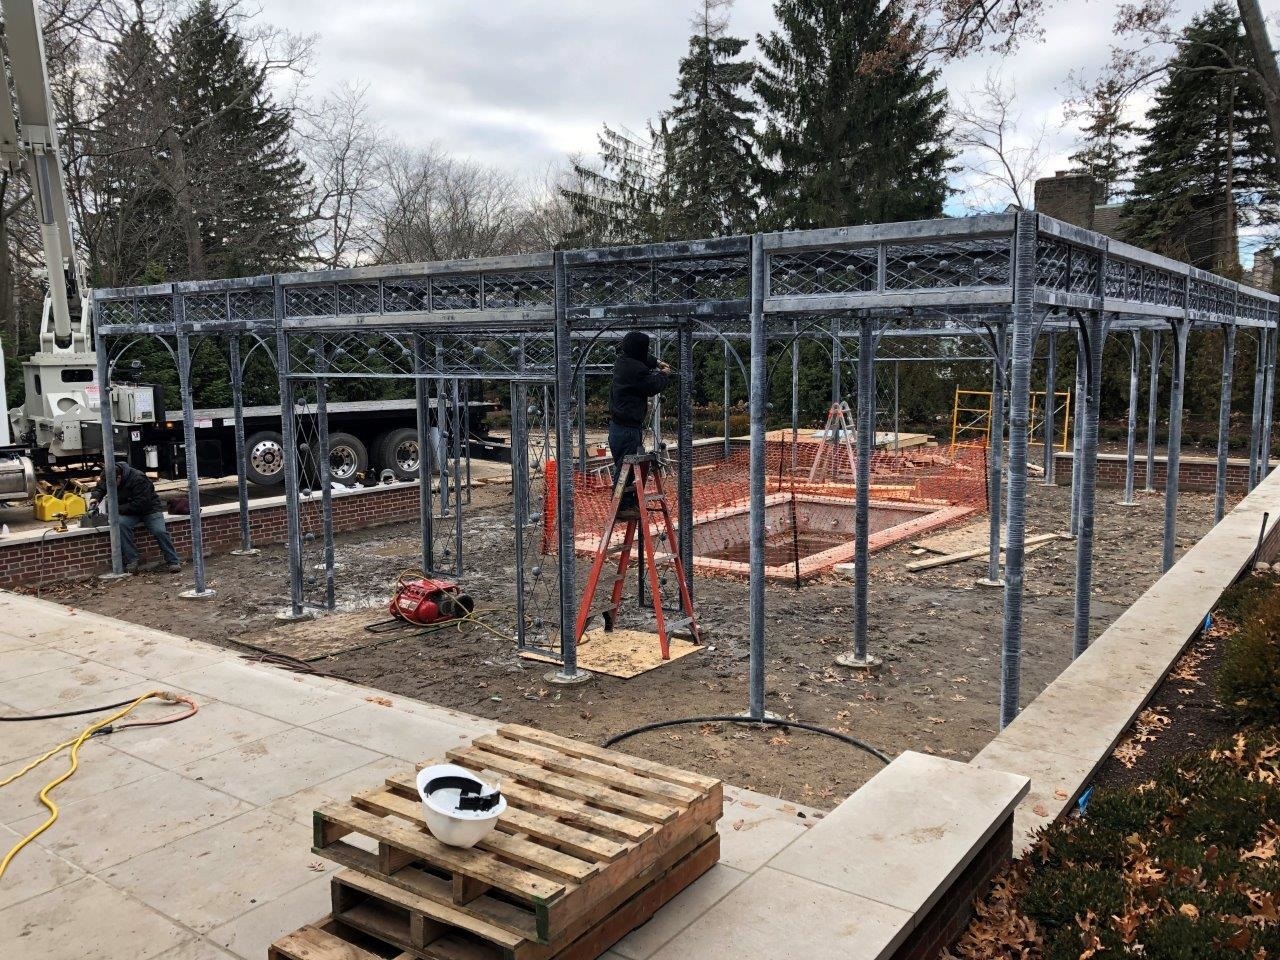
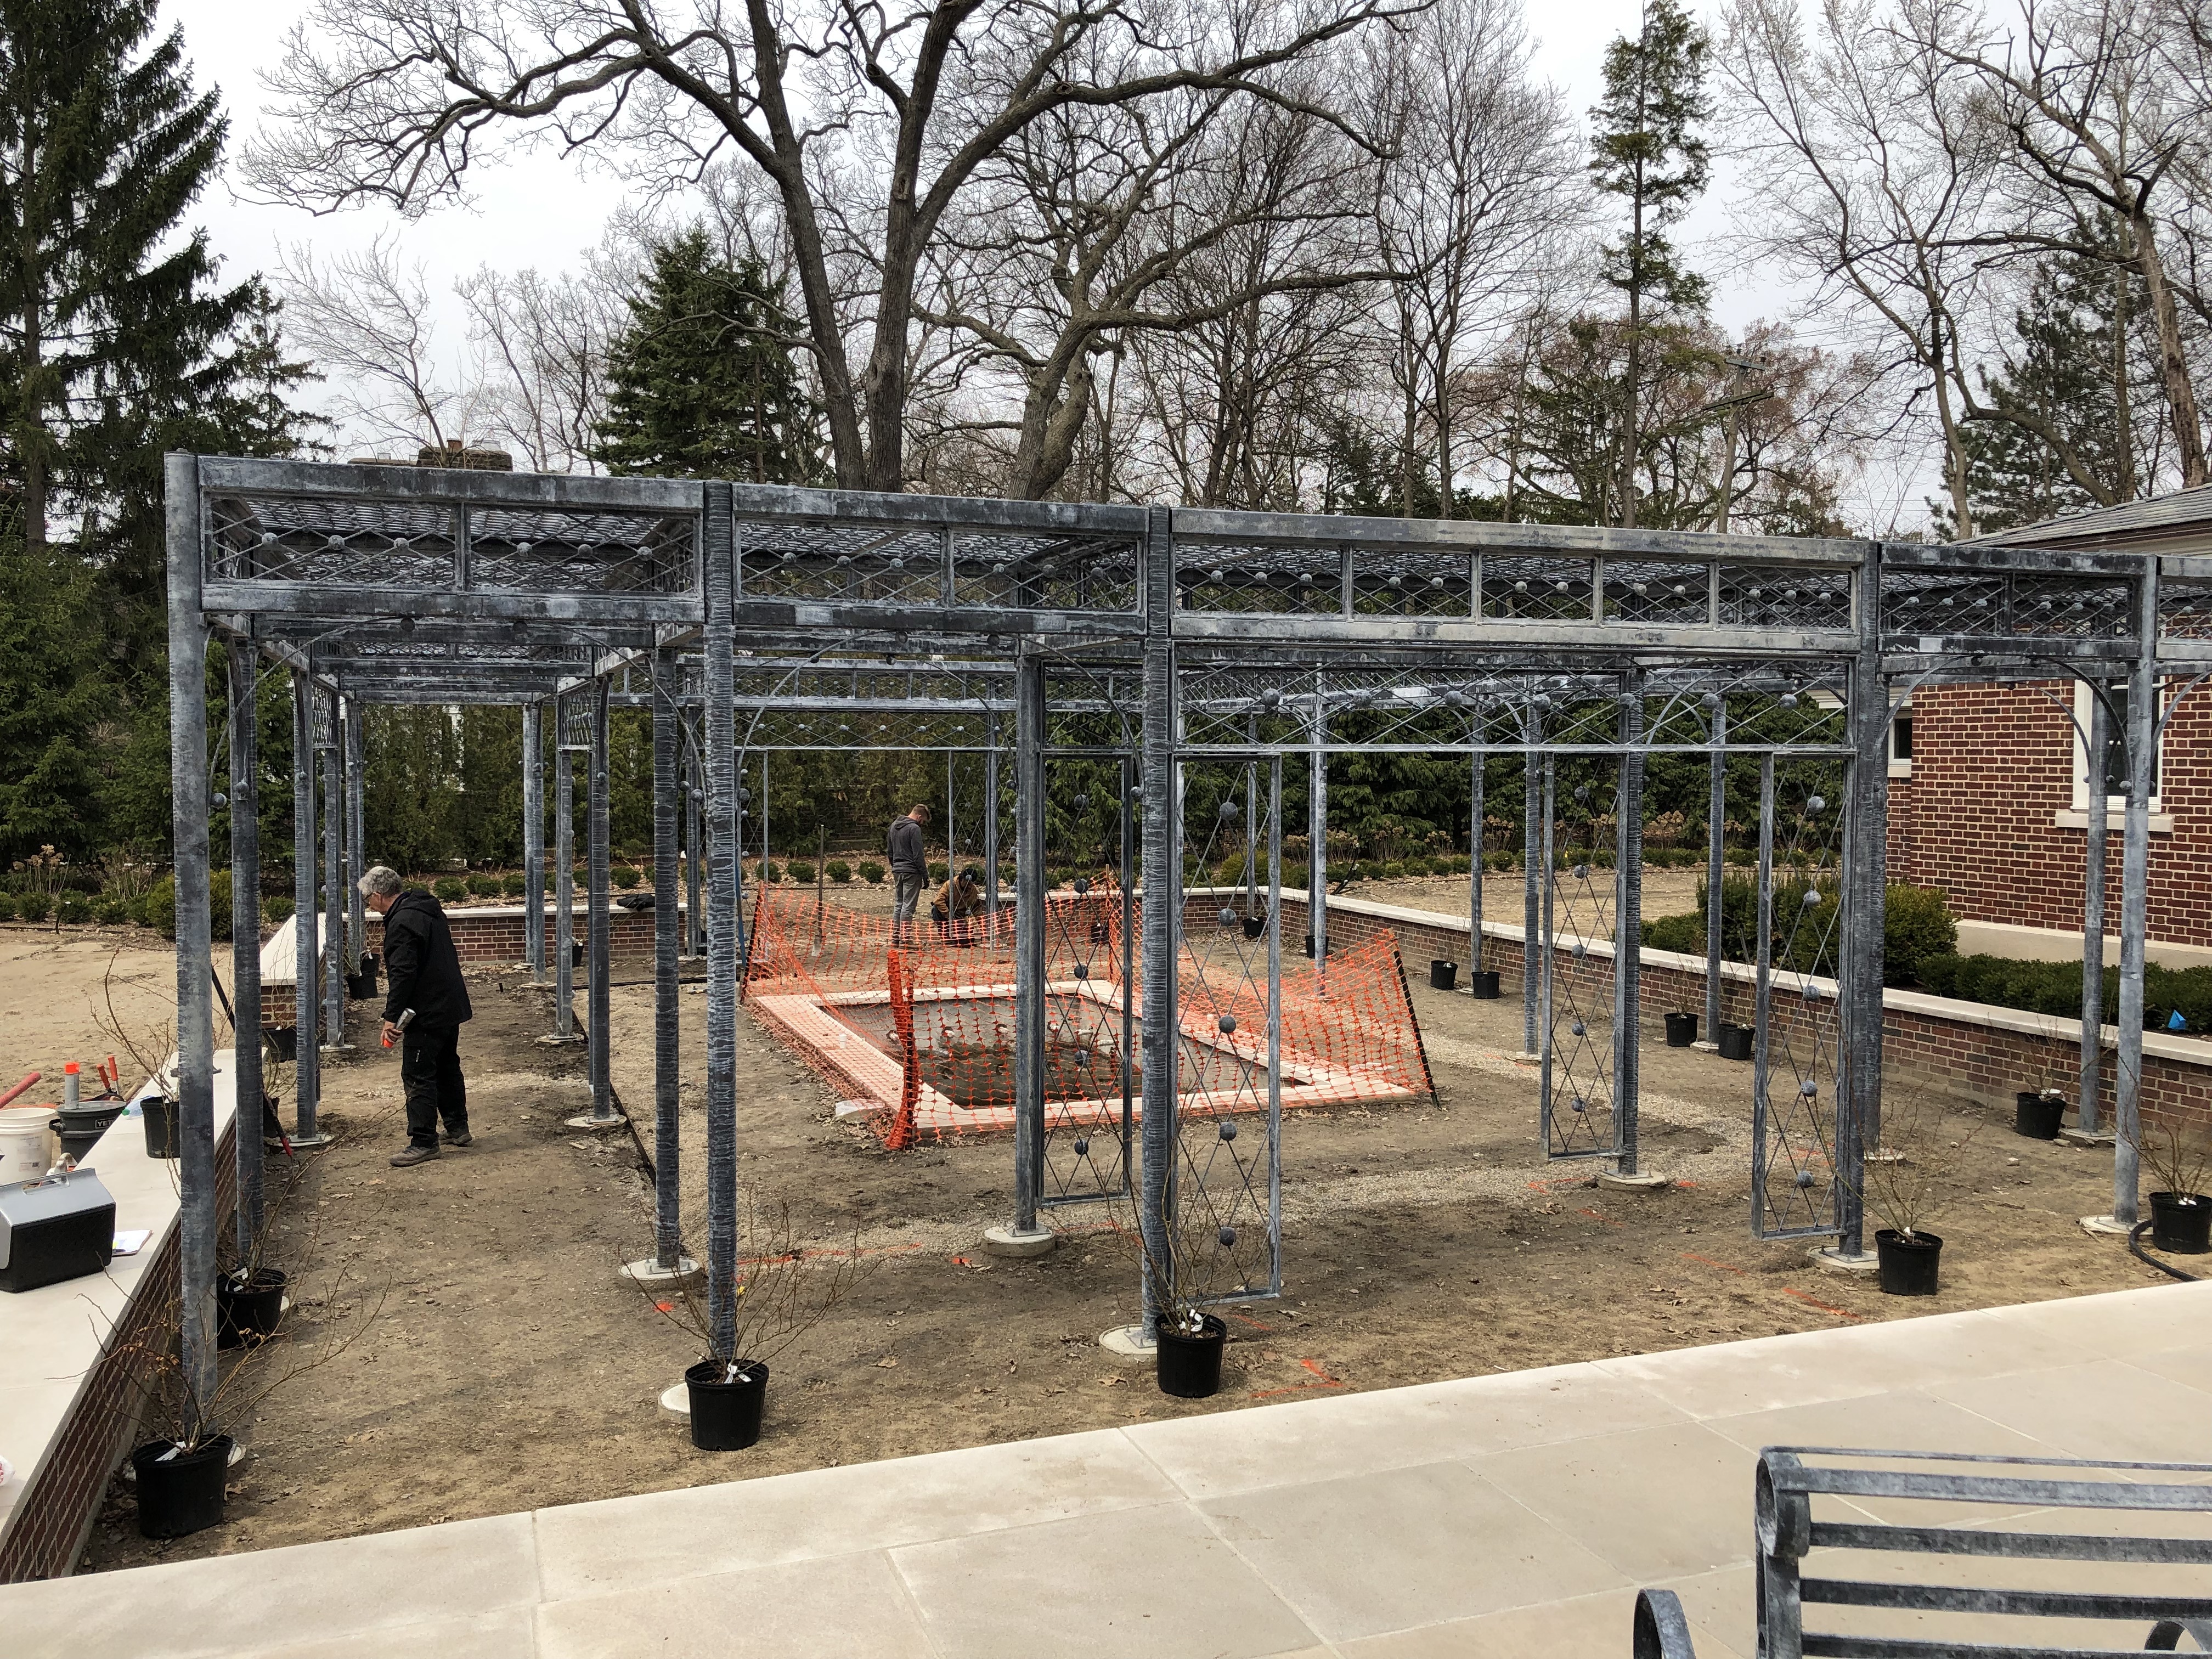
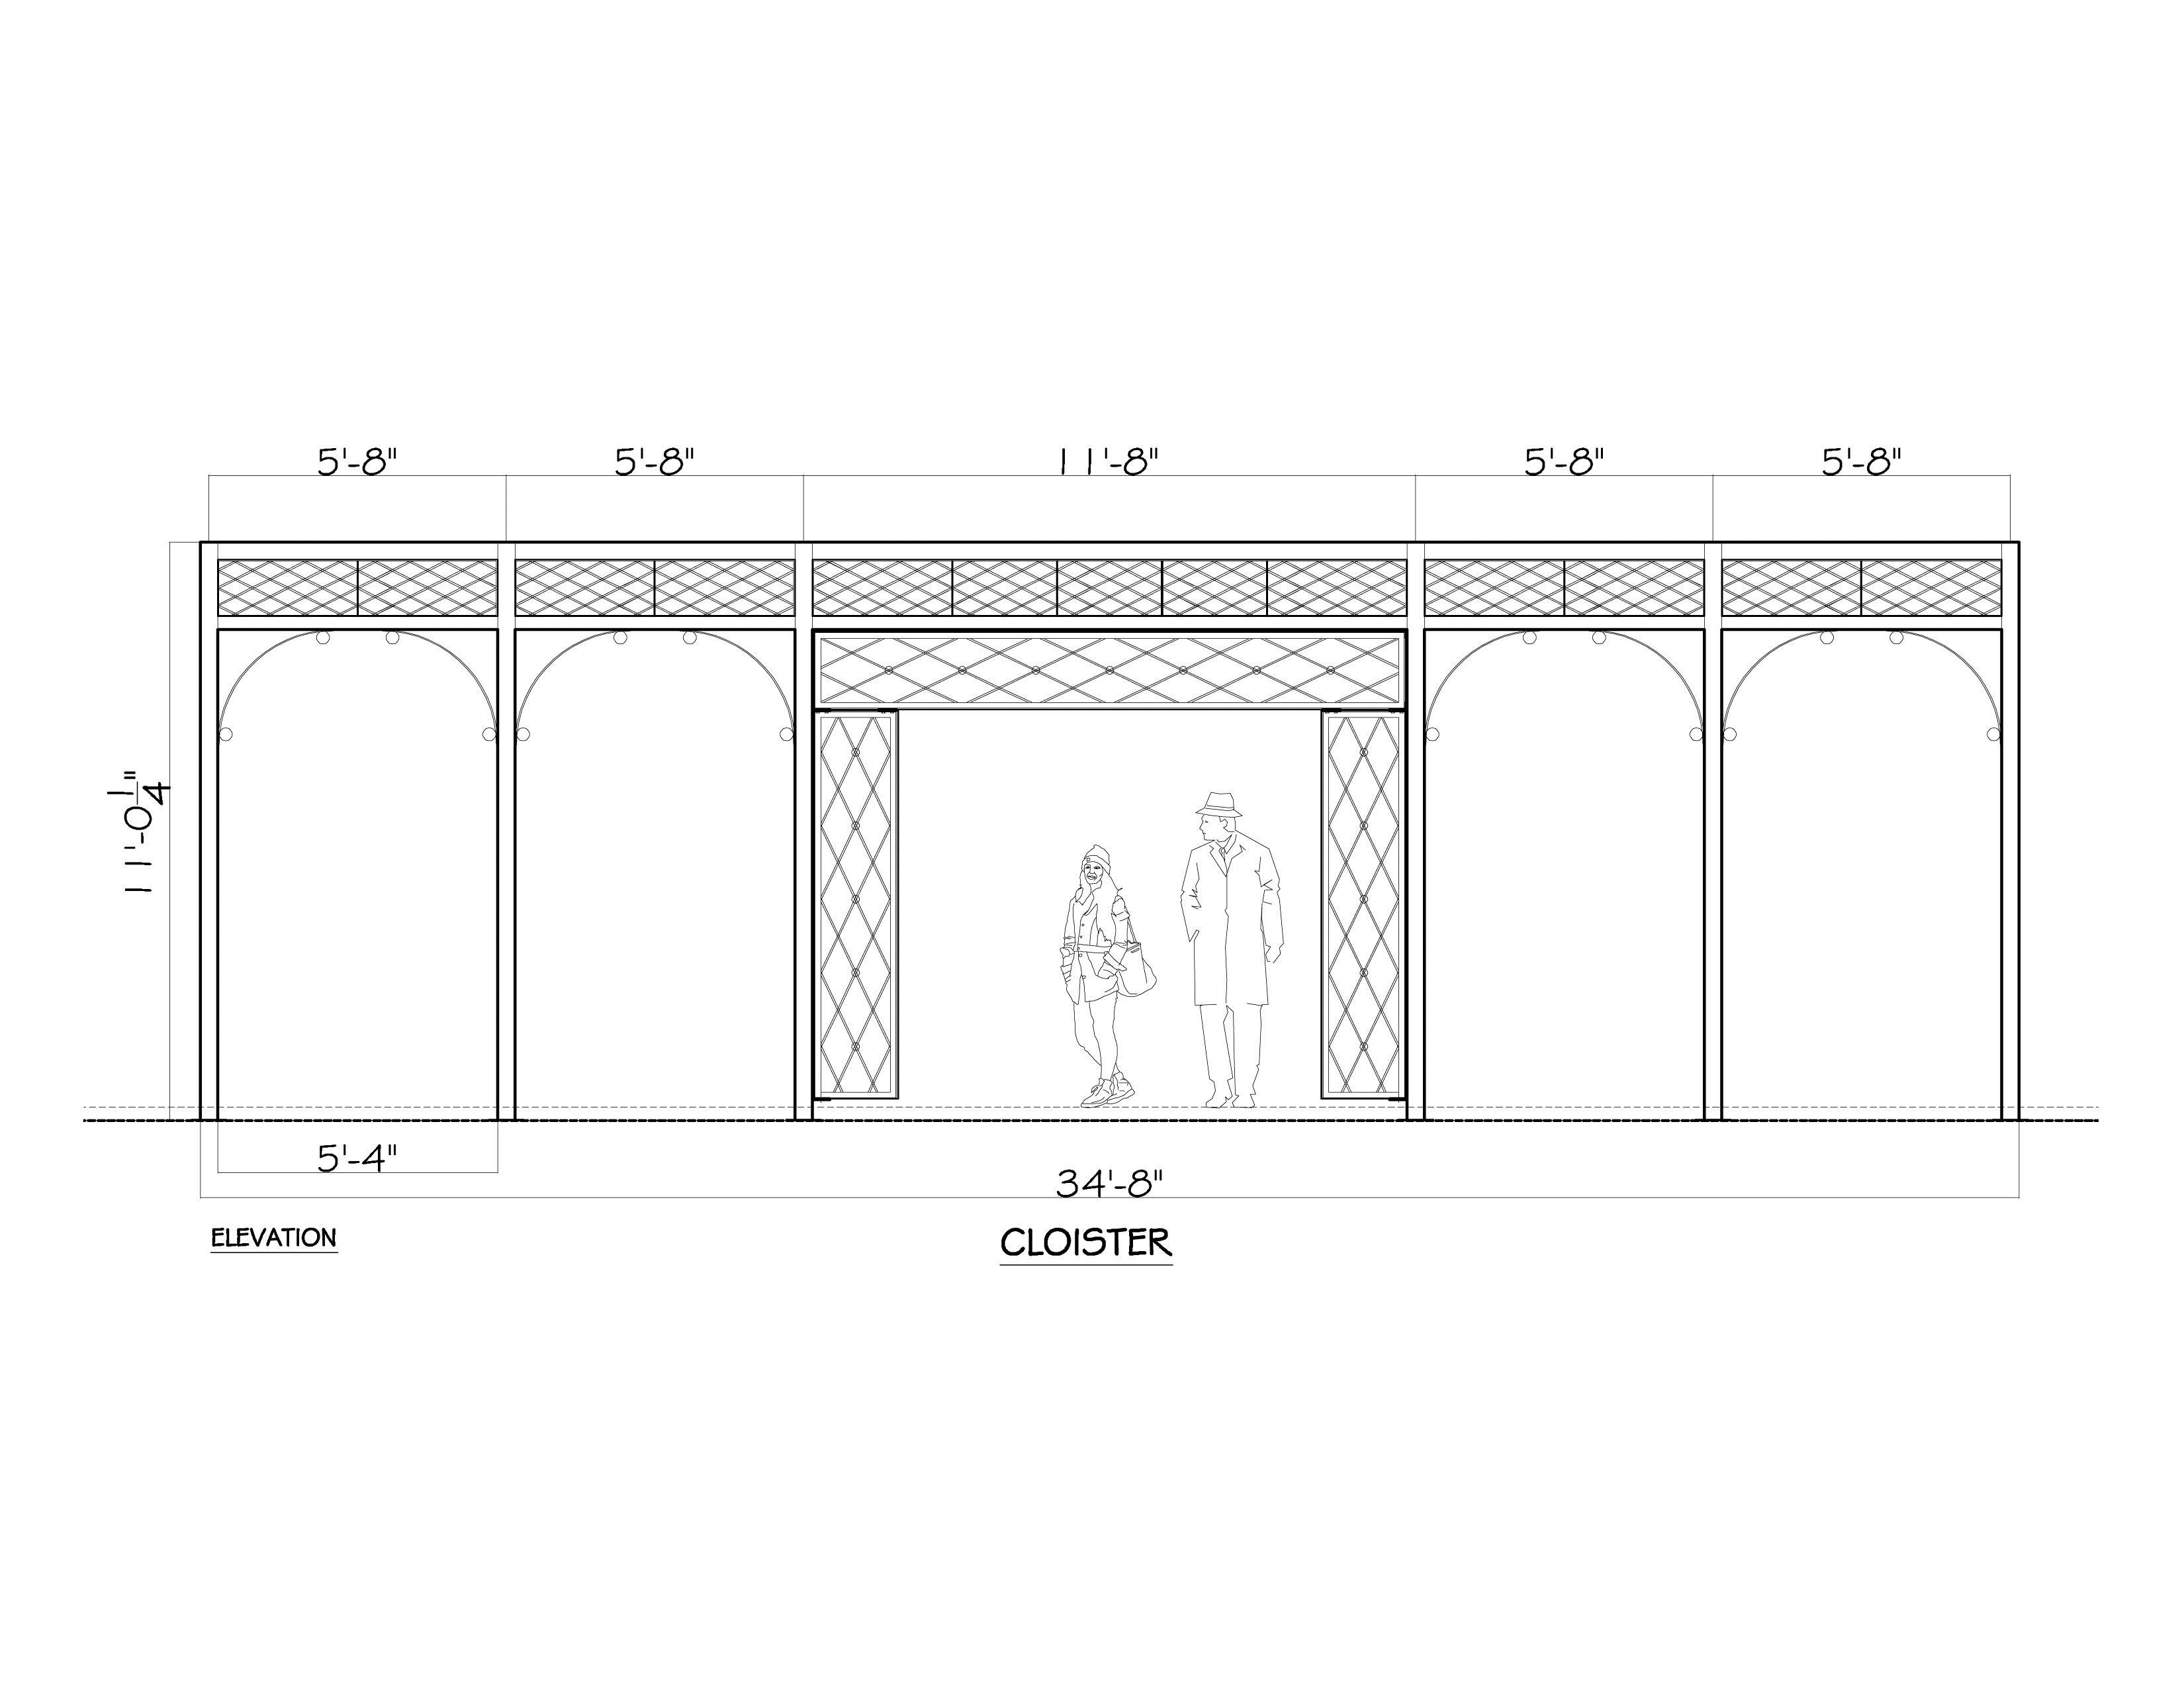
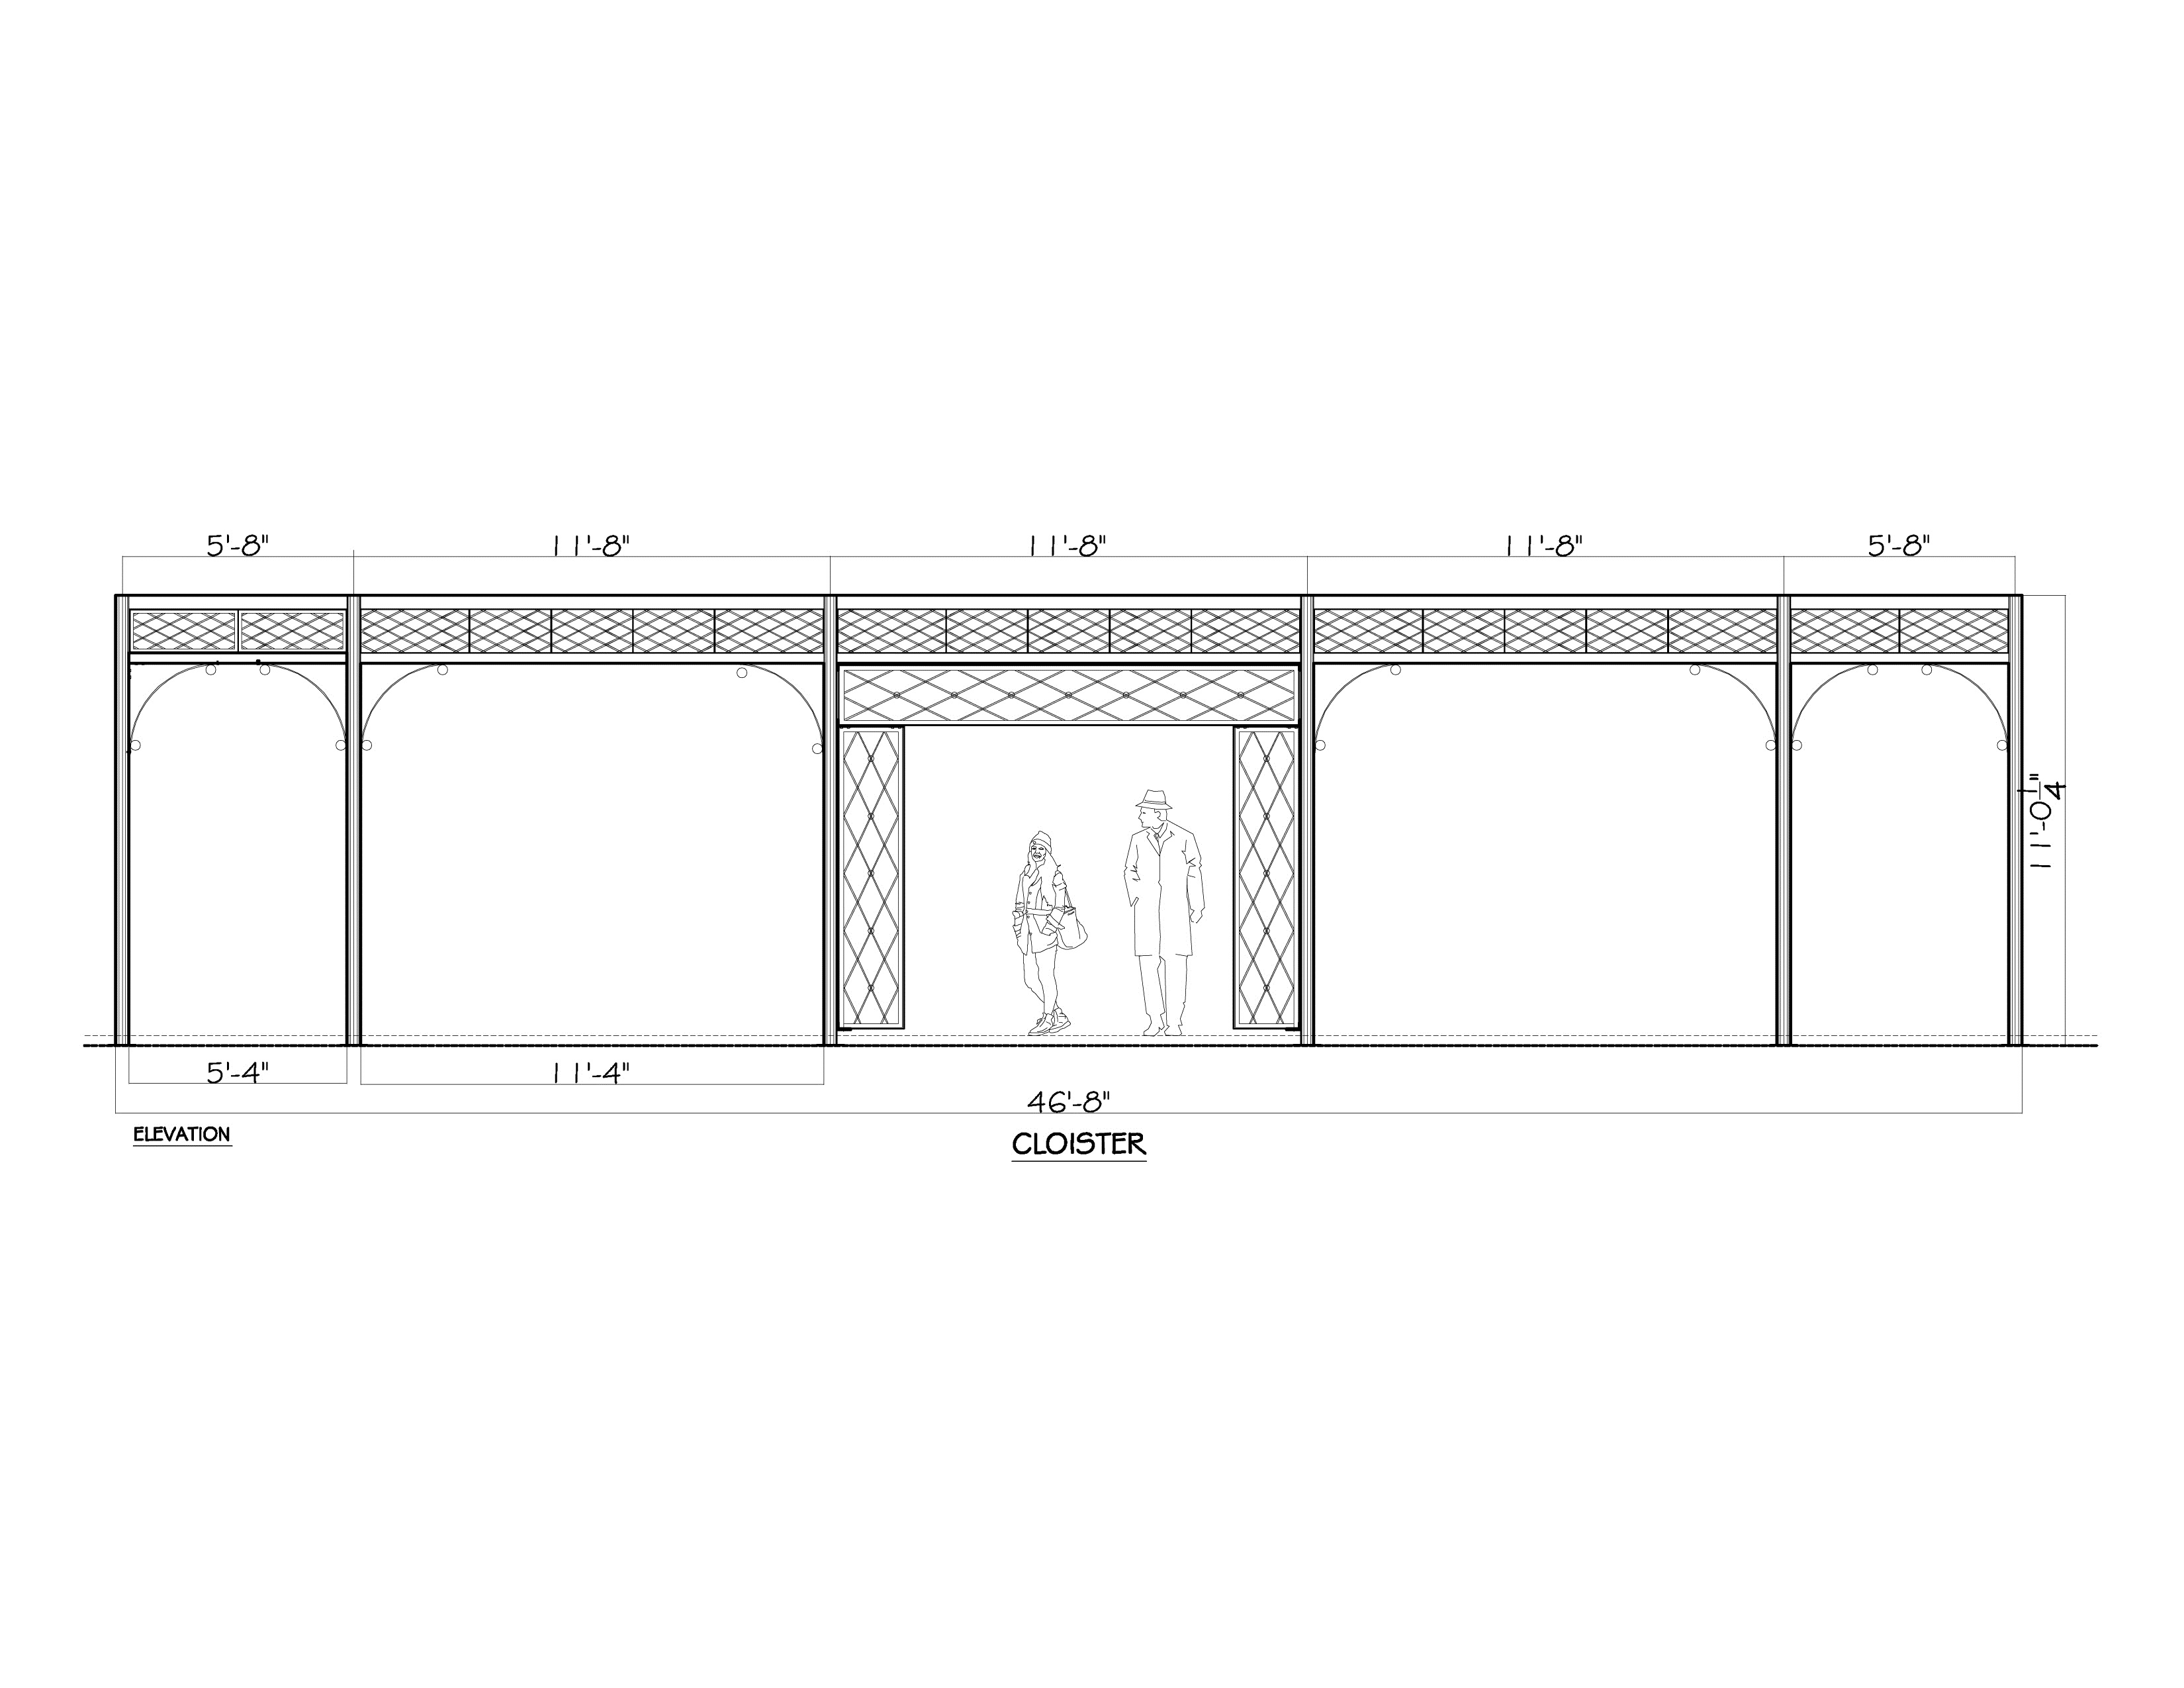
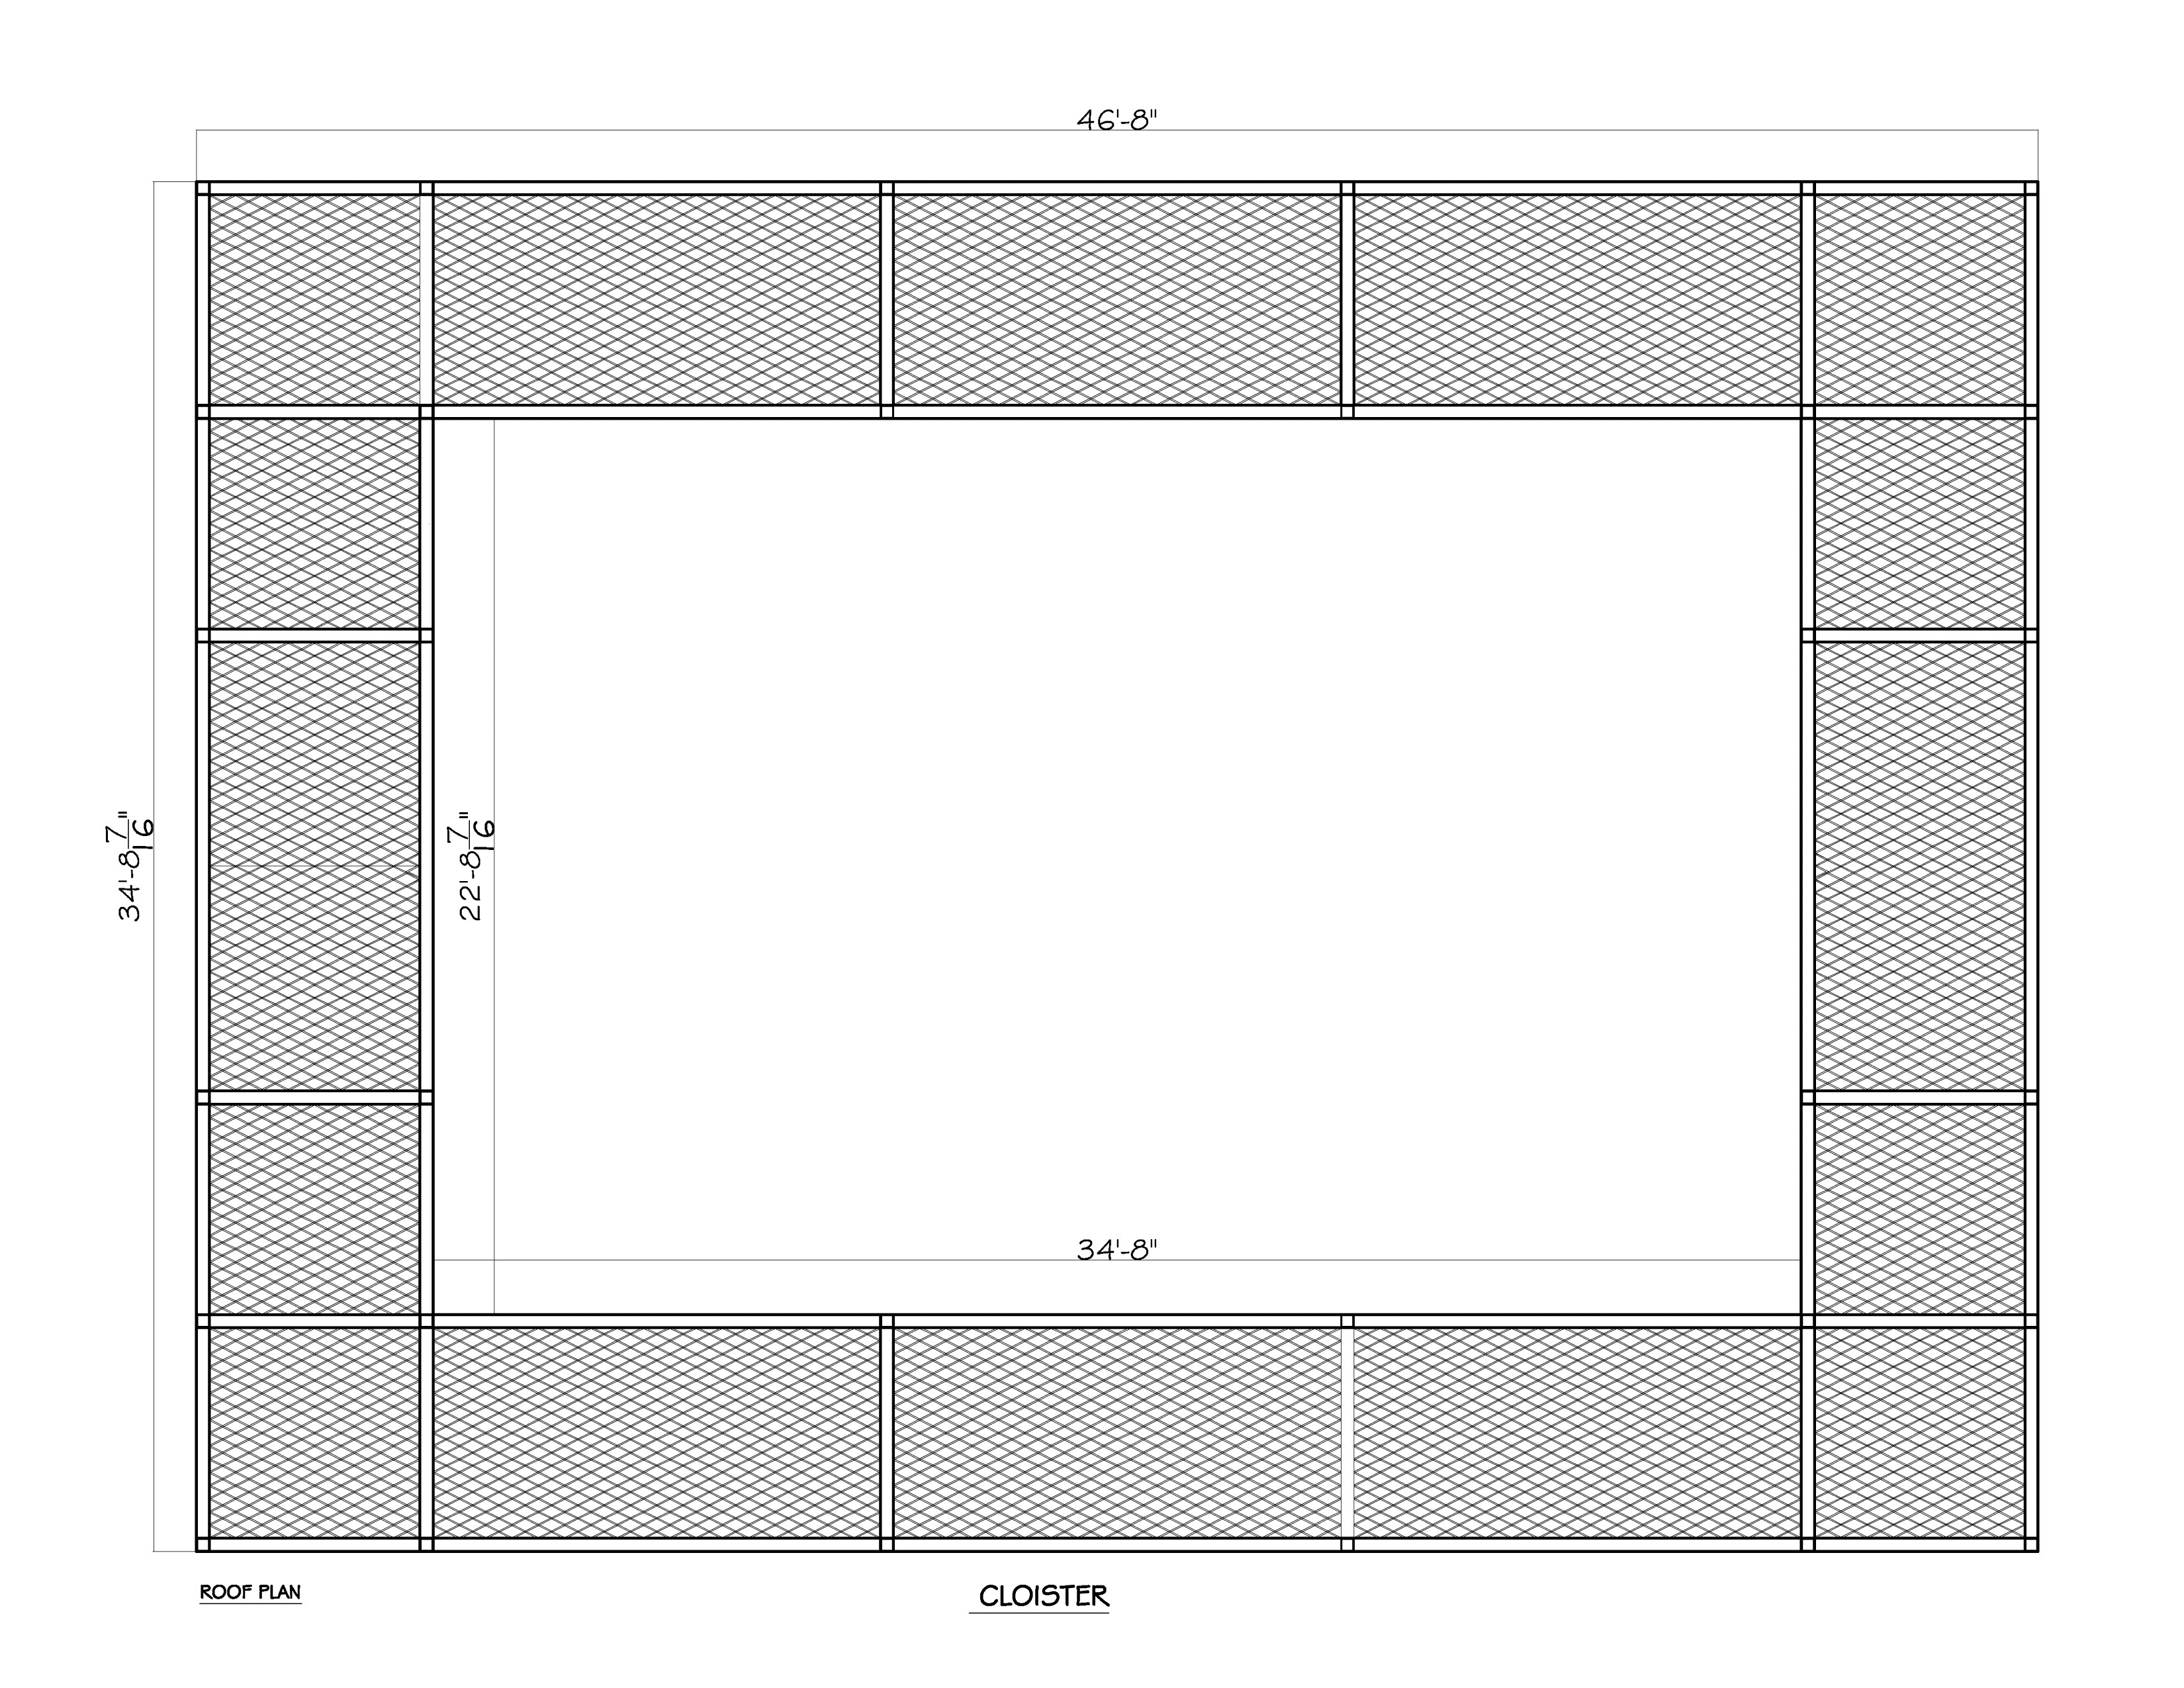
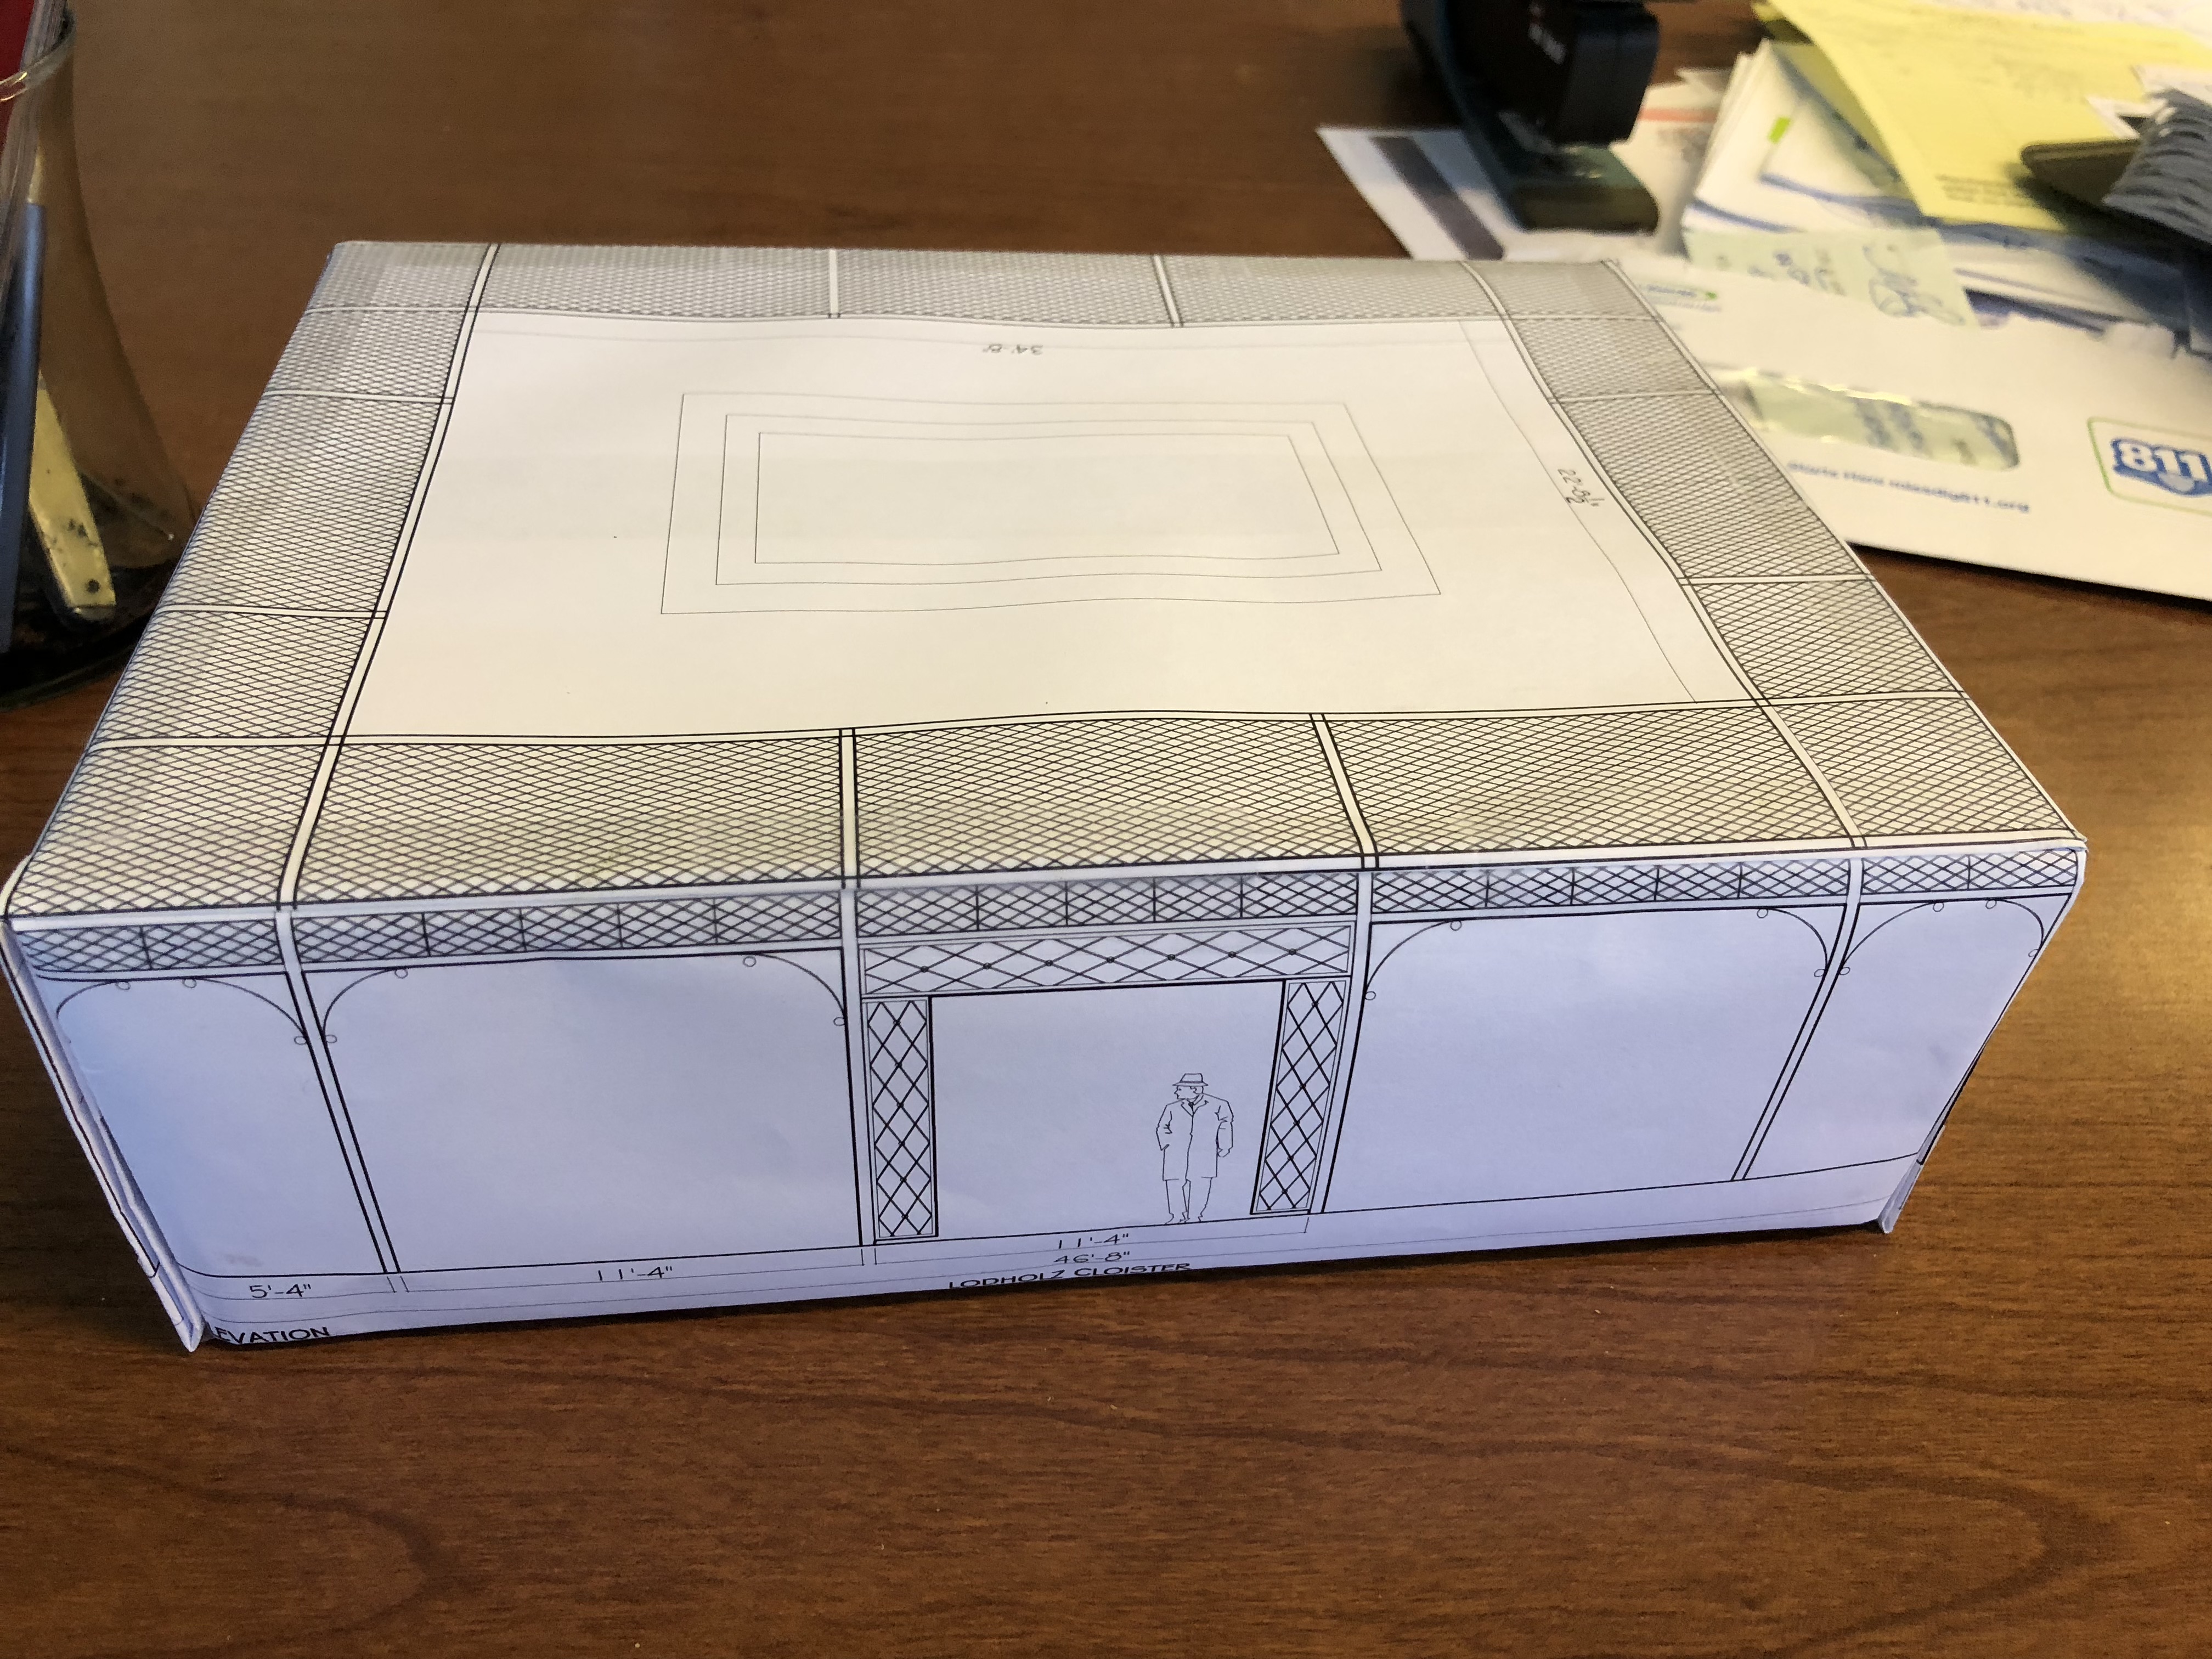
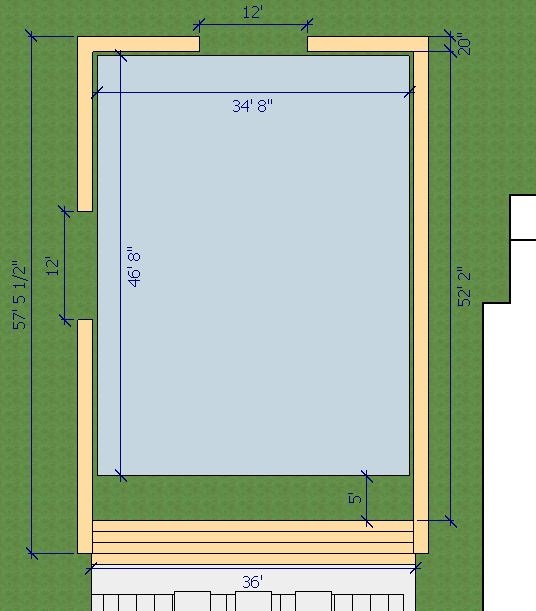
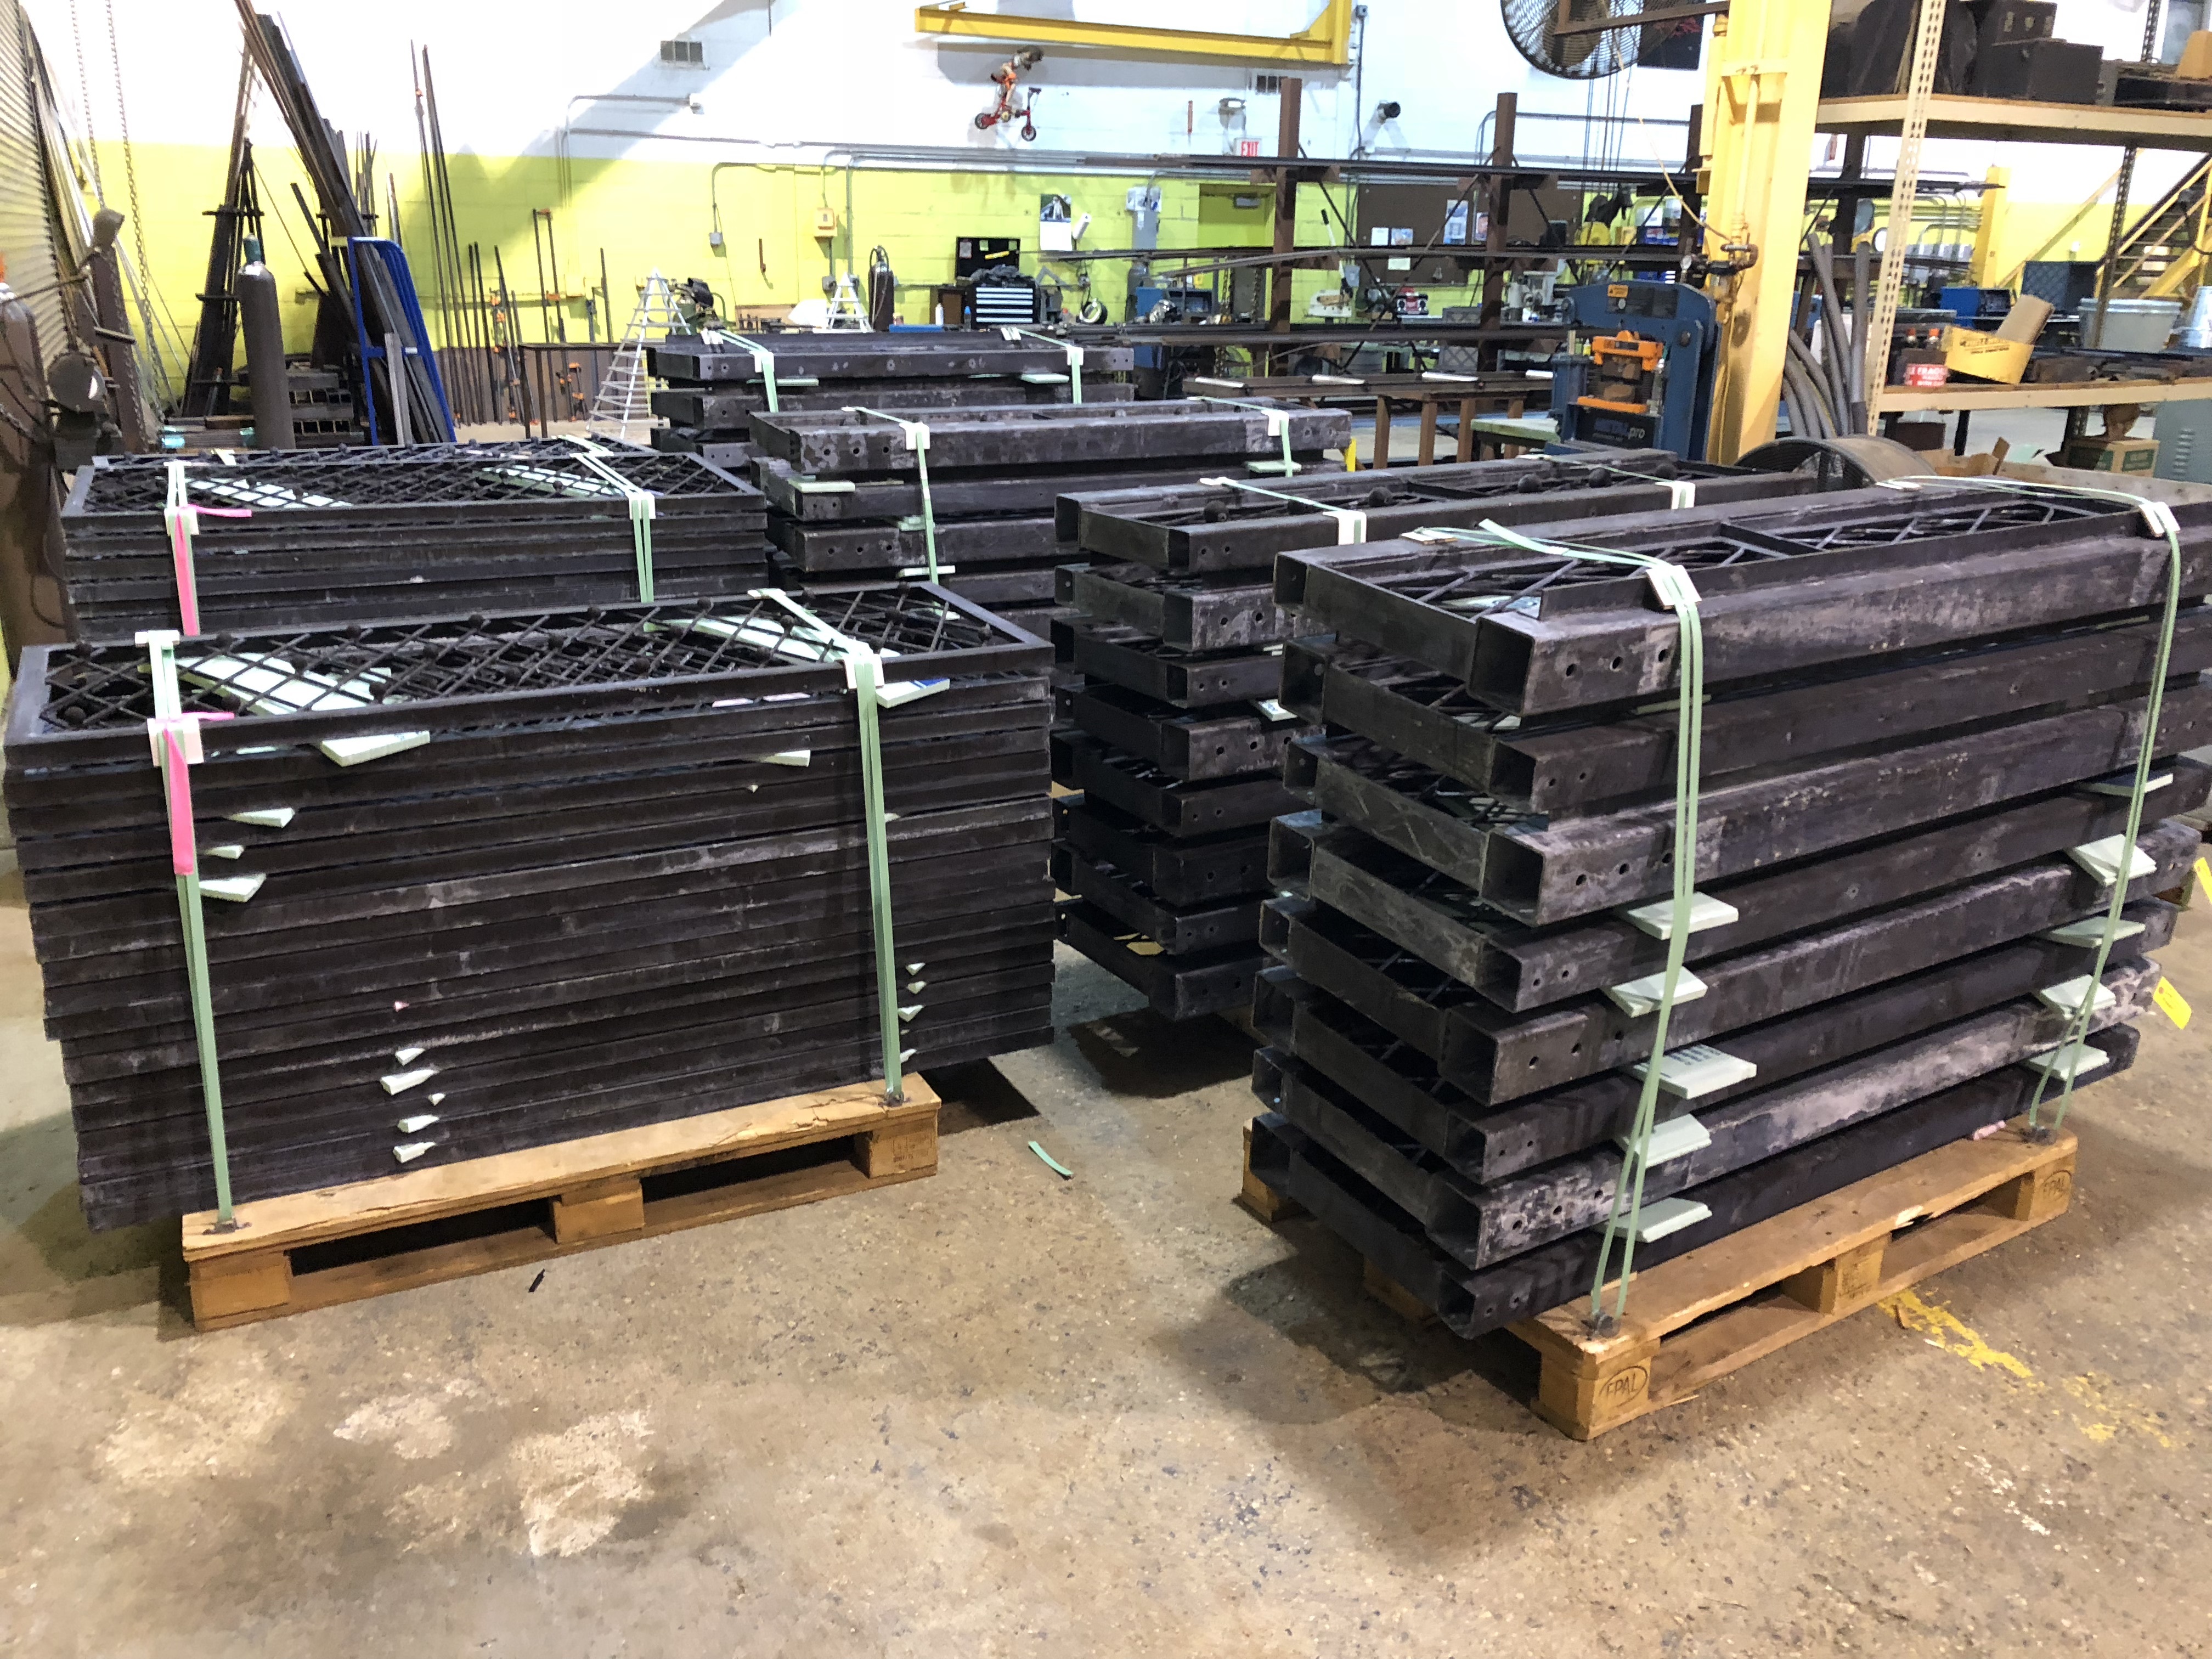
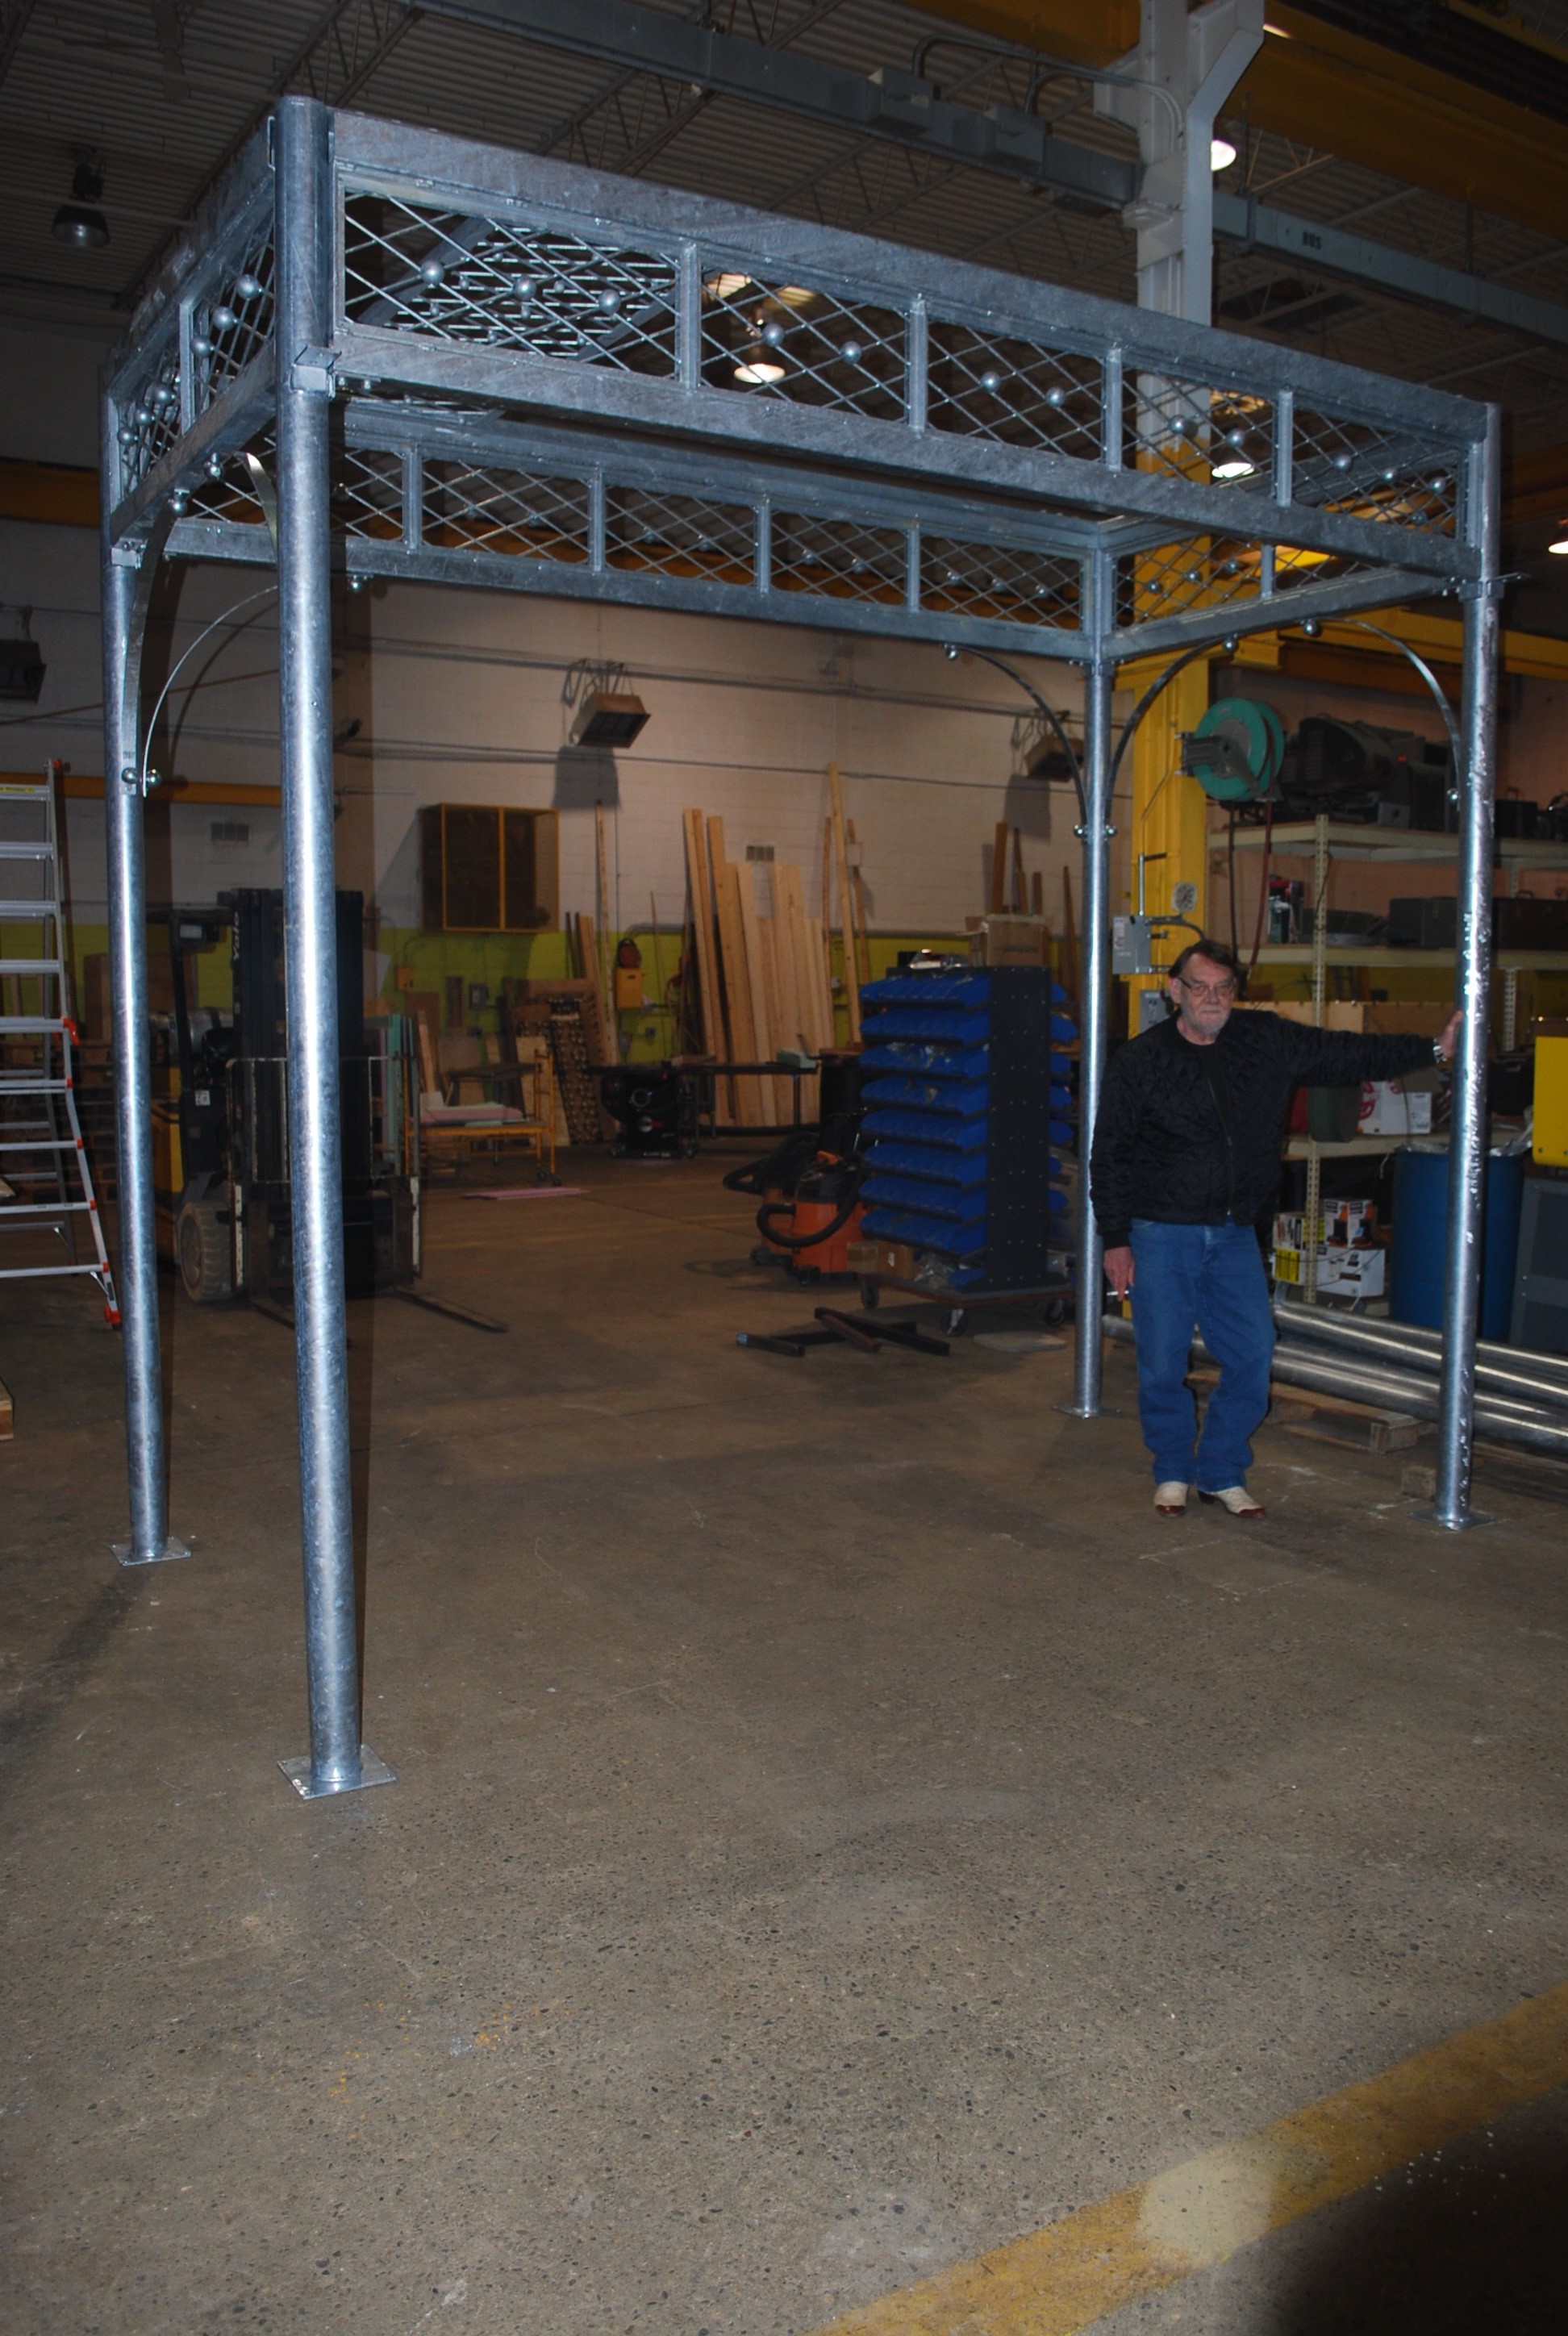
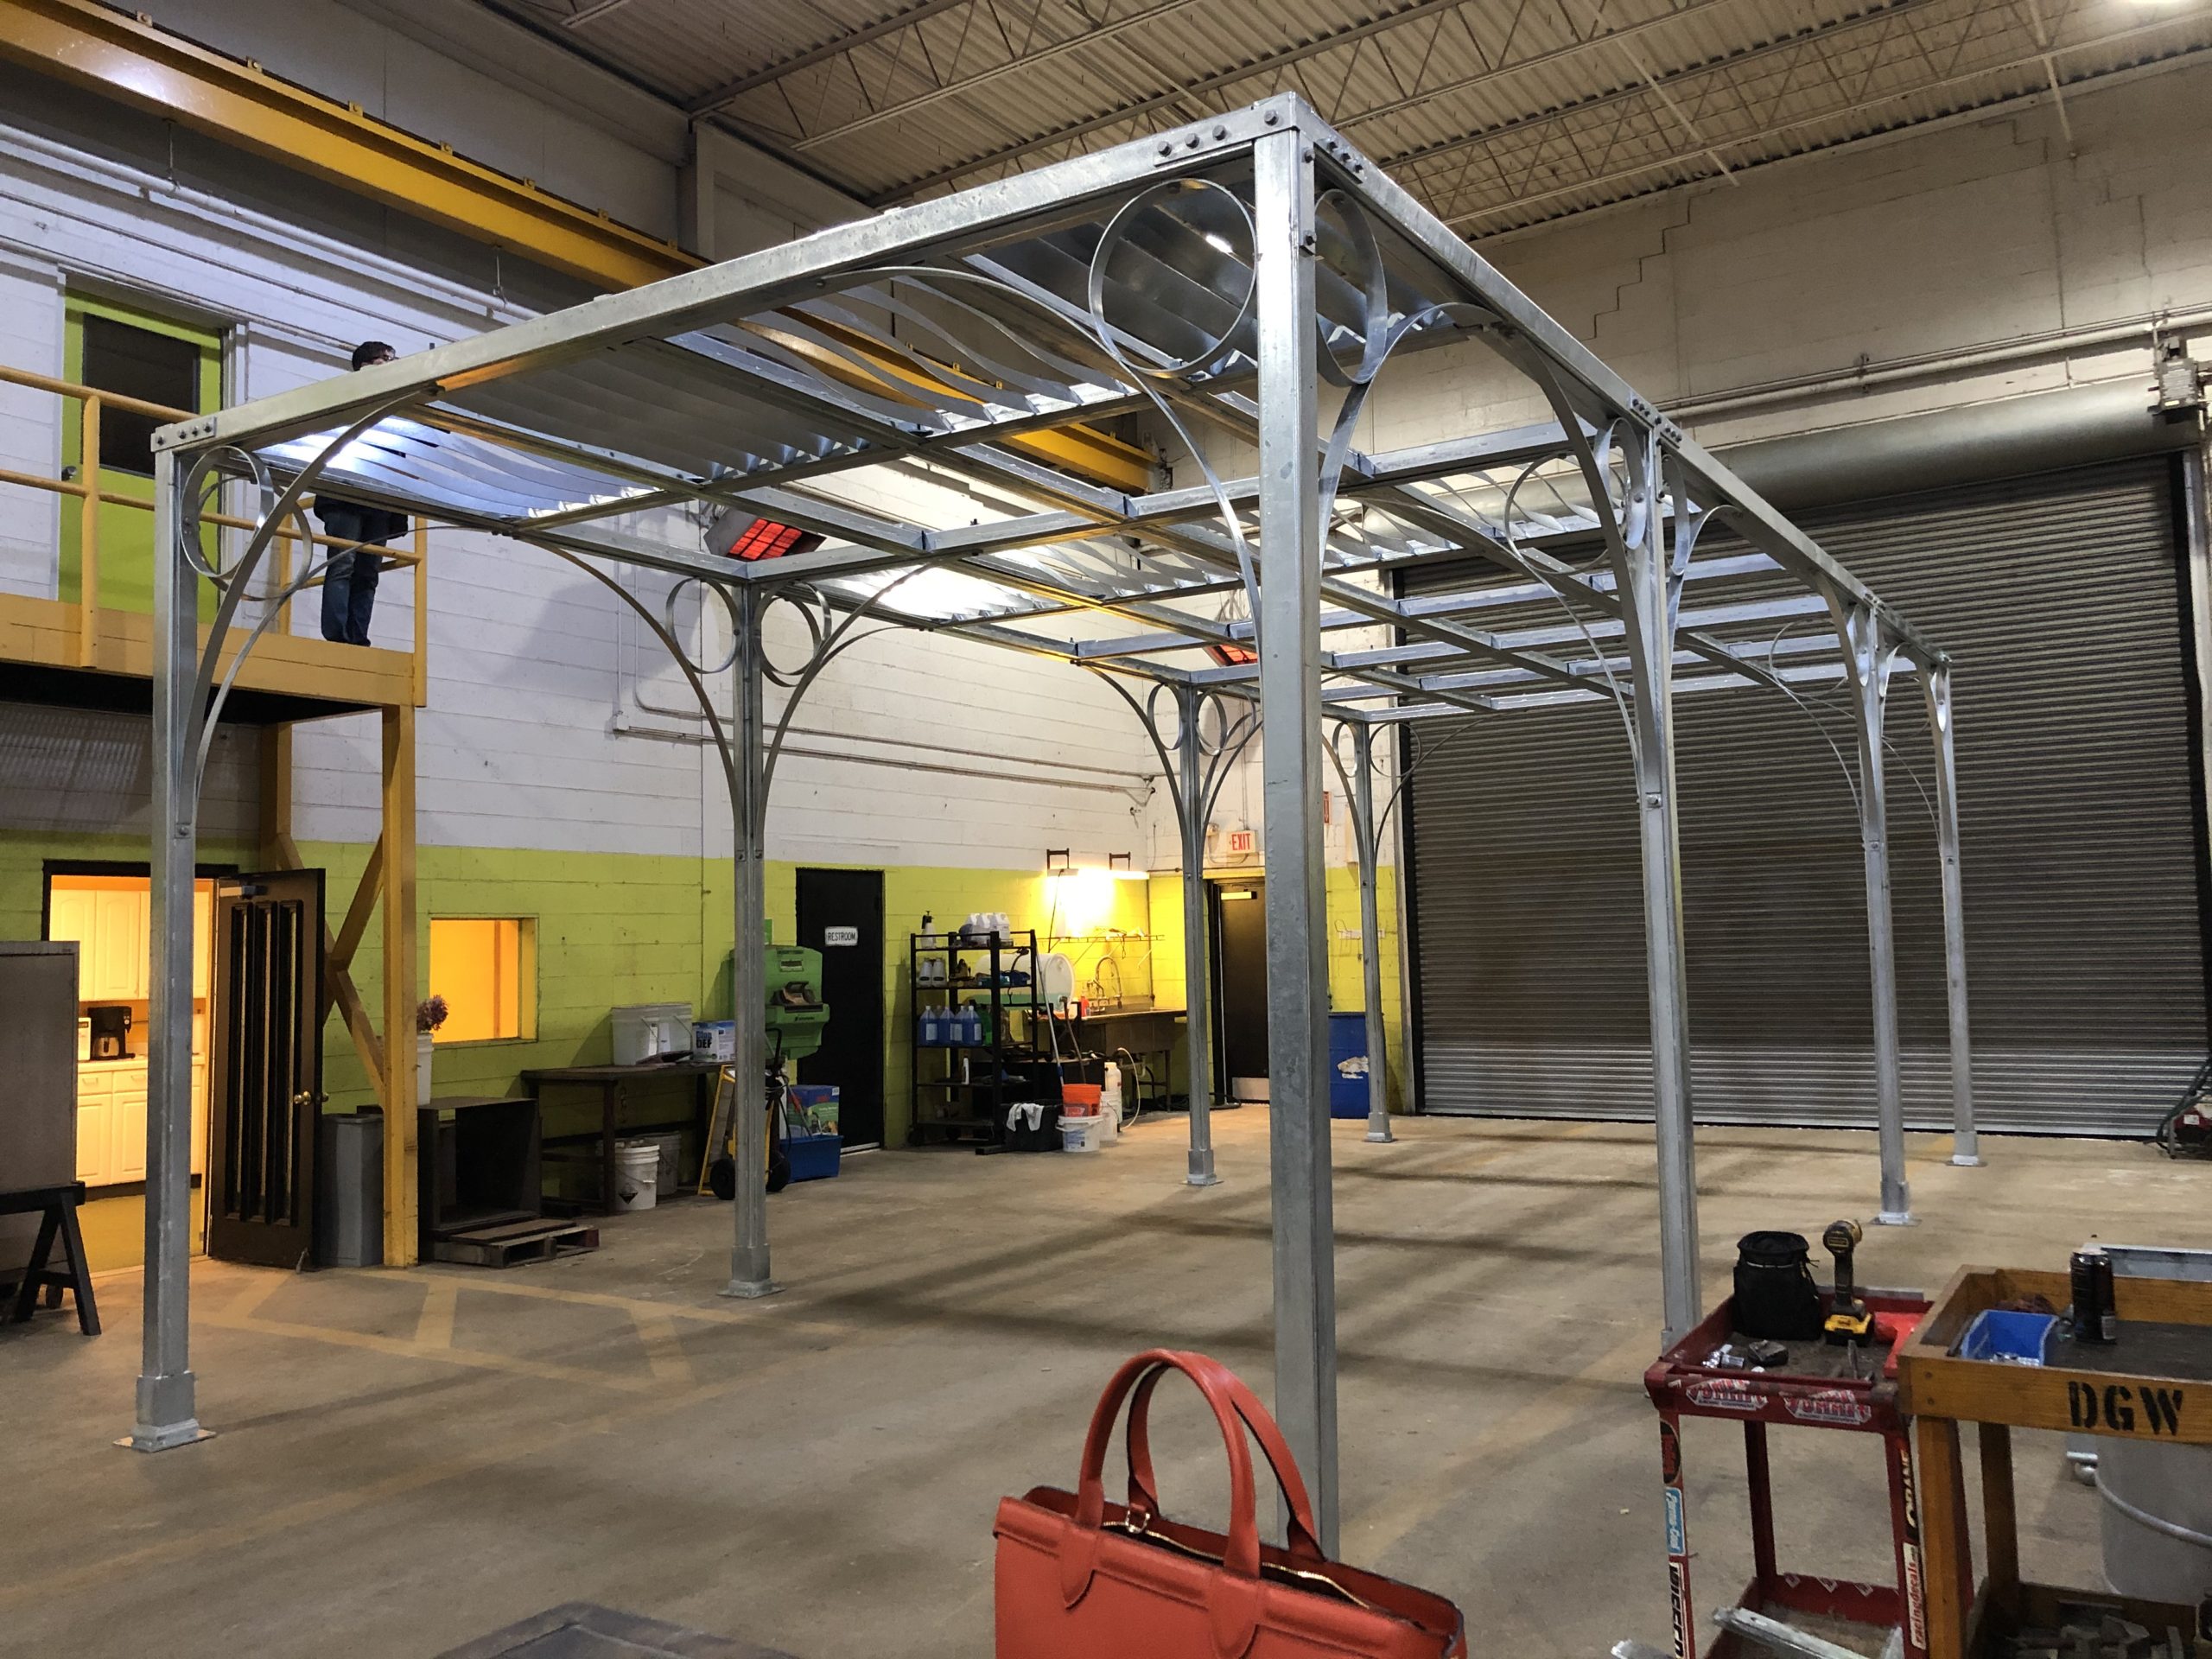
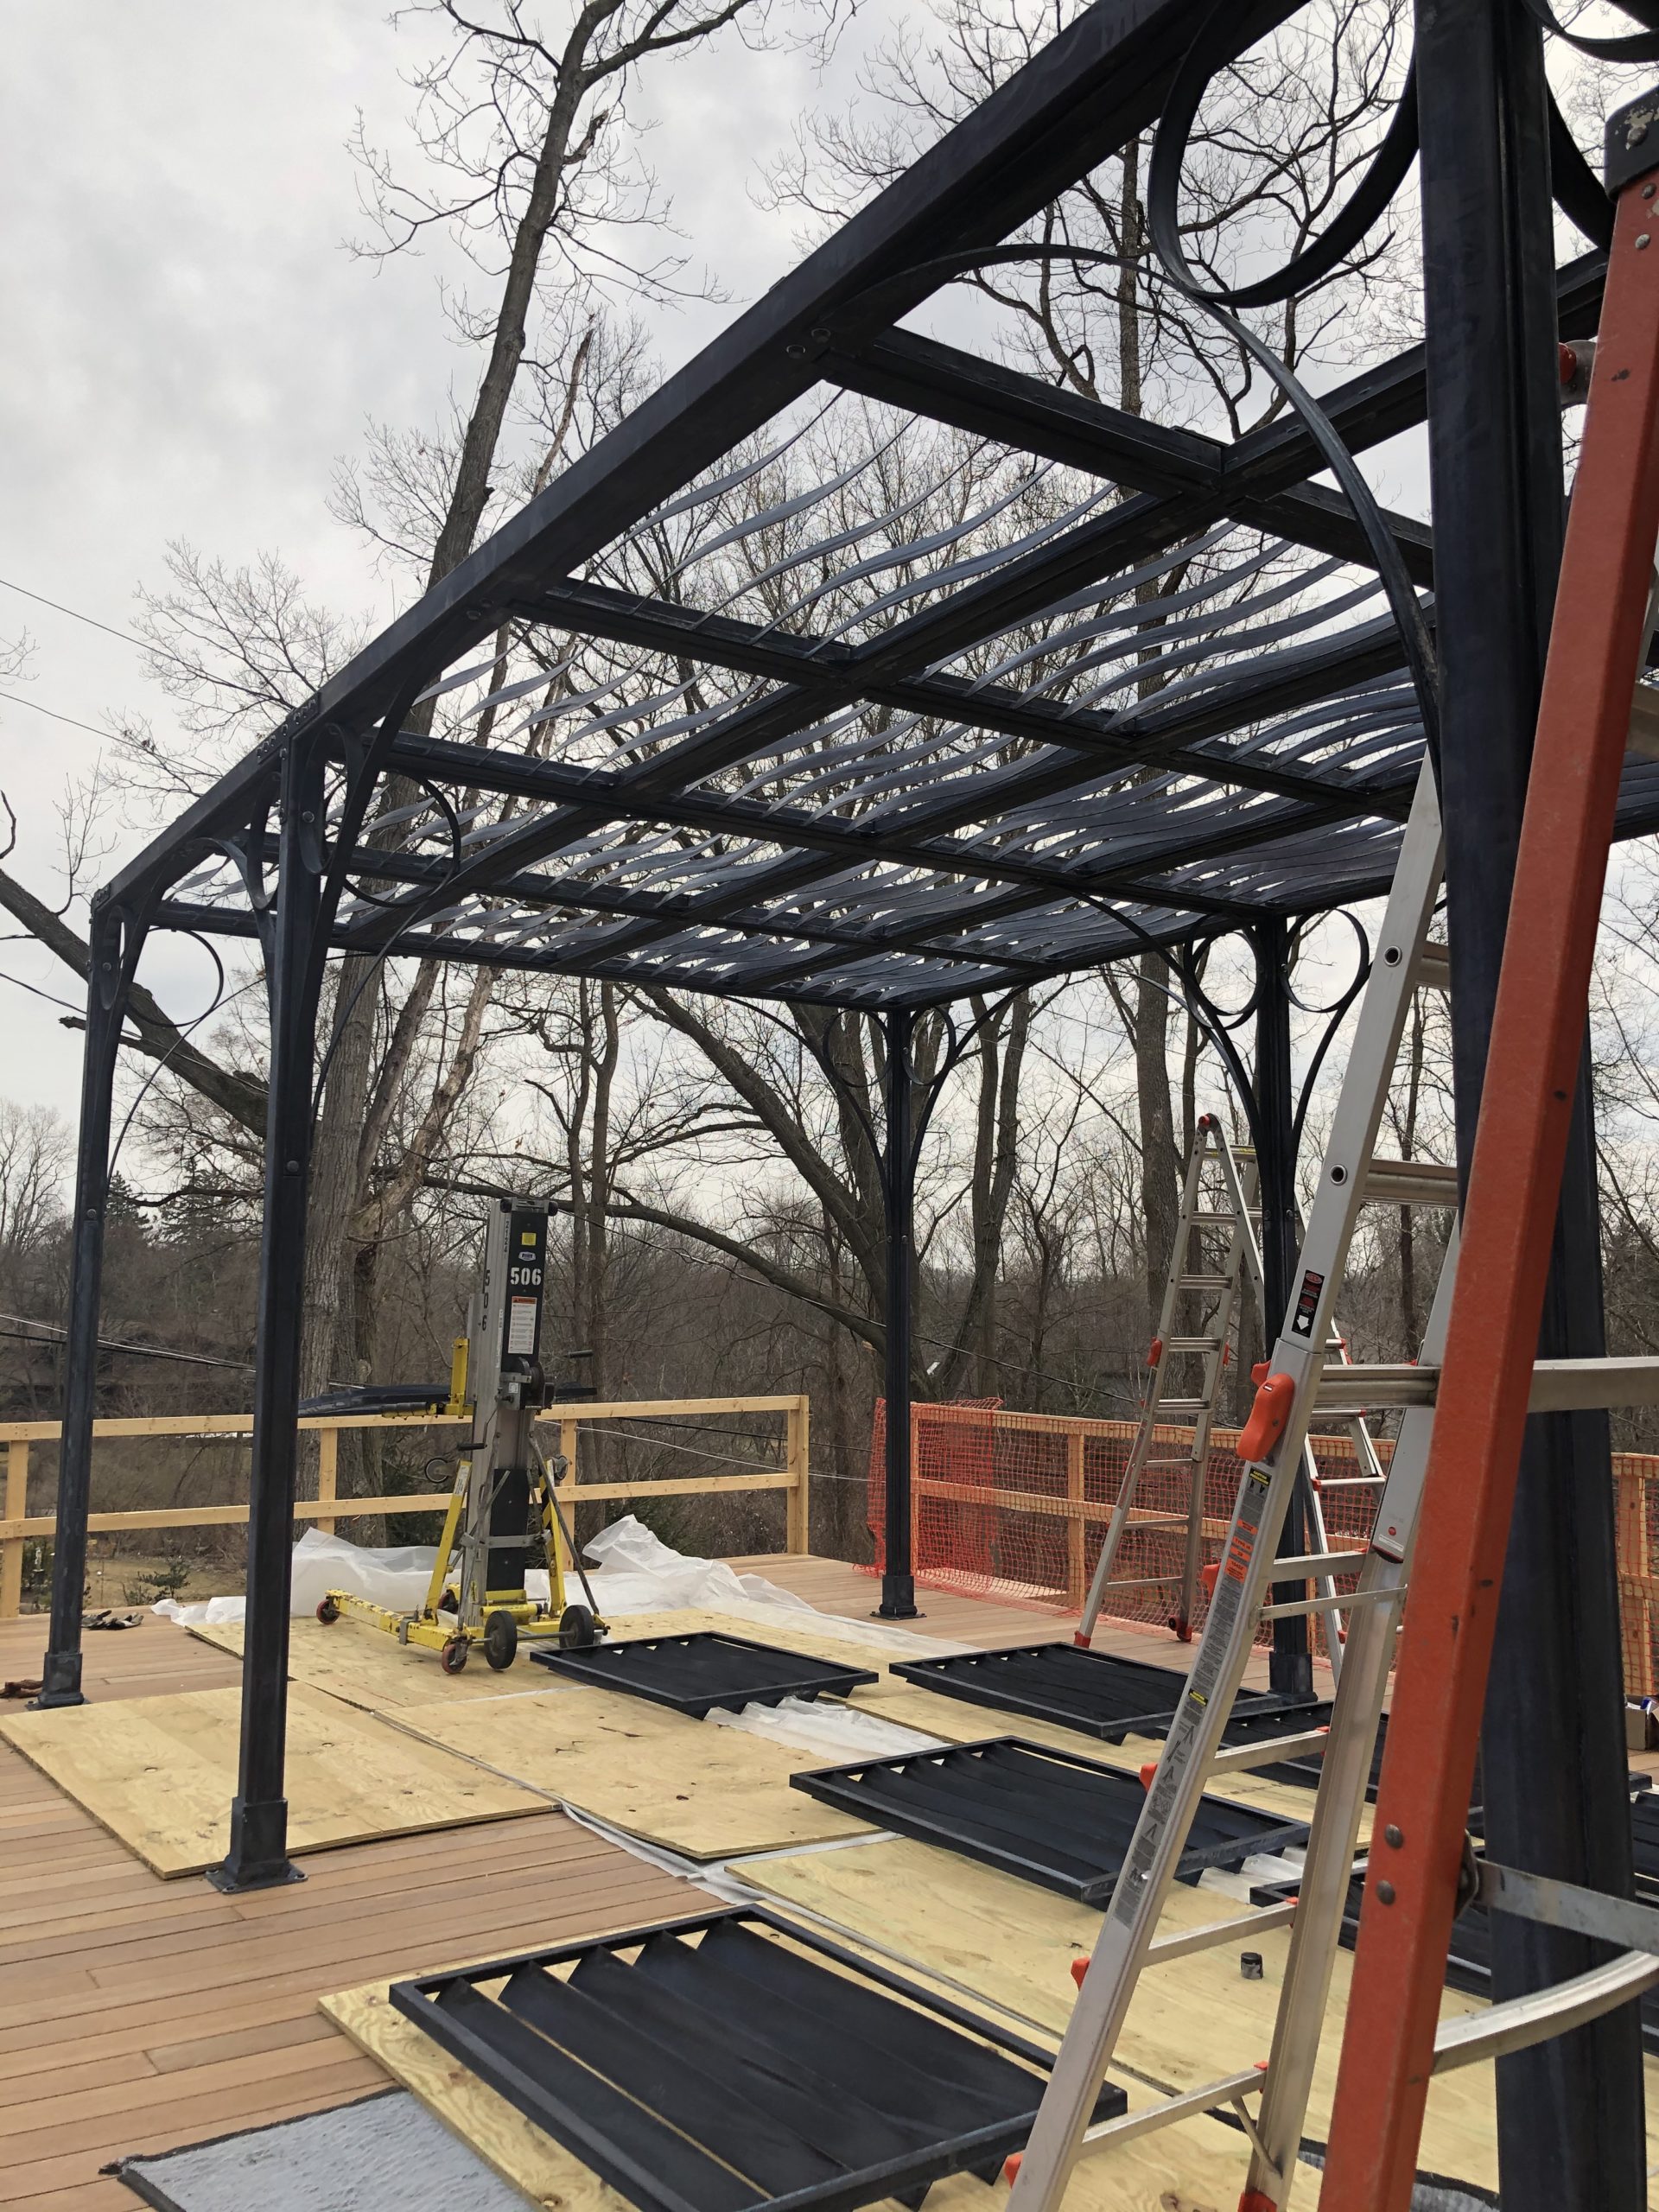
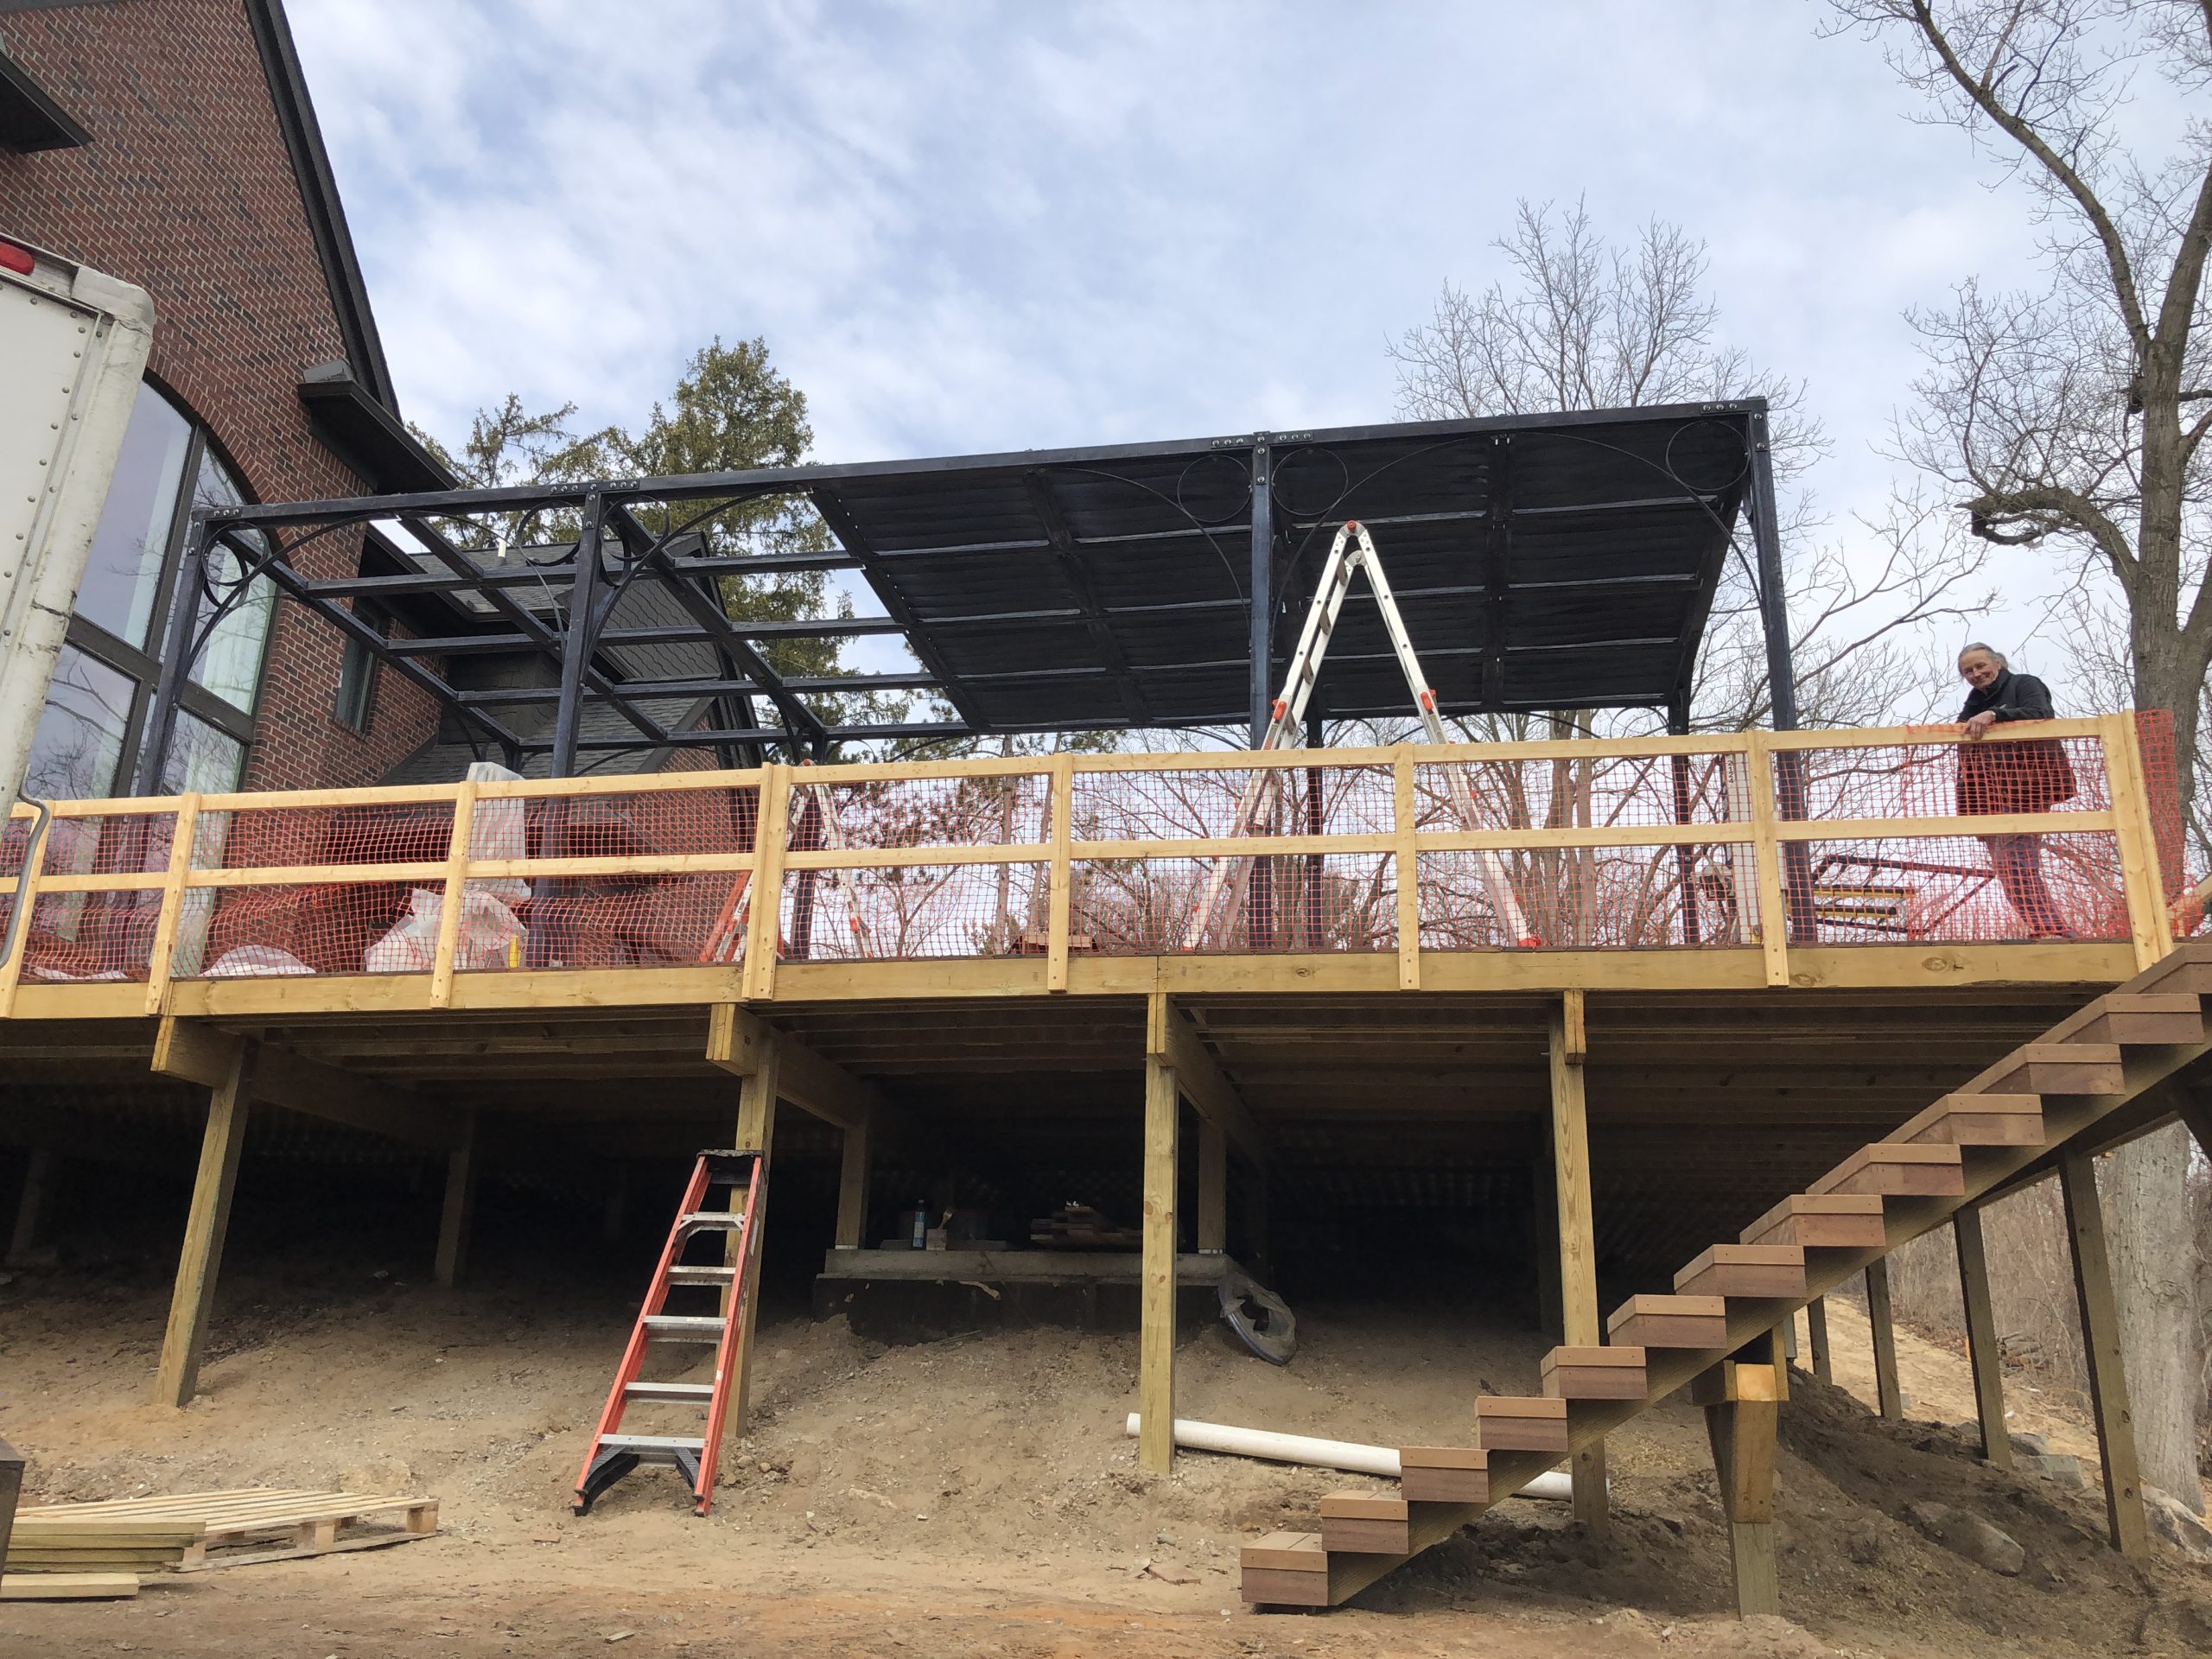
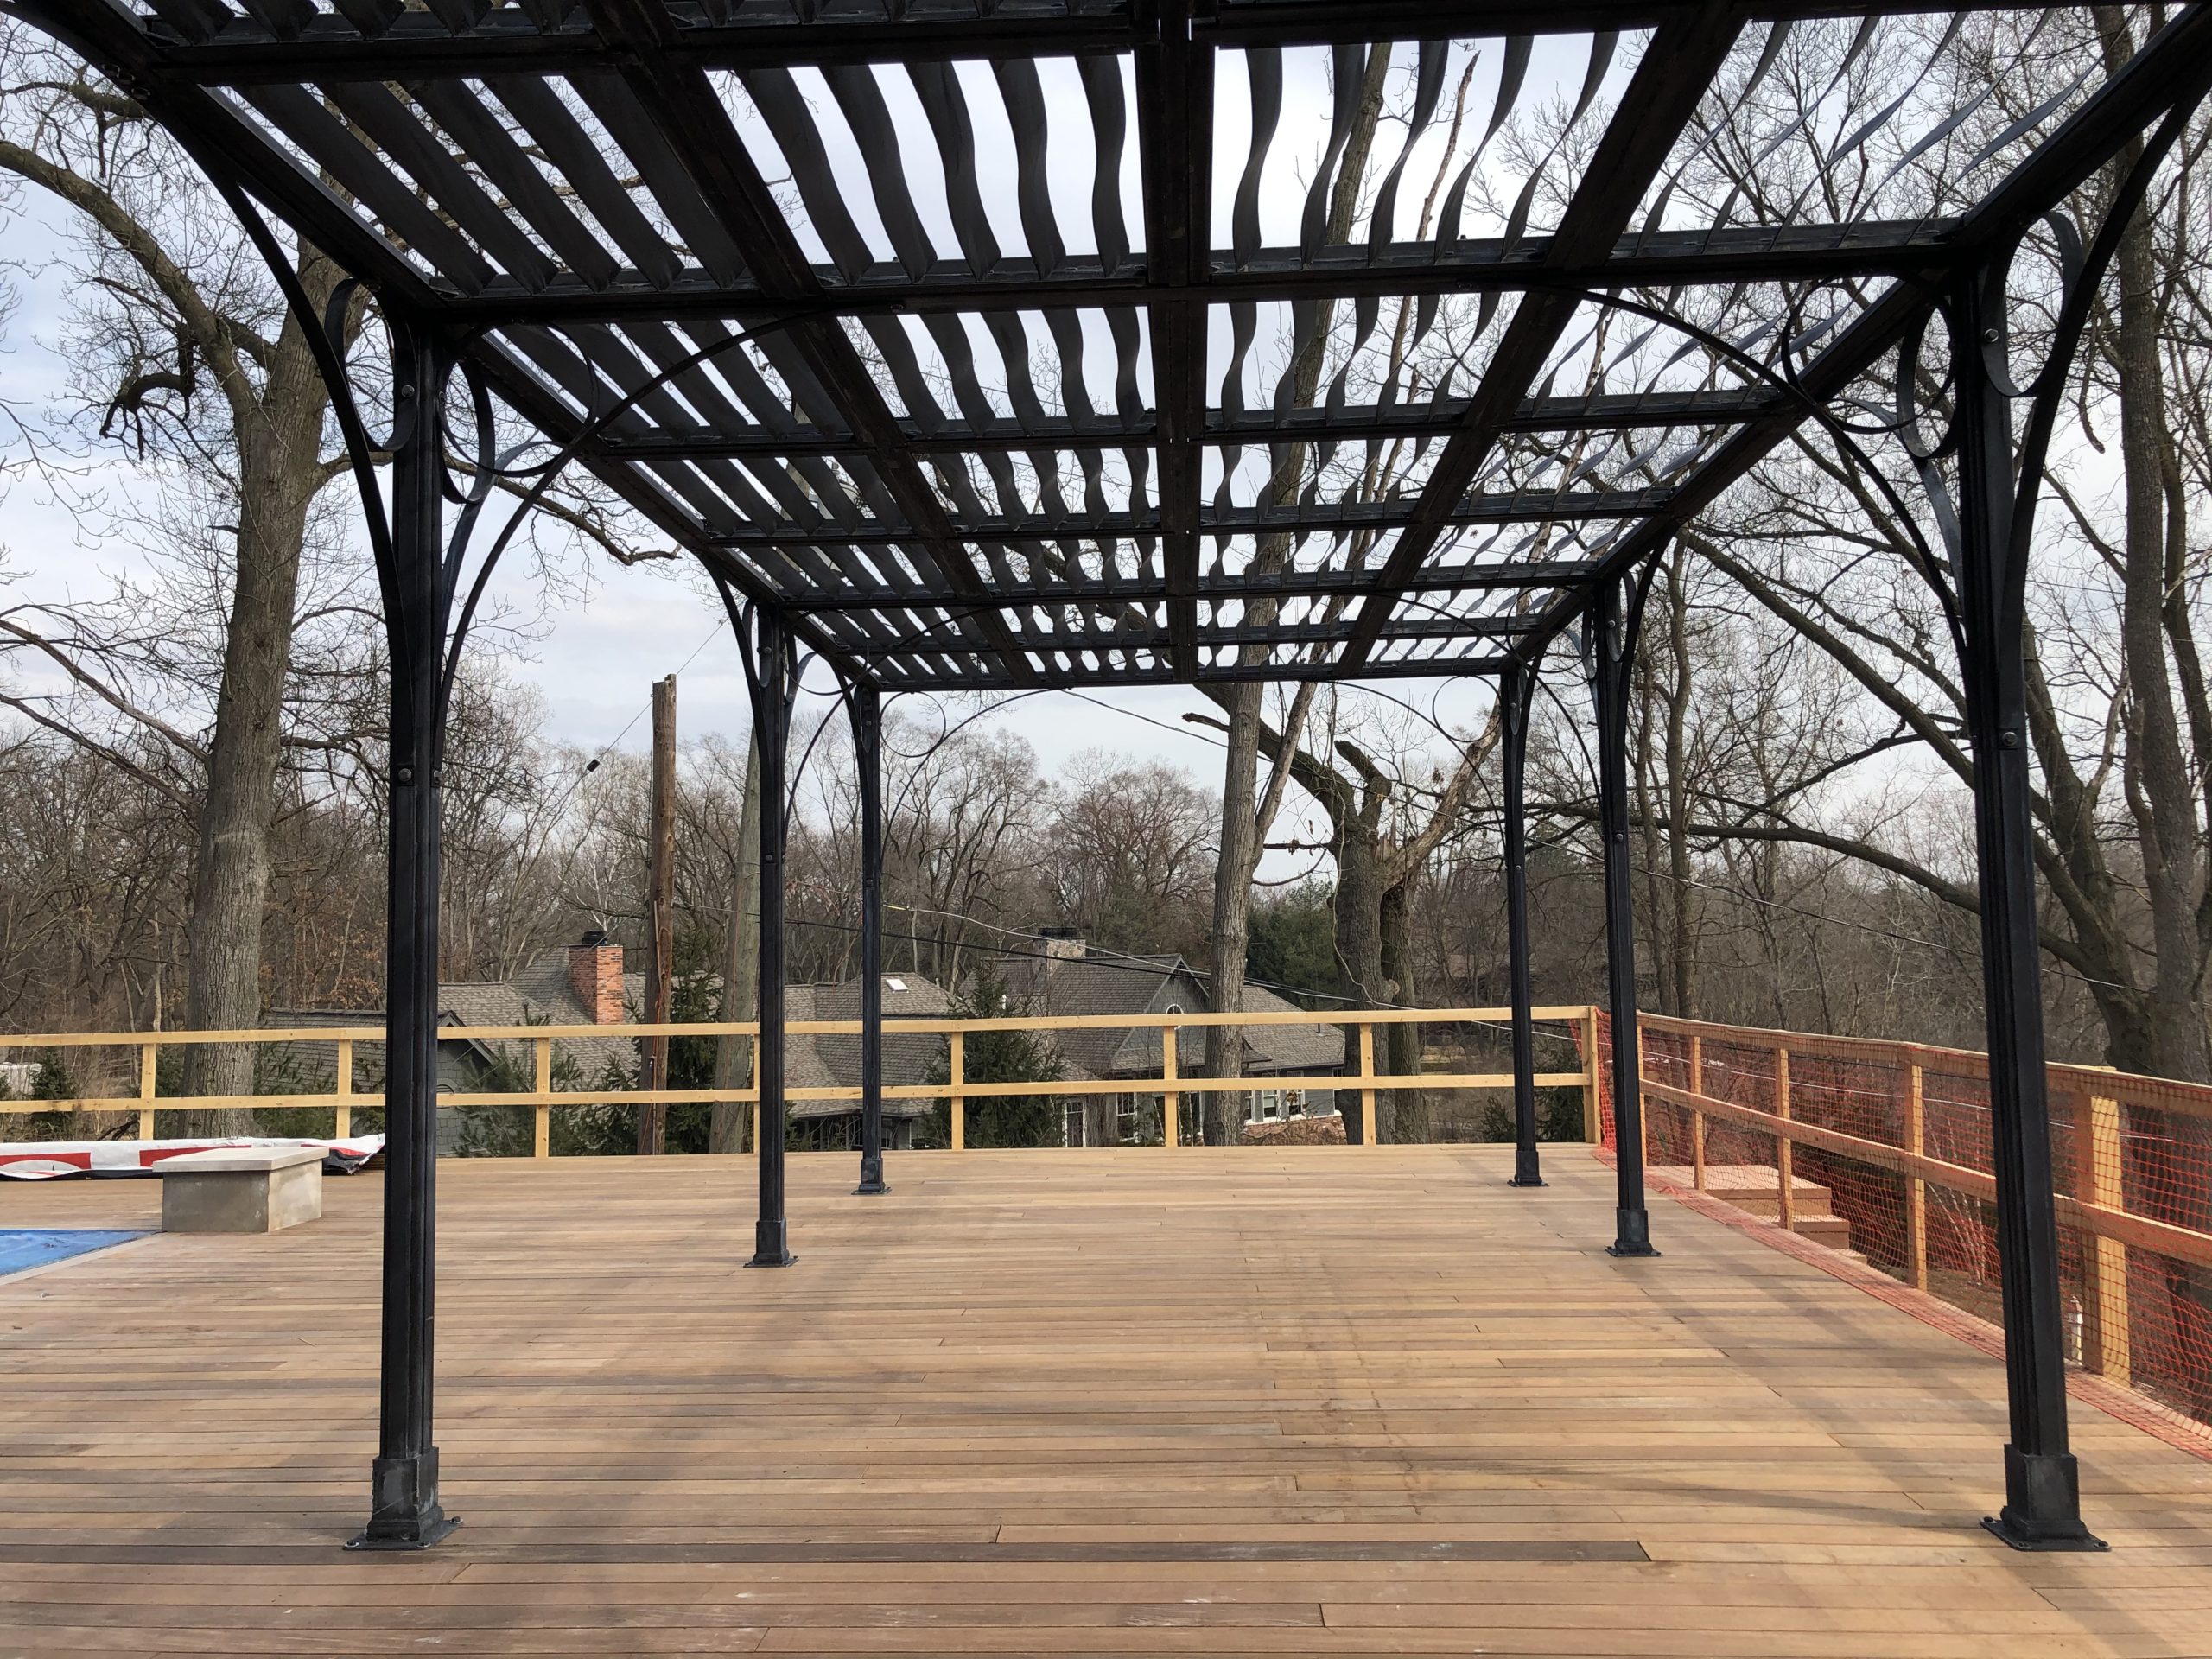
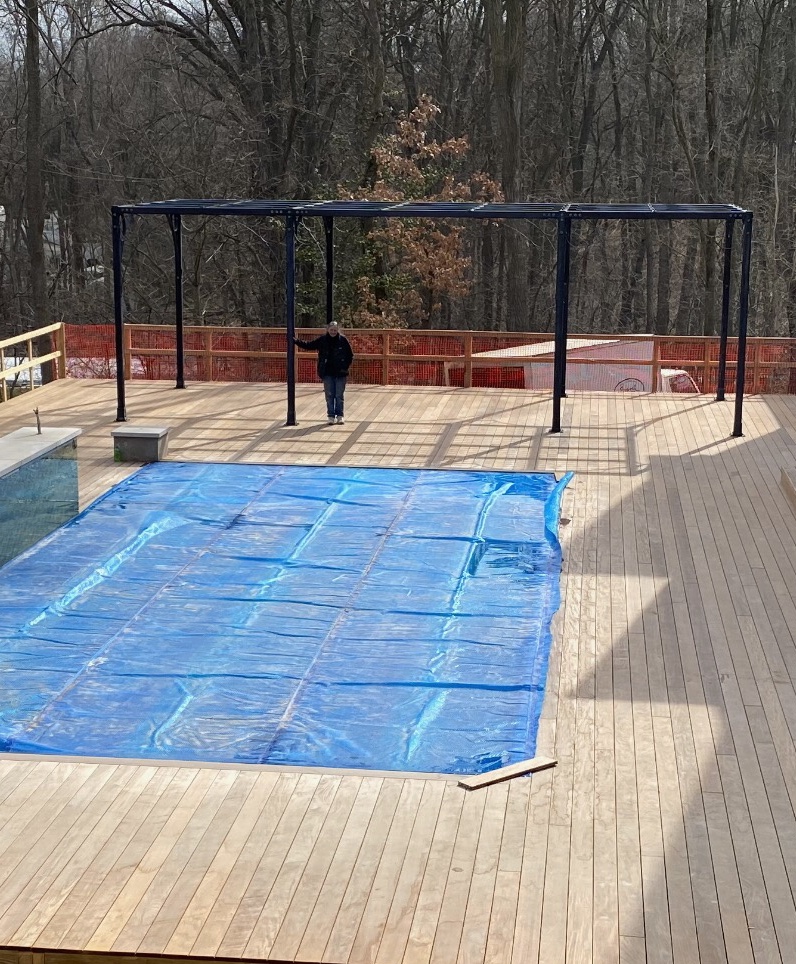
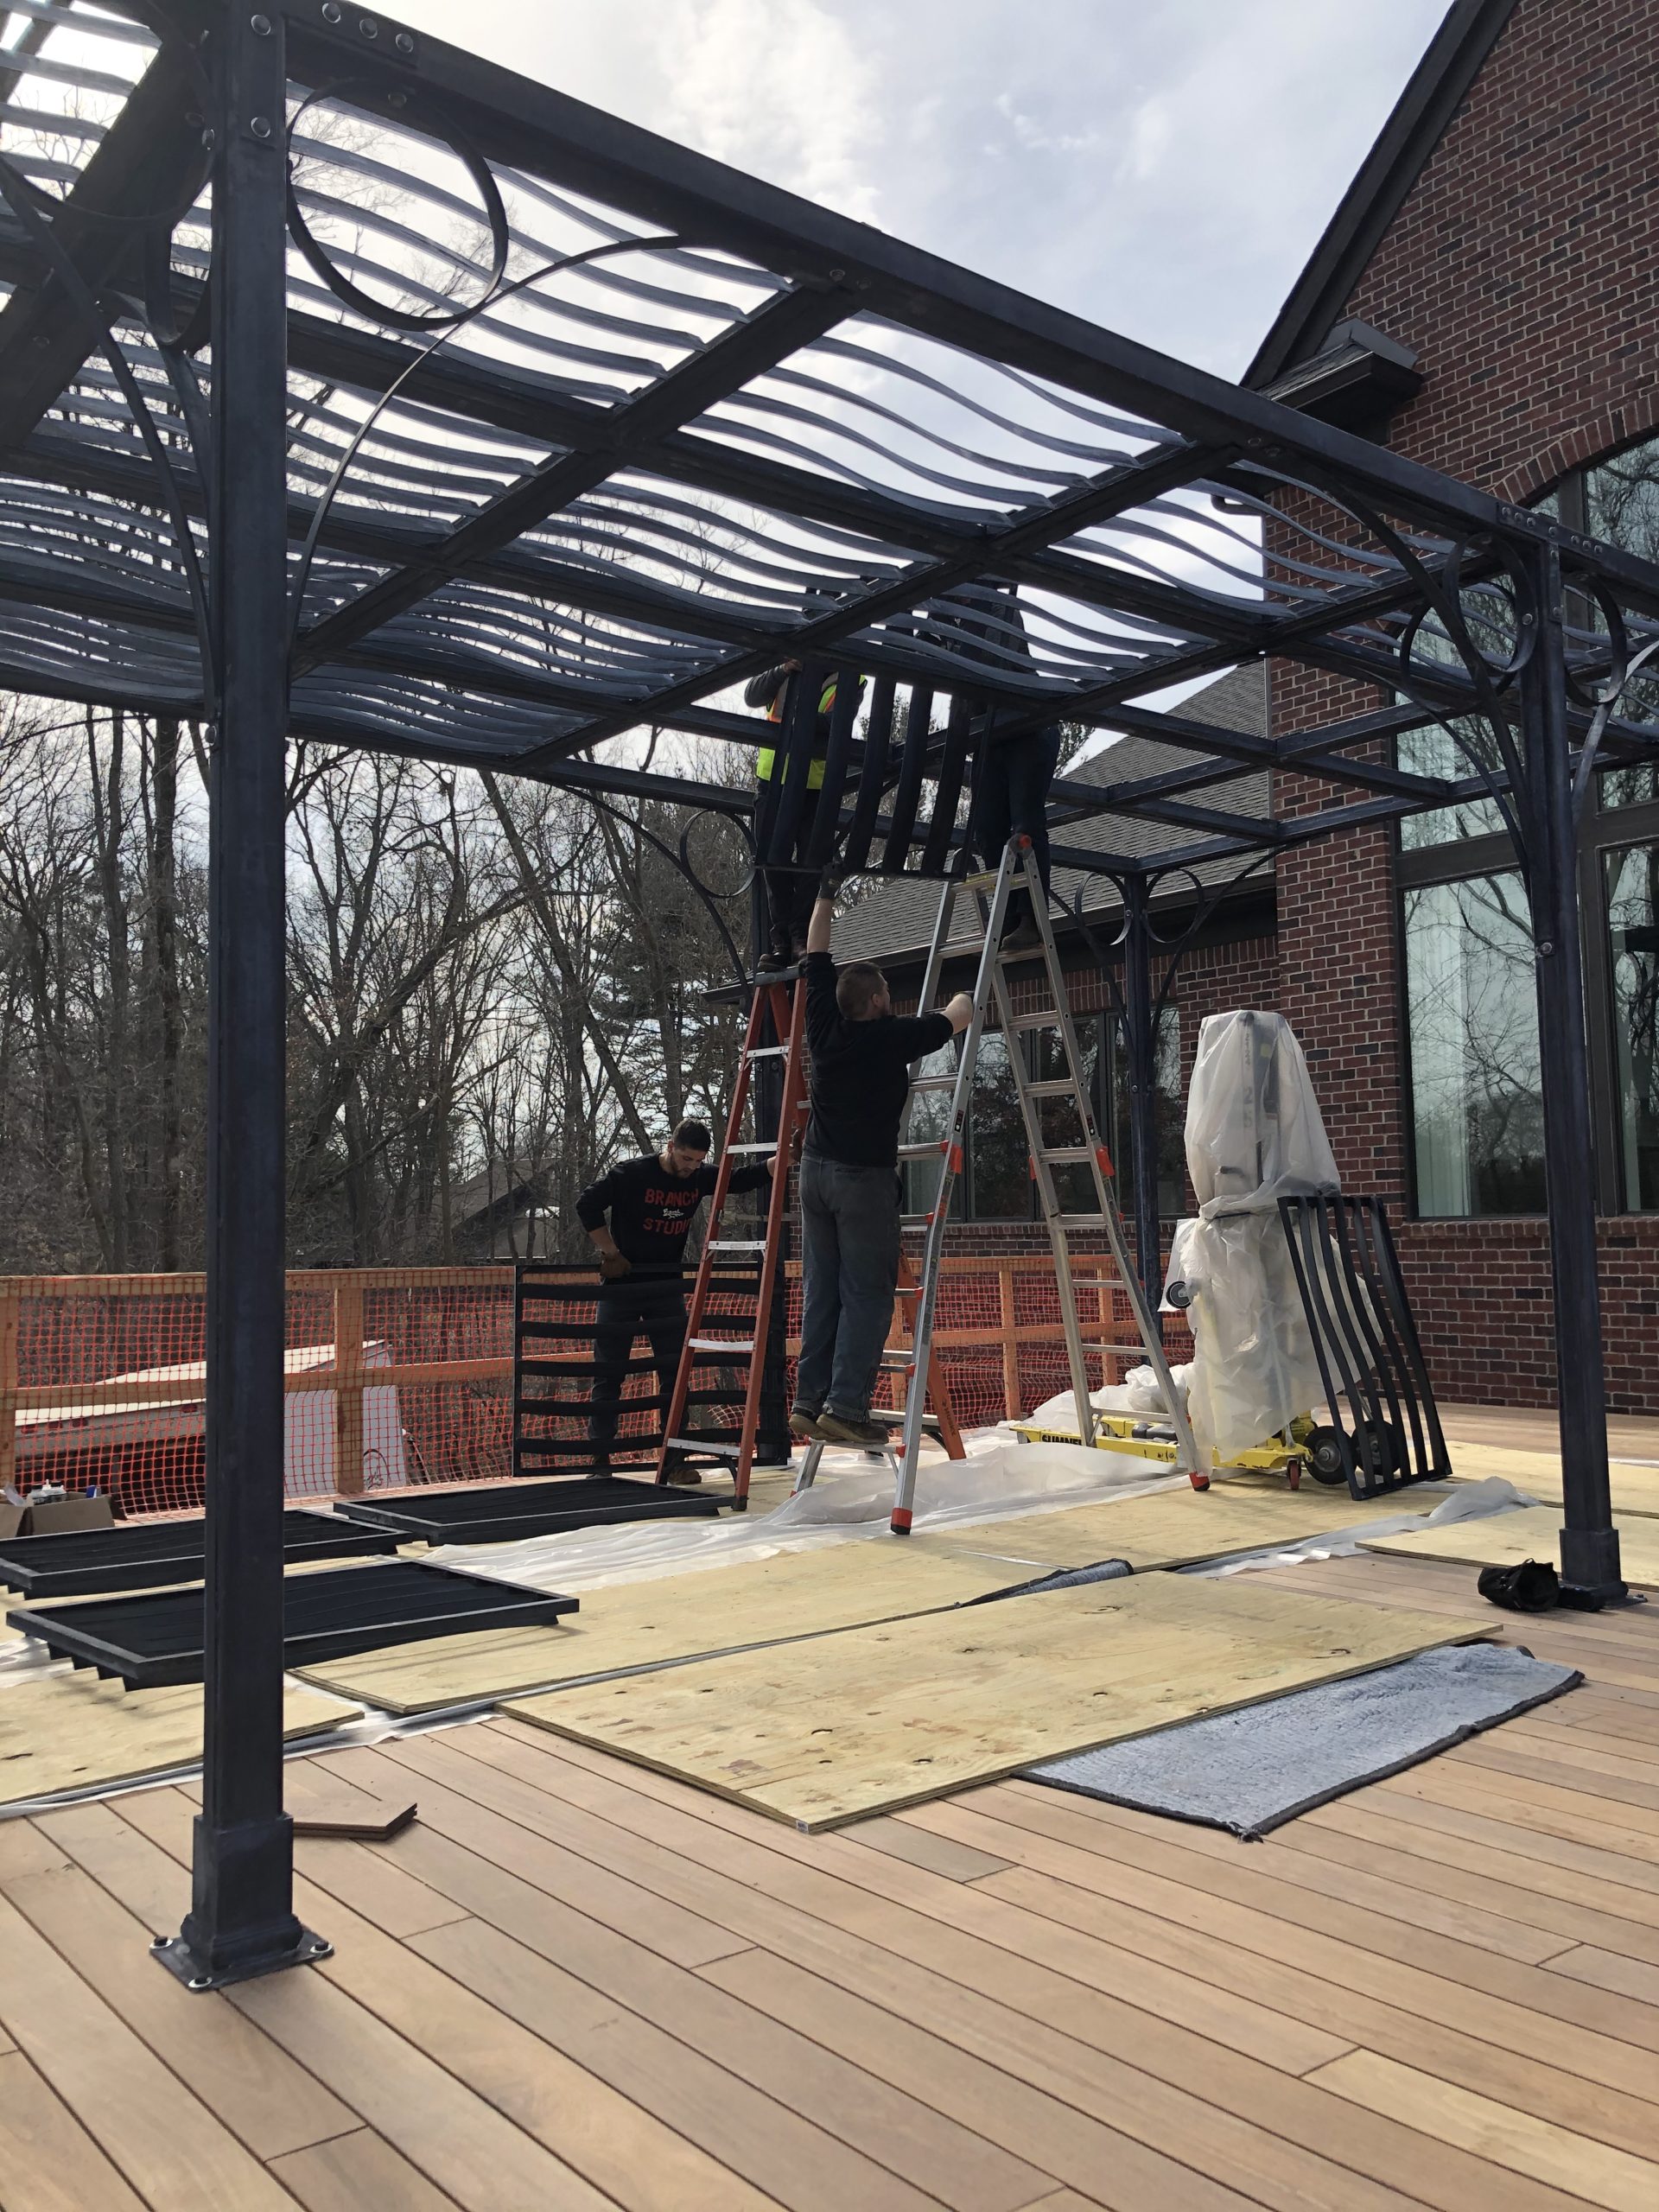
However, not every location for a pergola is accommodating to in ground plants.  The south end of this deck is long ways away from any soil, and the location is very sunny. We needed a structure with the intrinsic ability to provide shade. A pergola that could provide a shaded area for dining and seating would be a welcome addition to the deck furnishings. The curving louver design was inspired by the art glass sheathing a waterfall next to the pool. Engineering this roof took time. Eventually, 28 individual fixed louver steel roof panels that could be dropped into a framework built in to the roof were fabricated. The structure is 32 feet long, and 14′ deep. The 11′ height of the structure matches the height of a horizontal frame set in a series of 6 large windows on the facade of the house. The columns and corner brackets are beefy, as the roof is heavy.

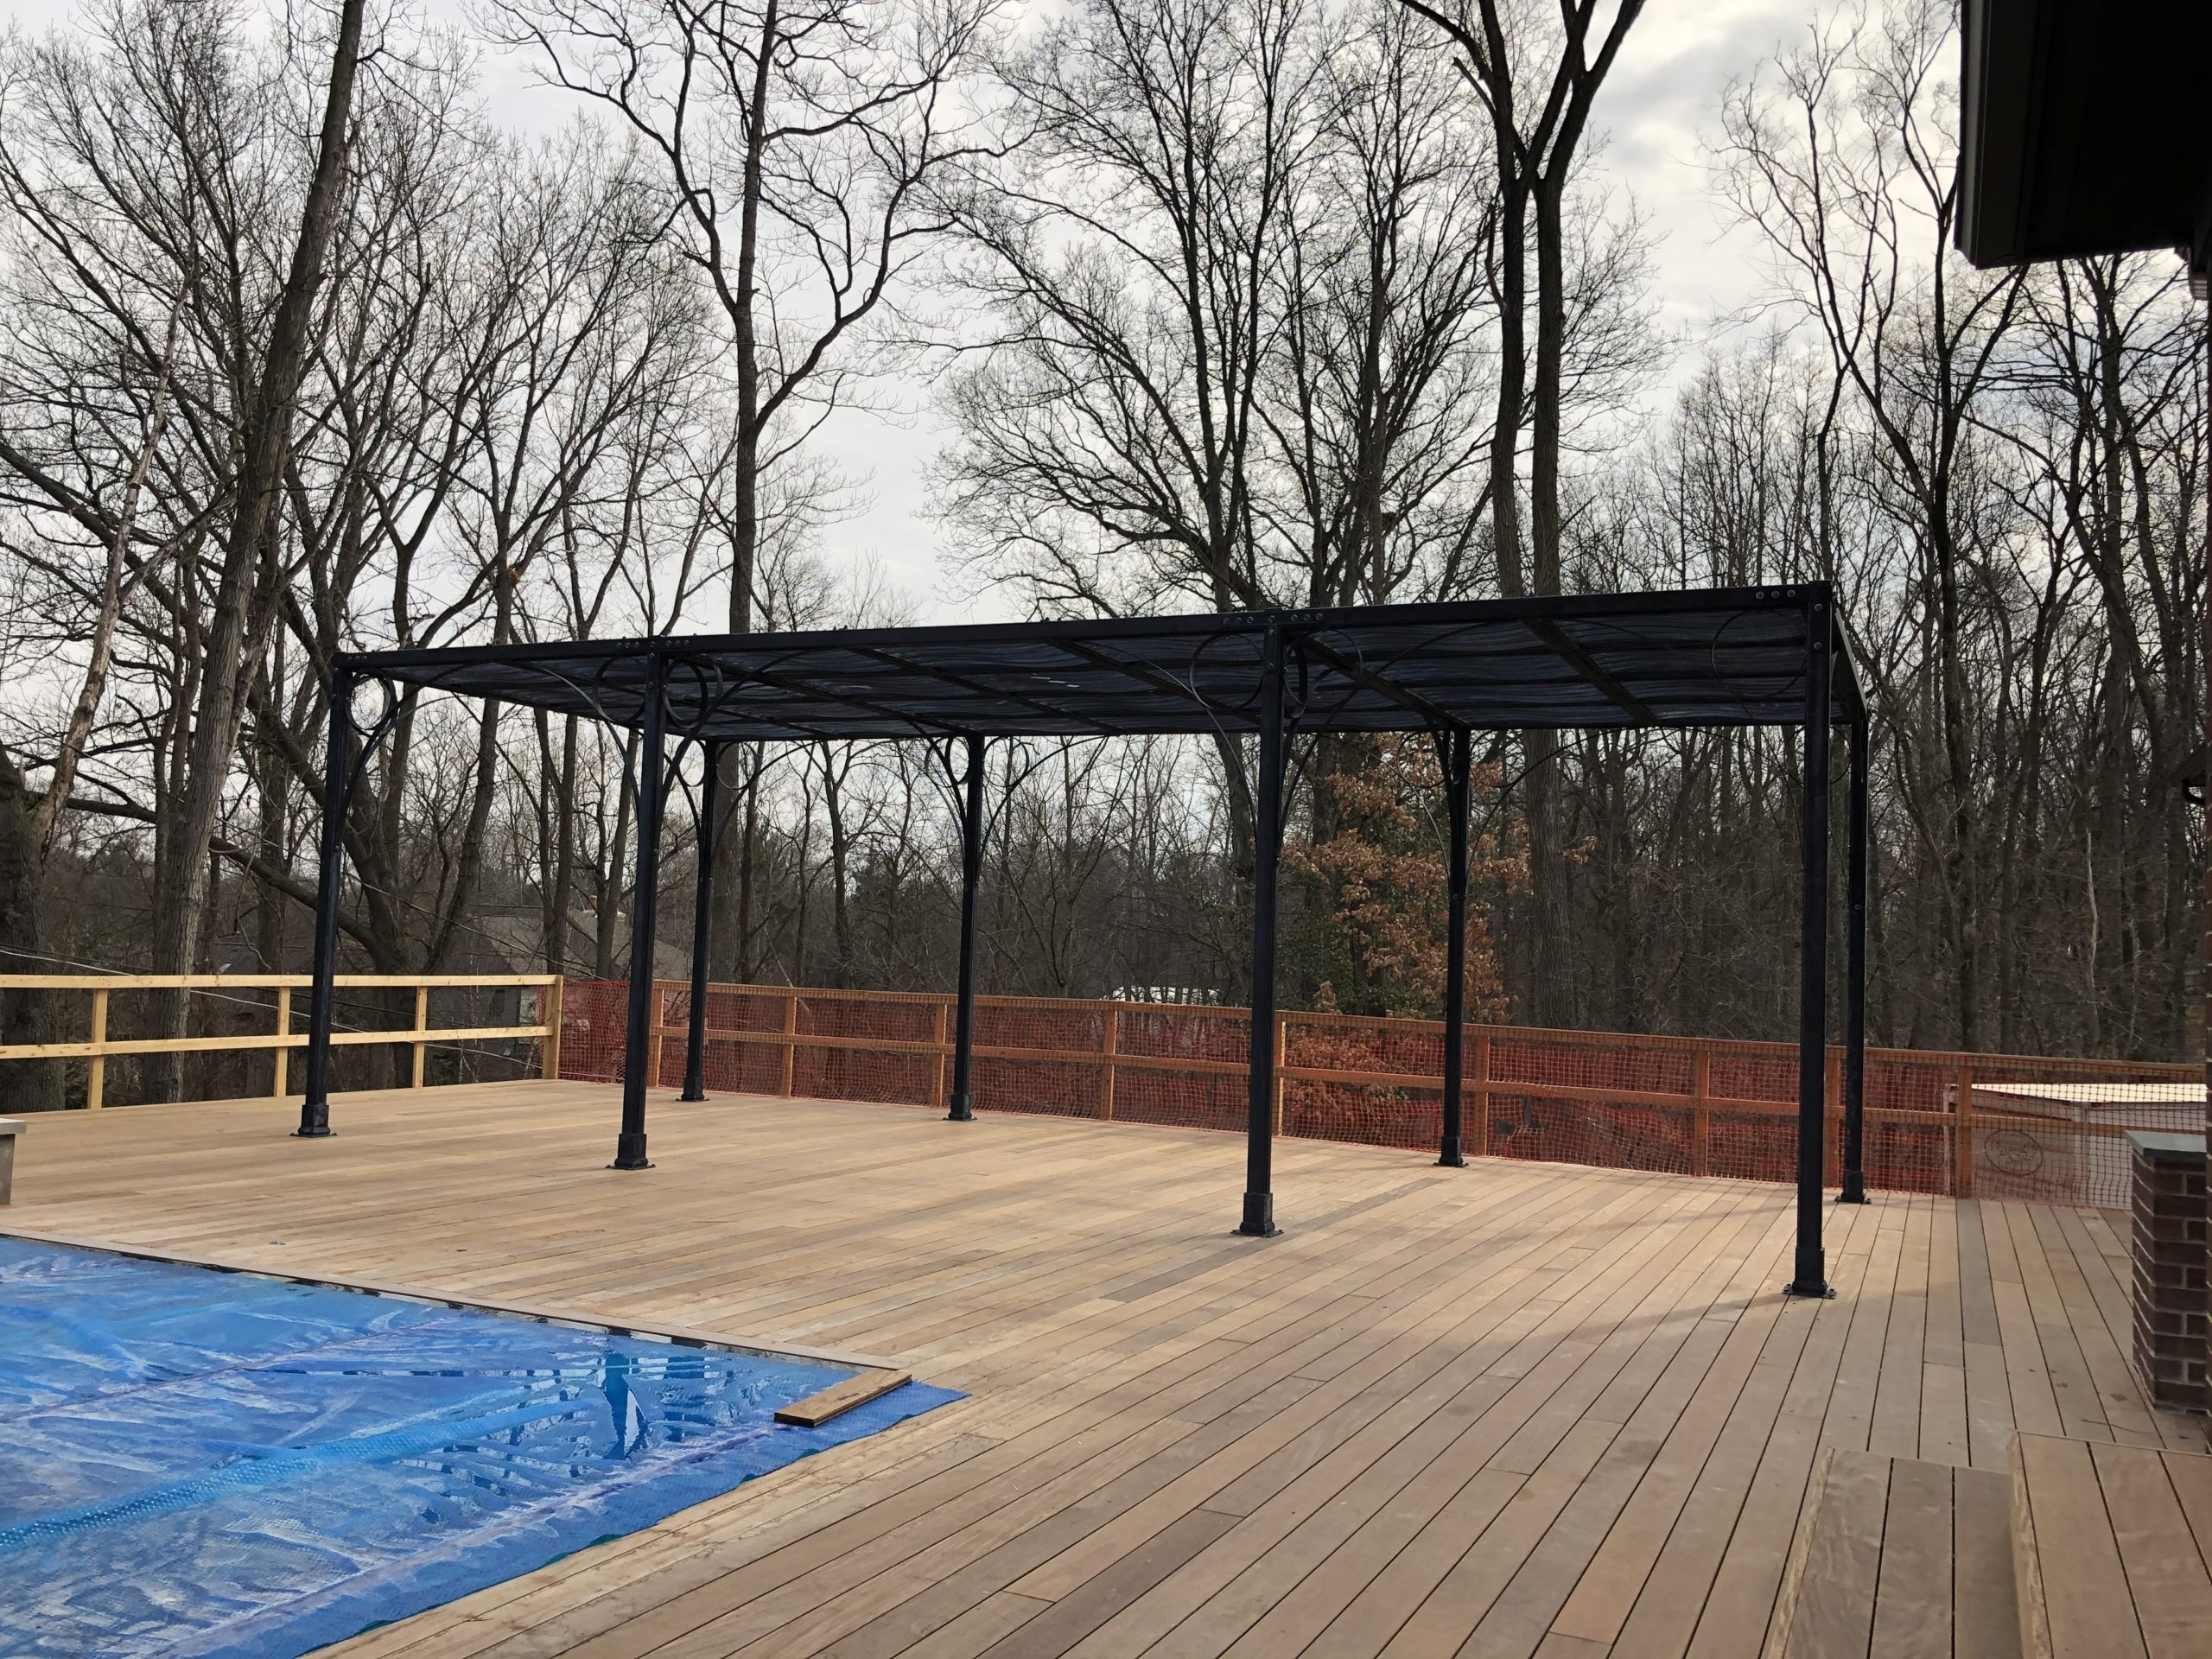
The pergola is tall enough that its roof does not interfere with the view out the picture windows. Nor does it restrict light coming in to those windows. It looks remarkably light and airy, considering it weighs 4500 pounds. The ipe deck is incredibly strong, but a pair of support beams traverse the underside of the deck to provide an additional level of support to the steel columns.

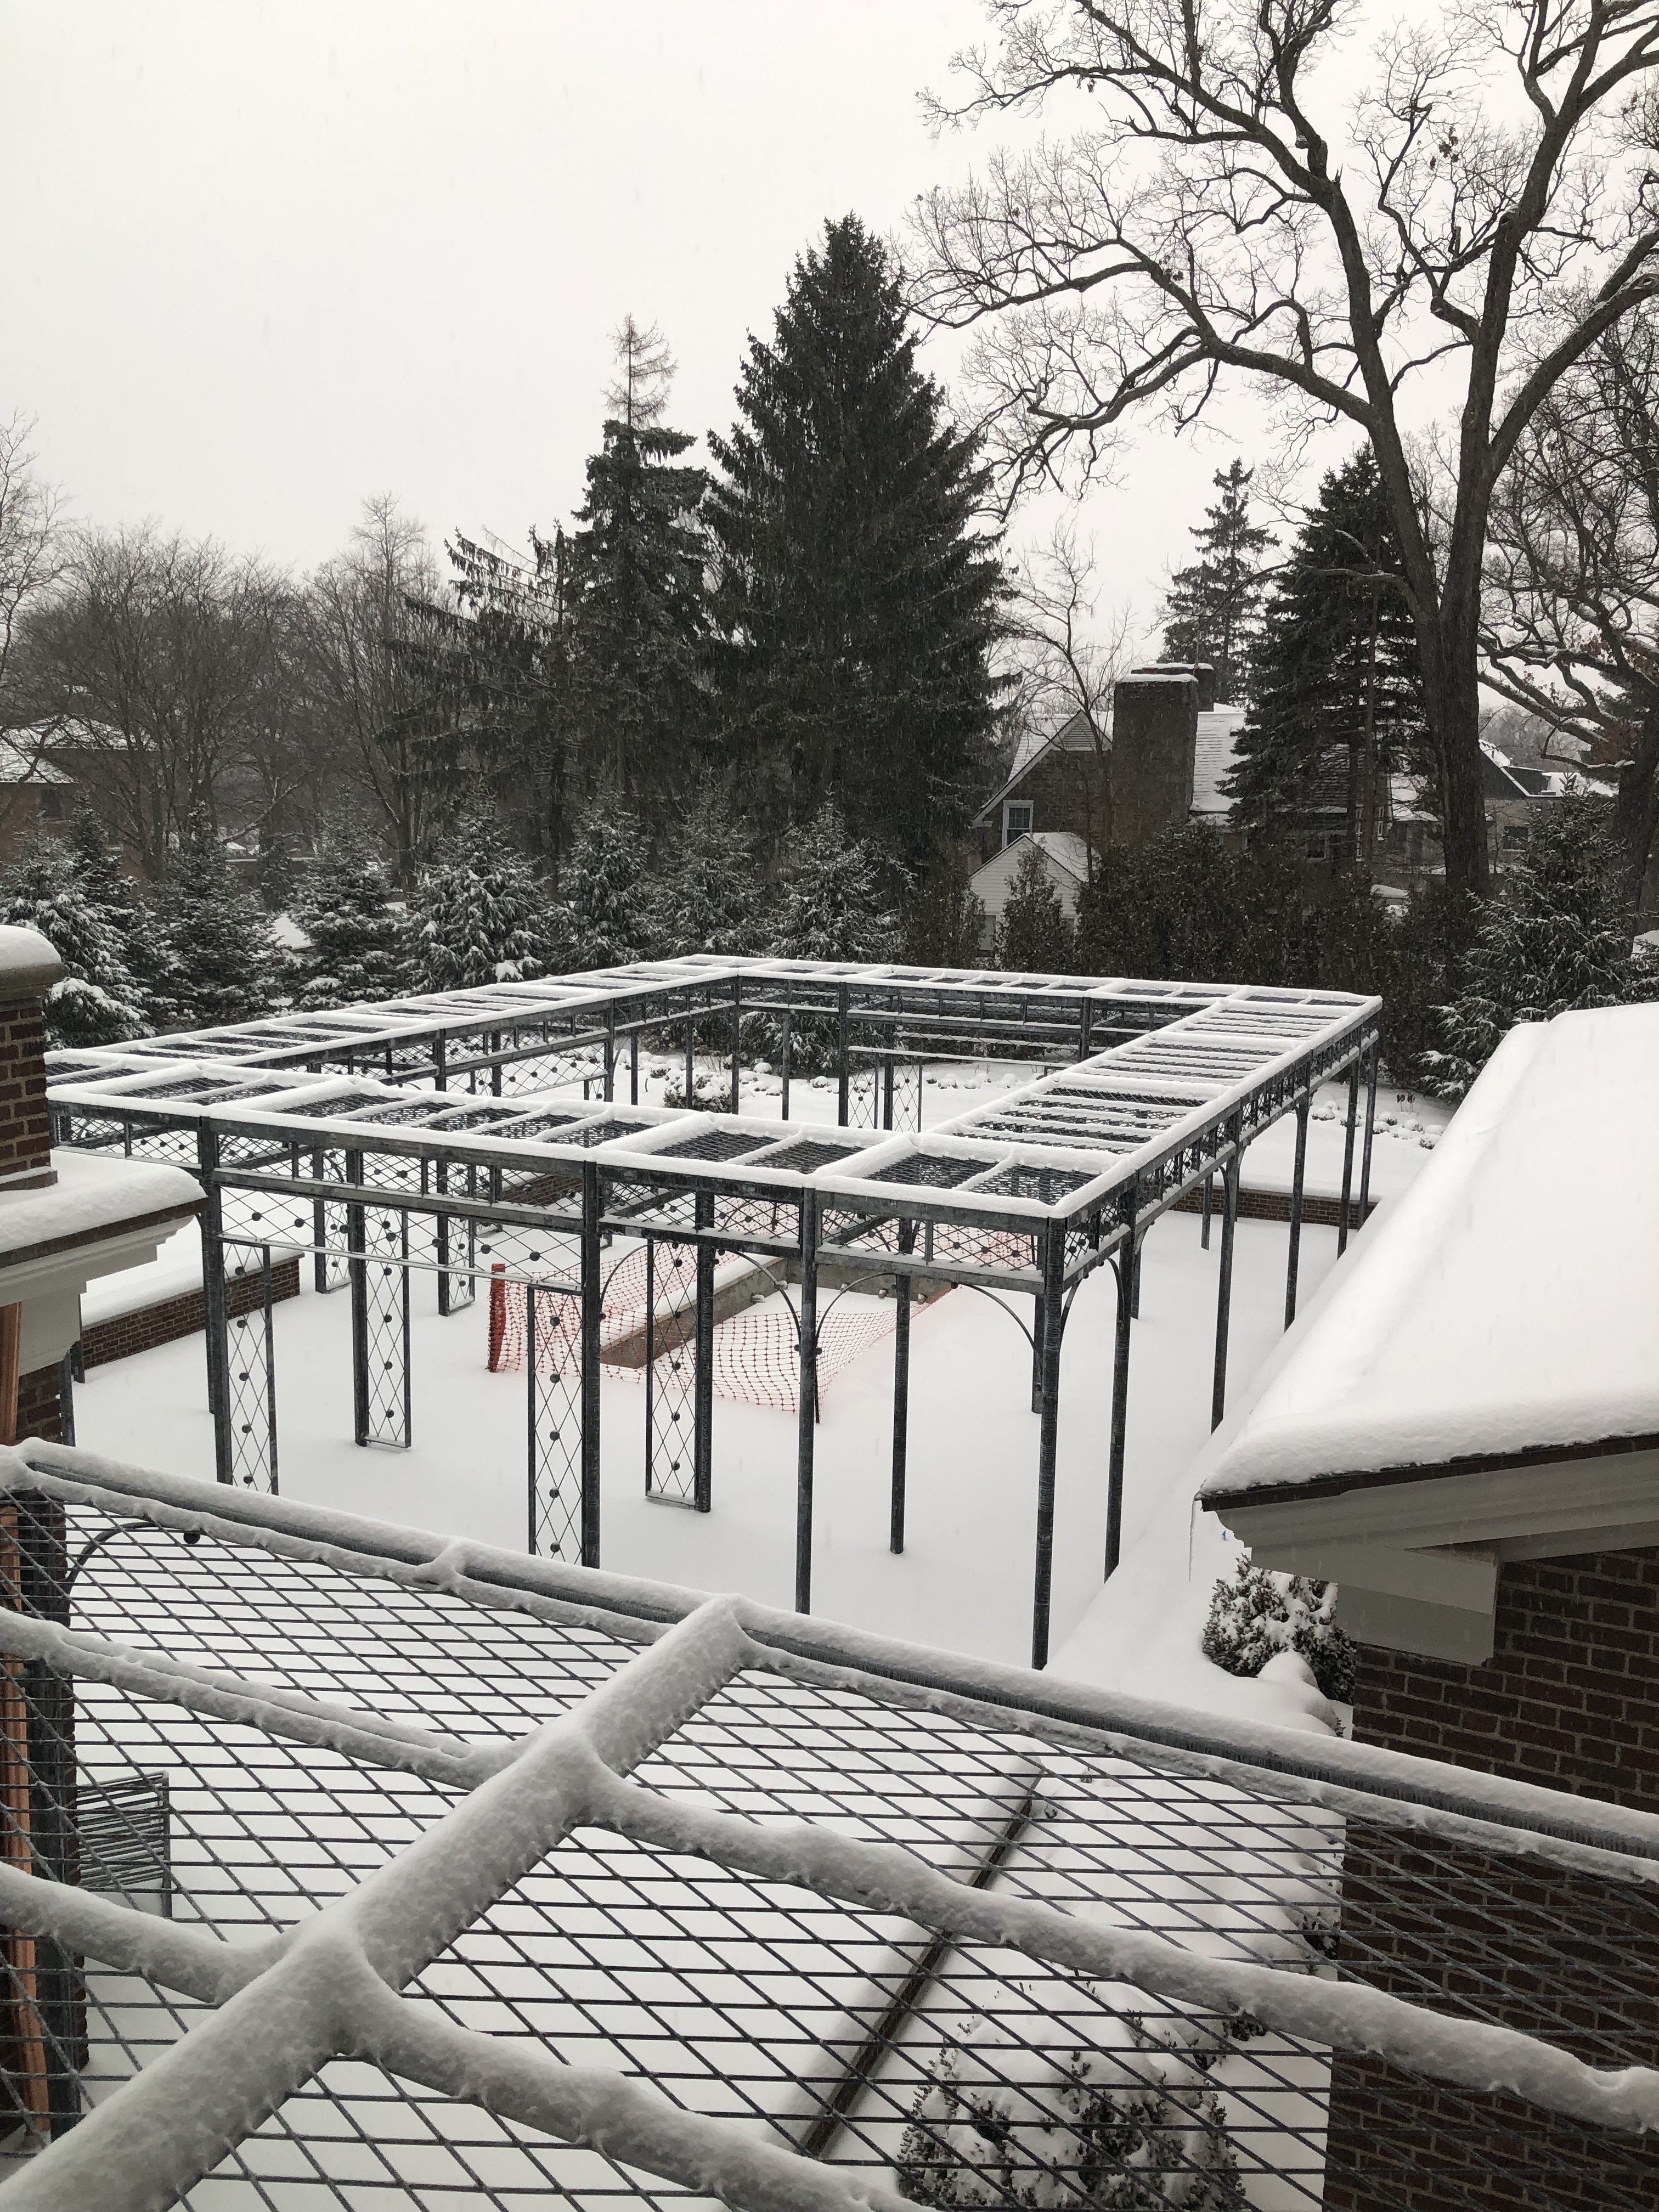
All of the roof panels are identical. But they cast different levels of shade depending on their orientation. Since the spring season is up next, and the intensity of sunlight at that time of year is subdued, the panels were placed to provide a more open shade from the south side. Being outdoors on a sunny spring day is one of the garden’s most memorable experiences.

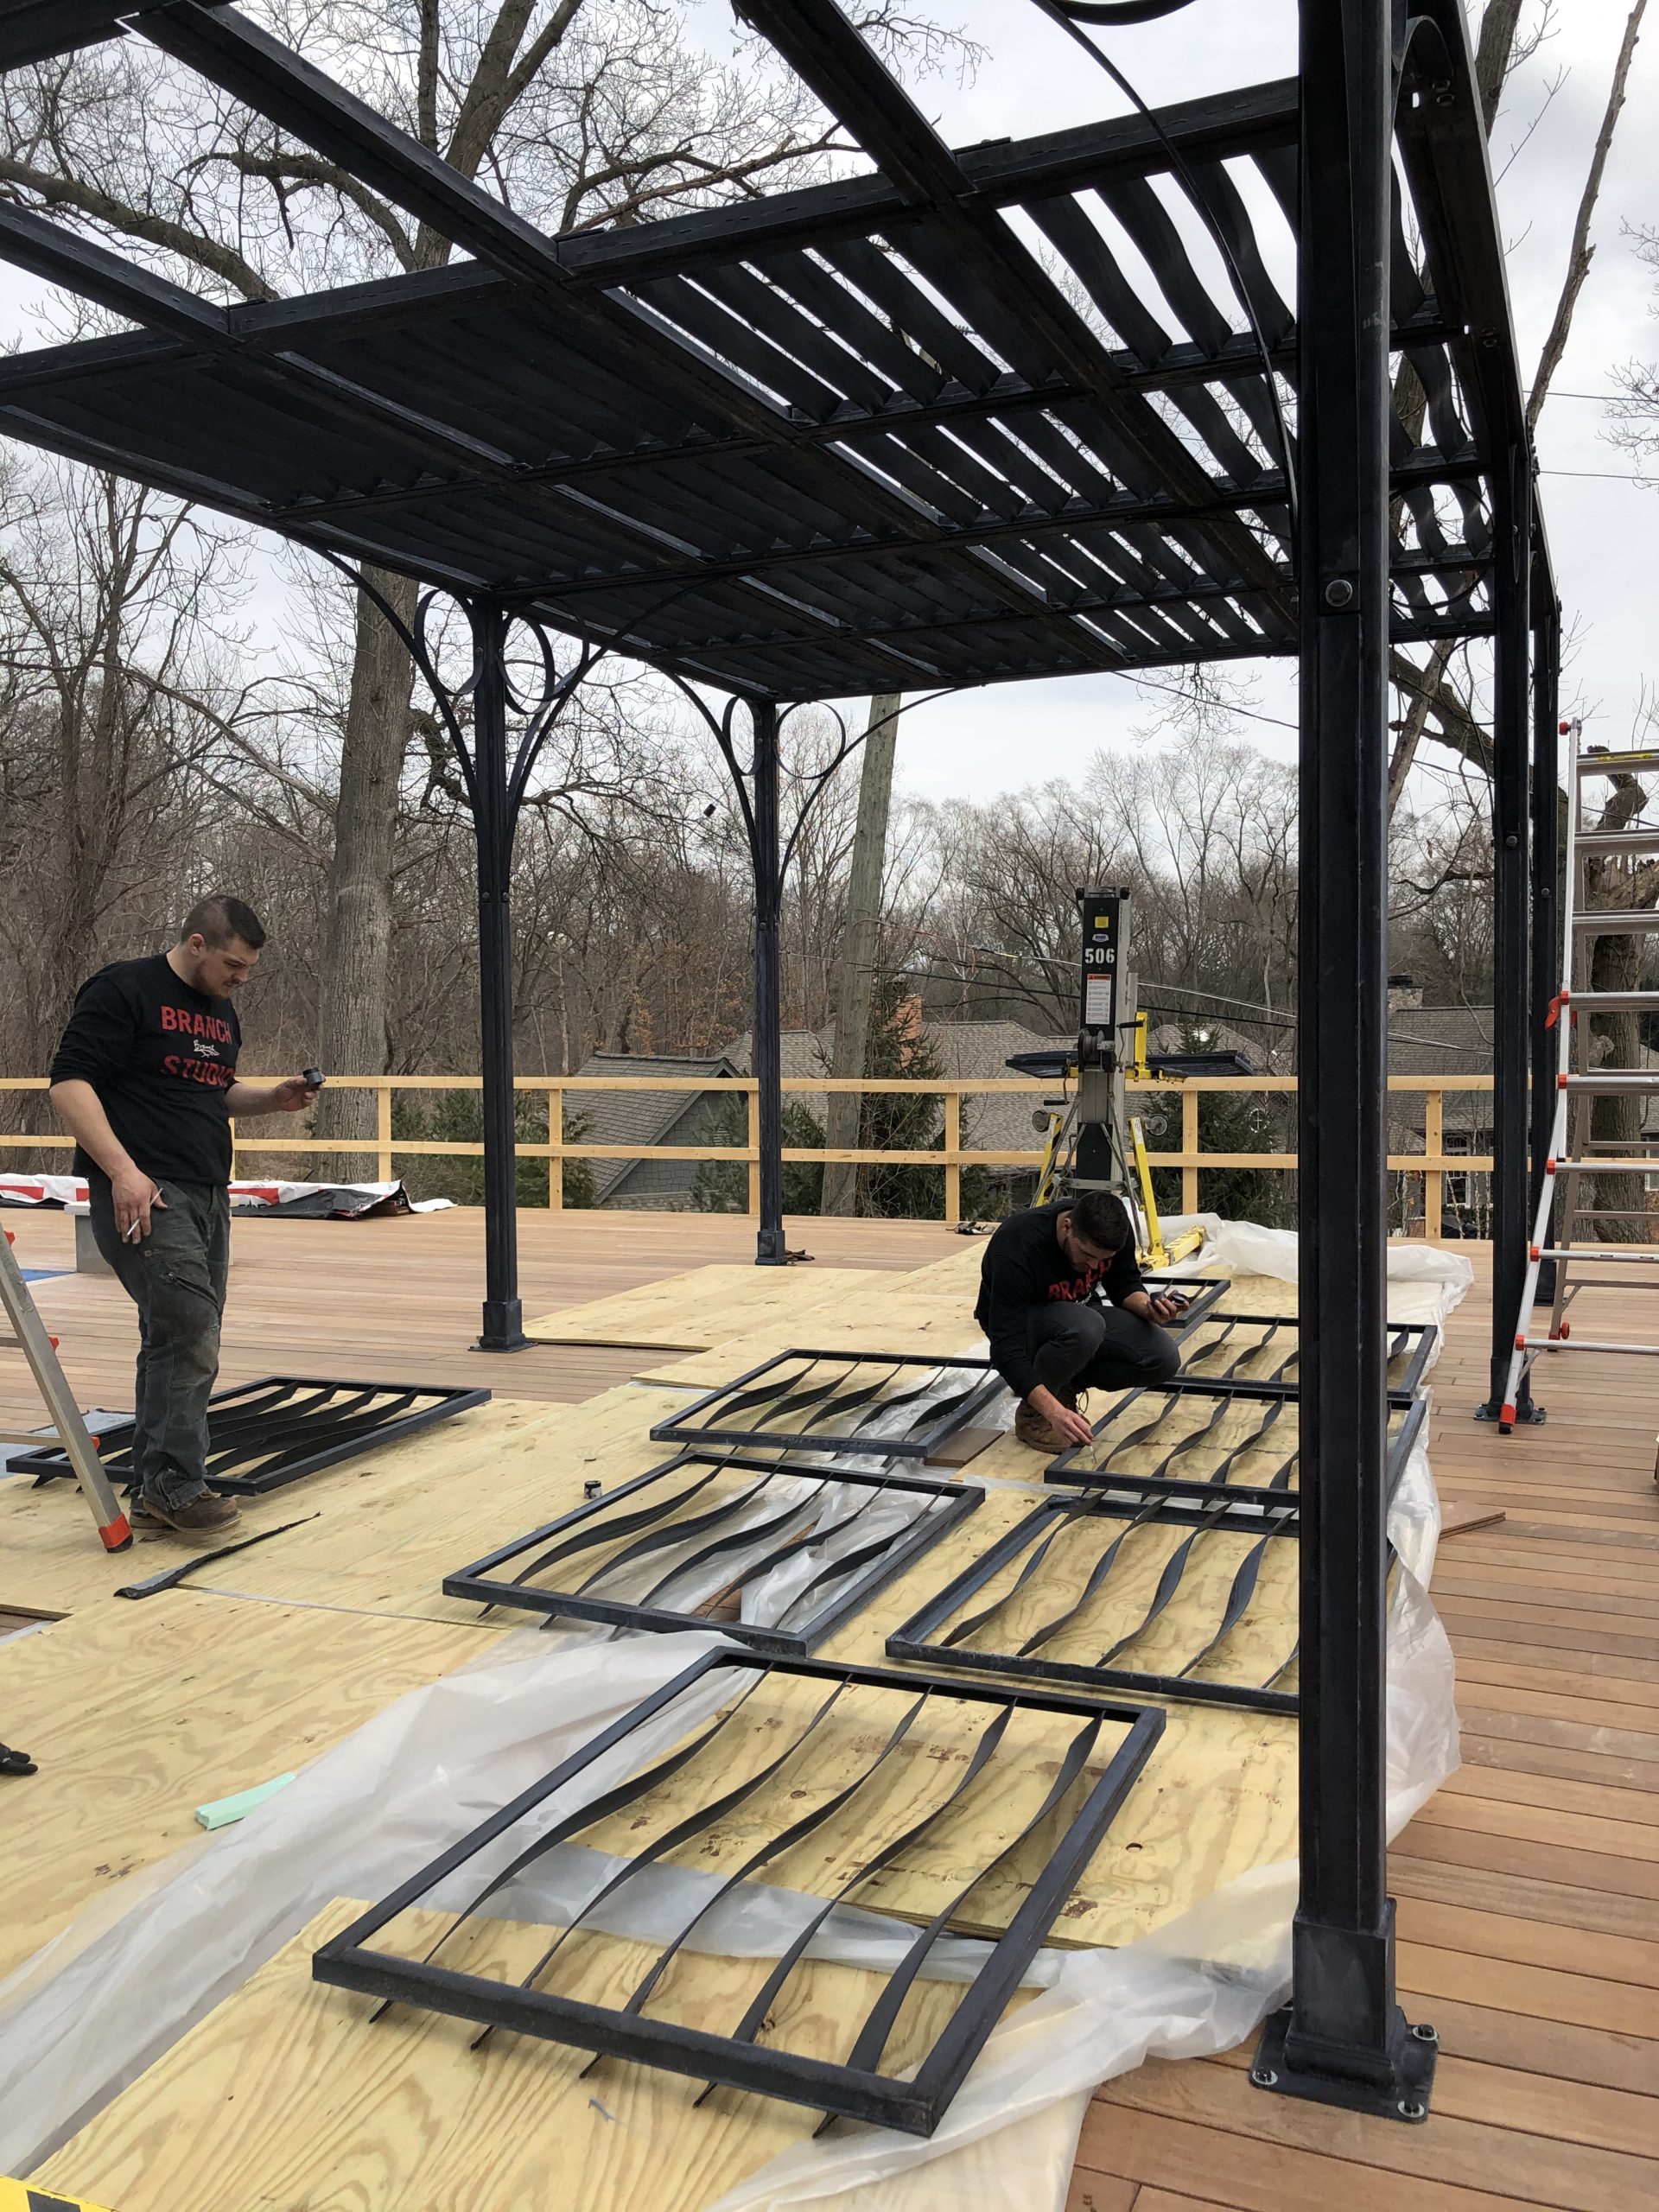
Viewed from the north side, the shade is more saturated. As the panels are dropped in, and held in place by the roof framing mechanism, the panels could be rotated to provide more shade from the south side later in the season. The panels could also be alternated one by one, or row by row, for other versions of shade. It would only take 2 people several hours to completely change the arrangement. The louver style means that warm air will be able to dissipate quickly.

Viewed from the northeast, it appears that the  areas of sun and shade will be balanced.

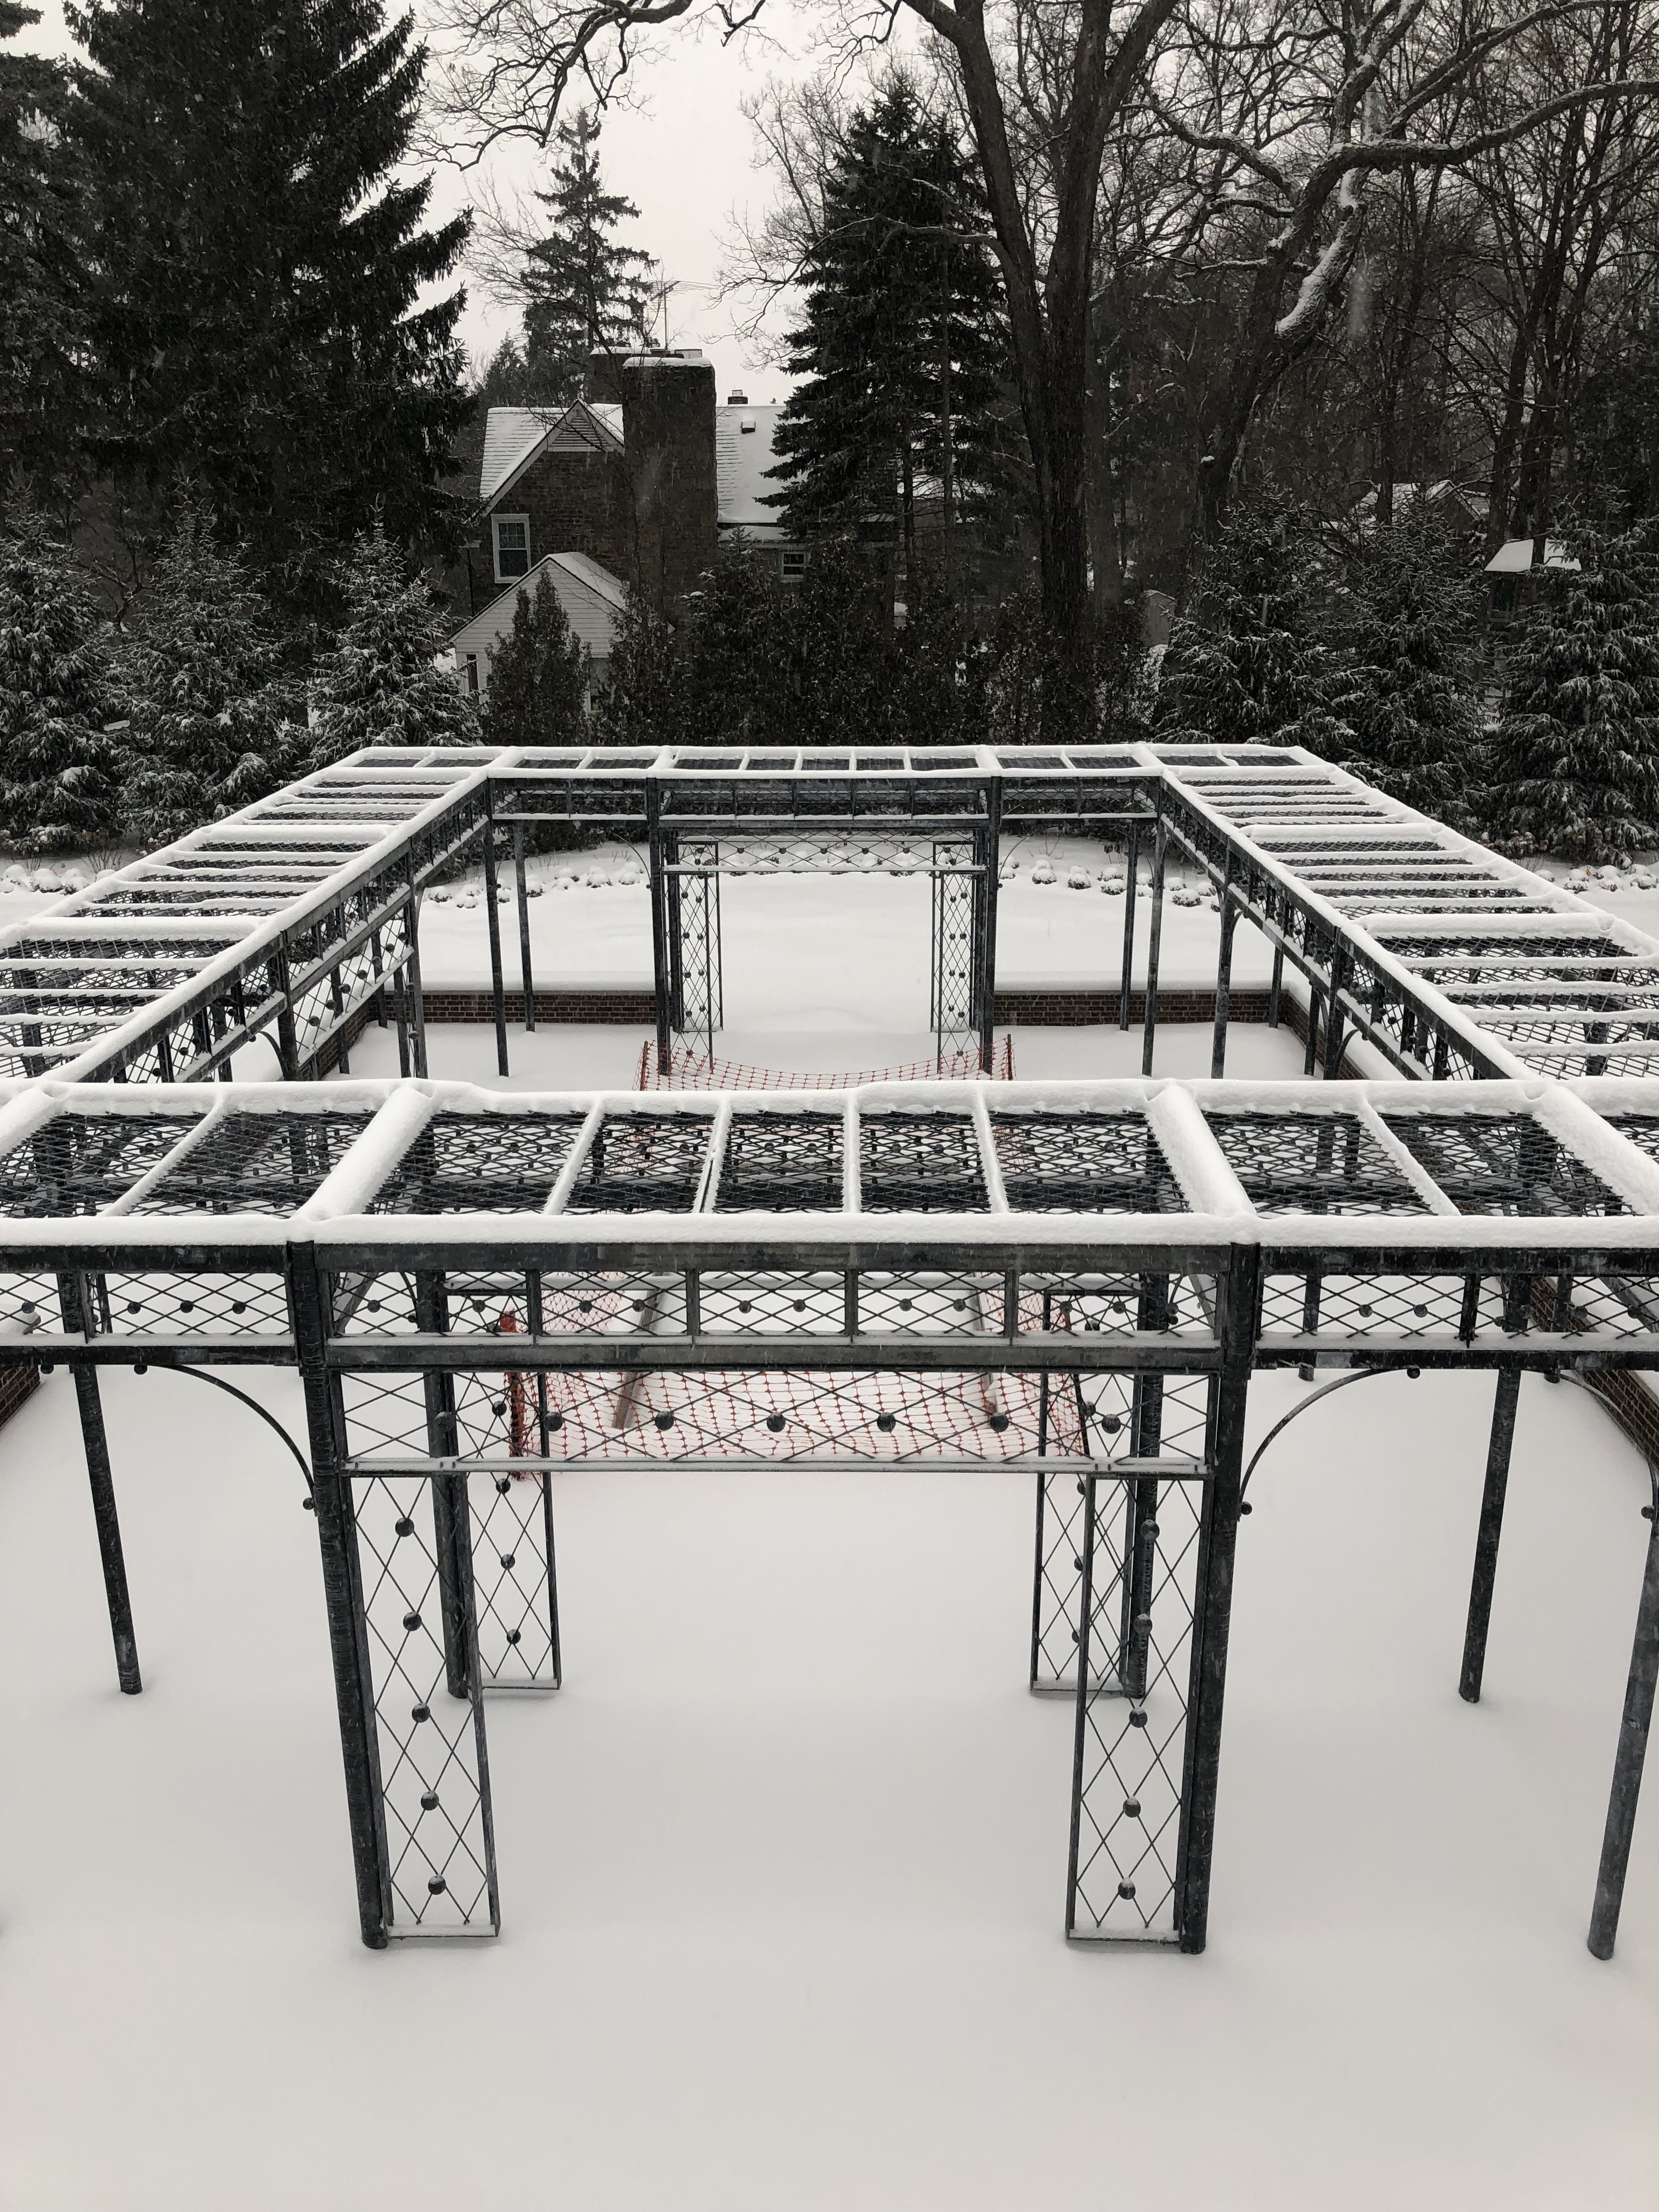
From the north side, the shade cast will be much more pronounced. The sun is still low in the sky now, so it will be interesting to see what level of shade is provided once the sun is directly overhead. In any event, the pergola will go a long way towards providing a comfortable place to enjoy the outdoors.

Everyone’s interest and participation in the landscape is unique to them. I have come to have loads of respect for all forms that expression might take. On a practical level, it means trying to provide whatever direction it takes to get people outdoors. It also means cultivating empathy as an essential element of good design. What could happen next is not predictable, but I have had numerous instances over the years of a tentative interest in nature blossoming into a commitment to the health and well being of a piece of property. Or down the line a garden with which to teach their children how to grow vegetables and flowers. Or a new found love for spring flowering bulbs or fruit trees. It happens.

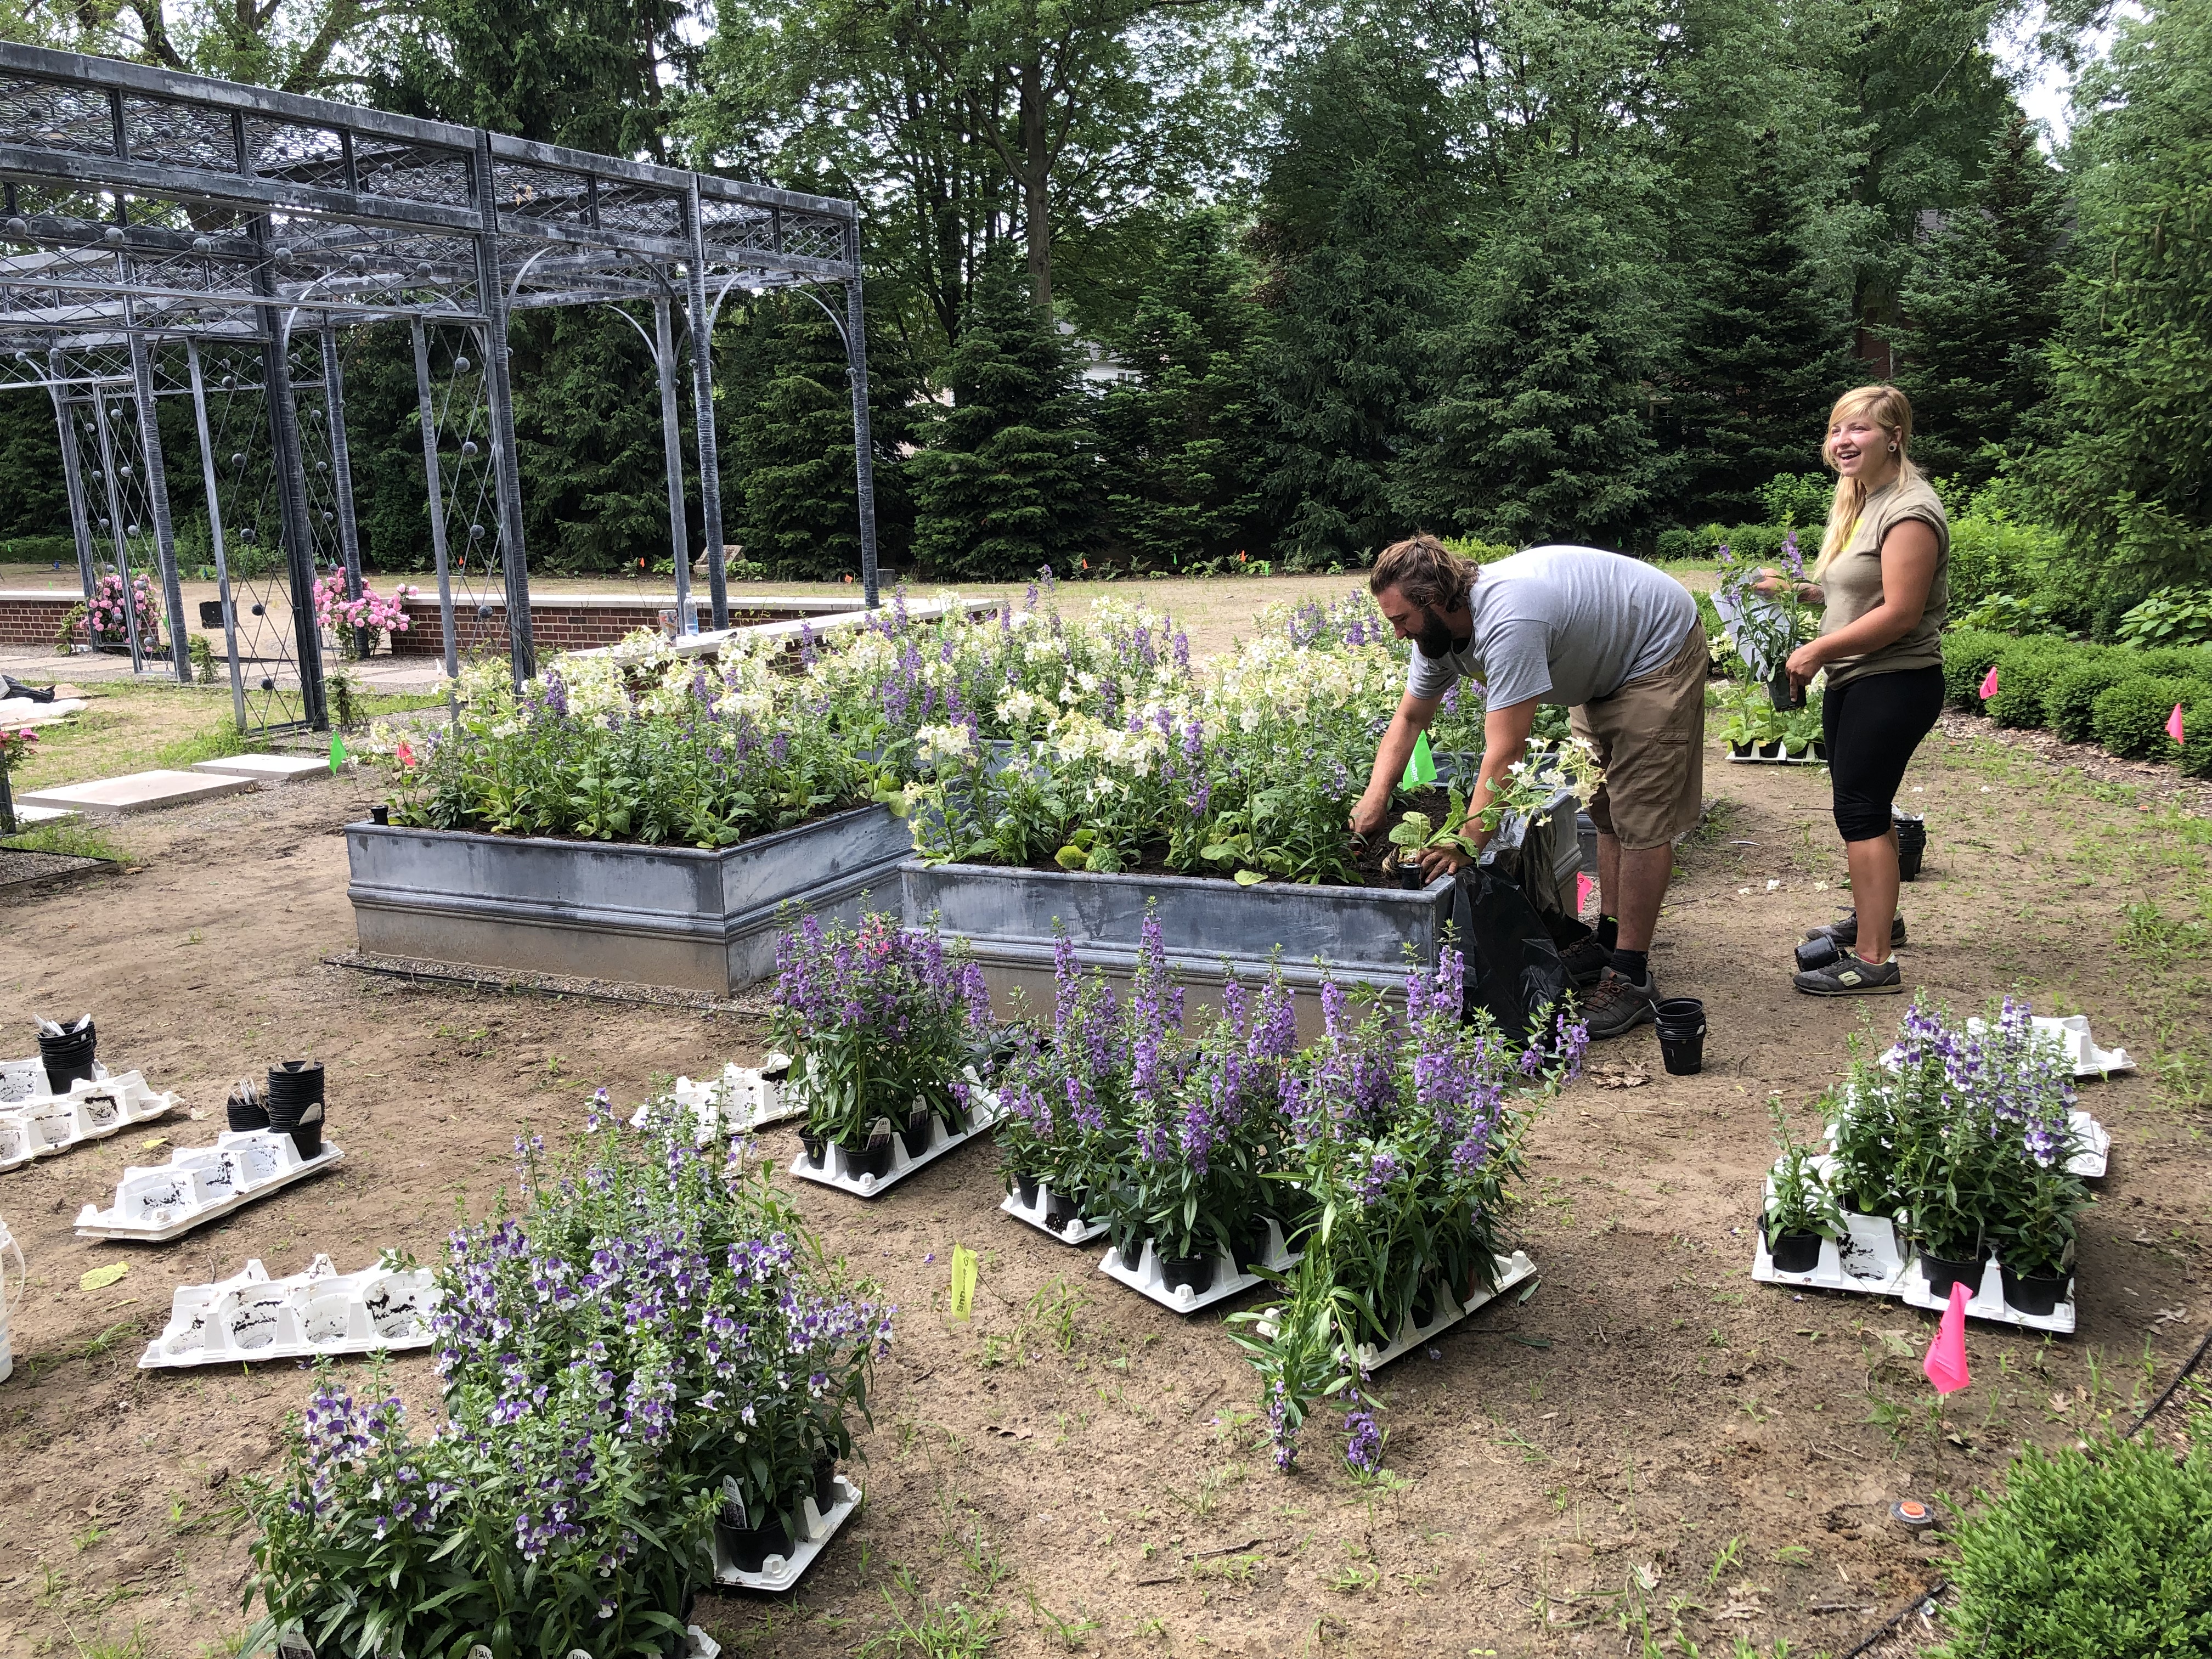
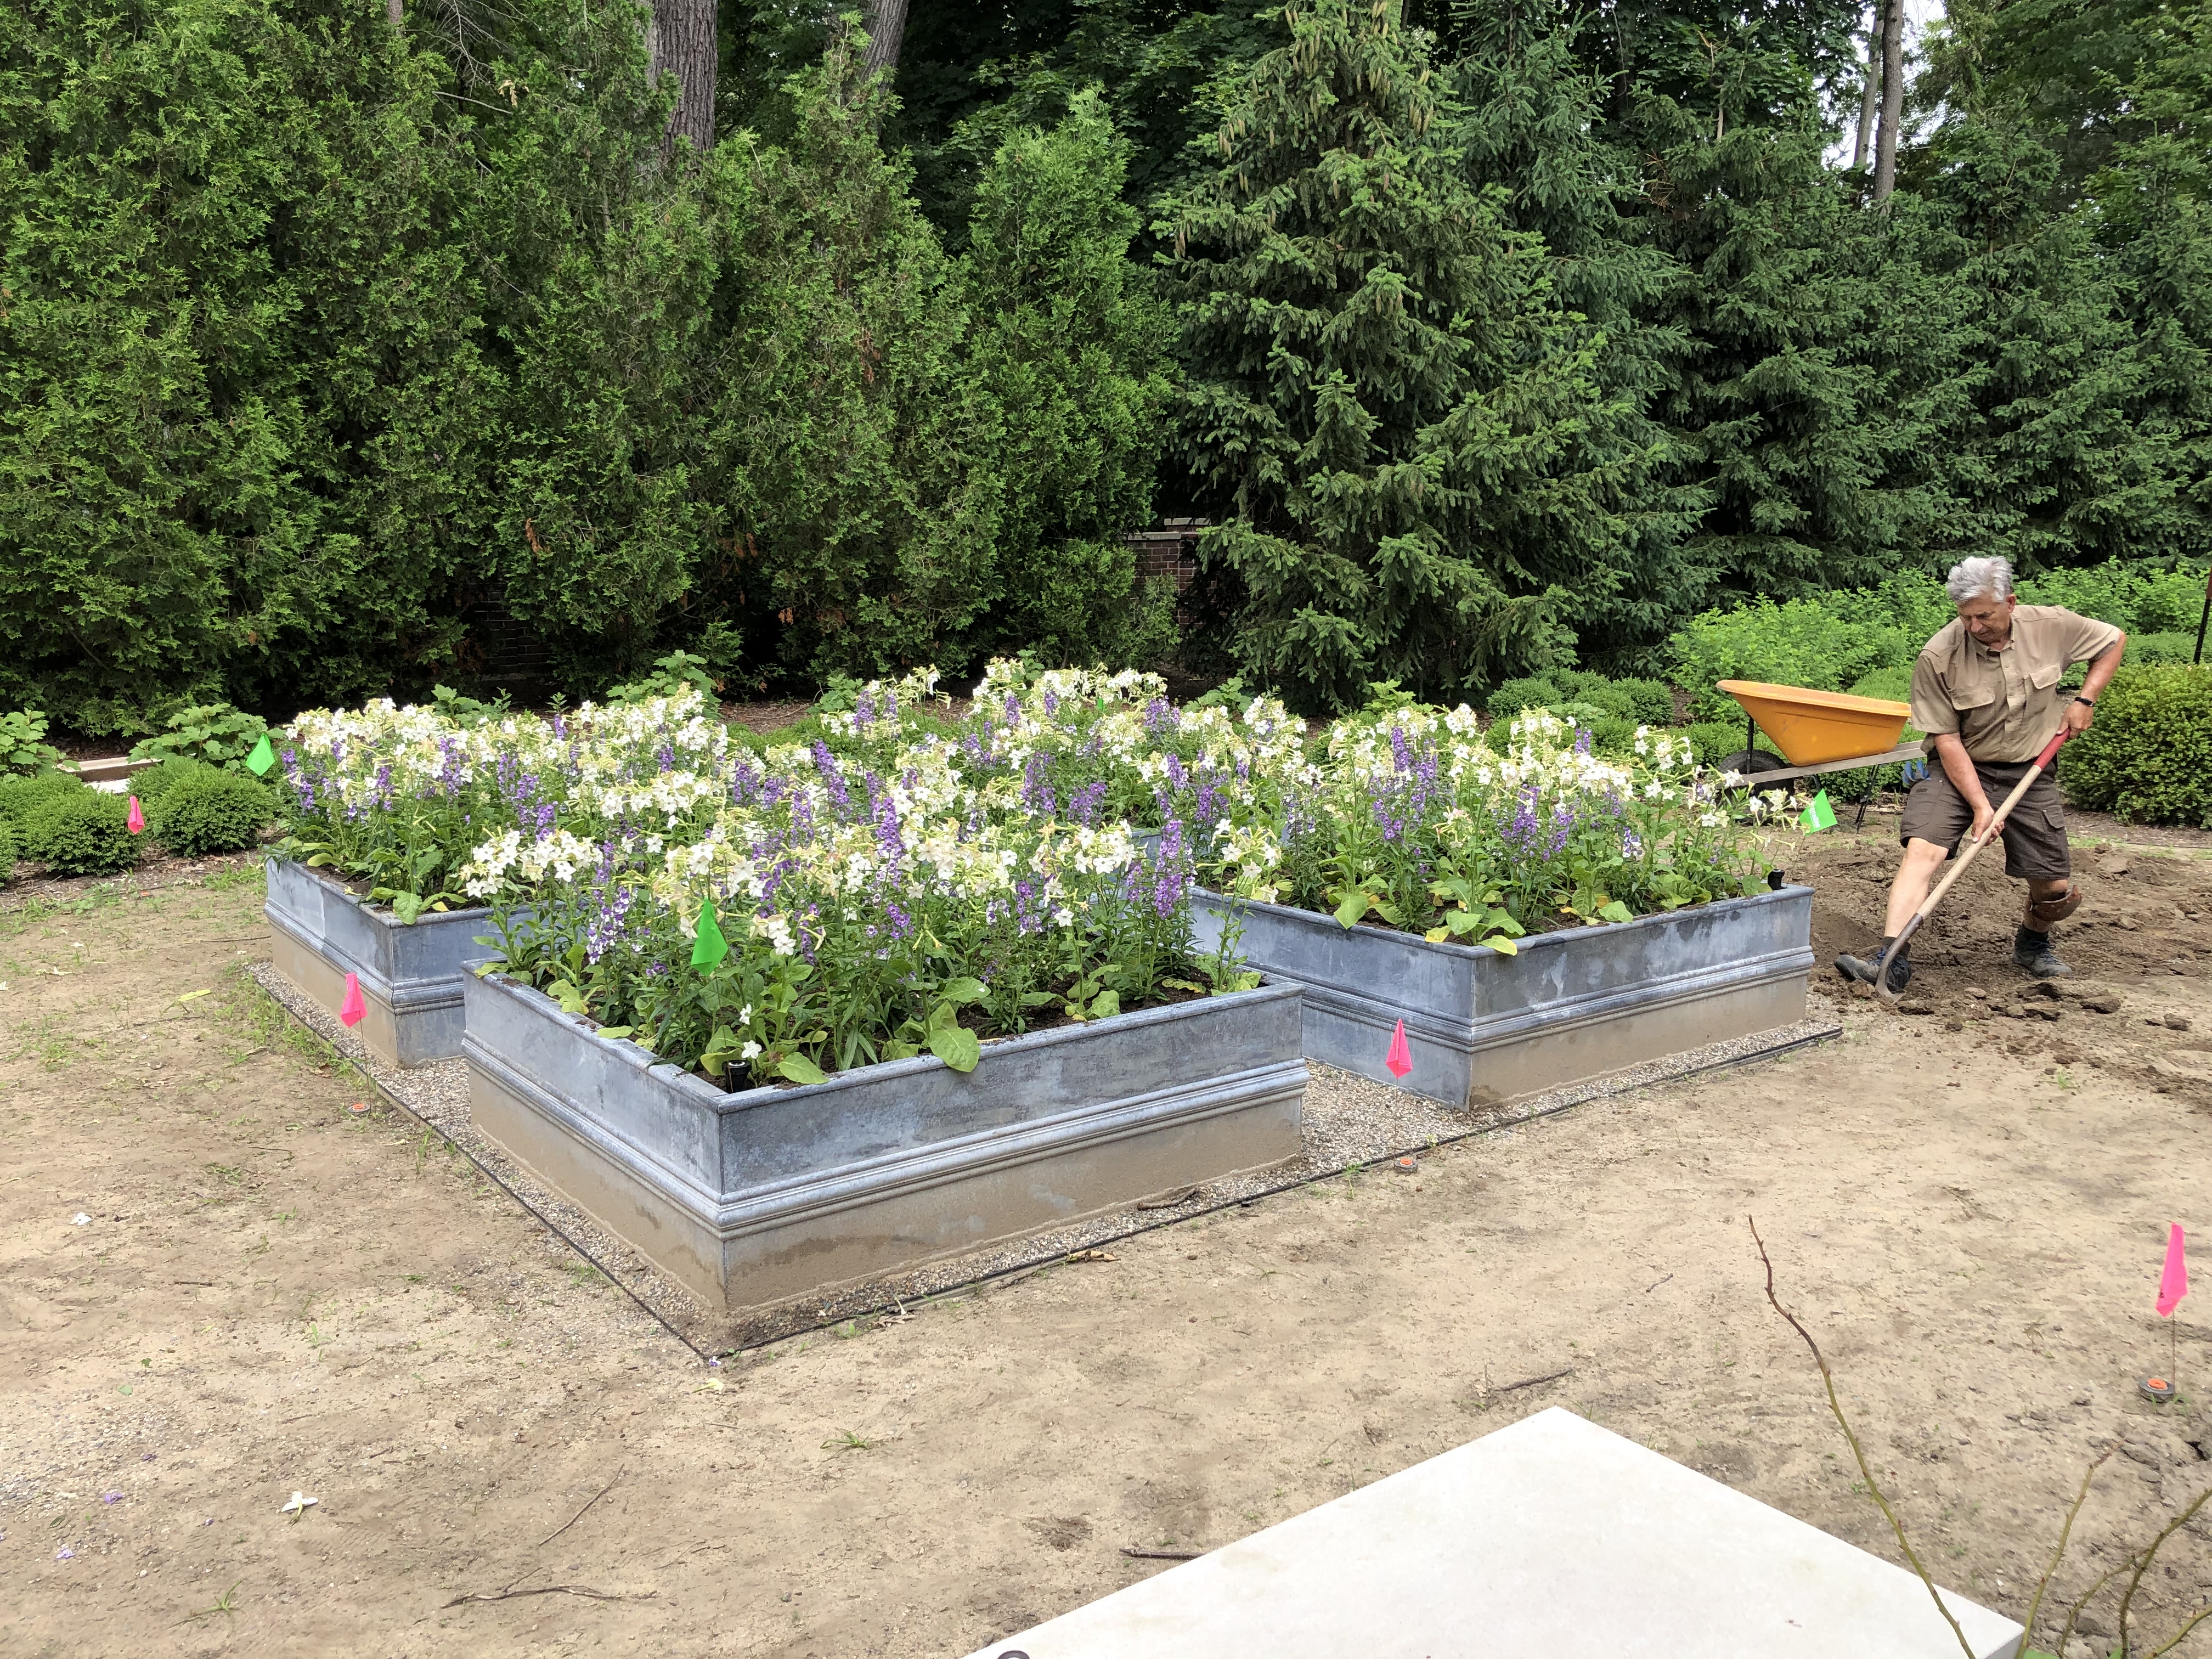
There is a special personal satisfaction in having taken the design of a structure for the landscape to another level. Our head of design and engineering, Dan Moore, and his fabrication group of 6 do a terrific job of manufacturing our stock line of boxes, pots, fountains and ornament. They do an equally great job of engineering and fabricating something they have never made before. I think they like making those forays into the unknown. All they needed from me was the concept.

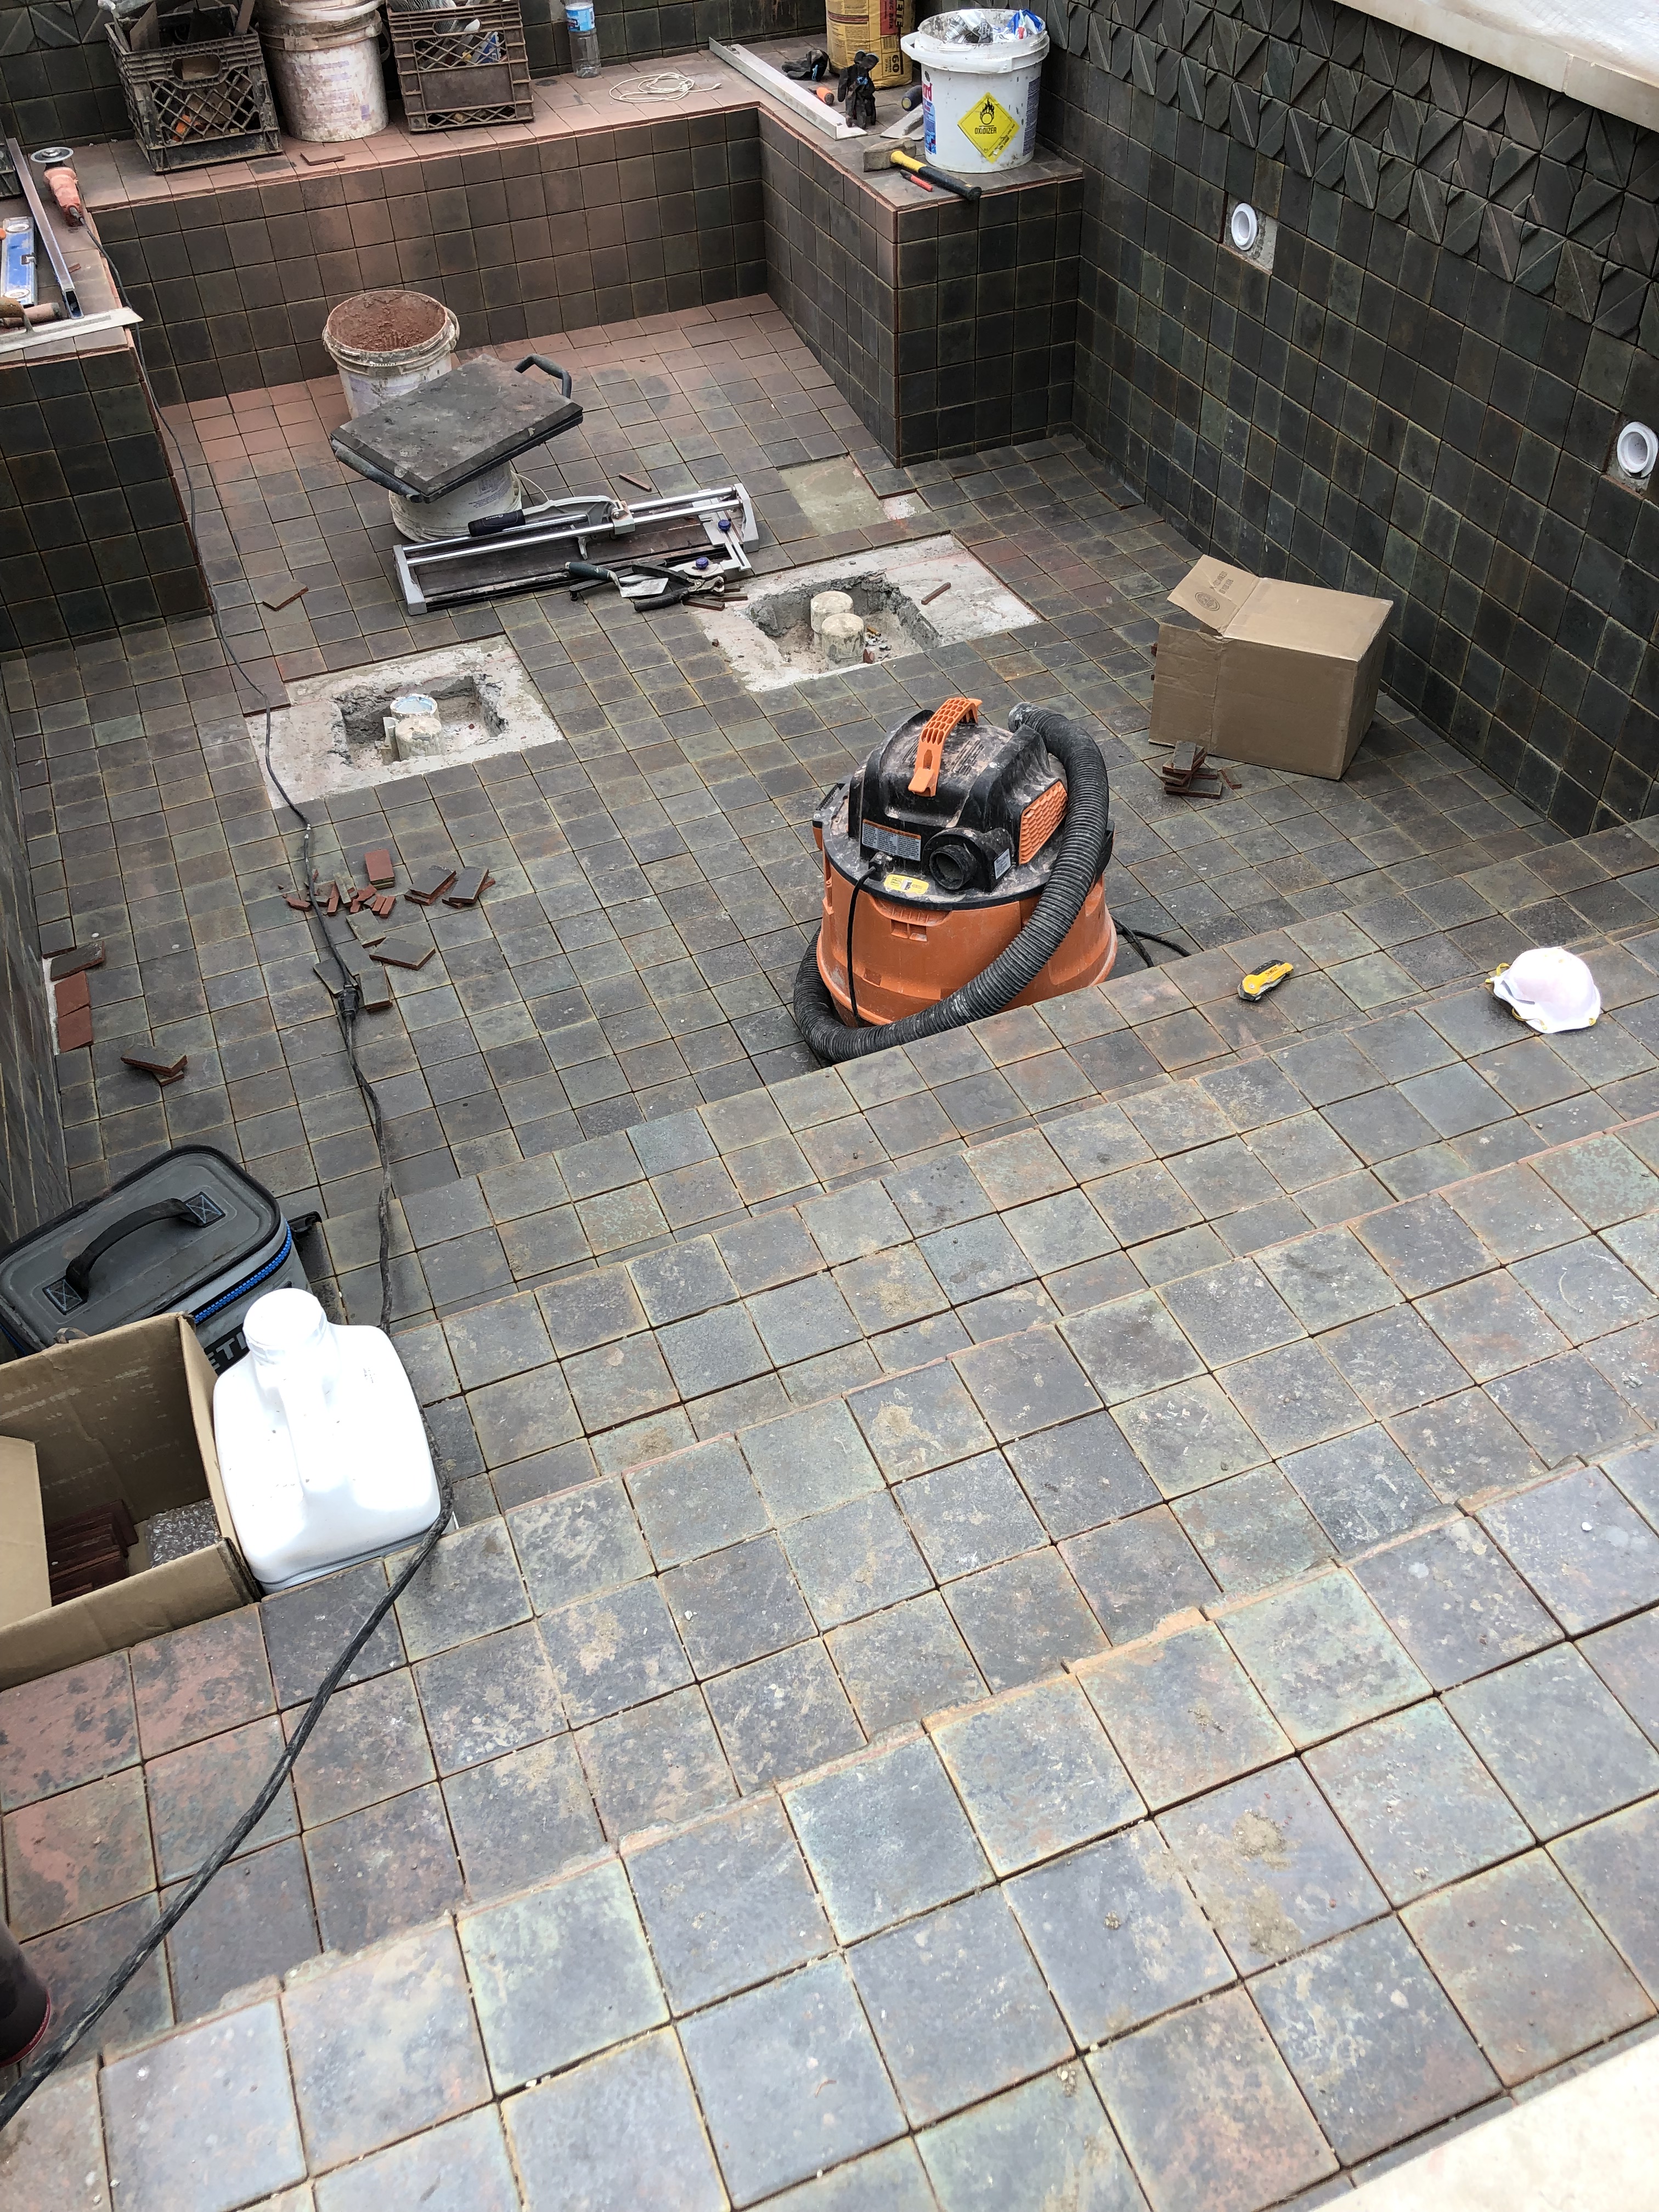
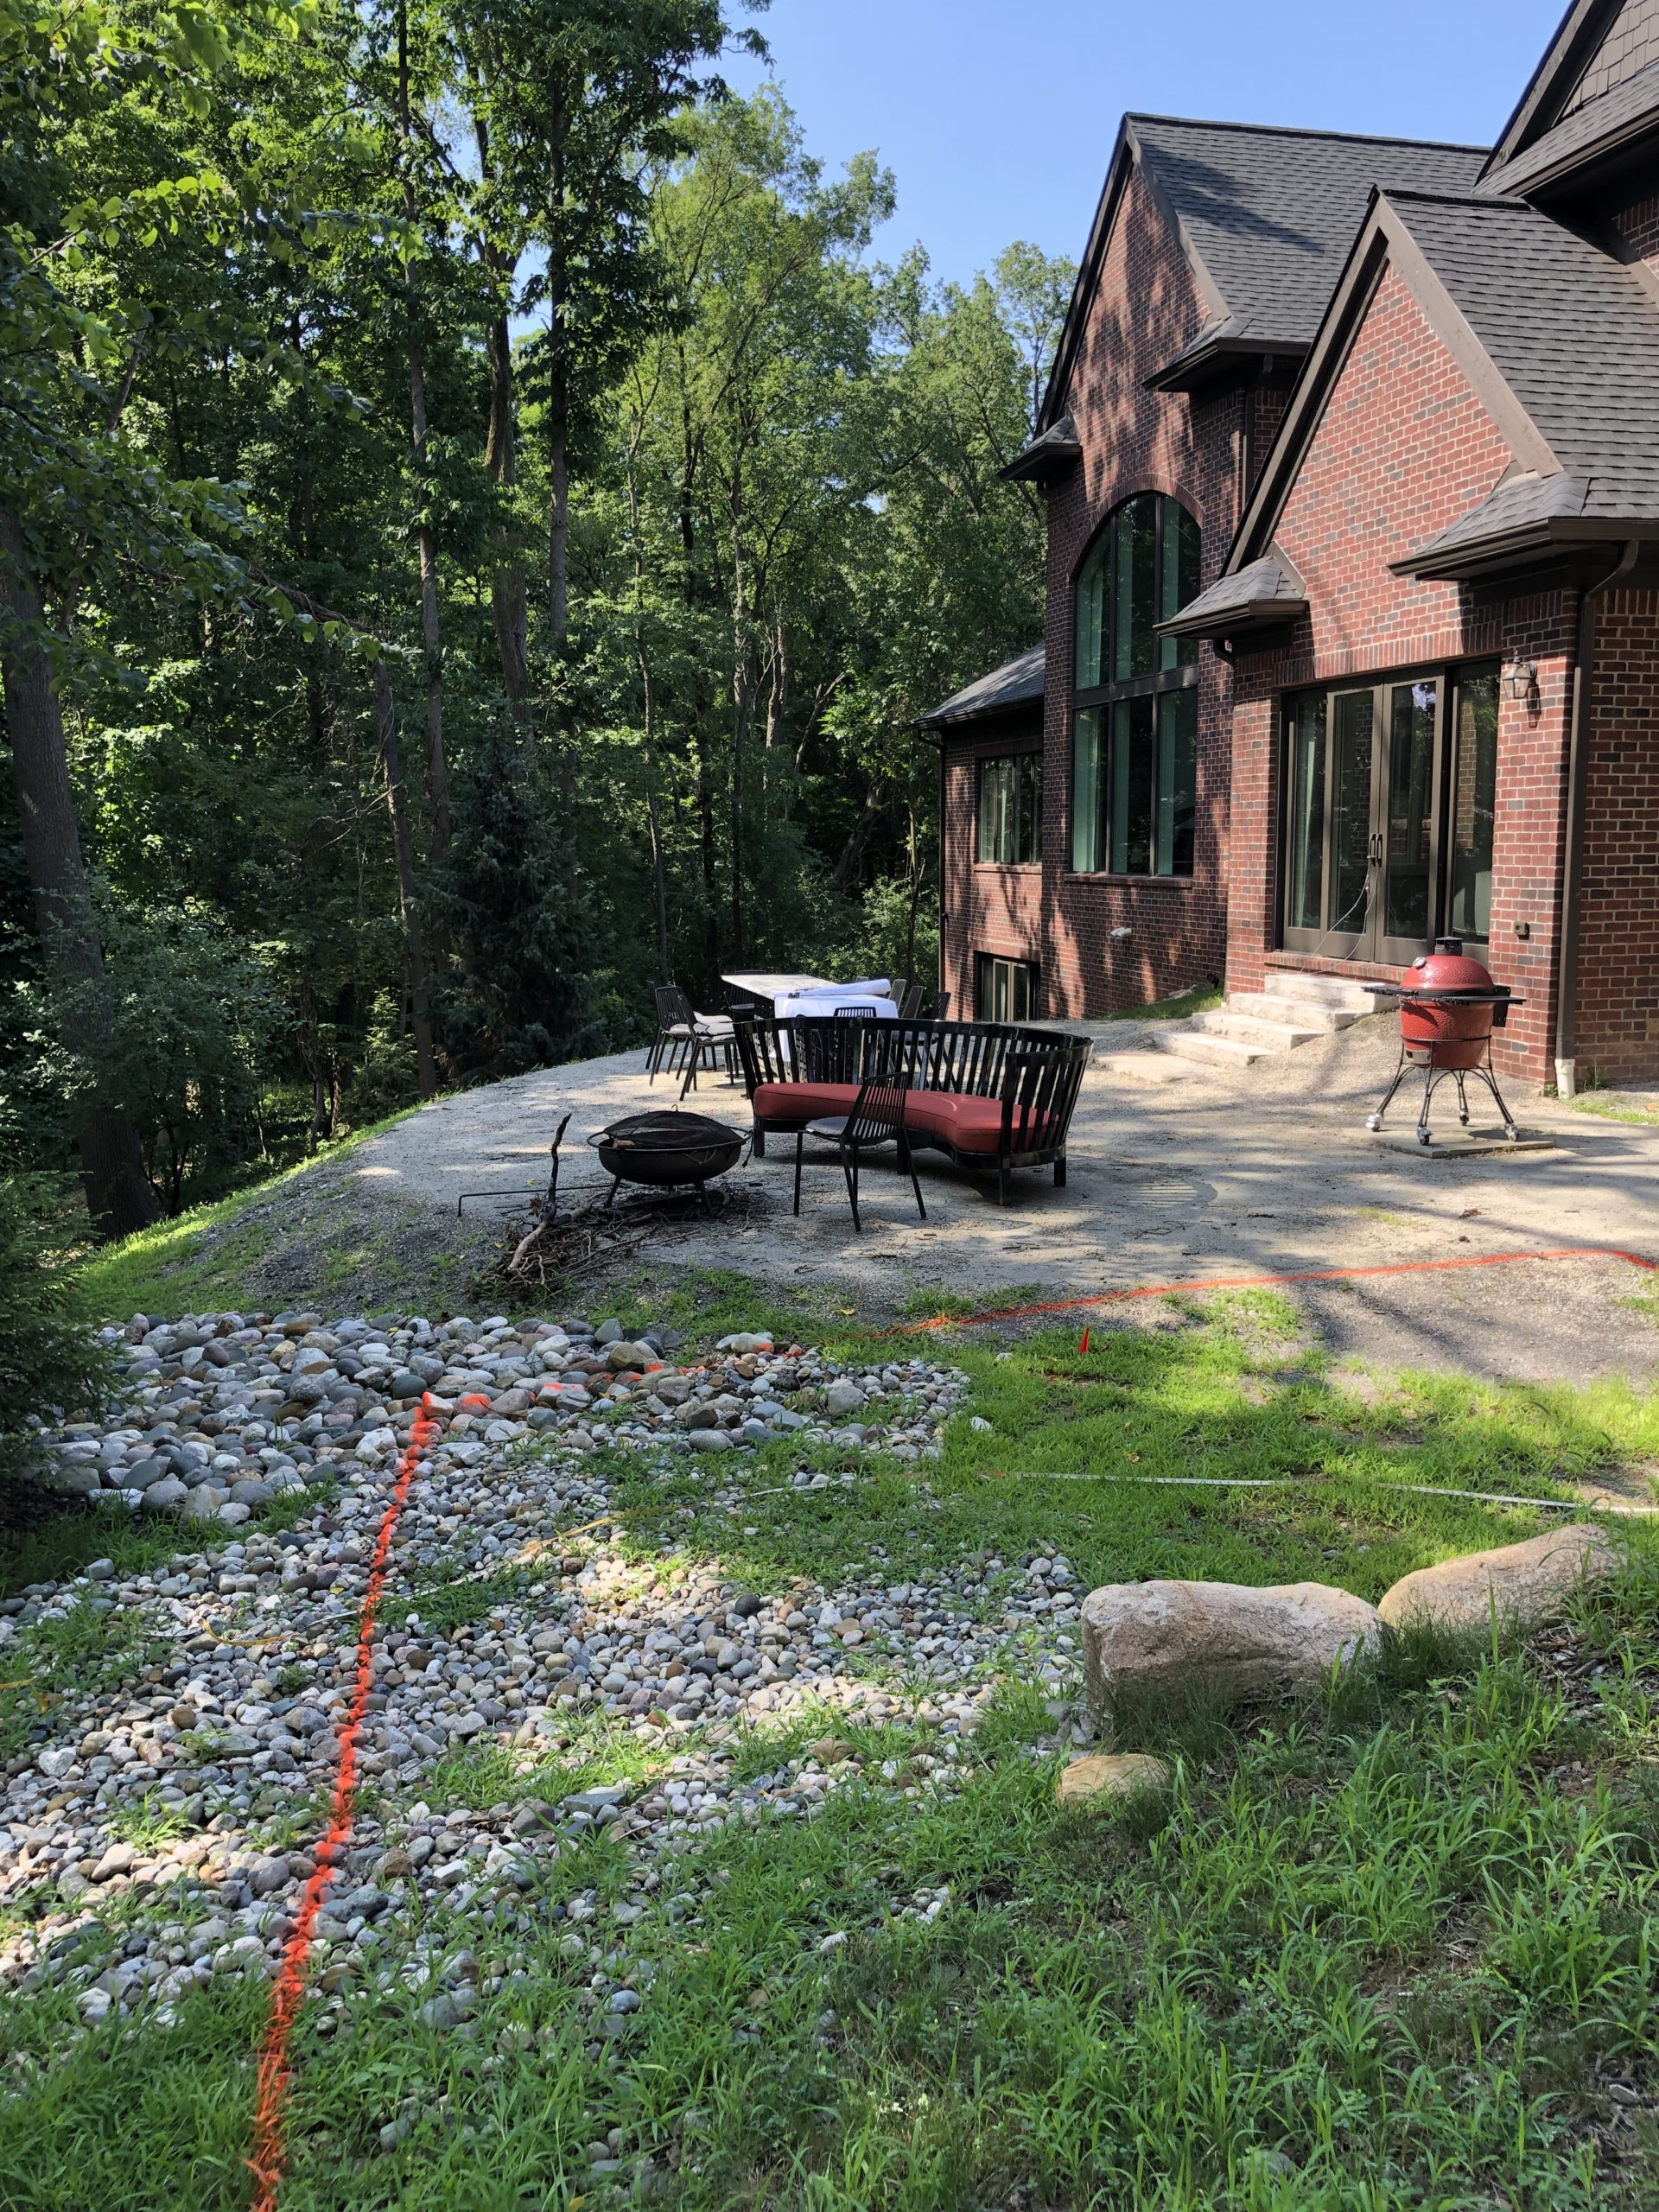
It will scarcely be another month or two before this space will be humming with activity. The waterfall will be running and the pool will be open to the sky.The glass rails should be installed by Memorial Day. The furniture has arrived, and is in place; the outdoor grill is hooked up. I can easily imagine this space full of people enjoying a summer evening.

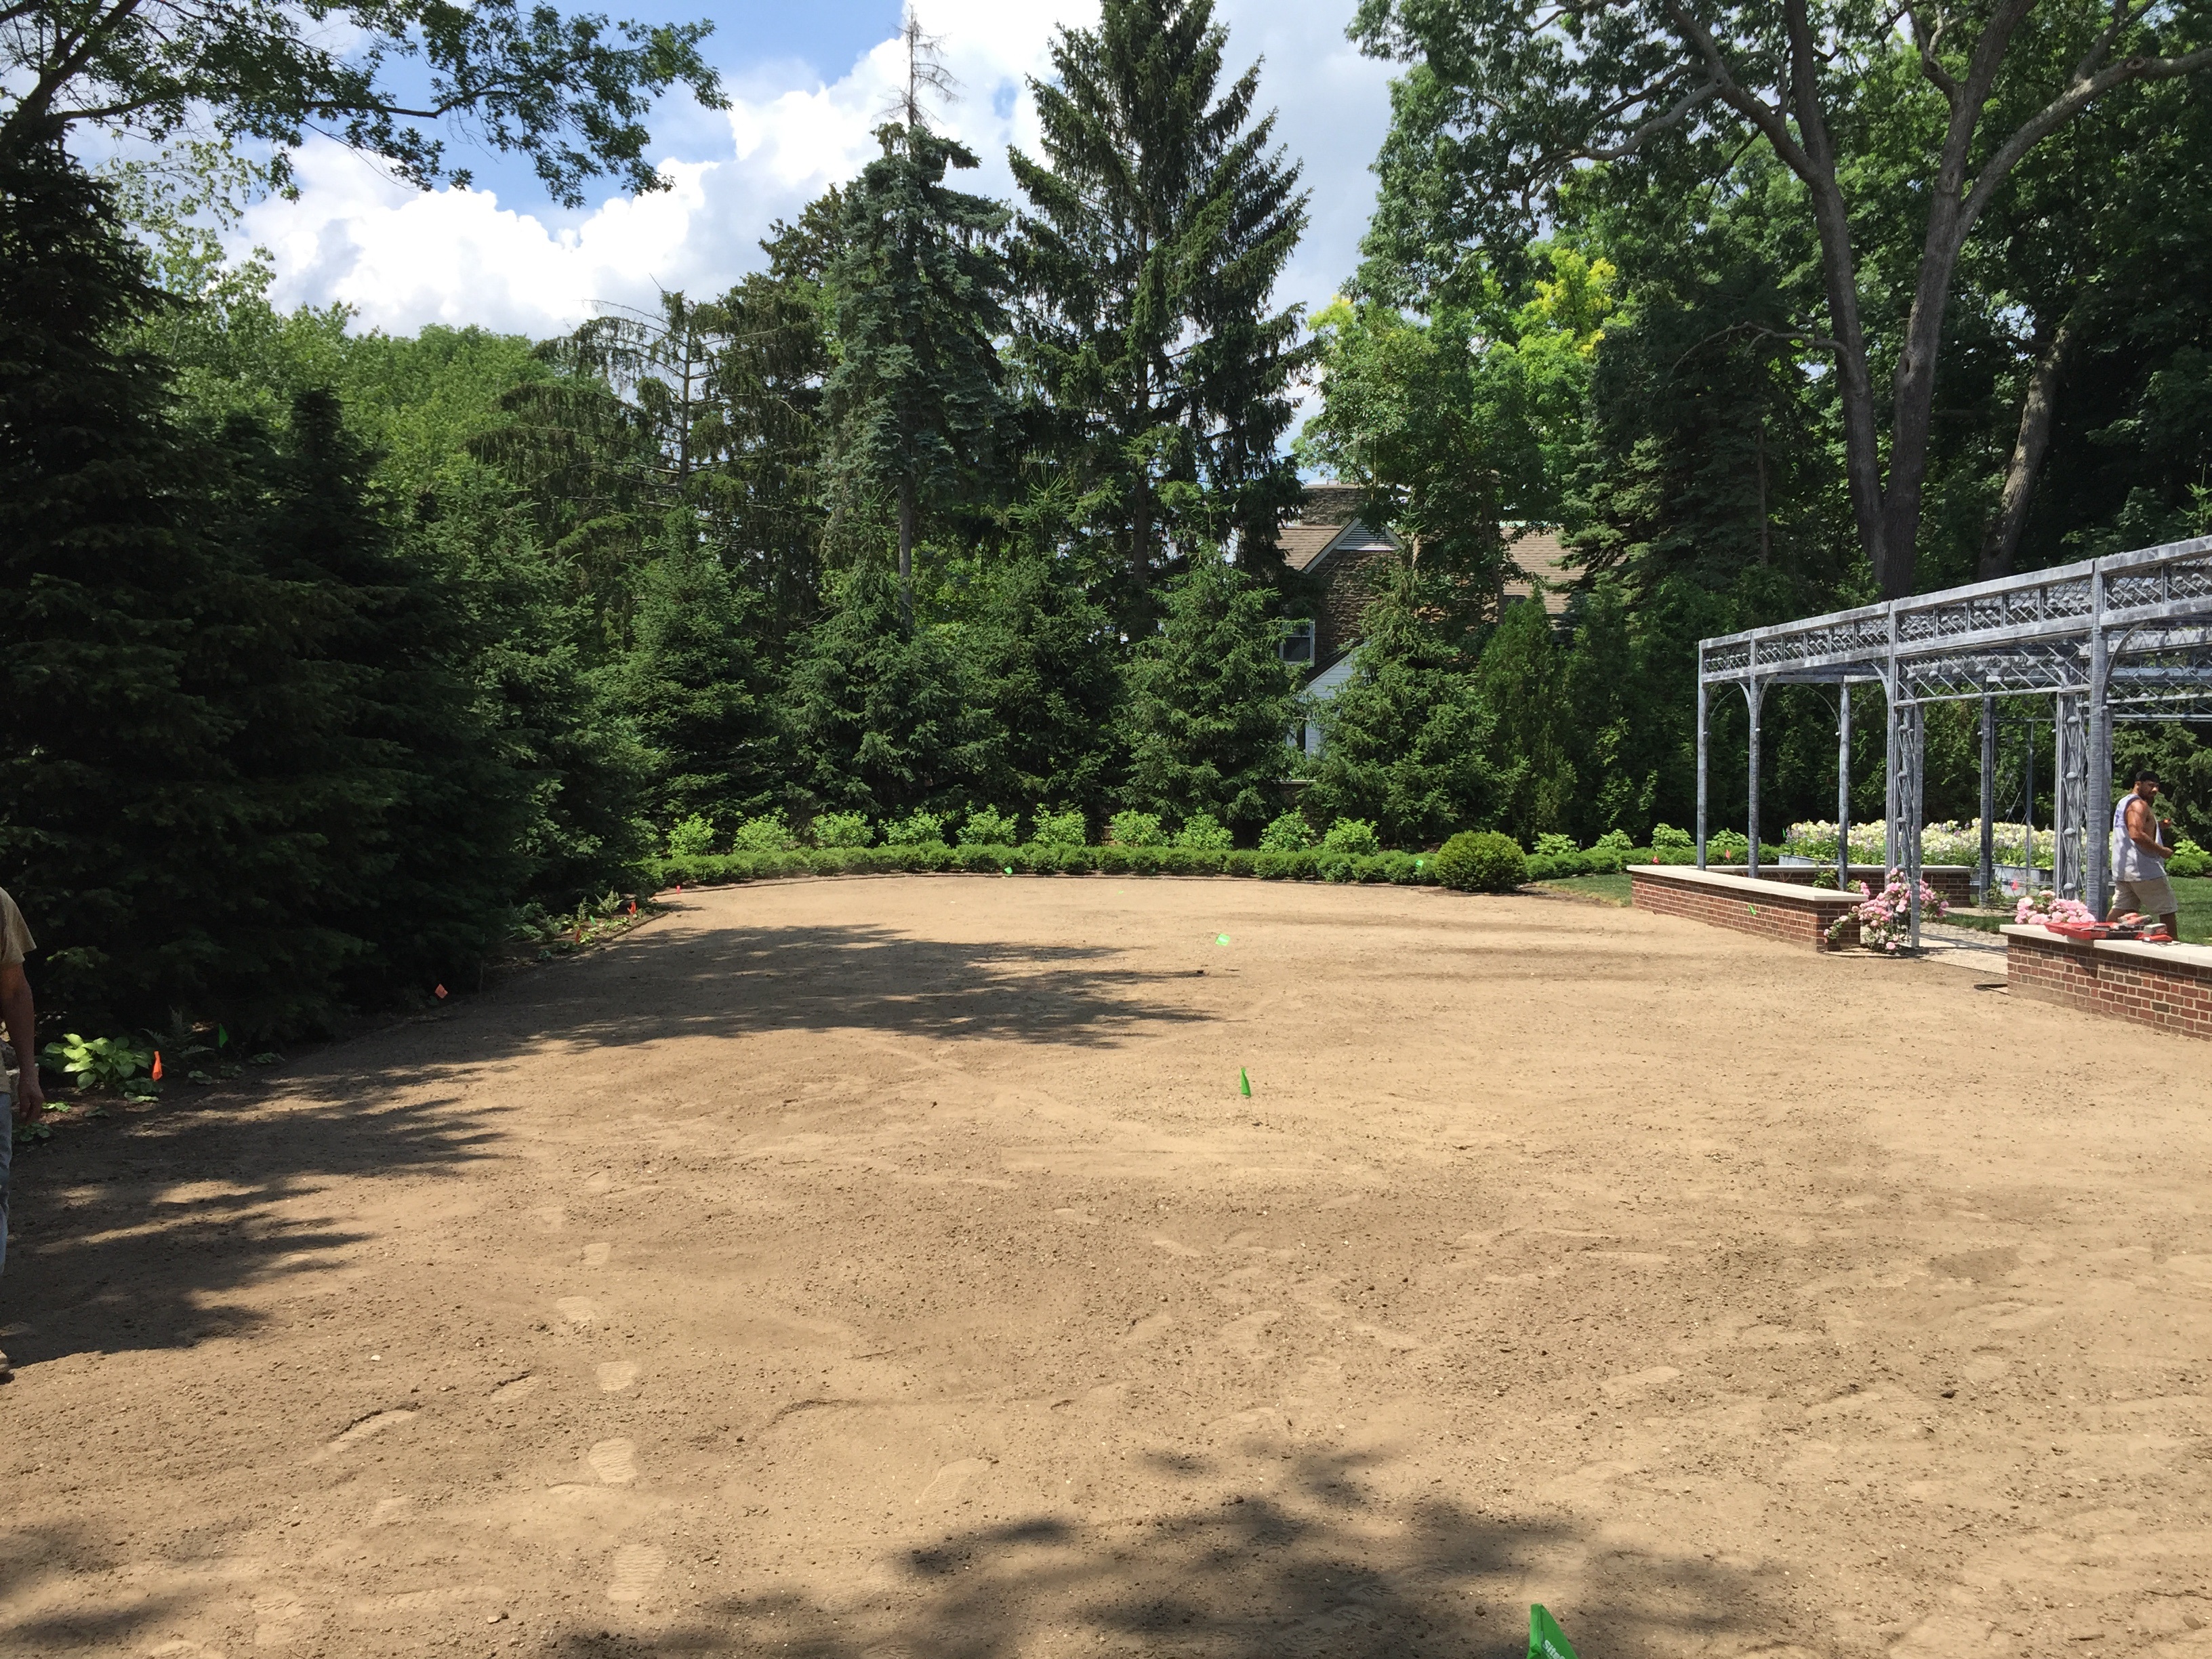
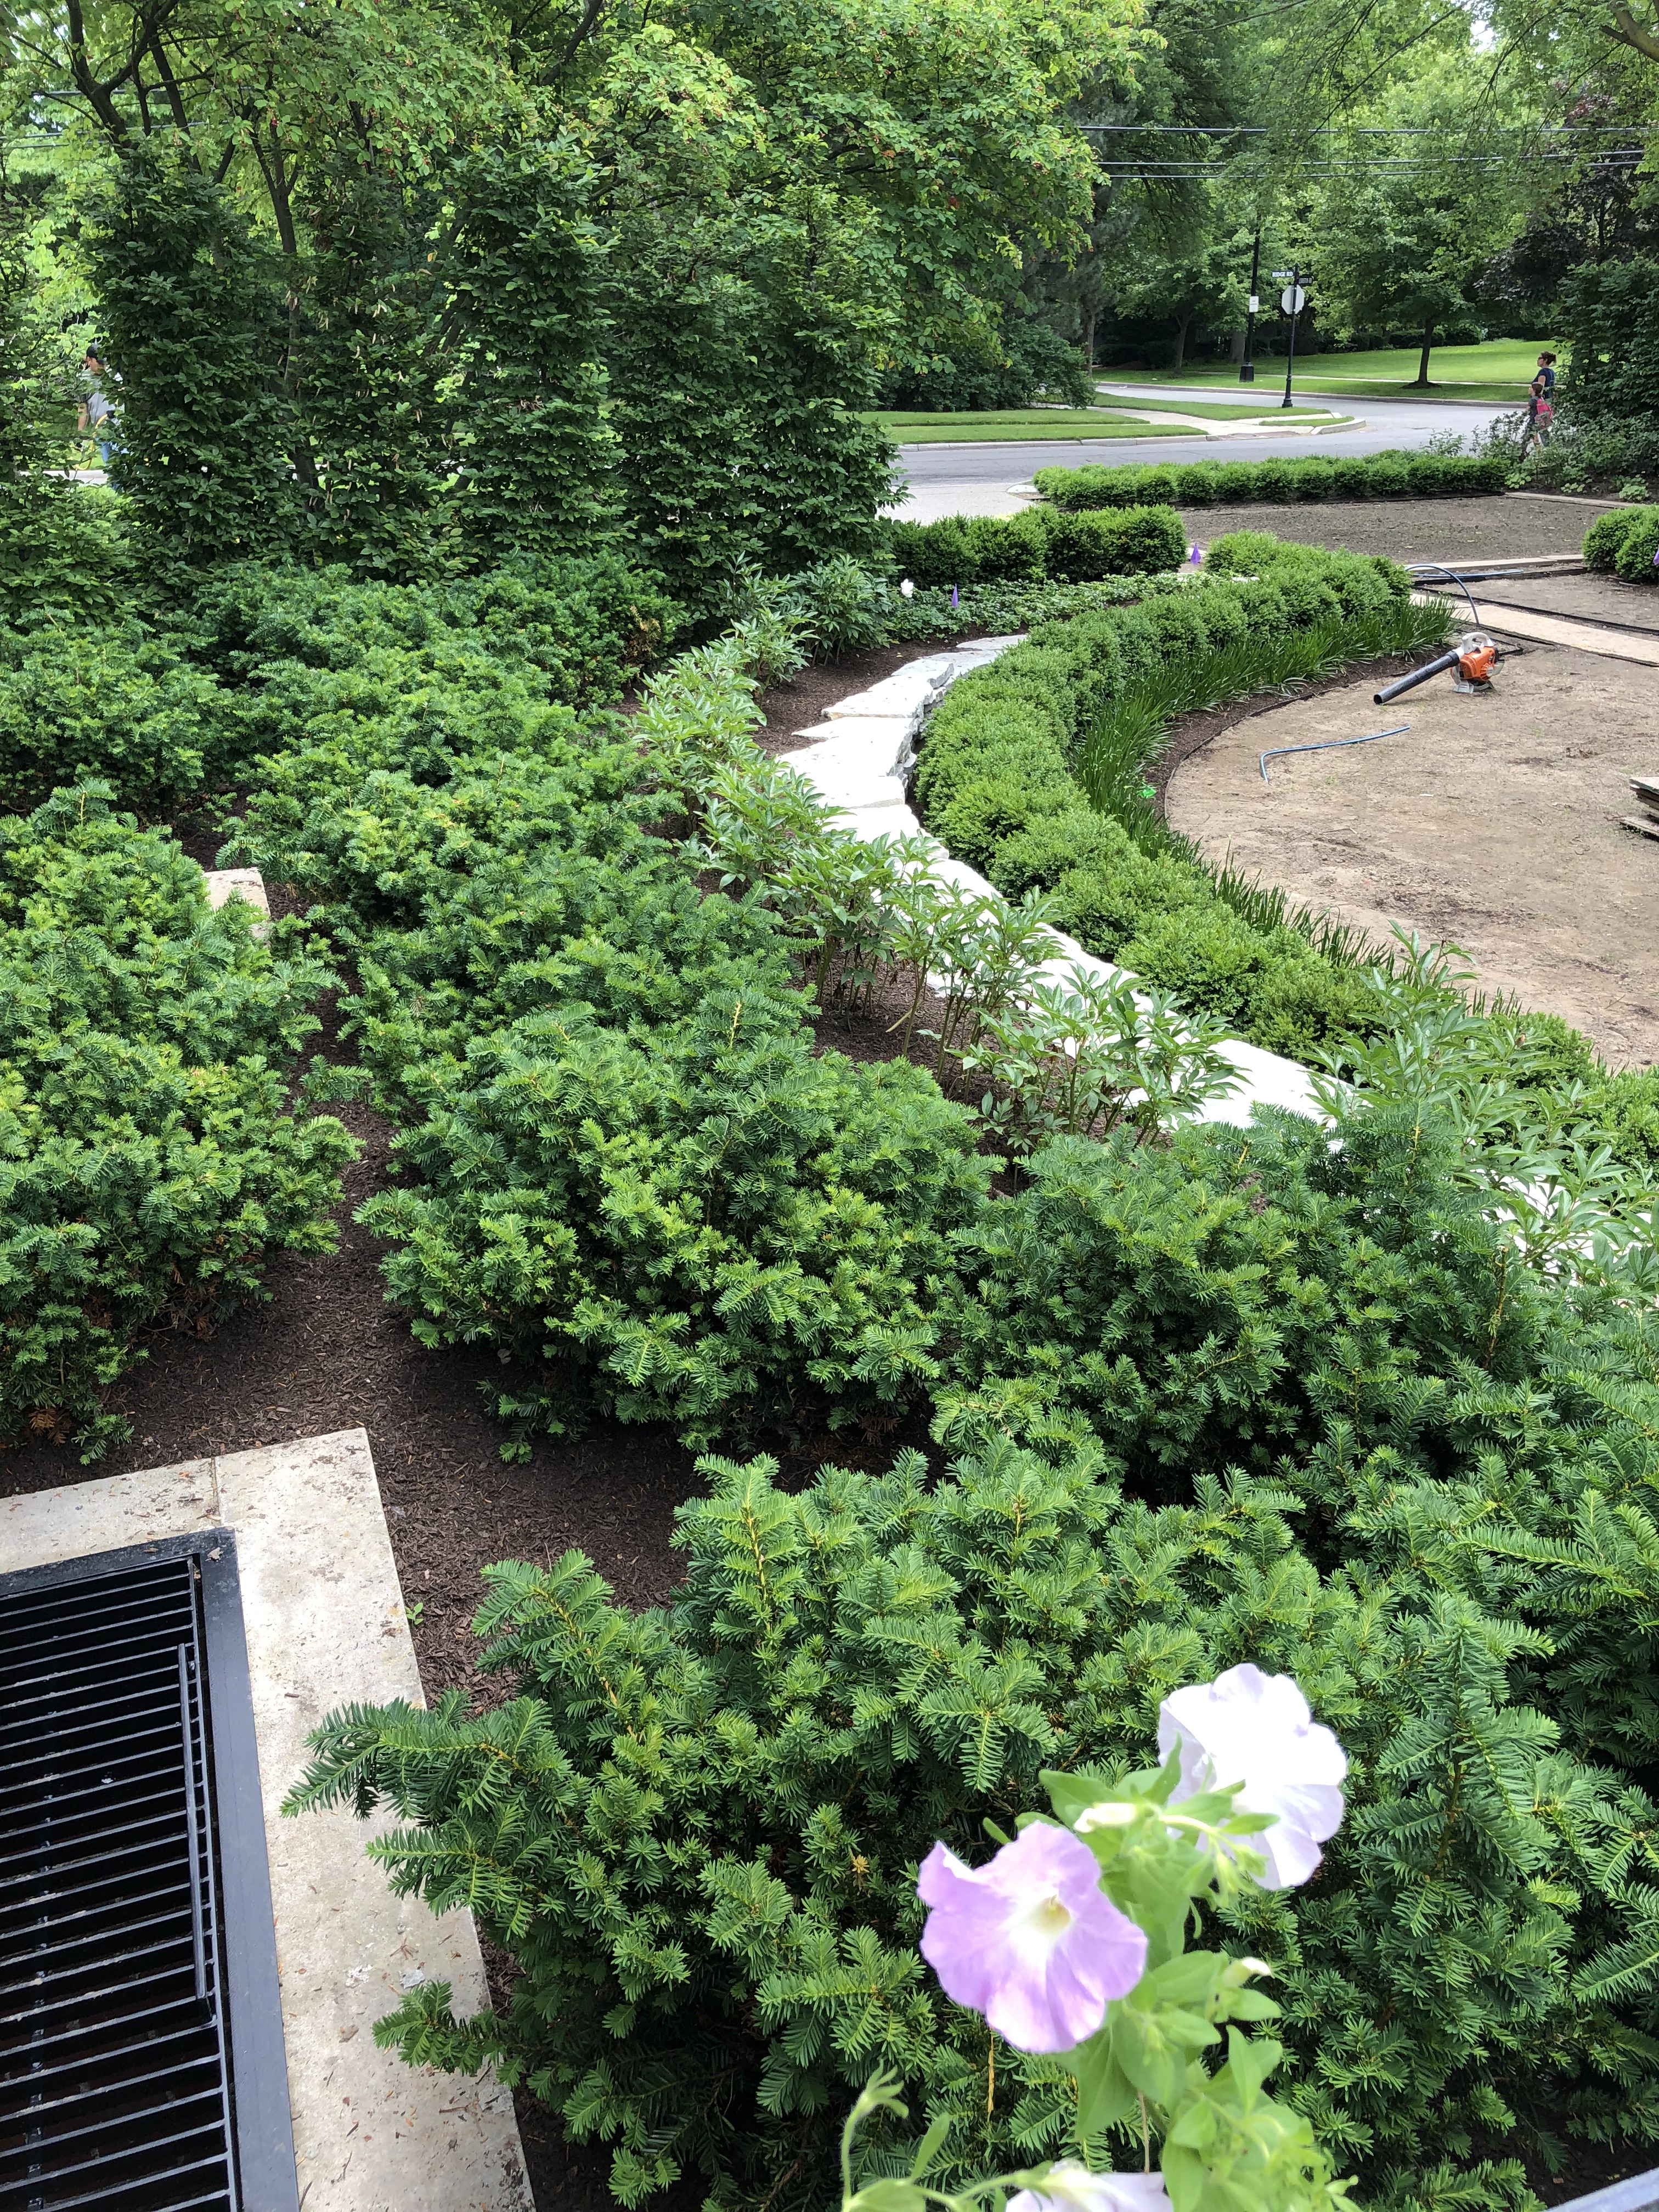
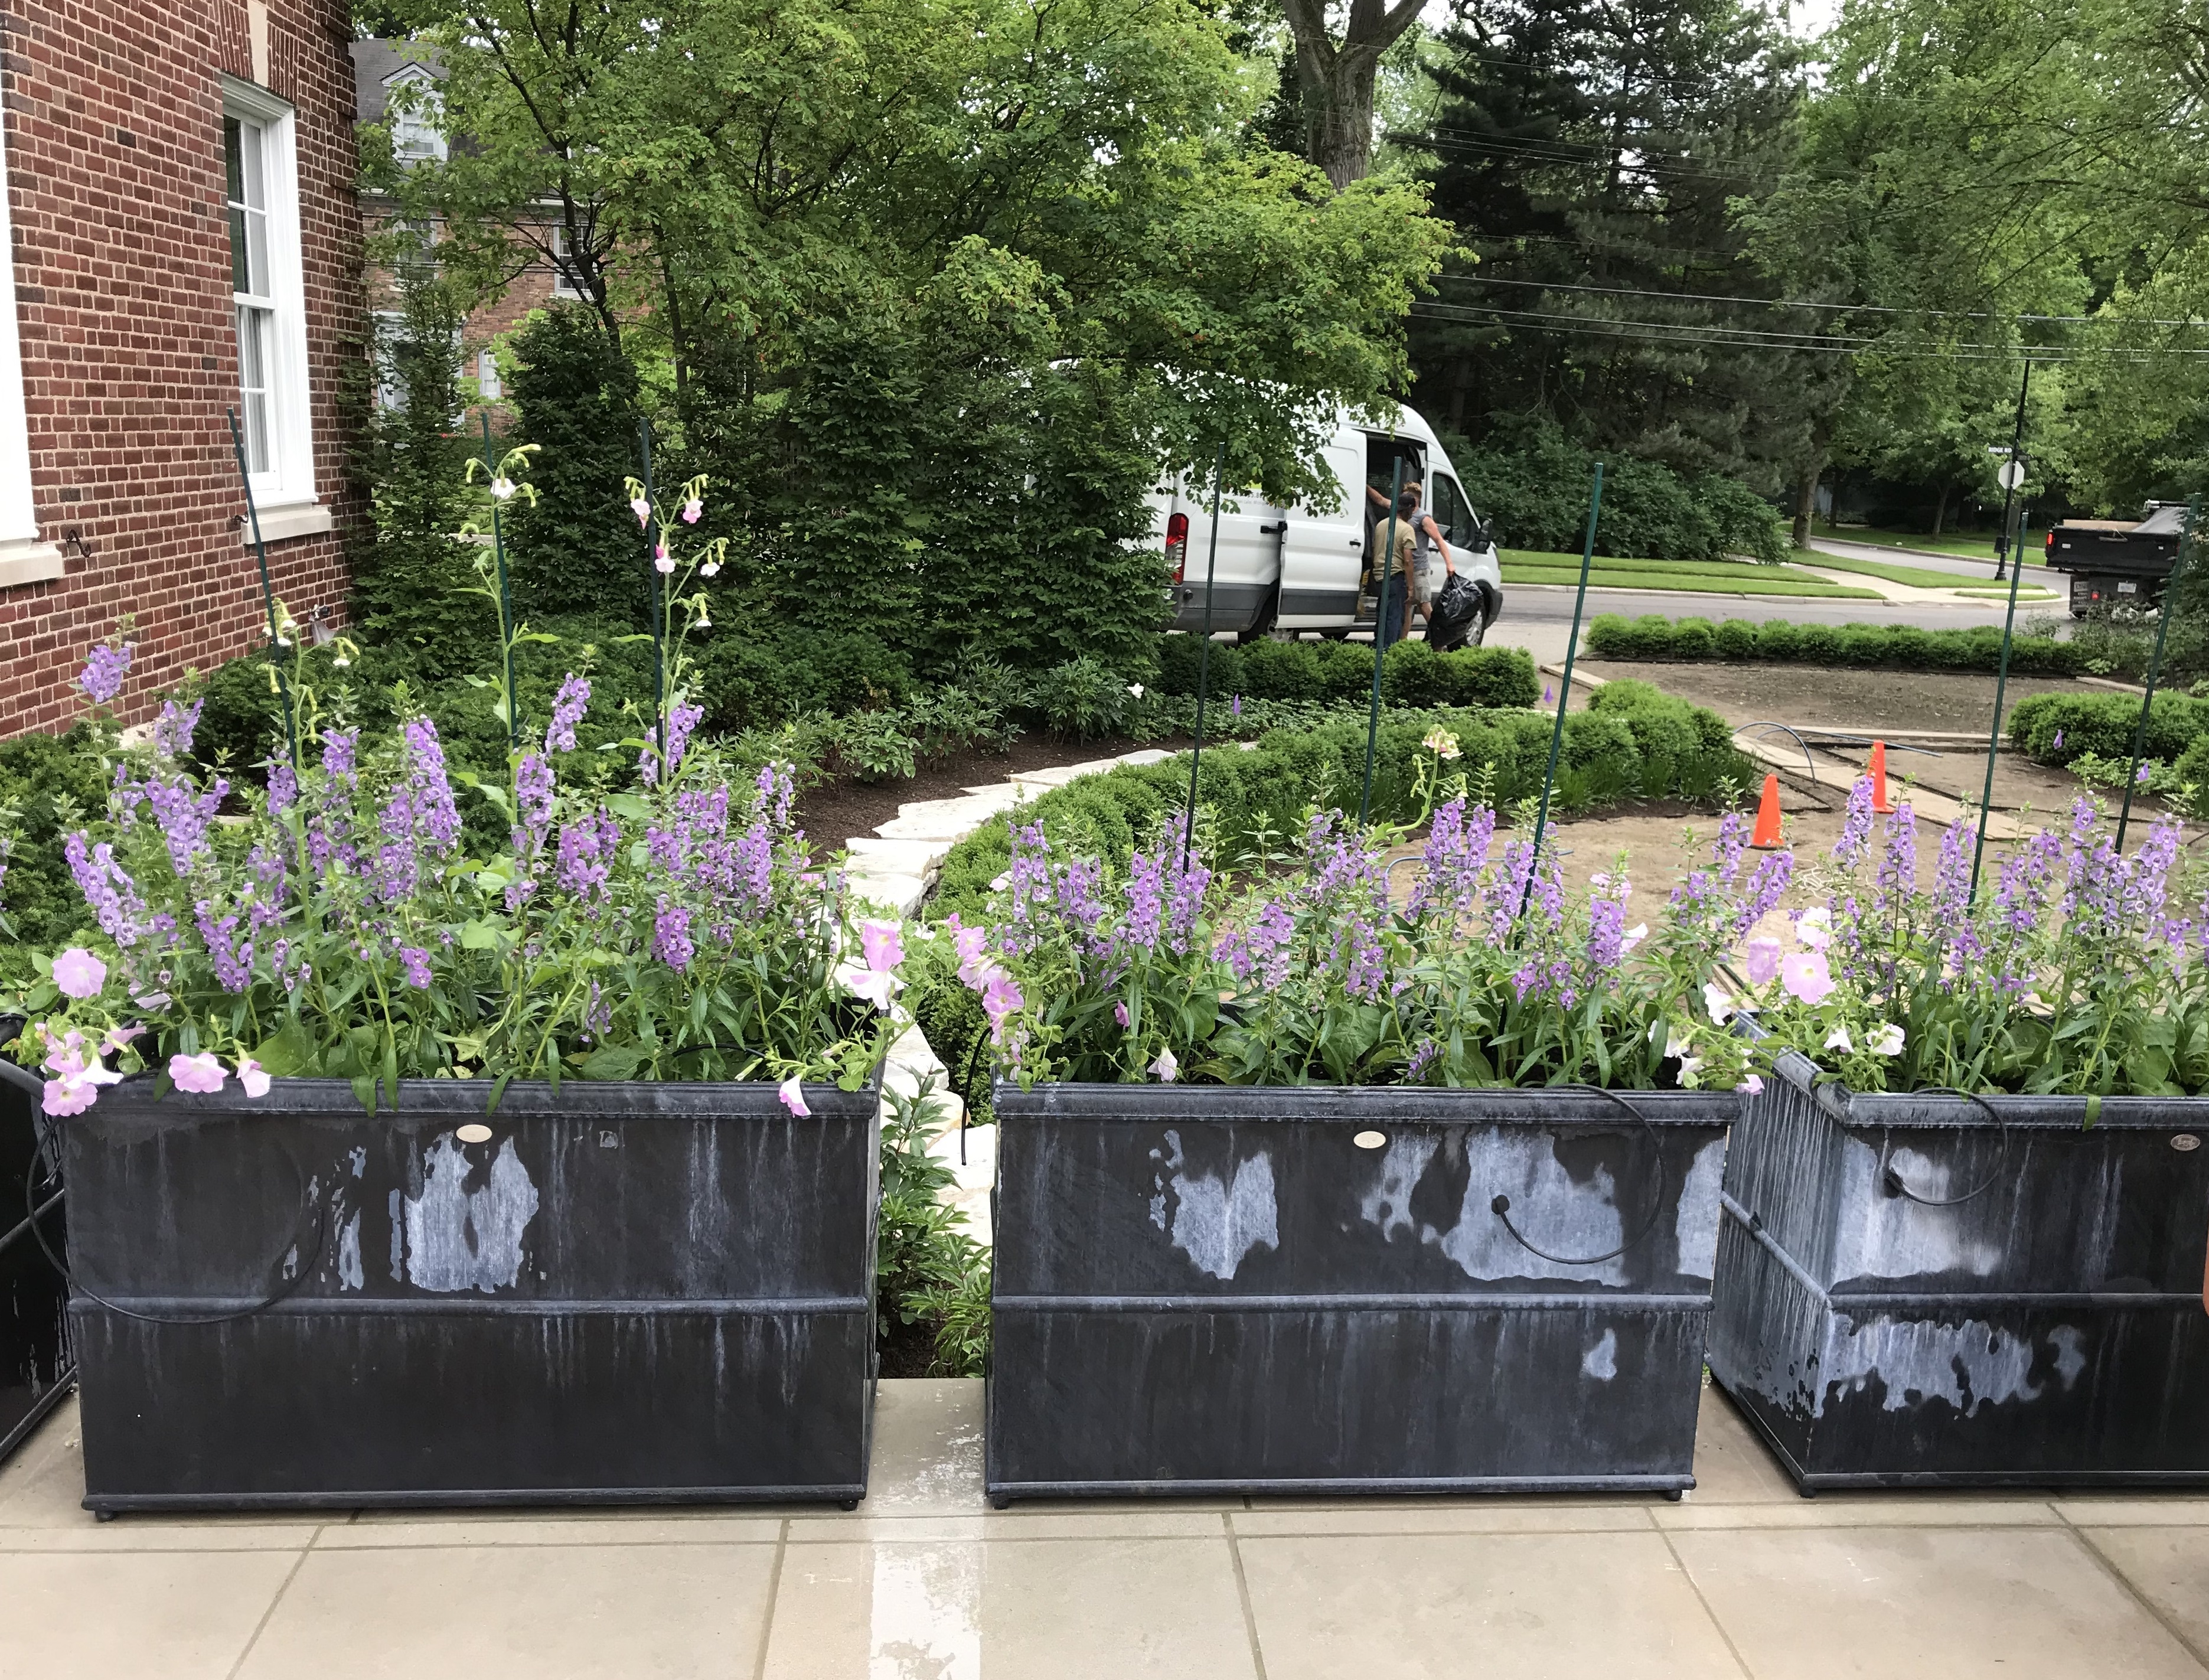
The last part, as usual, will be the landscape. We will be ready to start that in a few weeks. Most of what we plant will be trees. A new generation tucked in to an existing old woodland.

Savoring this moment.

The 2019 Garden Cruise

On Sunday July 21, Detroit Garden Works will host its 12th Garden Cruise to benefit the Greening of Detroit.  If you have never taken or heard of our tour, it began in 2009 when I became a member of their board of governors. Not being one to happily participate in meetings and such, I decided to put my effort into raising money for them. Since 2009, the tour of gardens and landscapes of my design or influence has raised close to 156,000.00. I could not be happier about this. Both Detroit Garden Works and Deborah Silver and Co pitch in to make the cruise and reception a reality. 100% of the proceeds of the ticket sales goes to the Greening. We pick up all of the expenses. And the project pictured above? It has been under construction since July of 2018, and yes, it will be on this year’s tour.

Nothing helps to to bring a landscape project to a close faster than a deadline.  I like deadlines, actually. They provide a framework around which to work. All of the contractors involved, myself included, have a personal interest in seeing this particular project come together. The client has everything to do with that. GP Enterprises handled the planting of all of the large trees, and an extensive drainage system and grading project. Ian Edmunds Irrigation is responsible for a very thoughtful watering system largely based on a network of drip zones. Mountain Pavers Construction, owned and operated by Mike Newman, built all of the terraces, retaining walls and steps and steppers, and a beautiful exposed aggregate driveway. The Branch Studio built a number of structures, containers, fencing and rails especially designed by me for this project. The landscape design was the first in, and the close of the installation of that landscape will be the last out.

We are in the process of sodding all of the grass areas.  That dirt you see in the above picture has a drain field and irrigation system underneath it. Countless yards of soil were added to make the grade flat. All of the landscaped portions of the yard are enclosed with aluminum edger strip. Over the course of several very hot days, all of the annual weeds have been scraped off, and the ground raked. My crew comes in at 7am when we lay sod. As much as can be done before the heat of the day sets in means the work of it is a little easier. I would think it would take every bit of the next three days to finish laying in all of the grass.  We will have it down in enough time for it to root in before the tour.

Much of the landscape was installed late last summer, and throughout the fall.  A collection of roses was custom grown for this project at Wiegand’s Nursery farm, and delivered 6 months before the installation date. A rose arbor from the Branch Studio will provide support for four Canadian Explorer roses known as John Cabot.  This very long lived and heavy blooming climber will give this arbor a run for its money. All of these other roses are fairly large growing shrub roses, thus the double wide border of Green Gem boxwood. Green Gem is incredible hardy in my zone. It will eventually be box pruned in a traditional and formal shape.

A quartet of steel boxes from Branch will hold flowers for cutting. That plant palette may change every year, depending on my client. This year’s plants were my choice. A new tall angelonia cultivar called Steel Blue is accompanied by the bicolor angelface angelonia and perfume white nicotiana.

What is my superintendent Dan S. doing here? He is digging over a drain line so he can cover it with landscape fabric, so the drain never clogs up with soil, and quits working. A landscape plan that includes a long range plan for watering and maintenance is a good plan. I always give my clients the option to prepare today for the future of the landscape. I know from my own experience that it will not get easier to tinker with my landscape as I get older. Planning for its care means I will always be able to enjoy it.

This mass of flowers will thrive in these raised beds. What gets cut for a vase in the house will hardly be noticed. The 5′ by 5′ boxes were set in a graveled spot to make cutting the grass around them a breeze.

The first round of grass transforms the look all of the work we have done on this landscape since last August.  This curving grass swath is a very wide path from the driveway, through the rose arbor, and over to the cloister pergola fabricated by the Branch Studio. Anyone who is interested in what the studio is capable of should take the tour, and see for themselves. This very large and complex structure is an incredibly beautiful anchor to the landscape.

The circle is a dominant theme in the landscape. The major landscape bed lines in the rear yard are portions of circles.  Those three radiused curves contrast and complement the rectilinear shapes of the cloister and raised planters. The center curve ends in spherical Green Gem boxwood of considerable size. A boxwood dot. Behind the boxwood? Limelight hydrangeas on the side curves, and Oakleaf hydrangeas in the center curve. The rear yard landscape is in large part evergreen, with a nod to a summer garden. Roses, hydrangeas, and more roses. The shadier parts of the garden feature perennials, dwarf shrubs and groundcover. Fragrance played a prime role in the selection of all of the plants. Roses, Peonies and phlox will perfume the garden. Even the pink snakeroot has a distinct fragrance, as does the sweet woodruff.  Dwarf button bush, lilacs, Viburnum Juddii and mock orange will add scent to the air one season after another.

That wood structure in the middle of the cloister? A fountain pool lies at the center of the cloister. The wood structure is overlaid with a tarp when there is a threat of rain. My client brought photographs of this house for me to see, after I designed the pergola and fountain. The original house had a reflecting pool, and wooden arbor in this location. In 1920. What a pleasure to see that what was on my mind had been expressed on this property close to 100 years ago.

This area was a grassed ditch when I first saw the property. The ground sloped down sharply from the foundation of the house and garage. This area now has two levels, both of which are flat and usable. Though I have previously posted about the fabrication and installation of the cloister,this picture provides a glimpse of how that structure will be integrated into the overall landscape. It also illustrates how the double walled structure with a roof overhead with create shade on the perimeter. Though the structure is comprised of many tons of steel anchored to 32 individual footings, and shadows cast are delicate and airy.

The fountain is tiled in its entirety.  The walls, steps, the bench, and the floor. The color variations are reminiscent of fountain tile of this era. The top 3 courses of tile have a strong geometric raised profile. I could not imagine this fountain coated on the interior with pebble tec, a common to swimming pools. This tile respects the architecture and era of the house. Gillette Pools has done an incredible job of installing a state of the art fountain/spa with the craftsmanship required to echo a previous era. My client and I fussed and fumed over the tile selection. What I see here seems just right.

The John Davis climbing roses are small yet, but they obligingly bloomed.  Each John Davis has a Guernsey Cream clematis to go with.

Yes, the tour is less than a month away, but this new project will be ready. I think the newness of it will enchant visitors in much the same way as I am enchanted. The beauty of the moment, and the hope for the future-every gardener knows about this. This is by far one one of the most exciting and rewarding landscape projects it has ever been my privilege to design and install. Thank you, H.

French pots on the upper terrace planted with braided ficus and white New Guinea impatiens

side yard curving landscape

Branch Studio planter boxes on a terrace

the front door

garden cruise 2019My photographs of this project do not do it justice. It will look very different on the 21st.  As in finished and ready for company. If you are interested and intrigued, buy a ticket, and see it for yourself in person. It will be worth the effort, and the Greening of Detroit will appreciate your support. The 2019 Garden Cruise has 5 other really terrific landscapes and gardens to visit as well. Hope to see you on the 21st.

The Cloister Style Pergola, Part Two

You may not have read in November of last year a post about a landscape renovation that we have had underway since June of 2018. A part of this project in process involves the design and fabrication of a large scale cloister style pergola. The story behind the design and fabrication? Click here for the details.   the design and fabrication of a steel cloister The 2018 story concluded with that moment when 18 tons of steel sections and parts finally made their way to the site for installation. Of note was the fact that wet weather necessitated building a road back to the installation site. A structure of this size had to be assembled on site, so Buck engineered it to be put together and set up one section at a time. Just before Thanksgiving, a large boom crane moved in for the duration, as each section of the structure would be far too heavy to maneuver by hand.

It was slow going. The weather was bitterly cold and muddy. The finished size of this structure is 47 feet long by 36′ wide. I have no idea how many pieces there were in total, but there were enough to call the installation of this pergola a puzzle of enormous size. To make every section line up perfectly so it could be bolted to the previous section was daunting. The process made my eyes water.

Eventually the structure took shape. Seeing it go up was an experience like no other I have ever had as a designer. The model I built my client was the size of a piece of copy paper- 8.5″ by 11″. Of course the model did not at all describe the actual structure that was to enclose 1700 square feet. The model was a not so accurate expression of a structure as it was an attempt to express an idea of the landscape shot through with romance. What?? Romance is my middle name. Ha. As much as I admire classic French landscapes for their edited expression, and coolly compelling geometry, Italian gardens and landscapes have that element of romance that I find irresistible. As for this steel cloister, suffice it to say the design is as more about my client and her love of the garden than anything else. Though I had spent hours going over every proportion and detail, at some point I had to commit to a design. And a presentation of that design to my client. In May of last year, she decided to go ahead and build.

Cloister? In its simplest form, a cloister is a covered walkway. This structure has a six foot wide walkway all the way around the perimeter. That walkway is covered by roof panels constructed in an open and elongated diamond pattern. The cover will provide some shade, but will permit light and rain to come through. That pattern is repeated on the fascia panels at the top. There are 32 round columns, each of which is bolted to a concrete foundation that goes 42″ deep into the ground. Between each pair of columns is a pair of curved steel brackets. This curved detail compliments the roundness of the columns, and the solid steel spheres that ornament the structure.

Buck’s first drawing of the cloister showed square columns. The look on his face when I told him that I wanted round columns was an unmistakable sign that I was asking for the moon.  After he explained that engineering flat surfaces to perfectly line up and be attached to a curved surface would be just about impossible, I paused. The roof and fascia panels would be built from round rod, and each panel would feature steel spheres. The round columns would be essential in giving a structure of this size a graceful appearance. The architecture of this stately old home was not asking for an industrial look. Please? He relented.

Buck did a superb job of engineering, and his group did an equally fine job of fabricating. My client took this photograph and the following one after a snow storm this past winter. I was delighted to see how the snow outlined and described every detail of the structure. It will be a feature of the landscape every season of the year. As planned, the cover over the walkway was permeable to both light and water. In the immediate foreground of this picture is the roof of a very simple version of the cloister over the dining and grilling terrace that is directly adjacent to the house.

The snow made it easier to see the long diamonds and dots pattern on the roof, fascia panels, and the main entrances into the space.

Now that the long winter is over, we are back on the project. I have every confidence that come late May, this landscape will be ready for her to enjoy. We have little to do in the interior of the pergola. Bringing up the soil level to grade, planting the roses, installing the edger strip and grass is about it. The irrigation in this area is underway, and the tile for the fountain pool is due in May first.

This was the first time I had seen the completed structure since the work began. I was thrilled with how it looked. And incredibly appreciative to have a client who made it possible. Their are limestone stepping stones yet to come. I had the roses custom grown several years ago. Dan and David have been growing them on, so we would have plants of some size from the beginning. The furniture and pots for this area have been in storage at our landscape building since last September. Though I will probably post about this project again when the landscape is complete, this is a very special moment for my entire group. The best part?  Our client is pleased.


In the homestretch now.

Part Three: The Pergola

If you  have been reading this series of posts, you will recall that my landscape design called for a rectangular cloister style pergola to be built off my client’s sun porch and garage. That shape was dictated by an L shaped space established by the sun porch, and the long back side of the garage.  The center of that cloister would be a fountain pool. My drawing, pictured in the previous post, was schematic, meaning that drawing was a generic structure, just holding a place on the page.  Once she indicated an interest in a pergola surrounding the fountain, I went to work to actually design that structure.


So what is a cloister?  A cloister is a covered walkway, frequently surrounded by a building or buildings on all four sides. Historically, it was an architectural feature common in monasteries and courtyard spaces in universities. The design for this pergola is predicated on a 6 foot wide covered walkway which would provide overhead structure to the fountain pool. The photo above shows Buck’s CAD drawing of the long side, which is almost 47 feet long. The design revolves around a series of elongated diamonds of different sizes, and steel spheres of 3 sizes. Buck added some figures to his drawing, so I could see what the relationship would be between person and structure. A good part of the reason it is 11 feet tall is its placement. Standing at the bottom of five steps from the sun porch grade, it was important that the roof did not appear too low from that vantage point. That height will also give it some presence from the upstairs windows, and the balcony which is on top of the sun porch roof.

This drawing of the roof panels makes clear the idea of a covered rectangular walkway. And that the interior space would be open to the sky. It was almost a year ago that we ordered the John Davis roses that would be planted on the pergola columns. I still have hopes of putting them in the ground yet this year, but if not, we can winter them over in our landscape building.

The drawings are useful to a designer, but maybe not so much to a client. Buck figured out how to scale the three drawings the same, and I built this model from sheets of copy paper. Buck drew the schematic for the pool on the roof plan. All of the white spaces on the paper will be open spaces.


This model came months after the presentation of the original plan. Once my client approved it, there would be much more work to come. Not only were there engineering issues to sort out, all of the dimensions would have to be coordinated with Mike Newman, as his steps and walls were an integral part of the installation. The following drawings were passed back and forth between Buck and Mike, so all the the locations and dimensions could be mutually agreed upon before anything was built.

This plan view of he steps, walls, and pergola show the relationships between the various elements. The walls would have 2  12′ wide openings that would provide access to the back and side yards. Upon reaching the bottom of the stairs, there would be 5 feet of open space before reaching the pergola.

These drawings do the best job of illustrating the fact that there are pairs of columns that would hold up the roof. There are 32 in all. And the columns are round.  I designed as much of this pergola to feature round shapes, as opposed to square or rectangular. The round shapes seemed less industrial, and more fitting to the period of the house. Buck said this decision made the engineering much more difficult, but I think it will prove to be well worth the trouble.

view from above

view from the far end

the view of both exits

Pictured above is a group of the roof panels, after the galvanizing process. The round rods are captured in a square steel channel. The solid steel spheres, welded at the juncture of every other diamond, will face down. There are 2000 of them, in all.

These fascia panels feature a larger gauge steel rod, and 2″ diameter solid steel spheres. These are finished panels in their raw steel state.

The pallet in the foreground is stacked with the pergola entrance panels. These have the largest diamonds, and 3″ diameter steel balls. In the background, pallets full of columns.

Branch limited the weight of every pallet so it would be easy to offload them at the site.

Prior to loading up the pallets, Buck had his guys pick random pieces from each stack of parts, and had them put together one 12′ by 6′ section. He wanted to be sure all of the parts would go together easily. Putting a pergola together in the field is a much different operation than putting it together in a warm dry shop, with a bridge crane overhead. The install will be lengthy, as it is a big structure. Maintaining the precision with which each piece was fabricated was a challenge. That precision is what will make the install go smoothly.

This view from the mezzanine at Branch shows a roof panel set in place.

Jackie arranged for a dedicated flatbed truck to transport the pieces to the job. Even so, there were 6 pallets left over that my landscape crews loaded in their trucks. None of the pallets could be stacked.

We had our loader on site, so we could offload once the truck arrived.

There was one part to the story we did not anticipate.  3.5 inches of rain fell in the area where the boom truck would be located, and those pallets would be staged.  We had not gotten to a finished grade in this side yard. The ground was very low here. Our original delivery and installation date came and went. I was not pleased with the prospect of having to waiting until the ground froze. I put in a call to my large tree contractor, and asked if there was anything he could do.

Ralph brought in 80 yards of sand, and 100 sheets of 3/4 inch thick plywood, with the intent of building up the grade such that we could access the site.

He built a road in that would be able to handle the weight of the pergola pieces, and trucks. Fortunately, this side yard is still so low, that all of that sand will eventually become part of the finished grade.  He is estimating he will need another 200 yards of soil to bring this space up to grade.

The boom truck is an incredibly heavy piece of equipment, featuring a large arm that will pick up each piece in the proper building order. That truck has huge steel arms that come out, and rest on the ground, to stabilize the truck.  Plywood and sand would not be enough to keep that truck stationary.  The construction mats you see in the above picture weigh 1000 pounds each. Ralph assured me that they would stabilize the ground for any truck we needed to get back there.

finishing up the road in

Sheets of plywood were all we needed to stash the various pallets.  The boom truck operator will be able to pick up any part he wants, when he needs it. It took 3 days to get the site ready. Templeton Building Company will do the actual installation. Buck will be there the first day, to advise.

Everything is ready. The boom truck is scheduled to arrive this afternoon. I hear the scaffolding is going up now. Each column will be bolted to the footings that Mike poured some time ago. The structure will be bolted together, one piece at a time. It could take a week, from start to finish. For now, I am just very happy to know we are in the home stretch.